
By Kelsey Wang
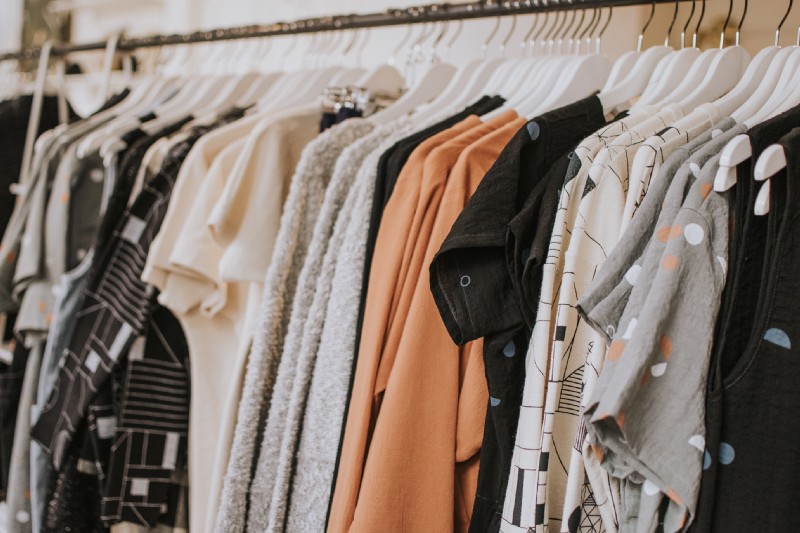
Imagine you’ve just stumbled into a Nordstrom at your local mall, lost in the Slenderman-looking mannequins and racks of overpriced coats. Or, more realistically, you’re browsing online because you’re too lazy to go to the store. You’re trying to find a birthday gift for your friend but you have no idea what they would like. What’s their style like? Do they want a ripped black shirt or a green and white striped sweater? You should know this, but you don’t.
No need to fear, because the customizable, artificially intelligent fashion police is here. We will be harnessing Microsoft’s “off-the-shelf” Custom Vision services to classify clothes as “cute” or “not cute” according to data you’ve given it. If you’re shopping online, you can just test this in the browser, but we’ll also make a simple React Native app to use the AI model on pictures you might take in-store.
Of course, taste is subjective, so the best part is that you will tailor the app to fit your friend (or your SO’s, or your own) taste in fashion by uploading pictures of clothing items they like and dislike.
Again, to do this relatively easily and quickly, we will be using Microsoft’s Custom Vision Prediction API. There are other services similar to this, like Google’s AutoML Vision services. These allow people with limited machine learning or computer vision experience to create and train custom models to, say, classify images with uncommon labels. They’re relatively quick and easy to use, perfect for this kind of project.
Getting started
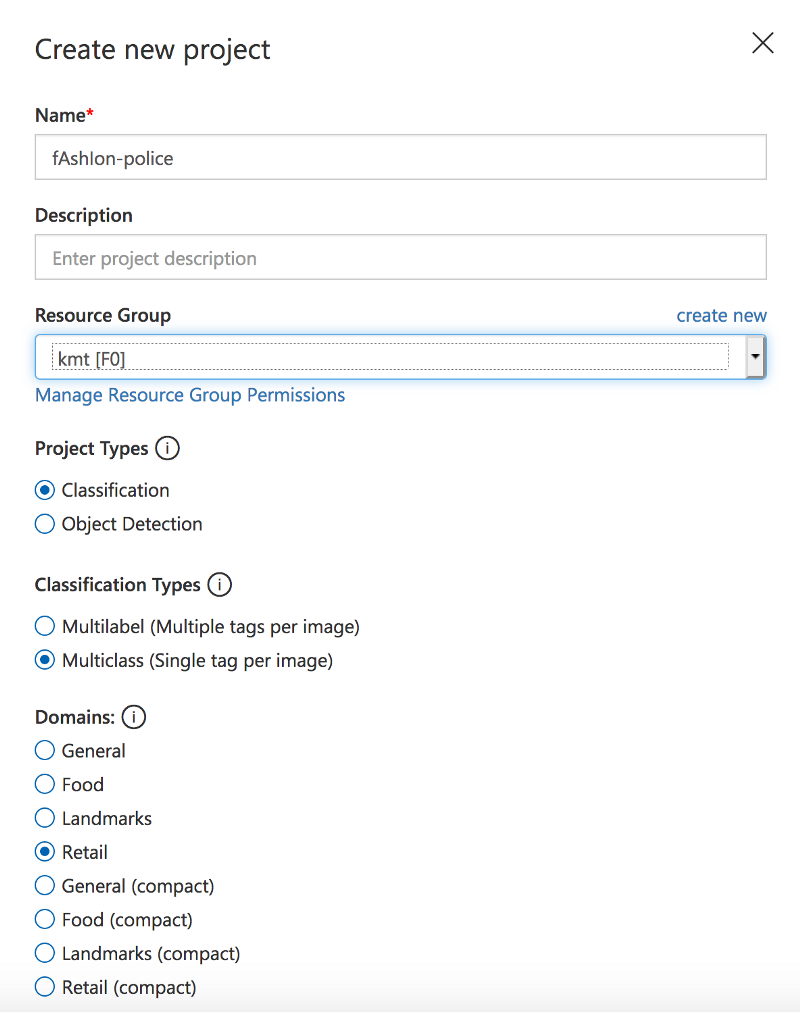
To start out this project, you have to make an Azure account and make a new project, etc. Azure offers a free trial, and I just followed the instructions here.
Things to note: make sure you “switch directory” to the Azure account you created — otherwise it won’t let you create a new custom vision project. Also, when you’re making the project, note that we are using a Multiclass classifier (and more specifically, a binary classifier), because each image only needs to be labeled with either “cute” or “not cute”.
Once you’ve determined whose style you want to create an AI emulation of (let’s denote this person the predictee), you will need to gather information about the predictee’s style. The more, the better. Because we have very little visibility into how exactly the prediction model is trained and cannot tweak any part of it, we must treat it as a black box. However, as with most data-driven AI systems, the more high quality, diverse data you feed it, the better it will perform.
Online shopping for a friend? No app necessary!
First, I tested the AI’s capability for online shopping. This was quite easy because I simply screenshotted pictures of clothing items that I liked and didn’t like, and fed it to the model. There’s no need to build an app for this — you can just train it and use it in the browser.
Training the AI
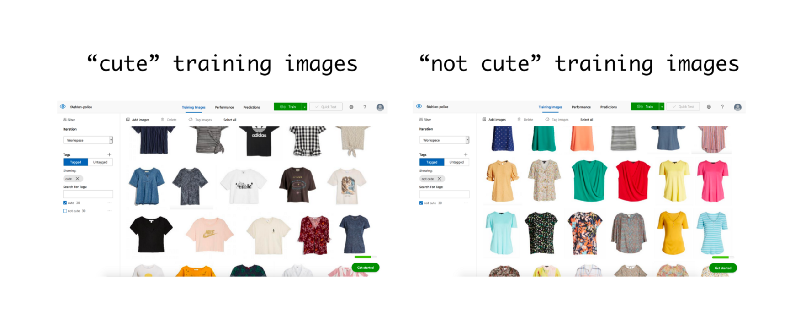
Nordstrom was actually really great for this because they have pictures of each item they sell without a person wearing it, taken under very similar lighting conditions and backgrounds. My hypothesis is that the model would work better under these consistent conditions, so that it might be able to pick out the nuances in pattern and color rather than the background color or people’s height or skin color.
I actually started out with just short-sleeved shirts — I saved 40 pictures of ones I liked and 40 of ones I didn’t like. I randomly picked 30 of each to give to Microsoft’s model to train with, and I saved 10 of each to test the model. And yeah, I know this is a crazy small dataset but I have a life outside of screenshotting Nordstrom pics :/
Testing the AI
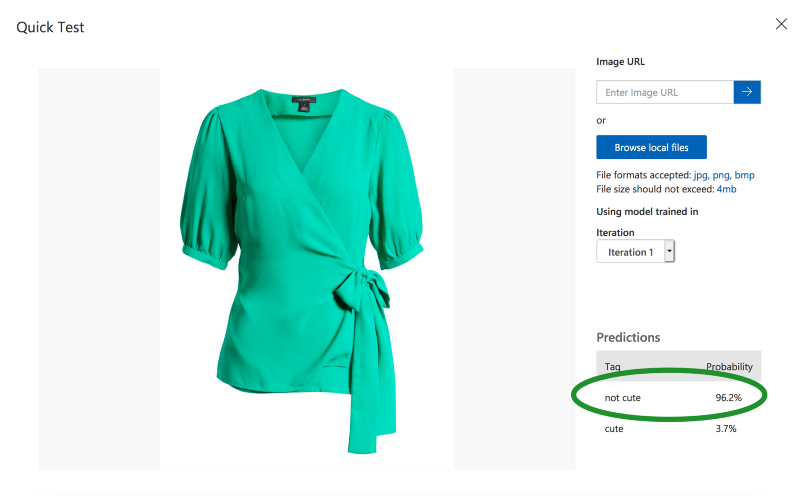
After training, I applied the model on my test set of 10 “cute” and 10 “not cute” labeled shirts by using the “Quick Test” functionality. I got the following results:
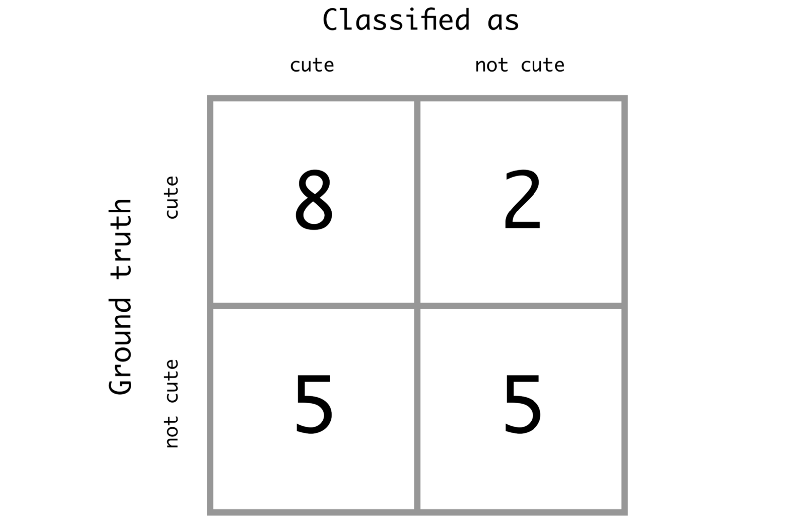
The recall — actually cute clothes correctly classified as cute — was 8/10, or .80. The precision — clothes classified as cute that were actually cute — was 8/13, about .62. The F1 score rounds up to .70. Not amazing, not terrible, I’d say, for an off-the-shelf model. Make of that what you will, but I think it’s definitely better than a clueless friend at picking out clothes for me.
When I looked at the classifications of each image, I saw that the AI tended to classify images based on color a lot. If you look at the training data above, you can see that I favored more plain colors like white, black, and blue, while bright shirts were mostly labeled “not cute”.
This simplistic view on my taste didn’t always work, though. Let’s look at some more examples.
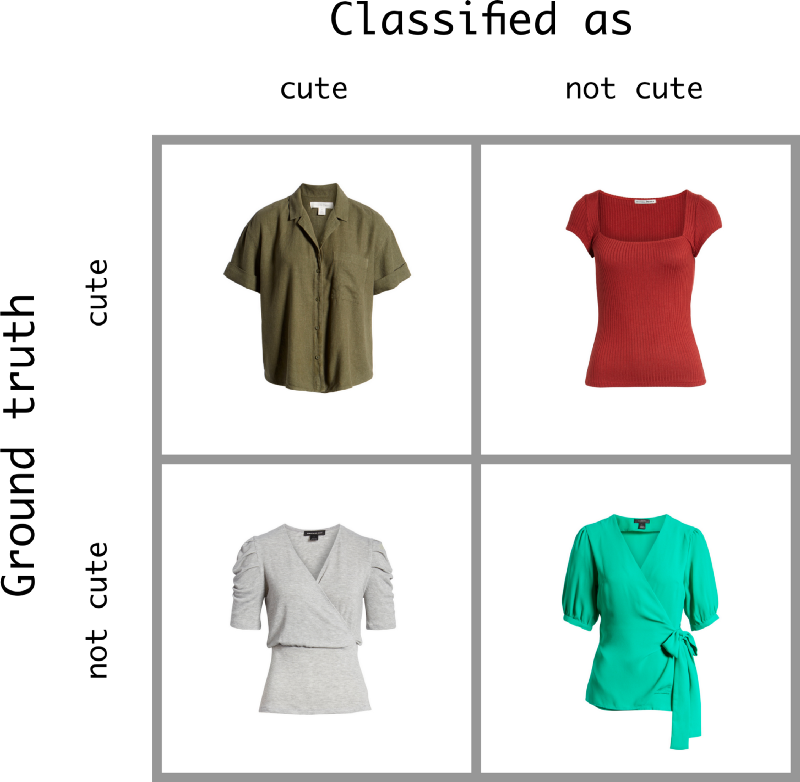
The AI didn’t really understand the “style” of the shirts, only the color. I labeled a lot of shirt with “folds” in them (like in the shoulder of the gray shirt above) as “not cute”, yet the AI still classified the gray shirt as cute. The red shirt above might’ve been too bright to be classified as “cute” and therefore was wrongly classified. So yes, the AI didn’t do too poorly because after all, color is a big factor that influences my own style, but it also seemed to fail at picking up more nuances in my taste.
Going to a store? You’ll need an app for that.
I also wanted to test the capabilities of the AI in the wild — like taking pictures of clothing in a store and using that to decide whether or not to buy a certain piece of clothing.
Creating an app for yourself is easier than ever, so don’t worry — we’re not going to be full-on deploying to the App Store. That takes too long, anyway. I used React Native to quickly put together a cross-platform (works on iPhones and Androids) app with the functionality I needed.
The functionality? Well, that would be the ability to take a picture of a piece of clothing and have the AI instantly predict whether the predictee would deem it “cute” or not. So we need to be able to use the phone’s camera, be able to take pictures, use the Microsoft Prediction API on pictures we take in real time, and convey the results back to the user. This is quite easy to do with Expo’s services, and if you want to dive into the specifics, all my code is available on Github.
A side note about the Prediction API
The most confusing part of making this was trying to send the image file taken from the phone camera directly through the API endpoint. You’re supposed to send the data as an “octet-stream”, and there is very little support or documentation on this on Microsoft’s end. I tried sending over a binary-encoded image, I tried sending the image file in a form-data format, I tried resizing the image and then doing a combination of the above — but nothing I tried worked.
To be honest, I spent hours and hours trying to figure out why nothing was getting me a good response. Ultimately, I asked a friend-of-a-friend who had actually encountered this exact issue before, and he said that he eventually gave up trying to directly send the image file, and instead used another API to upload the image first, then send the web url of the image.
Hearing this, I admitted defeat and adopted that solution: I used the Imgur API to upload the images taken from the phone and then sent in the image web url.
Anyway…
After this, the app worked! And the AI worked surprisingly similarly to the way it performed on the Nordstrom test set. It was still trained on the Nordstrom.com images, so see the following results on some random clothing I already own:
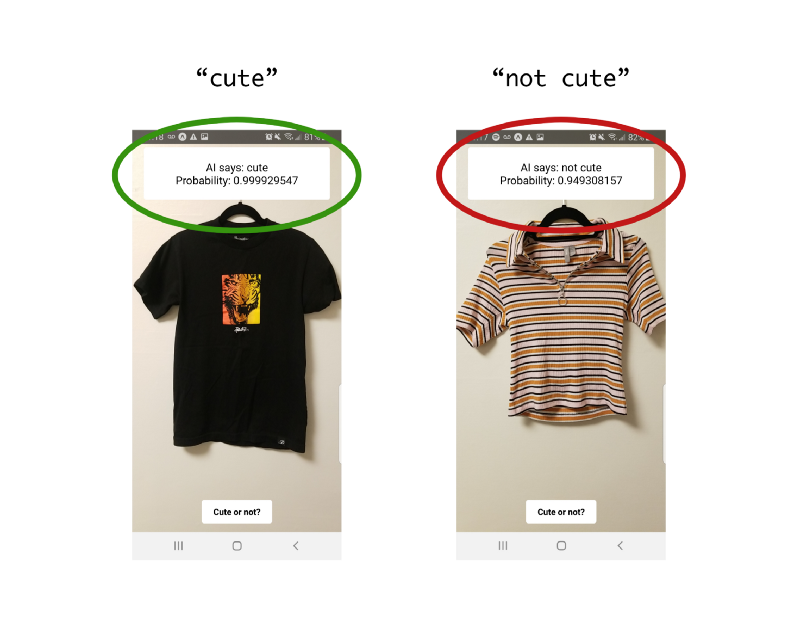
You can see how confident the AI is in classifying the black shirt as “cute” and the striped shirt as “not cute”. This is good because because it shows the AI hasn’t been heavily skewed by the new lighting conditions, and bad (but expected) because it still appears to perpetuate the simplistic view of “dull colors cute bright colors not”. But overall — pretty cool that you can use this “fashion police” in real life!
Final thoughts
Well, this was fun! There are some ~exciting but easy~ things that I eventually added, such as randomly varying the language that is reported back from the AI, saying things like “I like it!!” or “Don’t waste your money…” instead of simply the labels “cute” and “not cute”. The great thing about this app is that it’s completely open and adaptable — you can change up the user experience or literally train it on anything so that it’s predicting a landmark, a street sign, or even a hotdog or not-hotdog.
I also made a little video about using this in real life to spearhead my nerdy YouTube channel. You can check it out here if you want to see the app applied to make real fashion choices (and watch me be awkward in front of a camera)!
Thanks for reading :)