
Long-standing centralized intermediaries, like the government or big companies, are the ones who make and keep your ID information in traditional systems that manage who you are.
But this implies that you have no control over the information relating to your identification, who has access to personally identifiable information (PII), and to what extent.
As a result, Decentralized Identity provides identity-related information that is self-controlled, private, and portable. Decentralized identifiers and attestations serve as the main building pieces.
Thanks to Ceramic's decentralized application databases, application developers can reuse data across applications and automatically make them interoperable.
In this article, you will learn about Decentralized Identity, Decentralized Identifiers, Ceramic network, and how to build a decentralized identity profile with Ethereum on Ceramic Networks.
Here's what we'll cover:
- What is a Decentralized Identity?
- What are Decentralized Identifiers?
- What is Ceramic Data Network?
- Why Ceramic Network?
- How to Build a Decentralized Identity Profile with Next.js
- Prerequisites
- Project Setup and Installation
- Install TailwindCSS in Next.js
- Authenticate Users
- Create/Update User Profile
- How to Test the Application
- Conclusion
- References
What is a Decentralized Identity?
Decentralized Identity is a digital identification concept where people, companies, and items are in charge of their data and can share it selectively without relying on a centralized authority.
This is made possible by using decentralized technologies, such as blockchain. These give people control and ownership over the information associated with their identities rather than having it stored on a central server or managed by a third party.
A decentralized identity is a self-owned, independent identity that enables trusted data exchange.
Blockchain-based digital wallets, such as those used to store and handle cryptocurrencies, serve as a practical illustration of decentralized identification. Users of these wallets control the private keys that provide them access to their money and can distribute their public keys to others to accept payments from them.
Users who manage their private keys can conduct transactions with others without relying on a central authority, such as a bank, and keep custody of their money.
What are Decentralized Identifiers?
Decentralized identifiers (DIDs) are issued, held, and controlled by individuals. Since they are kept on peer-to-peer networks or distributed ledgers (blockchains), they are globally unique, highly available, and cryptographically verifiable.
Decentralized identifiers can be associated with individuals, groups, or governmental entities.
DIDs are a vital component of the developing decentralized identity ecosystem. They are designed to offer a uniform process for developing, maintaining, and exchanging digital identities unaffiliated with any one company or piece of technology.
This implies that a DID can be maintained and controlled by the person or entity to which it belongs and utilized across various systems and applications.
In recent years, smart contract platforms like Ethereum have demonstrated the utility of decentralized applications (dApps) that can be assembled like blocks to create new applications. This is especially evident in tokens that build upon one another, in DeFi protocols that use one another, and so on.
Thanks to Ceramic, data on the internet can now have the same kind of composability. Any data type, including profiles, social connections, blog posts, identities, reputations, and so on., can be included. You will learn more about Ceramic Network in the section below.
What is Ceramic Network?
Ceramic is a public, permissionless, open-source protocol that offers computation, state transitions, and consensus for all data structures on the decentralized web.
With the help of stream processing provided by Ceramic, developers can build apps that are strong, safe, trustless, and censorship-resistant using dynamic information – without using unreliable database servers.
Ceramic stores all content in smart documents, which are append-only IPFS logs. Before being anchored in a blockchain for consensus, each commit is verified by a decentralized identification (DID).
All papers in Ceramic are openly discoverable and can be referenced by other documents or queried by any other network user because the system is entirely peer-to-peer.
Why Ceramic Network?
Data interoperability is one of Ceramic Network's key benefits. This platform features a flexible and modular data schema that enables the decentralized and interoperable sharing and combining of various sorts of data.
Developers now have an easier time creating decentralized identification solutions that can be integrated with other programs and systems.
The infrastructure of Ceramic Network is scalable, fault-tolerant, decentralized, and highly available. This enables developers to create robust decentralized identity systems available to users everywhere.
Ceramic Network also provides a set of developer tools and libraries, making it simple to create decentralized identity apps and services. These tools include SDKs, APIs, developer guides, and an expanding ecosystem of open-source tools and libraries.
Now that you have learnt the theories behind decentralized identity, let's take a practical deep dive and get your hands dirty.
How to Build a Decentralized Identity Profile with Next.js
Prerequisites
To go through this tutorial, you'll need some experience with JavaScript and React.js. Experience with Next.js isn't a requirement, but it's nice to have.
Make sure to have Node.js or npm installed on your computer. If you don't, click here.
Also, it'll be very useful to have a basic understanding of blockchain technology and Web3 concepts.
Project Setup and Installation
Navigate to the terminal and cd into any directory of your choice. Then run the following commands:
mkdir decentralized-identity-project
cd decentralized-identity-project
npx create-next-app@latest .
Accept the following options:

Install the @self.id/react and @self.id/web packages using the code snippet below:
npm install @self.id/web @self.id/react
Next, start the app using the following command:
npm run dev
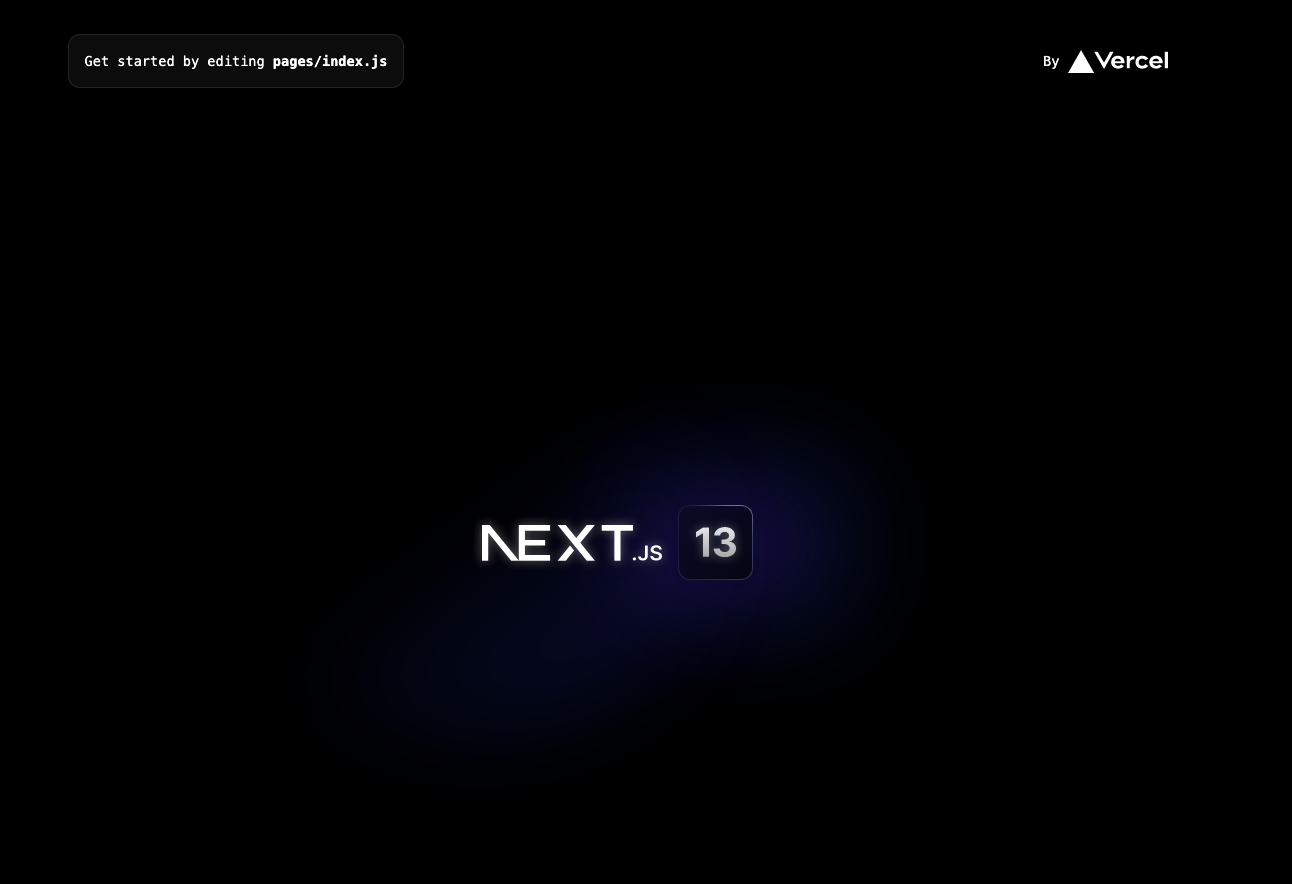
You should have something similar to what is shown below: the default boilerplate layout for Next.js 13.
Install TailwindCSS in Next.js
In this section, you will set up Tailwind CSS in a Next.js project. Install tailwindcss and its peer dependencies via npm, and then run the init command to generate both tailwind.config.js and postcss.config.js.
npm install -D tailwindcss postcss autoprefixer
npx tailwindcss init -p
Navigate to the tailwind.config.js file, and add the paths to your template files with the following code snippet.
/** @type {import('tailwindcss').Config} */

module.exports = {
  content: [
    "./app/**/*.{js,ts,jsx,tsx}",
    "./pages/**/*.{js,ts,jsx,tsx}",
    "./components/**/*.{js,ts,jsx,tsx}",

    // Or if using `src` directory:
    "./src/**/*.{js,ts,jsx,tsx}",
  ],
  theme: {
    extend: {},
  },
  plugins: [],
}
Delete all the CSS styles inside globals.css . Add the @tailwind directives for each of Tailwind’s layers to your globals.css file.
@tailwind base;
@tailwind components;
@tailwind utilities;
Configure the Provider Component
The Provider component must be placed at the top of the application tree to use the hooks detailed below. You can use it to supply an initial state as well as a specific configuration for the Self.ID clients and queries.
Update the _app.js file under the pages folder with the following code snippet:
// Import the Provider component from the "@self.id/react" library.
import { Provider } from "@self.id/react";

// Import the "globals.css" file from the "@/styles" directory.
import "@/styles/globals.css";

// Define the App component as a default export.
export default function App({ Component, pageProps }) {

  // Render the Provider component, which provides authentication and authorization functionality to the application.
  // Pass a client prop to the Provider component, which configures the Ceramic testnet with the "testnet-clay" value.
  // Render the Component with its props inside the Provider component, which allows the application to access the authentication and authorization context.

  return (
    <Provider client={{ ceramic: "testnet-clay" }}>
      <Component {...pageProps} />
    </Provider>
  );
}
In the code snippet above, we:
- Imported a context provider component and global CSS styles and then defined an
Appcomponent that wraps the entire application with the context provider. - Configured the context provider with a Ceramic testnet client, which allows the application to access authentication and authorization functionality.
- Finally, the
Componentis rendered with its props inside the context provider, allowing the application to access the authentication and authorization context.
Build the Layout
Next, navigate to the index.js file under the pages folder and update it with the following code:
// Import the Head component from the "next/head" module.
import Head from "next/head";

// Import the useViewerConnection and useViewerRecord hooks from the "@self.id/react" library.
import { useViewerConnection, useViewerRecord } from "@self.id/react";

// Import the EthereumAuthProvider component from the "@self.id/web" library.
import { EthereumAuthProvider } from "@self.id/web";

// Import the useState hook from the "react" module.
import { useEffect, useState } from "react";


export default function Home() {

  return (
    <>
      <Head>
        <title>
          Decentralized Identity: Build a Profile with NextJs, Ethereum & Ceramic Network
        </title>
        <meta name="description" content="Generated by create next app" />
        <meta name="viewport" content="width=device-width, initial-scale=1" />
        <link rel="icon" href="/favicon.ico" />
      </Head>
      <main className="min-h-screen bg-gray-200">
        <div className="bg-gray-600 py-4 px-4 sm:px-6 lg:px-8 lg:py-6 shadow-lg text-white">
          <div className="container mx-auto px-6 md:px-0">
            <h1 className="text-2xl font-bold text-white text-center">
              Decentralized Identity: Build a Profile with NextJs, Ethereum & Ceramic Network
            </h1>
          </div>
        </div>

        <div className="flex items-center justify-center pt-20 font-sans overflow-hidden">
          <div className="max-w-md w-full mx-auto">
            <div className="bg-white p-10 rounded-lg shadow-lg">
              <form>
                <div className="mb-6">
                  <label
                    className="block text-gray-700 font-bold mb-2"
                    htmlFor="name"
                  >
                    Name
                  </label>
                  <input
                    className="border border-gray-300 p-2 w-full rounded-lg"
                    type="text"
                    name="name"
                    id="name"
                    placeholder="Your name"
                  />
                </div>
                <div className="mb-6">
                  <label
                    className="block text-gray-700 font-bold mb-2"
                    htmlFor="bio"
                  >
                    Bio
                  </label>
                  <textarea
                    className="border border-gray-300 p-2 w-full rounded-lg"
                    name="bio"
                    id="bio"
                    rows="5"
                    placeholder="Write something about yourself"
                  ></textarea>
                </div>
                <div className="mb-6">
                  <label
                    className="block text-gray-700 font-bold mb-2"
                    htmlFor="username"
                  >
                    Username
                  </label>
                  <input
                    className="border border-gray-300 p-2 w-full rounded-lg"
                    type="text"
                    name="username"
                    id="username"
                    placeholder="Your username"
                  />
                </div>
                <div className="flex items-center justify-between">
                  <button
                    className="bg-blue-500 hover:bg-blue-700 text-white font-bold py-2 px-4 rounded"
                    type="submit"
                  >
                    Update Profile
                  </button>
                  <button
                    className="bg-green-500 hover:bg-green-700 text-white font-bold py-2 px-4 rounded"
                    type="button"
                  >
                    Connect Wallet
                  </button>
                </div>
              </form>
            </div>
          </div>
        </div>
      </main>
    </>
  );
}
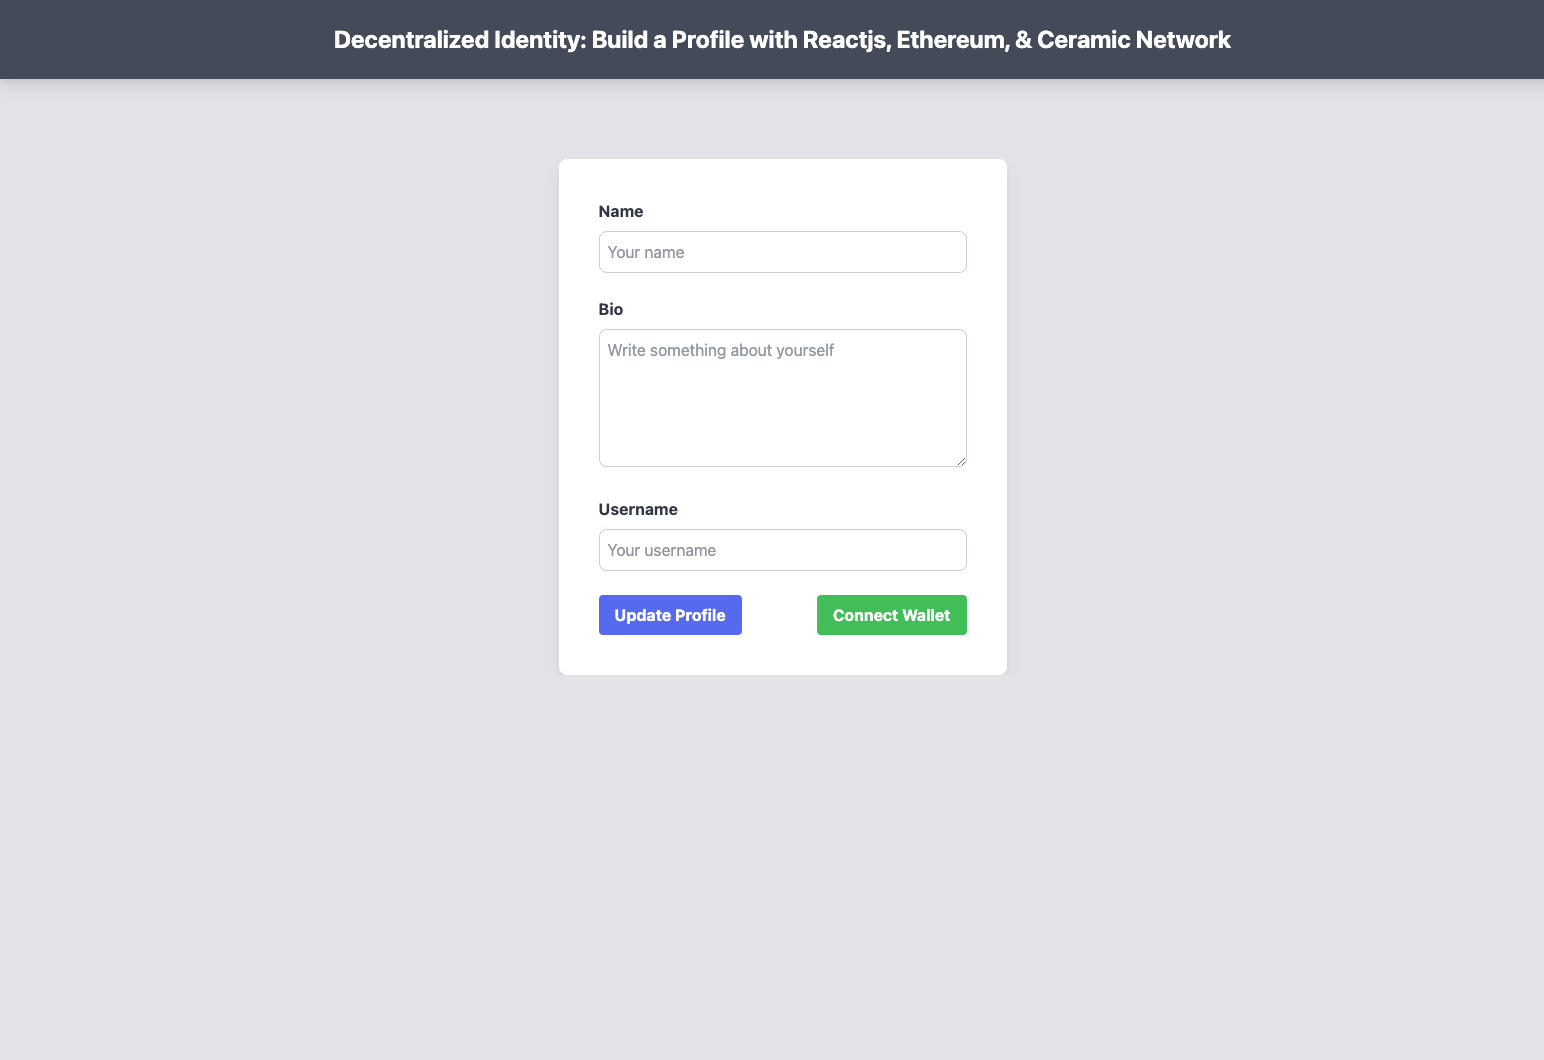
To start the application, run the following command and navigate to localhost:3000 on your browser; you should have something similar to what is shown below:
How to Authenticate Users
In this section, you will implement user authentication to allow users to connect their wallets and interact with the application.
Update the index.js with the following code:
//..

export default function Home() {

  // State variables for connection, connect function, and disconnect function
  const [connection, connect, disconnect] = useViewerConnection();


  const [isWindow, setIsWindow] = useState(null);


  // State variable for viewer's basic profile data
  const record = useViewerRecord("basicProfile");

  // Function to create EthereumAuthProvider using window.ethereum provider
  async function createAuthProvider() {
    const addresses = await window.ethereum.request({
      method: "eth_requestAccounts",
    });
    return new EthereumAuthProvider(window.ethereum, addresses[0]);
  }

  // Function to connect to viewer's account using created authProvider
  async function connectAccount() {
    const authProvider = await createAuthProvider();
    await connect(authProvider);
  }

  // Rendered JSX code
  return (
    <>
      {/* ... */}
      <div className="flex items-center justify-between">
        {/* ... */}

        {/* Conditionally render a button to connect/disconnect user */}
        {connection.status === "connected" ? (
          <button
            className="bg-red-500 hover:bg-red-700 text-white font-bold py-2 px-4 rounded"
            type="button"
            onClick={() => disconnect()}
          >
            Disconnect
          </button>
        ) : isWindow && "ethereum" in window ? (
          <button
            className="bg-green-500 hover:bg-green-700 text-white font-bold py-2 px-4 rounded"
            type="button"
            disabled={connection.status === "connecting" || !record}
            onClick={() => {
              connectAccount();
            }}
          >
            Connect Wallet
          </button>
        ) : (
          <p className="text-red-500 text-sm italic mt-2 text-center w-full">
            An injected Ethereum provider such as{" "}
            <a href="https://metamask.io/">MetaMask</a> is needed to
            authenticate.
          </p>
        )}
      </div>
    </>
  )
}
In the code snippet above,
- The
useViewerConnectionhook is used to set up a state variable for the user's connection status, connect and disconnect. isWindowto set the initial state of the the window to avoid React hydration error- The
useViewerRecordhook is used to retrieve the user's basic profile data. - The
createAuthProviderfunction creates anEthereumAuthProviderobject using thewindow.ethereumprovider. - The
connectAccountfunction callscreateAuthProviderand connects to the user's account usingconnect(authProvider). - The JSX code conditionally renders a button based on the user's connection status and the availability of an
ethereumprovider in thewindowobject. - If the user is already connected, the button will enable them to disconnect. If the user is not yet connected and an
ethereumprovider is available, the button will enable them to connect. But if the user is not connected and noethereumprovider is available, a message will be displayed to inform the user that an injected Ethereum provider like MetaMask is required to authenticate.
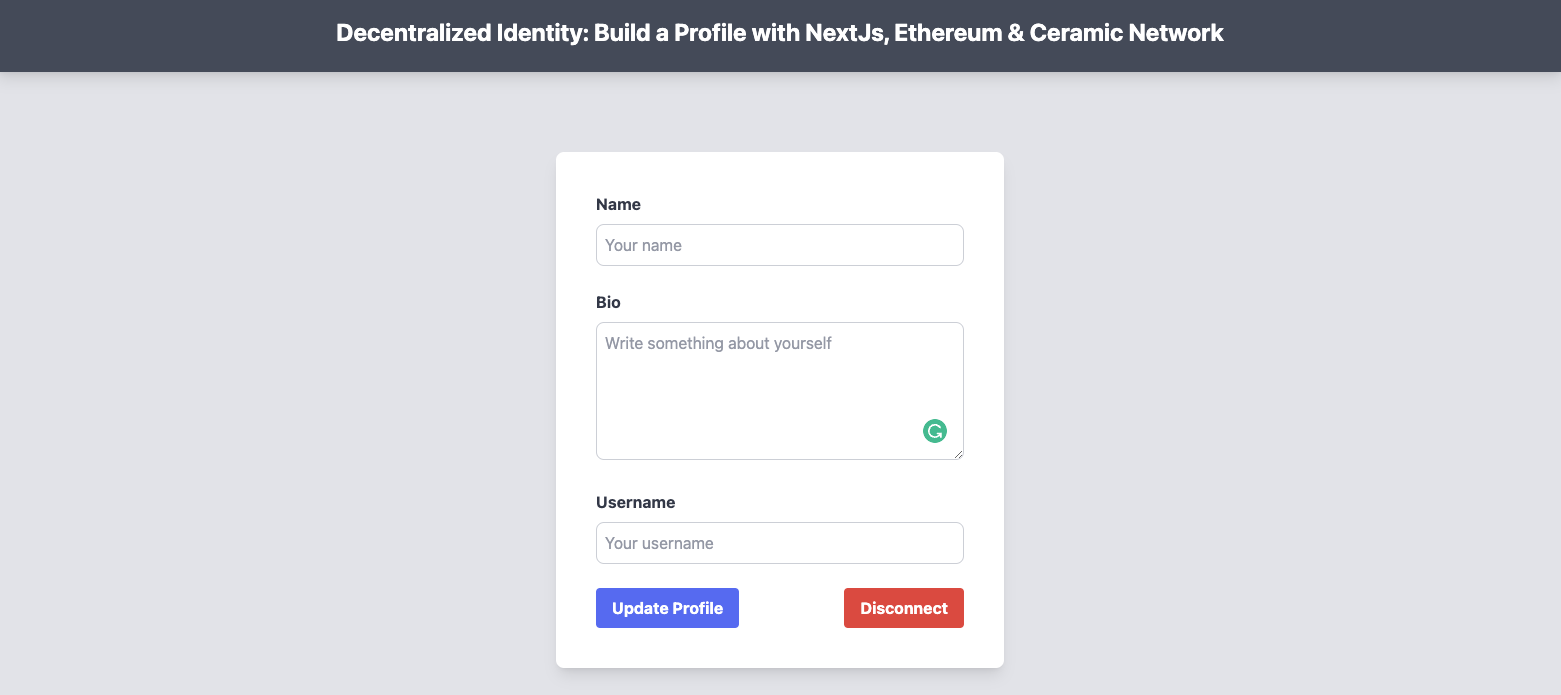
Testing out the authentication functionality, you should have something similar to what is shown below:
How to Create or Update a User Profile
In the previous section, you learned how to successfully authenticate users. Next, you will implement functionality to create and update an authenticated user with the following code snippet:
pages/index.js
//...


export default function Home() {
// Use the useState hook to create state variables and functions to update them
  const [name, setName] = useState("");
  const [bio, setBio] = useState("");
  const [username, setUsername] = useState("");

  //...

// Define an asynchronous function called updateProfile to update the profile information
  async function updateProfile() {
    // If any of the required fields are empty, return early and do not update
     if (!name || !bio || !username) {
       return;
     }

     // Use the merge method to update the record with the new information
     await record.merge({
       name,
       bio,
       username,
     });
   }

  // Render the component's UI
  return (
    <>

    {/* ... */}

    <div className="flex items-center justify-center pt-20 font-sans overflow-hidden">
          <div className="max-w-md w-full mx-auto">
            <div className="bg-white p-10 rounded-lg shadow-lg">
              <form>
               {/* ... */}
              </form>
            </div>
            {connection.status === "connected" && record && record.content ? (
              <div className="flex flex-col items-center mt-8">
                <h2 className="text-3xl font-bold mb-6 text-gray-900">
                  Profile Information
                </h2>
                <div className="w-full max-w-md bg-white p-8 rounded-lg shadow-lg">
                  <p className="mb-4">
                    <span className="font-bold text-gray-700 mr-2 text-lg">
                      Name:
                    </span>{" "}
                    <span id="nameOutput" className="text-lg">
                      {record.content.name || "No name set"}
                    </span>
                  </p>

                  <p className="mb-4">
                    <span className="font-bold text-gray-700 mr-2 text-lg">
                      Bio:
                    </span>{" "}
                    <span id="bioOutput" className="text-lg">
                      {record.content.bio || "No bio set"}
                    </span>
                  </p>
                  <p>
                    <span className="font-bold text-gray-700 mr-2 text-lg">
                      Username:
                    </span>{" "}
                    <span id="usernameOutput" className="text-lg">
                      {record.content.username || "No username set"}
                    </span>
                  </p>
                </div>
              </div>
            ) : (
              <div className="mt-8">
                <div className="bg-white p-8 rounded-lg shadow-lg">
                  <p>No profile found.</p>
                </div>
              </div>
            )}

          </div>
        </div>
    </>
  )
}
In the code above,
- The component uses the useState hook to manage the state of three variables:
name,bio, andusername. - There's an async function called
updateProfilethat is responsible for merging the current state of the variables into a record. - If any of the variables is empty, the
updateProfilefunction returns without updating the record. - There are three conditional statements that render a different UI based on whether a record is found or not.
- The first conditional statement checks whether the record is still loading, and if it is, it displays a
Loading...message. - The second conditional statement checks whether there's no record content and the connection status is connected. If this is true, it displays a
No profile found.message.
The third conditional statement checks whether the record content exists. If it does, it displays the profile information, which includes the user's name, bio, and username.
You are almost there. In the form tag, update the name, bio and username input field with the following code:
<div className="mb-6">
  <label
    className="block text-gray-700 font-bold mb-2"
    htmlFor="name"
  >
    Name
  </label>
  <input
    //...
    onChange={(e) => {
      setName(e.target.value);
    }}
  />
</div>
<div className="mb-6">
  <label
    className="block text-gray-700 font-bold mb-2"
    htmlFor="bio"
  >
    Bio
  </label>
  <textarea
    //...
    onChange={(e) => {
      setBio(e.target.value);
    }}
  ></textarea>
</div>
<div className="mb-6">
  <label
    className="block text-gray-700 font-bold mb-2"
    htmlFor="username"
  >
    Username
  </label>
  <input
    //...
    onChange={(e) => {
      setUsername(e.target.value);
    }}
  />
</div>
In the code snippet above, setName, setBio, and setUsername are functions provided by the useState hook that update the state of name, bio, or username.
Next, the Update Profile button.
//...

 <button
     className="bg-blue-500 hover:bg-blue-700 text-white font-bold py-2 px-4 rounded"
     type="submit"
     disabled={!record.isMutable || record.isMutating}
     onClick={() => updateProfile()}
 >
    {record.isMutating ? "Updating..." : "Update Profile"}
</button>

//..
In the code snippet above, the button is disabled when the record is not mutable or is currently mutating.
When the button is clicked, it calls the updateProfile function, which is responsible for updating the user's profile information. If the record mutates, the button will display Updating.... Otherwise, it will display Update Profile.
You can test out the application similar to what is shown below.
Kindly find the complete code on GitHub repository here.
Conclusion
In this post, you learn about Decentralized Identity, Decentralized Identifiers, Ceramic networks, why Ceramic network is useful, and how to build a decentralized identity profile with Ethereum on Ceramic Networks.
References
I'd love to connect with you at Twitter | LinkedIn | GitHub | Portfolio
See you in my next article. Take care!