By Kunal
One fine night, your stomach refuses to digest the large Pizza you had at dinner, and you have to rush to the bathroom in the middle of your sleep.
In the bathroom, while wondering why this is happening to you, you hear a heavy voice from the vent: “Hey, I am Batman.”
What would you do?
Before you panic and stand up in middle of the critical process, Batman says, “I need your help. I am a super geek, but I don’t know HTML. I need to write my love letter in HTML — would you do it for me?”
Who could refuse a request from Batman, right? Let’s write Batman’s love letter in HTML.
Your first HTML file
An HTML webpage is like other files on your computer. As a .doc file opens in MS Word, a .jpg file opens in Image Viewer, and a .html file opens in your Browser.
So, let’s create a .html file. You can do this in Notepad, or any other basic editor, but I would recommend using VS Code instead. Download and install VS Code here. It’s free, and the only Microsoft Product I love.
Create a directory in your system and name it “HTML Practice” (without quotes). Inside this directory, create one more directory called “Batman’s Love Letter” (without quotes). This will be our project root directory. That means that all our files related to this project will live here.
Open VS Code and press ctrl+n to create a new file and ctrl+s to save the file. Navigate to the “Batman’s Love Letter” folder and name the file “loveletter.html” and click save.
Now, if you open this file by double-clicking it from your file explorer, it will open in your default browser. I recommend using Firefox for web development, but Chrome is fine too.
Let’s relate this process to something we are already familiar with. Remember the first time you got your hands on a computer? The first thing I did was open MS Paint and draw something. You draw something in Paint and save it as an image and then you can view that image in Image Viewer. Then if you want to edit that image again, you re-open it in Paint, edit it, and save it.
Our current process is quite similar. As we use Paint to create and edit images, we use VS Code to create and edit our HTML files. And as we use Image Viewer to view the images, we use the Browser to view our HTML pages.
Your first Paragraph in HTML
We have our blank HTML file, so here’s the first paragraph Batman wants to write in his love letter
“After all the battles we fought together, after all the difficult times we saw together, and after all the good and bad moments we’ve been through, I think it’s time I let you know how I feel about you.”
Copy the paragraph in your loveletter.html in VS Code. Enable word wrap by clicking View -> Toggle Word Wrap (alt+z).
Save and open the file in your browser. If it’s already open, click refresh on your browser.
Voila! That’s your first webpage!
Our first paragraph is ready, but this is not the recommended way of writing a paragraph in HTML. We have a specific way to let the browser know that a text is a paragraph.
If you wrap the text with <p> and </p>, then the browser will know that the text inside the <p> and </p> is a paragraph. Let’s do this:
<p>After all the battles we fought together, after all the difficult times we saw together, after all the good and bad moments we've been through, I think it's time I let you know how I feel about you.</p>
By writing the paragraph inside <p> and </p> you created an HTML element. A web page is collection of HTML elements.
Let’s get some of the terminologies out of the way first: <p> is the opening tag, </p> is the closing tag, and “p” is the tag name. The text inside the opening and closing tag of an element is that element’s content.
The “style” attribute
You will see that the text covers the entire width of the screen.
We don’t want that. No one want’s to read such long lines. Let’s give a width of, say, 550px to our paragraph.
We can do that by using the element’s “style” attribute. You can define an element’s style (for example, width in our case), inside its style attribute. The following line will create an empty style attribute on a “p” element:
<p style="">...</p>
You see that empty ""? That’s where we will define the looks of the element. Right now we want to set the width to 550px. Let’s do that:
<p style="width:550px;">
    After all the battles we fought together, after all the difficult times we saw together, after all the good and bad moments we've been through, I think it's time I let you know how I feel about you.
</p>
We set the “width” property to 550px separated by a colon “:” and ended by a semicolon “;”.
Also, notice how we put the <p> and </p> in separate lines and the text content indented with one tab. Styling your code like this makes it more readable.
Lists in HTML
Next, Batman wants to list some of the virtues of the person that he admires, like this:
“ You complete my darkness with your light. I love:
- the way you see good in the worst things
- the way you handle emotionally difficult situations
- the way you look at Justice
I have learned a lot from you. You have occupied a special place in my heart over time.”
This looks simple.
Let’s go ahead and copy the required text below the </p>:
<p style="width:550px;">
  After all the battles we faught together, after all the difficult times we saw together, after all the good and bad moments we've been through, I think it's time I let you know how I feel about you.
</p>
<p style="width:550px;">
  You complete my darkness with your light. I love:
  - the way you see good in the worse
  - the way you handle emotionally difficult situations
  - the way you look at Justice
  I have learned a lot from you. You have occupied a special place in my heart over the time.
</p>
Save and refresh your browser.
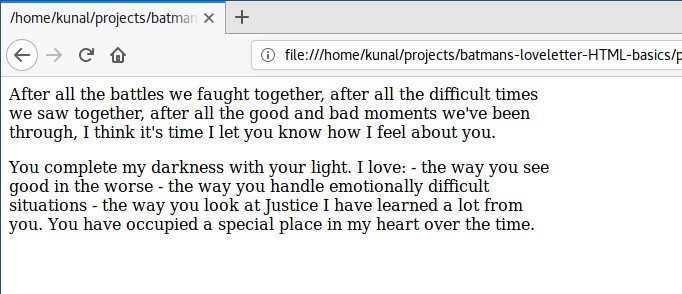
Woah! What happened here, where is our list?
If you look closely, you will observe that line breaks are not displayed. We wrote the list items in new lines in our code, but those are displayed in a single line in the browser.
If you want to insert a line break in HTML (newline) you have to mention it using <br>. Let’s use <br> and see how it looks:
<p style="width:550px;">
  After all the battles we faught together, after all the difficult times we saw together, after all the good and bad moments we've been through, I think it's time I let you know how I feel about you.
</p>
<p style="width:550px;">
  You complete my darkness with your light. I love: <br>
  - the way you see good in the worse <br>
  - the way you handle emotionally difficult situations <br>
  - the way you look at Justice <br>
  I have learned a lot from you. You have occupied a special place in my heart over the time.
</p>
Save and refresh:
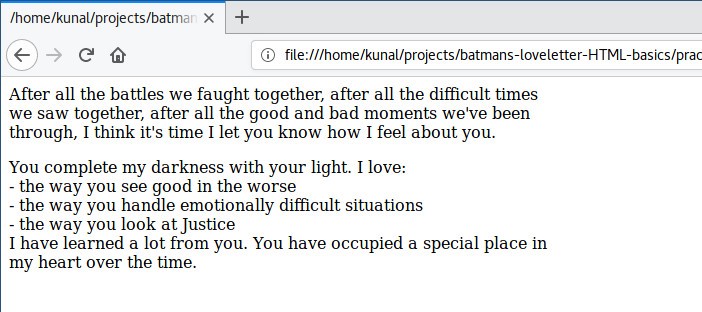
Okay, now it looks the way we want it to.
Also, notice that we didn’t write a </br>. Some tags don’t need a closing tag, (and they’re called self-closing tags).
One more thing: we didn’t use a <br> between the two paragraphs, but still the second paragraph starts from a new line. That’s because the “p” element automatically inserts a line break.
We wrote our list using plain text, but there are two tags we can use for this same purpose: <ul> and <li>.
To get the naming out of the way: ul stands for Unordered List, and li stands for List Item. Let’s use these to display our list:
<p style="width:550px;">
  After all the battles we faught together, after all the difficult times we saw together, after all the good and bad moments we've been through, I think it's time I let you know how I feel about you.
</p>

<p style="width:550px;">
  You complete my darkness with your light. I love:
  <ul>
    <li>the way you see good in the worse</li>
    <li>the way you handle emotionally difficult situations</li>
    <li>the way you look at Justice</li>
  </ul>
  I have learned a lot from you. You have occupied a special place in my heart over the time.
</p>
Before copying the code, notice the differences we made:
- We removed all the
<br>, since each<li>automatically displays in new line - We wrapped the individual list items between
<li>and</li>. - We wrapped the collection of all the list items between the
<ul>and</ul> - We didn’t define the width of the “ul” element as we were doing with the “p” element. This is because “ul” is a child of “p” and “p” is already constrained to 550px, so “ul” won’t go beyond that.
Let’s save the file and refresh the browser to see the results:
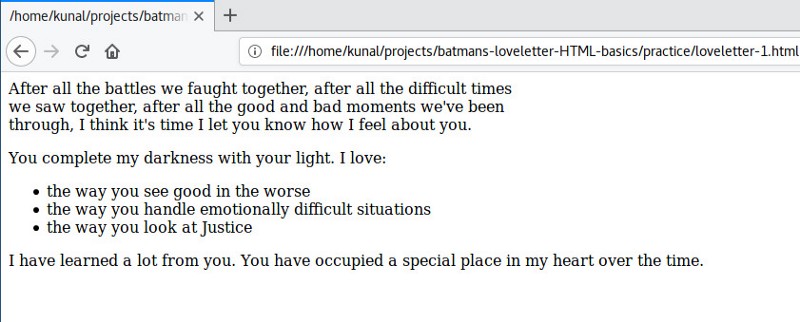
You will instantly notice that we get bullet points displayed before each list item. We don’t need to write that “-” before each list item now.
On careful inspection, you will notice that the last line goes beyond 550px width. Why is that? Because a “ul” element is not allowed inside a “p” element in HTML. Let’s put the first and last lines in separate “p” elements:
<p style="width:550px;">
  After all the battles we faught together, after all the difficult times we saw together, after all the good and bad moments we've been through, I think it's time I let you know how I feel about you.
</p>

<p style="width:550px;">
  You complete my darkness with your light. I love:
</p>

<ul style="width:550px;">
  <li>the way you see good in the worse</li>
  <li>the way you handle emotionally difficult situations</li>
  <li>the way you look at Justice</li>
</ul>

<p style="width:550px;">
  I have learned a lot from you. You have occupied a special place in my heart over the time.
</p>
Save and reload.
Notice that this time we defined the width of the “ul” element also. That’s because we have now moved our “ul” element out of the “p” element.
Defining the width of all the elements of our letter can become cumbersome. We have a specific element for this purpose: the “div” element. A “div” element is a generic container which is used to group content so it can be easily styled.
Let’s wrap our entire letter with a div element and give width:550px to that div element:
<div style="width:550px;">
  <p>
    After all the battles we faught together, after all the difficult times we saw together, after all the good and bad moments we've been through, I think it's time I let you know how I feel about you.
  </p>
  <p>
    You complete my darkness with your light. I love:
  </p>
  <ul>
    <li>the way you see good in the worse</li>
    <li>the way you handle emotionally difficult situations</li>
    <li>the way you look at Justice</li>
  </ul>
  <p>
    I have learned a lot from you. You have occupied a special place in my heart over the time.
  </p>
</div>
Great. Our code looks much cleaner now.
Headings in HTML
Batman is quite happy looking at the results so far, and he wants a heading on the letter. He wants to make the heading: “Bat Letter”. Of course, you saw this name coming already, didn’t you? :D
You can add heading using ht, h2, h3, h4, h5, and h6 tags, h1 is the biggest and main heading and h6 the smallest one.
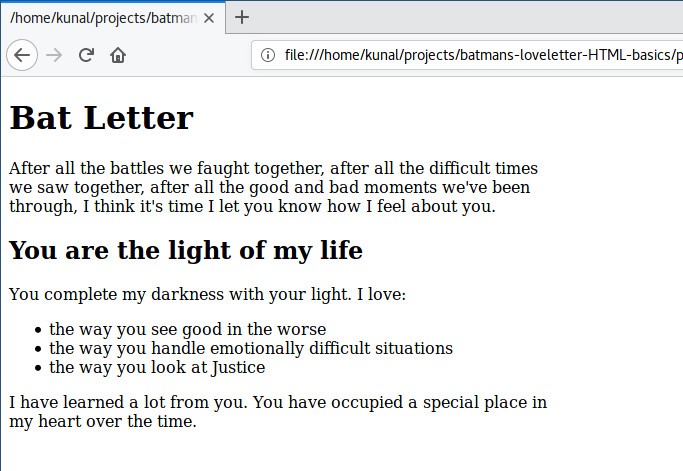
Let’s make the main heading using h1 and a subheading before second paragraph:
<div style="width:550px;">
  <h1>Bat Letter</h1>
  <p>
    After all the battles we faught together, after all the difficult times we saw together, after all the good and bad moments we've been through, I think it's time I let you know how I feel about you.
  </p>

  <h2>You are the light of my life</h2>
  <p>
    You complete my darkness with your light. I love:
  </p>
  <ul>
    <li>the way you see good in the worse</li>
    <li>the way you handle emotionally difficult situations</li>
    <li>the way you look at Justice</li>
  </ul>
  <p>
    I have learned a lot from you. You have occupied a special place in my heart over the time.
  </p>
</div>
Save, and reload.
Images in HTML
Our letter is not complete yet, but before proceeding, one big thing is missing — a Bat logo. Have you ever seen anything Batman owns that doesn’t have a Bat logo?
Nope.
So, let’s add a Bat logo to our letter.
Including an image in HTML is like including an image in a Word file. In MS Word you go to menu -> insert -> image -> then navigate to the location of the image -> select the image -> click on insert.
In HTML, instead of clicking on the menu, we use <img> tag to let the browser know that we need to load an image. We write the location and name of the file inside the “src” attribute. If the image is in the project root directory, we can simply write the name of the image file in the src attribute.
Before we dive into coding this, download this Bat logo from here. You might want to crop the extra white space in the image. Copy the image in your project root directory and rename it “bat-logo.jpeg”.
<div style="width:550px;">
  <h1>Bat Letter</h1>
  <img src="bat-logo.jpeg">
  <p>
    After all the battles we faught together, after all the difficult times we saw together, after all the good and bad moments we've been through, I think it's time I let you know how I feel about you.
  </p>

<h2>You are the light of my life</h2>
  <p>
    You complete my darkness with your light. I love:
  </p>
  <ul>
    <li>the way you see good in the worse</li>
    <li>the way you handle emotionally difficult situations</li>
    <li>the way you look at Justice</li>
  </ul>
  <p>
    I have learned a lot from you. You have occupied a special place in my heart over the time.
  </p>
</div>
We included the img tag on line 3. This tag is also a self-closing tag, so we don’t need to write </img>. In the src attribute, we give the name of the image file. This name should be exactly same as your image’s name, including the extension (.jpeg) and its case.
Save and refresh to see the result.
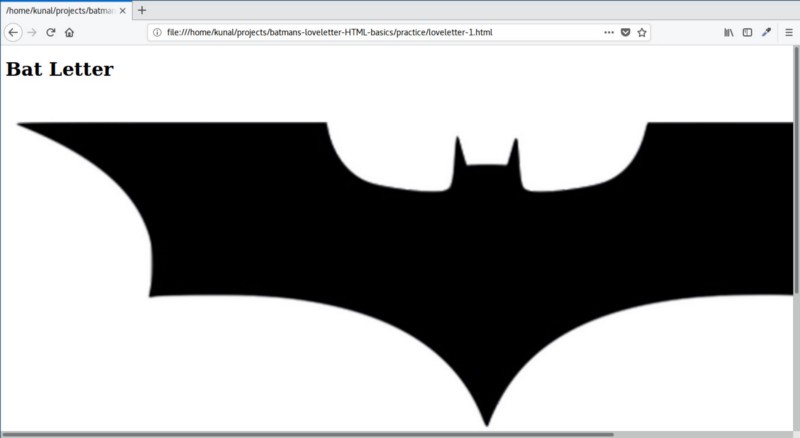
Damn! What just happened?
When you include an image using the img tag, by default the image will be displayed in its original resolution. In our case, the image is much wider than 550px. Let’s define its width using the style attribute:
<div style="width:550px;">
  <h1>Bat Letter</h1>
  <img src="bat-logo.jpeg" style="width:100%">
  <p>
    After all the battles we faught together, after all the difficult times we saw together, after all the good and bad moments we've been through, I think it's time I let you know how I feel about you.
  </p>

<h2>You are the light of my life</h2>
  <p>
    You complete my darkness with your light. I love:
  </p>
  <ul>
    <li>the way you see good in the worse</li>
    <li>the way you handle emotionally difficult situations</li>
    <li>the way you look at Justice</li>
  </ul>
  <p>
    I have learned a lot from you. You have occupied a special place in my heart over the time.
  </p>
</div>
You will notice that this time we defined width with “%” instead of “px”. When we define a width in “%” it will occupy that % of the parent element’s width. So, 100% of 550px will give us 550px.
Save and refresh to see the results.
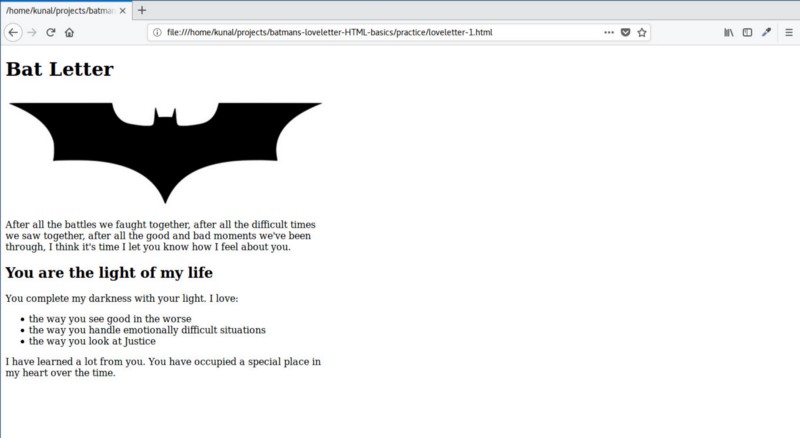
Fantastic! This brings a timid smile to Batman’s face :)
Bold and Italic in HTML
Now Batman wants to confess his love in the last few paragraphs. He has this text for you to write in HTML:
“I have a confession to make
It feels like my chest does have a heart. You make my heart beat. Your smile brings a smile to my face, your pain brings pain to my heart.
I don’t show my emotions, but I think this man behind the mask is falling for you.”
While reading this you ask Batman, “Wait, who is this for?” and Batman replies:
“It’s for Superman.”

You: Oh! I was going to guess Wonder Woman.
Batman: No, it’s Sups, please write “I love you Superman” at the end.
Fine, let’s do it then:
<div style="width:550px;">
  <h1>Bat Letter</h1>
  <img src="bat-logo.jpeg" style="width:100%">
  <p>
    After all the battles we faught together, after all the difficult times we saw together, after all the good and bad moments we've been through, I think it's time I let you know how I feel about you.
  </p>

<h2>You are the light of my life</h2>
  <p>
    You complete my darkness with your light. I love:
  </p>
  <ul>
    <li>the way you see good in the worse</li>
    <li>the way you handle emotionally difficult situations</li>
    <li>the way you look at Justice</li>
  </ul>
  <p>
    I have learned a lot from you. You have occupied a special place in my heart over the time.
  </p>
  <h2>I have a confession to make</h2>
  <p>
    It feels like my chest does have a heart. You make my heart beat. Your smile brings smile on my face, your pain brings pain to my heart.
  </p>
  <p>
    I don't show my emotions, but I think this man behind the mask is falling for you.
  </p>
  <p>I love you Superman.</p>
  <p>
    Your not-so-secret-lover, <br>
    Batman
  </p>
</div>
The letter is almost done, and Batman wants just two more changes. Batman wants the word “does” in the first sentence of the confession paragraph to be italic, and the sentence “I love you Superman” to be in bold.
We use <em> and <strong> to display text in italic and bold. Let’s update these changes:
<div style="width:550px;">
  <h1>Bat Letter</h1>
  <img src="bat-logo.jpeg" style="width:100%">
  <p>
    After all the battles we faught together, after all the difficult times we saw together, after all the good and bad moments we've been through, I think it's time I let you know how I feel about you.
  </p>

  <h2>You are the light of my life</h2>
  <p>
    You complete my darkness with your light. I love:
  </p>
  <ul>
    <li>the way you see good in the worse</li>
    <li>the way you handle emotionally difficult situations</li>
    <li>the way you look at Justice</li>
  </ul>
  <p>
    I have learned a lot from you. You have occupied a special place in my heart over the time.
  </p>
  <h2>I have a confession to make</h2>
  <p>
    It feels like my chest <em>does</em> have a heart. You make my heart beat. Your smile brings smile on my face, your pain brings pain to my heart.
  </p>
  <p>
    I don't show my emotions, but I think this man behind the mask is falling for you.
  </p>
  <p><strong>I love you Superman.</strong></p>
  <p>
    Your not-so-secret-lover, <br>
    Batman
  </p>
</div>
Styling in HTML
There are three ways you can style or define the look of an HTML element:
- Inline styling: We write styles using “style” attribute of the elements. This is what we have done up until now. This is not a good practice.
- Embedded styling: We write all the styles within a “style” element wrapped by .
- Linked stylesheet: We write styles of all the elements in a separate file with .css extension. This file is called Stylesheet.
Let’s have a look at how we defined the inline style of the “div” until now:
<div style="width:550px;">
We can write this same style inside <style> and </style> like this:
div{
  width:550px;
}
In embedded styling, the styles we write are separate from the elements. So we need a way to relate the element and its style. The first word “div” does exactly that. It lets the browser know that whatever style is inside the curly braces {…} belongs to the “div” element. Since this phrase determines which element to apply the style to, it’s called a selector.
The way we write style remains same: property(width) and value(550px) separated by a colon(:) and ended by a semicolon(;).
Let’s remove inline style from our “div” and “img” element and write it inside the <style> element:
<style>
  div{
    width:550px;
  }
  img{
    width:100%;
  }
</style>

<div>
  <h1>Bat Letter</h1>
  <img src="bat-logo.jpeg">
  <p>
    After all the battles we faught together, after all the difficult times we saw together, after all the good and bad moments we've been through, I think it's time I let you know how I feel about you.
  </p>

  <h2>You are the light of my life</h2>
  <p>
    You complete my darkness with your light. I love:
  </p>
  <ul>
    <li>the way you see good in the worse</li>
    <li>the way you handle emotionally difficult situations</li>
    <li>the way you look at Justice</li>
  </ul>
  <p>
    I have learned a lot from you. You have occupied a special place in my heart over the time.
  </p>
  <h2>I have a confession to make</h2>
  <p>
    It feels like my chest <em>does</em> have a heart. You make my heart beat. Your smile brings smile on my face, your pain brings pain to my heart.
  </p>
  <p>
    I don't show my emotions, but I think this man behind the mask is falling for you.
  </p>
  <p><strong>I love you Superman.</strong></p>
  <p>
    Your not-so-secret-lover, <br>
    Batman
  </p>
</div>
Save and refresh, and the result should remain the same.
There is one big problem though — what if there is more than one “div” and “img” element in our HTML file? The styles that we defined for div and img inside the “style” element will apply to every div and img on the page.
If you add another div in your code in the future, then that div will also become 550px wide. We don’t want that.
We want to apply our styles to the specific div and img that we are using right now. To do this, we need to give our div and img element unique ids. Here’s how you can give an id to an element using its “id” attribute:
<div id="letter-container">
and here’s how to use this id in our embedded style as a selector:
#letter-container{
  ...
}
Notice the “#” symbol. It indicates that it is an id, and the styles inside {…} should apply to the element with that specific id only.
Let’s apply this to our code:
<style>
  #letter-container{
    width:550px;
  }
  #header-bat-logo{
    width:100%;
  }
</style>

<div id="letter-container">
  <h1>Bat Letter</h1>
  <img id="header-bat-logo" src="bat-logo.jpeg">
  <p>
    After all the battles we faught together, after all the difficult times we saw together, after all the good and bad moments we've been through, I think it's time I let you know how I feel about you.
  </p>

  <h2>You are the light of my life</h2>
  <p>
    You complete my darkness with your light. I love:
  </p>
  <ul>
    <li>the way you see good in the worse</li>
    <li>the way you handle emotionally difficult situations</li>
    <li>the way you look at Justice</li>
  </ul>
  <p>
    I have learned a lot from you. You have occupied a special place in my heart over the time.
  </p>
  <h2>I have a confession to make</h2>
  <p>
    It feels like my chest <em>does</em> have a heart. You make my heart beat. Your smile brings smile on my face, your pain brings pain to my heart.
  </p>
  <p>
    I don't show my emotions, but I think this man behind the mask is falling for you.
  </p>
  <p><strong>I love you Superman.</strong></p>
  <p>
    Your not-so-secret-lover, <br>
    Batman
  </p>
</div>
Our HTML is ready with embedded styling.
However, you can see that as we include more styles, the will get bigger. This can quickly clutter our main html file. So let’s go one step further and use linked styling by copying the content inside our style tag to a new file.
Create a new file in the project root directory and save it as style.css:
#letter-container{
  width:550px;
}

#header-bat-logo{
  width:100%;
}
We don’t need to write <style> and </style> in our CSS file.
We need to link our newly created CSS file to our HTML file using the <link> tag in our html file. Here’s how we can do that:
<link rel="stylesheet" type="text/css" href="style.css">
We use the link element to include external resources inside your HTML document. It is mostly used to link Stylesheets. The three attributes that we are using are:
- rel: Relation. What relationship the linked file has to the document. The file with the .css extension is called a stylesheet, and so we keep rel=“stylesheet”.
- type: the Type of the linked file; it’s “text/css” for a CSS file.
- href: Hypertext Reference. Location of the linked file.
There is no at the end of the link element. So, is also a self-closing tag.
<link rel="gf" type="cute" href="girl.next.door">
If only getting a Girlfriend was so easy :D
Nah, that’s not gonna happen, let’s move on.
Here’s the content of our loveletter.html:
<link rel="stylesheet" type="text/css" href="style.css">
<div id="letter-container">
  <h1>Bat Letter</h1>
  <img id="header-bat-logo" src="bat-logo.jpeg">
  <p>
    After all the battles we faught together, after all the difficult times we saw together, after all the good and bad moments we've been through, I think it's time I let you know how I feel about you.
  </p>
  <h2>You are the light of my life</h2>
  <p>
    You complete my darkness with your light. I love:
  </p>
  <ul>
    <li>the way you see good in the worse</li>
    <li>the way you handle emotionally difficult situations</li>
    <li>the way you look at Justice</li>
  </ul>
  <p>
    I have learned a lot from you. You have occupied a special place in my heart over the time.
  </p>
  <h2>I have a confession to make</h2>
  <p>
    It feels like my chest <em>does</em> have a heart. You make my heart beat. Your smile brings smile on my face, your pain brings pain to my heart.
  </p>
  <p>
    I don't show my emotions, but I think this man behind the mask is falling for you.
  </p>
  <p><strong>I love you Superman.</strong></p>
  <p>
    Your not-so-secret-lover, <br>
    Batman
  </p>
</div>
and our style.css:
#letter-container{
  width:550px;
}

#header-bat-logo{
  width:100%;
}
Save both the files and refresh, and your output in the browser should remain the same.
A Few Formalities
Our love letter is almost ready to deliver to Batman, but there are a few formal pieces remaining.
Like any other programming language, HTML has also gone through many versions since its birth year(1990). The current version of HTML is HTML5.
So, how would the browser know which version of HTML you are using to code your page? To tell the browser that you are using HTML5, you need to include <!DOCTYPE html> at top of the page. For older versions of HTML, this line used to be different, but you don’t need to learn that because we don’t use them anymore.
Also, in previous HTML versions, we used to encapsulate the entire document inside <html></html> tag. The entire file was divided into two major sections: Head, inside <head></head>, and Body, inside <body></body>. This is not required in HTML5, but we still do this for compatibility reasons. Let’s update our code with <Doctype>, <html>, <head> and <body>:
<!DOCTYPE html>
<html>
<head>
  <link rel="stylesheet" type="text/css" href="style.css">
</head>
<body>
<div id="letter-container">
  <h1>Bat Letter</h1>
  <img id="header-bat-logo" src="bat-logo.jpeg">
  <p>
    After all the battles we faught together, after all the difficult times we saw together, after all the good and bad moments we've been through, I think it's time I let you know how I feel about you.
  </p>
  <h2>You are the light of my life</h2>
  <p>
    You complete my darkness with your light. I love:
  </p>
  <ul>
    <li>the way you see good in the worse</li>
    <li>the way you handle emotionally difficult situations</li>
    <li>the way you look at Justice</li>
  </ul>
  <p>
    I have learned a lot from you. You have occupied a special place in my heart over the time.
  </p>
  <h2>I have a confession to make</h2>
  <p>
    It feels like my chest <em>does</em> have a heart. You make my heart beat. Your smile brings smile on my face, your pain brings pain to my heart.
  </p>
  <p>
    I don't show my emotions, but I think this man behind the mask is falling for you.
  </p>
  <p><strong>I love you Superman.</strong></p>
  <p>
    Your not-so-secret-lover, <br>
    Batman
  </p>
</div>
</body>
</html>
The main content goes inside <body> and meta information goes inside <head>. So we keep the div inside <body> and load the stylesheets inside <head>.
Save and refresh, and your HTML page should display the same as earlier.
Title in HTML
This is the last change. I promise.
You might have noticed that the title of the tab is displaying the path of the HTML file:
We can use <title> tag to define a title for our HTML file. The title tag also, like the link tag, goes inside head. Let’s put “Bat Letter” in our title:
<!DOCTYPE html>
<html>
<head>
  <title>Bat Letter</title>
  <link rel="stylesheet" type="text/css" href="style.css">
</head>
<body>
<div id="letter-container">
  <h1>Bat Letter</h1>
  <img id="header-bat-logo" src="bat-logo.jpeg">
  <p>
    After all the battles we faught together, after all the difficult times we saw together, after all the good and bad moments we've been through, I think it's time I let you know how I feel about you.
  </p>
  <h2>You are the light of my life</h2>
  <p>
    You complete my darkness with your light. I love:
  </p>
  <ul>
    <li>the way you see good in the worse</li>
    <li>the way you handle emotionally difficult situations</li>
    <li>the way you look at Justice</li>
  </ul>
  <p>
    I have learned a lot from you. You have occupied a special place in my heart over the time.
  </p>
  <h2>I have a confession to make</h2>
  <p>
    It feels like my chest <em>does</em> have a heart. You make my heart beat. Your smile brings smile on my face, your pain brings pain to my heart.
  </p>
  <p>
    I don't show my emotions, but I think this man behind the mask is falling for you.
  </p>
  <p><strong>I love you Superman.</strong></p>
  <p>
    Your not-so-secret-lover, <br>
    Batman
  </p>
</div>
</body>
</html>
Save and refresh, and you will see that instead of the file path, “Bat Letter” is now displayed on the tab.
Batman’s Love Letter is now complete.
Congratulations! You made Batman’s Love Letter in HTML.

What we learned
We learned the following new concepts:
- The structure of an HTML document
- How to write elements in HTML ()
- How to write styles inside the element using the style attribute (this is called inline styling, avoid this as much as you can)
- How to write styles of an element inside (this is called embedded styling)
- How to write styles in a separate file and link to it in HTML using (this is called a linked stylesheet)
- What is a tag name, attribute, opening tag, and closing tag
- How to give an id to an element using id attribute
- Tag selectors and id selectors in CSS
We learned the following HTML tags:
: for paragraphs
: for line breaks- ,
- : to display lists
- : for grouping elements of our letter
,
: for heading and sub heading
: to insert an image
- , : for bold and italic text styling