

Get this post in PDF/ePub/MOBI format at vuehandbook.com
Vue is a very popular JavaScript front-end framework, one that’s experiencing a huge amount of growth.
It is simple, tiny (~24KB), and very performant. It feels different from all the other JavaScript front-end frameworks and view libraries. Let’s find out why.
First, what is a JavaScript front-end framework?
If you’re unsure what a JavaScript framework is, Vue is the perfect first encounter with one.
A JavaScript framework helps us to create modern applications. Modern JavaScript applications are mostly used on the Web, but also power a lot of Desktop and Mobile applications.
Until the early 2000s, browsers didn’t have the capabilities they have now. They were a lot less powerful, and building complex applications inside them was not feasible performance-wise. The tooling was not even something that people thought about.
Everything changed when Google unveiled Google Maps and GMail, two applications that ran inside the browser. Ajax made asynchronous network requests possible. Over time, developers started building on top of the Web platform, while engineers worked on the platform itself — browsers, the Web standards, the browser APIs, and the JavaScript language.
Libraries like jQuery and Mootools were the first big projects that built upon JavaScript and were hugely popular for a while. They basically provided a nicer API to interact with the browser and provided workarounds for bugs and inconsistencies among the various browsers.
Frameworks like Backbone, Ember, Knockout, and AngularJS were the first wave of modern JavaScript frameworks.
The second wave, which is the current one, has React, Angular, and Vue as its main actors.
Note that jQuery, Ember and the other projects I mentioned are still being heavily used, actively maintained, and millions of websites rely on them.
That said, techniques and tools evolve, and as a JavaScript developer, you’re now likely to be required to know React, Angular or Vue rather than those older frameworks.
Frameworks abstract the interaction with the browser and the DOM. Instead of manipulating elements by referencing them in the DOM, we declaratively define and interact with them, at a higher level.
Using a framework is like using the C programming language instead of using the Assembly language to write system programs. It’s like using a computer to write a document instead of using a typewriter. It’s like having a self-driving car instead of driving the car yourself.
Well, not that far, but you get the idea. Instead of using low-level APIs offered by the browser to manipulate elements, and building hugely complex systems to write an application, you use tools built by very smart people that make our life easier.
The popularity of Vue
How popular is Vue.js?
Vue had:
- 7,600 stars on GitHub in 2016
- 36,700 stars on GitHub in 2017
and it has more than 100,000+ stars on GitHub, as of June 2018.
Its npm download count is growing every day, and now it’s at ~350,000 downloads per week.
I would say Vue is very popular, given those numbers.
In relative terms, it has approximately the same numbers of GitHub stars as React, which was born years before.
Numbers are not everything, of course. The impression I have of Vue is that developers love it.
A key point in time of the rise of Vue has been the adoption in the Laravel ecosystem, a hugely popular PHP web application framework. But since then it has become widespread among many other development communities.
Why developers love Vue
First, Vue is called a progressive framework.
This means that it adapts to the needs of the developer. Other frameworks require a complete buy-in from a developer or team and often want you to rewrite an existing application because they require some specific set of conventions. Vue happily lands inside your app with a simple script tag to start with, and it can grow along with your needs, spreading from 3 lines to managing your entire view layer.
You don’t need to know about webpack, Babel, npm or anything to get started with Vue. But when you’re ready, Vue makes it simple for you to rely on them.
This is one great selling point, especially in the current ecosystem of JavaScript front-end frameworks and libraries that tend to alienate newcomers and also experienced developers that feel lost in the ocean of possibilities and choices.
Vue.js is probably the most approachable front-end framework around. Some people call Vue the new jQuery, because it easily gets in the application via a script tag, and gradually gains space from there. Think of it as a compliment, since jQuery dominated the Web in the past few years, and it still does its job on a huge number of sites.
Vue was built by picking the best ideas of frameworks like Angular, React and Knockout, and by cherry-picking the best choices those frameworks made. And by excluding some less brilliant ones, it kind of started as a “best-of” set and grew from there.
Where does Vue.js position itself in the frameworks landscape?
The two elephants in the room, when talking about web development, are React and Angular. How does Vue position itself relative to those two big and popular frameworks?
Vue was created by Evan You when he was working at Google on AngularJS (Angular 1.0) apps. It was born out of a need to create more performant applications. Vue picked some of the Angular templating syntax, but removed the opinionated, complex stack that Angular required, and made it very performant.
The new Angular (Angular 2.0) also solved many of the AngularJS issues, but in very different ways. It also requires a buy-in to TypeScript which not all developers enjoy using (or want to learn).
What about React? Vue took many good ideas from React, most importantly the Virtual DOM. But Vue implements it with some sort of automatic dependency management. This tracks which components are affected by a change of the state so that only those components are re-rendered when that state property changes.
In React, on the other hand, when a part of the state that affects a component changes, the component will be re-rendered. By default all its children will be re-rendered as well. To avoid this you need to use the shouldComponentUpdate method of each component and determine if that component should be re-rendered. This gives Vue a bit of an advantage in terms of ease of use, and out of the box performance gains.
One big difference with React is JSX. While you can technically use JSX in Vue, it’s not a popular approach and instead the templating system is used. Any HTML file is a valid Vue template. JSX is very different than HTML, and has a learning curve for people on the team that might only need to work with the HTML part of the app, like designers.
Vue templates are very similar to Mustache and Handlebars (although they differ in terms of flexibility). As such, they are more familiar to developers that already used frameworks like Angular and Ember.
The official state management library, Vuex, follows the Flux architecture and is somewhat similar to Redux in its concepts. Again, this is part of the positive things about Vue, which saw this good pattern in React and borrowed it for its ecosystem. And while you can use Redux with Vue, Vuex is specifically tailored for Vue and its inner workings.
Vue is flexible, but the fact that the core team maintains two packages that are very important for any web app (like routing and state management) makes it a lot less fragmented than React. For example: vue-router and vuex are key to the success of Vue.
You don't need to choose or worry if that library you chose is going to be maintained in the future and will keep up with framework updates. Since they are official, they are the canonical go-to libraries for their niche (but you can choose to use what you like, of course).
One thing that puts Vue in a different bucket compared to React and Angular is that Vue is an indie project: it’s not backed by a huge corporation like Facebook or Google.
Instead, it’s completely backed by the community, which fosters development through donations and sponsors. This makes sure the roadmap of Vue is not driven by a single company’s agenda.
Your first Vue App
If you’ve never created a Vue.js application, I am going to guide you through the task of creating one so that you understand how it works.
First example
First I’ll go through the most basic example of using Vue.
You create an HTML file which contains:
<html>
  <body>
    <div id="example">
      <p>{{ hello }}</p>
    </div>
    <script src="https://unpkg.com/vue"></script>
    <script>
        new Vue({
            el: '#example',
            data: { hello: 'Hello World!' }
        })
    </script>
  </body>
</html>
and you open it in the browser. That’s your first Vue app! The page should show a “Hello World!” message.
I put the script tags at the end of the body so that they are executed in order after the DOM is loaded.
What this code does is instantiate a new Vue app, linked to the #example element as its template. It's defined using a CSS selector usually, but you can also pass in an HTMLElement.
Then, it associates that template to the data object. That is a special object that hosts the data we want Vue to render.
In the template, the special {{ }} tag indicates that this is some part of the template that's dynamic, and its content should be looked up in the Vue app data.
You can see this example on CodePen.
CodePen is a little different from using a plain HTML file, and you need to configure it to point to the Vue library location in the Pen settings:

Second example: the Vue CLI default app
Let’s level up the game a little bit. The next app we’re going to build is already done, and it’s the Vue CLI default application.
What is the Vue CLI? It’s a command line utility that helps to speed up development by scaffolding an application skeleton for you, with a sample app in place.
There are two ways you can get this application:
Use the Vue CLI locally
The first is to install the Vue CLI on your computer and run the command:
vue create <enter the app name>
Use CodeSandbox
A simpler way, without having to install anything, is to go to CodeSandbox. The link opens the Vue CLI default application.
CodeSandbox is a cool code editor that allows you build apps in the cloud. You can use any npm package, and can easily integrate with Zeit Now for an easy deployment and with GitHub to manage versioning.
Whether you chose to use the Vue CLI locally, or go through CodeSandbox, let’s inspect that Vue app in detail.
The files structure
Beside package.json, which contains the configuration, these are the files contained in the initial project structure:
index.htmlsrc/App.vuesrc/main.jssrc/assets/logo.pngsrc/components/HelloWorld.vue
index.html
The index.html file is the main app file.
In the body it includes just one simple element: <div id="app">. This is the element the Vue application we’ll use to attach to the DOM.
<!DOCTYPE html>
<html>

<head>
  <meta charset="utf-8">
  <meta name="viewport" content="width=device-width,initial-scale=1.0">
  <title>CodeSandbox Vue</title>
</head>

<body>
  <div id="app"></div>
  <!-- built files will be auto injected -->
</body>

</html>
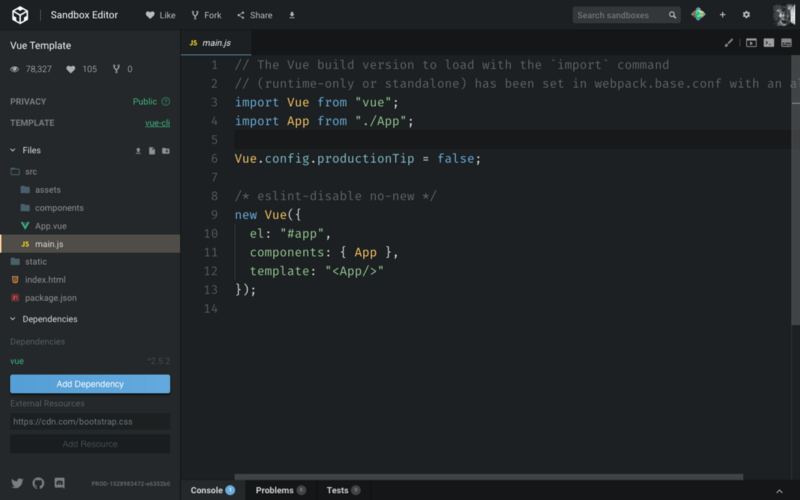
src/main.js
This is the main JavaScript file that drives our app.
We first import the Vue library and the App component from App.vue.
We set productionTip to false, to avoid Vue outputting a “you’re in development mode” tip in the console.
Next, we create the Vue instance, by assigning it to the DOM element identified by #app, which we defined in index.html, and we tell it to use the App component.
// The Vue build version to load with the `import` command
// (runtime-only or standalone) has been set in webpack.base.conf with an alias.
import Vue from 'vue'
import App from './App'

Vue.config.productionTip = false

/* eslint-disable no-new */
new Vue({
  el: '#app',
  components: { App },
  template: '<App/>'
})
src/App.vue
App.vue is a Single File Component. It contains three chunks of code: HTML, CSS, and JavaScript.
This might seem weird at first, but Single File Components are a great way to create self-contained components that have all they need in a single file.
We have the markup, the JavaScript that is going to interact with it, and style that’s applied to it, which can be scoped or not. In this case, it’s not scoped, and it’s just outputting that CSS which is applied like regular CSS to the page.
The interesting part lies in the script tag.
We import a component from the components/HelloWorld.vue file, which we'll describe later.
This component is going to be referenced in our component. It’s a dependency. We are going to output this code
<div id="app">
  <img width="25%" src="./assets/logo.png">
  <HelloWorld/>
</div>
from this component, which you see references the HelloWorld component. Vue will automatically insert that component inside this placeholder.
<template>
  <div id="app">
    <img width="25%" src="./assets/logo.png">
    <HelloWorld/>
  </div>
</template>

<script>
import HelloWorld from './components/HelloWorld'

export default {
  name: 'App',
  components: {
    HelloWorld
  }
}
</script>

<style>
#app {
  font-family: 'Avenir', Helvetica, Arial, sans-serif;
  -webkit-font-smoothing: antialiased;
  -moz-osx-font-smoothing: grayscale;
  text-align: center;
  color: #2c3e50;
  margin-top: 60px;
}
</style>
src/components/HelloWorld.vue
Here’s the HelloWorld component, which is included by the App component.
This component outputs a set of links, along with a message.
Remember above we talked about CSS in App.vue, which was not scoped? The HelloWorld component has scoped CSS.
You can easily determine it by looking at the style tag. If it has the scoped attribute, then it's scoped: <style scoped>
This means that the generated CSS will be targeting the component uniquely, via a class that’s applied by Vue transparently. You don’t need to worry about this, and you know the CSS won’t leak to other parts of the page.
The message the component outputs is stored in the data property of the Vue instance, and outputted in the template as {{ msg }}.
Anything that’s stored in data is reachable directly in the template via its own name. We didn't need to say data.msg, just msg.
<template>
  <div class="hello">
    <h1>{{ msg }}</h1>
    <h2>Essential Links</h2>
    <ul>
      <li>
        <a
          href="https://vuejs.org"
          target="_blank"
        >
          Core Docs
        </a>
      </li>
      <li>
        <a
          href="https://forum.vuejs.org"
          target="_blank"
        >
          Forum
        </a>
      </li>
      <li>
        <a
          href="https://chat.vuejs.org"
          target="_blank"
        >
          Community Chat
        </a>
      </li>
      <li>
        <a
          href="https://twitter.com/vuejs"
          target="_blank"
        >
          Twitter
        </a>
      </li>
      <br>
      <li>
        <a
          href="http://vuejs-templates.github.io/webpack/"
          target="_blank"
        >
          Docs for This Template
        </a>
      </li>
    </ul>
    <h2>Ecosystem</h2>
    <ul>
      <li>
        <a
          href="http://router.vuejs.org/"
          target="_blank"
        >
          vue-router
        </a>
      </li>
      <li>
        <a
          href="http://vuex.vuejs.org/"
          target="_blank"
        >
          vuex
        </a>
      </li>
      <li>
        <a
          href="http://vue-loader.vuejs.org/"
          target="_blank"
        >
          vue-loader
        </a>
      </li>
      <li>
        <a
          href="https://github.com/vuejs/awesome-vue"
          target="_blank"
        >
          awesome-vue
        </a>
      </li>
    </ul>
  </div>
</template>

<script>
export default {
  name: 'HelloWorld',
  data() {
    return {
      msg: 'Welcome to Your Vue.js App'
    }
  }
}
</script>

<!-- Add "scoped" attribute to limit CSS to this component only -->
<style scoped>
h1,
h2 {
  font-weight: normal;
}
ul {
  list-style-type: none;
  padding: 0;
}
li {
  display: inline-block;
  margin: 0 10px;
}
a {
  color: #42b983;
}
</style>
Run the app
CodeSandbox has a cool preview functionality. You can run the app and edit anything in the source to have it immediately reflected in the preview.
The Vue CLI
CodeSandbox is very cool for online coding and working without having to setup Vue locally. A great way to work locally is by setting up the Vue CLI (command line interface). Let’s find out more about it.
In the previous example, I introduced an example project based on the Vue CLI. What’s the Vue CLI exactly, and how does it fit in the Vue ecosystem? Also, how do we setup a Vue CLI-based project locally? Let’s find out!
Note: There is a huge rework of the CLI going on right now, going from version 2 to 3. While not yet stable, I will describe version 3, because it’s a huge improvement over version 2, and quite different.
Installation
The Vue CLI is a command line utility, and you install it globally using npm:
npm install -g @vue/cli
or using Yarn:
yarn global add @vue/cli
Once you do so, you can invoke the vue command.
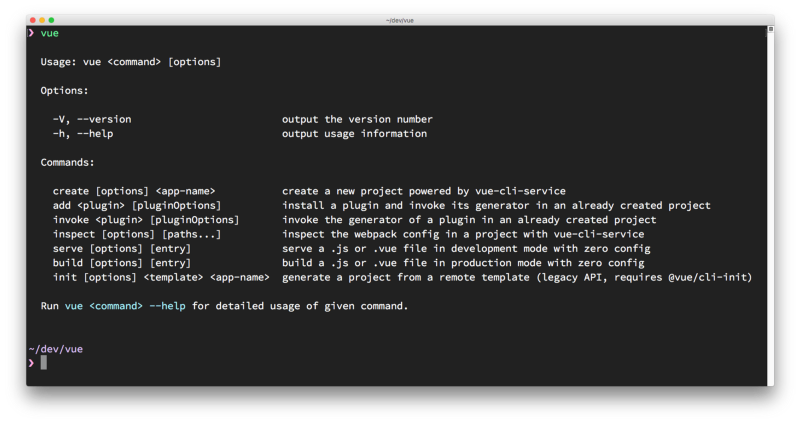
What does the Vue CLI provide?
The CLI is essential for rapid Vue.js development.
Its main goal is to make sure all the tools you need are working along, to perform what you need, and abstracts away all the nitty-gritty configuration details that using each tool in isolation would require.
It can perform an initial project setup and scaffolding.
It’s a flexible tool. Once you create a project with the CLI, you can go and tweak the configuration, without having to eject your application (like you’d do with create-react-app).
When you eject from create-react-app you can update and tweak what you want, but you can’t rely on the cool features that create-react-app provides.
You can configure anything and still be able to upgrade with ease.
After you create and configure the app, it acts as a runtime dependency tool, built on top of Webpack.
The first encounter with the CLI is when creating a new Vue project.
How to use the CLI to create a new Vue project
The first thing you’re going to do with the CLI is to create a Vue app:
vue create example
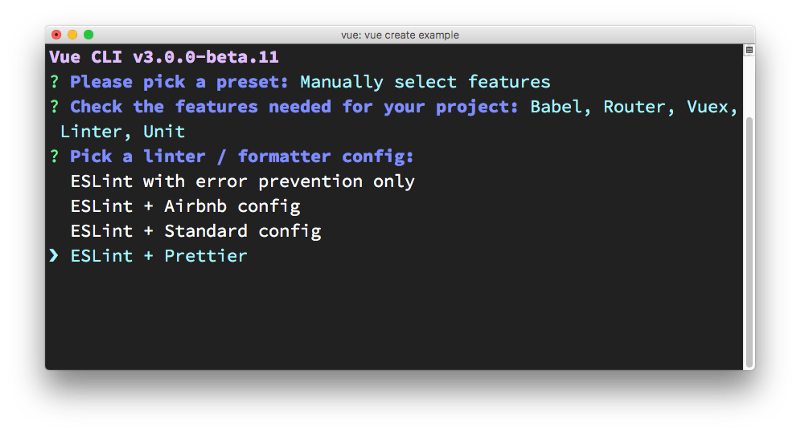
The cool thing is that it’s an interactive process. You need to pick a preset. By default, there is one preset that provides Babel and ESLint integration:
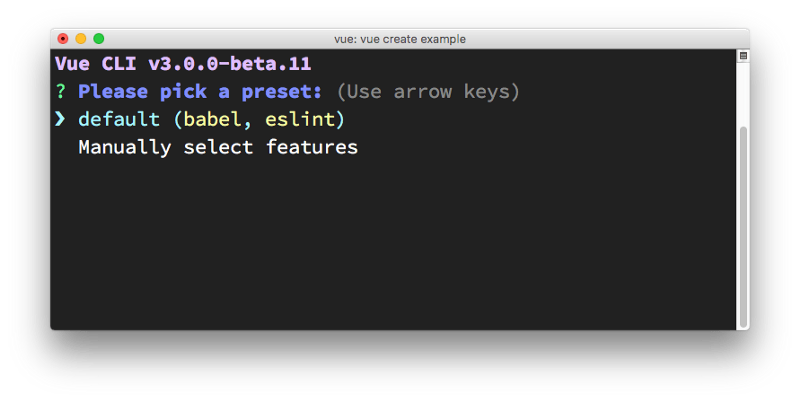
I’m going to press the down arrow ⬇️ and manually choose the features I want:
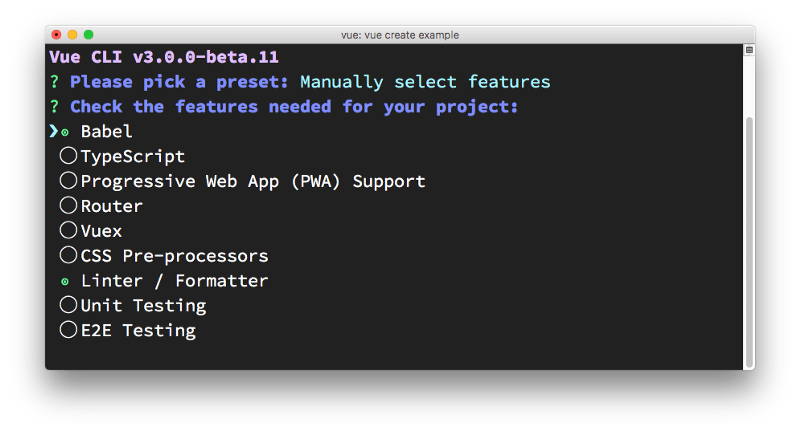
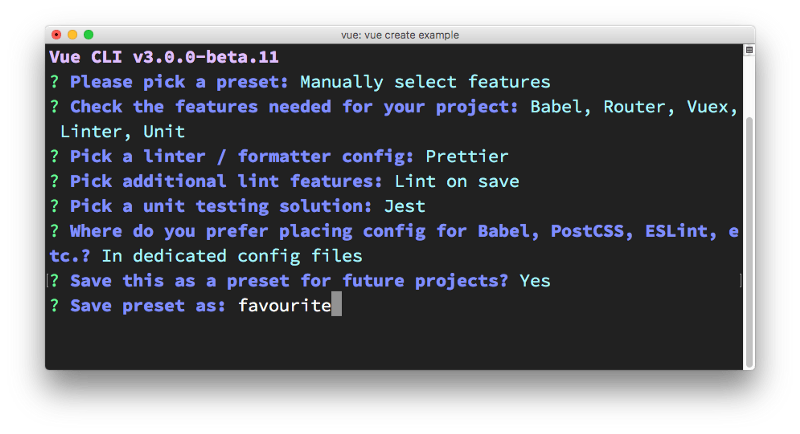
Press space to enable one of the things you need, and then press enter to go on. Since I chose Linter / Formatter, Vue CLI prompts me for the configuration. I chose ESLint + Prettier since that's my favorite setup:
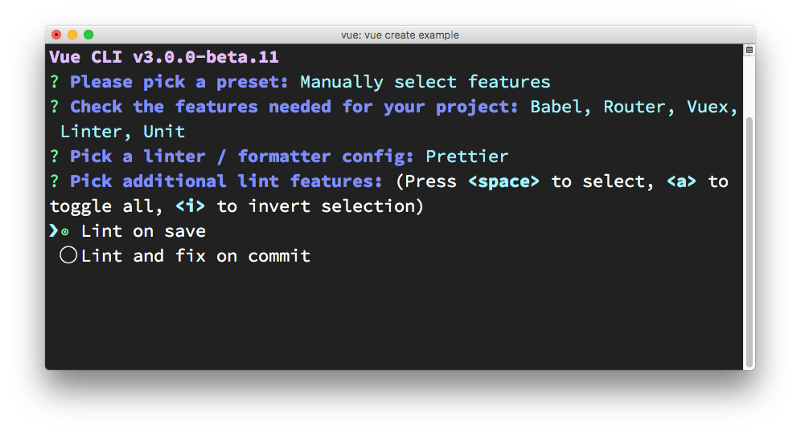
Next thing is choosing how to apply linting. I choose Lint on save.
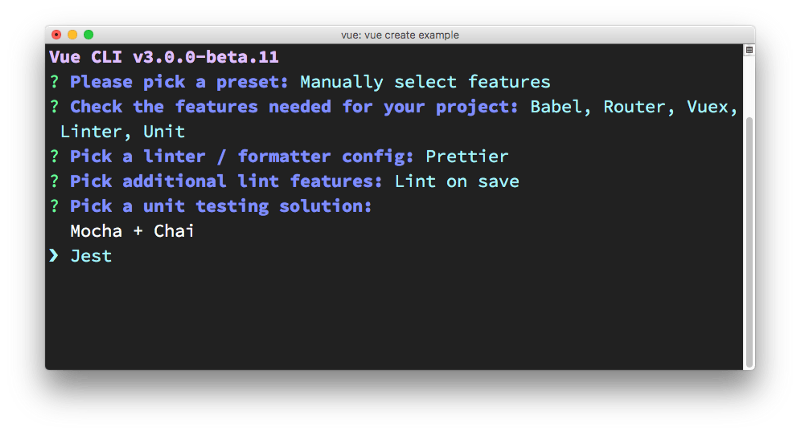
Next up: testing. Vue CLI lets me choose between the two most popular unit testing solutions: Mocha + Chai and Jest.
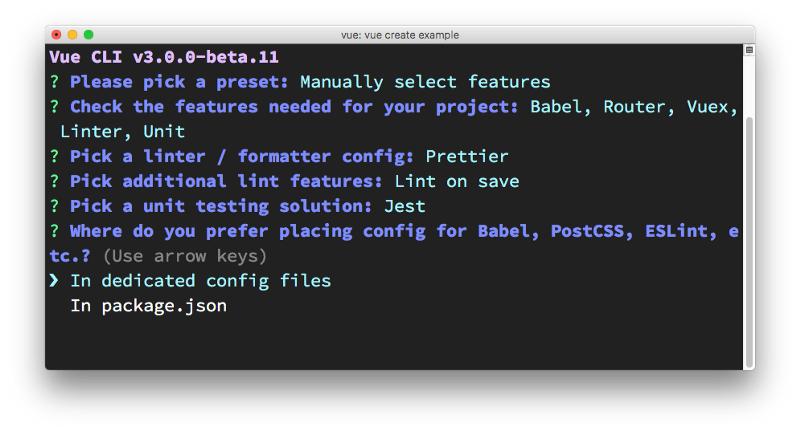
Vue CLI asks me where to put all the configuration: in the package.json file, or in dedicated configuration files, one for each tool. I chose the latter.
Next, Vue CLI asks me if I want to save these presets, and allows me to pick them as a choice the next time I use Vue CLI to create a new app. It’s a very convenient feature, as having a quick setup with all my preferences is a complexity reliever:
Vue CLI then asks me if I prefer using Yarn or NPM:
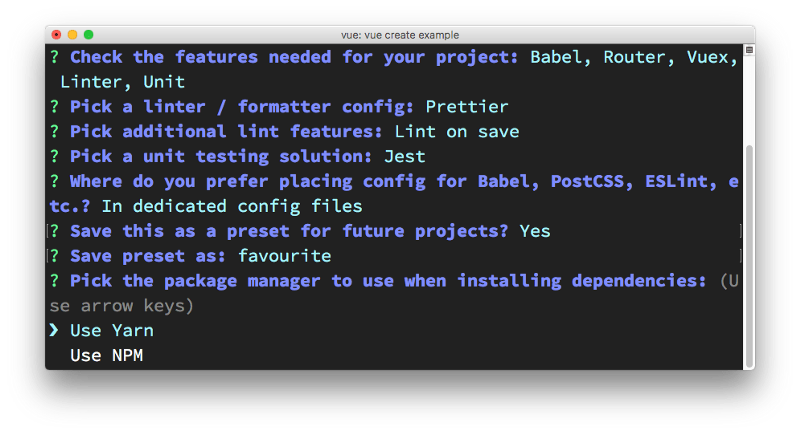
This is the last thing it asks me, and then it goes on to download the dependencies and create the Vue app:
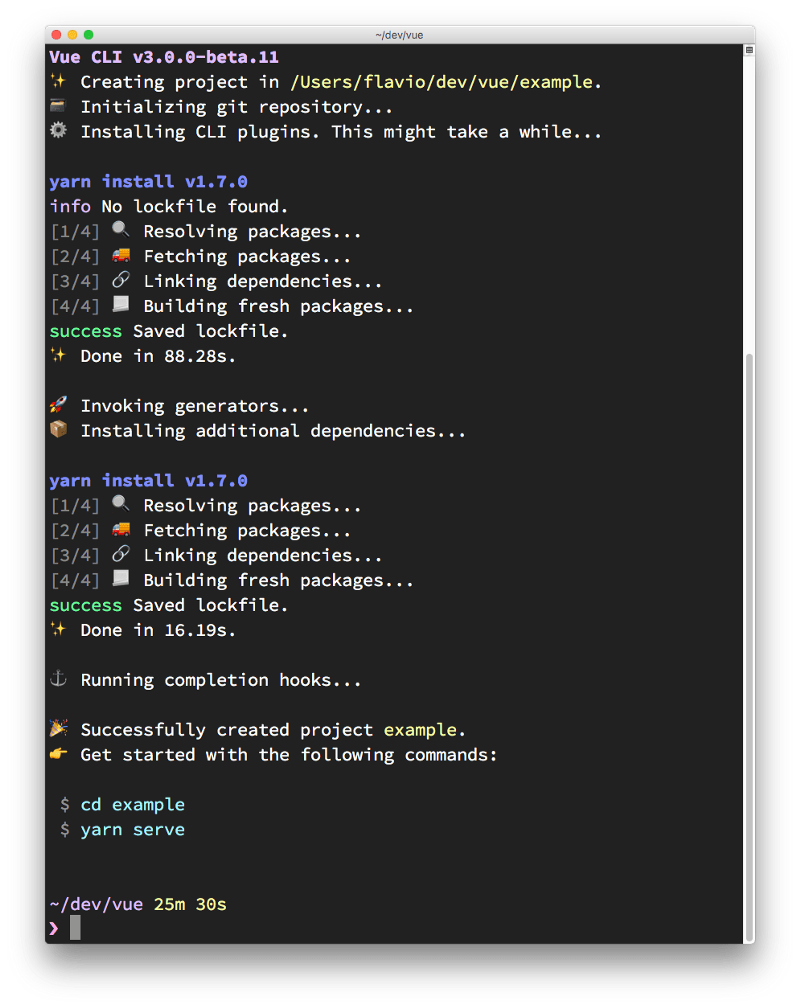
How to start the newly created Vue CLI application
Vue CLI has created the app for us, and we can go in the example folder and run yarn serve to start up our first app in development mode:

The starter example application source contains a few files, including package.json:
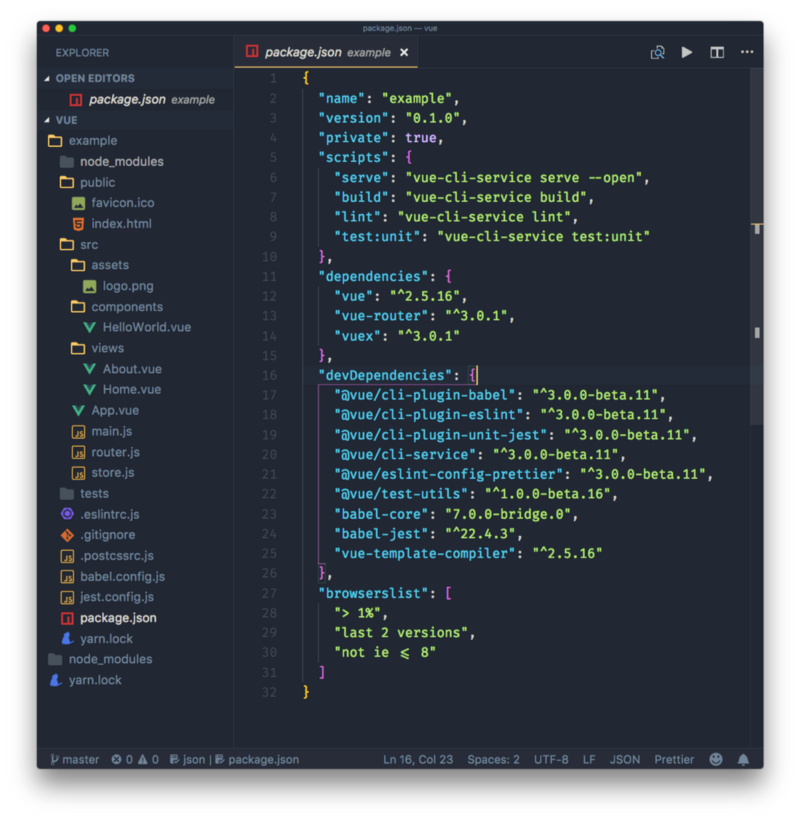
This is where all the CLI commands are defined, including yarn serve, which we used a minute ago. The other commands are
yarn build, to start a production buildyarn lint, to run the linteryarn test:unit, to run the unit tests
I will describe the sample application generated by Vue CLI in a separate tutorial.
Git repository
Notice the master word in the lower-left corner of VS Code? That's because Vue CLI automatically creates a repository, and makes the first commit. So we can jump right in, change things, and we know what we changed:
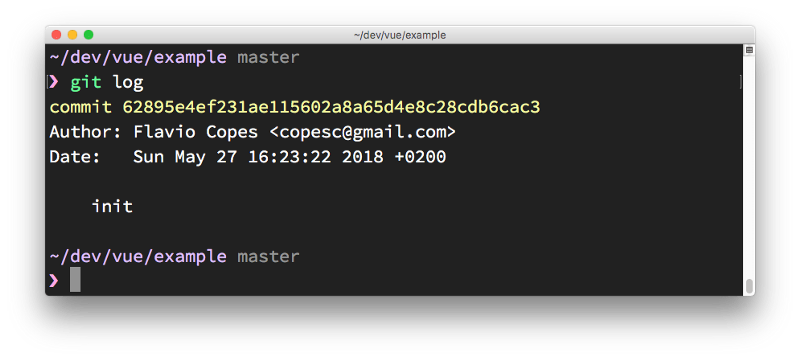
This is pretty cool. How many times do you dive in and change things, only to realize, when you want to commit the result, that you didn’t commit the initial state?
Use a preset from the command line
You can skip the interactive panel and instruct Vue CLI to use a particular preset:
vue create -p favourite example-2
Where presets are stored
Presets are stored in the .vuejs file in your home directory. Here's mine after creating the first "favorite" preset:
{
  "useTaobaoRegistry": false,
  "packageManager": "yarn",
  "presets": {
    "favourite": {
      "useConfigFiles": true,
      "plugins": {
        "@vue/cli-plugin-babel": {},
        "@vue/cli-plugin-eslint": {
          "config": "prettier",
          "lintOn": [
            "save"
          ]
        },
        "@vue/cli-plugin-unit-jest": {}
      },
      "router": true,
      "vuex": true
    }
  }
}
Plugins
As you can see from reading the configuration, a preset is basically a collection of plugins, with some optional configuration.
Once a project is created, you can add more plugins by using vue add:
vue add @vue/cli-plugin-babel
All those plugins are used in the latest version available. You can force Vue CLI to use a specific version by passing the version property:
"@vue/cli-plugin-eslint": {
  "version": "^3.0.0"
}
This is useful if a new version has a breaking change or a bug, and you need to wait a little bit before using it.
Remotely store presets
A preset can be stored in GitHub (or on other services) by creating a repository that contains a preset.json file, which contains a single preset configuration.
Extracted from the above, I made a sample preset which contains this configuration:
{ "useConfigFiles": true, "plugins": { "@vue/cli-plugin-babel": {}, "@vue/cli-plugin-eslint": { "config": "prettier", "lintOn": [ "save" ] }, "@vue/cli-plugin-unit-jest": {} }, "router": true, "vuex": true}
It can be used to bootstrap a new application using:
vue create --preset flaviocopes/vue-cli-preset example3
Another use of the Vue CLI: rapid prototyping
Up until now, I’ve explained how to use the Vue CLI to create a new project from scratch, with all the bells and whistles. But for really quick prototyping, you can create a really simple Vue application (even one that’s self-contained in a single .vue file) and serve that, without having to download all the dependencies in the node_modules folder.
How? First install the cli-service-global global package:
npm install -g @vue/cli-service-global
//or
yarn global add @vue/cli-service-global
Create an app.vue file:
<template> <div> <h2>Hello world!</h2> <marquee>Heyyy</marquee> </div></template>
and then run
vue serve app.vue
You can serve more organized projects, composed by JavaScript and HTML files as well. Vue CLI by default uses main.js / index.js as its entry point, and you can have a package.json and any tool configuration set up. vue serve will pick it up.
Since this uses global dependencies, it’s not an optimal approach for anything more than a demonstration or quick testing.
Running vue build will prepare the project for deployment in dist/, and will generate all the corresponding code (also for vendor dependencies).
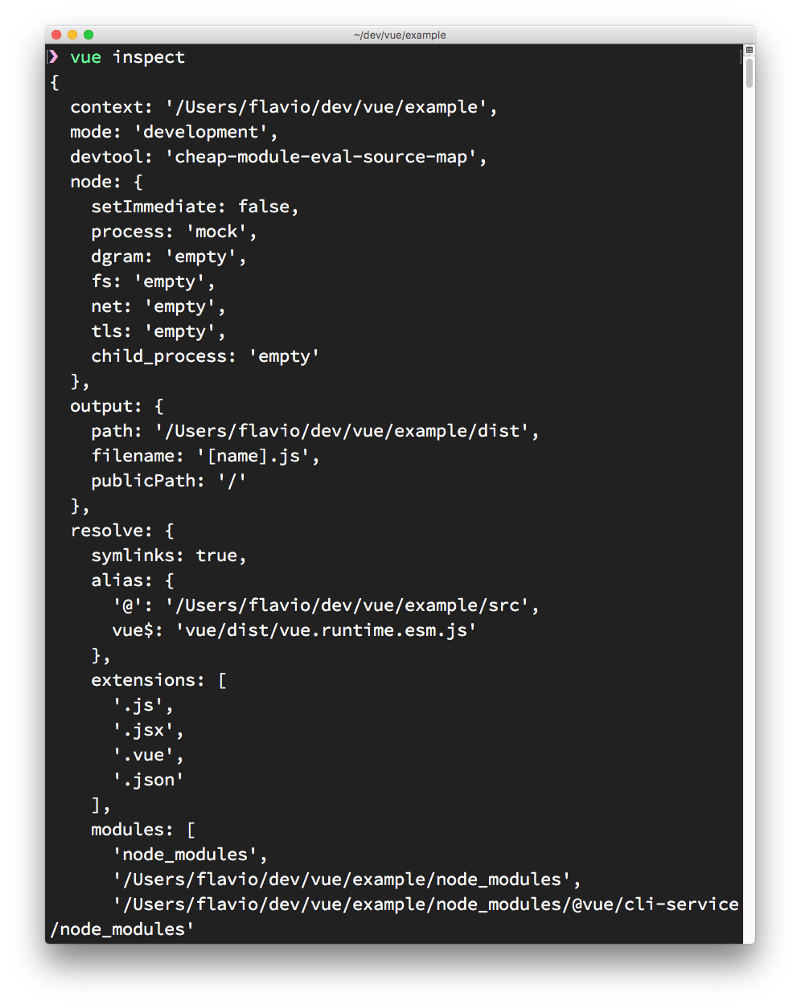
Webpack
Internally, Vue CLI uses Webpack, but the configuration is abstracted and we don’t even see the config file in our folder. You can still have access to it by calling vue inspect:
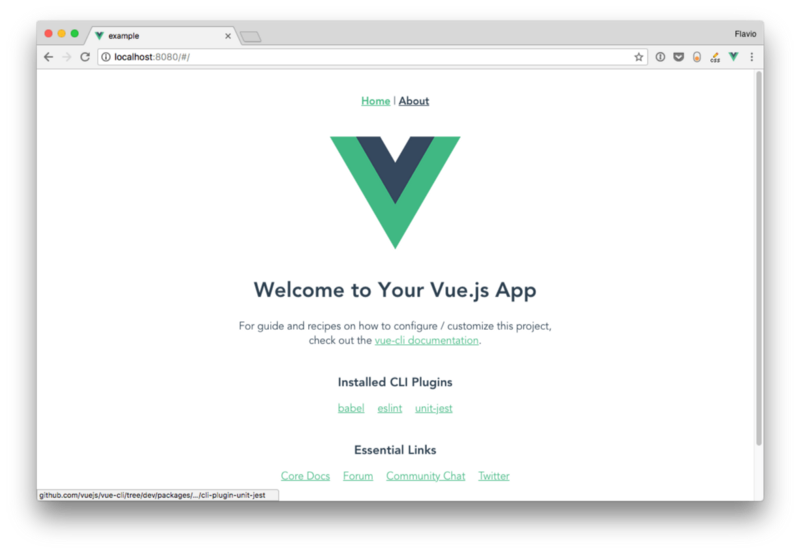
The Vue DevTools
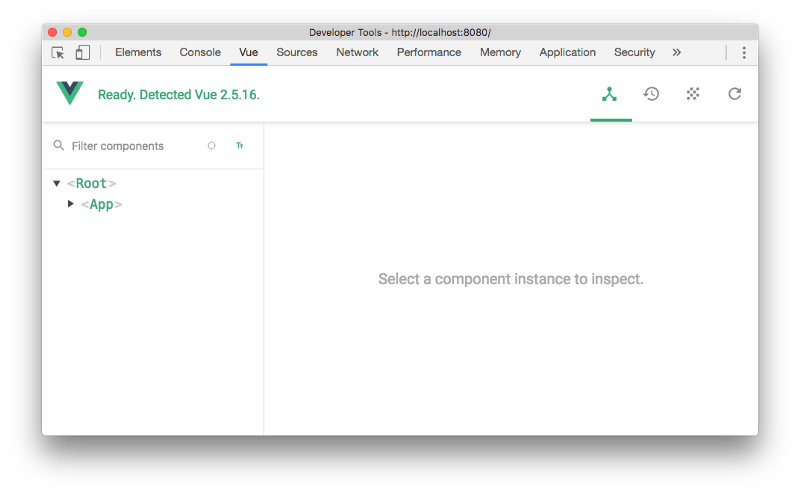
When you’re first experimenting with Vue, if you open the Browser Developer Tools, you will find this message: “Download the Vue Devtools extension for a better development experience: https://github.com/vuejs/vue-devtools"
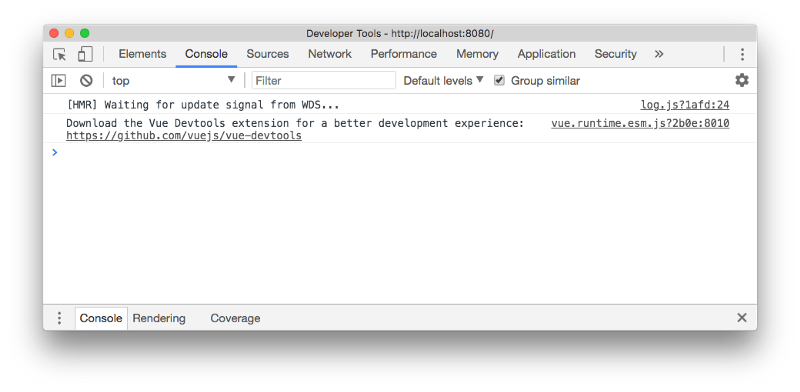
This is a friendly reminder to install the Vue Devtools Extension. What’s that? Any popular framework has its own devtools extension, which generally adds a new panel to the browser developer tools that is much more specialized than the ones that the browser ships by default. In this case, the panel will let us inspect our Vue application and interact with it.
This tool will be an amazing help when building Vue apps. The developer tools can only inspect a Vue application when it’s in development mode. This makes sure no one can use them to interact with your production app — and will make Vue more performant, because it does not have to care about the Dev Tools.
Let’s install it!
There are 3 ways to install the Vue Dev Tools:
- on Chrome
- on Firefox
- as a standalone application
Safari, Edge and other browsers are not supported with a custom extension, but using the standalone application you can debug a Vue.js app running in any browser.
Install on Chrome
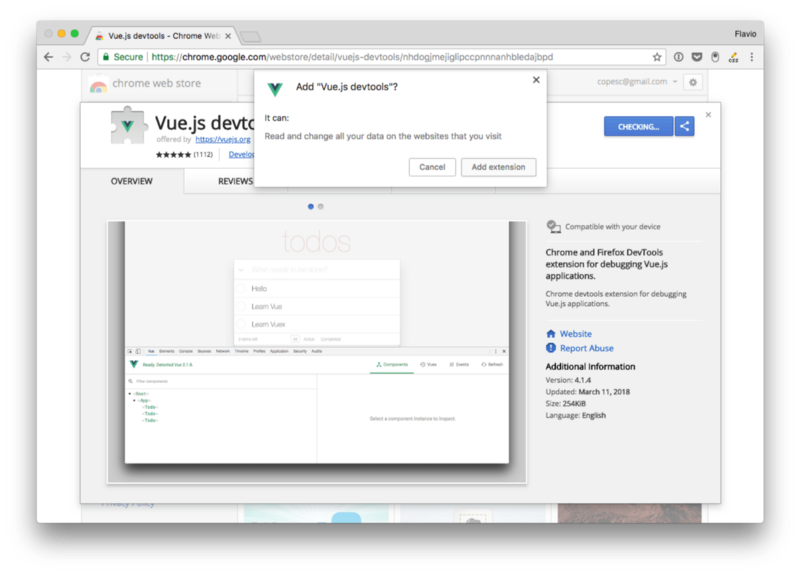
Go to this page on the Google Chrome Store and click **Add to Chrome**.
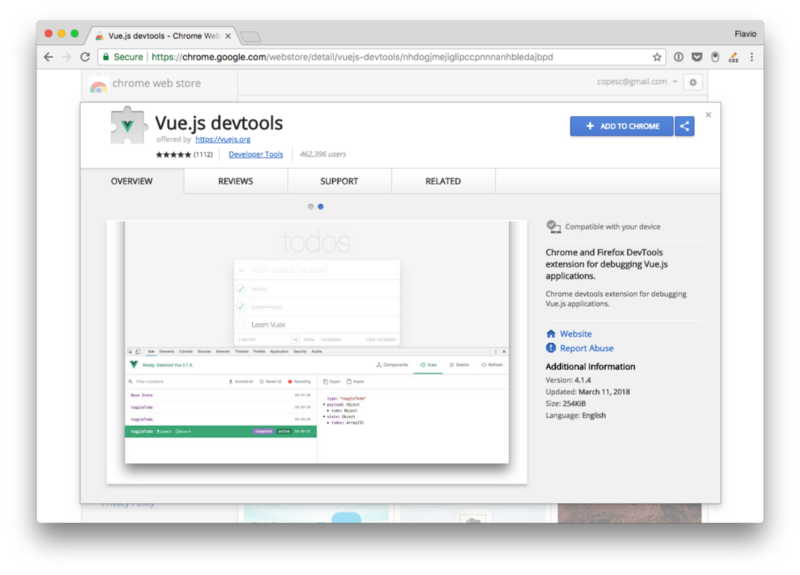
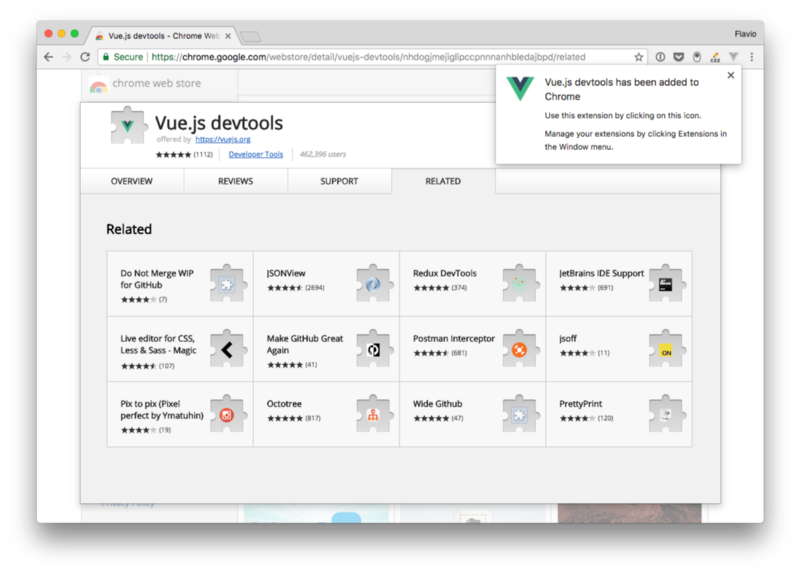
Go through the installation process:
The Vue.js devtools icon shows up in the toolbar. If the page does not have a Vue.js instance running, it’s grayed out.
If Vue.js is detected, the icon has the Vue logo’s colors.
The icon does nothing except show us that there is a Vue.js instance. To use the devtools, we must open the Developer Tools panel, using “View → Developer → Developer Tools”, or Cmd-Alt-i
Install on Firefox
You can find the Firefox dev tools extension in the Mozilla Add-ons store.
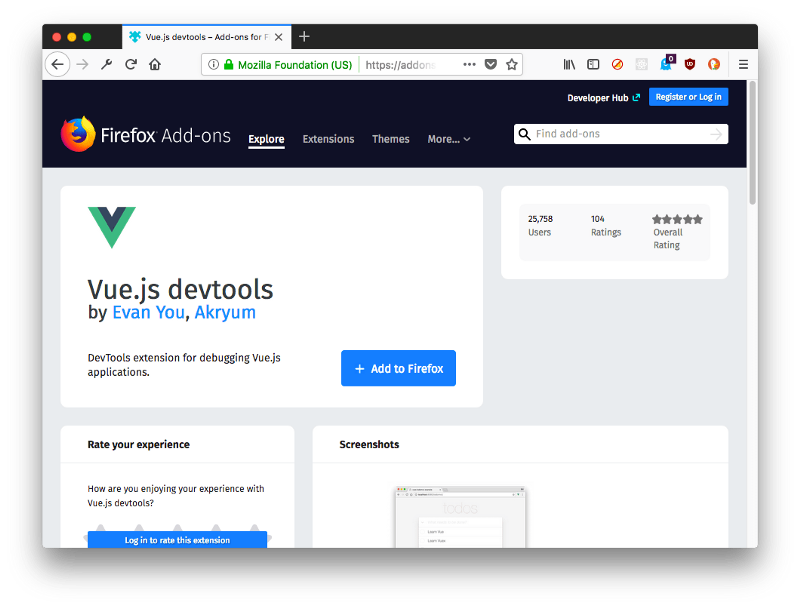
Click “Add to Firefox” and the extension will be installed. As with Chrome, a grayed icon shows up in the toolbar
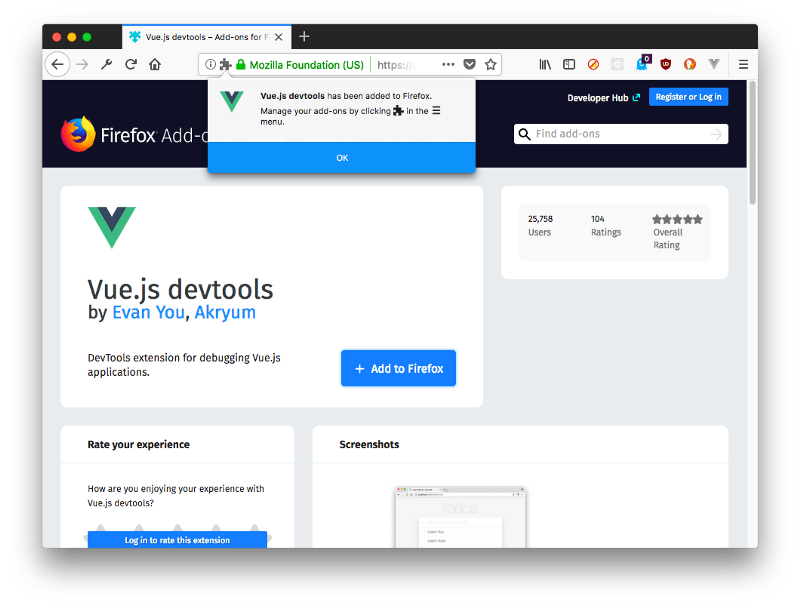
And when you visit a site that has a Vue instance running, it will become green, and when we open the Dev Tools we will see a “Vue” panel:
Install the standalone app
Alternatively, you can use the DevTools standalone app.
Simply install it using:
npm install -g @vue/devtools
//or
yarn global add @vue/devtools
and run it by calling:
vue-devtools
This will open the standalone Electron-based application.
Now, paste the script tag it shows you
<script src="http://localhost:8098"></script>
inside the project index.html file, and wait for the app to be reloaded. It will automatically connect to the app.
How to use the Developer Tools
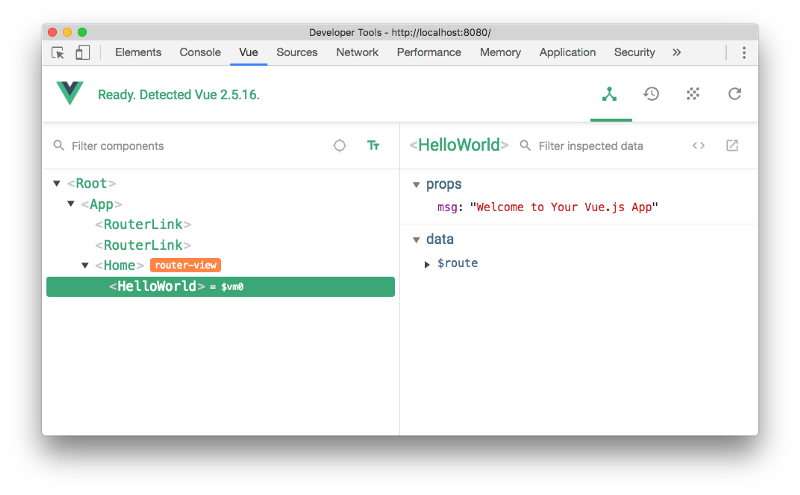
As mentioned, the Vue DevTools can be activated by opening the Developer Tools in the browser and moving to the Vue panel.
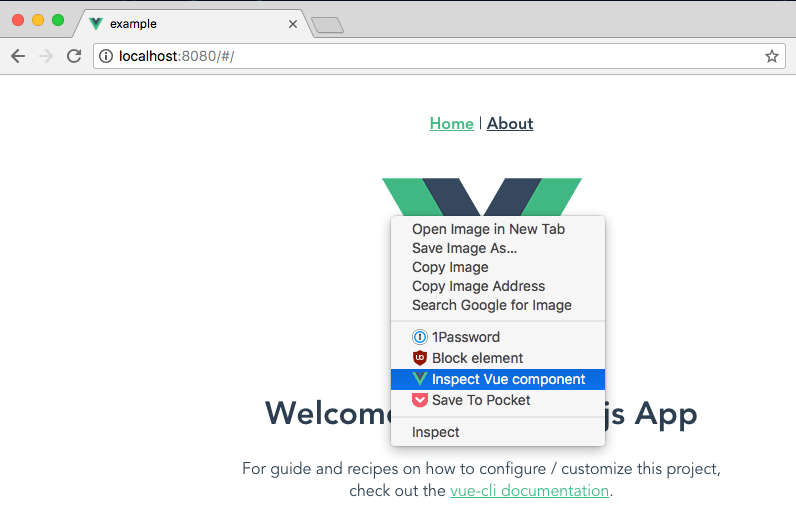
Another option is to right-click on any element in the page, and choose “Inspect Vue component”:
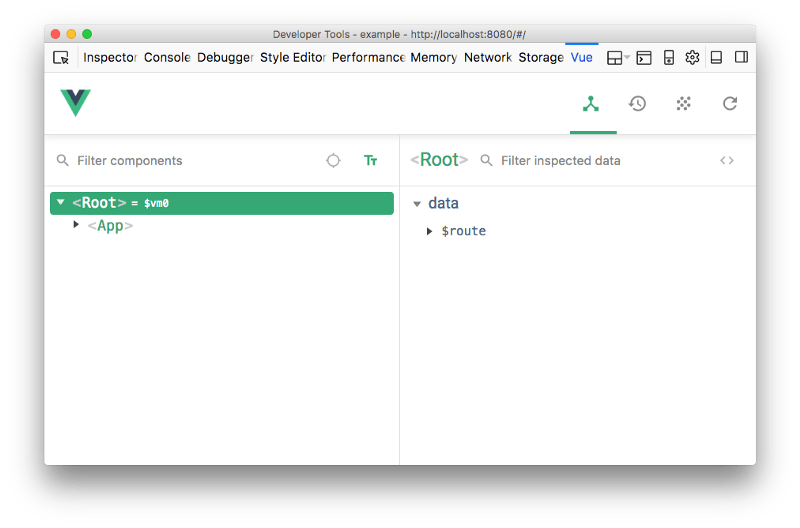
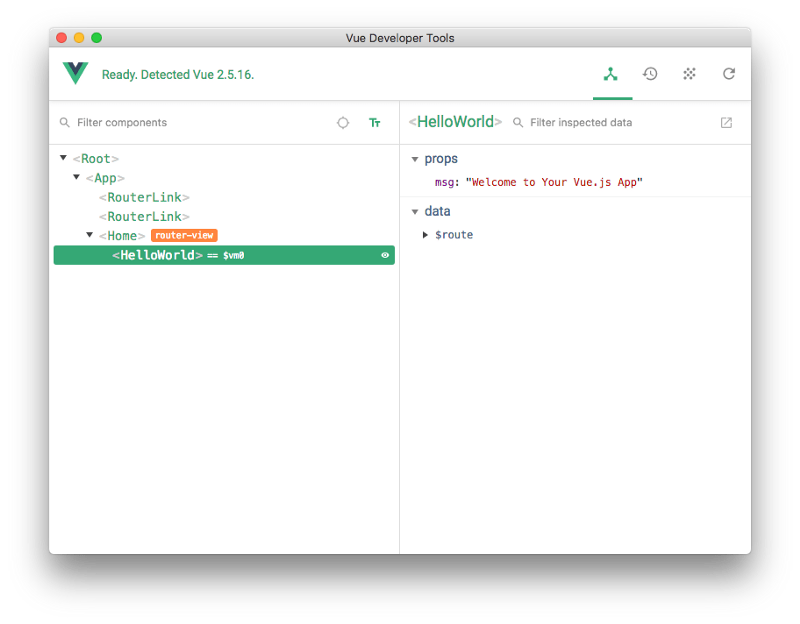
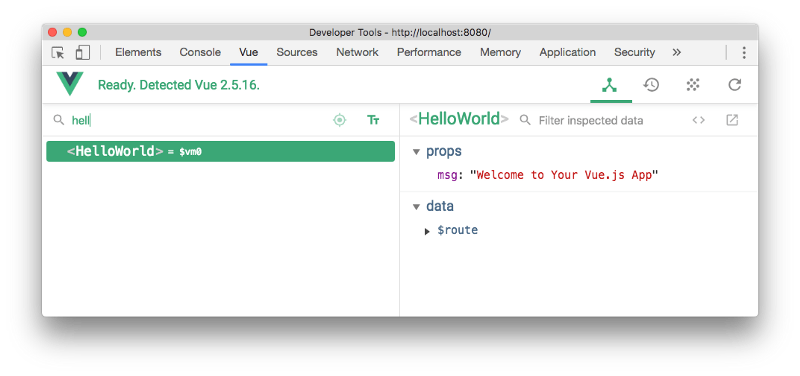
When the Vue DevTools panel is open, we can navigate the components tree. When we choose a component from the list on the left, the right panel shows the props and data it holds:
On the top there are fourbuttons:
- Components (the current panel), which lists all the component instances running in the current page. Vue can have multiple instances running at the same time. For example, it might manage your shopping cart widget and the slideshow, with separate, lightweight apps.
- Vuex is where you can inspect the state managed through Vuex.
- Events shows all the events emitted.
- Refresh reloads the devtools panel.
Notice the small = $vm0 text beside a component? It's a handy way to inspect a component using the Console. Pressing the "esc" key shows up the console in the bottom of the devtools, and you can type $vm0 to access the Vue component:
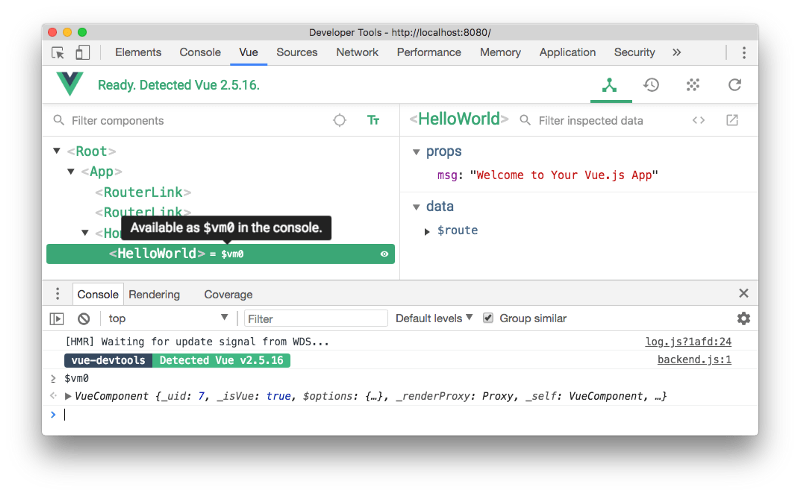
It’s very cool to inspect and interact with components without having to assign them to a global variable in the code.
Filter components
Start typing a component name, and the components tree will filter out the ones that don’t match.
Select a component in the page
Click the **Select component in the page** button.
Select component in the page
You can hover over any component in the page with the mouse, click it, and it will be opened in the devtools.
Format components names
You can choose to show components in camelCase or use dashes.
Filter inspected data
On the right panel, you can type any word to filter the properties that don’t match it.
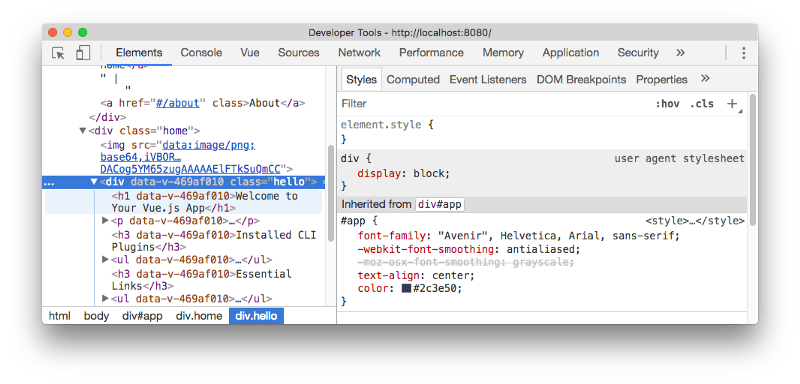
Inspect DOM
Click the Inspect DOM button to be brought to the DevTools Elements inspector, with the DOM element generated by the component:
Open in editor
Any user component (not framework-level components) has a button that opens it in your default editor. Very handy.
Setup VS Code to work with Vue
Visual Studio Code is one of the most used code editors in the world right now. Editors have, like many software products, a cycle. Once TextMate was the favorite among developers, then it was Sublime Text, now it’s VS Code.
The cool thing about being popular is that people dedicate a lot of time to building plugins for everything they can imagine.
One such plugin is an awesome tool that can help us Vue.js developers.
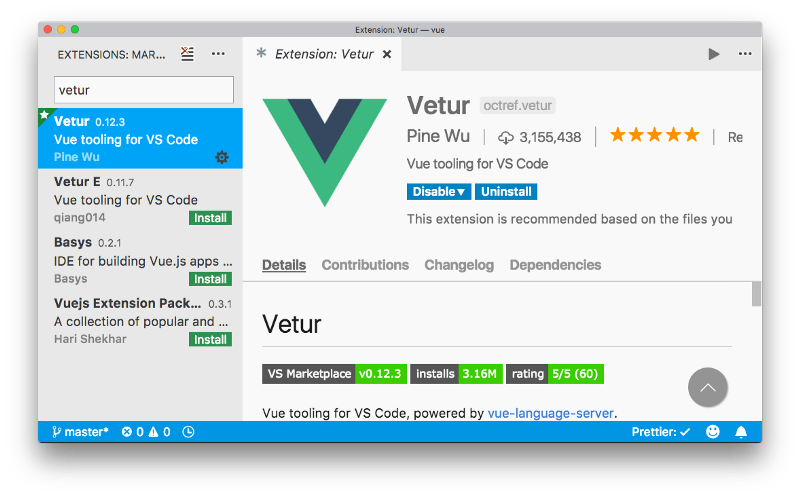
Vetur
It’s called Vetur, it’s hugely popular (more than 3 million downloads), and you can find it on the Visual Studio Marketplace.
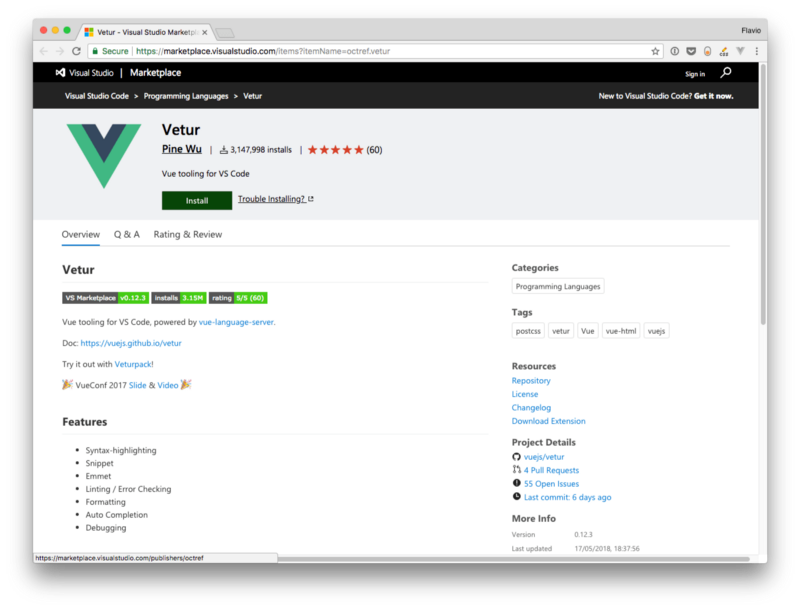
Installing Vetur
Clicking the Install button will trigger the installation panel in VS Code:
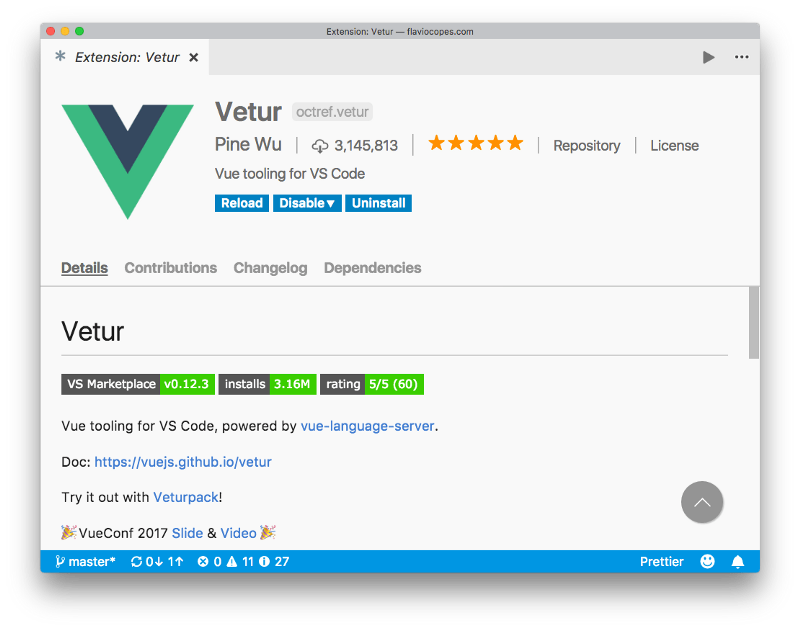
You can also simply open the Extensions in VS Code and search for “vetur”:
What does this extension provide?
Syntax highlighting
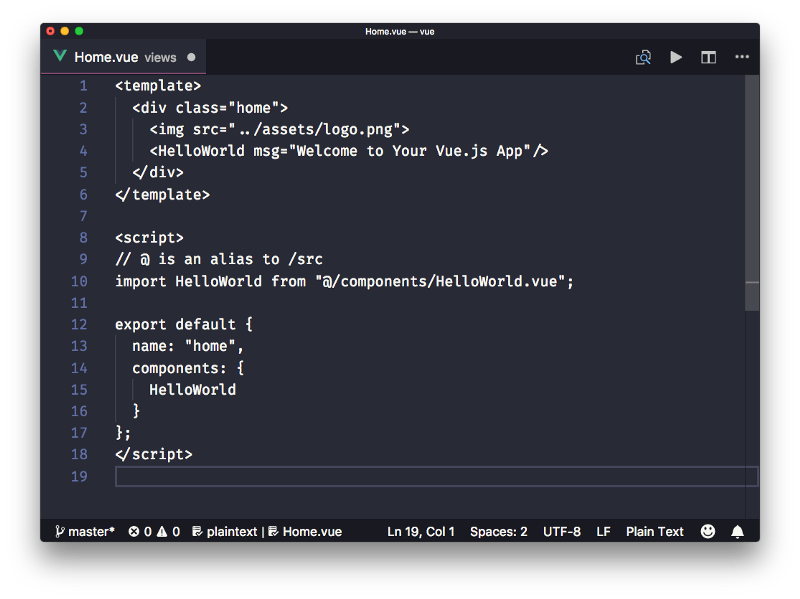
Vetur provides syntax highlighting for all your Vue source code files.
Without Vetur, a .vue file will be displayed in this way by VS Code:
with Vetur installed:
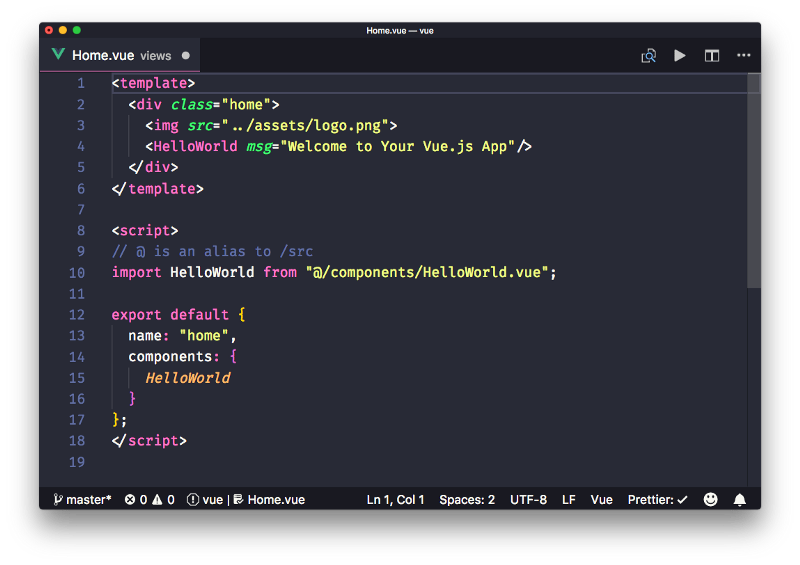
VS Code is able to recognize the type of code contained in a file from its extension.
Using Single File Components, you can mix different types of code inside the same file, from CSS to JavaScript to HTML.
VS Code by default cannot recognize this kind of situation, and Vetur provides syntax highlighting for each kind of code you use.
Vetur enables support, among other things, for:
- HTML
- CSS
- JavaScript
- Pug
- Haml
- SCSS
- PostCSS
- Sass
- Stylus
- TypeScript
Snippets
As with syntax highlighting, since VS Code cannot determine the kind of code contained in a part of a .vue file, it cannot provide the snippets we all love. Snippets are pieces of code we can add to the file, provided by specialized plugins.
Vetur gives VS Code the ability to use your favorite snippets in Single File Components.
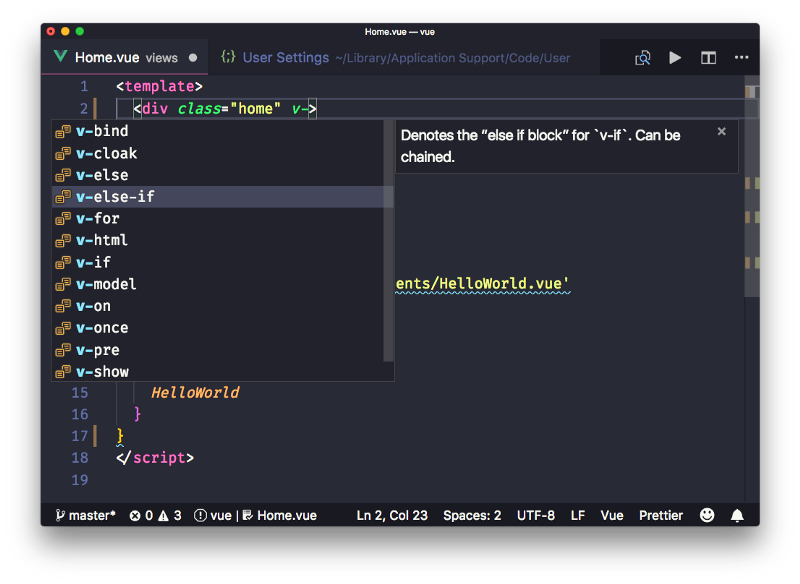
IntelliSense
IntelliSense is also enabled by Vetur, for each different language, with autocomplete:
Scaffolding
In addition to enabling custom snippets, Vetur provides its own set of snippets. Each one creates a specific tag (template, script, or style) with its own language:
scaffoldtemplate with htmltemplate with pugscript with JavaScriptscript with TypeScriptstyle with CSSstyle with CSS (scoped)style with scssstyle with scss (scoped)style with lessstyle with less (scoped)style with sassstyle with sass (scoped)style with postcssstyle with postcss (scoped)style with stylusstyle with stylus (scoped)
If you type scaffold, you'll get a starter pack for a single-file component:
<template>
</template>
<script>export default {
}</script>
<style>
</style>
The others are specific and create a single block of code.
Note: (scoped) in the above list means that it applies to the current component only.
Emmet
Emmet, the popular HTML/CSS abbreviations engine, is supported by default. You can type one of the Emmet abbreviations, and by pressing tab VS Code will automatically expand it to the HTML equivalent:
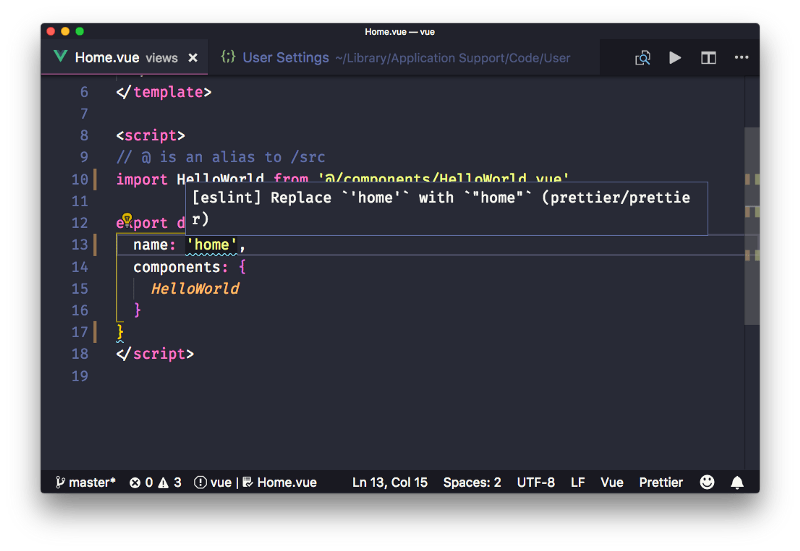
Linting and error checking
Vetur integrates with ESLint through the VS Code ESLint plugin.
Code Formatting
Vetur provides automatic support for code formatting to format the whole file upon save — in combination with the "editor.formatOnSave" VS Code setting.
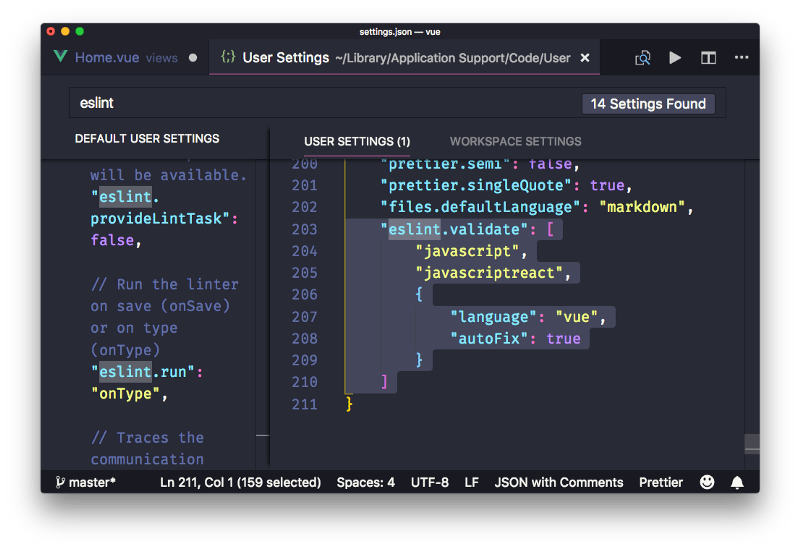
You can choose to disable automatic formatting for some specific languages by setting the vetur.format.defaultFormatter.XXXXX to none in the VS Code settings. To change one of those settings, just start searching for the string, and override what you want in the user settings on the right panel.
Most of the languages supported use Prettier for automatic formatting, a tool that’s becoming an industry standard. It uses your Prettier configuration to determine your preferences.
Introducing Vue Components
Components are single, independent units of an interface. They can have their own state, markup, and style.
How to use components
Vue components can be defined in four main ways. Let’s talk in code.
The first is:
new Vue({ /* options */})
The second is:
Vue.component('component-name', { /* options */})
The third is by using local components. These are components that are only accessible by a specific component, and not available elsewhere (great for encapsulation).
The fourth is in .vue files, also called Single File Components.
Let’s dive into the first 3 ways in detail.
Using new Vue() or Vue.component() is the standard way to use Vue when you're building an application that is not a Single Page Application (SPA). You use this method, rather, when you’re just using Vue.js in some pages, like in a contact form or in the shopping cart. Or maybe Vue is used in all pages, but the server is rendering the layout, and you serve the HTML to the client, which then loads the Vue application you build.
In an SPA, where it’s Vue that builds the HTML, it’s more common to use Single File Components as they are more convenient.
You instantiate Vue by mounting it on a DOM element. If you have a <div id="app"> tag, you will use:
new Vue({ el: '#app' })
A component initialized with new Vue has no corresponding tag name, so it's usually the main container component.
Other components used in the application are initialized using Vue.component(). Such a component allows you to define a tag — with which you can embed the component multiple times in the application — and specify the output of the component in the template property:
<div id="app"> <user-name name="Flavio"></user-name></div>
Vue.component('user-name', { props: ['name'], template: '<p>Hi {{ name }}</p>'})
new Vue({ el: '#app'})
What are we doing? We are initializing a Vue root component on #app, and inside that, we use the Vue component user-name, which abstracts our greeting to the user.
The component accepts a prop, which is an attribute we use to pass data down to child components.
In the Vue.component() call we passed user-name as the first parameter. This gives the component a name. You can write the name in 2 ways here. The first is the one we used, called kebab-case. The second is called PascalCase, which is like camelCase, but with the first letter capitalized:
Vue.component('UserName', { /* ... */})
Vue automatically creates an alias internally from user-name to UserName, and vice versa, so you can use whatever you like. It's generally best to use UserName in the JavaScript, and user-name in the template.
Local components
Any component created using Vue.component() is globally registered. You don't need to assign it to a variable or pass it around to reuse it in your templates.
You can encapsulate components locally by assigning an object that defines the component object to a variable:
const Sidebar = { template: '<aside>Sidebar</aside>'}
and then make it available inside another component by using the components property:
new Vue({ el: '#app', components: { Sidebar }})
You can write the component in the same file, but a great way to do this is to use JavaScript modules:
import Sidebar from './Sidebar'
export default { el: '#app', components: { Sidebar }}
Reusing a component
A child component can be added multiple times. Each separate instance is independent of the others:
<div id="app"> <user-name name="Flavio"></user-name> <user-name name="Roger"></user-name> <user-name name="Syd"></user-name></div>
Vue.component('user-name', { props: ['name'], template: '<p>Hi {{ name }}</p>'})
new Vue({ el: '#app'})
The building blocks of a component
So far we’ve seen how a component can accept the el, props and template properties.
elis only used in root components initialized usingnew Vue({}), and identifies the DOM element the component will mount on.propslists all the properties that we can pass down to a child componenttemplateis where we can set up the component template, which will be responsible for defining the output the component generates.
A component accepts other properties:
datathe component local statemethods: the component methodscomputed: the computed properties associated with the componentwatch: the component watchers
Single File Components
A Vue component can be declared in a JavaScript file (.js) like this:
Vue.component('component-name', { /* options */})
or also:
new Vue({ /* options */})
or it can be specified in a .vue file.
The .vue file is pretty cool because it allows you to define:
- JavaScript logic
- HTML code template
- CSS styling
all in just a single file. As such it got the name of Single File Component.
Here’s an example:
<template> <p>{{ hello }}</p></template>
<script>export default { data() { return { hello: 'Hello World!' } }}</script>
<style scoped> p { color: blue; }</style>
All of this is possible thanks to the use of Webpack. The Vue CLI makes this very easy and supported out of the box. .vuefiles cannot be used without a Webpack setup, and as such, they are not very suited to apps that just use Vue on a page without being a full-blown single-page app (SPA).
Since Single File Components rely on Webpack, we get for free the ability to use modern Web features.
Your CSS can be defined using SCSS or Stylus, the template can be built using Pug, and all you need to do to make this happen is to declare to Vue which language preprocessor you are going to use.
The list of supported preprocessors include
- TypeScript
- SCSS
- Sass
- Less
- PostCSS
- Pug
We can use modern JavaScript (ES6–7–8) regardless of the target browser using the Babel integration, and ES Modules too, so we can use import/export statements.
We can use CSS Modules to scope our CSS.
Speaking of scoping CSS, Single File Components make it absolutely easy to write CSS that won’t leak to other components, by using <style scoped> tags.
If you omit scoped, the CSS you define will be global. But adding the scoped tag, Vue automatically adds a specific class to the component, unique to your app, so the CSS is guaranteed to not leak out to other components.
Maybe your JavaScript is huge because of some logic you need to take care of. What if you want to use a separate file for your JavaScript?
You can use the src attribute to externalize it:
<template> <p>{{ hello }}</p></template><script src="./hello.js"></script>
This also works for your CSS:
<template> <p>{{ hello }}</p></template><script src="./hello.js"></script><style src="./hello.css"></style>
Notice how I used
export default { data() { return { hello: 'Hello World!' } }}
in the component’s JavaScript to set up the data.
Other common ways you will see are:
export default { data: function() { return { name: 'Flavio' } }}
The above is equivalent to what we did before.
Or:
export default { data: () => { return { name: 'Flavio' } }}
This is different, because it uses an arrow function. Arrow functions are fine until we need to access a component method. This is an issue if we need to make use of this, and such property is not bound to the component using arrow functions. So it's mandatory to use regular functions rather than arrow functions.
You might also see:
module.exports = { data: () => { return { name: 'Flavio' } }}
This is using the CommonJS syntax and it works as well. But I recommend using the ES Modules syntax, as that is a JavaScript standard.
Vue Templates
Vue.js uses a templating language that’s a superset of HTML.
Any HTML is a valid Vue.js template. In addition to that, Vue.js provides two powerful things: interpolation and directives.
This is a valid Vue.js template:
<span>Hello!</span>
This template can be put inside a Vue component declared explicitly:
new Vue({ template: '<span>Hello!</span>'})
or it can be put into a Single File Component:
<template> <span>Hello!</span></template>
This first example is very basic. The next step is making it output a piece of the component state, for example, a name.
This can be done using interpolation. First, we add some data to our component:
new Vue({
  data: {
    name: 'Flavio'
  },
  template: '<span>Hello!</span>'
})
and then we can add it to our template using the double brackets syntax:
new Vue({ data: { name: 'Flavio' }, template: '<span>Hello {{name}}!</span>'})
One interesting thing here. See how we just used name instead of this.data.name?
This is because Vue.js does some internal binding and lets the template use the property as if it was local. Pretty handy.
In a single file component, that would be:
<template> <span>Hello {{name}}!</span></template>
<script>export default { data() { return { name: 'Flavio' } }}</script>
I used a regular function in my export. Why not an arrow function?
This is because in data we might need to access a method in our component instance, and we can't do that if this is not bound to the component, so we can’t use an arrow function.
Do note that we could use an arrow function, but then I would need to remember to switch to a regular function in case I use this. Better play it safe, I think.
Now, back to the interpolation.
{{ name }} should remind you of Mustache / Handlebars template interpolation, but it's just a visual reminder.
While in those templating engines they are “dumb”, in Vue, you can do much more, and it’s more flexible.
You can use any JavaScript expression inside your interpolations, but you’re limited to just one expression:
{{ name.reverse() }}
{{ name === 'Flavio' ? 'Flavio' : 'stranger' }}
Vue provides access to some global objects inside templates, including Math and Date, so you can use them:
{{ Math.sqrt(16) * Math.random() }}
It’s best to avoid adding complex logic to templates, but the fact that Vue allows it gives us more flexibility, especially when trying things out.
We can first try to put an expression in the template, and then move it to a computed property or method later on.
The value included in any interpolation will be updated upon a change of any of the data properties it relies on.
You can avoid this reactivity by using the v-once directive.
The result is always escaped, so you can’t have HTML in the output.
If you need to have an HTML snippet, you need to use the v-html directive instead.
Styling components using CSS
The simplest option to add CSS to a Vue.js component is to use the style tag, just like in HTML:
<template> <p style="text-decoration: underline">Hi!</p></template>
<script>export default { data() { return { decoration: 'underline' } }}</script>
This is as static as you can get. What if you want underline to be defined in the component data? Here's how you can do it:
<template> <p :style="{'text-decoration': decoration}">Hi!</p></template>
<script>export default { data() { return { decoration: 'underline' } }}</script>
:style is a shorthand for v-bind:style. I'll use this shorthand throughout this tutorial.
Notice how we had to wrap text-decoration in quotes. This is because of the dash, which is not part of a valid JavaScript identifier.
You can avoid the quotes by using a special camelCase syntax that Vue.js enables, and rewriting it to textDecoration:
<template> <p :style="{textDecoration: decoration}">Hi!</p></template>
Instead of binding an object to style, you can reference a computed property:
<template> <p :style="styling">Hi!</p></template>
<script>export default { data() { return { textDecoration: 'underline', textWeight: 'bold' } }, computed: { styling: function() { return { textDecoration: this.textDecoration, textWeight: this.textWeight } } }}</script>
Vue components generate plain HTML, so you can choose to add a class to each element, and add a corresponding CSS selector with properties that style it:
<template> <p class="underline">Hi!</p></template>
<style>.underline { text-decoration: underline; }</style>
You can use SCSS like this:
<template> <p class="underline">Hi!</p></template>
<style lang="scss">body { .underline { text-decoration: underline; }}</style>
You can hard code the class like in the above example. Or you can bind the class to a component property, to make it dynamic, and only apply to that class if the data property is true:
<template> <p :class="{underline: isUnderlined}">Hi!</p></template>
<script>export default { data() { return { isUnderlined: true } }}</script>
<style>.underline { text-decoration: underline; }</style>
Instead of binding an object to class, like we did with <p :class="{text: isText}">Hi!
<template> <p :class="paragraphClass">Hi!</p></template>
<script>export default { data() { return { paragraphClass: 'underline' } }}</script>
<style>.underline { text-decoration: underline; }</style>
You can assign multiple classes, either by adding two classes to paragraphClass in this case or by using an array:
<template> <p :class="[decoration, weight]">Hi!</p></template>
<script>export default { data() { return { decoration: 'underline', weight: 'weight', } }}</script>
<style>.underline { text-decoration: underline; }.weight { font-weight: bold; }</style>
The same can be done using an object inlined in the class binding:
<template> <p :class="{underline: isUnderlined, weight: isBold}">Hi!</p></template>
<script>export default { data() { return { isUnderlined: true, isBold: true } }}</script>
<style>.underline { text-decoration: underline; }.weight { font-weight: bold; }</style>
And you can combine the two statements:
<template> <p :class="[decoration, {weight: isBold}]">Hi!</p></template>
<script>export default { data() { return { decoration: 'underline', isBold: true } }}</script>
<style>.underline { text-decoration: underline; }.weight { font-weight: bold; }</style>
You can also use a computed property that returns an object, which works best when you have many CSS classes to add to the same element:
<template> <p :class="paragraphClasses">Hi!</p></template>
<script>export default { data() { return { isUnderlined: true, isBold: true } }, computed: { paragraphClasses: function() { return { underlined: this.isUnderlined, bold: this.isBold } } }}</script>
<style>.underlined { text-decoration: underline; }.bold { font-weight: bold; }</style>
Notice that in the computed property you need to reference the component data using this.[propertyName], while in the template data, properties are conveniently put as first-level properties.
Any CSS that’s not hard coded like in the first example is going to be processed by Vue, and Vue does the nice job of automatically prefixing the CSS for us. This allows us to write clean CSS while still targeting older browsers (which still means browsers that Vue supports, so IE9+).
Directives
We saw in Vue.js templates and interpolations how you can embed data in Vue templates.
This section explains the other technique offered by Vue.js in templates: directives.
Directives are basically like HTML attributes which are added inside templates. They all start with v-, to indicate that's a Vue special attribute.
Let’s see each of the Vue directives in detail.
v-text
Instead of using interpolation, you can use the v-text directive. It performs the same job:
<span v-text="name"></span>
v-once
You know how {{ name }} binds to the name property of the component data.
Any time name changes in your component data, Vue is going to update the value represented in the browser.
Unless you use the v-once directive, which is basically like an HTML attribute:
<span v-once>{{ name }}</span>
v-html
When you use interpolation to print a data property, the HTML is escaped. This is a great way that Vue uses to automatically protect from XSS attacks.
There are cases, however, where you want to output HTML and make the browser interpret it. You can use the v-htmldirective:
<span v-html="someHtml"></span>
v-bind
Interpolation only works in the tag content. You can’t use it on attributes.
Attributes must use v-bind:
<a v-bind:href="url">{{ linkText }}</a>
v-bind is so common that there is a shorthand syntax for it:
<a v-bind:href="url">{{ linkText }}</a><a :href="url">{{ linkText }}</a>
Two-way binding using v-model
v-model lets us bind a form input element for example, and makes it change the Vue data property when the user changes the content of the field:
<input v-model="message" placeholder="Enter a message"><p>Message is: {{ message }}</p>
<select v-model="selected"> <option disabled value="">Choose a fruit</option> <option>Apple</option> <option>Banana</option> <option>Strawberry</option></select><span>Fruit chosen: {{ selected }}</span>
Using expressions
You can use any JavaScript expression inside a directive:
<span v-text="'Hi, ' + name + '!'"></span>
<a v-bind:href="'https://' + domain + path">{{ linkText }}</a>
Any variable used in a directive references the corresponding data property.
Conditionals
Inside a directive you can use the ternary operator to perform a conditional check, since that’s an expression:
<span v-text="name == Flavio ? 'Hi Flavio!' : 'Hi' + name + '!'"></span>
There are dedicated directives that allow you to perform more organized conditionals: v-if, v-else and v-else-if.
<p v-if="shouldShowThis">Hey!</p>
shouldShowThis is a boolean value contained in the component's data.
Loops
v-for allows you to render a list of items. Use it in combination with v-bind to set the properties of each item in the list.
You can iterate on a simple array of values:
<template> <ul> <li v-for="item in items">{{ item }}</li> </ul></template>
<script>export default { data() { return { items: ['car', 'bike', 'dog'] } }}</script>
Or on an array of objects:
<template> <div> <!-- using interpolation --> <ul> <li v-for="todo in todos">{{ todo.title }}</li> </ul> <!-- using v-text --> <ul> <li v-for="todo in todos" v-text="todo.title"></li> </ul> </div></template>
<script>export default { data() { return { todos: [ { id: 1, title: 'Do something' }, { id: 2, title: 'Do something else' } ] } }}</script>
v-for can give you the index using:
<li v-for="(todo, index) in todos"></li>
Events
v-on allows you to listen to DOM events, and trigger a method when the event happens. Here we listen for a click event:
<template> <a v-on:click="handleClick">Click me!</a></template>
<script>export default { methods: { handleClick: function() { alert('test') } }}</script>
You can pass parameters to any event:
<template> <a v-on:click="handleClick('test')">Click me!</a></template>
<script>export default { methods: { handleClick: function(value) { alert(value) } }}</script>
Small bits of JavaScript (a single expression) can be put directly into the template:
<template> <a v-on:click="counter = counter + 1">{{counter}}</a></template>
<script>export default { data: function() { return { counter: 0 } }}</script>
click is just one kind of event. A common event is submit, which you can bind using v-on:submit.
v-on is so common that there is a shorthand syntax for it, @:
<a v-on:click="handleClick">Click me!</a><a @click="handleClick">Click me!</a>
Show or hide
You can choose to only show an element in the DOM if a particular property of the Vue instance evaluates to true, using v-show:
<p v-show="isTrue">Something</p>
The element is still inserted in the DOM, but set to display: none if the condition is not satisfied.
Event directive modifiers
Vue offers some optional event modifiers you can use in association with v-on, which automatically make the event do something without you explicitly coding it in your event handler.
One good example is .prevent, which automatically calls preventDefault() on the event.
In this case, the form does not cause the page to be reloaded, which is the default behavior:
<form v-on:submit.prevent="formSubmitted"></form>
Other modifiers include .stop, .capture, .self, .once, .passive and they are described in detail in the official docs.
Custom directives
The Vue default directives already let you do a lot of work, but you can always add new, custom directives if you want.
Read here if you’re interested in learning more.
Methods
What are Vue.js methods?
A Vue method is a function associated with the Vue instance.
Methods are defined inside the methods property:
new Vue({ methods: { handleClick: function() { alert('test') } }})
or in the case of Single File Components:
<script>export default { methods: { handleClick: function() { alert('test') } }}</script>
Methods are especially useful when you need to perform an action and you attach a v-on directive on an element to handle events. Like this one, which calls handleClick when the element is clicked:
<template> <a @click="handleClick">Click me!</a></template>
Pass parameters to Vue.js methods
Methods can accept parameters.
In this case, you just pass the parameter in the template:
<template> <a @click="handleClick('something')">Click me!</a></template>
new Vue({ methods: { handleClick: function(text) { alert(text) } }})
or in the case of Single File Components:
<script>export default { methods: { handleClick: function(text) { alert(text) } }}</script>
How to access data from a method
You can access any of the data properties of the Vue component by using this.propertyName:
<template> <a @click="handleClick()">Click me!</a></template>
<script>export default { data() { return { name: 'Flavio' } }, methods: { handleClick: function() { console.log(this.name) } }}</script>
We don’t have to use this.data.name, just this.name. Vue does provide a transparent binding for us. Using this.data.name will raise an error.
As you saw before in the events description, methods are closely interlinked to events, because they are used as event handlers. Every time an event occurs, that method is called.
Watchers
A watcher is a special Vue.js feature that allows you to spy on one property of the component state, and run a function when that property value changes.
Here’s an example. We have a component that shows a name, and allows you to change it by clicking a button:
<template> <p>My name is {{name}}</p> <button @click="changeName()">Change my name!</button></template>
<script>export default { data() { return { name: 'Flavio' } }, methods: { changeName: function() { this.name = 'Flavius' } }}</script>
When the name changes we want to do something, like print a console log.
We can do so by adding to the watch object a property named as the data property we want to watch over:
<script>export default { data() { return { name: 'Flavio' } }, methods: { changeName: function() { this.name = 'Flavius' } }, watch: { name: function() { console.log(this.name) } }}</script>
The function assigned to watch.name can optionally accept 2 parameters. The first is the new property value. The second is the old property value:
<script>export default { /* ... */ watch: { name: function(newValue, oldValue) { console.log(newValue, oldValue) } }}</script>
Watchers cannot be looked up from a template as you can with computed properties.
Computed Properties
What is a Computed Property
In Vue.js you can output any data value using parentheses:
<template> <p>{{ count }}</p></template>
<script>export default { data() { return { count: 1 } }}</script>
This property can host some small computations. For example:
<template> {{ count * 10 }}</template>
But you’re limited to a single JavaScript expression.
In addition to this technical limitation, you also need to consider that templates should only be concerned with displaying data to the user, not perform logic computations.
To do something more than a single expression, and to have more declarative templates, you use a computed property.
Computed properties are defined in the computed property of the Vue component:
<script>export default { computed: {
}}</script>
An example of a computed property
Here’s an example that uses a computed property count to calculate the output.
Notice:
- I didn’t have to call
{{ count() }}. Vue.js automatically invokes the function - I used a regular function (not an arrow function) to define the
countcomputed property, because I need to be able to access the component instance throughthis.
<template> <p>{{ count }}</p></template>
<script>export default { data() { return { items: [1, 2, 3] } }, computed: { count: function() { return 'The count is ' + this.items.length * 10 } }}</script>
Computed properties vs. methods
If you already know about Vue methods, you may wonder what’s the difference.
First, methods must be called, not just referenced, so you’d need to do:
<template> <p>{{ count() }}</p></template>
<script>export default { data() { return { items: [1, 2, 3] } }, methods: { count: function() { return 'The count is ' + this.items.length * 10 } }}</script>
But the main difference is that computed properties are cached.
The result of the count computed property is internally cached until the items data property changes.
Important: Computed properties are only updated when a reactive source updates. Regular JavaScript methods are not reactive, so a common example is to use Date.now():
<template> <p>{{ now }}</p></template>
<script>export default { computed: { now: function () { return Date.now() } }}</script>
It will render once, and then it will not be updated even when the component re-renders. It’s just updated on a page refresh, when the Vue component is quit and reinitialized.
In this case, a method is better suited for your needs.
Methods vs. Watchers vs. Computed Properties
Now that you know about methods, watchers and computed properties, you might be wondering when should you use one vs the others.
Here’s a breakdown of this question.
When to use methods
- To react to some event happening in the DOM
- To call a function when something happens in your component.
You can call a method from computed properties or watchers.
When to use computed properties
- You need to compose new data from existing data sources
- You have a variable you use in your template that’s built from one or more data properties
- You want to reduce a complicated, nested property name to a more readable and easy to use one (but update it when the original property changes)
- You need to reference a value from the template. In this case, creating a computed property is the best thing, because it’s cached.
- You need to listen to changes of more than one data property
When to use watchers
- You want to listen when a data property changes, and perform some action
- You want to listen to a prop value change
- You only need to listen to one specific property (you can’t watch multiple properties at the same time)
- You want to watch a data property until it reaches some specific value and then do something
Props: pass data to child components
Props are the way components can accept data from components that include them (parent components).
When a component expects one or more prop, it must define them in its props property:
Vue.component('user-name', { props: ['name'], template: '<p>Hi {{ name }}</p>'})
or, in a Vue Single File Component:
<template> <p>{{ name }}</p></template>
<script>export default { props: ['name']}</script>
Accept multiple props
You can have multiple props by simply appending them to the array:
Vue.component('user-name', { props: ['firstName', 'lastName'], template: '<p>Hi {{ firstName }} {{ lastName }}</p>'})
Set the prop type
You can specify the type of a prop very simply by using an object instead of an array, using the name of the property as the key of each property, and the type as the value:
Vue.component('user-name', { props: { firstName: String, lastName: String }, template: '<p>Hi {{ firstName }} {{ lastName }}</p>'})
The valid types you can use are:
- String
- Number
- Boolean
- Array
- Object
- Date
- Function
- Symbol
When a type mismatches, Vue alerts you (in development mode) in the console with a warning.
Prop types can be more articulated.
You can allow multiple different value types:
props: { firstName: [String, Number]}
Set a prop to be mandatory
You can require a prop to be mandatory:
props: { firstName: { type: String, required: true }}
Set the default value of a prop
You can specify a default value:
props: { firstName: { type: String, default: 'Unknown person' }}
For objects:
props: { name: { type: Object, default: { firstName: 'Unknown', lastName: '' } }}
default can also be a function that returns an appropriate value, rather than being the actual value.
You can even build a custom validator, which is cool for complex data:
props: { name: { validator: name => { return name === 'Flavio' //only allow "Flavios" } }}
Passing props to the component
You pass a prop to a component using the syntax
<ComponentName color="white" />
if what you pass is a static value.
If it’s a data property, you use
<template> <ComponentName :color=color /></template>
<script>...export default { //... data: function() { return { color: 'white' } }, //...}</script>
You can use a ternary operator inside the prop value to check a truthy condition and pass a value that depends on it:
<template> <ComponentName :colored="color == 'white' ? true : false" /></template>
<script>...export default { //... data: function() { return { color: 'white' } }, //...}</script>
Handling Events in Vue
What are Vue.js events?
Vue.js allows us to intercept any DOM event by using the v-on directive on an element.
If we want to do something when a click event happens in this element:
<template> <a>Click me!</a></template>
we add a v-on directive:
<template> <a v-on:click="handleClick">Click me!</a></template>
Vue also offers a very convenient alternative syntax for this:
<template> <a @click="handleClick">Click me!</a></template>
You can choose to use the parentheses or not. @click="handleClick" is equivalent to @click="handleClick()".
handleClick is a method attached to the component:
<script>export default { methods: { handleClick: function(event) { console.log(event) } }}</script>
What you need to know here is that you can pass parameters from events: @click="handleClick(param)" and they will be received inside the method.
Access the original event object
In many cases, you will want to perform an action on the event object or look up some property in it. How can you access it?
Use the special $event directive:
<template> <a @click="handleClick($event)">Click me!</a></template>
<script>export default { methods: { handleClick: function(event) { console.log(event) } }}</script>
and if you already pass a variable:
<template> <a @click="handleClick('something', $event)">Click me!</a></template>
<script>export default { methods: { handleClick: function(text, event) { console.log(text) console.log(event) } }}</script>
From there you could call event.preventDefault(), but there's a better way: event modifiers.
Event modifiers
Instead of messing with DOM “things” in your methods, tell Vue to handle things for you:
@click.preventcallevent.preventDefault()@click.stopcallevent.stopPropagation()@click.passivemakes use of the passive option of addEventListener@click.captureuses event capturing instead of event bubbling@click.selfmake sure the click event was not bubbled from a child event, but directly happened on that element@click.oncethe event will only be triggered exactly once
All those options can be combined by appending one modifier after the other.
For more on propagation, bubbling and capturing, see my JavaScript events guide.
Inject content using slots
A component can choose to define its content entirely, like in this case:
Vue.component('user-name', { props: ['name'], template: '<p>Hi {{ name }}</p>'})
Or it can also let the parent component inject any kind of content into it, by using slots.
What’s a slot?
You define it by putting <slot></slot> in a component template:
Vue.component('user-information', { template: '<div class="user-information"><slot></slot></div>'})
When using this component, any content added between the opening and closing tag will be added inside the slot placeholder:
<user-information> <h2>Hi!</h2> <user-name name="Flavio"></user-information>
If you put any content side the <slot></slot> tags, that serves as the default content in case nothing is passed in.
A complicated component layout might require a better way to organize content.
Enter named slots.
With a named slot, you can assign parts of a slot to a specific position in your component template layout, and you use a slot attribute to any tag, to assign content to that slot.
Anything outside any template tag is added to the main slot.
For convenience, I use a page single file component in this example:
<template> <div> <main> <slot></slot> </main> <sidebar> <slot name="sidebar"></slot> </sidebar> </div></template>
<page> <ul slot="sidebar"> <li>Home</li> <li>Contact</li> </ul>
<h2>Page title</h2> <p>Page content</p></page>
Filters, helpers for templates
Filters are a functionality provided by Vue components that let you apply formatting and transformations to any part of your template dynamic data.
They don’t change a component’s data or anything, but they only affect the output.
Say you are printing a name:
<template> <p>Hi {{ name }}!</p></template>
<script>export default { data() { return { name: 'Flavio' } }}</script>
What if you want to check that name is actually containing a value, and if not print 'there', so that our template will print "Hi there!"?
Enter filters:
<template> <p>Hi {{ name | fallback }}!</p></template>
<script>export default { data() { return { name: 'Flavio' } }, filters: { fallback: function(name) { return name ? name : 'there' } }}</script>
Notice the syntax to apply a filter, which is | filterName. If you're familiar with Unix, that's the Unix pipe operator, which is used to pass the output of an operation as an input to the next one.
The filters property of the component is an object. A single filter is a function that accepts a value and returns another value.
The returned value is the one that’s actually printed in the Vue.js template.
The filter, of course, has access to the component data and methods.
What’s a good use case for filters?
- transforming a string, for example, capitalizing or making it lowercase
- formatting a price
Above you saw a simple example of a filter: {{ name | fallback }}.
Filters can be chained, by repeating the pipe syntax:
{{ name | fallback | capitalize }}
This first applies the fallback filter, then the capitalize filter (which we didn't define, but try making one!).
Advanced filters can also accept parameters, using the normal function parameters syntax:
<template> <p>Hello {{ name | prepend('Dr.') }}</p></template>
<script>export default { data() { return { name: 'House' } }, filters: { prepend: (name, prefix) => { return `${prefix} ${name}` } }}</script>
If you pass parameters to a filter, the first one passed to the filter function is always the item in the template interpolation (name in this case), followed by the explicit parameters you passed.
You can use multiple parameters by separating them using a comma.
Notice I used an arrow function. We avoid arrow functions in methods and computed properties, generally, because they almost always reference this to access the component data. But in this case, the filter does not need to access this but receives all the data it needs through the parameters, and we can safely use the simpler arrow function syntax.
This package has a lot of pre-made filters for you to use directly in templates, which include capitalize, uppercase, lowercase, placeholder, truncate, currency, pluralize and more.
Communication among components
Components in Vue can communicate in various ways.
Using Props
The first way is by using props.
Parents “pass down” data by adding arguments to the component declaration:
<template> <div> <Car color="green" /> </div></template>
<script>import Car from './components/Car'
export default { name: 'App', components: { Car }}</script>
Props are one-way: from parent to child. Any time the parent changes the prop, the new value is sent to the child and re-rendered.
The reverse is not true, and you should never mutate a prop inside the child component.
Using Events to communicate from children to parent
Events allow you to communicate from the children up to the parent:
<script>export default { name: 'Car', methods: { handleClick: function() { this.$emit('clickedSomething') } }}</script>
The parent can intercept this using the v-on directive when including the component in its template:
<template> <div> <Car v-on:clickedSomething="handleClickInParent" /> <!-- or --> <Car @clickedSomething="handleClickInParent" /> </div></template>
<script>export default { name: 'App', methods: { handleClickInParent: function() { //... } }}</script>
You can pass parameters of course:
<script>export default { name: 'Car', methods: { handleClick: function() { this.$emit('clickedSomething', param1, param2) } }}</script>
and retrieve them from the parent:
<template> <div> <Car v-on:clickedSomething="handleClickInParent" /> <!-- or --> <Car @clickedSomething="handleClickInParent" /> </div></template>
<script>export default { name: 'App', methods: { handleClickInParent: function(param1, param2) { //... } }}</script>
Using an Event Bus to communicate between any components
Using events you’re not limited to child-parent relationships. You can use the so-called Event Bus.
Above we used this.$emit to emit an event on the component instance.
What we can do instead is to emit the event on a more generally accessible component.
this.$root, the root component, is commonly used for this.
You can also create a Vue component dedicated to this job, and import it where you need.
<script>export default { name: 'Car', methods: { handleClick: function() { this.$root.$emit('clickedSomething') } }}</script>
Any other component can listen for this event. You can do so in the mounted callback:
<script>export default { name: 'App', mounted() { this.$root.$on('clickedSomething', () => { //... }) }}</script>
This is what Vue provides out of the box.
When you outgrow this, you can look into Vuex or other 3rd part libraries.
Manage state using Vuex
Vuex is the official state management library for Vue.js.
Its job is to share data across the components of your application.
Components in Vue.js out of the box can communicate using
- props, to pass state down to child components from a parent
- events, to change the state of a parent component from a child, or using the root component as an event bus
Sometimes things get more complex than what these simple options allow.
In this case, a good option is to centralize the state in a single store. This is what Vuex does.
Why should you use Vuex?
Vuex is not the only state management option you can use in Vue (you can use Redux too), but its main advantage is that it’s official, and its integration with Vue.js is what makes it shine.
With React you have the trouble of having to choose one of the many libraries available, as the ecosystem is huge and has no actual standard. Lately Redux was the most popular choice, with MobX following up in terms of popularity. With Vue I’d go as far as to say that you won’t need to look around for anything other than Vuex, especially when starting out.
Vuex borrowed many of its ideas from the React ecosystem, as this is the Flux pattern popularized by Redux.
If you know Flux or Redux already, Vuex will be very familiar. If you don’t, no problem — I’ll explain every concept from the ground up.
Components in a Vue application can have their own state. For example, an input box will store the data entered into it locally. This is perfectly fine, and components can have local state even when using Vuex.
You know that you need something like Vuex when you start doing a lot of work to pass a piece of state around.
In this case, Vuex provides a central repository store for the state, and you mutate the state by asking the store to do that.
Every component that depends on a particular piece of the state will access it using a getter on the store, which makes sure it’s updated as soon as that thing changes.
Using Vuex will introduce some complexity into the application, as things need to be set up in a certain way to work correctly. But if this helps solve the unorganized props passing and event system that might grow into a spaghetti mess if too complicated, then it’s a good choice.
Let’s start
In this example, I’m starting from a Vue CLI application. Vuex can be used also by directly loading it into a script tag. But, since Vuex is more in tune with bigger applications, it’s much more likely you will use it on a more structured application, like the ones you can start up quickly with the Vue CLI.
The examples I use will be put CodeSandbox, which is a great service that has a Vue CLI sample ready to go. I recommend using it to play around.
Once you’re there, click the Add dependency button, enter “vuex” and click it.
Now Vuex will be listed in the project dependencies.
To install Vuex locally you can simply run npm install vuex or yarn add vuex inside the project folder.
Create the Vuex store
Now we are ready to create our Vuex store.
This file can be put anywhere. It’s generally suggested to put it in the src/store/store.js file, so we'll do that.
In this file we initialize Vuex and tell Vue to use it:
import Vue from 'vue'import Vuex from 'vuex'
Vue.use(Vuex)
export const store = new Vuex.Store({})
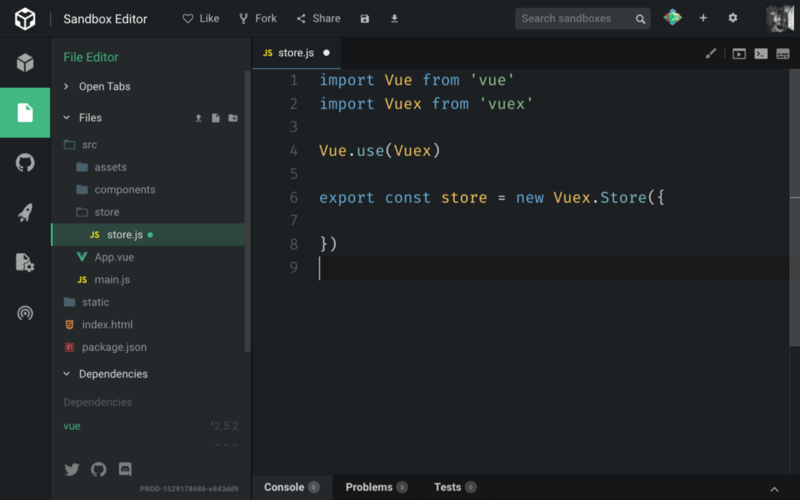
We export a Vuex store object, which we create using the Vuex.Store() API.
A use case for the store
Now that we have a skeleton in place, let’s come up with an idea for a good use case for Vuex, so I can introduce its concepts.
For example, I have two sibling components, one with an input field, and one that prints that input field content.
When the input field is changed, I want to also change the content in that second component. Very simple, but this will do the job for us.
Introducing the new components we need
I delete the HelloWorld component and add a Form component, and a Display component.
<template> <div> <label for="flavor">Favorite ice cream flavor?</label> <input name="flavor"> </div></template>
<template> <div> <p>You chose ???</p> </div></template>
Adding those components to the app
We add them to the App.vue code instead of the HelloWorld component:
<template> <div id="app"> <Form/> <Display/> </div></template>
<script>import Form from './components/Form'import Display from './components/Display'
export default { name: 'App', components: { Form, Display }}</script>
Add the state to the store
So with this in place, we go back to the store.js file. We add a property to the store called state, which is an object, that contains the flavor property. That's an empty string initially.
import Vue from 'vue'import Vuex from 'vuex'
Vue.use(Vuex)
export const store = new Vuex.Store({ state: { flavor: '' }})
We’ll update it when the user types into the input field.
Add a mutation
The state cannot be manipulated except by using mutations. We set up one mutation which will be used inside the Form component to notify the store that the state should change.
import Vue from 'vue'import Vuex from 'vuex'
Vue.use(Vuex)
export const store = new Vuex.Store({ state: { flavor: '' }, mutations: { change(state, flavor) { state.flavor = flavor } }})
Add a getter to reference a state property
With that set, we need to add a way to look at the state. We do so using getters. We set up a getter for the flavorproperty:
import Vue from 'vue'import Vuex from 'vuex'
Vue.use(Vuex)
export const store = new Vuex.Store({ state: { flavor: '' }, mutations: { change(state, flavor) { state.flavor = flavor } }, getters: { flavor: state => state.flavor }})
Notice how getters is an object. flavor is a property of this object, which accepts the state as the parameter, and returns the flavor property of the state.
Adding the Vuex store to the app
Now the store is ready to be used. We go back to our application code, and in the main.js file, we need to import the state and make it available in our Vue app.
We add
import { store } from './store/store'
and we add it to the Vue application:
new Vue({ el: '#app', store, components: { App }, template: '<App/>'})
Once we add this, since this is the main Vue component, the store variable inside every Vue component will point to the Vuex store.
Update the state on a user action using commit
Let’s update the state when the user types something.
We do so by using the store.commit() API.
But first, let’s create a method that is invoked when the input content changes. We use @input rather than @changebecause the latter is only triggered when the focus is moved away from the input box, while @input is called on every keypress.
<template> <div> <label for="flavor">Favorite ice cream flavor?</label> <input @input="changed" name="flavor"> </div></template>
<script>export default { methods: { changed: function(event) { alert(event.target.value) } }}</script>
Now that we have the value of the flavor, we use the Vuex API:
<script>export default { methods: { changed: function(event) { this.$store.commit('change', event.target.value) } }}</script>
See how we reference the store using this.$store? This is thanks to the inclusion of the store object in the main Vue component initialization.
The commit() method accepts a mutation name (we used change in the Vuex store) and a payload, which will be passed to the mutation as the second parameter of its callback function.
Use the getter to print the state value
Now we need to reference the getter of this value in the Display template, by using $store.getters.flavor. this can be removed because we're in the template, and this is implicit.
<template> <div> <p>You chose {{ $store.getters.flavor }}</p> </div></template>
The full, working source code is available here.
There are still many concepts missing in this puzzle:
- actions
- modules
- helpers
- plugins
But now you have the basics to go and read about them in the official docs.
Handle URLs using Vue Router
In a JavaScript web application, a router is the part that syncs the currently displayed view with the browser address bar content.
In other words, it’s the part that makes the URL change when you click something in the page, and helps to show the correct view when you hit a specific URL.
Traditionally, the Web is built around URLs. When you hit a certain URL, a specific page is displayed.
With the introduction of applications that run inside the browser and change what the user sees, many applications broke this interaction, and you had to manually update the URL with the browser’s History API.
You need a router when you need to sync URLs to views in your app. It’s a very common need, and all the major modern frameworks now allow you to manage routing.
The Vue Router library is the way to go for Vue.js applications. Vue does not enforce the use of this library. You can use whatever generic routing library you want, or also create your own History API integration, but the benefit of using Vue Router is that it’s official.
This means it’s maintained by the same people who maintain Vue, so you get a more consistent integration in the framework, and the guarantee that it’s always going to be compatible in the future, no matter what.
Installation
Vue Router is available via npm with the package named vue-router.
If you use Vue via a script tag, you can include Vue Router using
<script src="https://unpkg.com/vue-router"></script>
UNPKG is a very handy tool that makes every npm package available in the browser with a simple link.
If you use the Vue CLI, install it using:
npm install vue-router
Once you install vue-router and make it available either using a script tag or via Vue CLI, you can now import it in your app.
You import it after vue, and you call Vue.use(VueRouter) to install it inside the app:
import Vue from 'vue'import VueRouter from 'vue-router'
Vue.use(VueRouter)
After you call Vue.use() passing the router object, in any component of the app you have access to these objects:
this.$routeris the router objectthis.$routeis the current route object
The router object
The router object, accessed using this.$router from any component when the Vue Router is installed in the root Vue component, offers many nice features.
We can make the app navigate to a new route using
this.$router.push()this.$router.replace()this.$router.go()
which resemble the pushState, replaceState and go methods of the History API.
push()is used to go to a new route, adding a new item to the browser historyreplace()is the same, except it does not push a new state to the history
Usage samples:
this.$router.push('about') //named route, see laterthis.$router.push({ path: 'about' })this.$router.push({ path: 'post', query: { post_slug: 'hello-world' } }) //using query parameters (post?post_slug=hello-world)this.$router.replace({ path: 'about' })
go() goes back and forth, accepting a number that can be positive or negative to go back in the history:
this.$router.go(-1) //go back 1 stepthis.$router.go(1) //go forward 1 step
Defining the routes
I’m using a Vue Single File Component in this example.
In the template I use a nav tag that has three router-link components, which have the labels Home, Login, and About. A URL is assigned through the to attribute.
The router-view component is where the Vue Router will put the content that matches the current URL.
<template> <div id="app"> <nav> <router-link to="/">Home</router-link> <router-link to="/login">Login</router-link> <router-link to="/about">About</router-link> </nav> <router-view></router-view> </div></template>
A router-link component renders an a tag by default (you can change that). Every time the route changes, either by clicking a link or by changing the URL, a router-link-active class is added to the element that refers to the active route, allowing you to style it.
In the JavaScript part, we first include and install the router, then we define three route components.
We pass them to the initialization of the router object, and we pass this object to the Vue root instance.
Here’s the code:
<script>import Vue from 'vue'import VueRouter from 'vue-router'
Vue.use(Router)
const Home = { template: '<div>Home</div>'}
const Login = { template: '<div>Login</div>'}
const About = { template: '<div>About</div>'}
const router = new VueRouter({ routes: [ { path: '/', component: Home }, { path: '/login', component: Login }, { path: '/about', component: About } ]})
new Vue({ router}).$mount('#app')</script>
Usually, in a Vue app, you instantiate and mount the root app using:
new Vue({ render: h => h(App)}).$mount('#app')
When using the Vue Router, you don’t pass a render property but instead, you use router.
The syntax used in the above example:
new Vue({ router}).$mount('#app')
is shorthand for:
new Vue({ router: router}).$mount('#app')
See in the example, we pass a routes array to the VueRouter constructor. Each route in this array has a path and component params.
If you pass a name param too, you have a named route.
Using named routes to pass parameters to the router push and replace methods
Remember how we used the Router object to push a new state before?
this.$router.push({ path: 'about' })
With a named route we can pass parameters to the new route:
this.$router.push({ name: 'post', params: { post_slug: 'hello-world' } })
The same goes for replace():
this.$router.replace({ name: 'post', params: { post_slug: 'hello-world' } })
What happens when a user clicks a router-link?
The application will render the route component that matches the URL passed to the link.
The new route component that handles the URL is instantiated and its guards called, and the old route component will be destroyed.
Route guards
Since we mentioned guards, let’s introduce them.
You can think of them as life cycle hooks or middleware. Those are functions called at specific times during the execution of the application. You can jump in and alter the execution of a route, redirecting or simply canceling the request.
You can have global guards by adding a callback to the beforeEach() and afterEach() property of the router.
beforeEach()is called before the navigation is confirmedbeforeResolve()is called whenbeforeEach()is executed and all the componentsbeforeRouterEnterandbeforeRouteUpdateguards are called, but before the navigation is confirmed. The final check.afterEach()is called after the navigation is confirmed
What does “the navigation is confirmed” mean? We’ll see it in a second. In the meantime think of it as “the app can go to that route”.
The usage is:
this.$router.beforeEach((to, from, next) => { // ...})
this.$router.afterEach((to, from) => { // ...})
to and from represent the route objects that we go to and from.
beforeEach has an additional parameter next which if we call with false as the parameter, will block the navigation and cause it to be unconfirmed.
Like in Node middleware, if you're familiar, next() should always be called, otherwise execution will get stuck.
Single route components also have guards:
beforeRouteEnter(from, to, next)is called before the current route is confirmedbeforeRouteUpdate(from, to, next)is called when the route changes but the component that manages it is still the same (with dynamic routing, seenext)beforeRouteLeave(from, to, next)is called when we move away from here
We mentioned navigation. To determine if the navigation to a route is confirmed, Vue Router performs some checks:
- it calls
beforeRouteLeaveguard in the current component(s) - it calls the router
beforeEach()guard - it calls the
beforeRouteUpdate()in any component that needs to be reused, if any exist - it calls the
beforeEnter()guard on the route object (I didn't mention it but you can look here) - it calls the
beforeRouterEnter()in the component that we should enter into - it calls the router
beforeResolve()guard - if all was fine, the navigation is confirmed!
- it calls the router
afterEach()guard
You can use the route-specific guards (beforeRouteEnter and beforeRouteUpdate in case of dynamic routing) as life cycle hooks, so you can start data fetching requests for example.
Dynamic routing
The example above shows a different view based on the URL, handling the /, /login and /about routes.
A very common need is to handle dynamic routes, like having all posts under /post/, each with the slug name:
/post/first/post/another-post/post/hello-world
You can achieve this using a dynamic segment.
Those were static segments:
const router = new VueRouter({ routes: [ { path: '/', component: Home }, { path: '/login', component: Login }, { path: '/about', component: About } ]})
We add in a dynamic segment to handle blog posts:
const router = new VueRouter({ routes: [ { path: '/', component: Home }, { path: '/post/:post_slug', component: Post }, { path: '/login', component: Login }, { path: '/about', component: About } ]})
Notice the :post_slug syntax. This means that you can use any string, and that will be mapped to the post_slugplaceholder.
You’re not limited to this kind of syntax. Vue relies on this library to parse dynamic routes, and you can go wild with Regular Expressions.
Now inside the Post route component we can reference the route using $route, and the post slug using $route.params.post_slug:
const Post = { template: '<div>Post: {{ $route.params.post_slug }}</div>'}
We can use this parameter to load the contents from the back-end.
You can have as many dynamic segments as you want, in the same URL:
/post/:author/:post_slug
Remember before when we talked about what happens when a user navigates to a new route?
In the case of dynamic routes, what happens is a little different.
For Vue to be more efficient, instead of destroying the current route component and re-instantiating it, it reuses the current instance.
When this happens, Vue calls the beforeRouteUpdate life cycle event.
There you can perform any operation you need:
const Post = { template: '<div>Post: {{ $route.params.post_slug }}</div>' beforeRouteUpdate(to, from, next) { console.log(`Updating slug from ${from} to ${to}`) next() //make sure you always call next() }}
Using props
In the examples, I used $route.params.* to access the route data. A component should not be so tightly coupled with the router, and instead, we can use props:
const Post = { props: ['post_slug'], template: '<div>Post: {{ post_slug }}</div>'}
const router = new VueRouter({ routes: [ { path: '/post/:post_slug', component: Post, props: true } ]})
Notice the props: true passed to the route object to enable this functionality.
Nested routes
Before I mentioned that you can have as many dynamic segments as you want, in the same URL, like:
/post/:author/:post_slug
So, say we have an Author component taking care of the first dynamic segment:
<template> <div id="app"> <router-view></router-view> </div></template>
<script>import Vue from 'vue'import VueRouter from 'vue-router'
Vue.use(Router)
const Author = { template: '<div>Author: {{ $route.params.author}}</div>'}
const router = new VueRouter({ routes: [ { path: '/post/:author', component: Author } ]})
new Vue({ router}).$mount('#app')</script>
We can insert a second router-view component instance inside the Author template:
const Author = { template: '<div>Author: {{ $route.params.author}}<router-view></router-view></div>'}
We add the Post component:
const Post = { template: '<div>Post: {{ $route.params.post_slug }}</div>'}
Then we’ll inject the inner dynamic route in the VueRouter configuration:
const router = new VueRouter({ routes: [{ path: '/post/:author', component: Author, children: [ path: ':post_slug', component: Post ] }]})
Thank you for reading!
Get this post PDF/ePub/Kindle ebook at vuehandbook.com