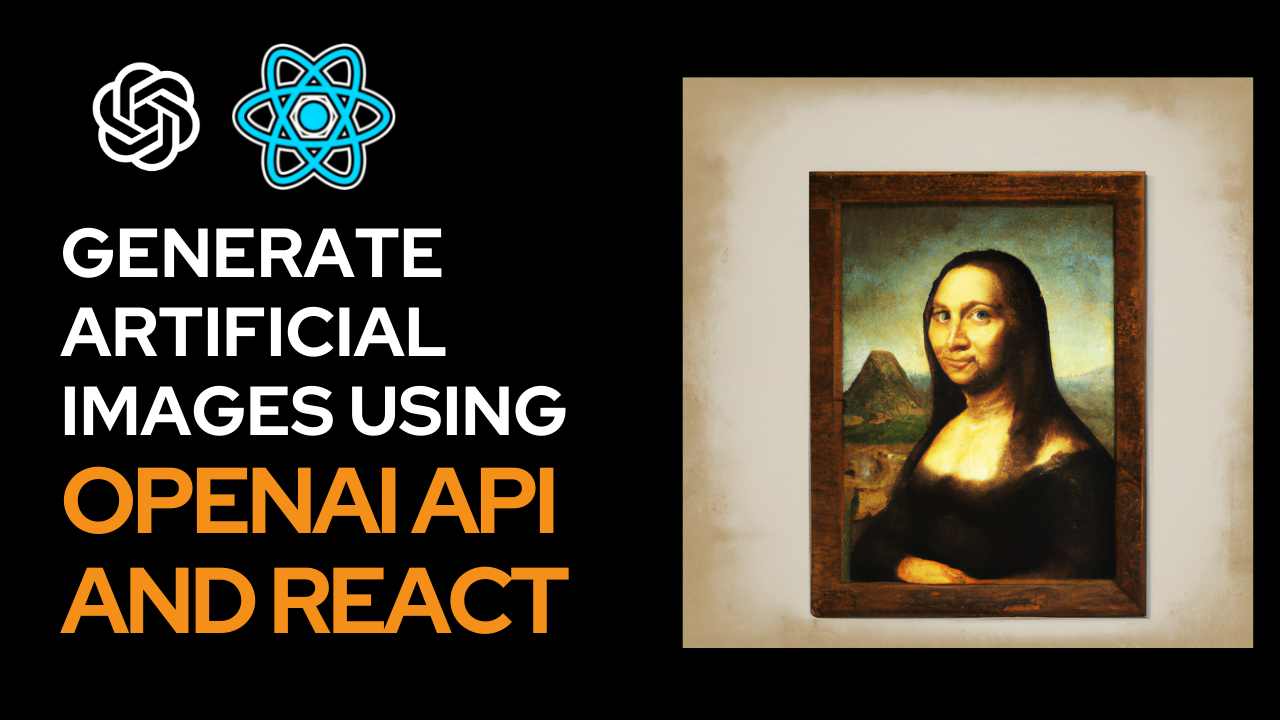
By Nishant Kumar
Hey everyone! OpenAI just released its DALL-E API where users can generate custom images by just typing in a query.
So in this tutorial, you'll learn how to integrate the OpenAI DALL-E 2 API with a React app.
But First, How Does Dall-E Work?
So as you already know, you have to type a query – something like Bears with Paint Brushes in Starry Night, painted by Vincent Van Gogh. This contains so many keywords, like Paint Brushes, Starry Night, and Vincent Van Gogh.
What Dall-E will do is search for these images that are related to the keywords that I just mentioned above. Then it will use Artificial Intelligence to merge all the images into one, and then serve it to us.
Now let’s learn how you can integrate this into your React application to create your own application with these amazing features.
How to Create a React Application
So, create a React application. You can create it with the CRA (create-react-app) command or you can use Vite.
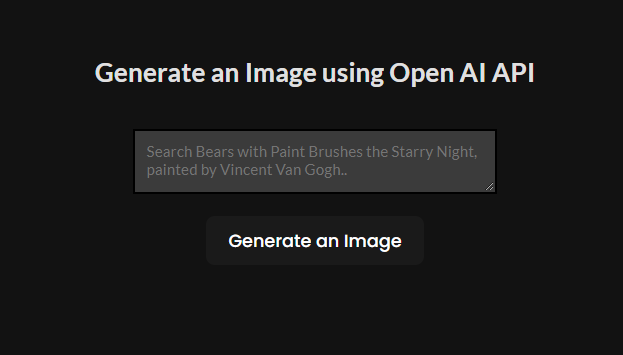
We need a text field and a button as UI components. The text field will be used to get the query from the user and the button to trigger the API request. Let’s also create a state to store the query and a function that will run on the button click.
import { useState } from "react";
import "./App.css";
function App() {
const [prompt, setPrompt] = useState("");
const generateImage = async () => {};
return (
<div className="app-main">
<>
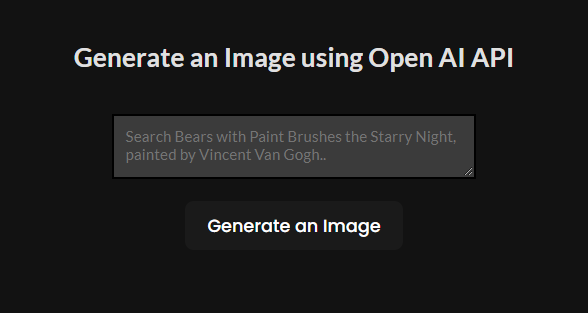
<h2>Generate an Image using Open AI API</h2>
<textarea
className="app-input"
placeholder="Search Bears with Paint Brushes the Starry Night, painted by Vincent Van Gogh.."
onChange={(e) => setPrompt(e.target.value)}
rows="10"
cols="40"
/>
<button onClick={generateImage}>Generate an Image</button>
</>
</div>
);
}
export default App;
Our output will look something like this:
How to Integrate the DALL-E 2 API with the React Application
Let’s see how we can integrate the DALL-E 2 API into our application.
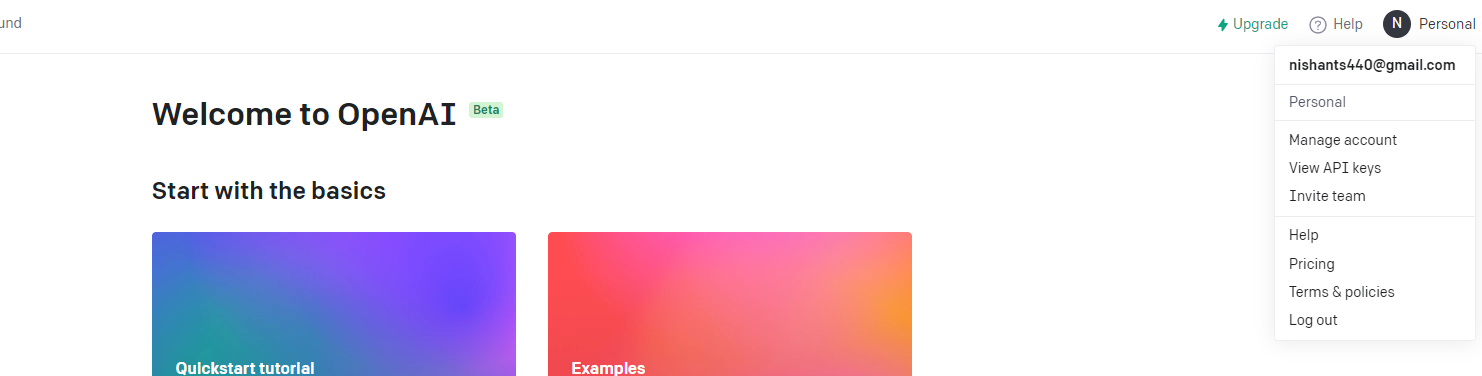
First of all, we need to go to the OpenAI website. You need to sign up to generate an API key. You will also get $18 in your account that you can use.
Choose that you are creating an application while you are signing up.
So after you have created your account, go to the View API Keys section, where you can create your unique API key. Check the below image for reference.
Now in your React App, create a .env file. This is to store the API key.

Add your API key there. Note that the method of getting the key from .env files is different in CRA and Vite React App. So please keep that in mind. I am using Vite, so this is how we do it:
VITE_Open_AI_Key = "Your API Key"
Now that the API key is added, we need to import a few things in our App.js or App.jsx file. These include the Configuration and OpenAIApi from openai SDK. But first, we need to install the openai SDK into the React App.
To install it, just type the command below:
npm install openai
It may take some time to install. Then, import both things that we mentioned earlier like this:
import { Configuration, OpenAIApi } from "openai";
We need to create a configuration variable, which will take the API key from the .env file.
const configuration = new Configuration({
    apiKey: import.meta.env.VITE_Open_AI_Key,
});
Now, we need to pass this configuration instance to the OpenAIApi, and create a new instance for OpenAIApi.
const openai = new OpenAIApi(configuration);
Here is the whole code until now:
import { Configuration, OpenAIApi } from "openai";

import { useState } from "react";
import "./App.css";

function App() {
  const [prompt, setPrompt] = useState("");
  const configuration = new Configuration({
    apiKey: import.meta.env.VITE_Open_AI_Key,
  });

  const openai = new OpenAIApi(configuration);


  return (
    <div className="app-main">
      <>
        <h2>Generate an Image using Open AI API</h2>

        <textarea
          className="app-input"
          placeholder="Search Bears with Paint Brushes the Starry Night, painted by Vincent Van Gogh.."
          onChange={(e) => setPrompt(e.target.value)}
          rows="10"
          cols="40"
        />
        <button onClick={generateImage}>Generate an Image</button>
      </>
    </div>
  );
}

export default App;
Now in the generateImage function, we need to call the OpenAIApi instance that we created before. Remember, the function needs to be asynchronous.
const generateImage = async () => {
    await openai.createImage({
      prompt: prompt,
      n: 1,
      size: "512x512",
    });
  };
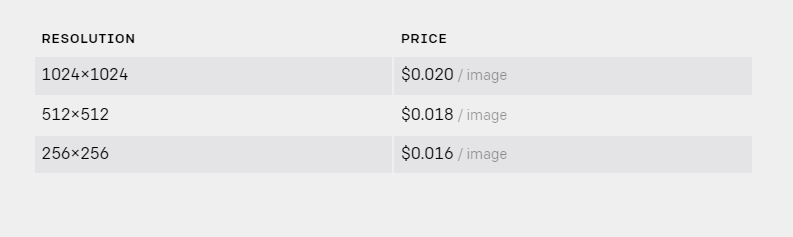
As you can see, we are using openai.createImage. This API is used to create an image using a user query. It also takes n, which is the number of images we want the API to return, and the size of the image.
There are three different image sizes with different prices, which are listed below. If you are using 1024x1024 size, it will cost you $0.020 per image.
Now this openai.createImage returns some response that we can store in a variable. We can then get the generated image link from the response variable.
const generateImage = async () => {
    const res = await openai.createImage({
      prompt: prompt,
      n: 1,
      size: "512x512",
    });

    console.log(res.data.data[0].url);
  };
But let’s not do that. Let’s create one more state to store this image link so that we can view the image in the UI itself.
const [result, setResult] = useState("");

const generateImage = async () => {
    const res = await openai.createImage({
      prompt: prompt,
      n: 1,
      size: "512x512",
    });

    setResult(res.data.data[0].url);
  };
Now the image link will be stored inside the result state. Let's also render the image in the UI. But as the result is initially empty, we can create a check. We will only see the image tag where there is a link inside the state.
{result.length > 0 ? (
          <img className="result-image" src={result} alt="result" />
        ) : (
          <></>
        )}
And here's the styling too:
.result-image {
  margin-top: 20px;
  width: 350px;
}
The UI will now look something like this:
Let's type something and see the output:

In the above example, I have typed A Horse on the Beach with Red Sands. And here is the result.
Let's try something more complex, like Bears with Paint Brushes in Starry Night, painted by Vincent Van Gogh.
Here is the result:
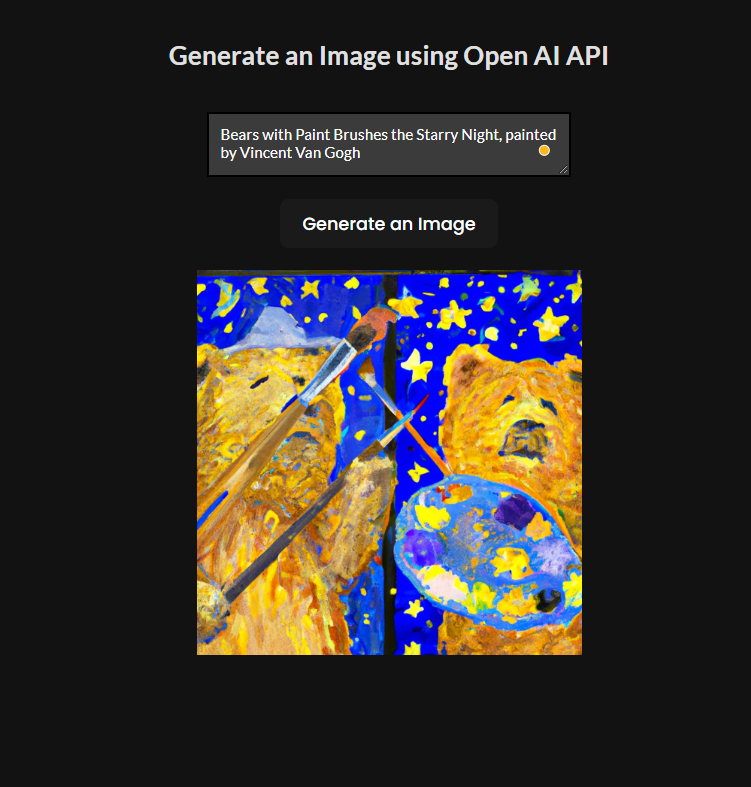
This is how you do it. You can type any input query and it will generate that image through Artificial Intelligence.
Wrapping Up
And that’s all folks. Now you know how to create your own React application with the DALL-E 2 API to generate images using AI. There are a lot more functionalities that you can add. So go ahead and experiment a little.
If you want to see the video version of this, check my video on Generate Images using React and Dall-E API - React and OpenAI API Tutorial on my YouTube channel Cybernatico.
Check the code on GitHub for your reference.
Happy Learning.