
By Anton Garcia Diaz
Millions of people have already shifted from traditional tv to online content, and from traditional malls to online stores. Because of this, e-commerce and marketing teams need to deploy and maintain strong online presences for their businesses.
This usually means running the brand's own online store and having a presence in different marketplaces that cover different regions and population segments. The never-ending list of possible marketplaces in which to showcase, promote, and sell products just gets longer and longer.
To make matters worse, different marketplaces have different requirements and restrictions on images, which can add a burden for the devops and marketing teams. It's also a source of inconsistency in the public image of a brand.
Here, we'll review the main aspects to consider when setting up a clean pipeline for the seamless production of omnichannel images.
A single master image through a single pipeline
To simplify workflows and keep them sustainable, a good practice is to apply the principles of omnichannel to images. This basically means to set a single, easy to configure pipeline for the creation of variants, from the same master or pristine images. Under this approach, we can use the same product image for every channel.
Our pipeline should receive master images and produce the derivatives needed to feed the marketplaces. At a minimum, it should cope with a workflow like this.
Of course, a front-end and cloud storage are not necessary. The pipeline may just work by watching a hot folder and creating the variants as master images land there. We'll also take a look at this.
Image transformation and optimization
Each web channel has its own web design and layout. As for images, this means different and specific aspect ratios. Besides, each marketplace usually has an image policy in place, which limits the resolution and the weight of the image and sets the admissible image format. Usually, it also specifies other style guidelines.
Let's look at the main operations we'll want to accomplish with our pipeline.
Resizing, cropping, padding
To change the aspect ratio of an image we may crop it or pad it. To get a squared image from a vertical one we may cut out the upper and bottom parts or we may fill in the left and right sides with white stripes.
There are open source tools – like ImageMagick – that allow you to perform these operations effectively. Resizing an image with ImageMagick to limit its maximum dimensions to 800 px is as simple as this:
convert input.jpg -resize 800x800 resized.jpg
This instruction respects the aspect ratio. If the original image is not squared, then the resized image has one dimension lower than 800 px. Let's say the image is vertical and we want it for Tmall, which requires a squared image of 800x800 px. Then we may pad it like this:
convert resized.jpg -gravity center -extent 800x800 padded.jpg
Also, we may simply crop it to fit the dimensions:
convert input.jpg -gravity Center -crop 800x800+0+0 +repage crop.jpg
While some marketplaces like Tmall encourage padding images with white stripes and branding them with logos to use them in category pages, others like Amazon or Lamoda forbid this practice.
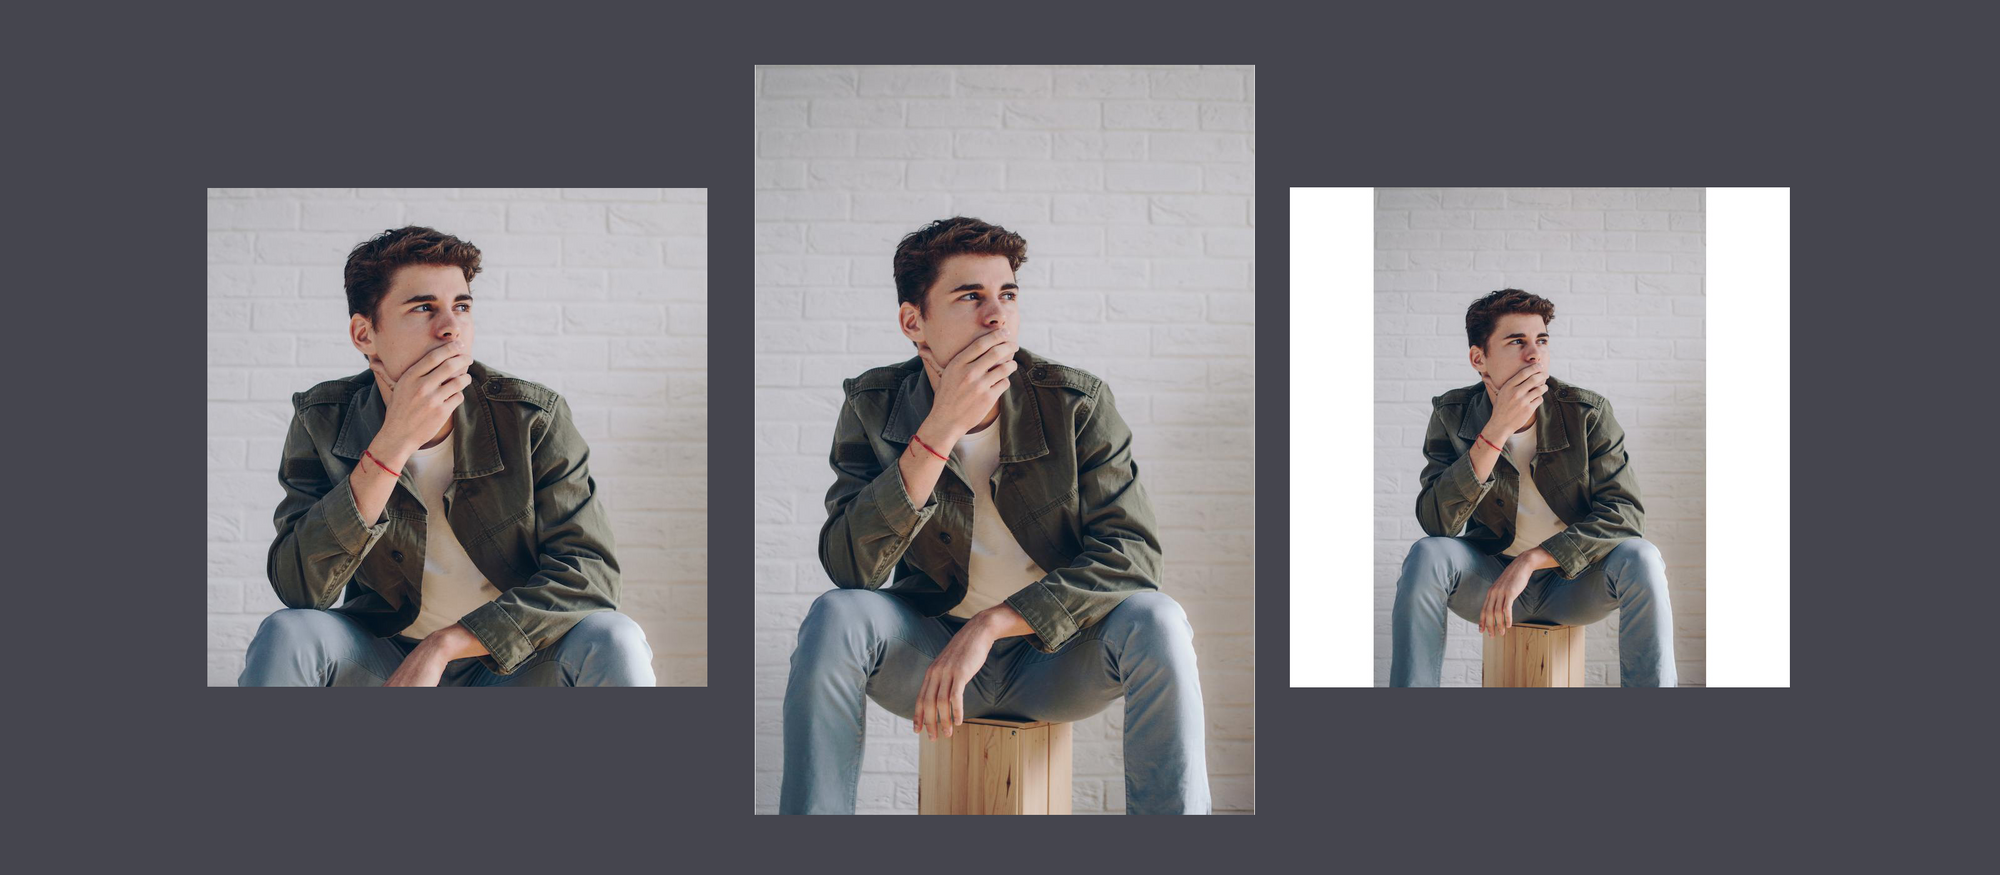 Cropping (left), Resizing (center), Resizing and padding (right)
When we pad an image to match the aspect ratio, we don’t risk cropping out important parts. In fact, padding is a trick to keep the aspect ratio unchanged. However, the risk is real when we crop the image.
So, it is a good practice to ensure in the studio that we comply with some composition requirements set by each channel. We should produce master images with a view of the product compatible with the different aspect ratios that we'll deliver.
Smart cropping
There are algorithms inspired by human attention and aesthetic perception that provide an enhanced protection against bad automatic crops. In the next example, with smart image cropping (white line) we avoid cutting the face unlike a simple center cropping (red line) would do.
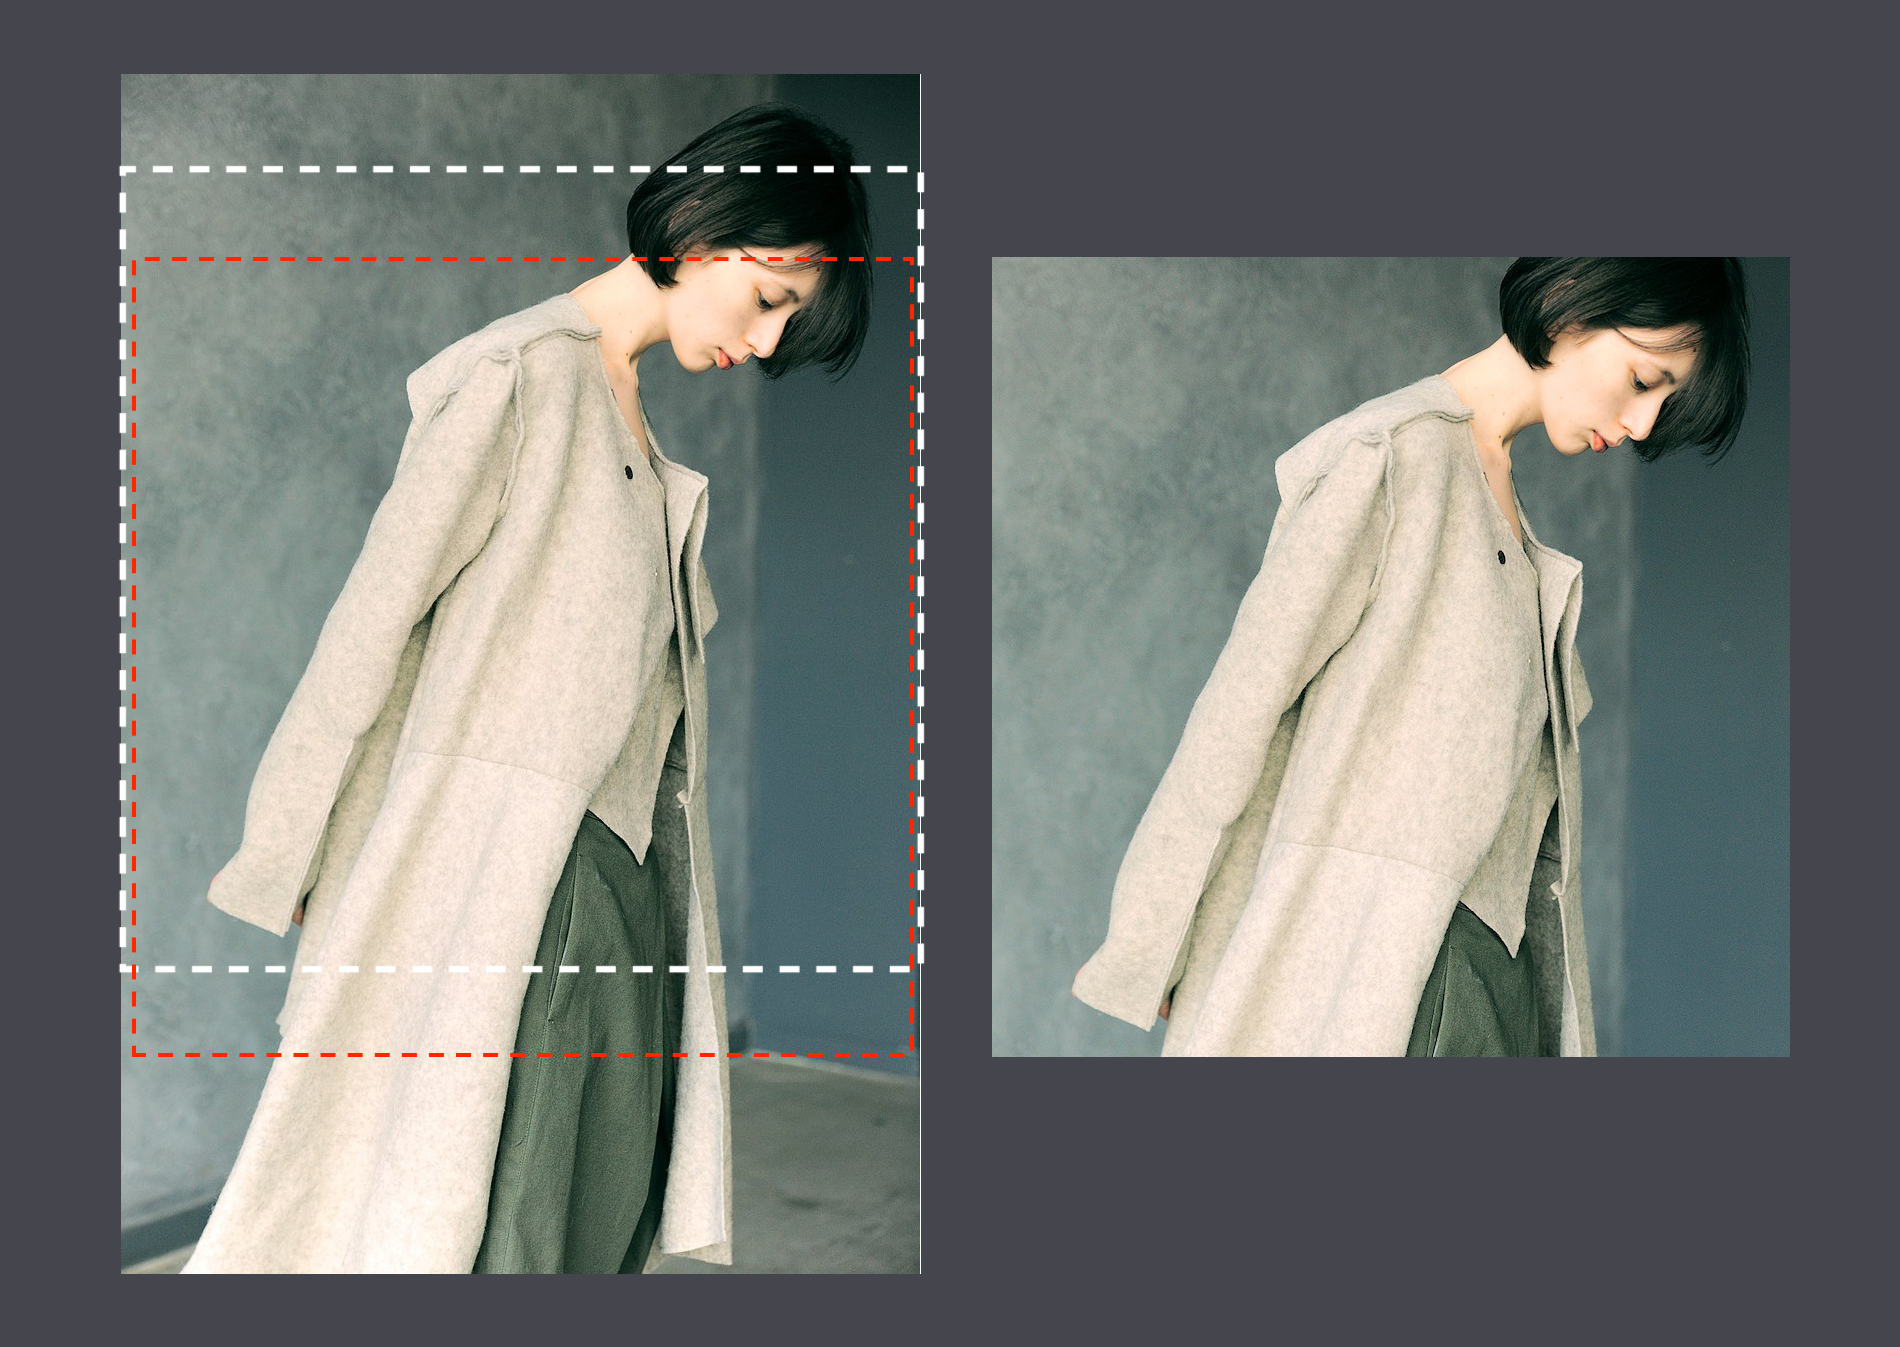 Example of smart cropping with a cloud service vs center cropping
This option is available in some cloud services. If we're going to use it, we should verify that it works properly for us because many solutions only use an attention map and do not consider aesthetic aspects. Usually, choosing a number of representative images, making some tests with them, and finally verifying the results is enough to get a good grasp.
Overlaying logos and text
We may also need to add our brand logo or to add a message to the image by overlaying a vector graphic or a text. Moreover, in many cases we need some content localization strategy in place – like tailoring discounts and language to a market region. Sticking to our example, with ImageMagick we can overlay text on a padded image.
convert -fill black -pointsize 70 -gravity center -draw "rotate -90 text 0,-330 'MyBrandHere'" padded.jpg padded-with-brand.jpg
Once we configure it for one image, we may apply it to any other with the same dimensions.
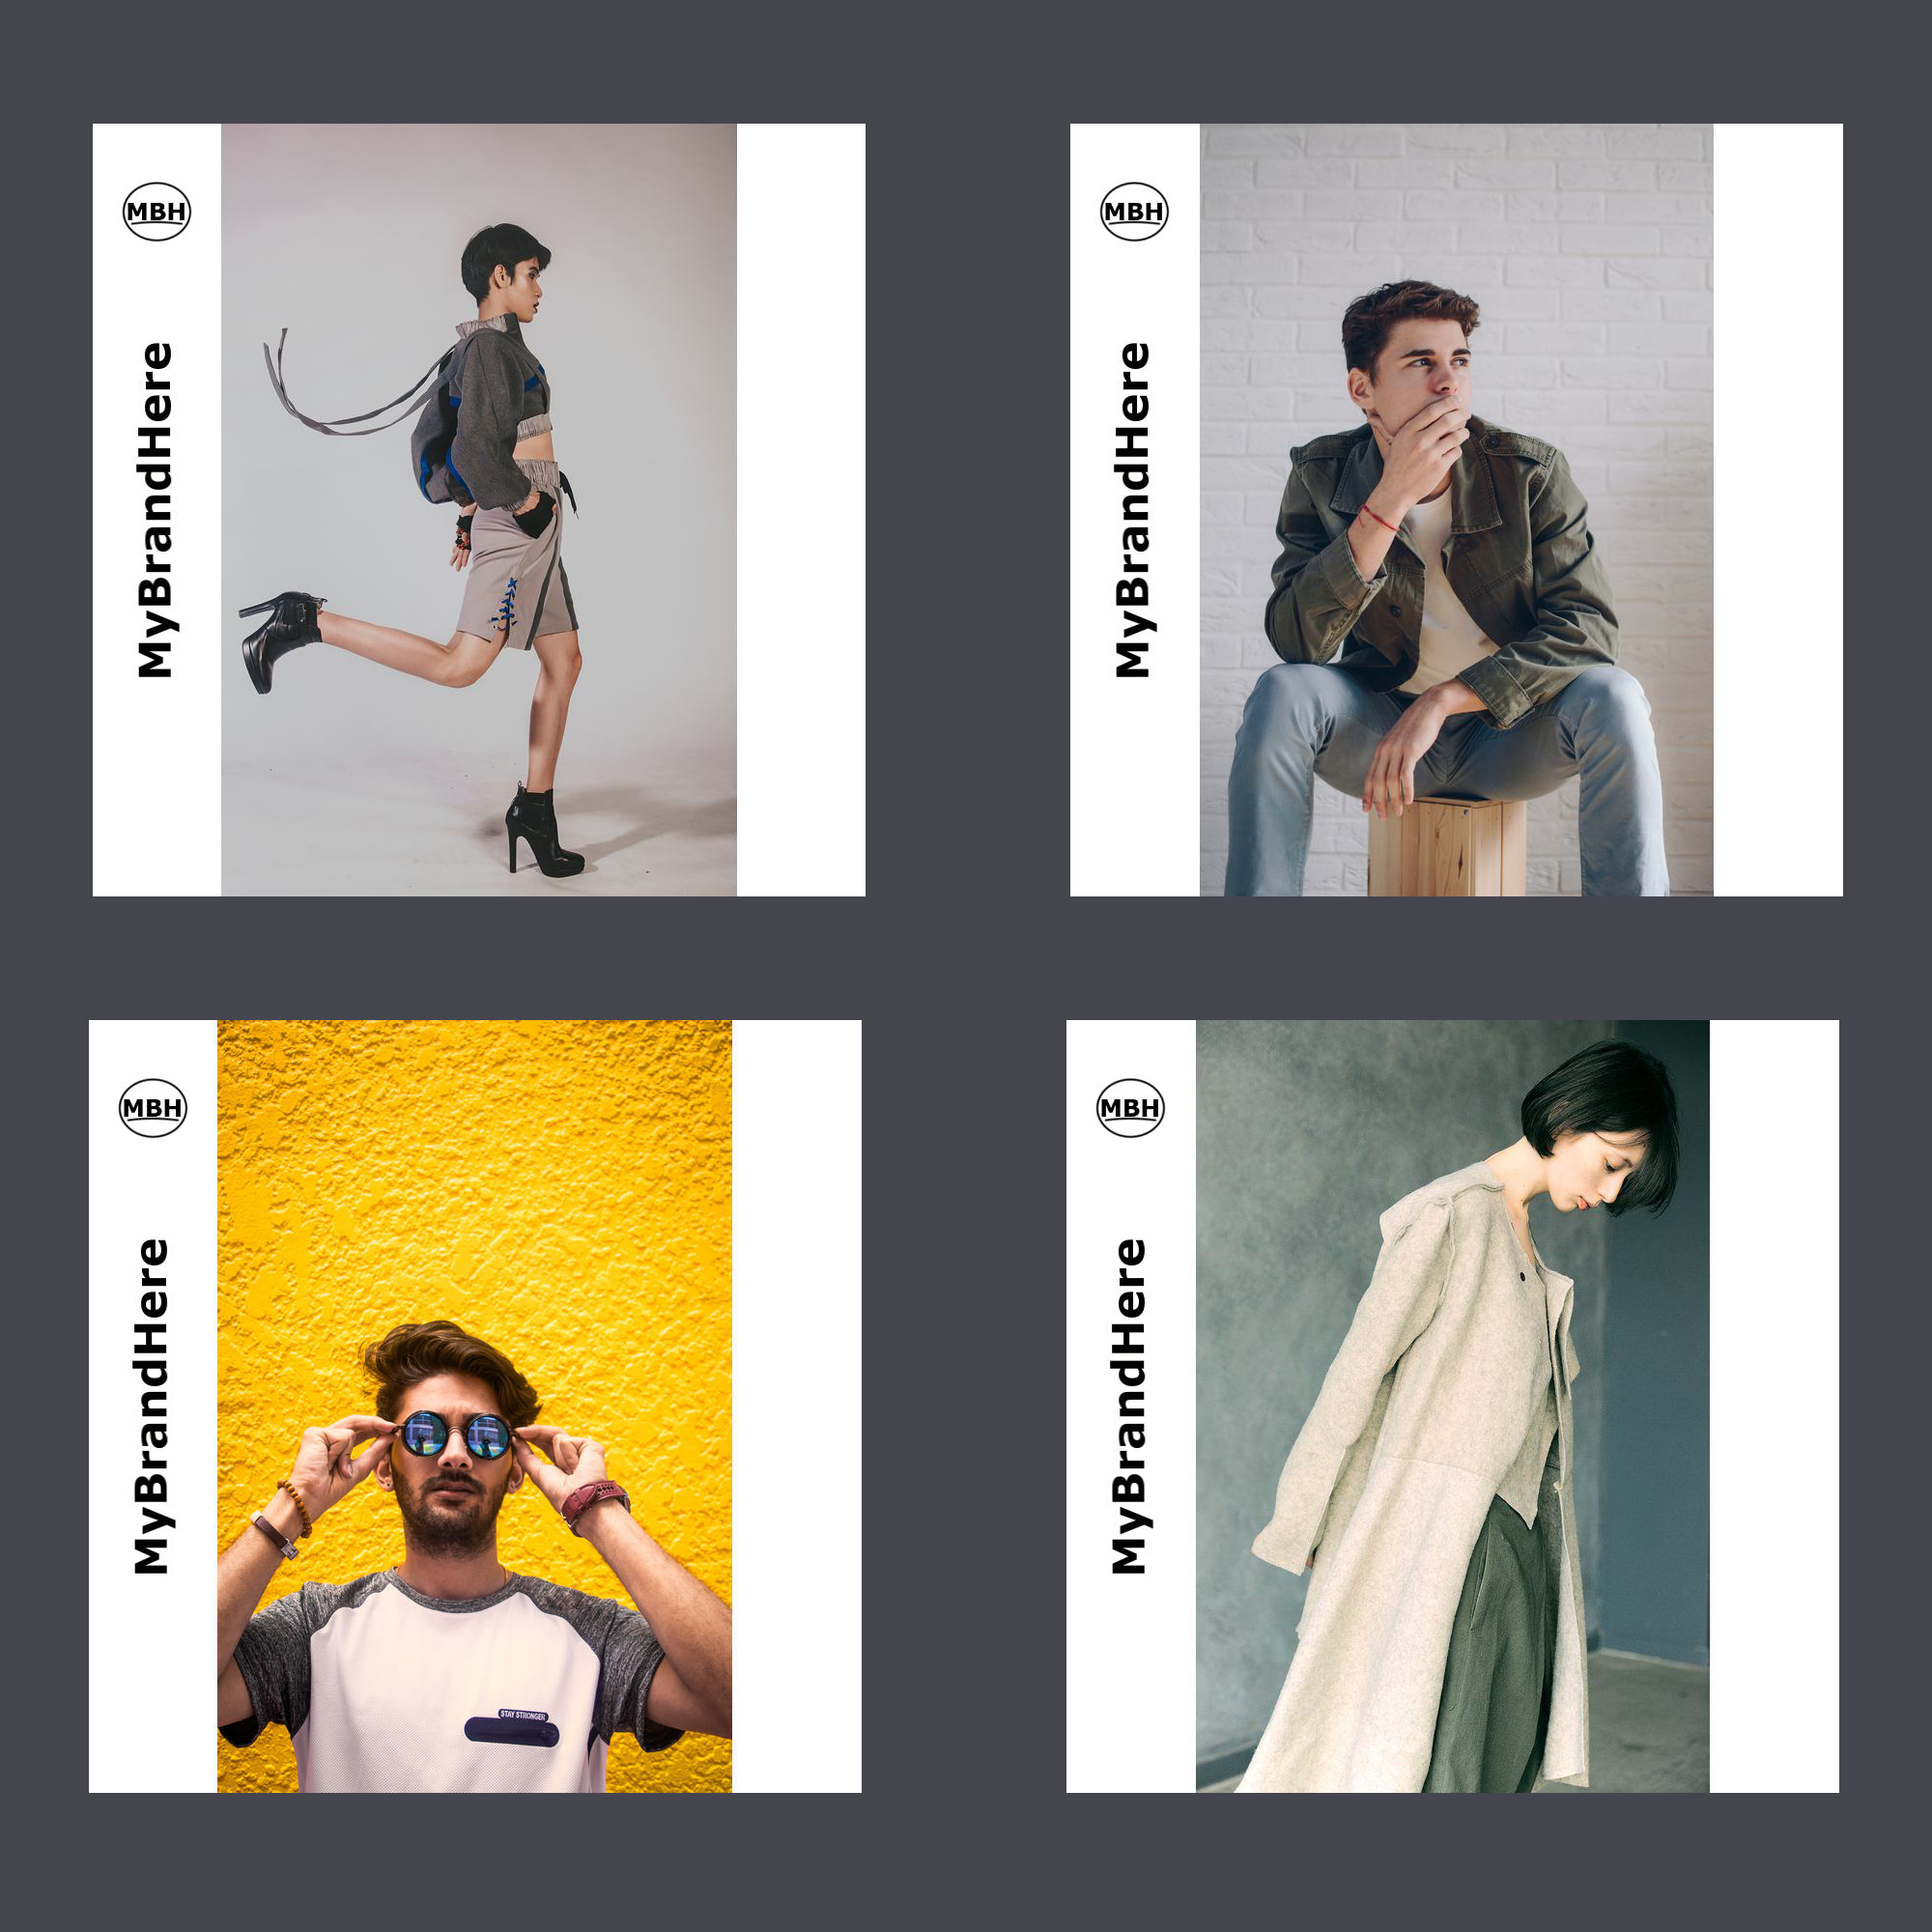 Examples of batch image branding using Abraia's cloud service
Otherwise, handling typographies and different settings may end being tricky in workflows with certain complexity. In this regard, a cloud service usually provides a front-end to make the configuration intuitive and fast, and more convenient to handle. It also deals with other stuff like typographies or quality preservation in image recompression.
The workflows
There are many ways to deploy an image processing pipeline. Depending on the flow rate of images, we may need to support different types of workflows.
Batch processing
In the most simple case – when the flow rate is low – a batch image processing solution may be enough. With ImageMagick, we can use mogrify (instead of convert) to process all the images inside a folder.
In certain cases, like image versions with a text in different languages, we may need to code a script, but that's not a big deal either. To make it even easier, we may use a cloud batch processing tool in which we drop images and it gives us back all the variants we need, like in the video at the beginning of the post.
Hot folders
For in-house deployments where we need something more than simple batch image processing, the use of hot folders may be a good option. In this case, we should set a worker that watches a folder. Any time an image lands the folder the watcher triggers the process that creates all the variants we need.
In this regard, Gulp comes very handy to implement a folder watching pipeline. This GitHub repository brings a ready-to-use implementation of hot folder based on Gulp. It allows us to transform images using Abraia's cloud service or optimize them using Imagemin (an open source solution). Once installed, the watcher is easily started with just one command in the terminal.
$ gulp
This video shows the process at work.
Full cloud
Cloud services usually bring the most flexible and fast-to-deploy solution. Still, there are different ways to go full cloud. In the most simple approach from a user perspective, an image management and optimization service takes charge of the transformation. It also manages the delivery to end users (through a CDN) or other web channels like marketplaces and social networks. The user only needs to upload the master images and to configure the transformations, usually with an intuitive graphic interface.
In medium to large companies that manage their own cloud, services from different providers are usually combined. In this case, we are likely to have to manage private and public buckets. We can have a service accessing a bucket, creating the variants, and delivering the resources or just returning them to a different bucket.
Also, a cloud pipeline may be partially implemented in-house. In this case we have endless possibilities. However, such development effort only makes sense when no service complies with the requirements and there is a justified need for a tailored solution.
Summary
Studio shooting and photography retouching are time-consuming and costly operations. Being able to use the same master material everywhere is very important to keep times and cost under control.
We have reviewed the main aspects of a complete pipeline in charge of creating image variants. On one hand, we looked at the transformations you need to perform from resizing, cropping, or padding, to the overlay of texts and graphics. On the other, we looked at the workflows to implement from batch processing to hot folders or full cloud solutions. We have reviewed some important open source resources (like ImageMagick or Gulp) that make it possible to implement a pipeline you develop yourself.
In the end, there are two main factors to consider when deciding whether to use an in-house or a cloud service. First, you must evaluate your willingness to take on the development effort. Second, you need to decide what features you require, from an easy to use interface for the configuration of variants to advanced features like smart cropping.