

Git and GitHub are two technologies that every developer should learn, irrespective of their field.
If you're a beginner developer, you might think that these two terms mean the same thing – but they're different.
This tutorial will help you understand what Git and version control are, the basic Git commands you need to know, how you can use its features to boost your work efficiency, and how to extend these features using GitHub.
This guide is beginner friendly, as the examples will be very easy to understand. It will also be a generalized tutorial so anyone can follow along no matter what your favorite programming language is.
For our project, we'll make a to-do list written in a text (txt) file. You will see how we can use the features of Git to work on and create a final version of the list.
Prerequisites
In order to complete this tutorial, you'll need the following:
- A command line interface.
- A text editor of your choice (I will be using VS Code).
- A GitHub account.
What is Git?
Git is a version control system which lets you track changes you make to your files over time. With Git, you can revert to various states of your files (like a time traveling machine). You can also make a copy of your file, make changes to that copy, and then merge these changes to the original copy.
For example, you could be working on a website's landing page and discover that you do not like the navigation bar. But at the same time, you might not want to start altering its components because it might get worse.
With Git, you can create an identical copy of that file and play around with the navigation bar. Then, when you are satisfied with your changes, you can merge the copy to the original file.
You are not limited to using Git just for source code files – you can also use it to keep track of text files or even images. This means that Git is not just for developers – anyone can find it helpful.
How to install Git
In order to use Git, you have to install it on your computer. To do this, you can download the latest version on the official website. You can download for your operating system from the options given.
You can also install Git using the command line, but since the commands vary with each operating system, we'll focus on the more general approach.
How to configure Git
I will assume that at this point you have installed Git. To verify this, you can run this command on the command line: git --version. This shows you the current version installed on you PC.
The next thing you'll need to do is to set your username and email address. Git will use this information to identify who made specific changes to files.
To set your username, type and execute these commands: git config --global user.name "YOUR_USERNAME" and git config --global user.email "YOUR_EMAIL". Just make sure to replace "YOUR_USERNAME" and "YOUR_EMAIL" with the values you choose.
How to Create and Initialize a Project in Git
We are finally done with installing and setting up Git. It is now time to create our project.
I have created a folder on my desktop called Git and GitHub tutorial. Using the command line, navigate to your new project's location. For me, I would run the following commands:
cd desktop
cd Git and GitHub tutorial
If you are new to the command line and are still learning how to use it to navigate around your PC, then I would suggest using Microsoft's Visual Studio Code. It is a code editor which has an inbuilt terminal for executing commands. You can download it here.
After installing VS Code, open your project in the editor and open a new terminal for your project. This automatically points the terminal/command line to your project's path.
Now to initialize your project, simply run git init. This will tell Git to get ready to start watching your files for every change that occurs. It looks like this:
 git init
The first line has information about my PC and the path to where the folder exists. The second line is the command git init, and the third line is the response sent back telling me that my repository (repo) has been initialized. It is considered empty because we have not told Git what files to track.
A repository is just another way to define a project being watched/tracked by Git.
Git project files
I have created only one file called todo.txt. This is what the file looks like:
MY TO-DO LIST

1. Write an article.
2. Code.
3. Study books.
4. Attend classes on time.
5. Visit aunt.
6. Apply for remote jobs.
Before we proceed with learning other Git commands, let's talk about GitHub.
What is GitHub?
GitHub is an online hosting service for Git repositories. Imagine working on a project at home and while you are away, maybe at a friend's place, you suddenly remember the solution to a code error that has kept you restless for days.
You cannot make these changes because your PC is not with you. But if you have your project hosted on GitHub, you can access and download that project with a command on whatever computer you have access to. Then you can make your changes and push the latest version back to GitHub.
In summary, GitHub lets you store your repo on their platform. Another awesome feature that comes with GitHub is the ability to collaborate with other developers from any location.
Now that we have created and initialized our project locally, let's push it to GitHub.
If you are a beginner, you will come across some new terms like push, commit, add, and so on – but do not be overwhelmed by them. With some practice you will be able to remember these terms and what they do.
How to push a repository to GitHub
I will divide this section into steps to help you understand the process more clearly.
Step 1 – Create a GitHub account
To be able to use GitHub, you will have to create an account first. You can do that on their website.
Step 2 – Create a repository
You can click on the + symbol on the top right corner of the page then choose "New repository". Give your repo a name then scroll down and click on "Create repository".
Step 3 – Add and commit file(s)
Before we "add" and "commit" our files, you need to understand the stages of a file being tracked by Git.
Committed state
A file is in the committed state when all the changes made to the file have been saved in the local repo. Files in the committed stage are files ready to be pushed to the remote repo (on GitHub).
Modified state
A file in the modified state has some changes made to it but it's not yet saved. This means that the state of the file has been altered from its previous state in the committed state.
Staged state
A file in the staged state means it is ready to be committed. In this state, all necessary changes have been made so the next step is to move the file to the commit state.
You can understand this better by imagining Git as a camera. The camera will only take a snapshot when the file reaches the commit state. After this state, the camera starts comparing changes being made to the same file with the last snapshot (this is the modified state). And when the required changes have been made, the file is staged and moved to the commit state for a new snapshot.
This might be a lot of information to take in at the moment, but do not be discouraged – it gets easier with practice.
How to add files in Git
When we first initialized our project, the file was not being tracked by Git. To do that, we use this command git add . The period or dot that comes after add means all the files that exist in the repository. If you want to add a specific file, maybe one named about.txt, you use git add about.txt.
Now our file is in the staged state. You will not get a response after this command, but to know what state your file is in, you can run the git status command.
How to commit files in Git
The next state for a file after the staged state is the committed state. To commit our file, we use the git commit -m "first commit" command.
The first part of the command git commit tells Git that all the files staged are ready to be committed so it is time to take a snapshot. The second part -m "first commit" is the commit message. -m is shorthand for message while the text inside the parenthesis is the commit message.
After executing this command, you should get a response similar to this:
 git commit
Now our file is in the committed state.
Step 4 – Push the repository to GitHub
After you create the repo, you should be redirected to a page that tells you how to create a repo locally or push an existing one.
In our case, the project already exists locally so we will use commands in the "…or push an existing repository from the command line" section. These are the commands:
git remote add origin https://github.com/ihechikara/git-and-github-tutorial.git
git branch -M main
git push -u origin main
The first command git remote add origin [https://github.com/ihechikara/git-and-github-tutorial.git](https://github.com/ihechikara/git-and-github-tutorial.git) creates a connection between your local repo and the remote repo on Github.
The URL for your remote project should be entirely different from the one above. So to follow along, make sure you are following the steps and working with your own remote repo. You won't usually get a response after executing this command but make sure you have an internet connection.
The second command git branch -M main changes your main branch's name to "main". The default branch might be created as "master", but "main" is the standard name for this repo now. There is usually no response here.
The last command git push -u origin main pushes your repo from your local device to GitHub. You should get a response similar to this:
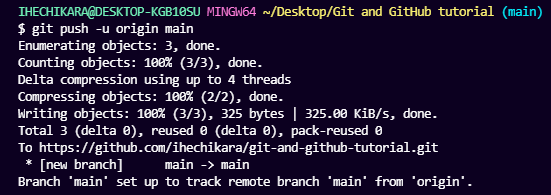 git push
To help you deepen your understanding of file stages, I will make changes to the file and then push the new version to GitHub.
Recall that our file is now in the committed state. Let's make changes to the file and take note of the states.
I am going to add a new task to the to-do list:
MY TO-DO LIST

1. Write an article.
2. Code.
3. Study books.
4. Attend classes on time.
5. Visit aunt.
6. Apply for remote jobs.
7. Practice code
After adding the new task, run the git status command. This is what you should see:
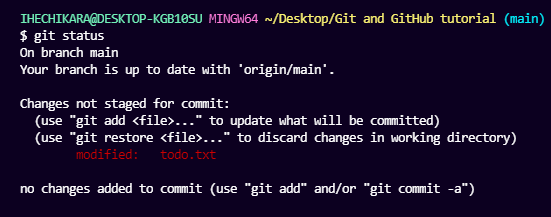 git status
After making changes to the file, it moved to the modified state – but it's not yet staged for commit, so you can't push it to GitHub yet. Git has not taken a final snapshot of this current state as it's only comparing the changes we have made now with the last snapshot.
Now we are going to add (stage) this file and then commit and push it. This is the same as in the last section.
We first add the file by using git add . which adds all the files in the folder (one file in our case). Then we commit the file by running git commit -m "added new task" followed by git push -u origin main.
Those are the three steps to pushing your modified files to GitHub. You add, commit, and then push. I hope you now understand file stages and the commands associated with them.
How to Use Branches in Git
With branches, you can create a copy of a file you would like to work on without messing up the original copy. You can either merge these changes to the original copy or just let the branch remain independent.
Before we go into using branches, I want to show you a visual representation of our repo which looks like this:
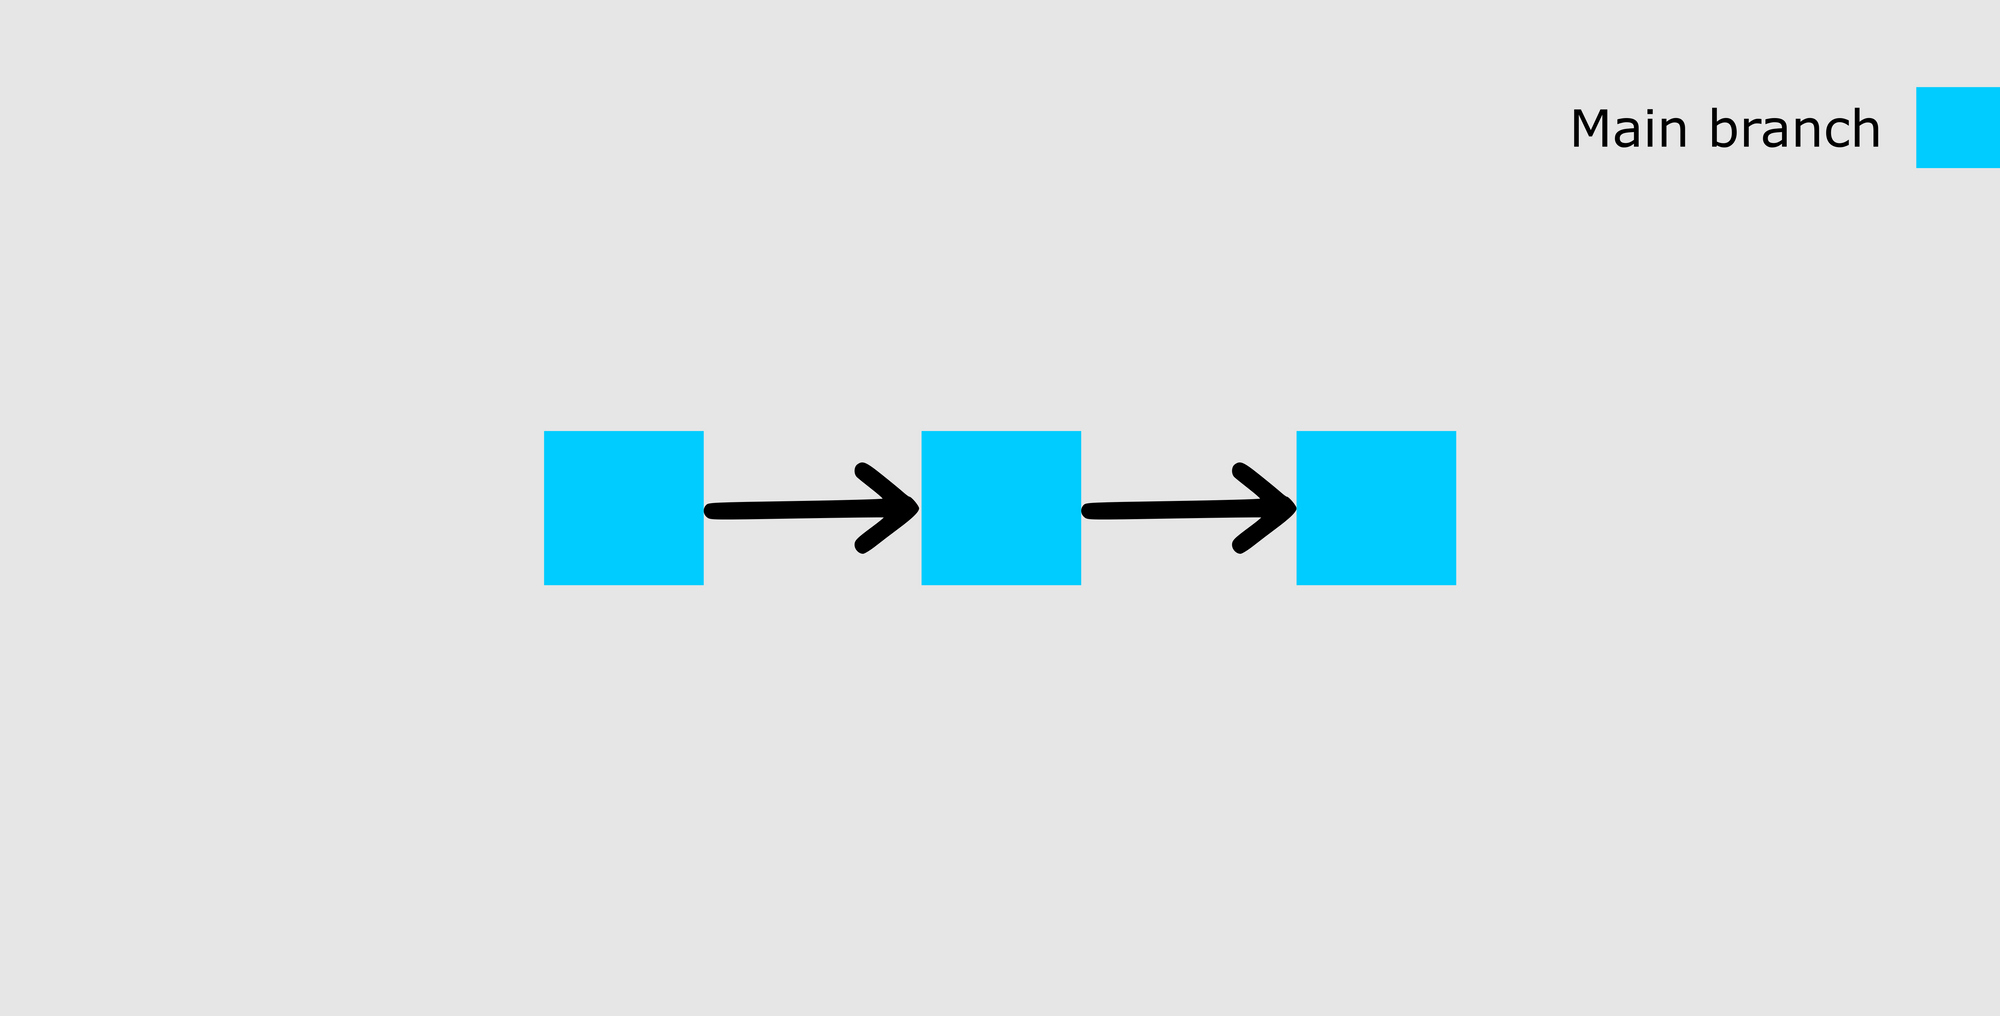 main banch
The image above shows our main branch with the last two commits (the first commit and the added new task commit).
At this point, I want to add more tasks to the list but I am not yet sure whether I want them on my main list. So I will create a new branch called test to see what my list would look like with more tasks included.
To create a new branch, run this command: git checkout -b test. I will break it down.
checkout tells Git it is supposed to switch to a new branch. -b tells Git to create a new branch. test is the name of the branch to be created and switched to. Here is the response you should get:
 git checkout -b
Now that we have a new branch created, this is what our repo will look like:
 git branch
We created the new branch from the state of our last commit. Let's now add more tasks to this new branch.
MY TO-DO LIST

1. Write an article.
2. Code.
3. Study books.
4. Attend classes on time.
5. Visit aunt.
6. Apply for remote jobs.
7. Practice code
8. Complete internship task.
9. Practice chess openings.
10. Solve chess puzzles.
11. Check exam schedule.
I have added four new tasks. To merge the new state to the main branch, you have to first stage and commit this branch. I will not go into details about how to do this as we did it twice in the last section.
You should try doing it yourself so you understand how it works. As a hint, add the file and then commit with a message (refer to the previous section for details showing you how to do that).
After committing your test branch, switch back to the main branch by running this command: git checkout main.
Did you notice that we did not add -b ? This is because we are not creating a new branch but rather switching to an existing one. You can check all the branches that exist in your repo by running the git branch command.
Now we can merge the changes we made in the test branch into the main branch by running git merge test. At this point, you will see all the changes made in the test branch reflected on the main branch. You should also receive a response similar to this:
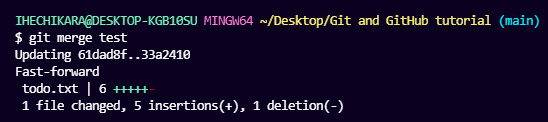 git merge
Here is a visual representation of our repo:
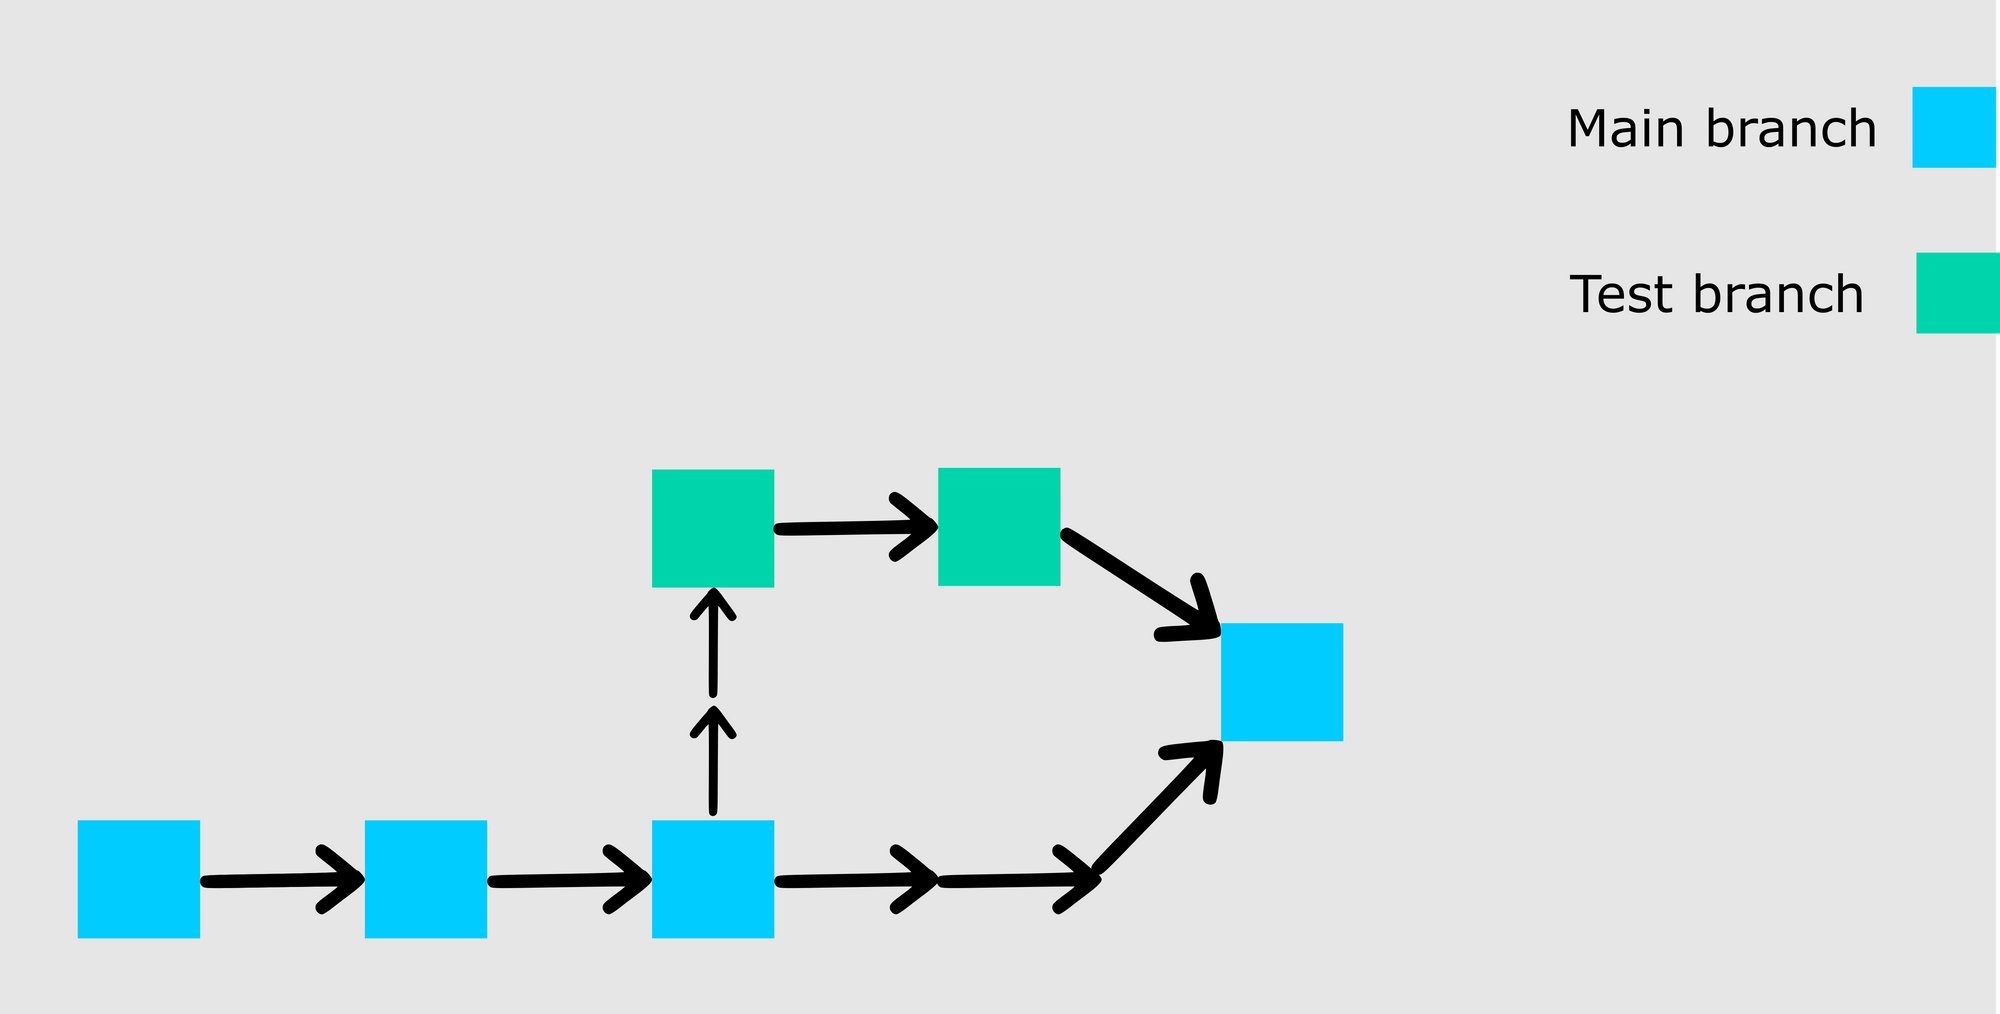 git merge
If you go on to push your repo to GitHub, you'll see that the test branch will not be pushed. It will only remain in your local repo. If you would like to push your test branch, switch to the branch using git checkout test and then run git push -u origin test.
How to Pull a Repository in Git
To pull in Git means to clone a remote repository's current state into your computer/repository. This comes in handy when you want to work on your repo from a different computer or when you are contributing to an open source project online.
To test this, don't worry about switching to a new computer. Just run cd .. to leave the current directory and go back one step. In my own case, I have navigated back to my desktop.
Go to GitHub, and on your repository's main page you should see a green button that says "Code". When you click on the button, you should see some options in a dropdown menu. Go on and copy the HTTPS URL.
After that, run git clone YOUR_HTTPS_URL. This command pulls the remote repository into your local computer in a folder called git-and-git-tutorial. That is:
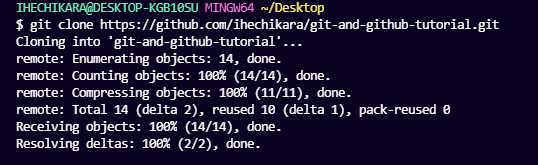 git clone
Conclusion
This article covered the basic commands that'll help get you started using Git. We also started learning how to use GitHub.
If you have followed up to this point then congratulations, you are good to go. You can now use Git in your projects no matter what programming language you are using.
You should know that these are not all the commands that exist in Git – so feel free to do more research to learn more commands and their uses. This article and this cheat sheet are great places to start. This is a great place to see a detailed list of more Git commands.
Find me on Twitter @ihechikara2. Happy coding!