
By Preethi⚡
Hey friends, have you ever been working in Git and found yourself wondering if you're going to stage the correct changes?
Or maybe you want to see what changes you're going to commit compared to your last commit. Perhaps you want to see the differences between two branches, commits, or files.
These are common issues and tasks when working with a version control system. Fortunately, you can verify all this using the Git diff command.
I know you're probably concerned with your time, so let's get this ride on the road.
And don't worry – I will teach you each command with a fun example. Just start to read the article cheerfully.
git diff – the Universal diff Command
git diff lists out the changes between your current working directory and your staging area.
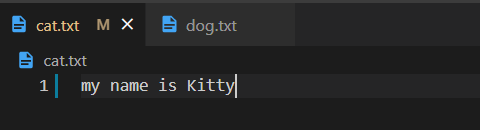
Let's take an example: I created a Git repository which is cat_vs_dog. No, it's not a formal repo, but it's quite serious 😉. Then I created cat.txt and dog.txt.
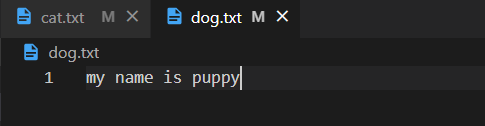
They introduce themselves with their names – like this:
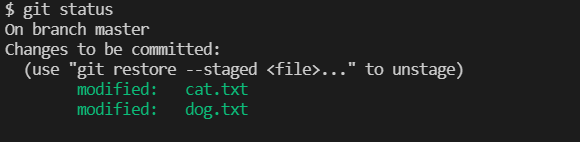
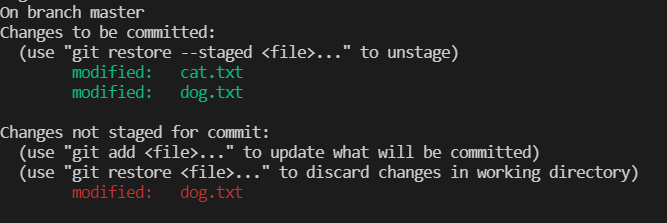
Then we move this change to the staging area using git add cat.txt dog.txt. Want to confirm? Then use git status, which shows which changes are ready to commit like below:
Then, let's say I want to make some changes to the dog's name – like I wish to call it "pup" instead of "puppy".
Before that, if I run the git diff command, it shows nothing. Can you guess why? If you can't, that's completely fine. Just continue to travel with me and pause on this for a few seconds.
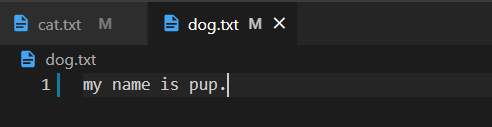
Now, I changed "puppy" to "pup". It's cool to call it pup.
Prior to staging them, I wish to see that what I changed in my current working directory (that is the current working folder) compares with the staged changes.
To do this, I run the git diff command. Now you can see their differences below.
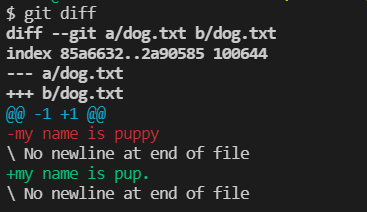
This kinda makes sense, but it's also a little weird, right? Don't be scared, I am here to teach you about each line of diff's outcome.
Earlier, we ran the git diff command which shows nothing. Because git diff shows the difference between changes in your working directory and staged area. But, we didn't change anything in the working directory after we staged the changes. So, there is nothing different while compared with the staged area. I hope that makes sense.
Understanding git diff's Results – Line by Line
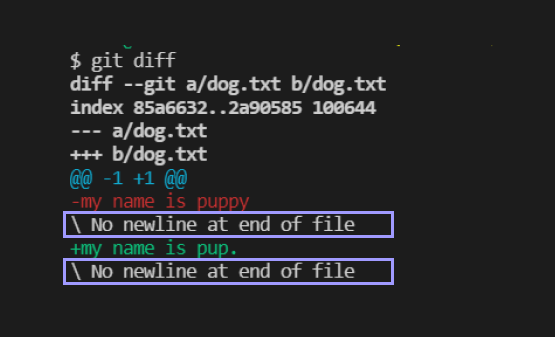
Line 1 – It's two versions of the same file. Git named it A for the 1st version and B for the 2nd version.
- A – Old version of file
- B – New version of file
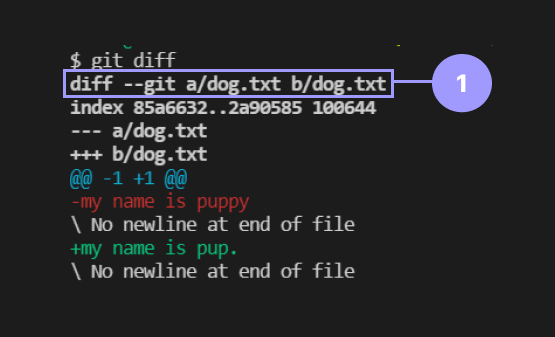
Line 2 – Meta data about the file which is not super useful to your life. The first two hashes are concerned with two files that are compared. 100644 is an internal file mode identifier.
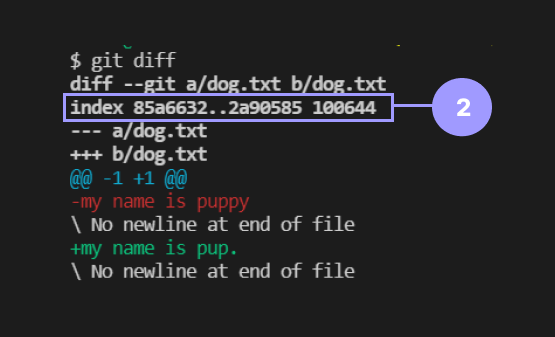
Line 3 – Git assigned a minus sign (-) to the A version of the file and a plus sign (+) to the B version of the file.
Line 4 – Git normally shows a chunk of lines that has been modified, not the entire file.
- The line starting with the (-) symbol came from the A version
- The line starting with the (+) symbol came from the B version
Except the modified lines, which also include some lines of code before and after that chunk to show the context.
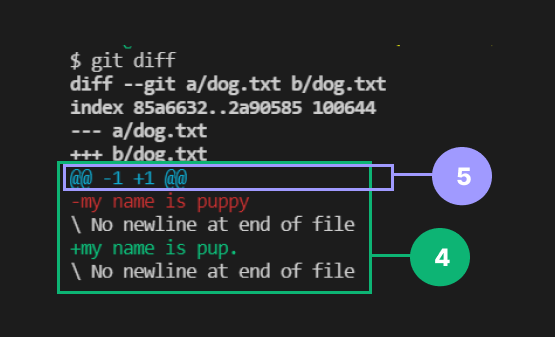
Line 5 – Every chunk starts with a Chunk header. The chunk header will be identified by @@ (at the start and end). Then, there are two sets of numbers. Can you see the -1 and +1?
- -1 means from the A version file, extracting one line starting at line 1.
- +1 means from the B version file, extracting one line starting at line 1.
If the sets look like -3,4 +3,2, then:
- -3,4 means from A version file, extracting four lines starting from line 3.
- +3,2 means from B version file, extracting two lines starting from line 3.
No newline at the end of the file – The text says that there are no lines after those modified lines. This means that, in the above example, I added only one line and I modified the same line. So, there are no more lines after that.
That's why it displays "No newline at end of file" in the diff's outcome. Hope you get my point.
Celebration time
Take a tiny second to celebrate your cognitive effort. Because you've already gotten your hands dirty with diff's outcome. Now, you have a strong foundation so you can start to learn more commands with a smile....

How to Compare Staged Changes in Git
Before you commit your changes, you can compare the staged changes with the last commit. You can do this by adding a single flag --staged or --cached. I love --staged because it makes sense. If you prefer --cached, that's good, too.
Let me explain it through an example. First we commit our staged changes in our cat_vs_dog repo. If you can't remember what we staged, they introduced themselves as kitty and puppy.
There we wanted to make a change – that is, we wished to change the "puppy" to "pup" which is not staged.
Fine, first we commit the staged changes by git commit -m "intro to cat and dog":
Now, stage the "puppy" to "pup" change. Then, run the git diff --staged command which lists out the changes between the staged area and your last commit.
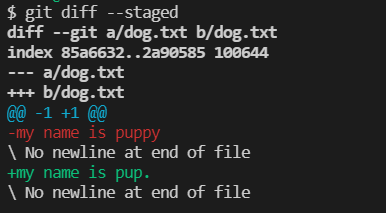
- A version – last commit containing the line
my name is puppyindog.txt - B version – staging area which differed from the last commit. Like "puppy" to "pup" in
dog.txt.
From the diff's outcome, we cleared with what we modified and staged – "my name is puppy" from A version and "my name is pup" from B version.
I hope you're now able to compare the changes and recognize what we changed by looking at the diff's outcome. diff is a super powerful command that lets you compare changes in lots of ways.
4 Diff Comparisons You Need to Know
You can run the git diff HEAD command to compare the both staged and unstaged changes with your last commit.
You can also run the git diff <branch_name1> <branch_name2> command to compare the changes from the first branch with changes from the second branch. Order does matter when you're comparing branches. So diff's outcome will change depending on the order.
Top Tip: Branch comparison considers the commits only. It doesn't look for staged and unstaged changes.
You can run git diff <commit_hash> <commit_hash> the command to compare the changes between two commits. Like branch comparison, order does matter in comparing commits.
You can run the below commands to compare the changes for specific file:
git diff HEAD <file_name>git diff <file_name>git diff --staged <file_name>orgit diff --cached <file_name>,git diff <branch_name1> <branch_name2> <file_name>git diff <commit_hash> <commit_hash> <file_name>
Conclusion
I hope this article helps you make your next commit or staging more accurate. Your mindset is important when working with Git commands. Handle it with confidence and you can learn from any mistakes.
If you find anything that needs to be updated in this tutorial, feel free to ping me😜.