

Golang is an awesome, simple, modern, and fast programming language.
It’s compiled, open source, and strongly typed.
Golang – also called Go – was created by Google engineers with these main goals:
- make their projects compile (and run) faster
- be simple so people can pick it up in little time
- be low level enough but also avoid some pitfalls of being too low level
- be portable (compiled Go programs are binaries that do not require other files to run and are cross-platform, so they can be distributed easily)
- be boring, stable, predictable, offer less opportunities to make mistakes
- make it easy to take advantage of multiprocessor systems
Go was meant to be a replacement for C and C++ codebases. It aims to make some things simpler like concurrency and memory management, with garbage collection.
Also, it was built to work along with C and C++ codebases, thanks to its C interoperability features.
You can use Go for many different tasks, and it can solve both simple problems and very complex ones.
You can use Go to create command line utilities and networking servers, and it's widely used in many different scenarios.
For example, Docker and Kubernetes are written in Go.
My favorite Static Site Generator (Hugo) is written in Go.
Caddy, a quite popular web server, is written in Go.
There’s lots of different, widely used tools that use this programming language under the hood.
This handbook will introduce you to the Go programming language so you can get started coding in Go.
You can get a PDF and ePub version of this Go Beginner's Handbook here.
Table of Contents
- How to get started with Go
- How to install Go
- How to setup your editor
- How to write Hello, World! in Go
- How to compile and run a Go program
- The Go workspace
- Diving into the Go language
- Variables in Go
- Basic types in Go
- Strings in Go
- Arrays in Go
- Slices in Go
- Maps in Go
- Loops in Go
- Conditionals in Go
- Operators in Go
- Structs in Go
- Functions in Go
- Pointers in Go
- Methods in Go
- Interfaces in Go
- Where to go from here
How to Get Started with Go
Here are a few things you should know before we dive into the specifics of the language.
First, https://go.dev is the homepage of the language. This will be your go-to resource to:
- Download the Go binaries (the
gocommand and other related tools) from https://go.dev/doc/install - Reference the official Go documentation https://go.dev/doc/
- See all the the Go packages https://pkg.go.dev/
- Access the Go Playground https://go.dev/play/
…and more.
How to Install Go
Go to https://go.dev/doc/install and download the package for your Operating System.
Run the installer, and at the end of the process you will have the go command available in your terminal:
 Welcome to the Go installer
 Successful installation modal
Open the terminal and run go version and you should see something like this:
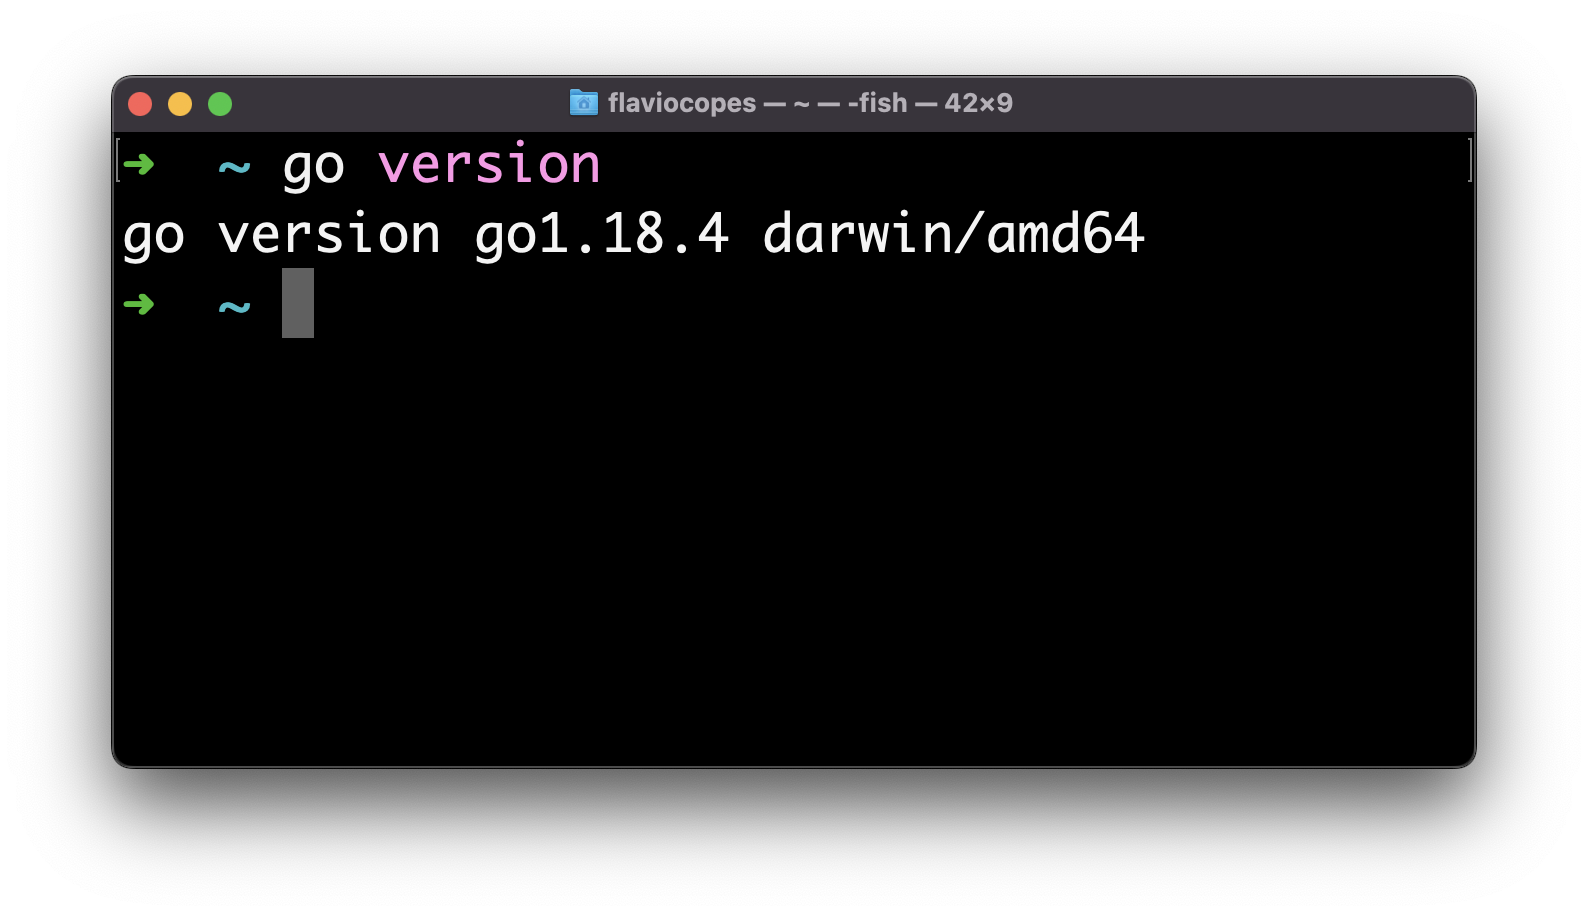 Displaying the Go version you have
NOTE: you might have to open a new terminal before you can run the program, as the installer added the Go binaries folder to the path.
The exact location of the Go installation files will depend on your Operating System.
On macOS, it’s under /usr/local/go, with binaries in /usr/local/go/bin.
On Windows, it will be under C:\Program Files\go.
The Windows and Mac installers will set the Go binaries path automatically.
On a Mac you might also want to install Go via Homebrew using brew install golang. This will make it easier to update later.
On Linux you will have to add the Go binaries folder to your terminal path before you can run the go command after unpackaging the Linux package to /usr/local/go with this command:
echo 'export PATH=$PATH:/usr/local/go/bin' >> $HOME/.profile
source $HOME/.profile
How to Setup Your Editor
I recommend using Visual Studio Code (aka VS Code) as your editor.
Read Go in Visual Studio Code for a quick “up and running” setup. At the bare minimum, install the Go extension.
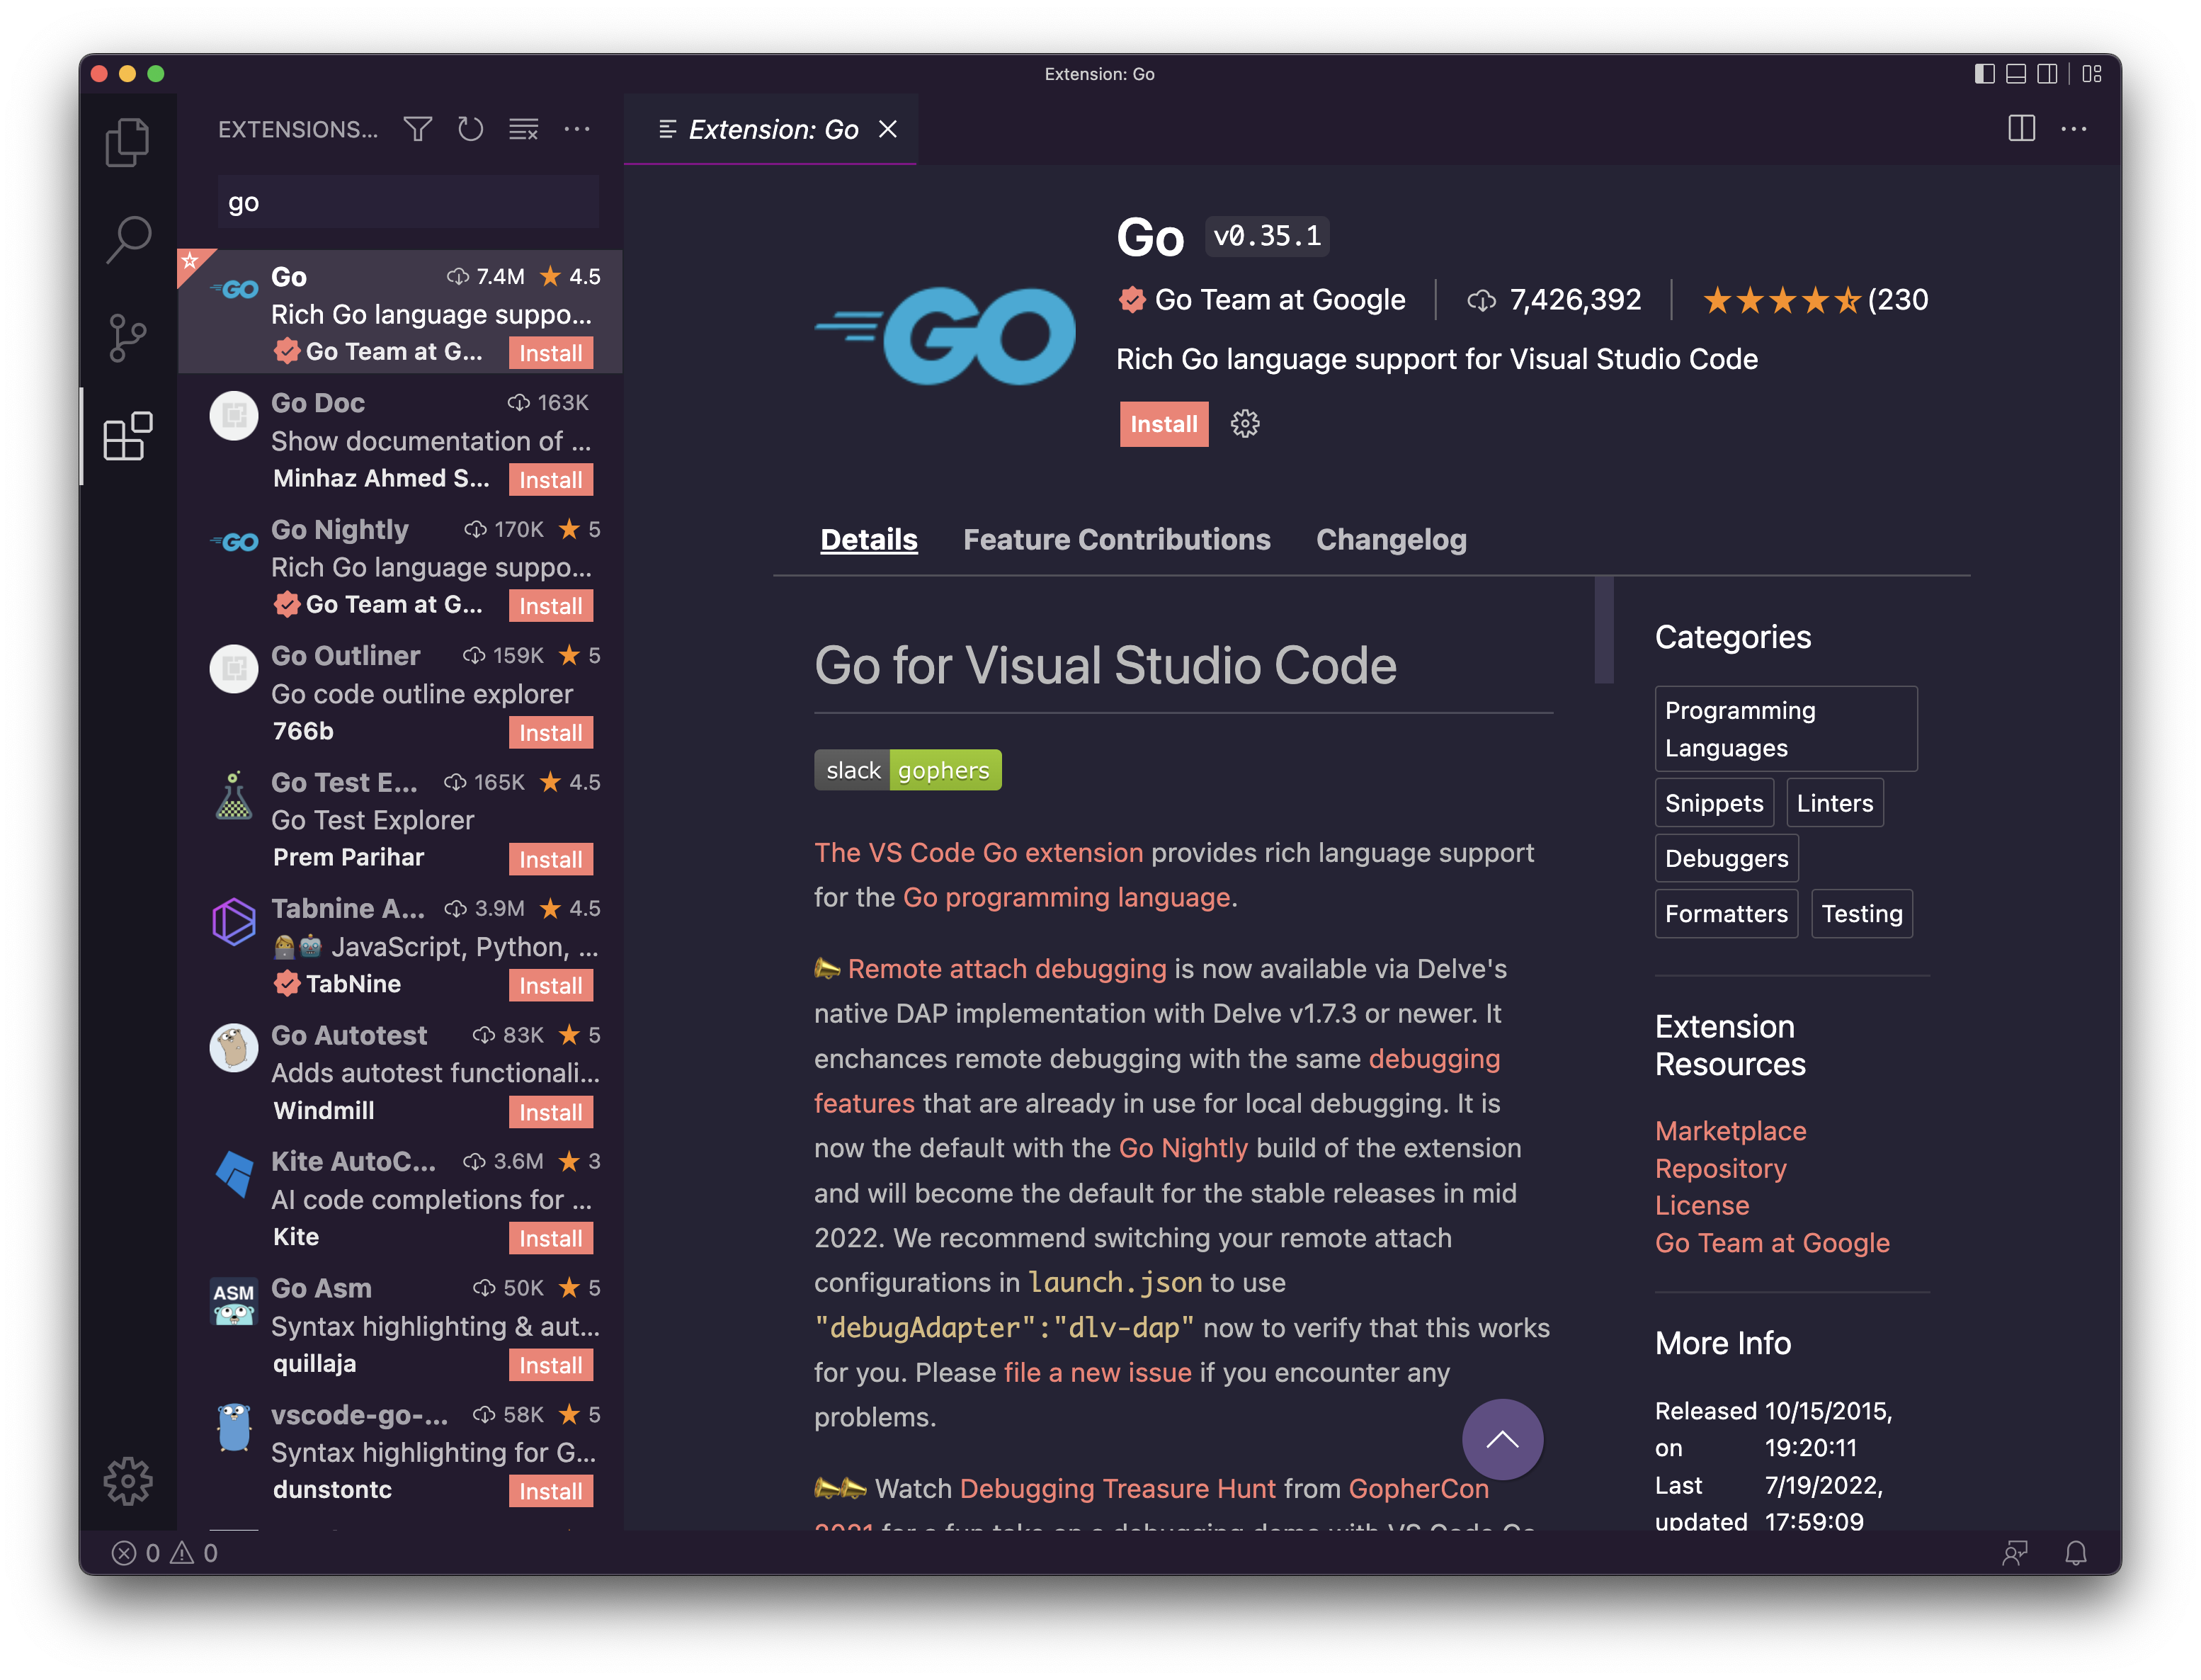 Go extension for VSCode
This extension will make your life easier, as it provides IntelliSense (syntax highlighting, autocompletion, on hover information, error highlighting…) and other things like auto formatting, menu options to install packages, testing, and more.
How to Write Hello, World! in Go
Now we’re ready to create our first Go program!
It’s a programmer's tradition to make the first program print the “Hello, World!” string to the terminal when it’s run. So we’ll do that first, and then we’ll explain how we did it.
Maybe you have a folder in your home directory where you keep all your coding projects and tests.
In there, create a new folder, for example call it hello.
In there, create a hello.go file (you can name it as you want).
Add this content:
package main

import "fmt"

func main() {
    fmt.Println("Hello, World!")
}
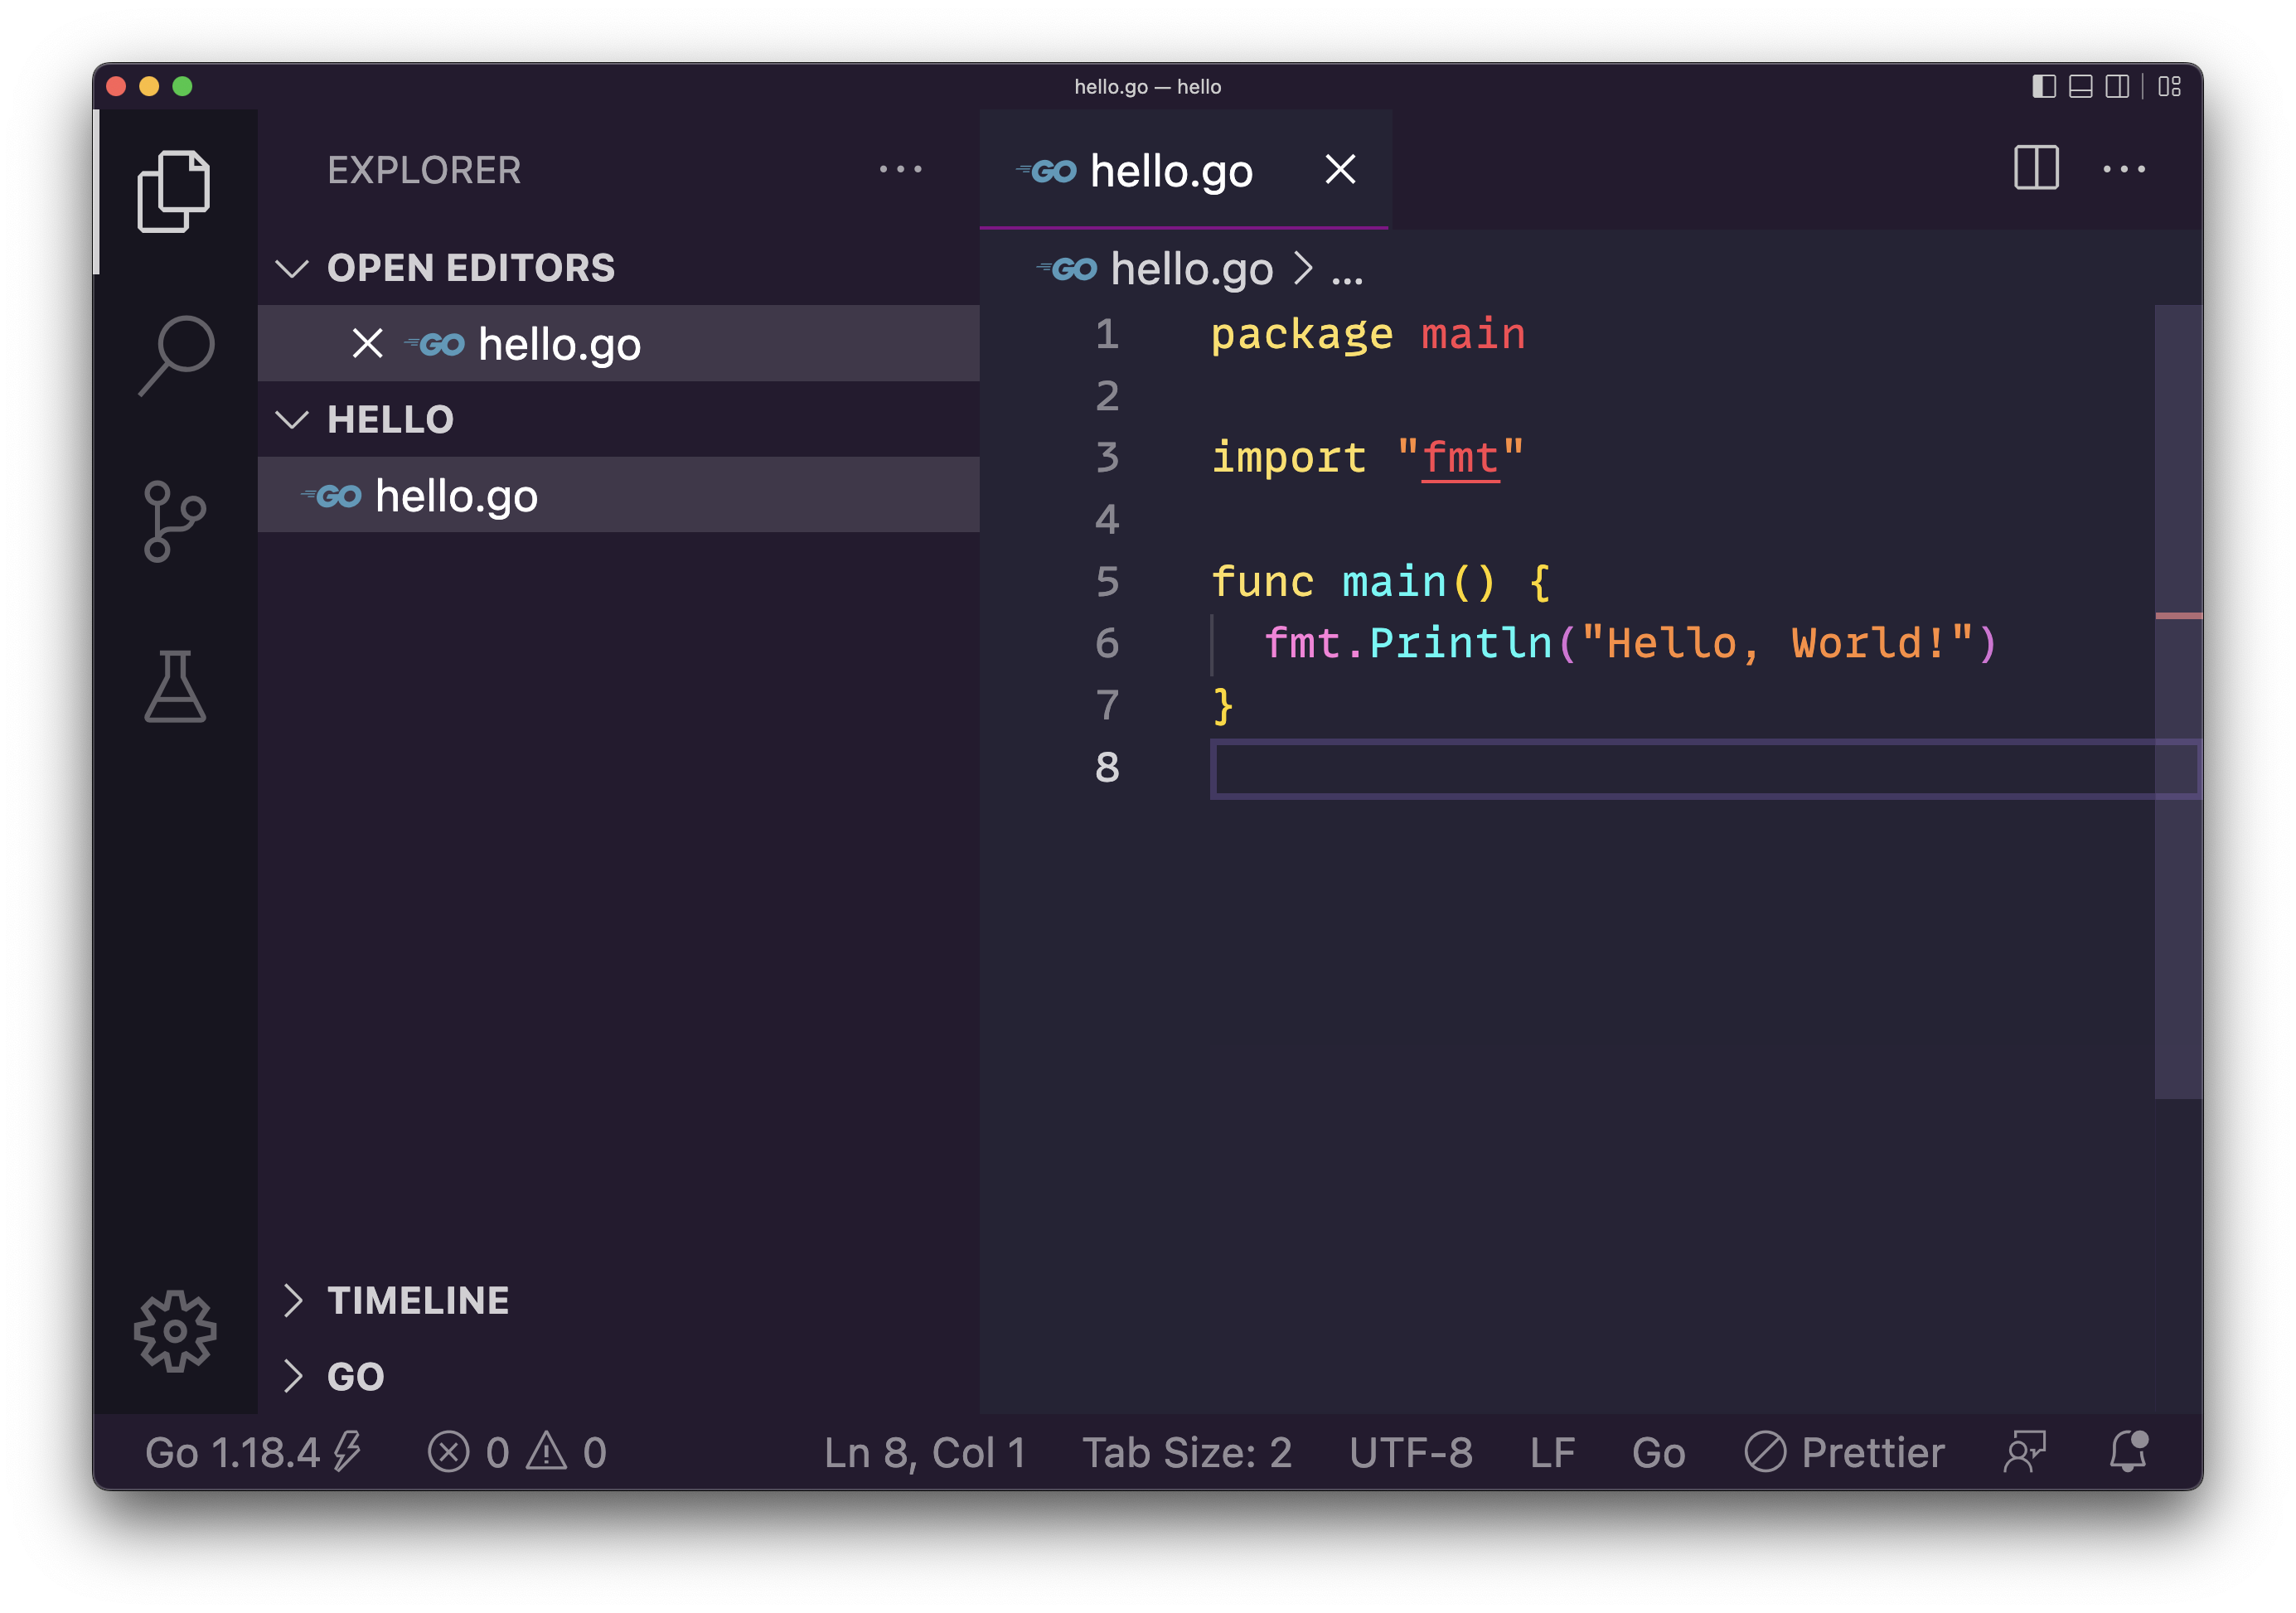 Go "Hello, World!" code
This is your first Go program!
Let’s analyze this line by line.
package main
We organize Go programs in packages.
Each .go file first declares which package it is part of.
A package can be composed by multiple files, or just one file.
A program can contain multiple packages.
The main package is the entry point of the program and identifies an executable program.
import "fmt"
We use the import keyword to import a package.
fmt is a built-in package provided by Go that provides input/output utility functions.
We have a large standard library ready to use that we can use for anything from network connectivity to math, crypto, image processing, filesystem access, and more.
You can read about all the features that this fmt package provides on the official documentation.
func main() {

}
Here we declare the main() function.
What’s a function? We’ll see more about them later, but in the meantime let’s say a function is a block of code that’s assigned a name, and contains some instructions.
The main function is special because what’s where the program starts.
In this simple case we just have one function – the program starts with that and then ends.
fmt.Println("Hello, World!")
This is the content of the function we defined.
We call the Println() function defined in the fmt package we previously imported, passing a string as a parameter.
This function, according to the docs "formats according to a format specifier and writes to standard output”.
Take a look at the docs because they are great. They even have examples you can run:
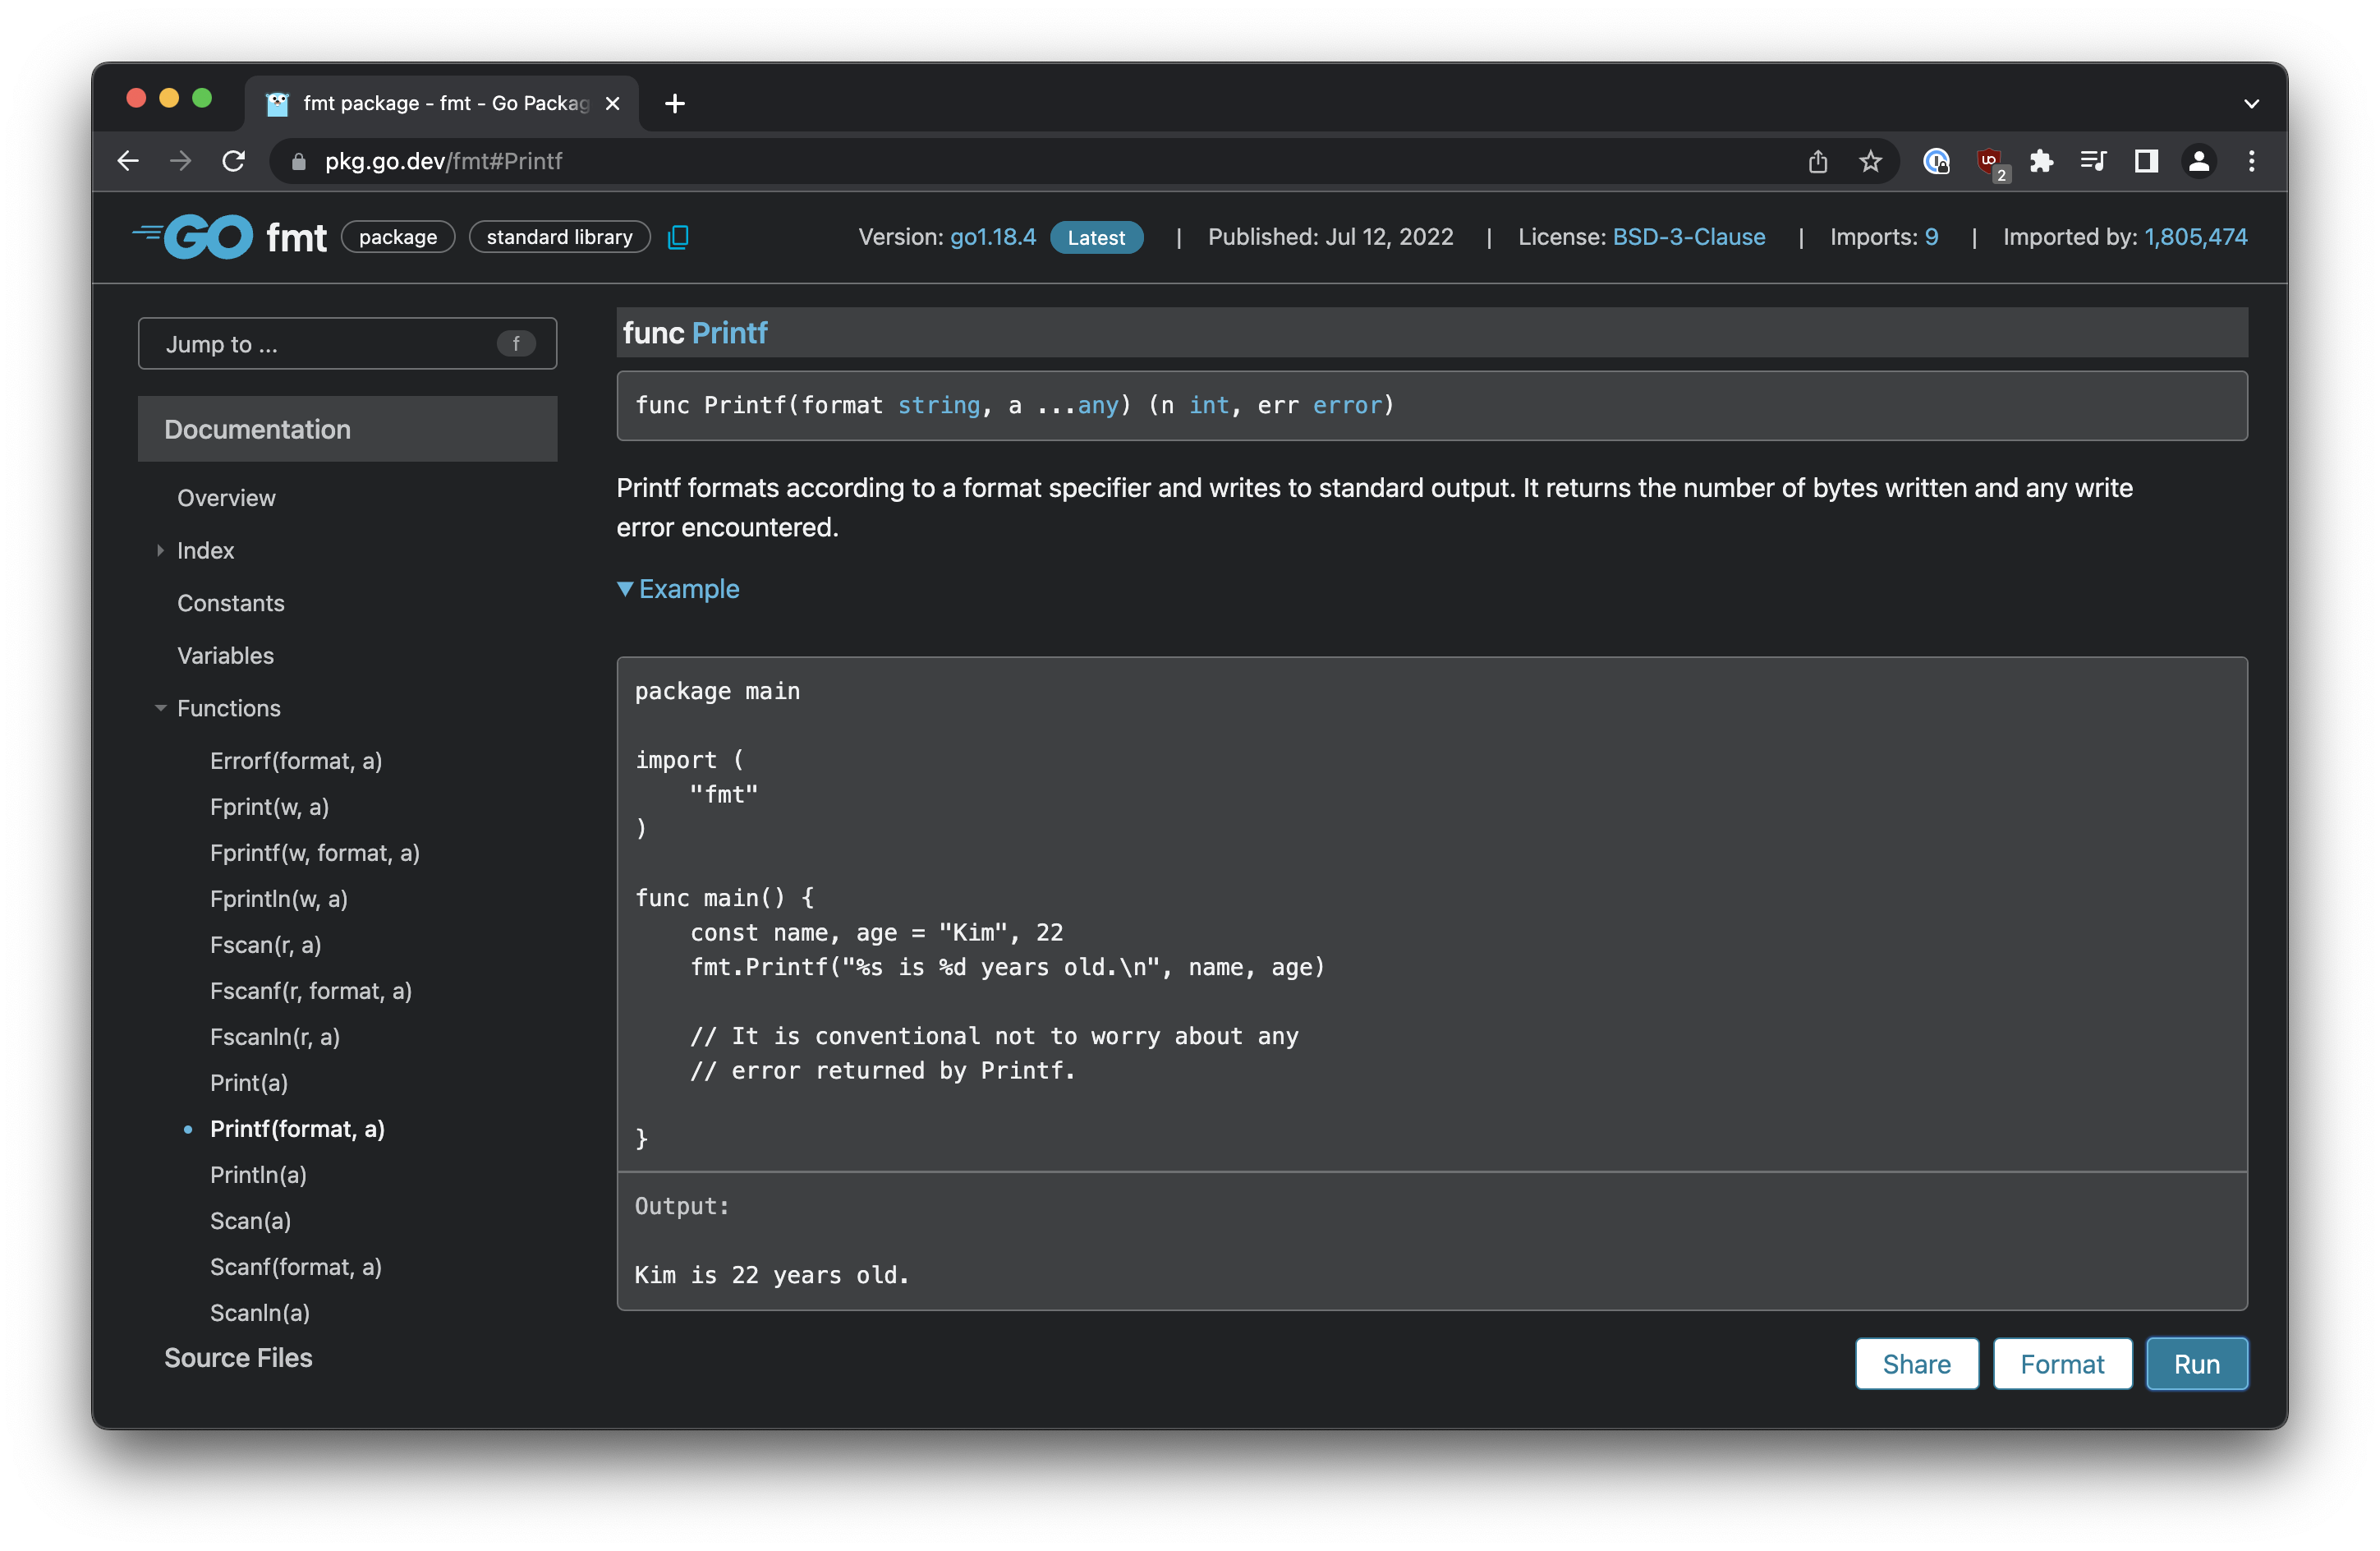 Go basic function example
We use the “dot” syntax fmt.Println() to specify that the function is provided by that package.
After the code executes the main function, it has nothing else to do and the execution ends.
How to Compile and Run a Go program
Now open the terminal in the hello folder and run the program using:
go run hello.go
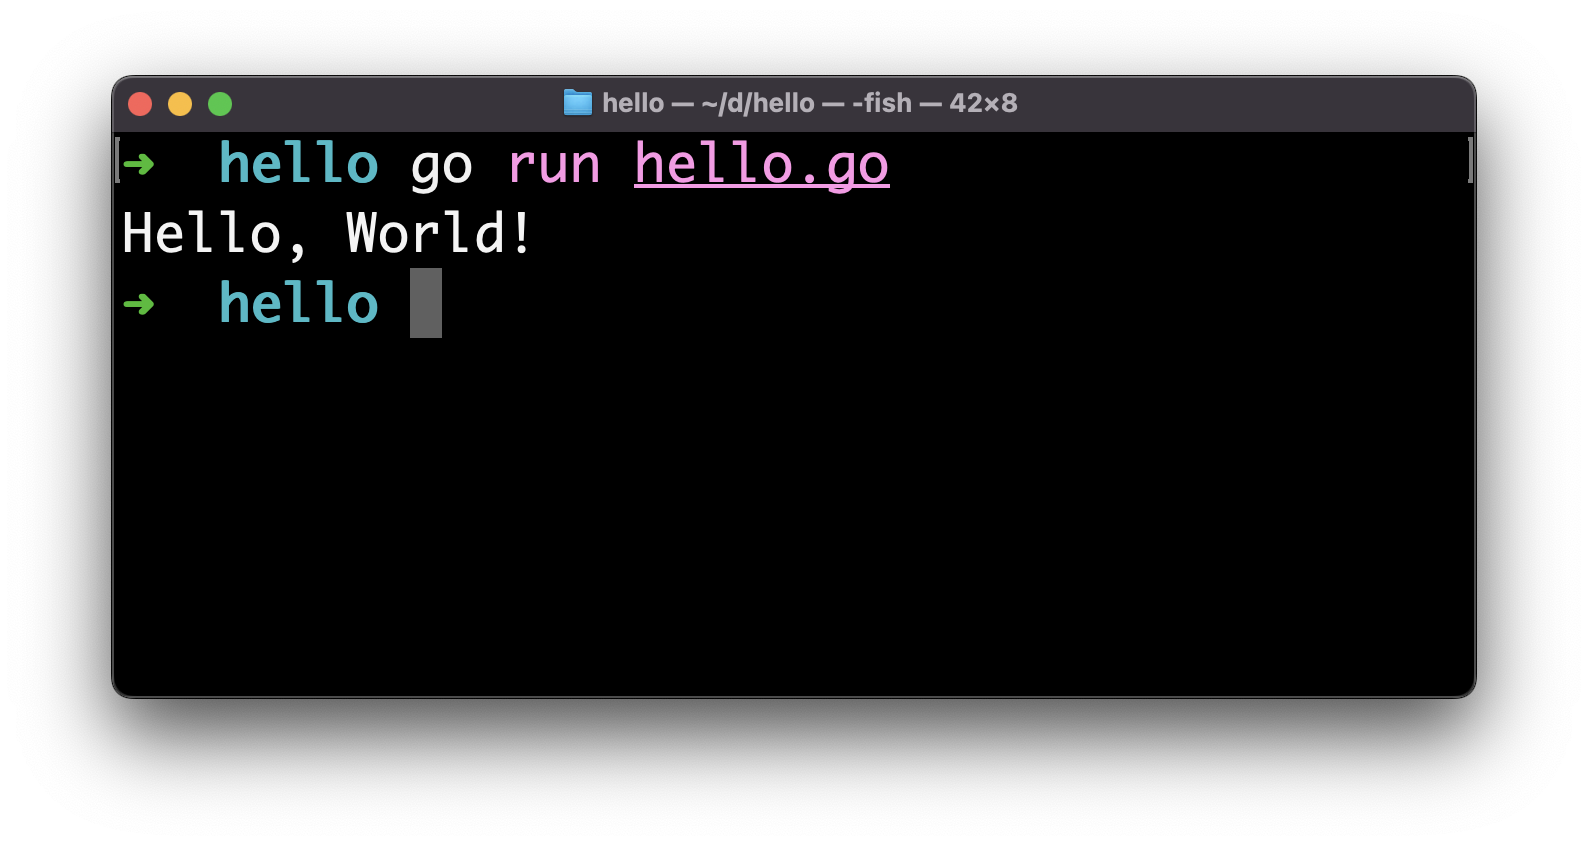 Hello world output in Go
Our program ran successfully, and it printed “Hello, World!” to the terminal.
The go run tool first compiles and then runs the program specified.
You can create a binary using go build:
go build hello.go
This will create a hello file that’s a binary you can execute:
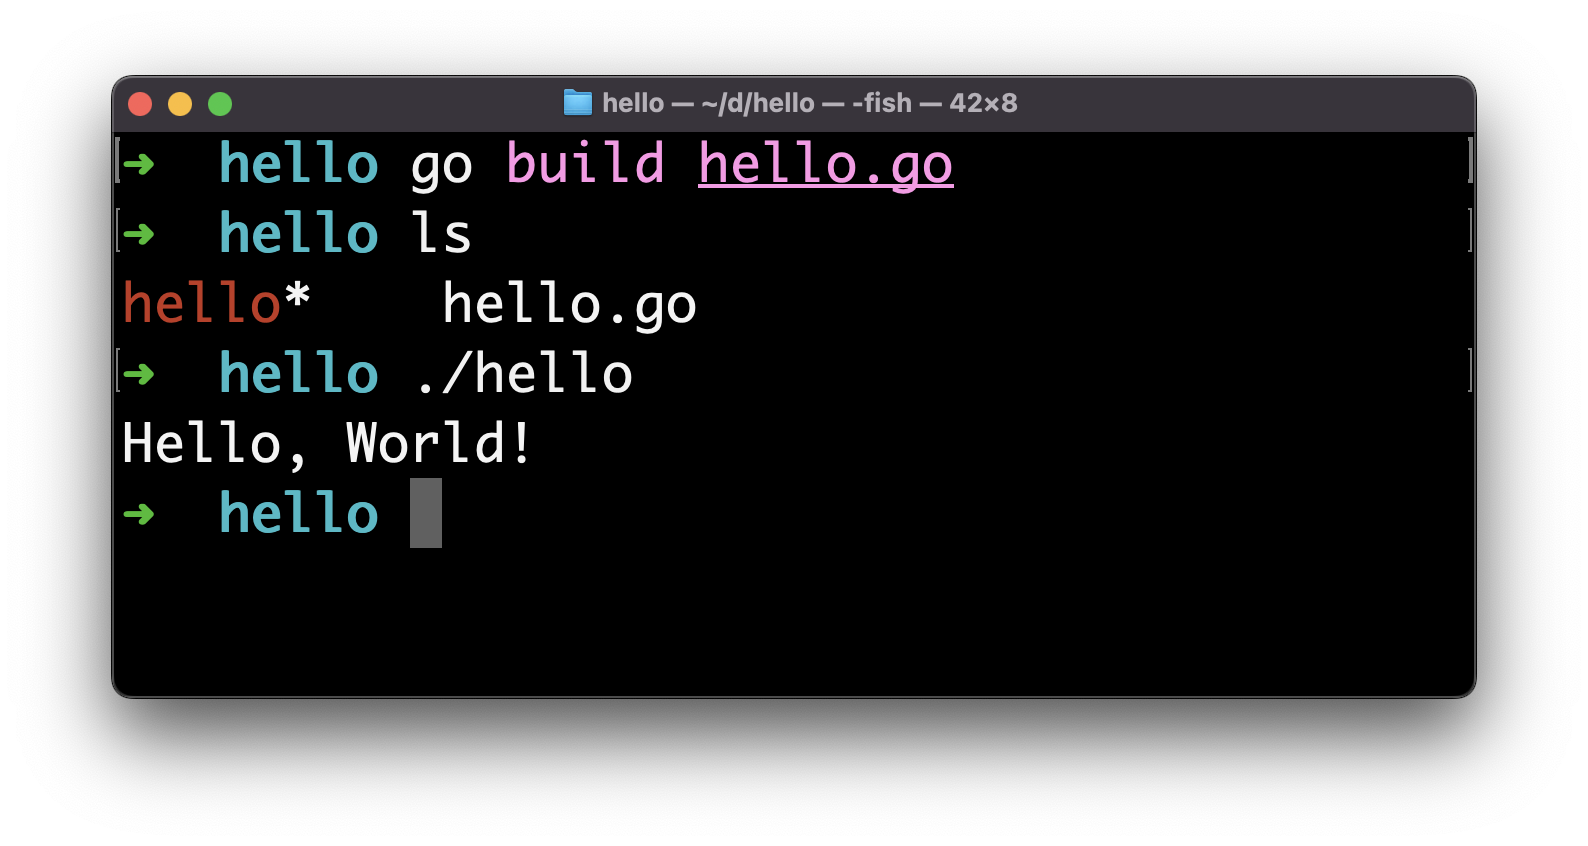 Executable binary in Go
In the introduction I mentioned that Go is portable.
Now you can distribute this binary and everyone can run the program as-is, because the binary is already packaged for execution.
The program will run on the same architecture we built it on.
We can create a different binary for a different architecture using the GOOS and GOARCH environment variables, like this:
GOOS=windows GOARCH=amd64 go build hello.go
This will create a hello.exe executable for 64-bit Windows machines:
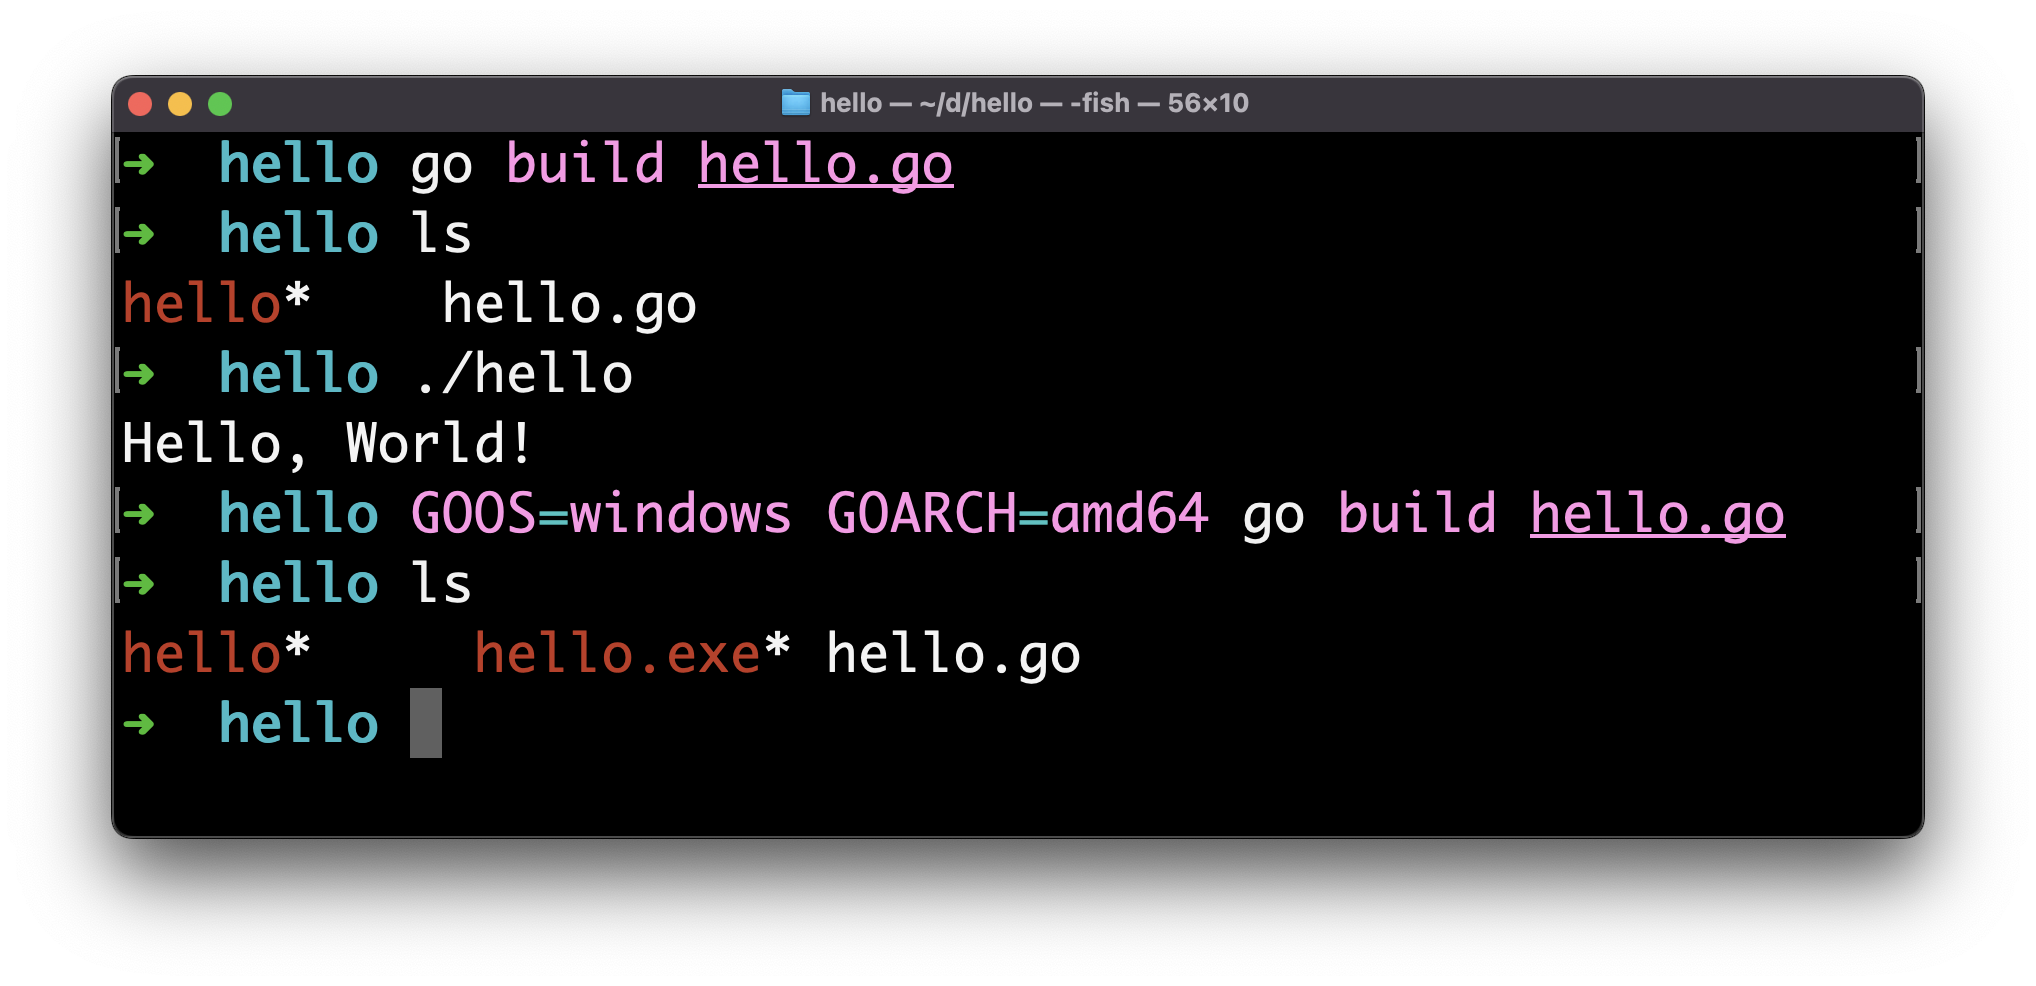 Hello.exe executable
Setup for 64-bit macOS (Intel or Apple Silicon) is GOOS=darwin GOARCH=amd64 and Linux is GOOS=linux GOARCH=amd64.
This is one of the best features of Go.
The Go Workspace
One special thing about Go is what we call the workspace.
The workspace is the “home base” for Go.
By default Go picks the $HOME/go path, so you will see a go folder in your home.
It’s first created when you install a package (as we’ll see later) but also to store some tooling.
For example the moment I loaded the hello.go file in VS Code, it prompted me to install the [gopls](https://pkg.go.dev/golang.org/x/tools/gopls) command, the Delve debugger (dlv), and the staticcheck linter.
They were automatically installed under $HOME/go:
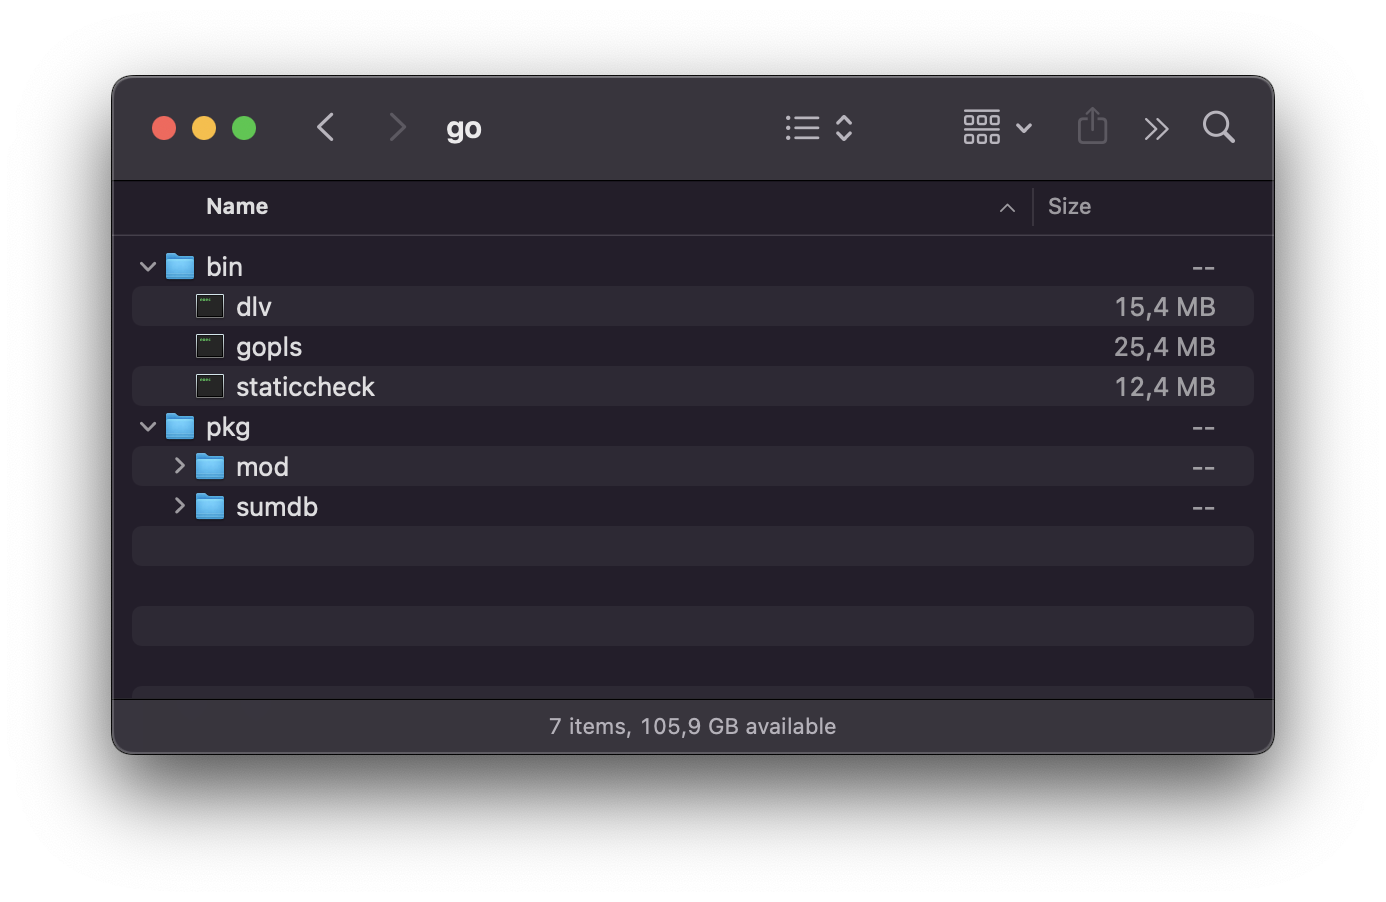
$HOME/go
When you install packages using go install, they will be stored here.
This is what we call GOPATH.
You can change the GOPATH environment variable to change where Go should install packages.
This is useful when working on different projects at the same time and you want to isolate the libraries you use.
Diving into the Go Language
Now that we've got the first notions in place, and we ran our first Hello, World! program, we can dive into the language.
The language has no semantically significant whitespace. This is like C, C++, Rust, Java, JavaScript, but unlike Python, where whitespace is meaningful and is used to create blocks instead of curly brackets.
Semicolons are optional, like in JavaScript (unlike in C, C++, Rust or Java).
Go takes indentation and visual order very seriously.
When we install Go we also get access to the gofmt command line tool which we can use to format Go programs. VS Code uses that under the hood to format Go source files.
This is very interesting and innovative because formatting and issues like tabs vs spaces or “should I put the curly brackets on the same line of the loop definition or in the next line” are a huge waste of time.
The language creators defined the rules, and everyone uses those rules.
This is great for projects with large teams.
I recommend you enable in the VS Code Settings “Format on Save” and “Format on Paste”:
 VS Code settings for Go - Format on Paste and Format on Save
You can write comments in Go using the usual C / C++ / JavaScript / Java syntax:
// this is a line comment

/*
multi
line
comment
*/
Variables in Go
One of the first things you do in a programming language is defining a variable.
In Go we define variables using var:
var age = 20
You can define variables at the package level:
package main

import "fmt"

var age = 20

func main() {
    fmt.Println("Hello, World!")
}
or inside a function:
package main

import "fmt"

func main() {
    var age = 20

    fmt.Println("Hello, World!")
}
Defined at the package level, a variable is visible across all the files that compose the package. A package can be composed of multiple files, you just need to create another file and use the same package name at the top.
Defined at the function level, a variable is visible only within that function. It’s initialized when the function is called, and destroyed when the function ends the execution.
In the example we used:
var age = 20
we assign the value 20 to age.
This makes Go determine that the type of the variable age is int.
We’ll see more about types later, but you should know there are many different ones, starting with int, string, and bool.
We can also declare a variable without an existing value, but in this case we must set the type like this:
var age int
var name string
var done bool
When you know the value, you typically use the short variable declaration with the := operator:
age := 10
name := "Roger"
For the name of the variable you can use letters, digits, and the underscore _ as long as the name starts with a character or _.
Names are case sensitive.
If the name is long, it’s common to use camelCase. So to indicate the name of the car we use carName.
You can assign a new value to a variable with the assignment operator =
var age int
age = 10
age = 11
If you have a variable that never changes during the program you can declare it as a constant using const:
const age = 10
You can declare multiple variables on a single line:
var age, name
and initialize them too:
var age, name = 10, "Roger"

//or

age, name := 10, "Roger"
Declared variables that are not used in the program raise an error and the program does not compile.
You will see a warning in VS Code:
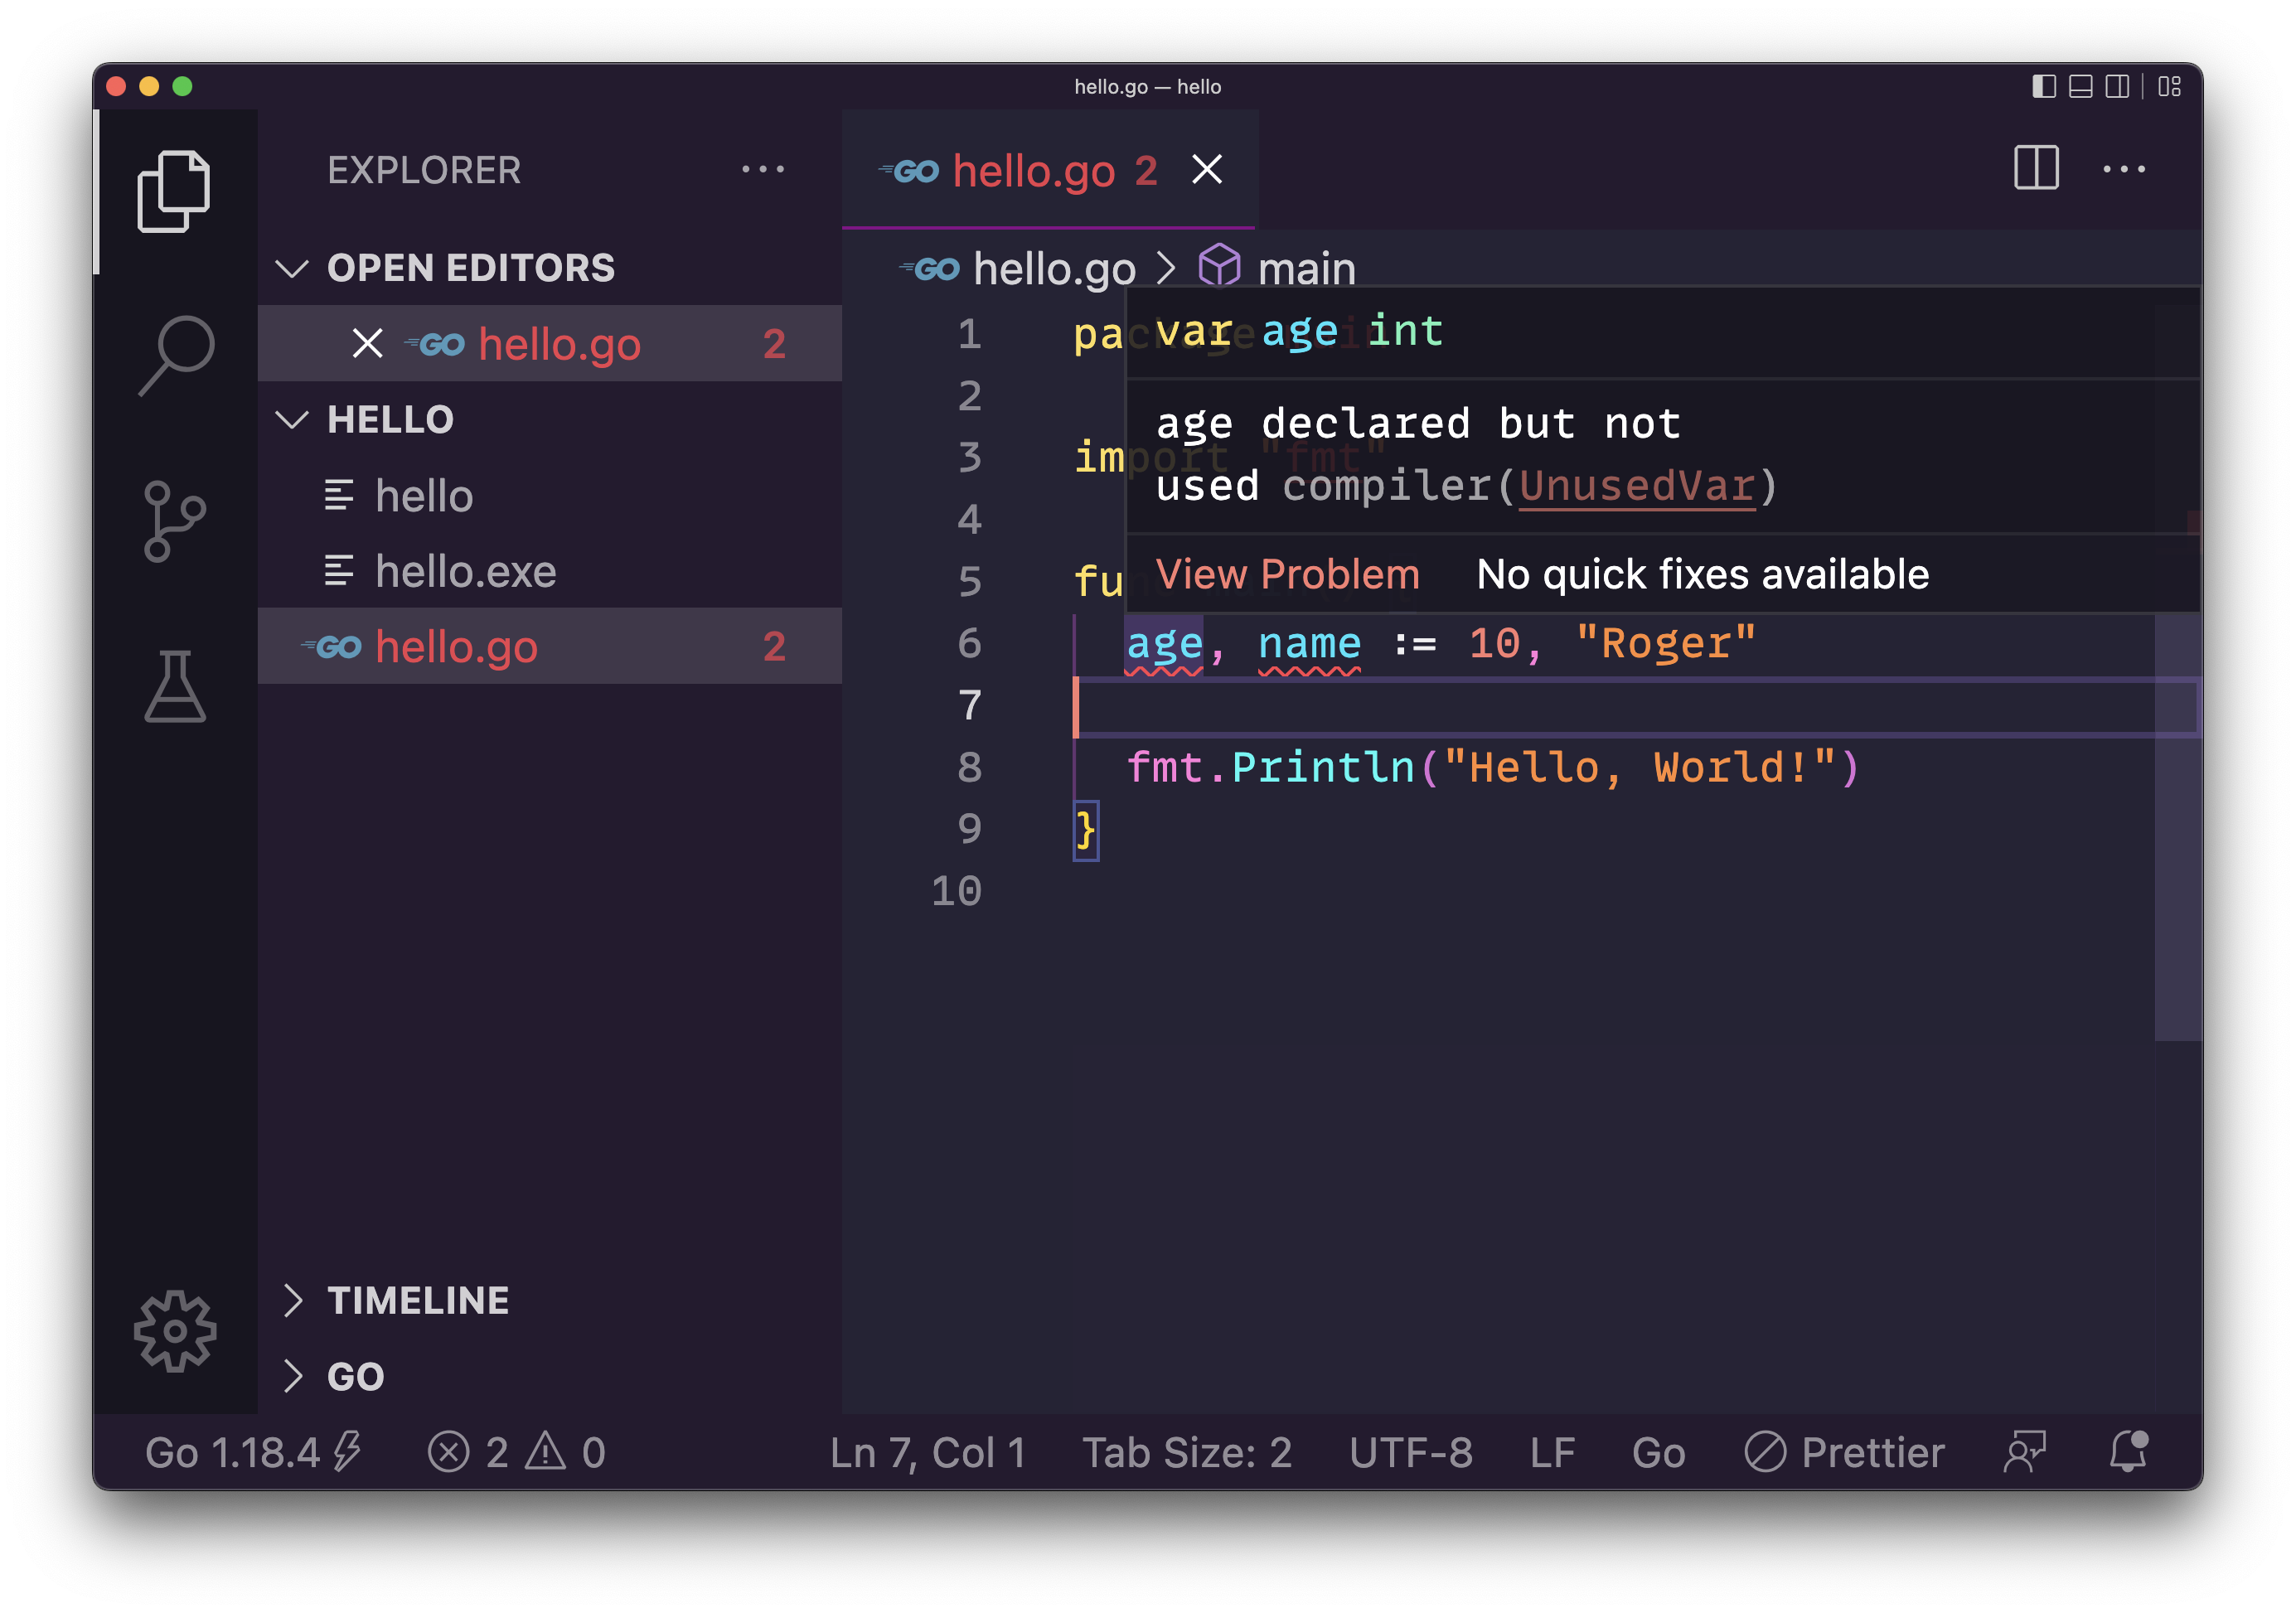 Warning for unused declared variables
and the error from the compiler:
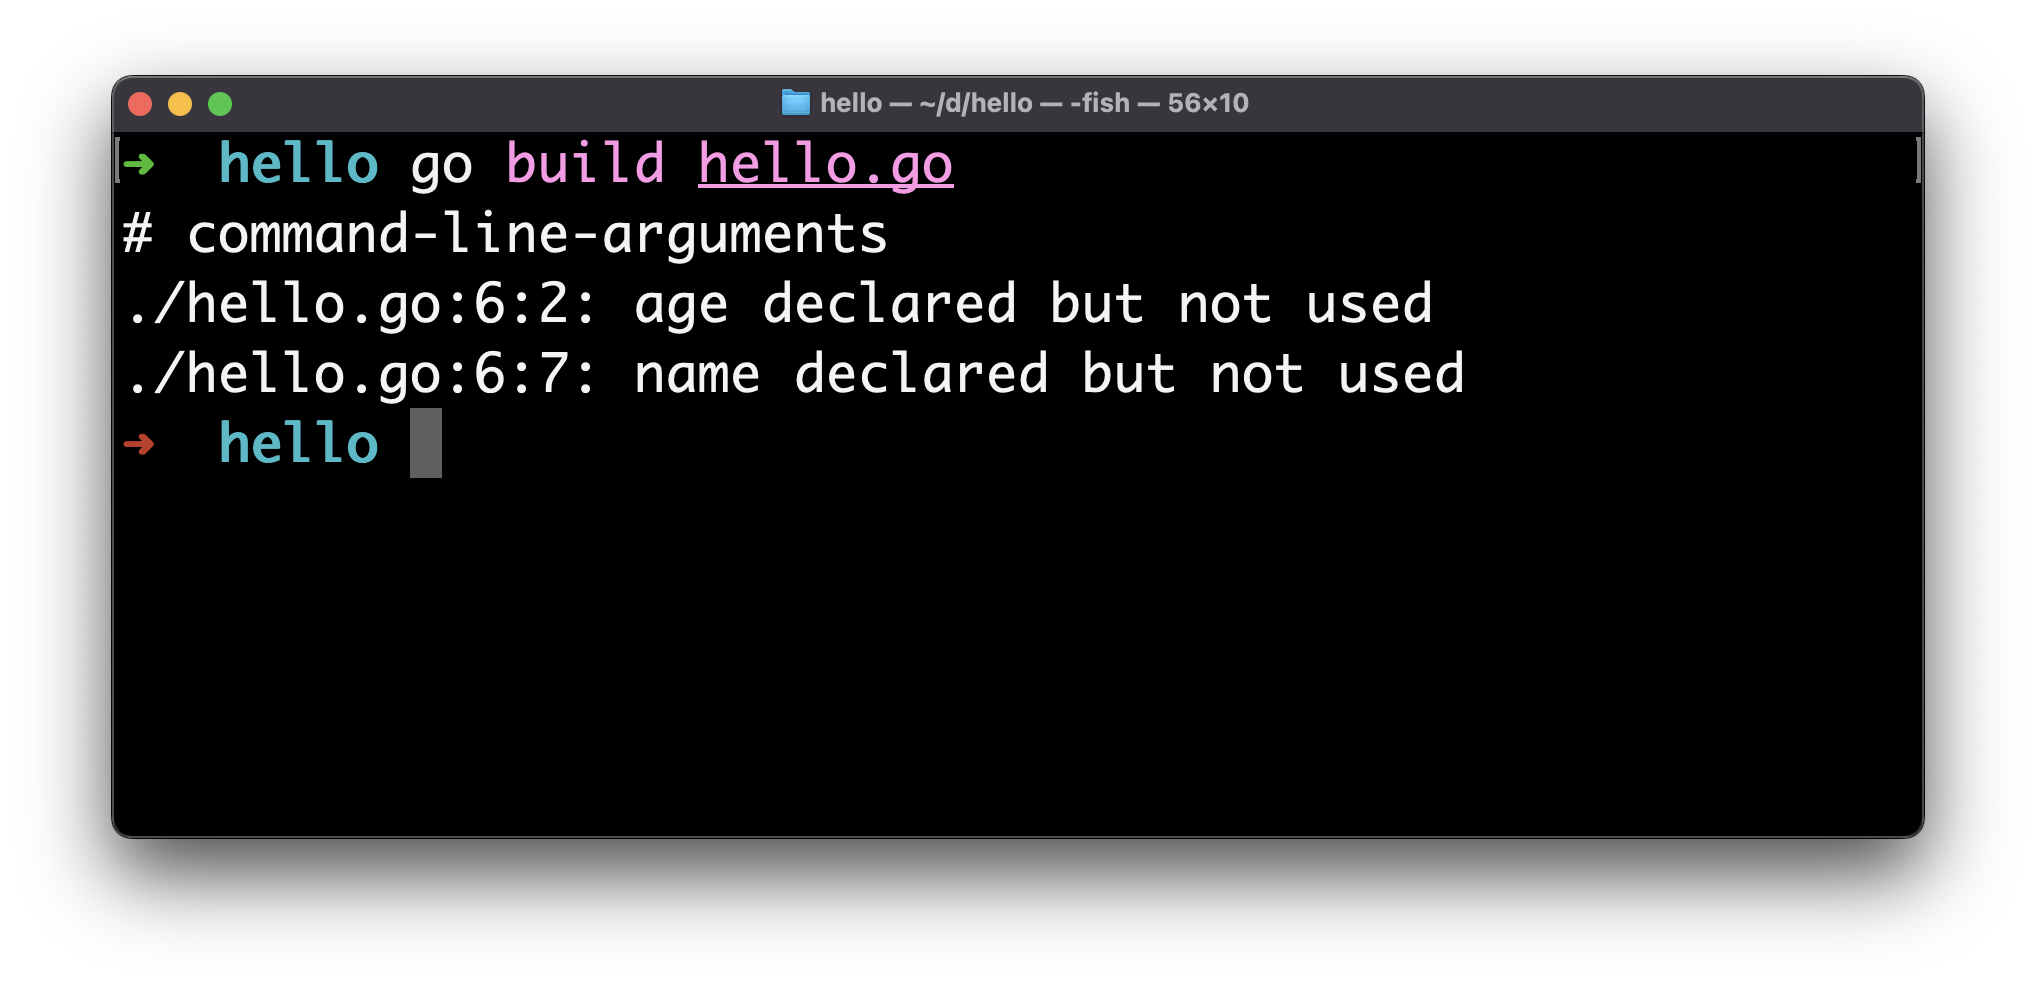 Error in compiler for unused declared variables
If you declare a variable without initializing it to a value, it is assigned a value automatically that depends on the type – for example an integer is 0 and a string is an empty string.
Basic Types in Go
Go is a typed language.
We saw how you can declare a variable, specifying its type:
var age int
Or you can let Go infer the type from the initial value assigned:
var age = 10
The basic types in Go are:
- Integers (
int,int8,int16,int32,rune,int64,uint,uintptr,uint8,uint16,uint64) - Floats (
float32,float64), useful to represent decimals - Complex types (
complex64,complex128), useful in math - Byte (
byte), represents a single ASCII character - Strings (
string), a set ofbytes - Booleans (
bool), either true or false
We have a lot of different types to represent integers. You will use int most of the time, and you might choose a more specialized one for optimization (not something you need to think about when you are just learning).
An int type will default to be 64 bits when used on a 64 bit system, 32 bits on a 32 bit system, and so on.
uint is an int that’s unsigned, and you can use this to double the amount of values you can store if you know the number is not going to be negative.
All the above basic types are value types, which means they are passed by value to functions when passed as parameters, or when returned from functions.
Strings in Go
A string in Go is a sequence of byte values.
As we saw above, you can define a string using this syntax:
var name = "test"
It’s important to note that unlike other languages, strings are defined only using double quotes, not single quotes.
To get the length of a string, use the built-in len() function:
len(name) //4
You can access individual characters using square brackets, passing the index of the character you want to get:
name[0] //"t" (indexes start at 0)
name[1] //"e"
You can get a portion of the string using this syntax:
name[0:2] //"te"
name[:2]  //"te"
name[2:]  //"st"
Using this you can create a copy of the string using:
var newstring = name[:]
You can assign a string to a new variable like this:
var first = "test"
var second = first
Strings are immutable, so you cannot update the value of a string.
Even if you assign a new value to first using an assignment operator, the value second is still going to be "test":
var first = "test"
var second = first

first = "another test"

first  //"another test"
second //"test"
Strings are reference types, which means if you pass a string to a function, the reference to the string will be copied, not its value. But since strings are immutable, in this case it’s not a big difference in practice with passing an int, for example.
You can concatenate two strings using the + operator:
var first = "first"
var second = "second"

var word = first + " " + second  //"first second"
Go provides several string utilities in the the strings package.
We already saw how to import a package in the “Hello, World!” example.
Here’s how you can import strings:
package main

import (
    "strings"
)
And then you can use it.
For example we can use the HasPrefix() function to see if a string starts with a specific substring:
package main

import (
    "strings"
)

func main() {
    strings.HasPrefix("test", "te") // true
}
You can find the full list of methods here: https://pkg.go.dev/strings.
Here’s a list of methods you might use frequently:
strings.ToUpper()returns a new string, uppercasestrings.ToLower()returns a new string, lowercasestrings.HasSuffix()checks if a string ends with a substringstrings.HasPrefix()checks if a string starts with a substringstrings.Contains()checks if a string contains a substringstrings.Count()counts how many times a substring appears in a stringstrings.Join()used to join multiple strings and create a new onestrings.Split()used to create an array of strings from a string, dividing the original one on a specific character, like a comma or a spacestrings.ReplaceAll()used to replace a portion in a string and replace it with a new one
Arrays in Go
Arrays are a sequence of items of a single type.
We define an array in this way:
var myArray [3]string //an array of 3 strings
and you can initialize the array with values using:
var myArray = [3]string{"First", "Second", "Third"}
In this case you can also let Go do some work and count the items for you:
var myArray = [...]string{"First", "Second", "Third"}
An array can only contain values of the same type.
The array cannot be resized – you have to explicitly define the length of an array in Go. That’s part of the type of an array. Also, you cannot use a variable to set the length of the array.
Due to this limitation, arrays are rarely used directly in Go. Instead we use slices (more on them later). Slices use arrays under the hood, so it’s still necessary to know how they work.
You can access an item in the array with the square brackets notation we already used in strings to access a single character:
myArray[0] //indexes start at 0
myArray[1]
You can set a new value for a specific position in the array:
myArray[2] = "Another"
And you can get the length of an array using the len() function:
len(myArray)
Arrays are value types. This means copying an array:
anotherArray := myArray
or passing an array to a function, or returning it from a function, creates a copy of the original array.
This is different from other programming languages out there.
Let’s make a simple example where we assign a new value to an array item after copying it. See, the copy doesn't change:
var myArray = [3]string{"First", "Second", "Third"}
myArrayCopy := myArray
myArray[2] = "Another"

myArray[2]     //"Another"
myArrayCopy[2] //"Third"
Remember you can only add a single type of items in an array, so setting the myArray[2] = 2 for example will raise an error.
Low-level elements are stored continuously in memory.
Slices in Go
A slice is a data structure similar to an array, but it can change in size.
Under the hood, slices use an array and they are an abstraction built on top of them that makes them more flexible and useful (think about arrays as lower level).
You will use slices in a way that’s very similar to how you use arrays in higher level languages.
You define a slice similarly to an array, omitting the length:
var mySlice []string //a slice of strings
You can initialize the slice with values:
var mySlice = []string{"First", "Second", "Third"}

//or

mySlice := []string{"First", "Second", "Third"}
You can create an empty slice of a specific length using the make() function:
mySlice := make([]string, 3) //a slice of 3 empty strings
You can create a new slice from an existing slice, appending one or more items to it:
mySlice := []string{"First", "Second", "Third"}

newSlice := append(mySlice, "Fourth", "Fifth")
Note that we need to assign the result of append() to a new slice, otherwise we’ll get a compiler error. The original slice is not modified – we’ll get a brand new one.
You can also use the copy() function to duplicate a slice so it does not share the same memory of the other one and is independent:
mySlice := []string{"First", "Second", "Third"}

newSlice := make([]string, 3)

copy(newSlice, mySlice)
If the slice you’re copying to does not have enough space (is shorter than the original) only the first items (until there’s space) will be copied.
You can initialize a slice from an array:
myArray := [3]string{"First", "Second", "Third"}

mySlice = myArray[:]
Multiple slices can use the same array as the underlying array:
myArray := [3]string{"First", "Second", "Third"}

mySlice := myArray[:]
mySlice2 := myArray[:]

mySlice[0] = "test"

fmt.Println(mySlice2[0]) //"test"
Those 2 slices now share the same memory. Modifying one slice modifies the underlying array and causes the other slice generated from the array to be modified, too.
As with arrays, each item in a slice is stored in memory in consecutive memory locations.
If you know you need to perform operations on the slice, you can request it to have more capacity than initially needed. This way, when you need more space, the space will be readily available (instead of finding and moving the slice to a new memory location with more space to grow and dispose via garbage collection of the old location).
We can specify the capacity by adding a third parameter to make():
newSlice := make([]string, 0, 10)
//an empty slice with capacity 10
As with strings, you can get a portion of a slice using this syntax:
mySlice := []string{"First", "Second", "Third"}

newSlice := mySlice[:2] //get the first 2 items
newSlice2 := mySlice[2:] //ignore the first 2 items
newSlice3 := mySlice[1:3] //new slice with items in position 1-2
Maps in Go
A map is a very useful data type in Go.
In other language it’s also called a dictionary or hash map or associative array.
Here’s how you create a map:
agesMap := make(map[string]int)
You don’t need to set how many items the map will hold.
You can add a new item to the map in this way:
agesMap["flavio"] = 39
You can also initialize the map with values directly using this syntax:
agesMap := map[string]int{"flavio": 39}
You can get the value associated with a key using:
age := agesMap["flavio"]
You can delete an item from the map using the delete() function in this way:
delete(agesMap, "flavio")
Loops in Go
One of Go’s best features is to give you fewer choices.
We have one loop statement: for.
You can use it like this:
for i := 0; i < 10; i++ {
    fmt.Println(i)
}
We first initialize a loop variable, then we set the condition we check for with each iteration to decide if the loop should end. Finally we have the post statement, executed at the end of each iteration, which in this case increments i.
i++ increments the i variable.
The < operator is used to compare i to the number 10 and returns true or false, determining if the loop body should be executed or not.
We don’t need parentheses around this block, unlike other languages like C or JavaScript.
Other languages offer different kind of loop structures, but Go only has this one. We can simulate a while loop, if you’re familiar with a language that has it, like this:
i := 0

for i < 10 {
    fmt.Println(i)
  i++
}
We can also completely omit the condition and use break to end the loop when we want:
i := 0

for {
    fmt.Println(i)

    if i < 10 {
        break
    }

  i++
}
I used a if statement inside the loop body, but we haven’t seen conditionals yet! We’ll do that next.
One thing I want to introduce now is range.
We can use for to iterate through an array using this syntax:
numbers := []int{1, 2, 3}

for i, num := range numbers {
    fmt.Printf("%d: %d\n", i, num)
}

//0: 1
//1: 2
//2: 3
Note: I used fmt.Printf() which allows us to print any value to the terminal using the verbs %d which mean decimal integer and \n means add a line terminator.
It’s common to use this syntax when you don’t need to use the index:
for _, num := range numbers {
  //...
}
We're using the special _ character that means “ignore this” to avoid the Go compiler raising an error saying “you’re not using the i variable!”.
Conditionals in Go
We use the if statement to execute different instructions depending on a condition:
if age < 18 {
    //underage
}
The else part is optional:
if age < 18 {
    //underage
} else {
  //adult
}
and can be combined with other ifs:
if age < 12 {
    //child
} else if age < 18  {
  //teen
} else {
    //adult
}
If you define any variable inside the if, that’s only visible inside the if (same applies to else and anywhere you open a new block with {}).
If you’re going to have many different if statements to check a single condition, it’s probably better to use switch:
switch age {
case 0: fmt.Println("Zero years old")
case 1: fmt.Println("One year old")
case 2: fmt.Println("Two years old")
case 3: fmt.Println("Three years old")
case 4: fmt.Println("Four years old")
default: fmt.Println(i + " years old")
}
Compared to C, JavaScript, and other languages, you don’t need to have a break after each case.
Operators in Go
We've used some operators so far in our code examples, like =, := and <.
Let’s talk a bit more about them.
We have assignment operators = and := we use to declare and initialize variables:
var a = 1

b := 1
We have comparison operators == and != that take 2 arguments and return a boolean:
var num = 1
num == 1 //true
num != 1 //false
and <, <=, >, >=:
var num = 1
num > 1 //false
num >= 1 //true
num < 1 //false
num <= 1 //true
We have binary (require two arguments) arithmetic operators, like +, -, *, /, %.
1 + 1 //2
1 - 1 //0
1 * 2 //2
2 / 2 //1
2 % 2 //0
+ can also join strings:
"a" + "b" //"ab"
We have unary operators ++ and -- to increment or decrement a number:
var num = 1
num++ // num == 2
num-- // num == 1
Note that unlike C or JavaScript we can’t prepend them to a number like ++num. Also, the operation does not return any value.
We have boolean operators that help us with making decisions based on true and false values: &&, || and !:
true && true  //true
true && false //false
true || false //true
false || false //false
!true  //false
!false //true
Those are the main ones.
Structs in Go
A struct is a type that contains one or more variables. It’s like a collection of variables. We call them fields. And they can have different types.
Here’s an example of a struct definition:
type Person struct {
    Name string
    Age int
}
Note that I used uppercase names for the fields, otherwise those will be private to the package. And when you pass the struct to a function provided by another package, like the ones we use to work with JSON or database, those fields cannot be accessed.
Once we define a struct we can initialize a variable with that type:
flavio := Person{"Flavio", 39}
and we can access the individual fields using the dot syntax:
flavio.Age //39
flavio.Name //"Flavio"
You can also initialize a new variable from a struct in this way:
flavio := Person{Age: 39, Name: "Flavio"}
This lets you initialize only one field, too:
flavio := Person{Age: 39}
or even initialize it without any value:
flavio := Person{}

//or

var flavio Person
and set the values later:
flavio.Name = "Flavio"
flavio.Age = 39
Structs are useful because you can group unrelated data and pass it around to/from functions, store in a slice, and more.
Once defined, a struct is a type like int or string and this means you can use it inside other structs, too:
type FullName struct {
    FirstName string
    LastName string
}

type Person struct {
    Name FullName
    Age int
}
Functions in Go
A function is a block of code that’s assigned a name, and contains some instructions.
In the “Hello, World!” example we created a main function, which is the entry point of the program.
package main

import "fmt"

func main() {
    fmt.Println("Hello, World!")
}
That’s a special function.
Usually we define functions with a custom name:
func doSomething() {

}
and then you can call them, like this:
doSomething()
A function can accept parameters, and we have to set the type of the parameters like this:
func doSomething(a int, b int) {

}

doSomething(1, 2)
a and b are the names we associate to the parameters internally to the function.
A function can return a value, like this:
func sumTwoNumbers(a int, b int) int {
    return a + b
}

result := sumTwoNumbers(1, 2)
Note that we specified the return value type.
A function in Go can return more than one value:
func performOperations(a int, b int) (int, int) {
    return a + b, a - b
}

sum, diff := performOperations(1, 2)
It’s interesting because many languages only allow one return value.
Any variable defined inside the function is local to the function.
A function can also accept an unlimited number of parameters, and in this case we call it a variadic function:
func sumNumbers(numbers ...int) int {
    sum := 0
    for _, number := range numbers {
        sum += number
    }
    return sum
}

total := sumNumbers(1, 2, 3, 4)
Pointers in Go
Go supports pointers.
Suppose you have a variable:
age := 20
Using &age you get the pointer to the variable, its memory address.
When you have the pointer to the variable, you can get the value it points to by using the * operator:
age := 20
ageptr = &age
agevalue = *ageptr
This is useful when you want to call a function and pass the variable as a parameter. Go by default copies the value of the variable inside the function, so this will not change the value of age:
func increment(a int) {
    a = a + 1
}

func main() {
    age := 20
    increment(age)

    //age is still 20
}
You can use pointers for this:
func increment(a *int) {
    *a = *a + 1
}

func main() {
    age := 20
    increment(&age)

    //age is now 21
}
Methods in Go
You can assign a function to a struct, and in this case we call it a method.
Example:
type Person struct {
    Name string
    Age int
}

func (p Person) Speak() {
    fmt.Println("Hello from " + p.Name)
}

func main() {
    flavio := Person{Age: 39, Name: "Flavio"}
    flavio.Speak()
}
You can declare methods to be pointer receiver or value receiver.
The above example shows a value receiver. It receives a copy of the struct instance.
This would be a pointer receiver that receives the pointer to the struct instance:
func (p *Person) Speak() {
    fmt.Println("Hello from " + p.Name)
}
Interfaces in Go
An interface is a type that defines one or more method signatures.
Methods are not implemented, just their signature: the name, parameter types and return value type.
Something like this:
type Speaker interface {
    Speak()
}
Now you could have a function accept any type that implements all the methods defined by the interface:
func SaySomething(s Speaker) {
    s.Speak()
}
And we can pass it any struct that implements those methods:
type Speaker interface {
    Speak()
}

type Person struct {
    Name string
    Age int
}

func (p Person) Speak() {
    fmt.Println("Hello from " + p.Name)
}

func SaySomething(s Speaker) {
    s.Speak()
}

func main() {
    flavio := Person{Age: 39, Name: "Flavio"}
    SaySomething(flavio)
}
Where to Go from Here
This handbook is an introduction to the Go programming language.
Beside these basics, there are many things to learn now.
Garbage collection, error handling, concurrency and networking, the filesystem APIs, and much more.
The sky is the limit.
My suggestion is to pick a program you want to build and just start, learning the things you need along the way.
It will be fun and rewarding.
Note: you can get a PDF and ePub version of this Go Beginner's Handbook here.