
By Michael Habib
Before this year’s AWS re:Invent, there was no supported way to write AWS Lambda functions with Rust. I often come across the use of the Go runtime as a wrapper for the underlying Rust code. At re:Invent, AWS announced that its lambda functions will now be able to support any language. Users will be able to take advantage of this by using the new runtime API. Alongside that announcement, AWS also open sourced a Rust runtime and posted a quick how-to here.
The goal of this post is to provide enough information to get up and running with API Gateway and Rust. We will be creating a simple AWS Lambda function that will serve a single API Gateway resource. A more intermediate example using DynamoDB will be released on YouTube in March. If you are interested in being notified when that is released follow me on Twitter. Although still in progress, the code used in that video is on the intermediate branch of the repo.
Requirements
Clone and fork the repo from here. AWS setup instructions can be found here.
Handling Requests
To get started run git checkout scratch and edit the Cargo.toml in the users folder.
The [[bin]]section at the bottom of the file tells cargo to generate an executable with that name. This is needed because AWS Lambda deployment packages expect a bootstrap file. Now let's shift our focus to the actual code that will handle the incoming API Gateway requests. Edit users/src/main.rs so that it matches the file below.
We start off by declaring a User struct that will be used for our responses. We then define a router that matches on the request method. The three functions responsible for creating responses are not_allowed , add_user and get_users . Each function builds a response, deals with a potential error, and finally sends the response back.
The lambda_http crate conveniently lets us turn server JSON values into a response with into_response() . This is done in add_user and get_users when we go from a user to a JSON value then finally into a response.
Keep in mind that none of the POST requests will actually add any users to any databases. All the add_user method is doing here is deserializing the body and sending it back.
Operations — Build & Deploy
Bundling your code and dependencies for lambda can sometimes be tricky. At the time of this writing, SAM does not have a build command to bundle cargo projects. Instead of SAM, we will be using Docker and Terraform to create these deployment packages and more. Add a Dockerfile to the users folder with the following contents.
A lambci build image is used as the base image because they provide a pretty seamless building process. The Dockerfile above can be broken into five main parts:
- Installing the nightly edition of Rust
- Adding project files
- Compiling the project
- Zipping up the executable
- Creating the Terraform plan
We also need a Dockerfile that will specifically be used for deploying our API Gateway resources. Create a file called Dockerfile.api with the following contents.
Now let's create a build script that will drive the process of creating and applying our Terraform plans. A Terraform plan is just a proposal on the resources it wants to create. Add the following contents to a build.sh and deploy.sh .
The build and deploy scripts leverage Docker and Terraform to create or update our AWS resources. In a nutshell, the Terraform plan to provision resources is created when build.sh is run and that plan is then applied when running deploy.sh . Terraform is out of the scope of this post but you can check out all the code in users/terraform . To build and deploy our lambda resources run ./build.sh && ./deploy.sh .
If everything went well, you should see the tail of your output like the one below. Keep in mind that the Dockerfiles assume AWS_* credentials are set as environment variables.
 ./build.sh && ./deploy.sh
To now deploy our API Gateway resources run ./build.sh --api && ./deploy.sh --api. Like the above command, if everything went well you should see the tail of your output like the one below.
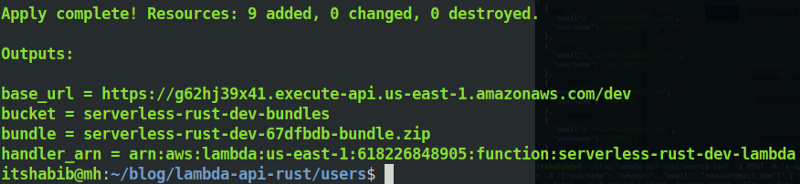
./build.sh --api && ./deploy.sh --api
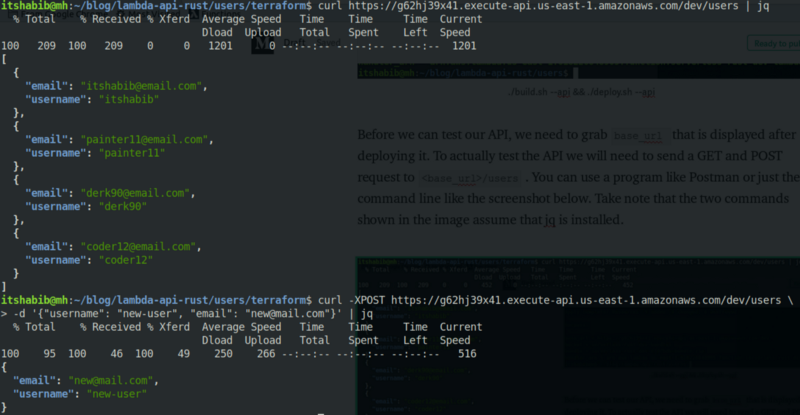
Make sure to take note of the base_url that is displayed after deploying. To test the API, we will need to send a GET and POST request to <base_url>/users . You can use a program like Postman or the command line like the screenshot below. The two commands shown in the image assume that jq is installed.
To destroy all the resources created in this post run ./destroy.sh && ./destroy.sh --state .
I hope you found this post useful in getting up and running with API Gateway and Rust. Feel free to comment, ask questions, or suggest a topic I can write about next.
_P.S. Follow me on Twitter_