By Oliver Nybroe
Recently a new package has revolutionized the creation of a GraphQL API in Laravel. This package makes it so simple and easy to set up a GraphQL server, that it gives you the same feeling you had the first time you worked with Laravel, “What magic is this!”. This package is, of course, Lighthouse.
In this article, I will cover how to set up Lighthouse with a simple blog example. I will assume that you already are familiar with the basics of GraphQL. The example will let you get and create articles via GraphQL. Lighthouse uses a schema approach. You define your API by creating a GraphQL schema, then use directives to add bindings with Laravel.
Installment
For getting started, simply add the package via composer and publish the config file. (The package laravel-graphql-playground is a GraphQL browser client which is optional.)
$ composer require nuwave/lighthouse$ php artisan vendor:publish --provider="Nuwave\Lighthouse\Providers\LighthouseServiceProvider"$ composer require mll-lab/laravel-graphql-playground$ php artisan vendor:publish --provider="MLL\GraphQLPlayground\GraphQLPlaygroundServiceProvider"
Creating the schema
Now for the interesting part: when setting up this package, we just have to create the following file routes/graphql/schema.graphql. This file is the one containing our whole schema for the graphql server.
To get started we will add a simple endpoint for getting all posts in our database. For doing this we first need to create our Article type in the schema file.
...type Article { id: ID! title: String! body: String! author: User!}
Defining the schema query
We now have two types, a type for articles and one for users, so we can get the author of the post. However we still don’t have any endpoints for the articles, so let’s add one in the schema file.
type Query { ... articles: [Article]! @paginate(type: "paginator" model: "Article")}
Now some more magic is happening. We are adding a custom directive called paginate. This directive adds pagination for the given model supplied (in this case Article). We are also saying it should use the type paginator which will result in it making a pagination-compatible type for us.
For browsing the endpoints, let’s open up the GraphQL client we installed by going to your-url.test/graphql-playground. In the schema, we can now see that a new type called ArticlePaginator is added. The endpoint articles is returning an instance of the ArticlePaginator.
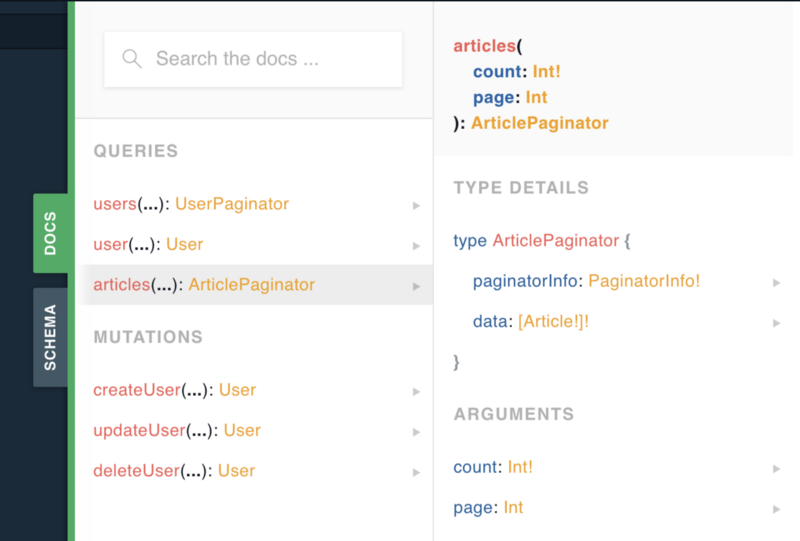 Screenshot from graphql-playground
Running the query
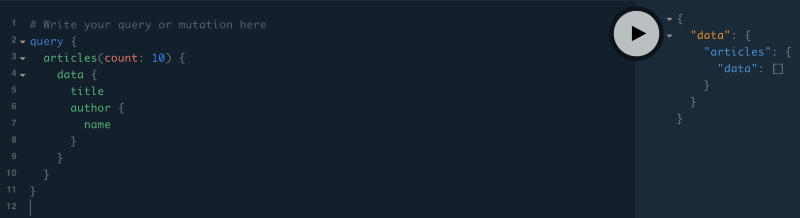
So let’s create a simple query to get 10 articles with their title and the name of the author.
query { articles(count: 10) { data { title author { name } } }}
When we run this query, it results in an error saying that it was not able to find a class called Article. This makes sense as we haven’t created the model yet. This debug message is only visible because we are not running in a production environment.
 Screenshot from graphql-playground showing error of no Article class
Creating our model and migrations
So let’s create our models and migrations. By default, Lighthouse looks for models inside app/models. To make it easier we will add the Article model in here. We do not have to move the User model as in the schema file, the namespace for User has been typed directly.
$ php artisan make:model Models\\Article -m
Then update the migration and the models:
Querying the articles
Now that our models and migrations are set up, let’s migrate the database and check if it still fails.
 Screenshot from graphql-playground showing no result
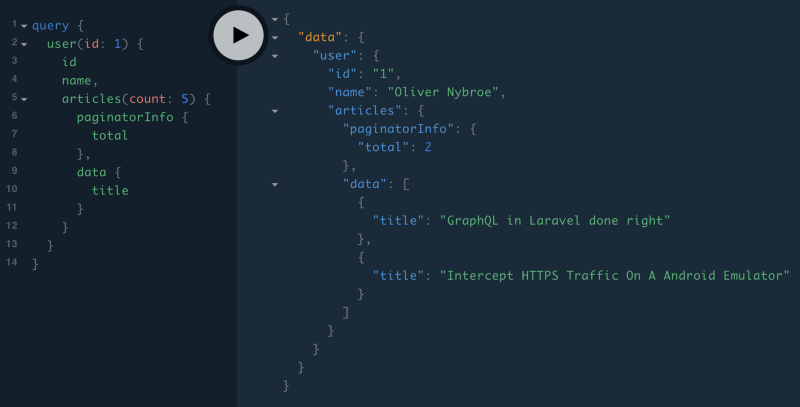
So we can see now that the endpoint works, but we have no data in the database. We will add some manually and then later tackle how to do this through GraphQL.
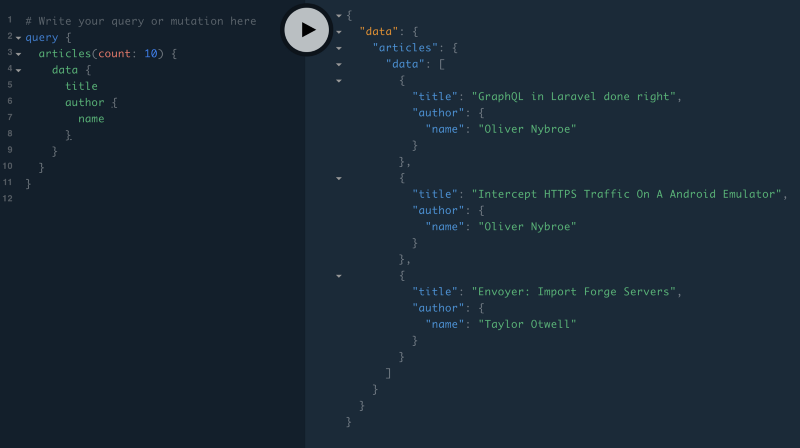 Screenshot from graphql-playground showing articles
Great! We are now able to fetch articles through GraphQL. Let’s also add support for getting the articles from a user instead. For doing this we have to change our GraphQL user type to have a relationship to articles.
...type User { id: ID! name: String! email: String! created_at: DateTime! updated_at: DateTime! articles: [Article] @hasMany(relation:"articles" type:"paginator")}
 Screenshot from graphql-playground showing articles from user
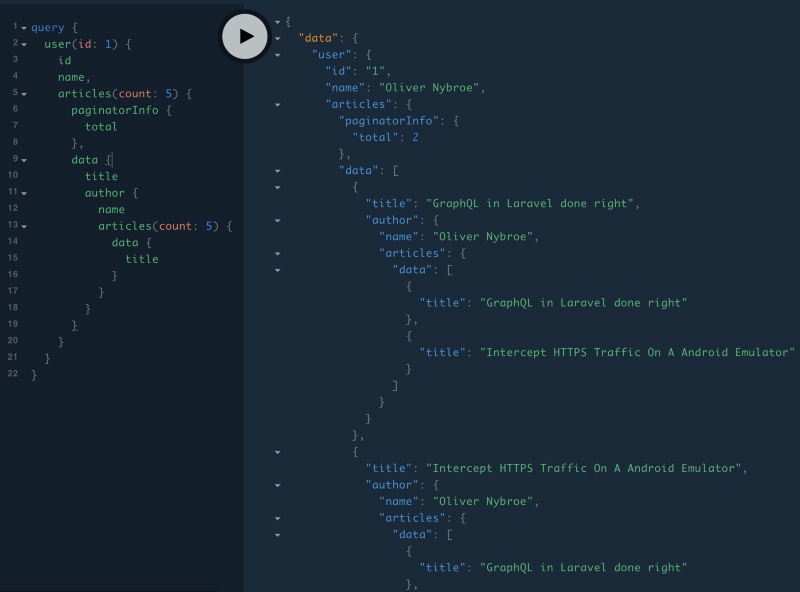
As this is GraphQL, we could keep chaining it. So we can get the author now from the article and then the articles from that author and so on (even though that would be rather pointless).
 Screenshot from graphql-playground showing pointless query
Creating a mutator
Now let’s add a mutator for creating a new article. This endpoint will also need authentication. Of course, we need to be a user in the system before we can create a new article. To do this we will use Laravel’s middleware auth:api. Remove all the previous mutations, as we do not need them, and add the following:
type Mutation @group(middleware: ["auth:api"]) { createArticle(title: String!, body: String!): Article @create(model: "Article") @inject(context: "user.id", name: "author_id")}
Authenticating the mutator
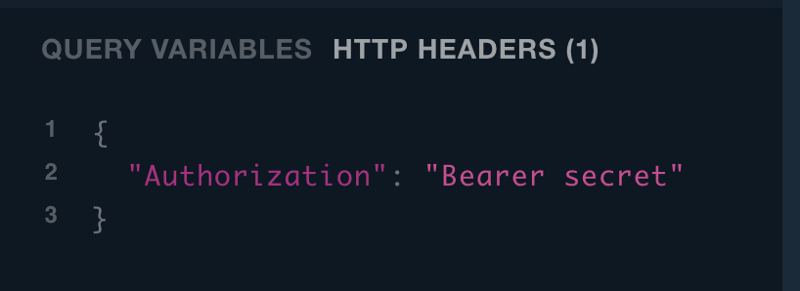
To use the auth:api middleware, we will need to set up a Guard. For this example, we will just use the TokenGuard. For using the token guard, we need to add a field to the user called api_token, and then the value there is your token.
Schema::create('users', function (Blueprint $table) { $table->increments('id'); $table->string('name'); $table->string('email')->unique(); $table->timestamp('email_verified_at')->nullable(); $table->string('password'); $table->string('api_token'); // The new API token field $table->rememberToken(); $table->timestamps();});
Now we manually add the token in the database and set it to secret (you can create your own UI for setting the token or use Laravel Passport). We then add this token to our request, so we are authenticated.
 Screenshot from graphql-playground showing headers
Using the mutator
 Screenshot from graphql-playground showing mutation
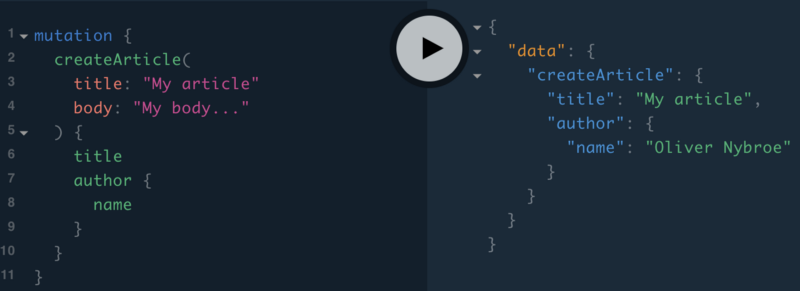
We now have a new article, and we can see that the author who made it was our authenticated user. So now we have a really simple GraphQL API up and running, but with support for getting our articles and creating them!
Hope you enjoyed this post, and if you would like to know more visit Lighthouse documentation. You can also find the example created above on Github.