
Welcome to Git and GitHub for Beginners! This comprehensive guide is tailored to help you navigate the world of version control and collaboration.
Whether you're a newbie just starting out or an experienced developer looking to brush up on your skills, this guide offers a step-by-step approach to understanding and effectively using Git and GitHub.
By the end of this journey, you'll have a solid foundation in Git and GitHub. You'll be equipped with practical knowledge to streamline your coding workflow, collaborate seamlessly with teams, and contribute to open-source projects.
So, let's dive in and get started on your Git and GitHub adventure!
Table of Contents
- Who is this guide for?
- Technologies
- Terms
- What is GitHub?
- What is GitHub used for?
- Common tasks you'll perform with Git
- How to install Git
- How to configure Git
- How to set the default editor
- How to create a repository using the Github website
- How to create a repository using the Git command line
- How to connect a local repository to a remote repository on GitHub
- How to pull changes from a remote repository to a local repository
- How to work with Git commands
- How to make changes to a file
- How to check the status of the current branch
- How to stage changes
- How to commit changes
- How to push changes to a remote repository
- How to create a branch
- How to create a pull request
- How to merge a pull request
- Wrapping Up
Who is This Guide For?
This guide is for everyone who wants to level up their coding skills and become proficient in using Git and GitHub.
Whether you're:
- just starting your tech career and need to learn the basics of version control.
- an aspiring developer eager to integrate
Gitinto your workflow. - an experienced programmer looking to refresh your knowledge or discover new features.
- a team lead or manager interested in fostering a culture of collaboration and efficient code management.
Regardless of your background or experience, this guide is designed to empower you with the tools and knowledge you need to excel in your coding endeavors.
Technologies
Before you start, make sure:
- You have a GitHub account
- Git is installed on your machine
- You have a text editor, such as Visual Studio Code installed
- Node.js is installed on your machine
Terms
They are a lot of terms around Git and Github that you may meet when you're working with version control. Let me break it down for you before we start:
- Branch: A version of the codebase that diverges from the main branch to isolate changes for specific features, fixes, or experiments.
- Commit: A snapshot of your changes, saved to your local repository. Each commit is uniquely identified by a checksum.
- Stage: The area where Git tracks changes that are ready to be included in the next commit. Files in the staging area are prepared (staged) for the next commit.
- Merge: The process of integrating changes from one branch into another, typically the main branch.
- Pull Request: A proposal to merge changes from one branch into another, often used in collaborative environments to review and discuss changes before they are merged.
- Fork: A personal copy of someone else's project that lives on your GitHub account.
- Clone: The act of downloading a repository from a remote source to your local machine.
- Remote: A common repository that all team members use to exchange their changes.
- Origin: The default name Git gives to the server from which you cloned.
- Upstream: The original repository that was cloned.
- Master: The default branch name given to a repository when it is created. In modern practice, it is often replaced with
main. - Repository: A storage location where your project lives, containing all the files and revision history.
- Working Directory: The directory on your computer where you are making changes to your project.
- Staging Area: Also known as the "Index," it's an area where Git tracks changes that are ready to be committed.
- Index: Another name for the staging area, where Git tracks changes that are ready to be committed.
- HEAD: A reference to the last commit in the currently checked-out branch.
- Checkout: The action of switching from one branch to another or to a specific commit.
- Push: The action of sending your commits to a remote repository.
- Pull: The action of fetching changes from a remote repository and merging them into your current branch.
- Fetch: The action of retrieving updates from a remote repository without merging them into your current branch.
What is GitHub?

GitHub is a platform that hosts code, providing version control and collaboration features. It enables you and others to work together on projects from anywhere in the world.
This guide will introduce you to essential GitHub concepts such as repositories, branches, commits, and Pull Requests. You will learn how to create your own 'Hello World' repository and understand GitHub's Pull Request workflow, a widely-used method for creating and reviewing code.
By the end of this guide, you'll be equipped with the knowledge and skills to collaborate effectively on GitHub.
What is GitHub Used For?
GitHub is more than just a code hosting platform. It's a tool that allows for seamless collaboration and version control. Here are some of its uses:
- Hosting and sharing your code with others.
- Tracking and assigning issues to maintain an organized workflow.
- Managing pull requests to review and incorporate changes into your project.
- Creating your own website using GitHub Pages, a static site hosting service.
- Collaborating with others on projects, making it an excellent tool for open-source contributions.
What is Git?
Git is a free and open-source distributed version control system. It's designed to handle everything from small to very large projects with speed and efficiency
Git is easy to learn and has a tiny footprint with lightning-fast performance. It outclasses SCM tools like Subversion, CVS, Perforce, and ClearCase with features like cheap local branching, convenient staging areas, and multiple workflows
Git was initially designed and developed by Linus Torvalds for Linux kernel development.
Some features/benefits of Git:
- Allows you to track changes to your code over time.
- Enables you to collaborate with others on the same codebase.
- You can easily revert to a previous version of your code or experiment with new features without affecting the main codebase.
- Provides a record of all changes made to your code, including who made them and when which can be useful for auditing and debugging.
Common Tasks You'll Perform with Git
- Create a repository
- Create a branch
- Make changes to a file
- Stage changes
- Commit changes
- Push changes to a remote repository
- Merge changes
- Revert changes
- Delete a branch
How to Install Git
To install Git on your local machine, you need to follow these steps:
Download Git from the official website: Git Downloads
Install Git on your local machine by following the instructions provided on the official website: Installing Git
Congratulations! You have successfully installed Git on your local machine. You are now ready to start using Git for your projects.
How to Configure Git
Git offers a variety of configurations that can streamline your workflow. In this section, I will guide you through the process of setting up Git on your local machine. Let's get started.
Configuring your name and email address on your local machine is an essential step in setting up Git. These details are attached to each commit you make, providing context and ownership. Let's learn how to use the git config --global command to set your name and email globally on your local machine.
To set up your name, you need to type the following command in your terminal:
# Set a name that is identifiable for credit when reviewing version history

$ git config --global user.name "Your Name"
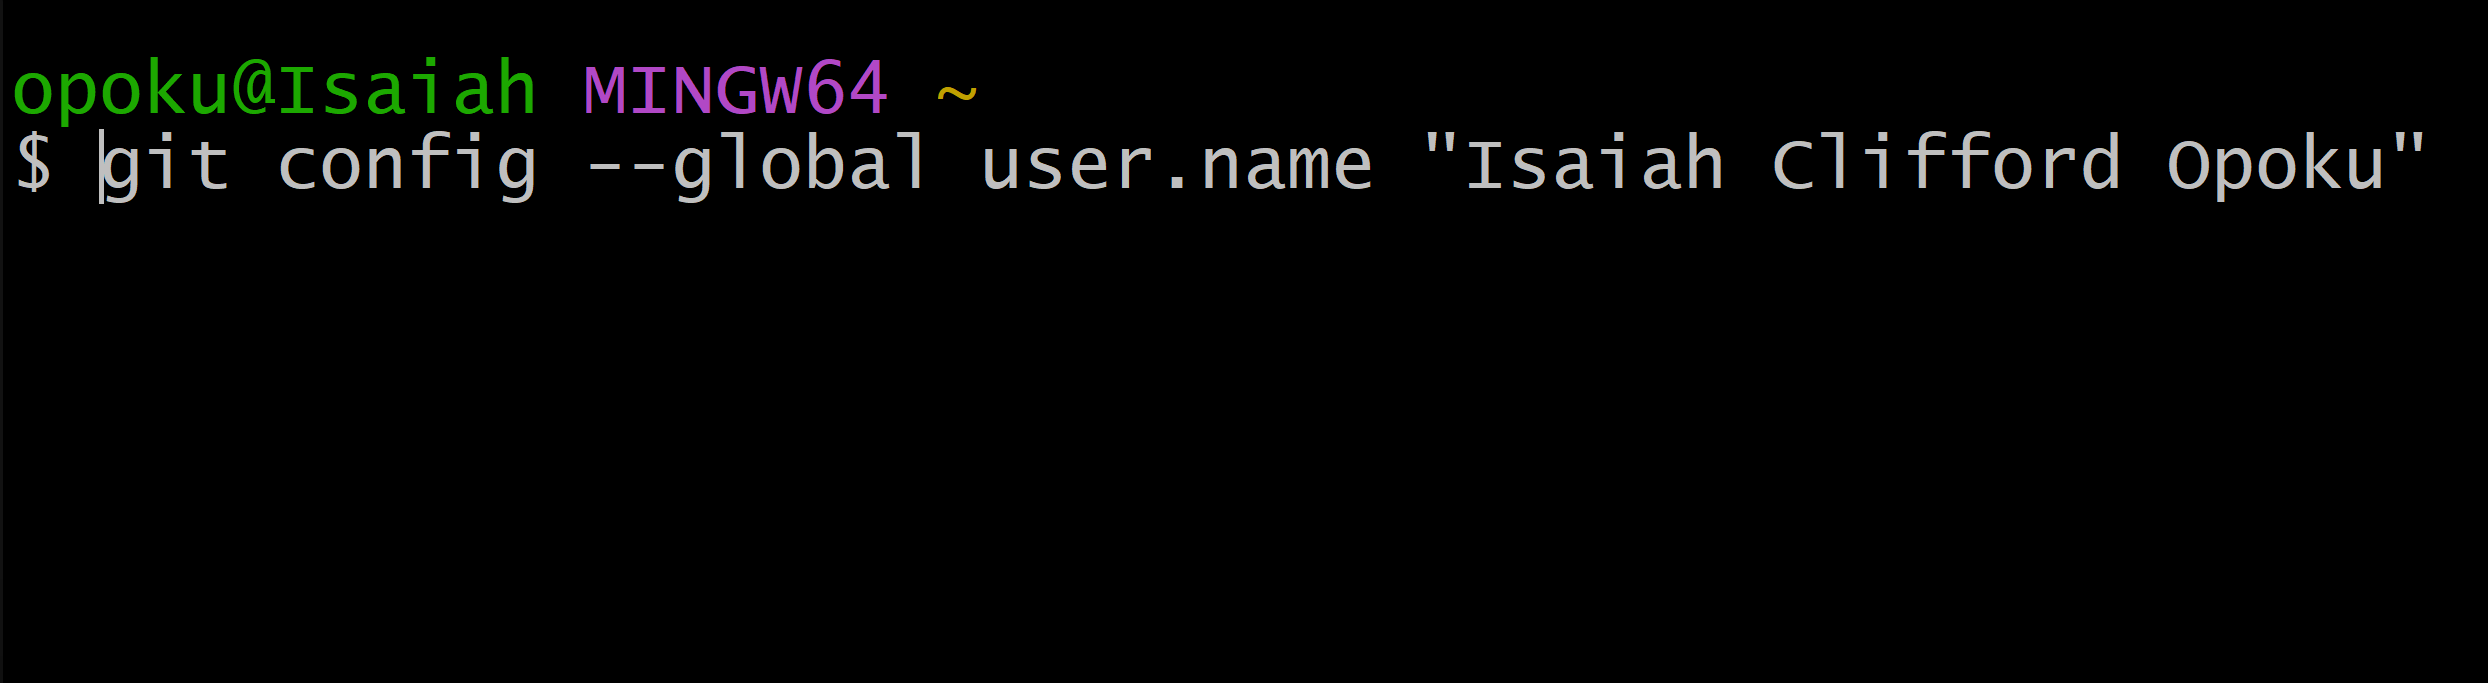
As you can see in the image above, I have entered my name.
After entering your name, press Enter to save it. You won't receive any response, but rest assured, your name has been stored successfully.
Just like we set up the user name, we also need to set up the user email. This email will be associated with each commit you make. Let's learn how to use the git config --global command to set your email globally on your local machine.
# Set an email address that will be associated with each history marker
$ git config --global user.email "your-email@example.com"
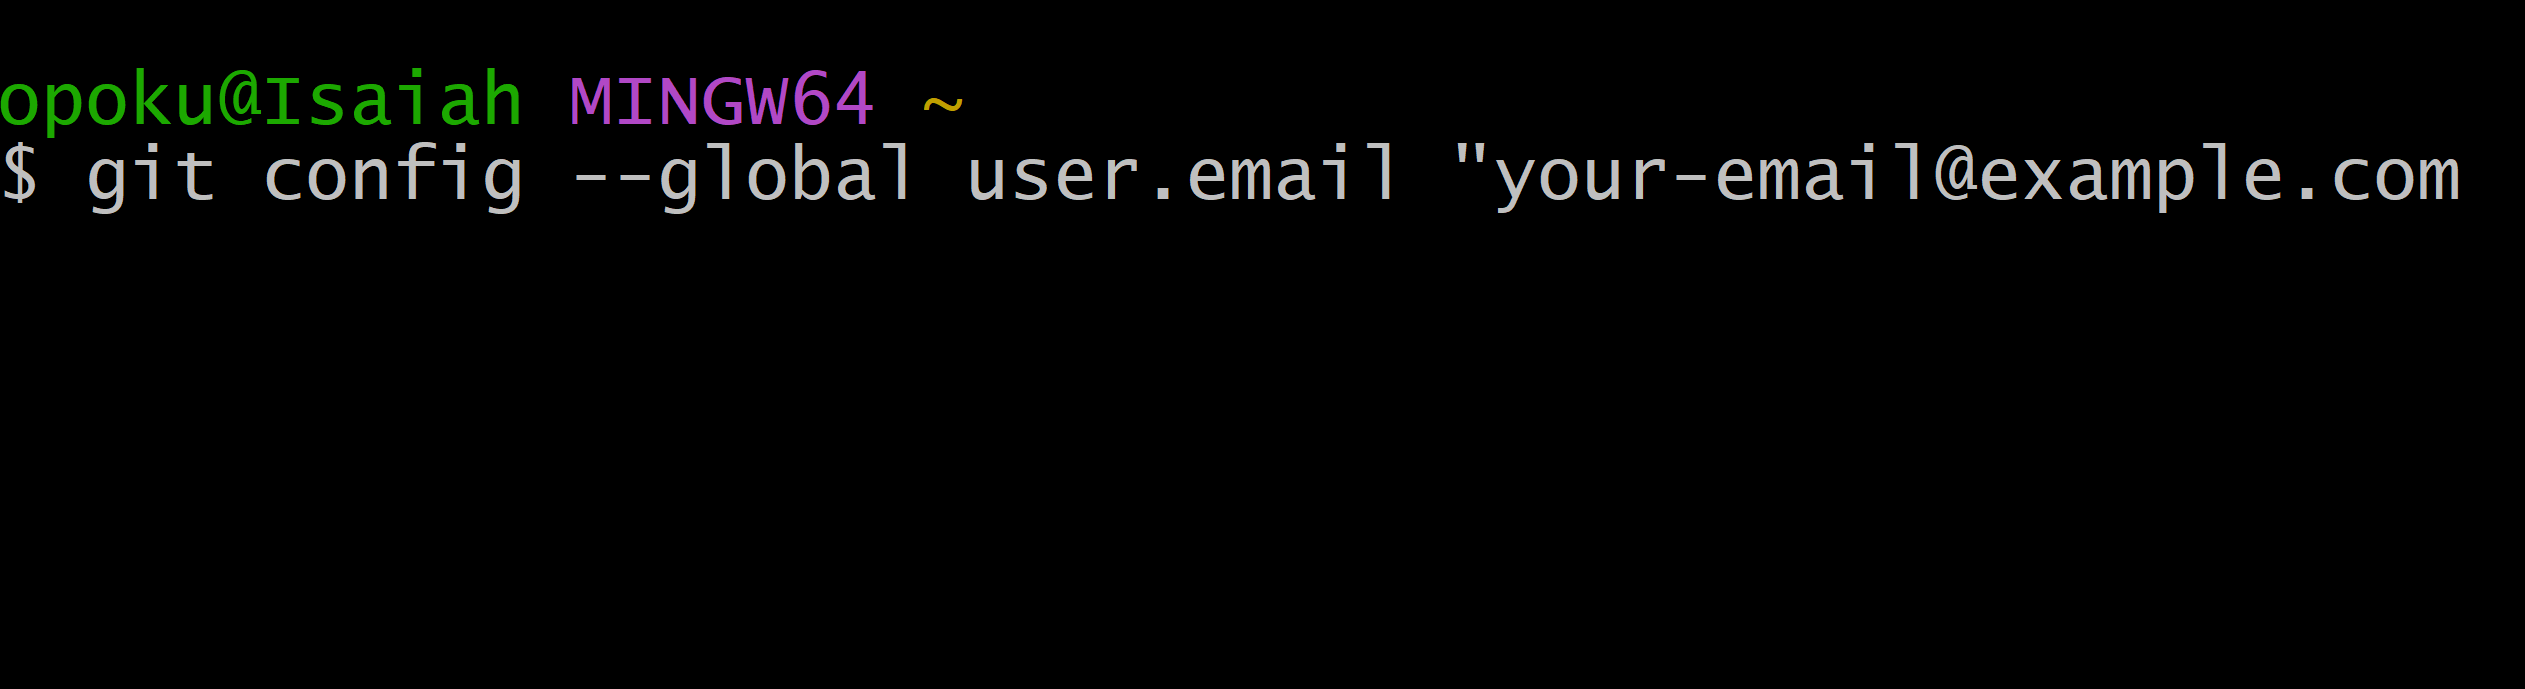
Make sure to replace this with your actual email used in your GitHub account.
Now that we have finished setting up your username and email for Git and GitHub, let's verify that everything is configured correctly.
To do this, use the following command:
git config --global --list
This command will list the username and email being used in the console for you to see.
You should see some information displayed in your terminal.
How to Set the Default Editor
In modern development, having a code editor can significantly simplify your workflow, especially when you're focused on coding.
Now, let's see how to configure Git to use a default editor by using this command:
# Set the default editor for Git
$ git config --global core.editor "code --wait"
Congratulations! You have successfully configured Git on your local machine. You are now ready to start using Git for your projects.
How to Create a Repository Using the Github Website
Creating a repository is the first step in using Git. A repository is a storage location where your projects live, containing all the files and revision history.
In this section, I will guide you through the process of creating a repository on GitHub.
There are two ways to create a repository: using the GitHub website or the command line. Let's get started. In this section, we'll focus on creating a repository using the GitHub website and the command line.
After logging into your GitHub account, you can create a new repository by following these steps:
- Click on the
+sign in the top right corner of the page and selectNew Repositoryfrom the dropdown menu.
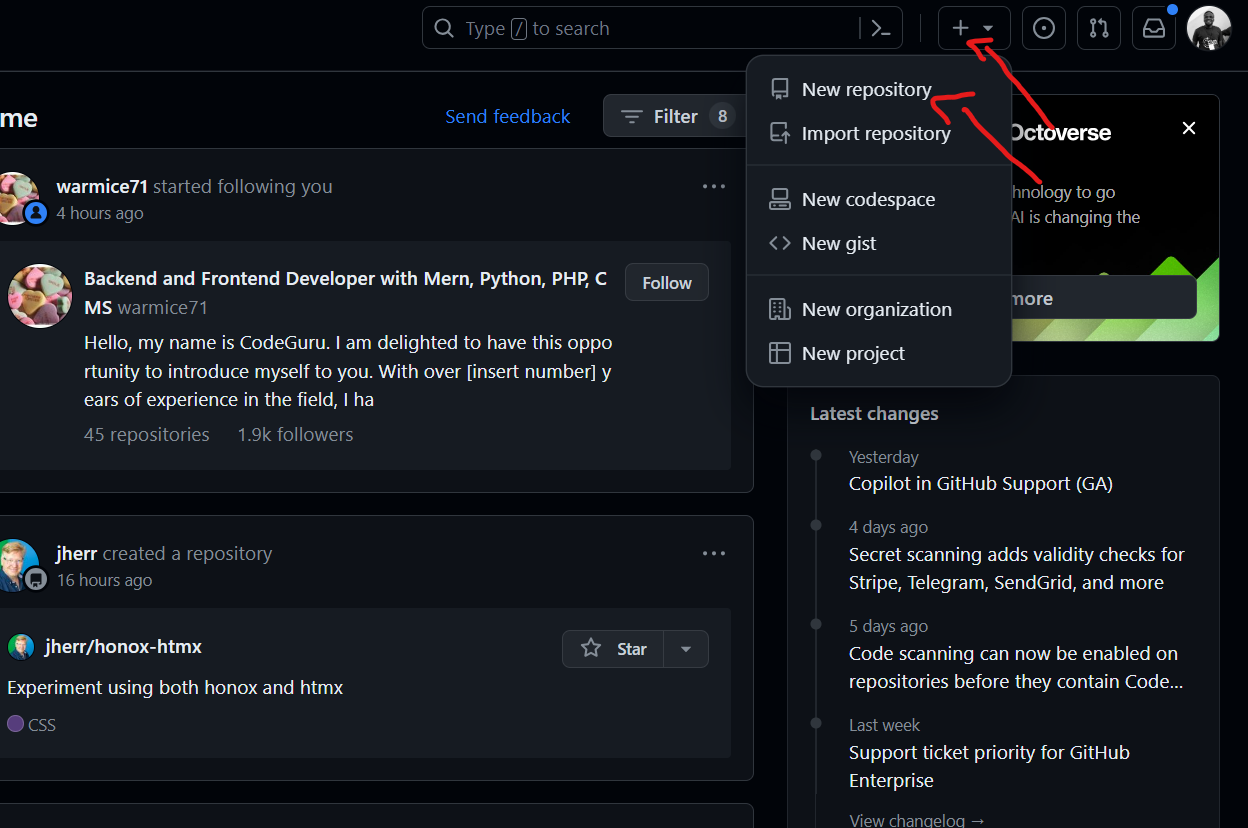
Above is an image of the new repository button on GitHub.
You will be directed to a new page where you can fill in the details of your new repository. You will need to enter the following information:
Repository name: This is the name of your repository. It should be unique and descriptive.Description: A brief description of your repository.Public or Private: You can choose to make your repository public or private. Public repositories are visible to everyone, while private repositories are only visible to you and the people you share them with.Initializethis repository with a README: You can choose to initialize your repository with a README file. This is useful if you want to provide information about your project or instructions on how to use it.
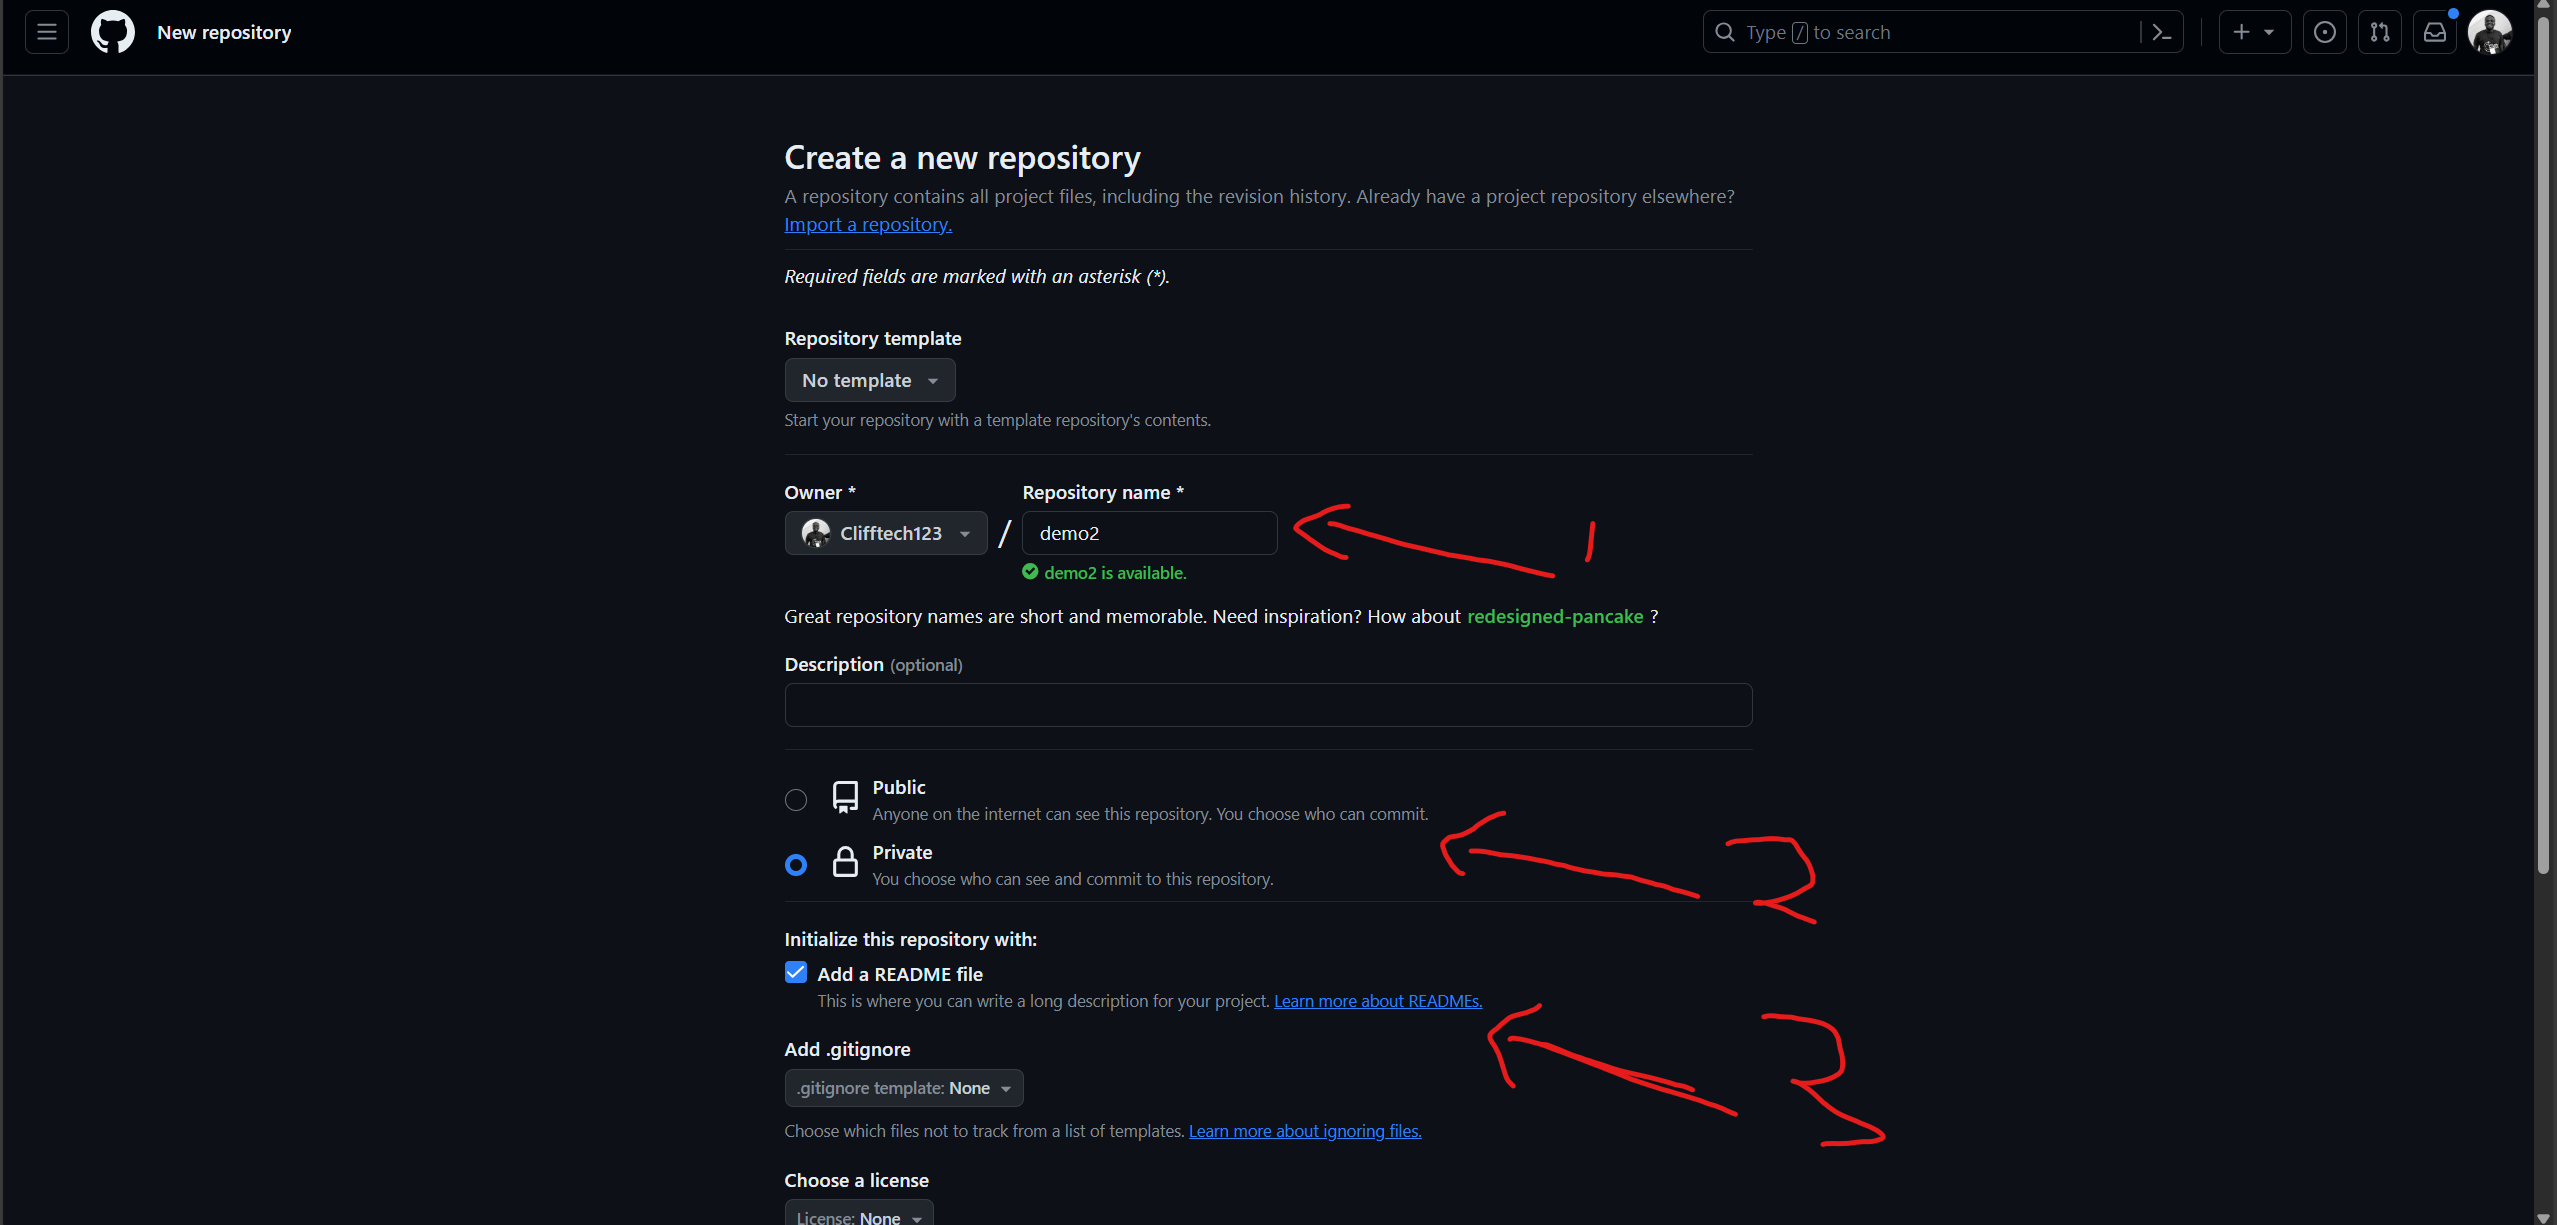
The image above shows the form where you'll fill in the details of your new repository.
- Once you have filled in the details, click on the
Create Repositorybutton to create your new repository.
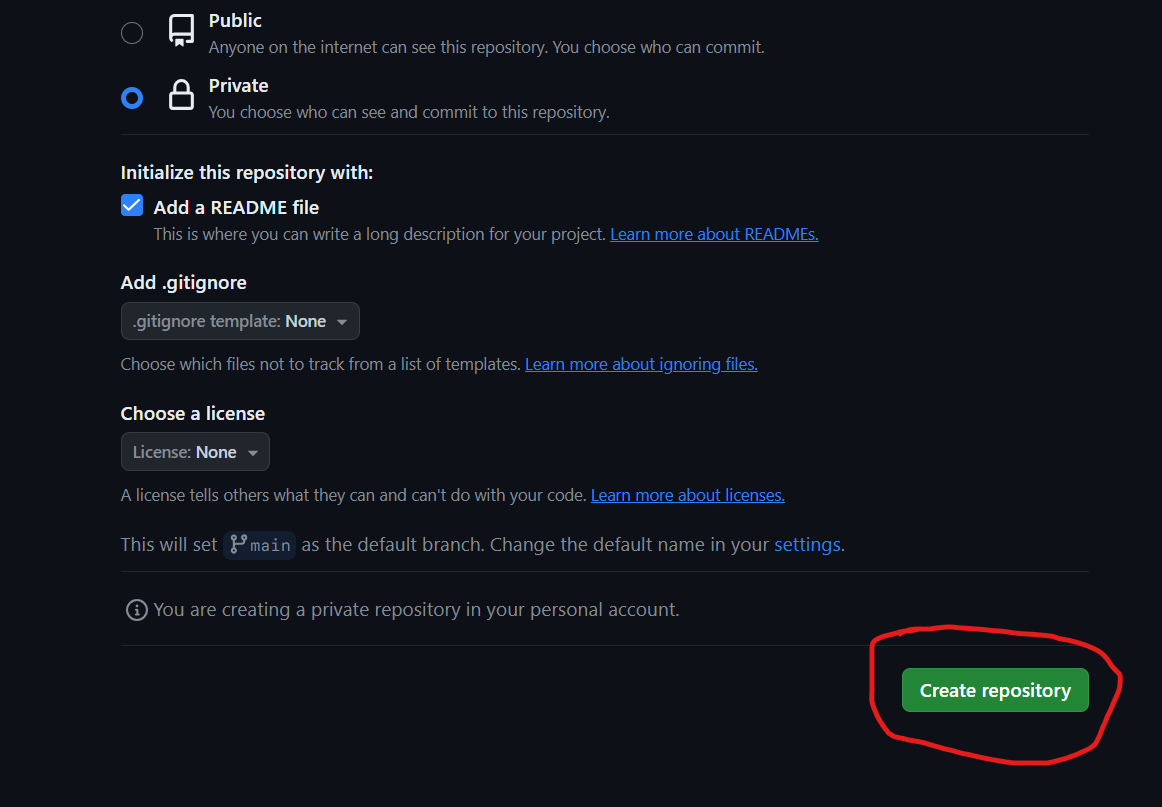
The image above shows the Create Repository button_.
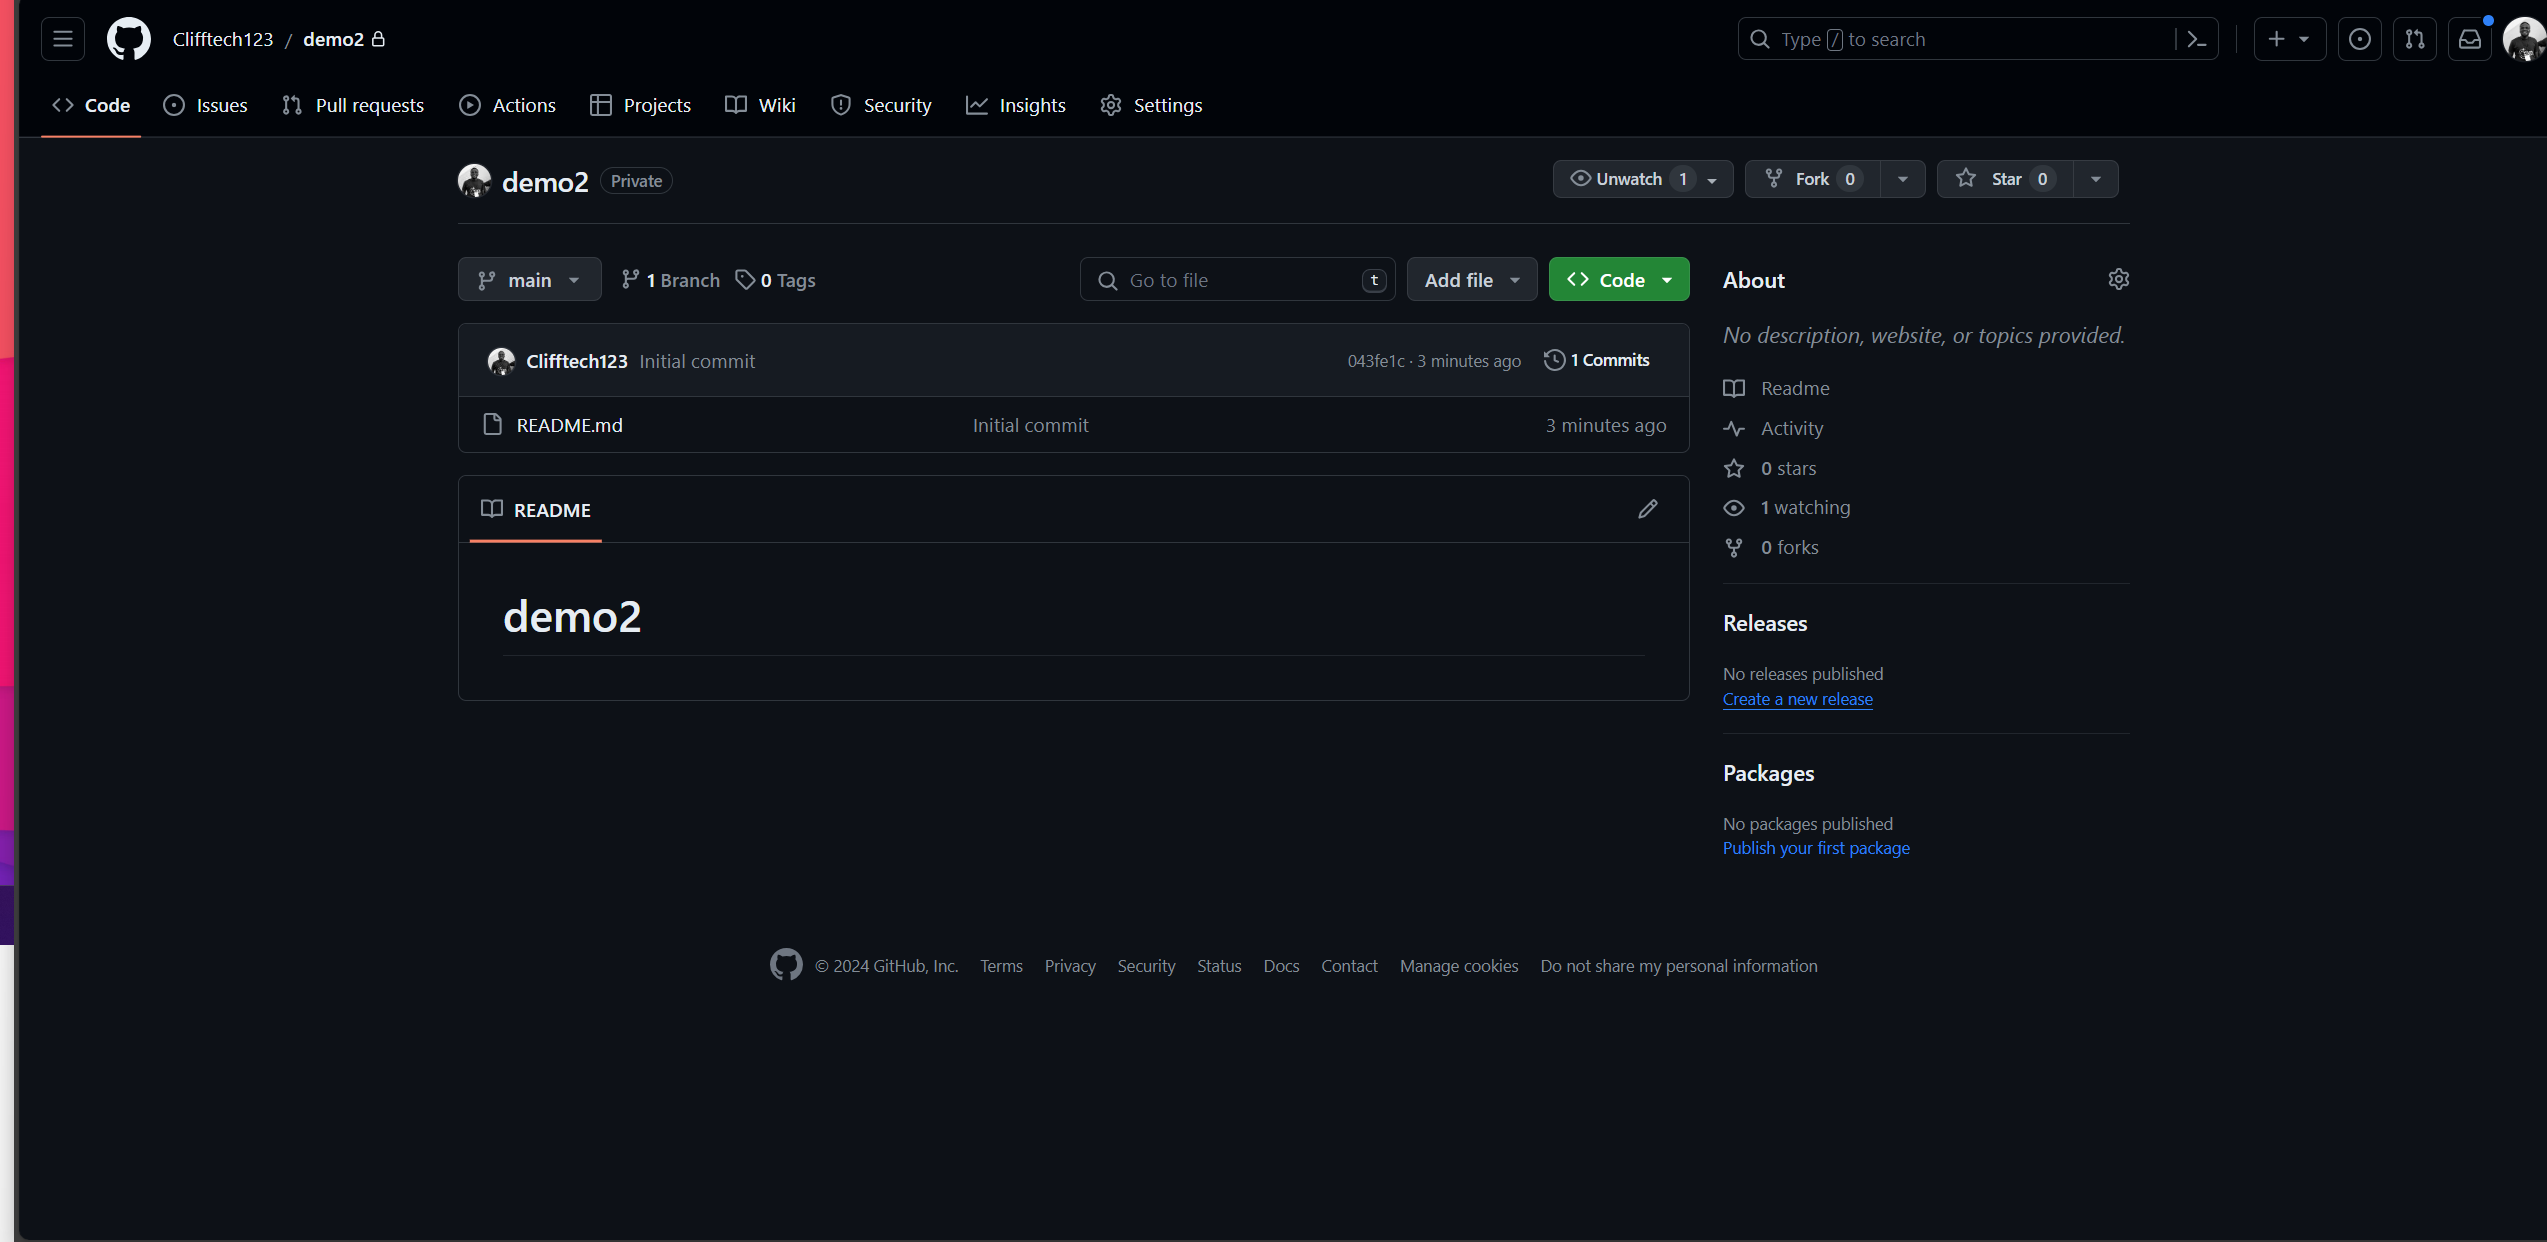
Congratulations! You have successfully created a new repository on GitHub. You can now start adding files and making changes to your repository.
You should see a page like the one below:
Now let's create a repository using the command line.
How to Create a Repository Using the Git Command Line
To create a new repository using the command line, you need to follow these steps:
Open your terminal and navigate to the directory where you want to create your new repository.
Use the
git initcommand to create a new repository. This command will create a new directory called.gitin your current directory, which will contain all the necessary files for your repository.
# initialize a new repository called my-project

$ git init my-project

The image above shows the command to initialize a new repository called my-project.
- Once you have created your new repository, you can start adding files and making changes to it. You can also connect your local repository to a remote repository on GitHub by following the instructions provided on the GitHub website.
Congratulations! You have successfully created a new repository using the command line.
Now we have successfully created a repository using the GitHub website and the command line – but how do we connect them? Now let's learn how to connect a local repository to a remote repository on GitHub.
How to Connect a Local Repository to a Remote Repository on GitHub
To connect your local repository to a remote repository on GitHub, you need to follow these steps:
On GitHub, navigate to the main page of the repository you created earlier.
Click on the
Codebutton to copy the URL of your repository.
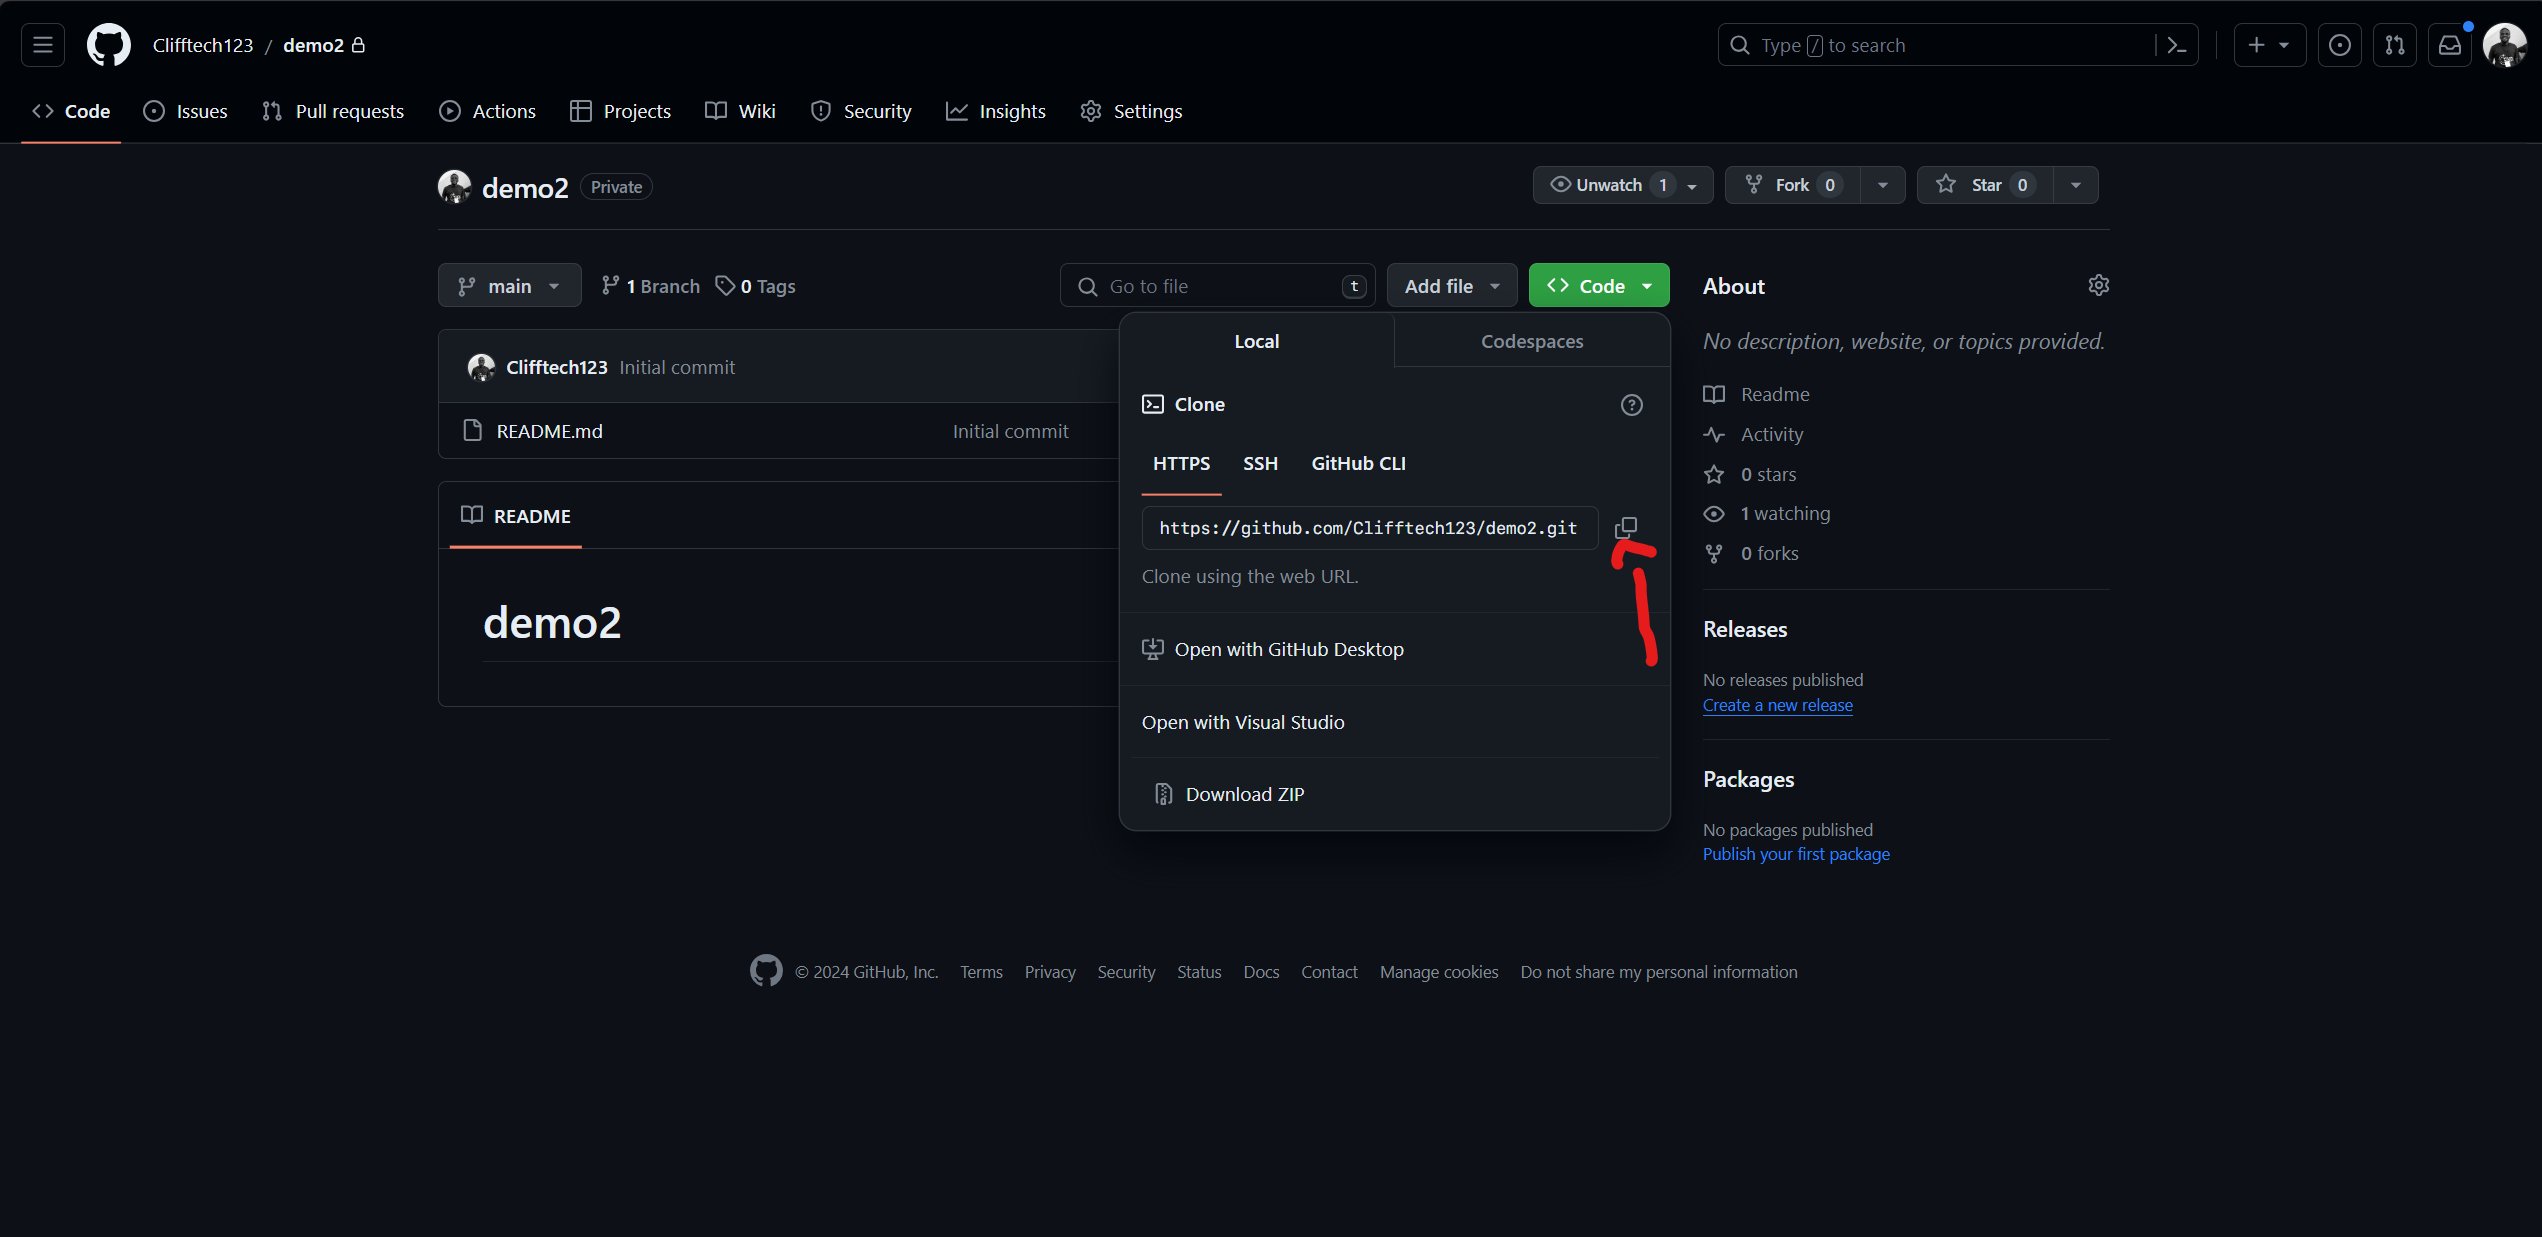
The image above shows the code button to copy the URL of your repository.
In your terminal, navigate to the directory of your local repository.
Use the
git remote add origincommand to connect your local repository to the remote repository on GitHub. Replace repository-URL with the URL of your repository.
$ git remote add origin repository-url
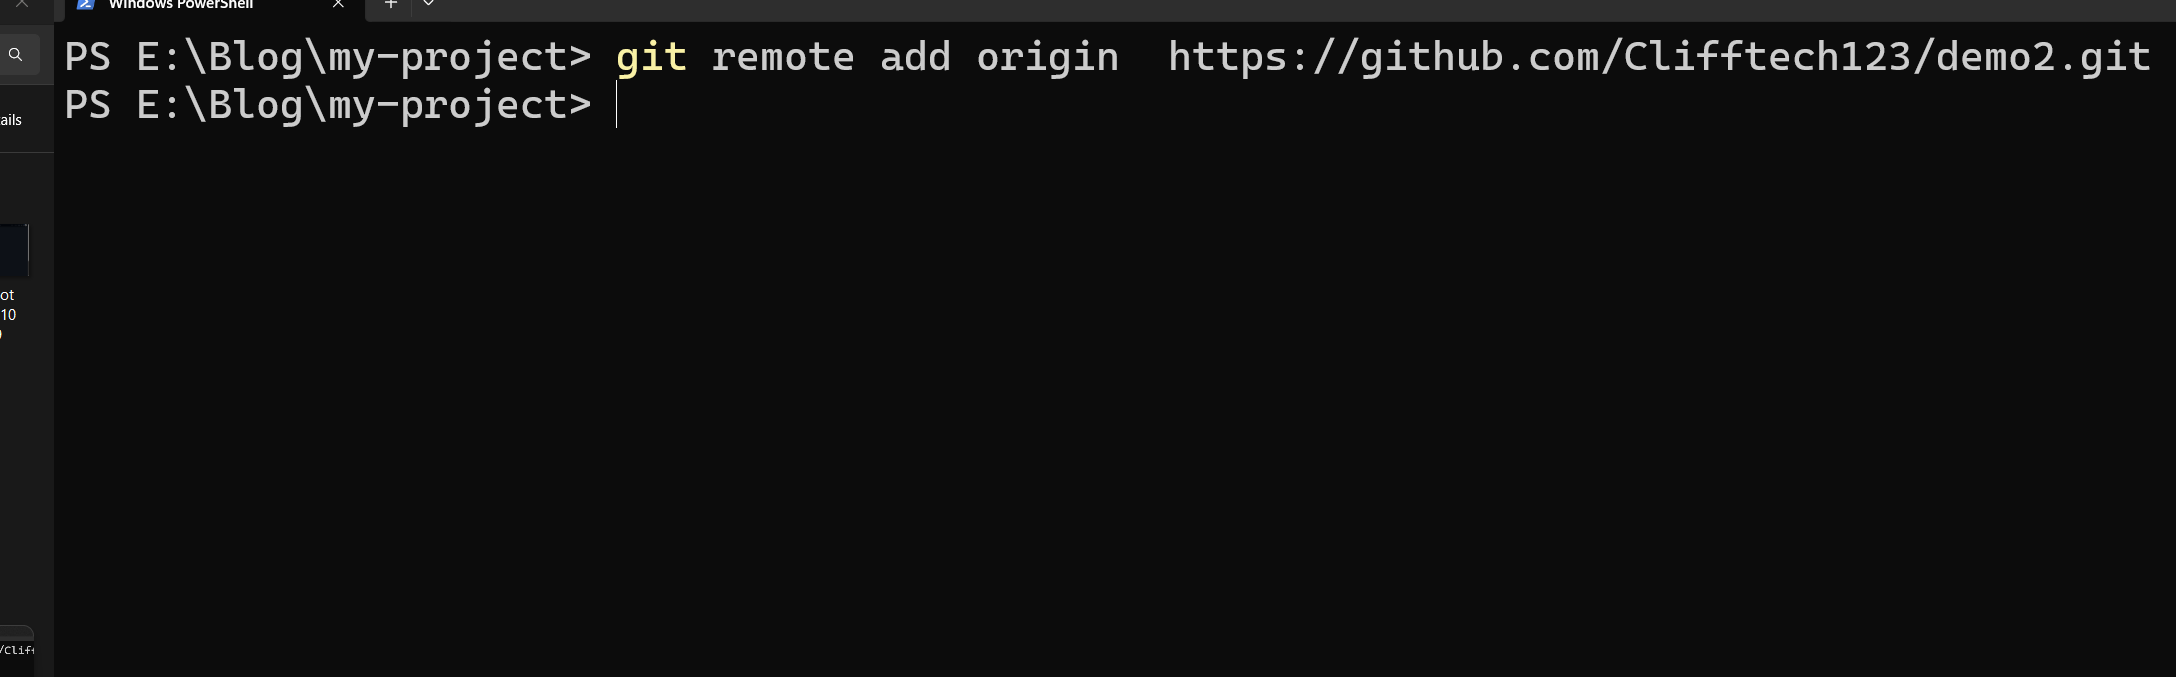
The image above shows the command to connect your local repository to the remote repository on GitHub.
- Once you have connected your local repository to the remote repository on GitHub, you can start pushing your changes to the remote repository using the
git pushcommand.
Congratulations! You have successfully connected your local repository to the remote repository on GitHub.
How to Pull Changes from a Remote Repository to a Local Repository
To pull changes from the remote repository to the local repository, you need to follow these steps:
In your terminal, navigate to the directory of your local repository.
Use the
git pullcommand to pull changes from the remote repository to the local repository.
$ git pull origin main
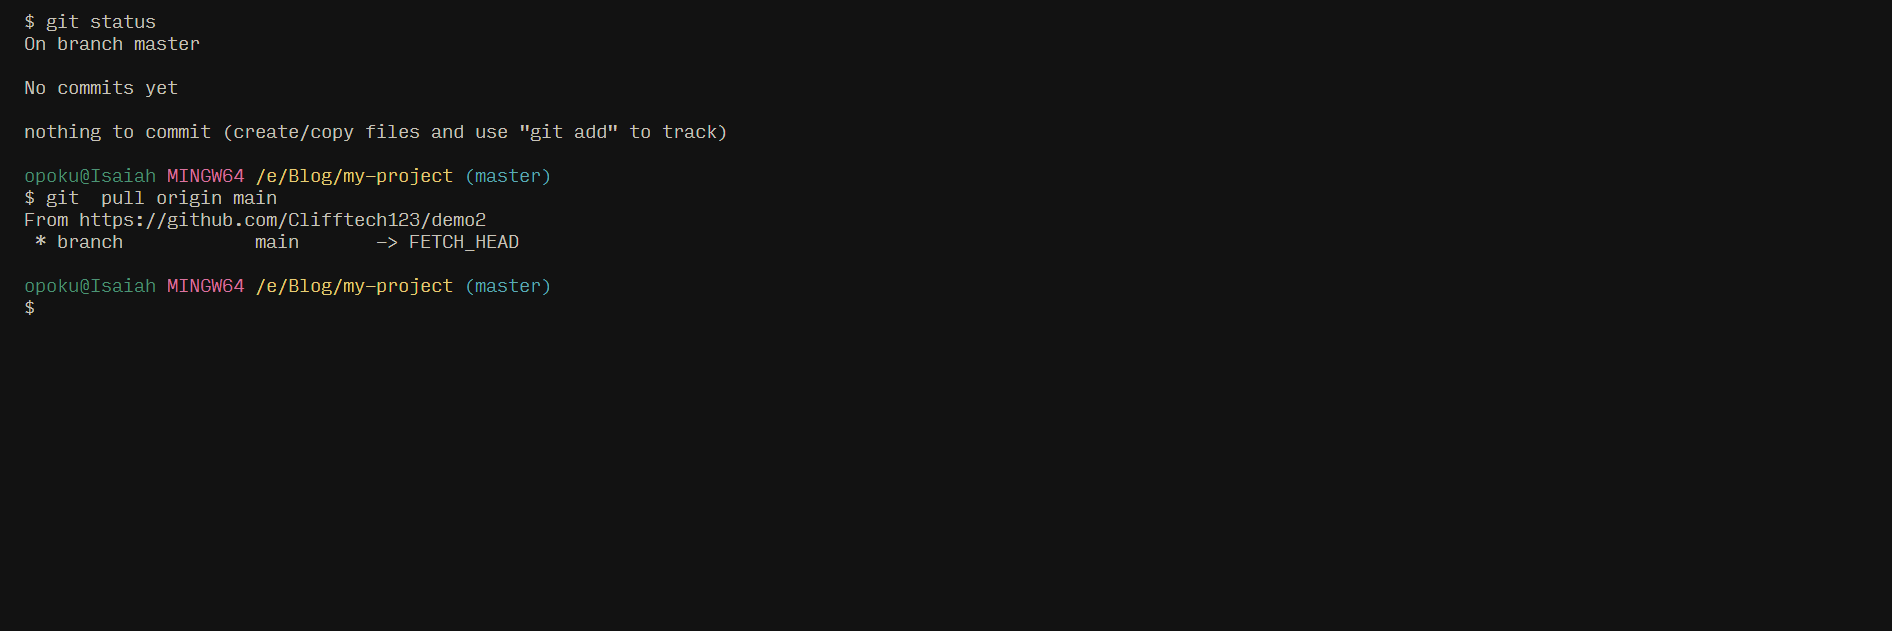
The image above shows the command to pull changes from the remote repository to the local repository.
After that, navigate the main branch by using the following command:
$ git checkout main
Congratulations! You have successfully pulled changes from a remote repository to a local repository. Your local repository is now up-to-date with the remote repository on GitHub*.
How to Work with Git Commands
In this section, we will cover some of the most commonly used Git commands and their functions. These commands will help you navigate your way through the Git workflow in your GitHub repository. Let's get started.
First, I will add some files so that we can start using the Git commands.
How to Make Changes to a File
To make changes to a file in Git, you need to follow these steps:
Open your terminal and navigate to the directory of your local repository.
Use a text editor to make changes to the file. For example, you can use the
codecommand to open the file in Visual Studio Code.
$ code file-name # For example, code index.html
- Once you have made your changes, save the file and close the text editor.
Congratulations! You have successfully made changes to a file in your local repository. Next, let's proceed to the next step: staging changes.
The image above shows the new file I added which is a React and TypeScript app.
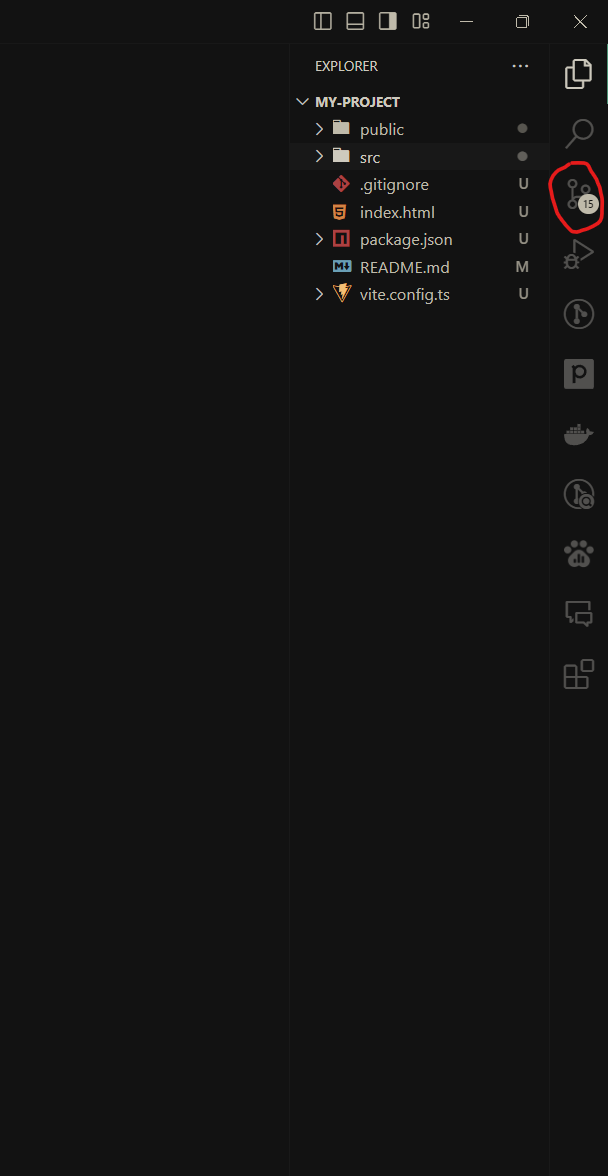
Visual Studio Code (VS Code) includes a source control feature that allows you to interact directly with your GitHub repository. This feature supports a variety of operations, including staging, committing, pushing, and pulling changes.
In addition to the source control feature, you can also use the integrated terminal in VS Code to interact with your GitHub repository.
Currently, if you look at the source control section in VS Code, you'll see the file we added listed under changes.
Next, let's explore how to use the terminal to interact with our GitHub repository.
Open your terminal and navigate to the directory of your local repository.
Now, let's use the git status command to check the status of the current branch.
How to Check the Status of the Current Branch
The git status command shows the status of the current branch, including any changes that have been made to the files in the repository. It provides information about which files have been modified, which files have been staged, and which files are untracked.
This command is useful for understanding the current state of your repository and determining which files need to be staged and committed.
#  Check the status of the current branch

$ git status  # On branch master
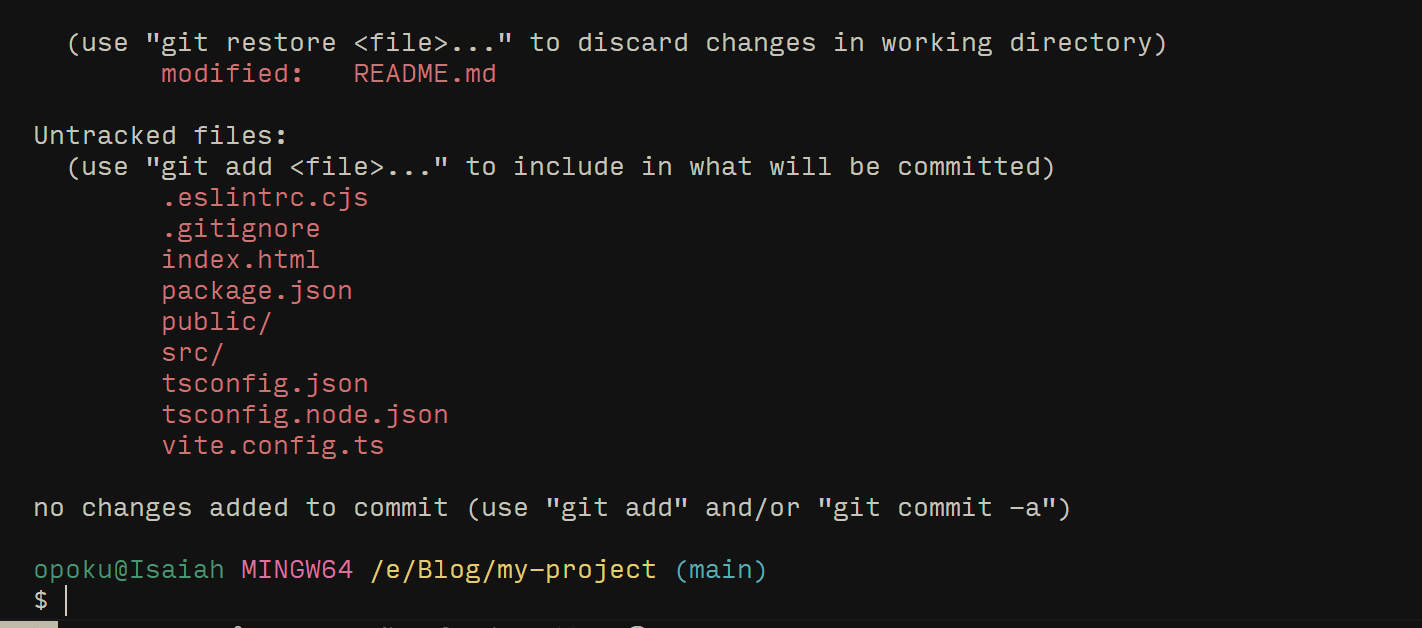
The image above shows the command to check the status of the current branch.
You may notice that parts of the file are highlighted in different colors. The red color indicates that the file has been modified, while the green color signifies that the file has been added to the staging area.
Currently, all files should be highlighted in red because we have not yet added any files to the staging area.
Let's add the file to the staging area using the git add command.
How to Stage Changes
The git add command adds files to the staging area, preparing them for the next commit. You can add all the files in the current directory to the staging area using the git add . command.
If you want to add a specific file, use the git add <file-name> command, replacing <file-name> with the name of your file. This process is known as staging, which prepares files for the next commit.
# Add files to the staging area

$ git add .  # Changes to be committed:

or

$ git add file-name  # Changes to be committed:
Think of it like this: getting into the car is like adding files to the staging area, and driving the car is like making a commit.
Now, let's use the git commit command to commit the changes to the current branch.
How to Commit Changes
The git commit command commits the changes to the current branch. You can use the -m flag to add a message to your commit. This message should provide a brief summary of the changes you've made.
For instance, "Initial commit" could be your commit message. This command is used to save the changes to the local repository.
# Commit changes to the current branch

$ git commit -m "Commit message"   # For example, git commit -m "Initial commit"
We've successfully committed the changes to the current branch. Next, we'll push these changes to the remote repository on GitHub using the git push command.
How to Push Changes to a Remote Repository
The git push command pushes changes from your local repository to a remote repository on GitHub. You can use the git push command to push changes from your local repository to the remote repository on GitHub. This process is essential for updating the remote repository with the changes you've made locally.
# Push changes to a remote repository

$ git push origin main  # For example, git push origin master
Congratulations! You have successfully pushed your changes to the remote repository on GitHub. You can now view your changes on the GitHub website.
Now that we've successfully pushed our changes to the remote repository on GitHub, let's proceed to the next step: creating a branch.
Depending on your PC environment, your local repository may have a default branch named either main or master. In this guide, we'll use main as the default branch name, aligning with GitHub's recent change from master to main.
Before we start adding files, let's ensure our local repository is up-to-date with the remote repository by pulling any changes.
If the term branch seems unfamiliar, don't worry. In the next section, we'll cover how to create a branch and how to pull changes from the remote repository to the local repository.
How to Create a Branch
Branching is a fundamental concept in Git. It allows you to diverge from the main line of development and continue working without impacting the main codebase.
In this section, I'll guide you through the process of creating a new branch using the git branch command. This command creates a new branch but does not switch to it. In the following steps, we'll also cover how to switch to your newly created branch using the git checkout command. Let's dive in.
To create a new branch, you need to follow these steps:
Open your terminal and navigate to the directory of your local repository.
Use the
git branchcommand to create a new branch. Replace<branch-name>with the name of your new branch.
# Create a new branch

$ git branch <branch-name>  # For example, git branch feature-branch
The git branch command creates a new branch but does not switch to it. To switch to your newly created branch, use the git checkout command.
# Switch to the newly created branch

$ git checkout <branch-name>  # For example, git checkout feature-branch
The git checkout command is used to switch from one branch to another. Replace <branch-name> with the name of your new branch. In this case, we're switching to the feature-branch branch. But we if want to delete the branch, we can use the following command:
# Delete a branch

$ git branch -d <branch-name>  # For example, git branch -d feature-branch
The git branch -d command is used to delete a branch. Replace <branch-name> with the name of the branch you want to delete. In this case, we're deleting the feature-branch branch.
Congratulations! You have successfully created a new branch and switched to it. You can now start adding files and making changes to your new branch.
Now you know how to create GitHub repository, connect a local repository to a remote repository on GitHub, pull changes from a remote repository to a local repository, work with Git commands, and create a branch.
Let's proceed to the next section, where we'll cover how to create a pull request. This is a crucial step in the collaborative workflow, as it allows you to propose changes and request a review from other collaborators.
How to Create a Pull Request
A pull request is a proposal to merge changes from one branch into another. It's a widely-used method for creating and reviewing code. In this section, I'll guide you through the process of creating a pull request using the GitHub website.
For instance, let's say you have a branch named feature-branch and you want to merge it into the main branch. We'll walk you through how to create a pull request for this scenario. Let's get started.
First, let's make a change to our feature branch by adding a file to it:
$ git checkout feature-branch
You should see something like this in your terminal:
git checkout feature-branch
Switched to a new branch 'feature-branch'
branch 'feature-branch' set up to track 'origin/feature-branch'.
Now, let's add a file to the feature branch.
$ touch feature-branch-file.txt
After running the command, you should see a new file called feature-branch-file.txt in your directory.
The touch command is used to create a new file. Replace feature-branch-file.txt with the name of your file. In this case, we're creating a new file called feature-branch-file.txt.
Now, let's add some content to the file.
$ echo "This is a file in the feature branch" >> feature-branch-file.txt
This command adds the text "This is a file in the feature branch" to the feature-branch-file.txt file.
The echo command is used to add content to a file. In this case, we're adding the text "This is a file in the feature branch" to the feature-branch-file.txt file.
Now that we have some text in the file, let's stage and commit the changes to the feature branch.
$ git add .
The git add . command stages all the changes in the current directory.
$ git commit -m "Add file to feature branch"
The git commit -m command commits the changes to the current branch. Replace Add file to feature branch with your own descriptive message. This message should provide a brief summary of the changes you've made. In this case, we're committing the changes to the feature branch.
Now, let's push the changes to the remote repository on GitHub.
$ git push origin feature-branch
The git push command is used to push changes from your local repository to the remote repository on GitHub. Replace feature-branch with the name of your branch. In this case, we're pushing the changes to the feature-branch branch.
Congratulations! You have successfully pushed your changes to the remote repository on GitHub. You can now view your changes on the GitHub website.
Now when you open your GitHub repository, you should see a message indicating that you recently pushed a new branch. You can click on the Compare & pull request button to create a pull request for the feature-branch branch.
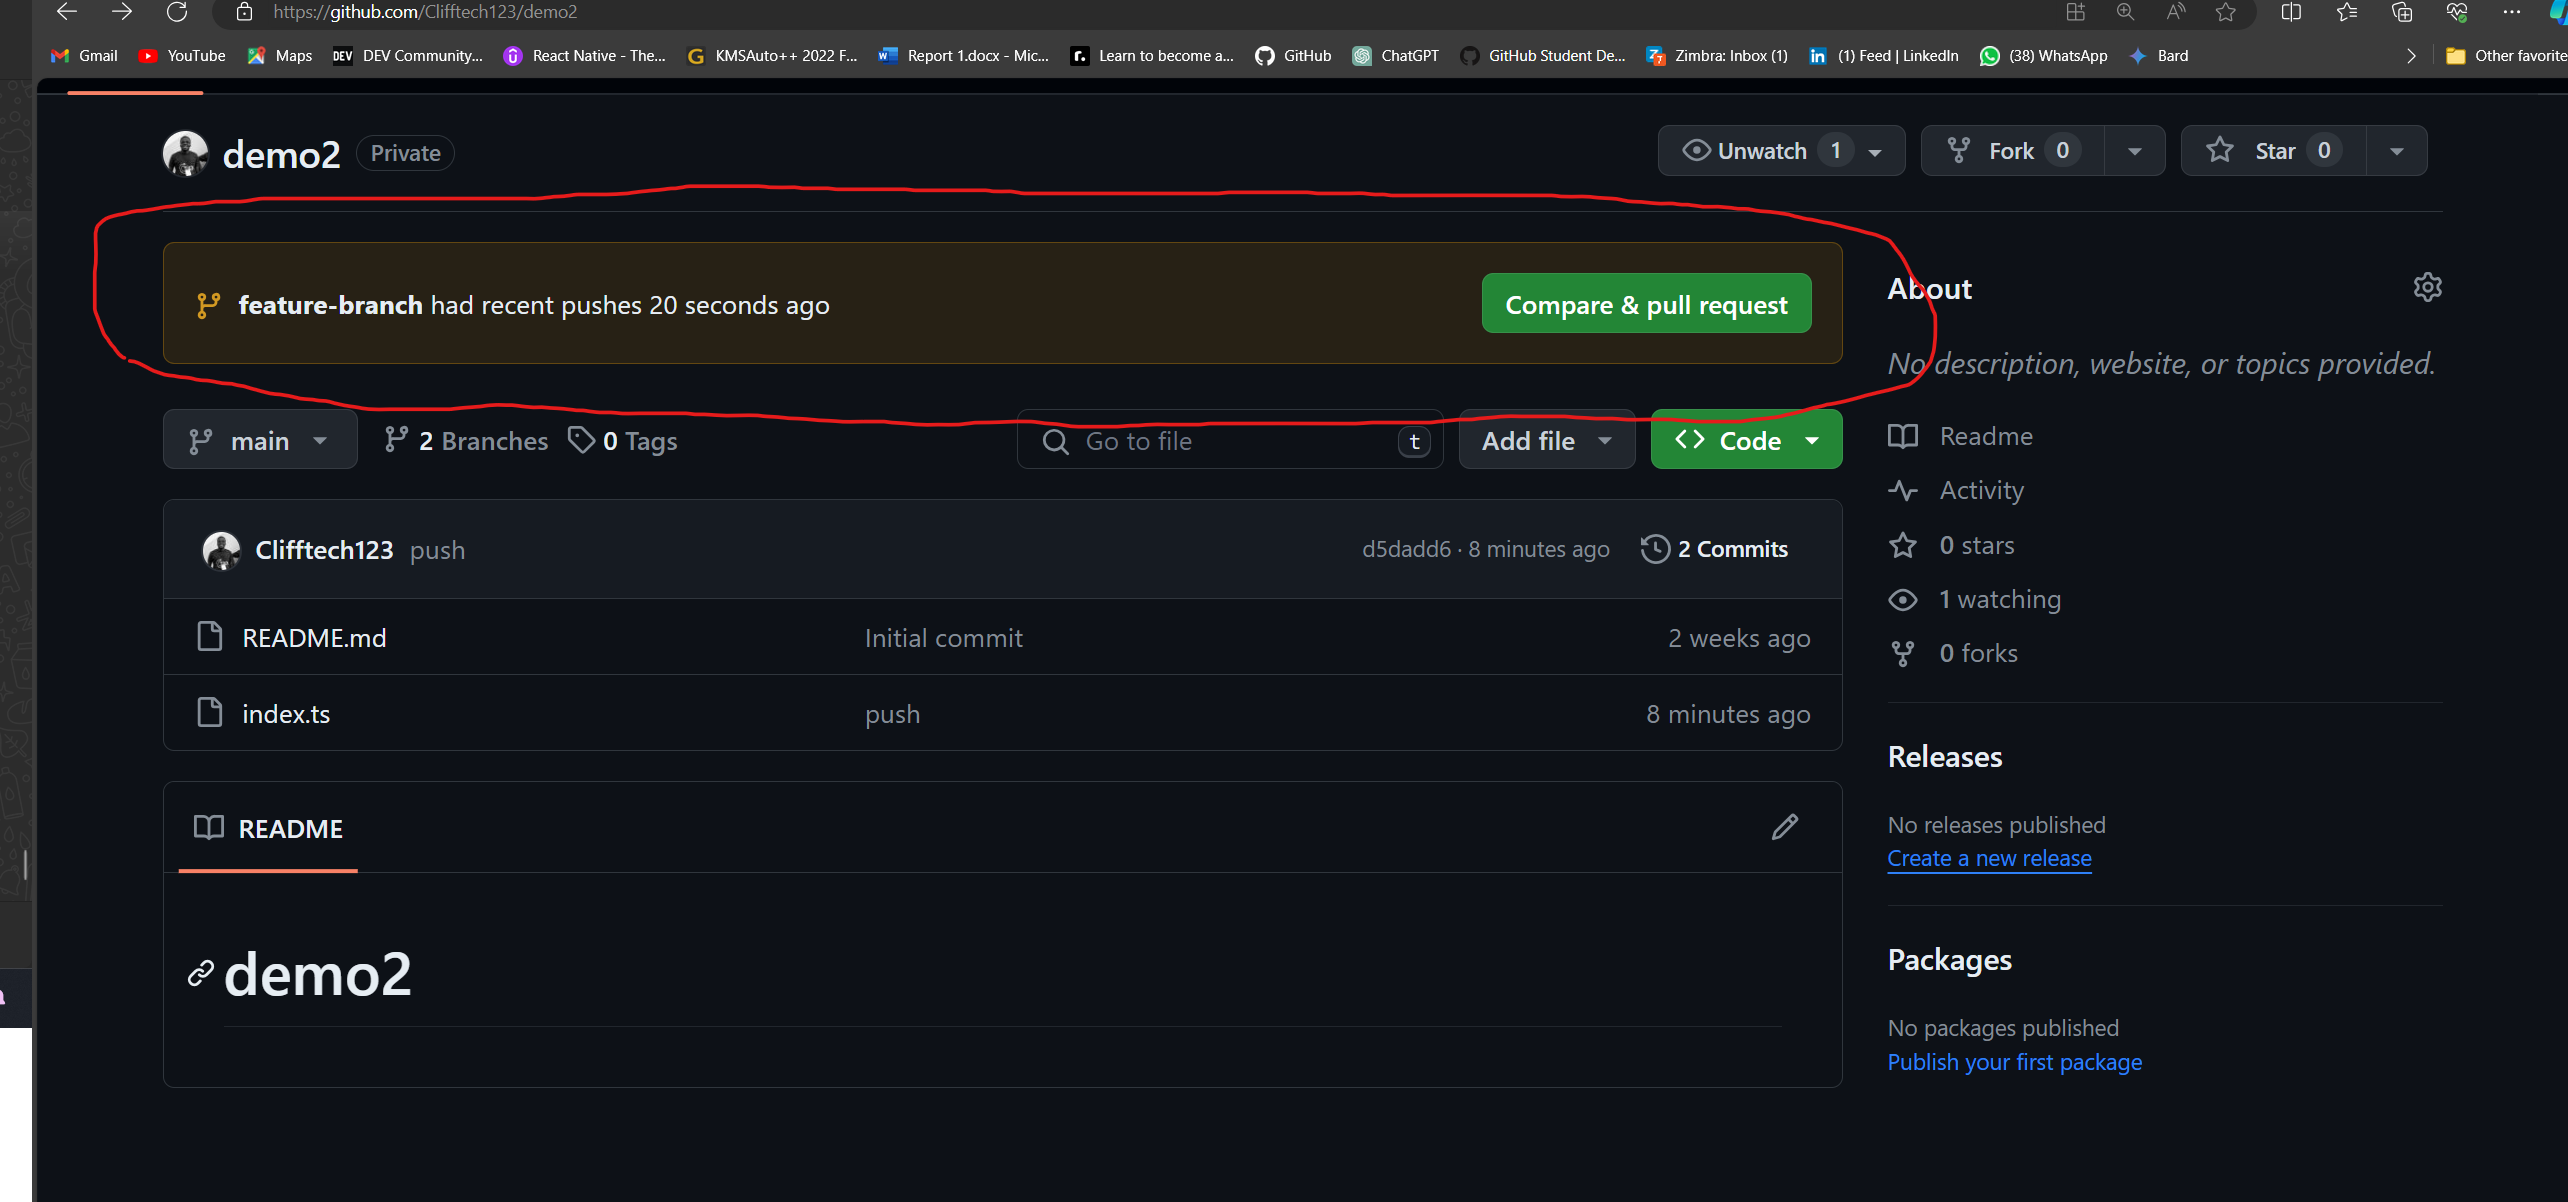
The image above shows the Compare & pull request button on GitHub.
After clicking on the Compare & pull request button, you will be directed to a new page where you can fill in the details of your pull request.
You will need to enter the following information:
- Title: a brief summary of your pull request.
- Description: a detailed description of your pull request, including information about the changes you've made and why you've made them.
- Reviewers: you can choose to request a review from specific collaborators.
- Assignees: you can choose to assign your pull request to specific collaborators.
- Labels: you can choose to add labels to your pull request to categorize it.
- Projects: you can choose to add your pull request to a project board.
- Milestone: you can choose to add your pull request to a milestone.
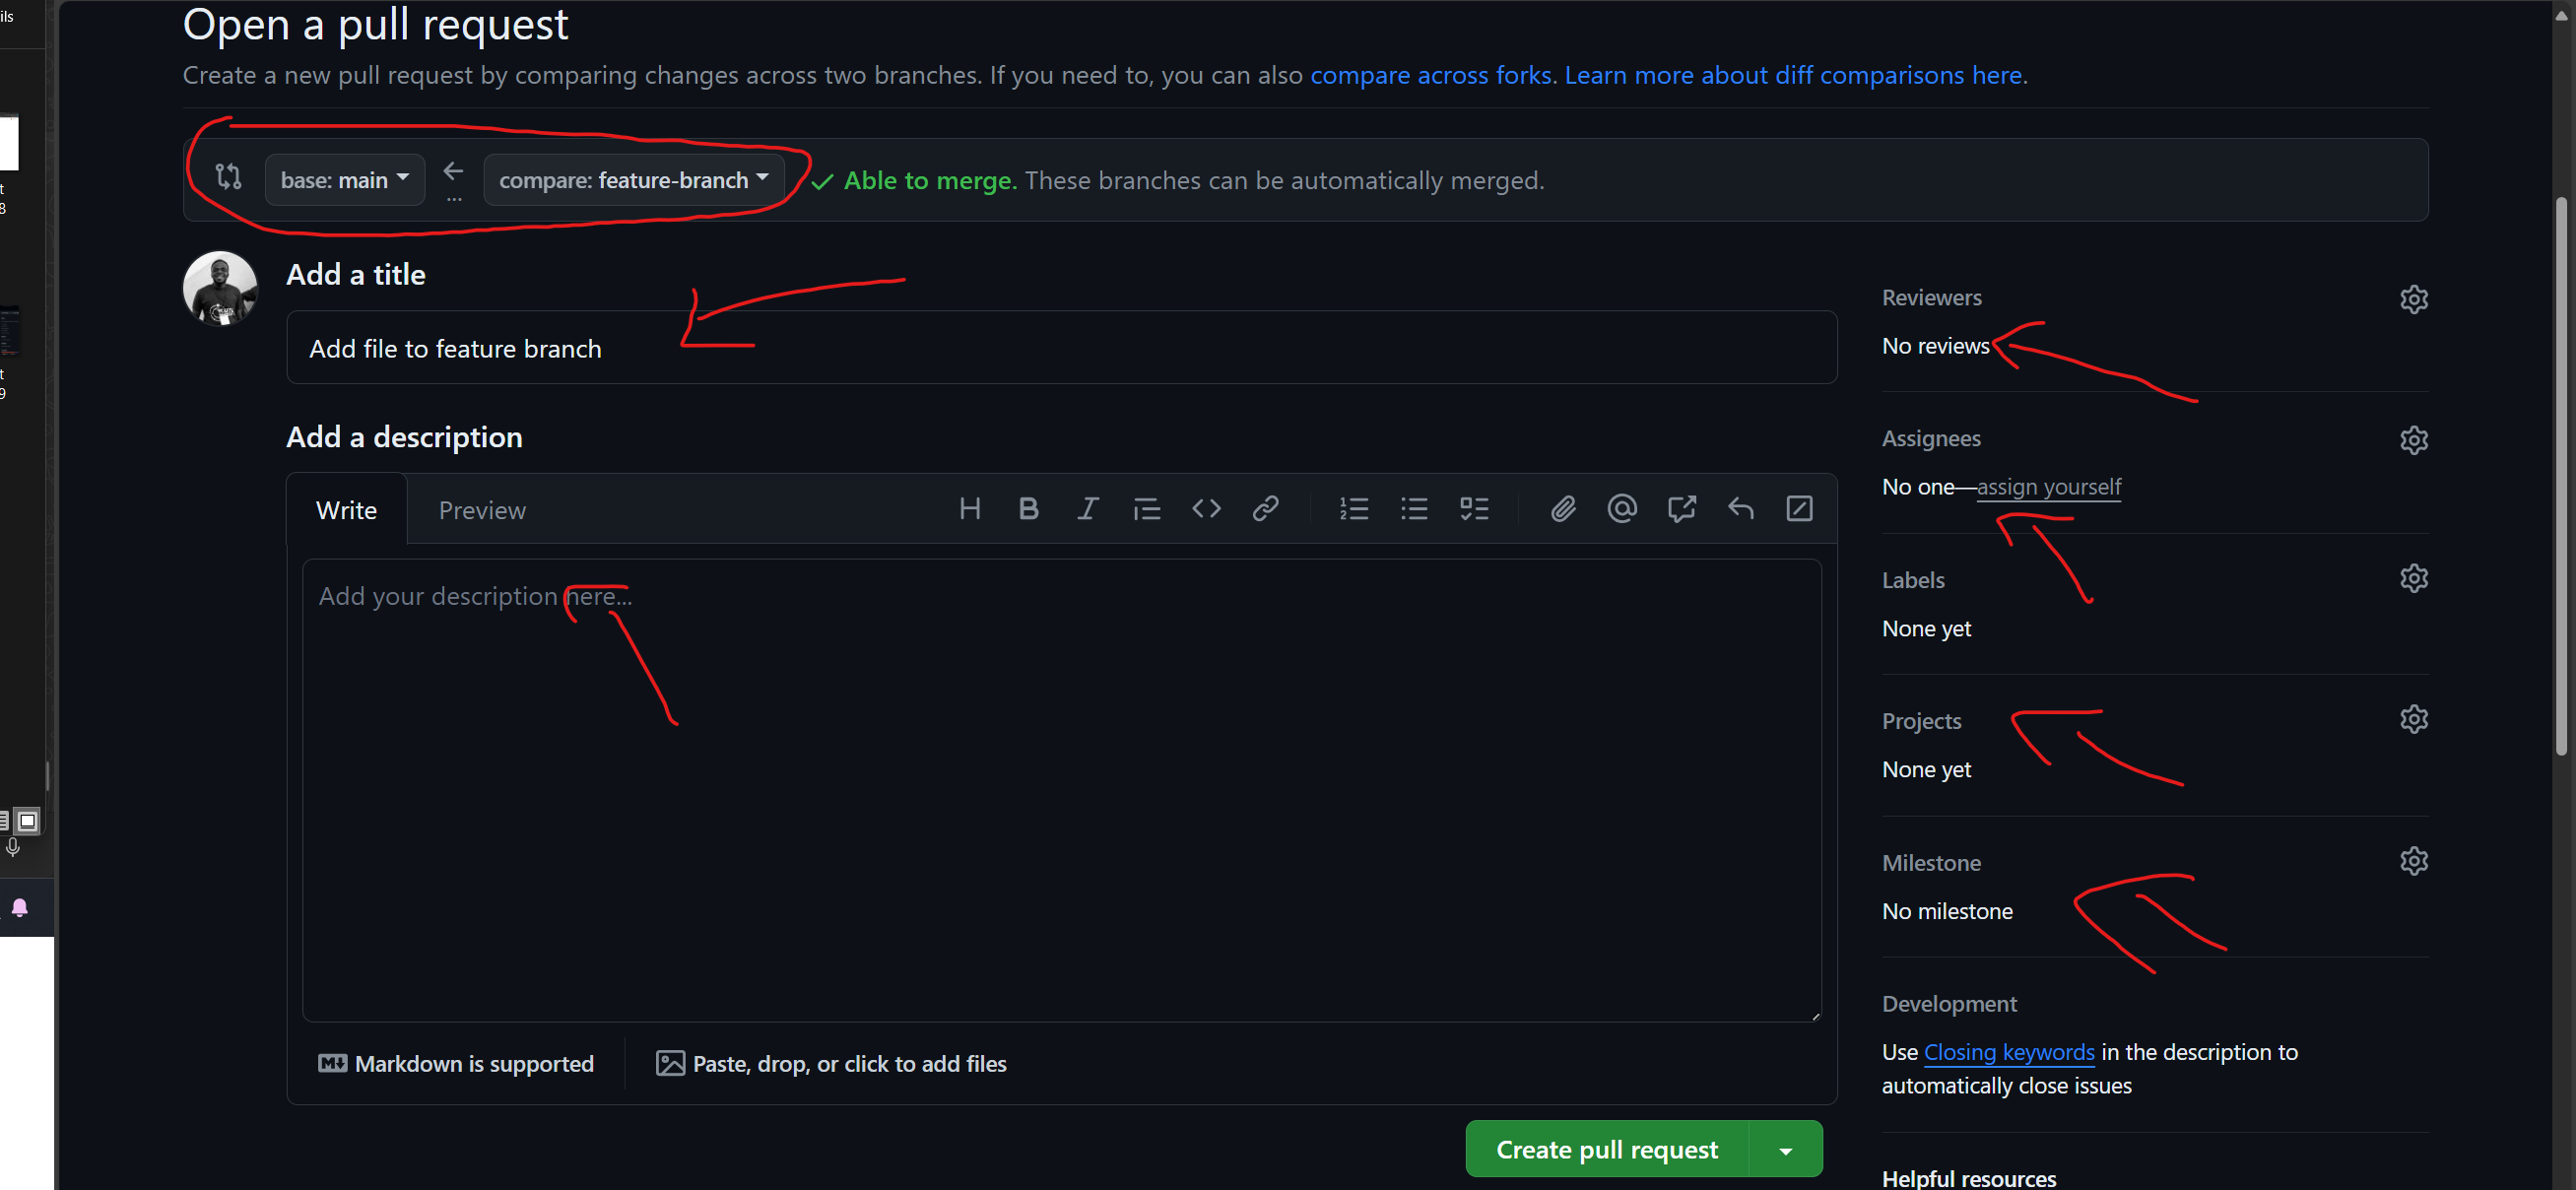
The image above shows the form to fill in the details of your pull request.
You can decide to file the details of your pull request or create the pull request. After creating the pull request, you can view it on the GitHub website. You can also request a review from specific collaborators and make changes to your pull request if necessary.
Once your pull request has been reviewed and approved, you can merge it into the main branch. In our case we not going to file the form but we are going to create the pull request.
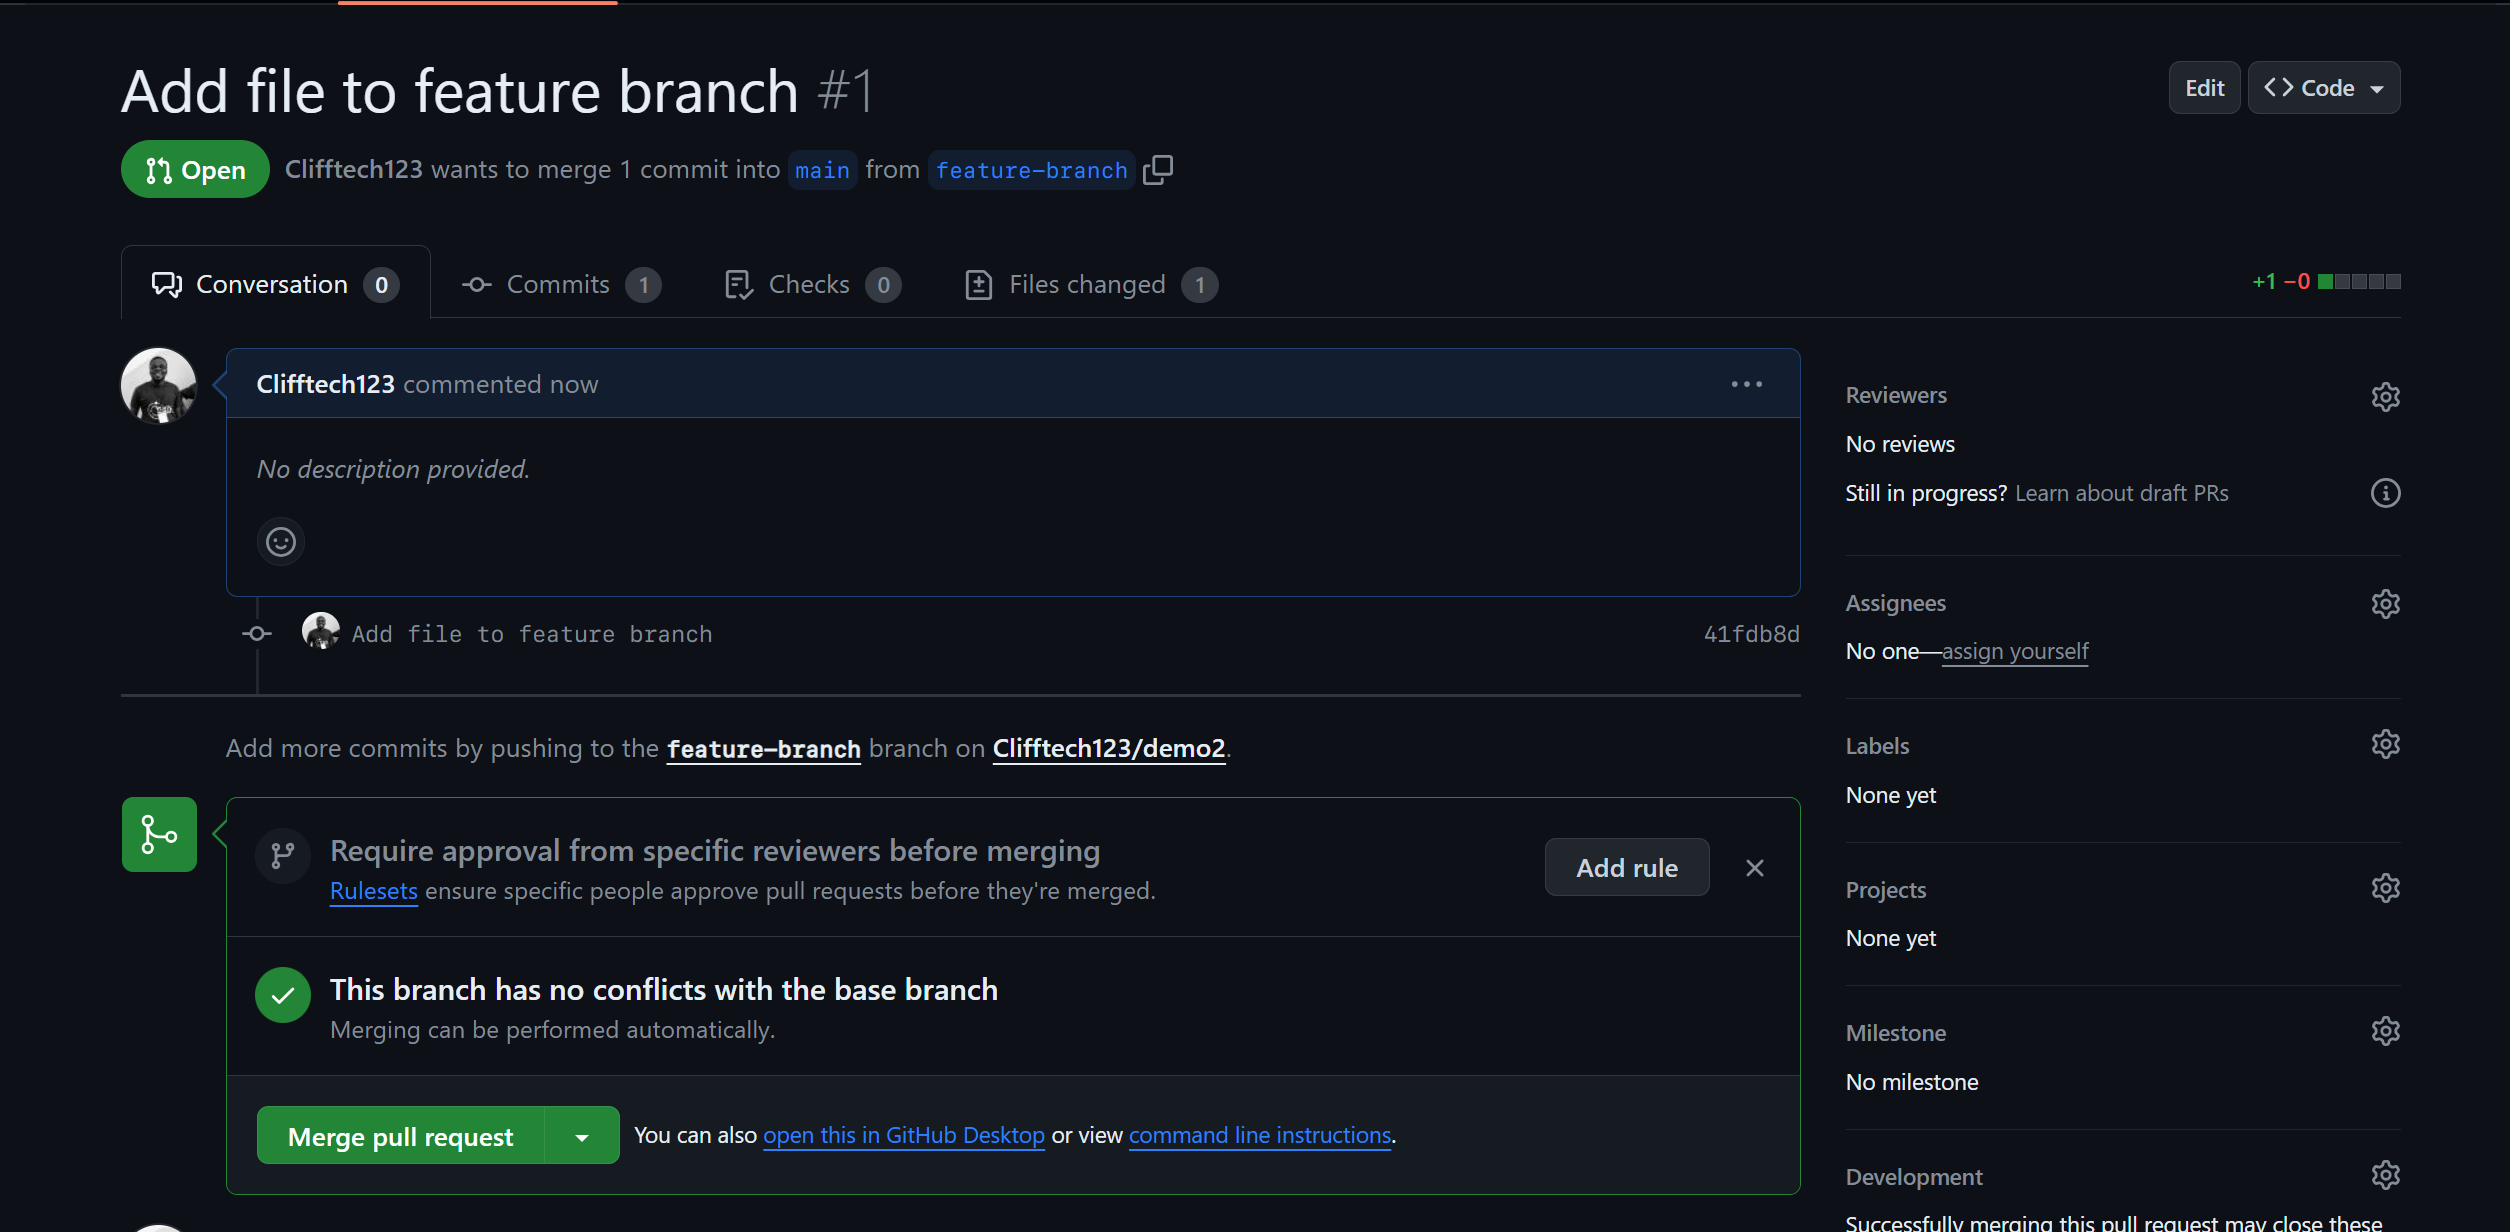
The image above shows the pull request created on GitHub.
Now that we have created a pull request, let's proceed to the next section, where we'll cover how to merge a pull request. This is the final step in the collaborative workflow, as it allows you to incorporate changes into the main codebase.
How to Merge a Pull Requset
Merging a pull request signifies the integration of changes from one branch into another, often the main branch. This step is pivotal in collaborative workflows, enabling the assimilation of modifications into the primary codebase.
In this section, we'll navigate the process of merging a pull request via the GitHub website.
After creating a pull request, you can merge it into the main branch by following these steps:
On GitHub, navigate to the main page of the repository where you created the pull request.
Click on the
Pull requeststab to view the list of pull requests.
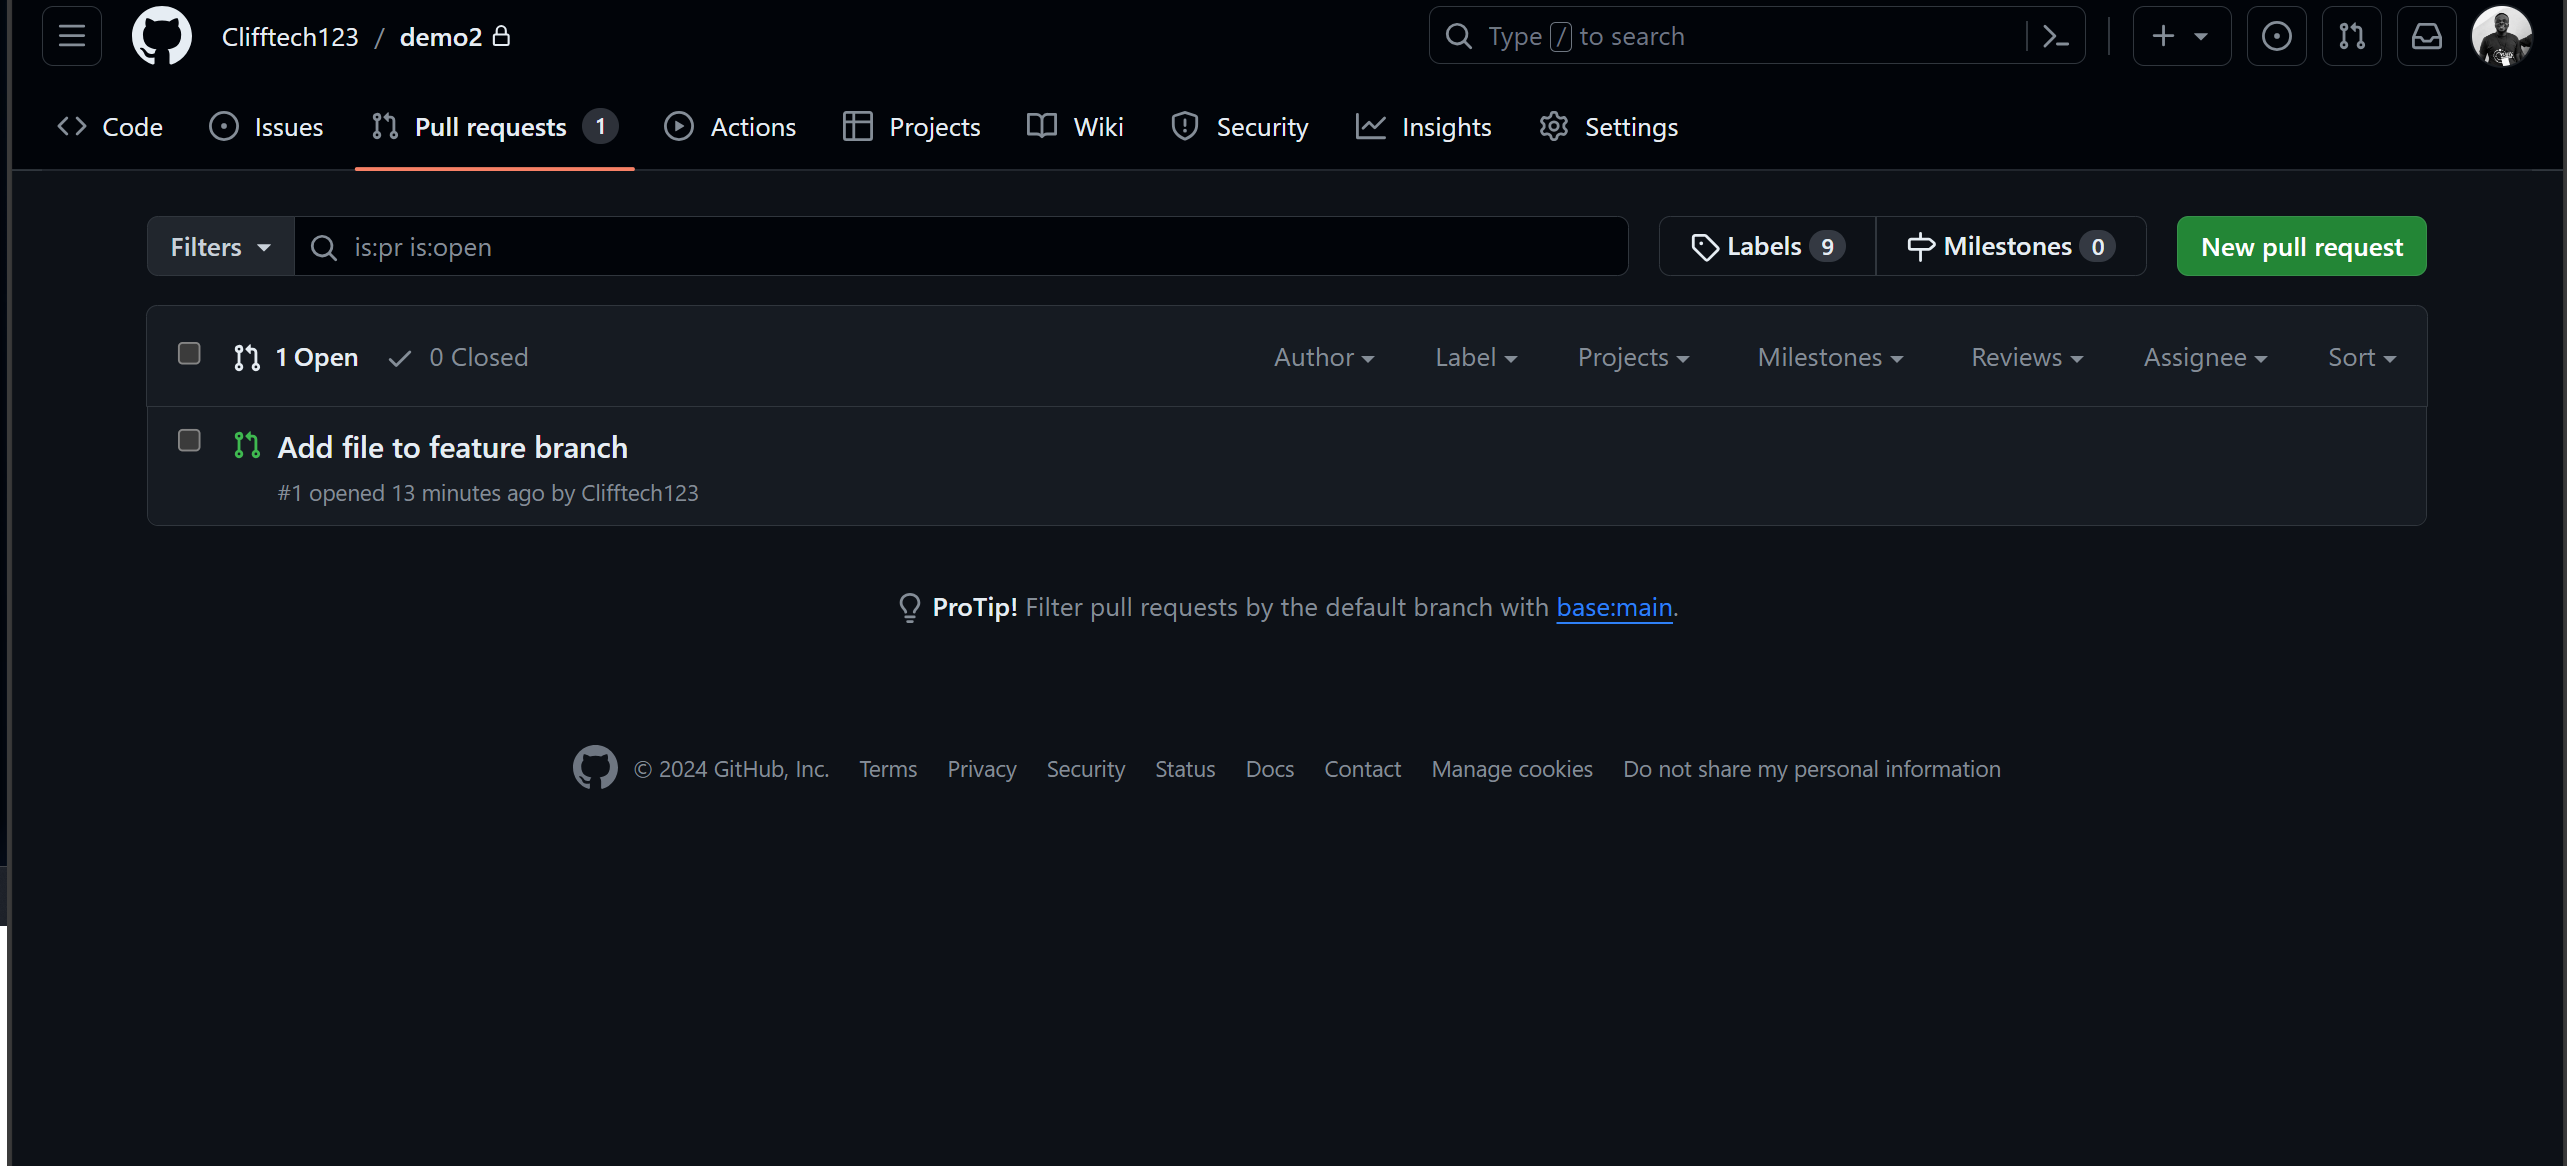
The image above shows the Pull requests tab on GitHub.
Click on the pull request you want to merge.
Click on the
Merge pull requestbutton to merge the pull request into themainbranch.Click on the
Confirm mergebutton to confirm the merge.
After that you should see a message indicating that the pull request has been successfully merged. You can also delete the branch after merging the pull request.
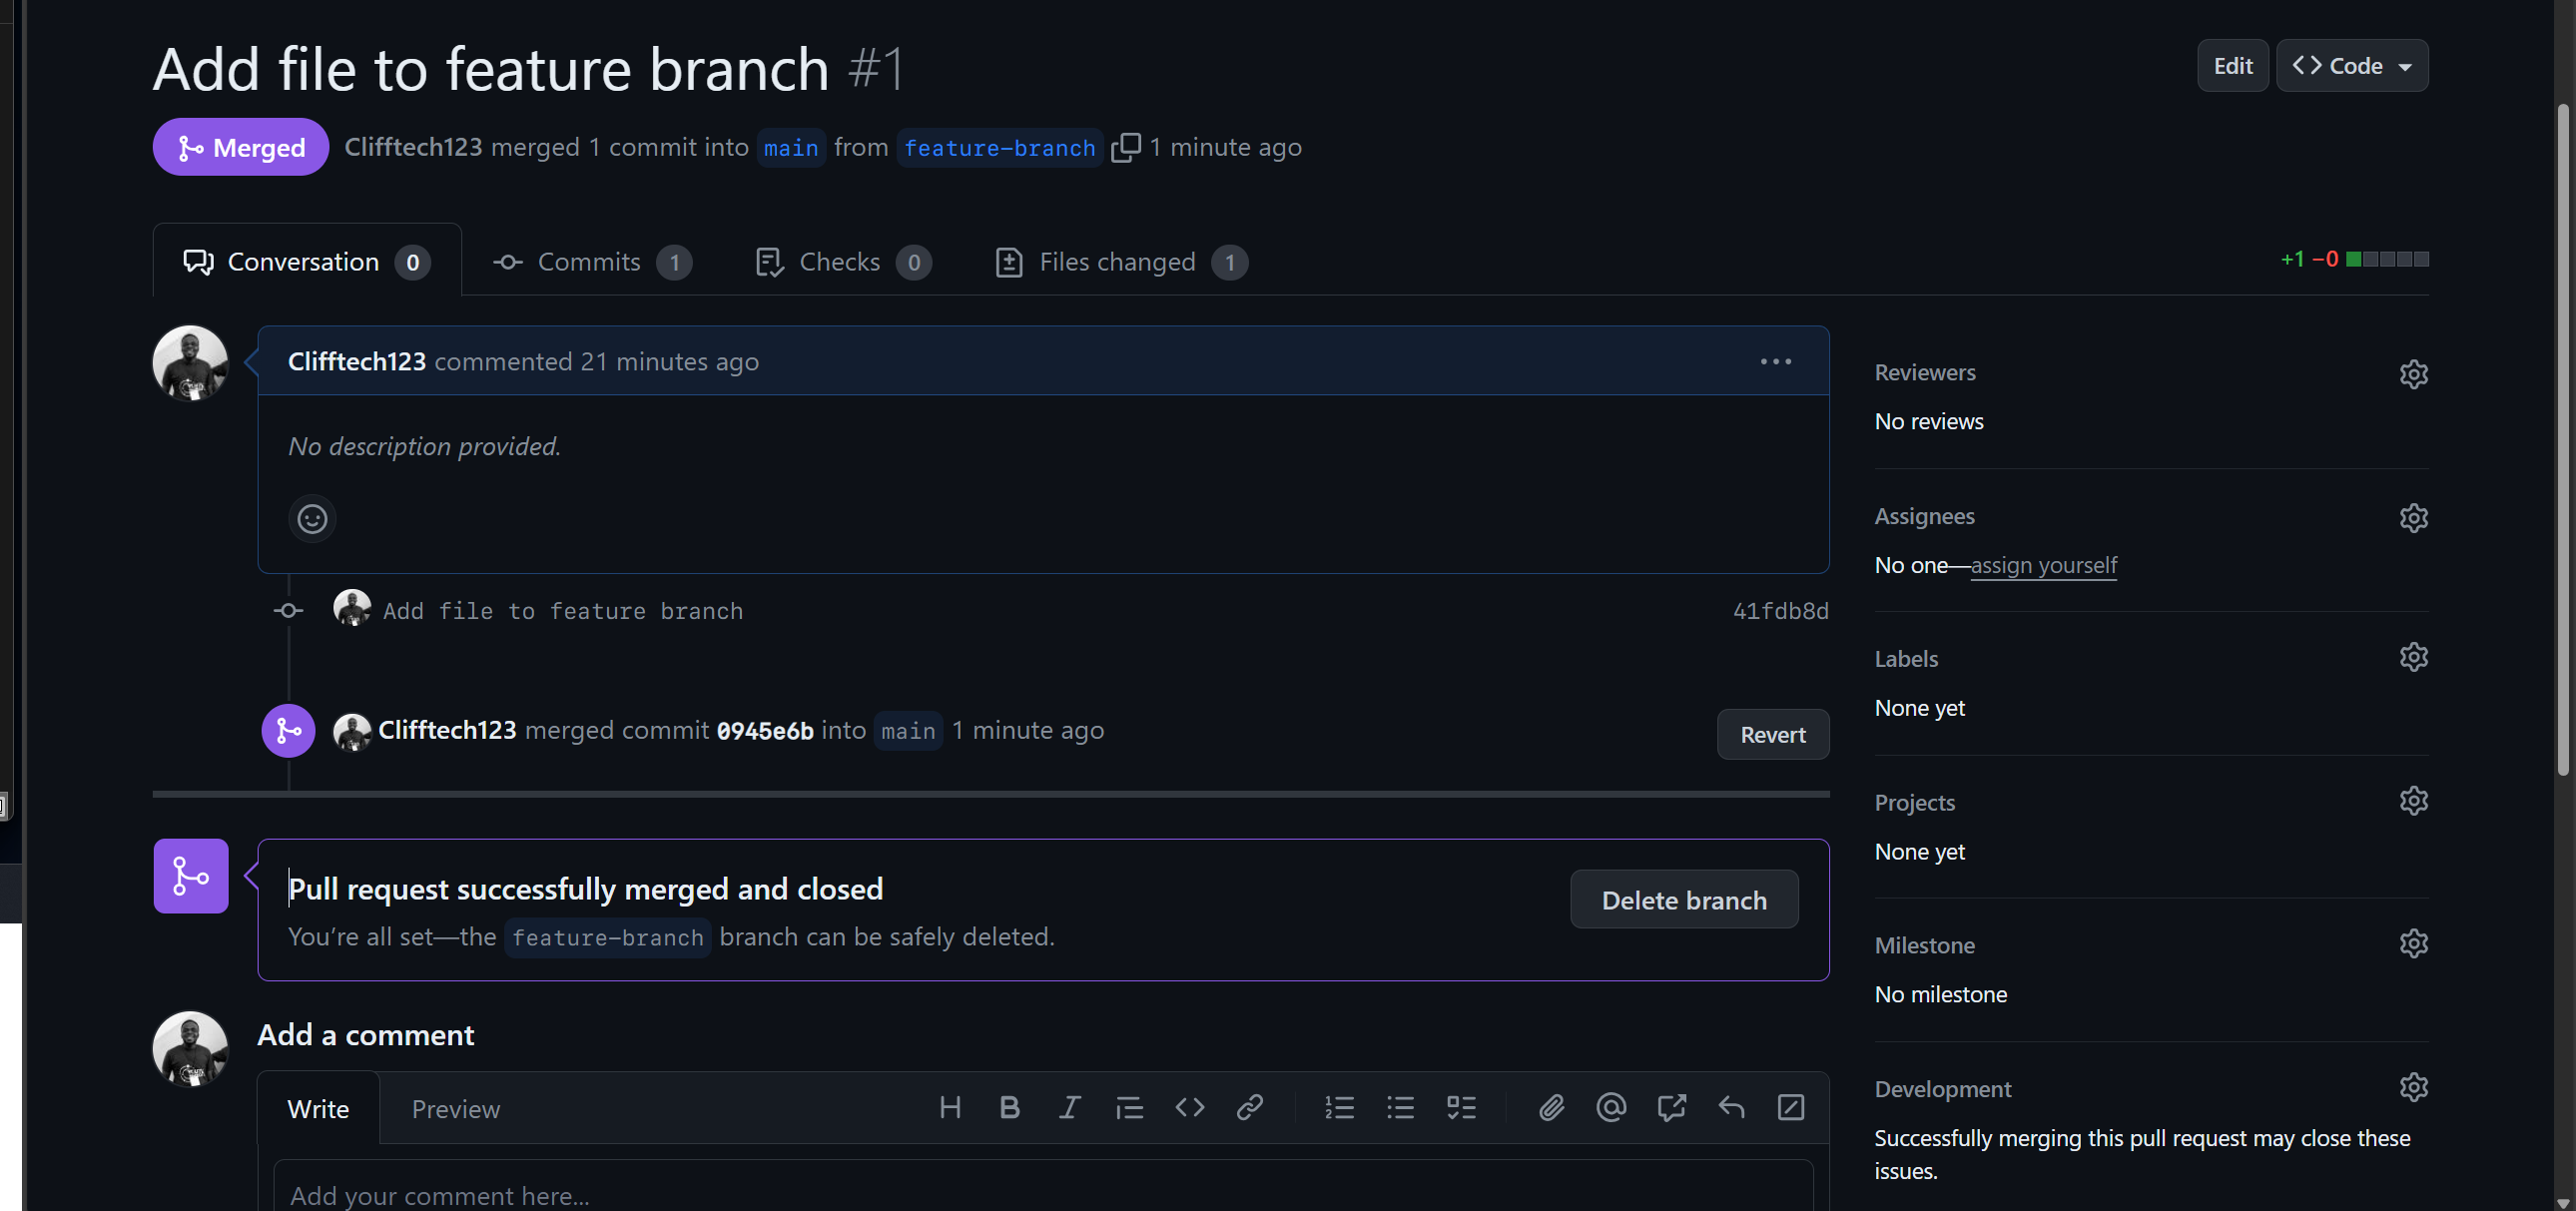
Now you have successfully merged the pull request into the main branch. You can now delete the feature-branch branch, as it is no longer needed.
Wrapping Up
Throughout this guide, we've delved into the core concepts of Git and GitHub, equipping you with a robust understanding of version control and collaborative practices.
We've navigated the essential Git operations, including setting up a repository, linking the local repository to its remote counterpart on GitHub, synchronizing changes between the local and remote repositories, executing Git commands, branching, initiating pull requests, and merging those requests.
Mastering these principles will significantly enhance your coding workflow, facilitate seamless team collaboration, and enable meaningful contributions to open-source projects.
I trust that this guide has instilled in you the knowledge and confidence to excel in your programming journey and start contributing to open source projects. Here's to your success in coding!
You can contact me on Twitter or LinkedIn for any questions or feedback. I'd love to hear from you!