

Higher-order components (HOCs) are a powerful feature of the React library. They allow you to reuse component logic across multiple components.
In React, a higher-order component is a function that takes a component as an argument and returns a new component that wraps the original component.
HOCs allow you to add additional functionality to a component without modifying the component's code. For example, you can use a HOC to add authentication or routing capabilities to a component or to apply a specific style or behavior to multiple components.
HOCs can take additional arguments, which lets you customize the behavior of the HOC. This makes them a flexible and reusable way to add functionality to your components.
Benefits of Using Higher-Order Components in React
- Reusability: HOCs allow you to reuse component logic across multiple components, which can save time and reduce code duplication.
- Flexibility: HOCs can take additional arguments, which allows you to customize the behavior of the HOC. This makes them a flexible way to add functionality to your components.
- Separation of concerns: HOCs can help separate concerns in your code by encapsulating certain functionality in a separate component. This can make the code easier to read and maintain.
- Composition: HOCs can be composed together to create more complex functionality. This allows you to build up functionality from smaller, reusable pieces.
- Higher-order components can be used to implement cross-cutting concerns in your application such as authentication, error handling, logging, performance tracking, and many other features.
Higher-Order Component Structure
To define a Higher-Order Component (HOC) in React, you'll typically follow a few basic steps:
First, you'll define the HOC function. This is a function that takes a component as input and returns a new component with additional functionality.
const hoc = (WrappedComponent) => {
  // ...
}
Then you define the new component. This is a class component that wraps the WrappedComponent and adds additional functionality.
class NewComponent extends React.Component {
  // ...
  render() {
    // ...
  }
}
Next, you pass props to the WrappedComponent. In the render() method of the NewComponent, pass all the props (including the additional props added by the HOC) to the WrappedComponent.
render() {
  return <WrappedComponent {...this.props} additionalProp={additionalProp} />
}
Finally, return the new component. The HOC function should return the NewComponent so it can be used in the application.
const hoc = (WrappedComponent) => {
  class NewComponent extends React.Component {
    // ...
    render() {

      // ...
    }
  }

  return NewComponent;
}
When to Use HOCs in your React Code
Authentication
Suppose you have an application with various routes, some of which require the user to be authenticated before accessing them.
Instead of duplicating the authentication logic in each component or route, you can create an HOC called withAuth that checks if the user is authenticated and redirects them to the login page if not. Then, you can wrap the specific components or routes that need authentication with this HOC, reducing duplication and enforcing consistent authentication behavior.
Logging
Imagine you want to log some data every time a specific set of components mount or update. Rather than adding the logging logic to each component, you can create an HOC called withLogger that handles the logging functionality.
By wrapping the relevant components with withLogger, you can achieve consistent logging across those components.
Styling and Theming
You might have a design system with reusable styles and themes. You can create an HOC named withTheme that provides the necessary theme-related props to a component.
This way, the wrapped component can easily access and apply the appropriate styles based on the provided theme.
How to Use Higher-Order Components in React
To create a HOC in React, we define a function that takes a component as an argument and returns a new component that wraps the original component. Here's an example of a simple HOC:
import React from 'react';
import ReactDOM from 'react-dom';
const withLoading = (WrappedComponent) => {
  class WithLoading extends React.Component {
    state = {
      isLoading: true,
    };

    componentDidMount() {
      setTimeout(() => {
        this.setState({ isLoading: false });
      }, 2000);
    }

    render() {
      return (
        <WrappedComponent
          {...this.props}
          loading={this.state.isLoading}
        />
      );
    }
  }

  WithLoading.displayName = `withLoading(${WrappedComponent.displayName || WrappedComponent.name})`;

  return WithLoading;
};

const MyComponent = ({ loading }) => (
  <div>
    {loading ? <p>Loading...</p> : <p>Hello, world!</p>}
  </div>
);

const MyComponentWithLoading = withLoading(MyComponent);

ReactDOM.render(
  <MyComponentWithLoading />,
  document.getElementById("root")
);
In this example, the withLoading HOC takes a component WrappedComponent as input and returns a new component WithLoading that adds a loading prop to the WrappedComponent.
The WithLoading component sets the isLoading state to true initially, then after 2 seconds, sets it to false. The WrappedComponent is rendered with the loading prop set to this.state.isLoading.
The MyComponent component is a functional component that renders either a Loading... message or a Hello, world! message depending on the value of the loading prop.
The MyComponentWithLoading component is created by passing MyComponent to the withLoading HOC. Finally, the MyComponentWithLoading component is rendered using ReactDOM.render().
Real-world Example: Logging HOC
Let's build a simple real-life React app that logs data when a user performs certain actions. We'll create a "Todo List" app, and whenever a user adds or completes a task, we'll log the event in the browser console.
Assuming you already have Node.js and npm installed on your system, open a terminal window and run the following commands:
npx create-react-app hoc-example
cd hoc-example
Create the withLogger HOC in the src folder, create a new file named withLogger.js. Copy the following code into the file:
import React, { useEffect } from 'react';

const withLogger = (WrappedComponent) => {
  const WithLogger = (props) => {
    useEffect(() => {
      // Log data on component mount
      console.log(`Component ${WrappedComponent.name} mounted.`);
      return () => {
        // Log data on component unmount
        console.log(`Component ${WrappedComponent.name} unmounted.`);
      };
    }, []);

    useEffect(() => {
      // Log data on component update
      console.log(`Component ${WrappedComponent.name} updated.`);
    });

    return <WrappedComponent {...props} />;
  };

  WithLogger.displayName = `withLogger(${WrappedComponent.displayName || WrappedComponent.name})`;
  return WithLogger;
};

export default withLogger;
The code above demonstrates a Higher-Order Component (HOC) called withLogger. In this case, the withLogger HOC is adding logging functionality to the component it wraps.
Create the Todo List App Components
In the src folder, create three new files called TodoList.js, TodoItem.js, and TodoForm.js. These files will contain the components for the Todo List app.
In TodoList.js, add the following code:
import React, { useState } from 'react';
import TodoItem from './TodoItem';
import withLogger from './withLogger';
import TodoForm from './TodoForm';

const TodoList = () => {
  const [todos, setTodos] = useState([]);
  const [newTodo, setNewTodo] = useState('');

  const addTodo = () => {
    if (newTodo.trim() !== '') {
      setTodos((prevTodos) => [...prevTodos, newTodo]);
      setNewTodo('');
    }
  };

  const completeTodo = (index) => {
    setTodos((prevTodos) => {
      const updatedTodos = [...prevTodos];
      updatedTodos.splice(index, 1);
      return updatedTodos;
    });
  };

  return (
    <div>
      <h1>Todo List</h1>
      <TodoForm newTodo={newTodo} setNewTodo={setNewTodo} addTodo={addTodo} />
      <ul>
        {todos.map((todo, index) => (
          <TodoItem key={index} todo={todo} onComplete={() => completeTodo(index)} />
        ))}
      </ul>
    </div>
  );
};

export default withLogger(TodoList);
In the above code we have implemented the TodoList component and used the withLogger HOC to add logging functionality to it. The TodoList component manages the state for a list of todos and provides functions to add and complete todos.
In TodoItem.js, add the following code:
import React from 'react';

const TodoItem = ({ todo, onComplete }) => {
  return (
    <li>
      {todo}
      <button onClick={onComplete}>Complete</button>
    </li>
  );
};

export default TodoItem;
The above is a simple functional component that renders a single todo item with its corresponding "Complete" button.
This TodoItem component is responsible for displaying individual todo items and allows the user to complete them by clicking the "Complete" button. It is a simple and essential part of the Todo List app, and when used in conjunction with the TodoList component, it should provide a complete and functional Todo List experience.
In TodoForm.js, add the following code:
import React from 'react';

const TodoForm = ({ newTodo, setNewTodo, addTodo }) => {
  return (
    <div>
      <input
        type="text"
        value={newTodo}
        onChange={(e) => setNewTodo(e.target.value)}
        placeholder="Enter a new todo"
      />
      <button onClick={addTodo}>Add Todo</button>
    </div>
  );
};

export default TodoForm;
This is a functional component responsible for rendering the input field and "Add Todo" button, allowing users to add new todos to the list.
With this TodoForm component, users can input a new todo item in the input field and click the "Add Todo" button to add it to the list managed by the TodoList component.
Update the App component to use MyComponent
Open the App.js file in the src folder and replace its content with the following code:
import React from 'react';
import TodoList from './TodoList';

function App() {
  return (
    <div>
      <TodoList />
    </div>
  );
}

export default App;
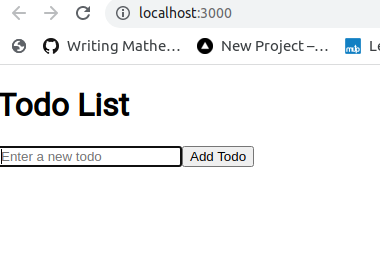
Save all the files and go back to the terminal. Make sure you are still in the project root folder (hoc-example). Now, start the development server by running the following command:
npm start
This will launch your React app:
Additionally, each time you add or complete a task, the app will log the events in the browser console using the withLogger HOC. For example, the console will show:

That's it! You have now implemented a real-world example of using the withLogger Higher-Order Component in a React project. Here is the full GitHub code
Conclusion
In this article, we discussed Higher-order Components (HOCs) in React and their benefits in building reusable and flexible component logic. We also discussed their structure and learned how to build HOCs in React.
Happy coding!