
By Eduardo Vedes
Welcome to the Hitchhiker’s Guide to React Router v4, Part IV!
Now that we’ve learned about recursive routes, let’s get back to our initial boilerplate, to avoid mixing concerns, and learn how to create a route configuration array.
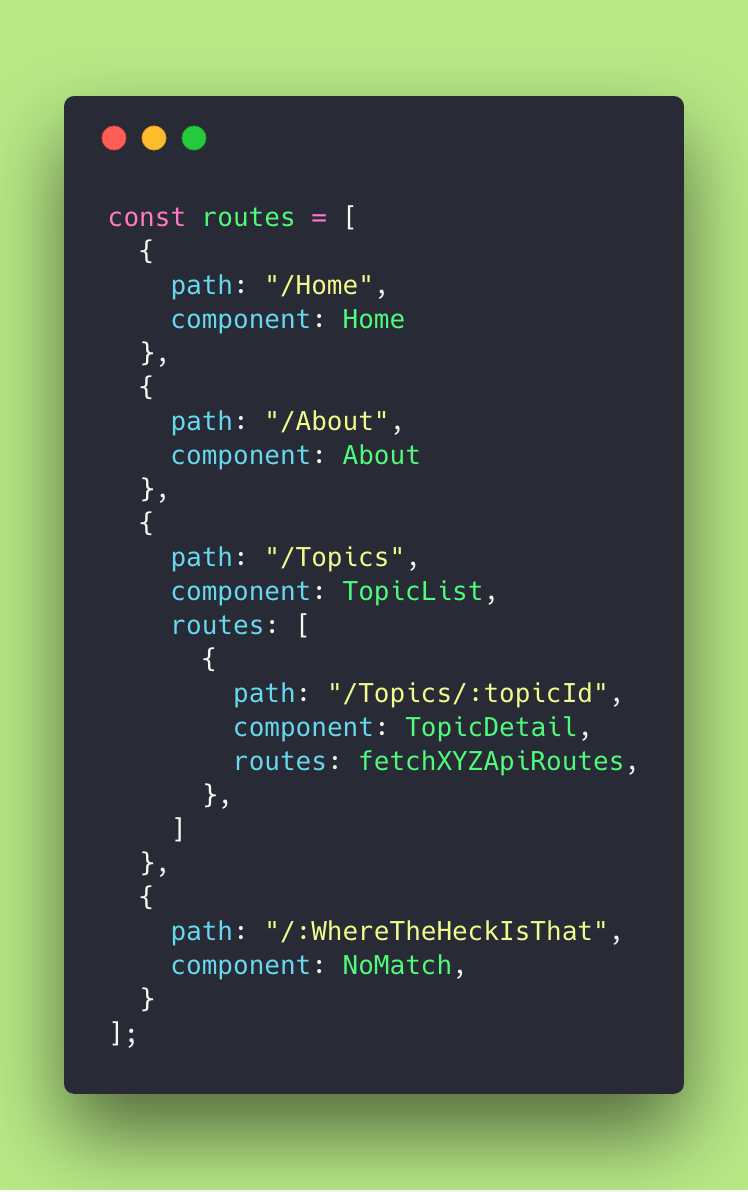
So, just to recap a bit what we did in the beginning, let’s take a look at our initial routes.js file:
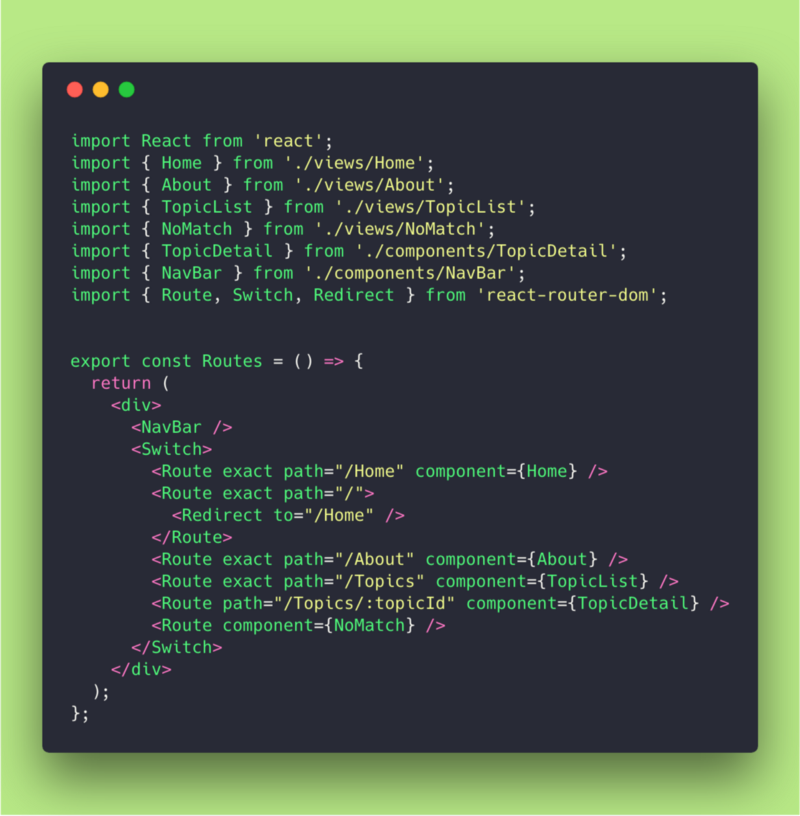
Our Routes component is returning a div with a NavBar and a Switch where we’ve defined all the routes of our App.
Our first step in this Part 4 will be to define a routes array.
Routes Array
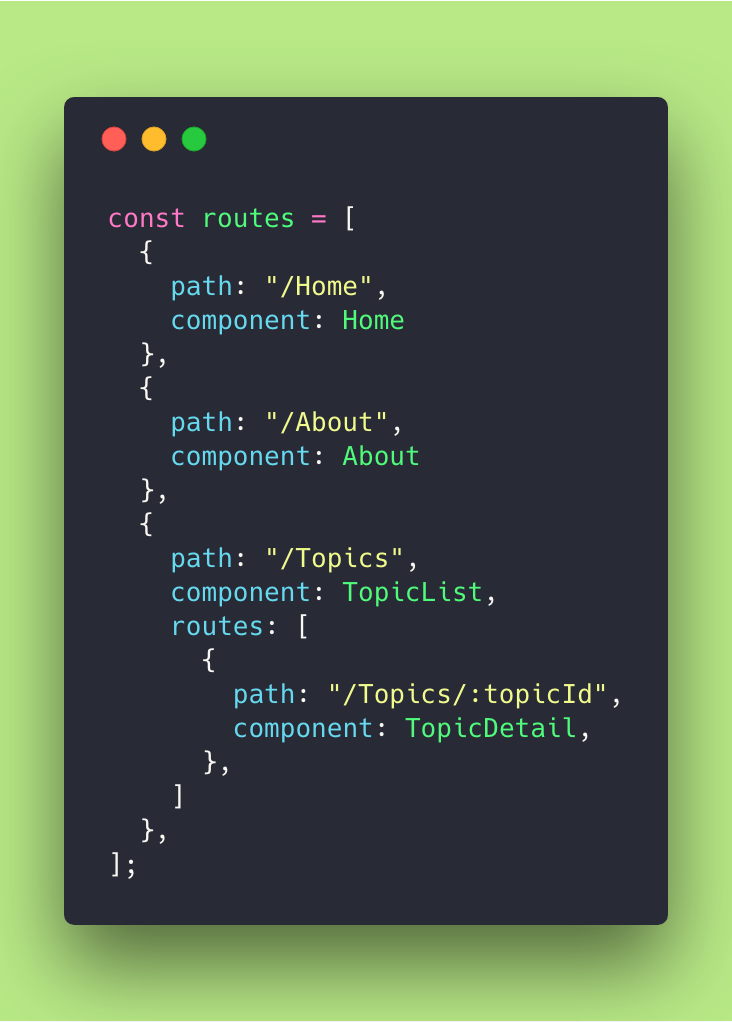
I’ve taken a look at our routes and created this array that defines each route and sub-route we had in our application.
Nice! Now what?!? ?
Refactor the Old Hardcoded Routes
Now let’s clean our hardcoded routes and the Switch!
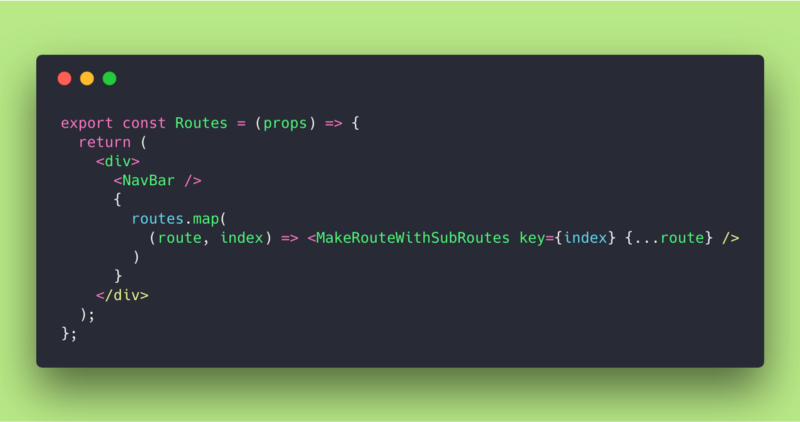
Yeah! Goodbye all those lines of code. What are we really doing?
Well, we’re mapping over the map array using an ES6 (fat arrow) callback to return an abstract component called . We are passing into it a key (just for React indexing purposes) and we are spreading the route info also into it.
Component
In the meantime, we need to create that component. I’ve decided to create it apart and import it into the routes.js file.
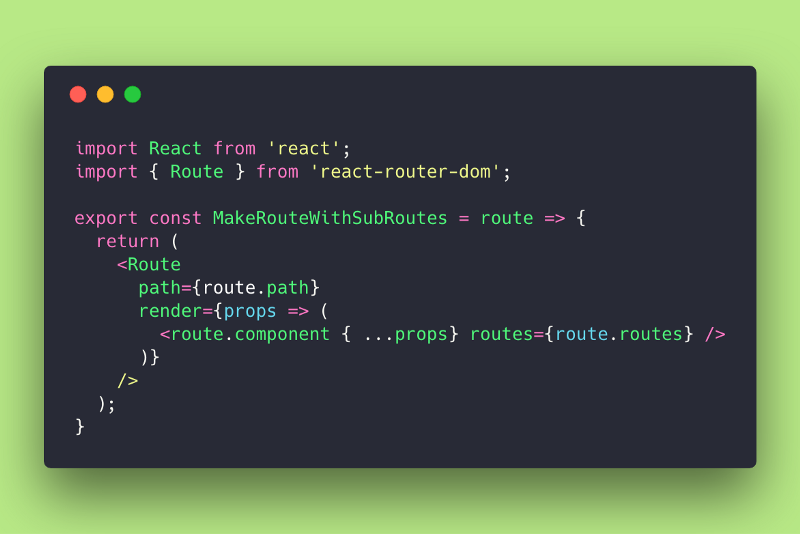
Okay, this Component is picking up each route you pass into it and returning a React Router Component.
As props, we have the path and the render method, which will invoke the route.component you want to render (then passing into it the spread props and the sub-routes that it needs to know).
This routes are coming from the route config array — got it? Nice! ?
TopicList (Sub-Routing)
This being said, let’s take a loot at the TopicList component because it’s the one receiving sub-routes from the route config array:
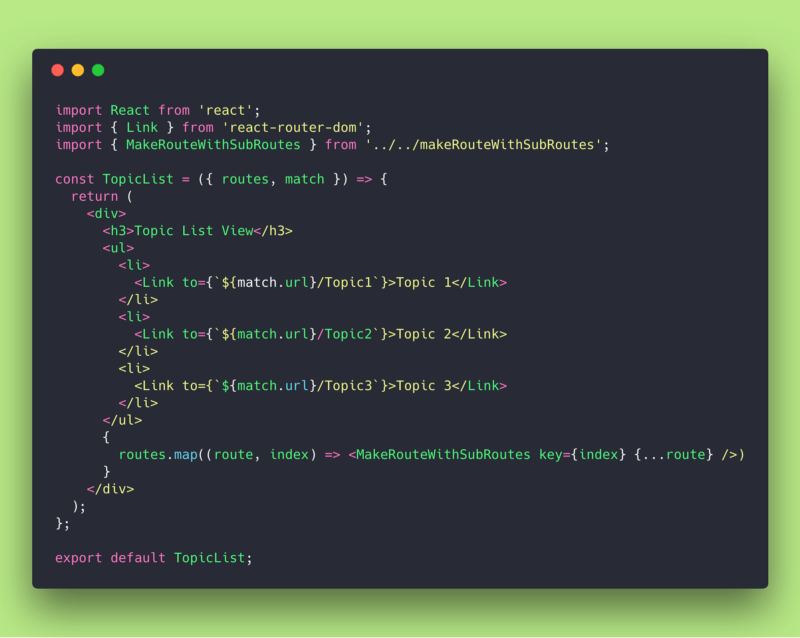
So, what’s happening here? Our TopicList now is importing the component and reusing with routes it has received.
It also does a routes.map over the sub-routes and repeats the process done in the routes.js file.
Take a minute to understand it and play with it!
More and More Sub-Routing
As you can see, this works quite well. It’s abstracted, there’s separation of concerns. The is a quite easy to use stateless component or function which doesn’t care about the routing content. It just routes whatever you feed to it.
What if we wanted to do more sub-routing?
Easy peasy! Just keep growing or redesigning your routes configuration array!
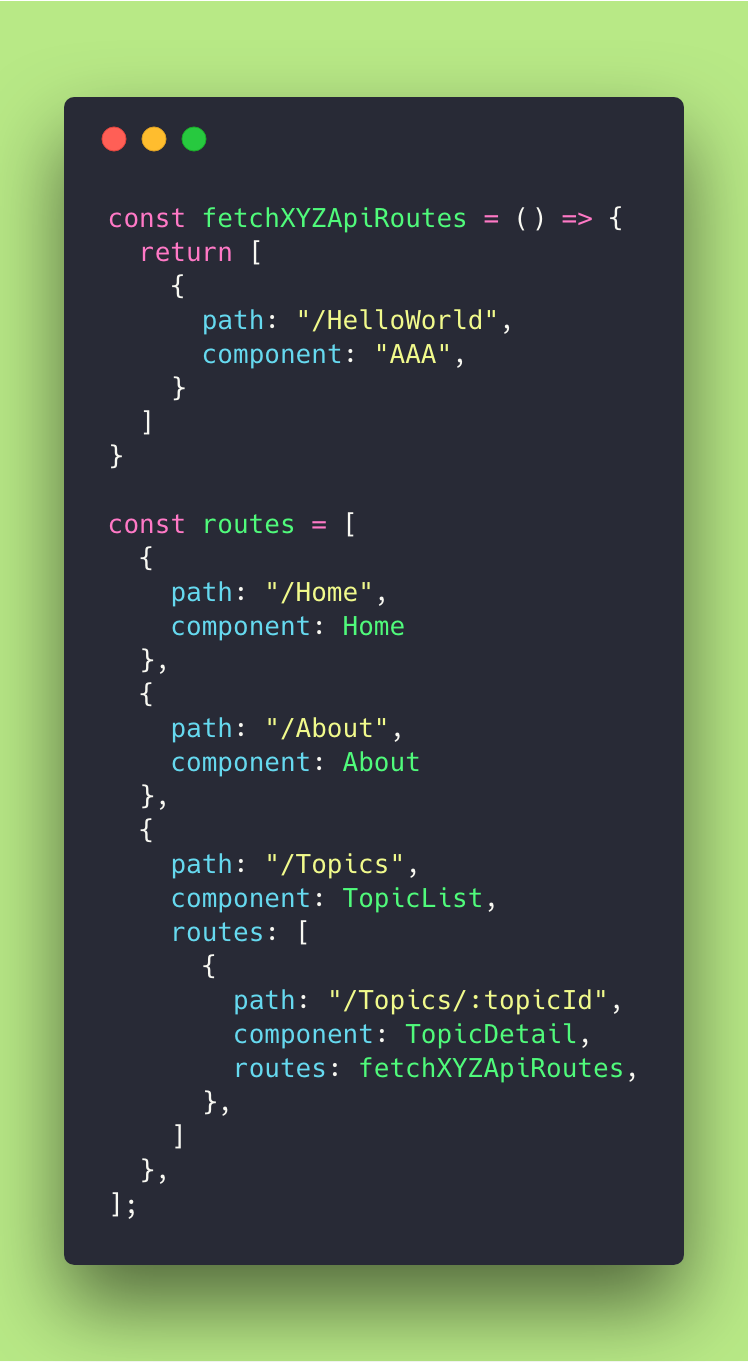
See? The routes of the /Topics/:topicId could simply be an array like its parent routes. But I’ve decided to do better and invoke a function that calls an API and returns a new array of routes (just imagine it fetches the API ?).
So how can we check that in the App?
Let’s put a console.log inside the TopicDetail component and check what it is receiving:
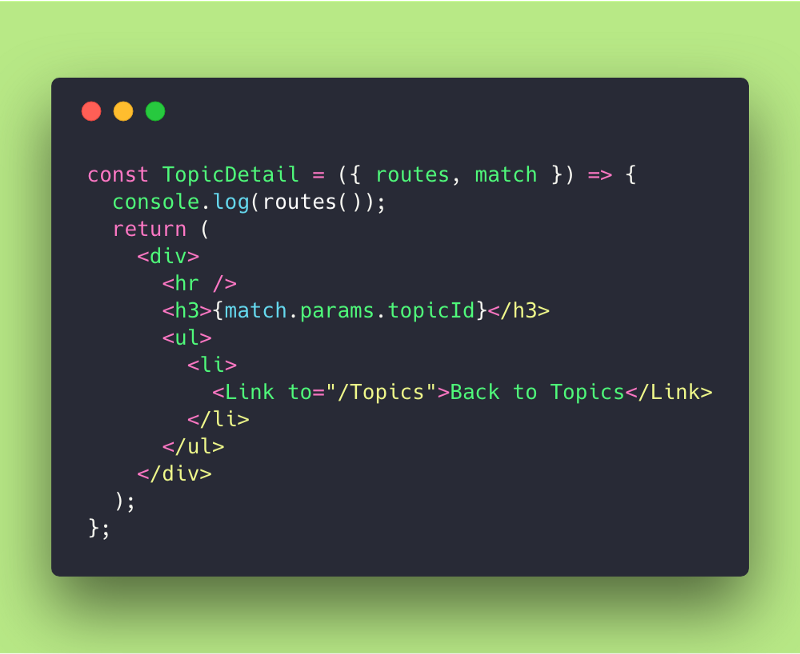
I’m invoking routes() in console.log because now this sub-route is a function! Remember? All good! ?
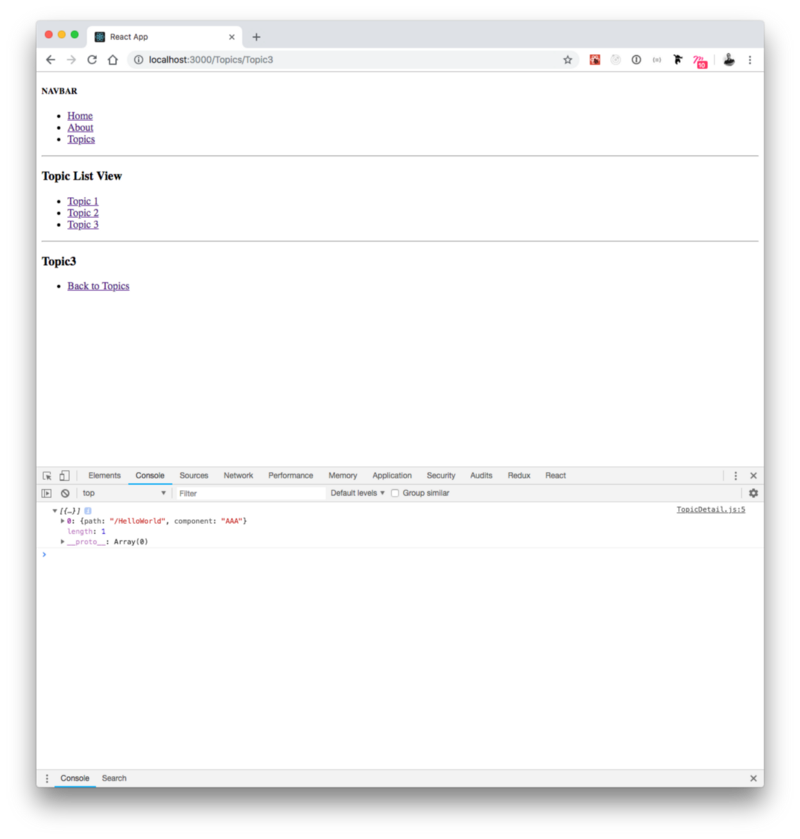
Yeah Ma! We’ve done it! We’re receiving the routes dynamically and propagating those into our sub-routes and components. This is so great!
NoMatch And Ambiguous Routes
Wait! Where’s our NoMatch Component?
Okay, let’s introduce it into our route config array:
Observe that :WhereTheHeckIsThat is a variable because it has the colon before it.
What should we expect?
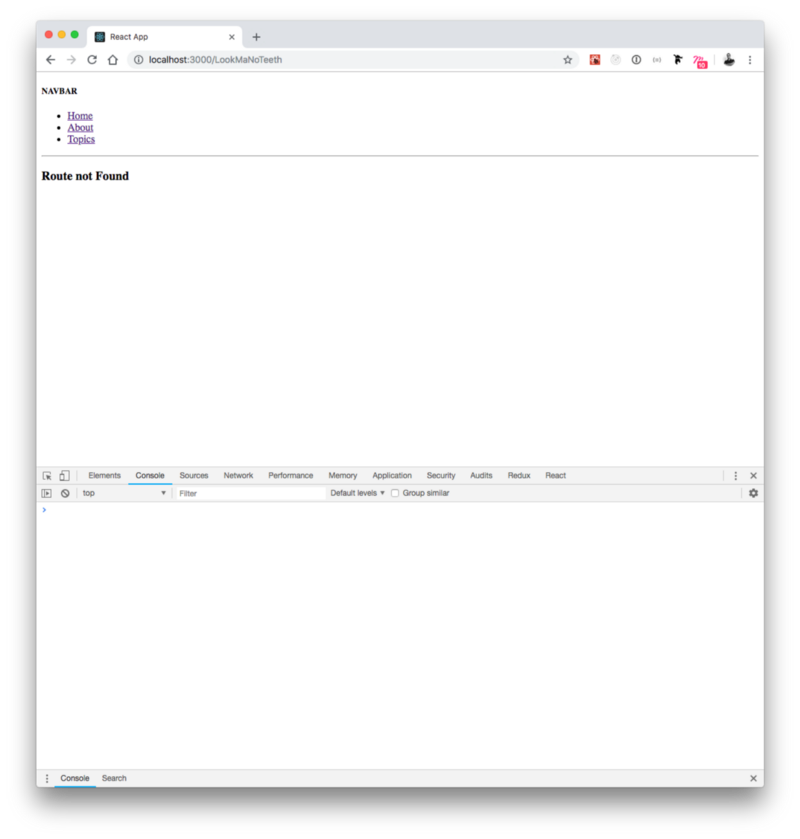
Let’s see it in action:
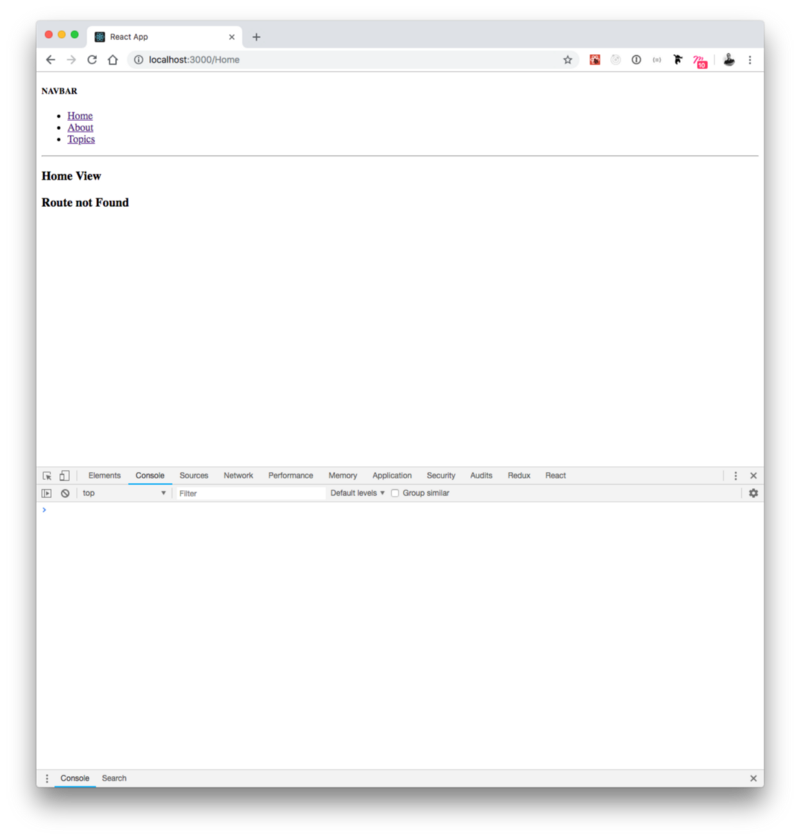
Wow! As a matter of fact it’s rendering the NoMatch but it’s also rendering the Home View. Why?
Well, what’s happening is that in our initial boilerplate we had a that was picking up the first that matches the path remember?
So now, as we do not have the switch, it can match more than one path at a time!
These are called Ambiguous Routes. Router matched the /Home and at the same time /:WhereTheHeckIsThat because it’s kind of a wildcard that accepts everything.
How to we correct that?
Simple: grab back!
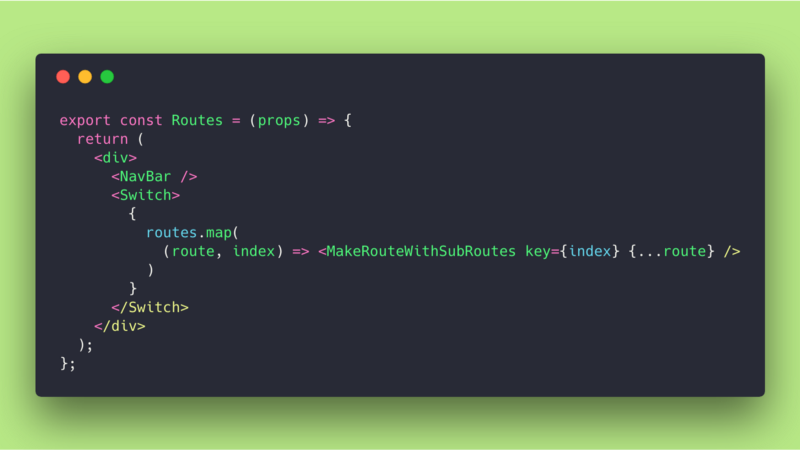
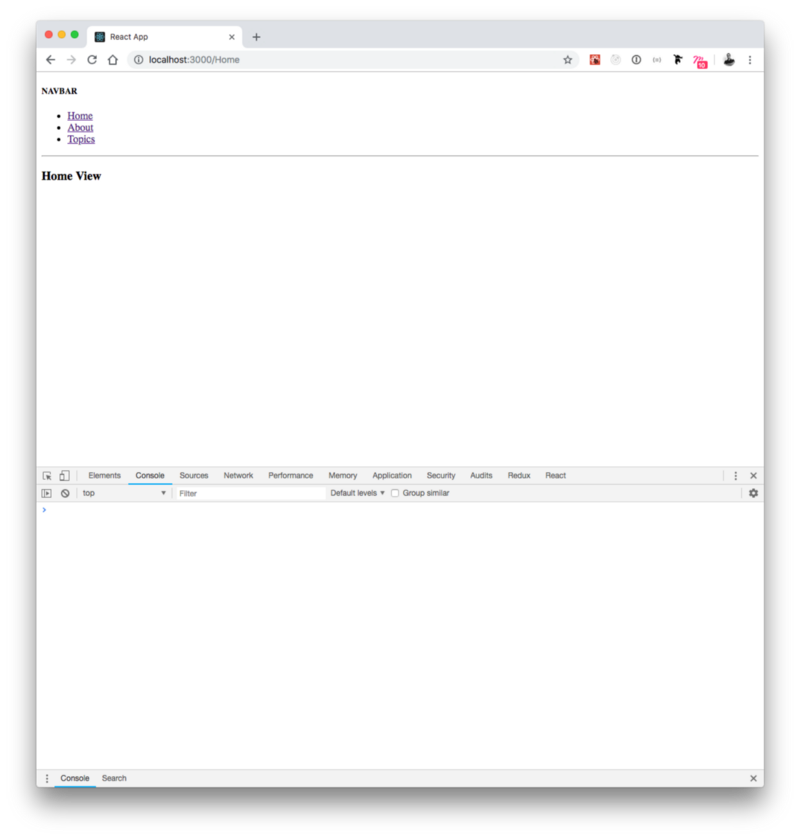
As you can see above, now the /Home is rendered alone, because found it and returned it immediately.
If you put some unknown path in the URL, it triggers the :/WhereTheHeckIsThat and renders the NoMatch component as a default.
Great job! Everything is working as we’d expected and now we have a powerful route array configuration which allows us to have a lot of flexibility.
This really is the hidden value of having an abstraction and defining a route configuration array!
Last but not least
This is the end of the Hitchhiker’s Guide To React Router v4.0!
There is still are some stuff to pay attention to, but I prefer to let you deep dive a little bit in the boilerplates we’ve built and look for what you need in the React router website.
I had so much fun doing this Guide that I think I’m going to start writing more and more :)
It was good not only because I was able to teach you something but also because I’ve also learned a lot in this process.
GitHub Repo
The changes I’ve made to the application, to produce this article, can be found in my GitHub repo for Part 4.
Bibliography
To make this article I’ve used the React Router documentation that you can find here.
All the other sites I’ve used are linked along the document to add info or provide context to what I’ve tried to explain to you.
This article is part 4 of a series called “Hitchhiker’s Guide to React Router v4”
- Part I: Grok React Router in 20minutes
- Part II: [match, location, history] — your best friends!
- Part III: recursive paths, to the infinity and beyond!
? Thank you very much!