
By Cynthia Lee
I embarked on my freeCodeCamp journey in Dec 2017, and am two projects shy of completing the Front-End Development Certificate. This post documents my process of completing the Pomodoro Clock project.
What is a Pomodoro Clock?
The Pomodoro Technique is a time-management framework which is as simple as it is effective - you use a timer to break your work into time blocks (usually 25 minutes), separated by a 5 minute break. After every 4 pomodoros, you can take a longer break.
I had to fulfil the following user stories:
- I can start a 25 minute pomodoro, and the timer will go off once 25 minutes has elapsed.
- I can reset the clock for my next pomodoro.
- I can customise the length of each pomodoro.
Design / layout
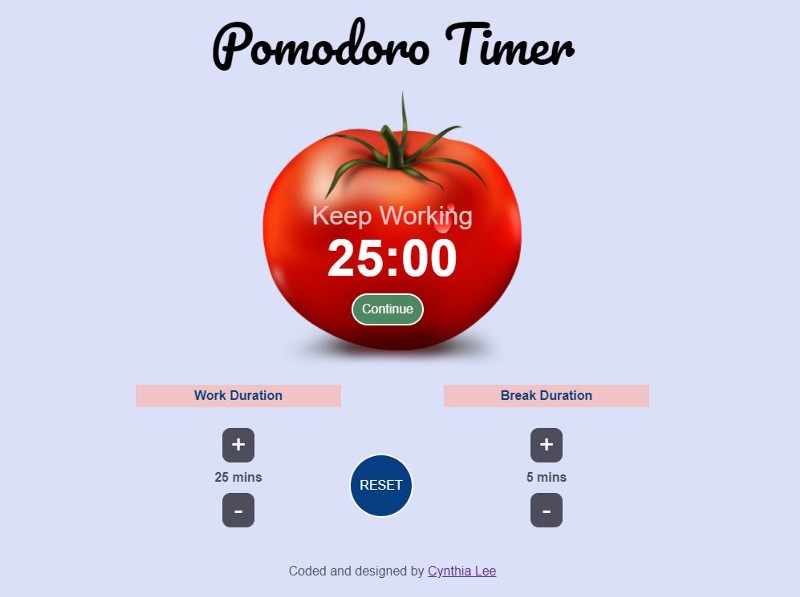
My design principle is to keep the user interface clean and simple. I loved the idea of using a tomato as the timer. There is a work/break display, timer countdown, and a play/pause button.
Below the timer, I had settings to modify the work and break duration, and a reset button.
Layout issues I encountered
I had major issues with getting the tomato image positioned in the background under the other elements. How I wish there was a layout option I could select! ?
 Good old Microsoft Word picture layout options
One suggestion I found was to save the tomato image on my preferred background colour as a new image, then use that image in the background. The downside to that was that it started to look wonky once I tested the layout responsiveness.
In the end, I managed to get it right with a combination of absolute positioning, modifying the top and left percentages, and transform.
#status { position: absolute; top: 45%; left:50%; transform: translate(-50%, -50%);}
.timerDisplay { position: absolute; top: 60%; left: 50%; transform: translate(-50%, -50%);}
#start-btn { position: absolute; bottom: 8%; left: 48%; transform: translate(-50%, -50%);}
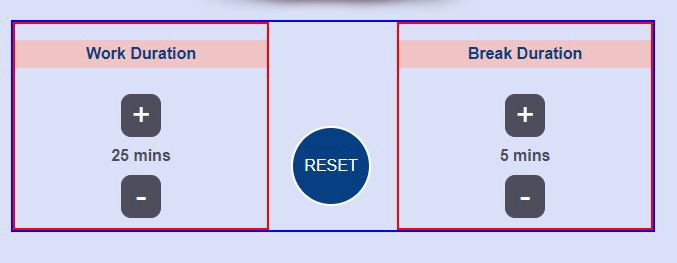
The bottom settings were fairly straightforward. I used CSS Grid to separate the components into three columns, with the middle column being half the width of the outer columns.
.settings { margin: auto; width: 80%; display: grid; grid-template-columns: 2fr 1fr 2fr; align-items: center;}
Once again, I used transform to shift the reset button for better alignment.
Structuring my code - and then tearing it apart
I find it helpful to come up with my code structure if I breakdown the requirements:
- The timer will toggle between starting and pausing when I click the ‘start’ button.
- Once the timer reaches zero, an alarm will go off.
- A work session is always followed by a break session.
- The work and break durations can be modified.
- The ‘reset’ button will (you guessed it) reset the timer.
I had previously completed a countdown clock in the Wes Bos JavaScript30 course, so I knew that I could use the setInterval method. I also decided to challenge myself by sticking to vanilla JavaScript, and avoid relying on jQuery.
And so I started writing my JavaScript code. While I managed to create a functional pomodoro clock, I won’t go through the first version of my code here. This is because I made significant changes to it after receiving constructive feedback from an amazing stranger on Reddit. ?
Yes, nice things do happen on Reddit!
The main points of the feedback were:
setInterval(timer, 1000)takes at least 1000 ms to trigger, but may take longer. So you should check how much time actually elapsed, or your clock can be inaccurate.- Group all HTML updates in one section, as this makes your code easier to update and debug.
- It is generally a good idea to make the code without thinking about the representation at all.
- Be sure about the logic of the timer, and get rid of unnecessary code.
- Make sure the variable names are descriptive. Leave comments when necessary.
You can view my first commit on GitHub.
Refactoring my code
After getting all that valuable feedback, I refactored my code several times until I was satisfied with it.
First, I defined all the variables. As I was not using jQuery, I ensured that I captured all my elements using document.querySelector.
let countdown = 0; // variable to set/clear intervalslet seconds = 1500; // seconds left on the clocklet workTime = 25;let breakTime = 5;let isBreak = true;let isPaused = true;
const status = document.querySelector("#status");const timerDisplay = document.querySelector(".timerDisplay");const startBtn = document.querySelector("#start-btn");const resetBtn = document.querySelector("#reset");const workMin = document.querySelector("#work-min");const breakMin = document.querySelector("#break-min");
Next, I created the audio element.
const alarm = document.createElement('audio'); alarm.setAttribute("src", "https://www.soundjay.com/misc/sounds/bell-ringing-05.mp3");
When the ‘start’ button is clicked, the interval is cleared. A new interval is set if isPaused changes from true to false.
The ‘reset’ button clears the interval, and resets the variables.
startBtn.addEventListener('click', () => { clearInterval(countdown); isPaused = !isPaused; if (!isPaused) { countdown = setInterval(timer, 1000); }})
resetBtn.addEventListener('click', () => { clearInterval(countdown); seconds = workTime * 60; countdown = 0; isPaused = true; isBreak = true;})
The timer function is where the countdown magic happens. It deducts one second from seconds. If seconds <; 0, the alarm is played, and the function determines if the next countdown should be a work session or break session.
function timer() { seconds --; if (seconds < 0) { clearInterval(countdown); alarm.currentTime = 0; alarm.play(); seconds = (isBreak ? breakTime : workTime) * 60; isBreak = !isBreak; }}
Now it’s time to work on the +/- buttons for the work and break durations. Initially, I created an onclick function for every button. While it was functional, there was definitely room for improvement.
document.querySelector("#work-plus").onclick = function() { workDuration < 60 ? workDuration += increment : workDuration; }document.querySelector("#work-minus").onclick = function() { workDuration > 5 ? workDuration -= increment : workDuration; }document.querySelector("#break-plus").onclick = function() { breakDuration < 60 ? breakDuration += increment : breakDuration; }document.querySelector("#break-minus").onclick = function() { breakDuration > 5 ? breakDuration -= increment : breakDuration; }
That same kind Redditor suggested that I use an associative array, which is essentially a set of key value pairs.
let incrementFunctions = {"#work-plus": function () { workTime = Math.min(workTime + increment, 60)}, "#work-minus": function () { workTime = Math.max(workTime - increment, 5)}, "#break-plus": function () { breakTime = Math.min(breakTime + increment, 60)}, "#break-minus": function () { breakTime = Math.max(breakTime - increment, 5)}};
for (var key in incrementFunctions) { if (incrementFunctions.hasOwnProperty(key)) { document.querySelector(key).onclick = incrementFunctions[key]; }}
It’s time to update the HTML!
I created functions to update the countdown display and button display, and incorporated those functions into an overarching function that also updated the Work/Break status and durations.
Finally, I used document.onclick to run the updateHTML function everytime the user clicks on the page. I also used window.setInterval to run the function 10 times a second for good measure.
function countdownDisplay() { let minutes = Math.floor(seconds / 60); let remainderSeconds = seconds % 60; timerDisplay.textContent = `${minutes}:${remainderSeconds < 10 ? '0' : ''}${remainderSeconds}`;}
function buttonDisplay() { if (isPaused && countdown === 0) { startBtn.textContent = "START"; } else if (isPaused && countdown !== 0) { startBtn.textContent = "Continue"; } else { startBtn.textContent = "Pause"; }}
function updateHTML() { countdownDisplay(); buttonDisplay(); isBreak ? status.textContent = "Keep Working" : status.textContent = "Take a Break!"; workMin.textContent = workTime; breakMin.textContent = breakTime;}
window.setInterval(updateHTML, 100);
document.onclick = updateHTML;
And that’s the wrap up of my project!
You can view my final project here.
Final thoughts
My biggest takeaway from this project is that I should aim for simplicity in terms of code design, because it is a prerequisite for reliability. It will make my code easy to understand, easy to debug, and easy to update.
I am also reminded of the benefits of paired programming and code reviews, especially when one is new to coding.
There is still so much to learn. But for now, let me reward myself with a plate of Pasta al pomodoro.