
By Kristóf Litavecz
Last summer my wife and our two children flew from Hungary to California to visit friends. Among other complications, our airline lost our little one’s stroller on the way.
After numerous unsuccessful attempts to contact the airline through emails, tweets, friendly phone calls — and then angry phone calls — to cover our costs, I had enough. I decided to take things to the next level.
So I built a Twitter Bot that replied to every tweet from the airline’s account to remind them of our case, which had been pending for over three months at that point.
By no means did I do this for revenge or extort money. All I wanted them to do was treat us fairly and cover the costs of a child’s lost stroller.
I had been learning to program for about a year now, and making heavy use of freeCodeCamp community for support and inspiration.
So, here is what I did:
- I created a new Cloud9 dev environment
- I created a Twitter account
- I created a simple Twitter Bot using Node.js
- I configured it so that it would randomly tweet one of ten reminder messages every hour
- Then I launched the bot
One and a half weeks later, the money landed in my account, and I bought a new stroller.
I put all of my code on this GitHub repository in case you ever find yourself in a similar situation. And here’s how I did all this.
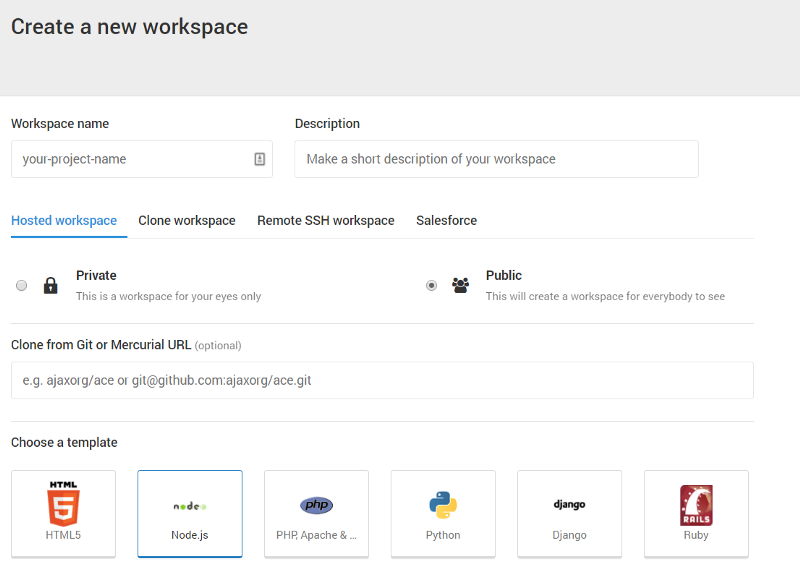
Step #1: Create a new Cloud9 IDE environment:
Head to Cloud9 and create a new workspace.
If you would like to replicate my bot just clone my repository by entering the following line in your terminal:
git clone [https://github.com/krizsoo/twitterbot](https://github.com/krizsoo/twitterbot)
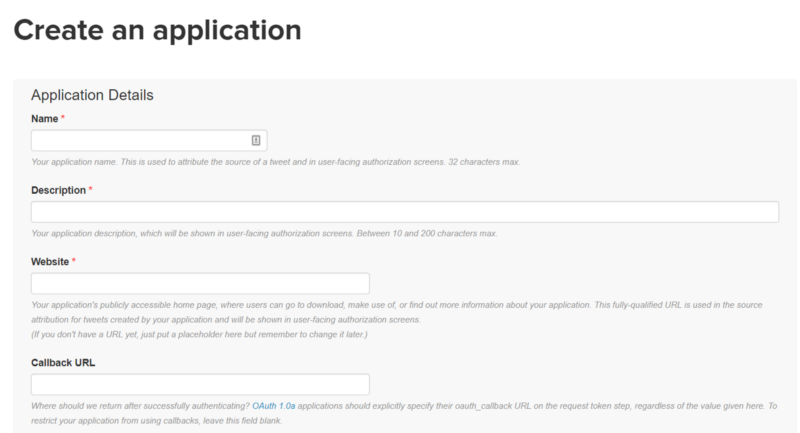
Step #2: Create a Twitter account and a Twitter App
If you don’t have a Twitter account yet, go ahead and create one. Once you are registered, you can create a new application, which will allow you to access Twitter’s API and programmatically generate tweets.
As soon as my app was set up I retrieved four security keys that are necessary to access the API:
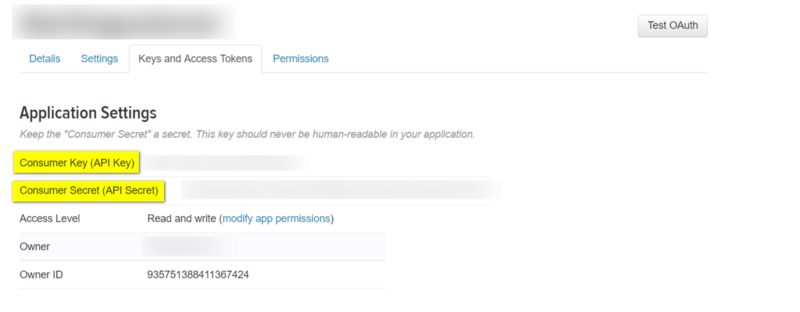
- Consumer Key (API Key)
- Consumer Secret (API Secret)
- Access Token
- Access Token Secret
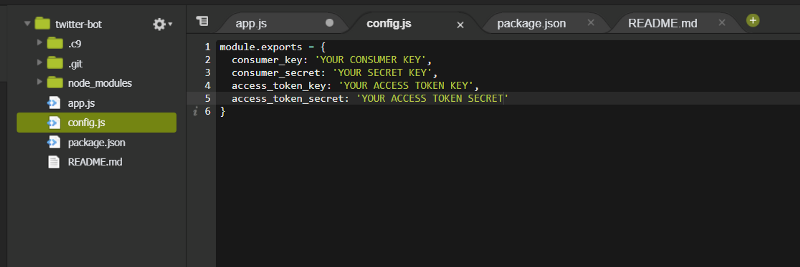
All of the above keys should be added to the config.js file the following way:
Step #3: Configure the Twitter bot
I had to do some initial configuration to ensure that the bot will do what it is supposed to do.
1. Install Node.js dependencies
npm install --save twitter
2. Set up the search query
This was an important step to define a search query to which the Bot tweeted back to. I went to the “app.js” file and updated the search parameters.
qrepresents the keywords.countrepresents the number of tweets the query should return.result_typerepresents the sorting logic, in our case, it shows the most recent one first.langstands for language (for example, English).
The below config would automatically reply to the most recent tweet that contains “@freecodecamp”
// Set up your search parametersvar params = { q: '@freecodecamp', count: 1, result_type: 'recent', lang: 'en'}
Step #4: Configure the tweets
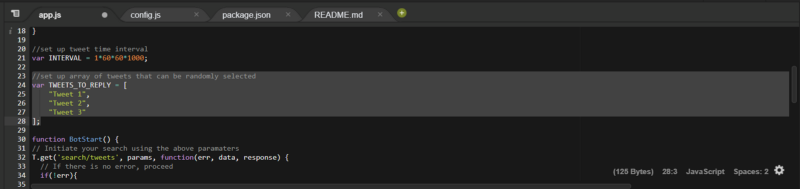
Since the Bot was running hourly, I did not want it to tweet the same message over and over again. Therefore I created an array of ten or so tweets and the Bot randomly selected one every time.
//set up array of tweets that can be randomly selectedvar TWEETS_TO_REPLY = [ "This is the first version of my tweets", "This is the second", "Tweet 3 where is my stroller?"];
EDIT: As Jonny Asmar pointed out below, make sure that you do not mention people in your responses as that is against Twitter’s TOS.
Step #5: Configure the tweet frequency
Lastly, I set up the Bot to run hourly.
First I created a variable that represents one hour in milliseconds:
//set up tweet time intervalvar INTERVAL = 1*60*60*1000;
Then I made sure that I launched the Bot accordingly:
// Start bot and timerBotStart();setInterval(BotStart, INTERVAL);
Step #6: Launch the bot
As soon as it was all configured I launched the Bot and waited patiently.
npm run serve
What I learned from all this
To my surprise, about 24 hours later, a customer service representative finally responded to me. They informed me that they had initiated the money transfer.
A year ago I would not have been able to do any of this. Even if this is a small thing, this triumph mattered to me a lot.
This story is about how I learned to code in 2017, and how I found some additional inspiration this side project. I did not start a new career as a developer (yet), but there are many other ways you can make use of your coding skills in your day to day life. Some even argue that coding has become the 4th literacy.
Hopefully for all of you who are starting to learn how to code, you will find a little inspiration in my story, too. On all those late nights when you’re struggling with a coding challenge, keep in mind that whether or not you will start a new career as a developer, understanding the language of the computers will pay off one day.
Acknowledgments
This post could not have happened without the freeCodeCamp community, nor the CS50 team. I am grateful for their support.
Also, I’m grateful to Brandon Morelli and Scott Spence for writing these detailed guides Twitter Bot guides:
Build a simple Twitter Bot with Node.js in just 38 lines of code
_Tutorials don’t have to be complicated. Together we’ll build a simple Twitter favorite bot with Node.js in just 38…_codeburst.ioWhy you should have your own Twitter bot, and how to build one in less than 30 minutes
_UPDATE 20171102: Since this story was originally posted back in January 2017 there have been a few things that have…_medium.freecodecamp.org