
YouTube gives content creators a ton of tools to add their work for everyone to see. But those tools only help you manage the experience on YouTube.
How can we utilize the YouTube API to bring our video content to our own website?
- YouTube has an API?
- What are we going to build?
- Step 0: Getting started with Next.js
- Step 1: Creating a Google Developer project
- Step 2: Requesting playlist items from the YouTube API
- Step 3: Showing YouTube playlist videos on the page
YouTube has an API?
Yup! YouTube, along with a lot of other Google services, has an API that we can use to take advantage of our content in ways outside of YouTube. And the API is pretty extensive.
With YouTube’s API, you can do things like manage your videos, access analytics, and manage playback. But we’re going to use it for grabbing videos from a playlist so that we can add them to a page.
What are we going to build?
We’re going to put together a Next.js app that uses the YouTube API To fetch videos from a playlist.
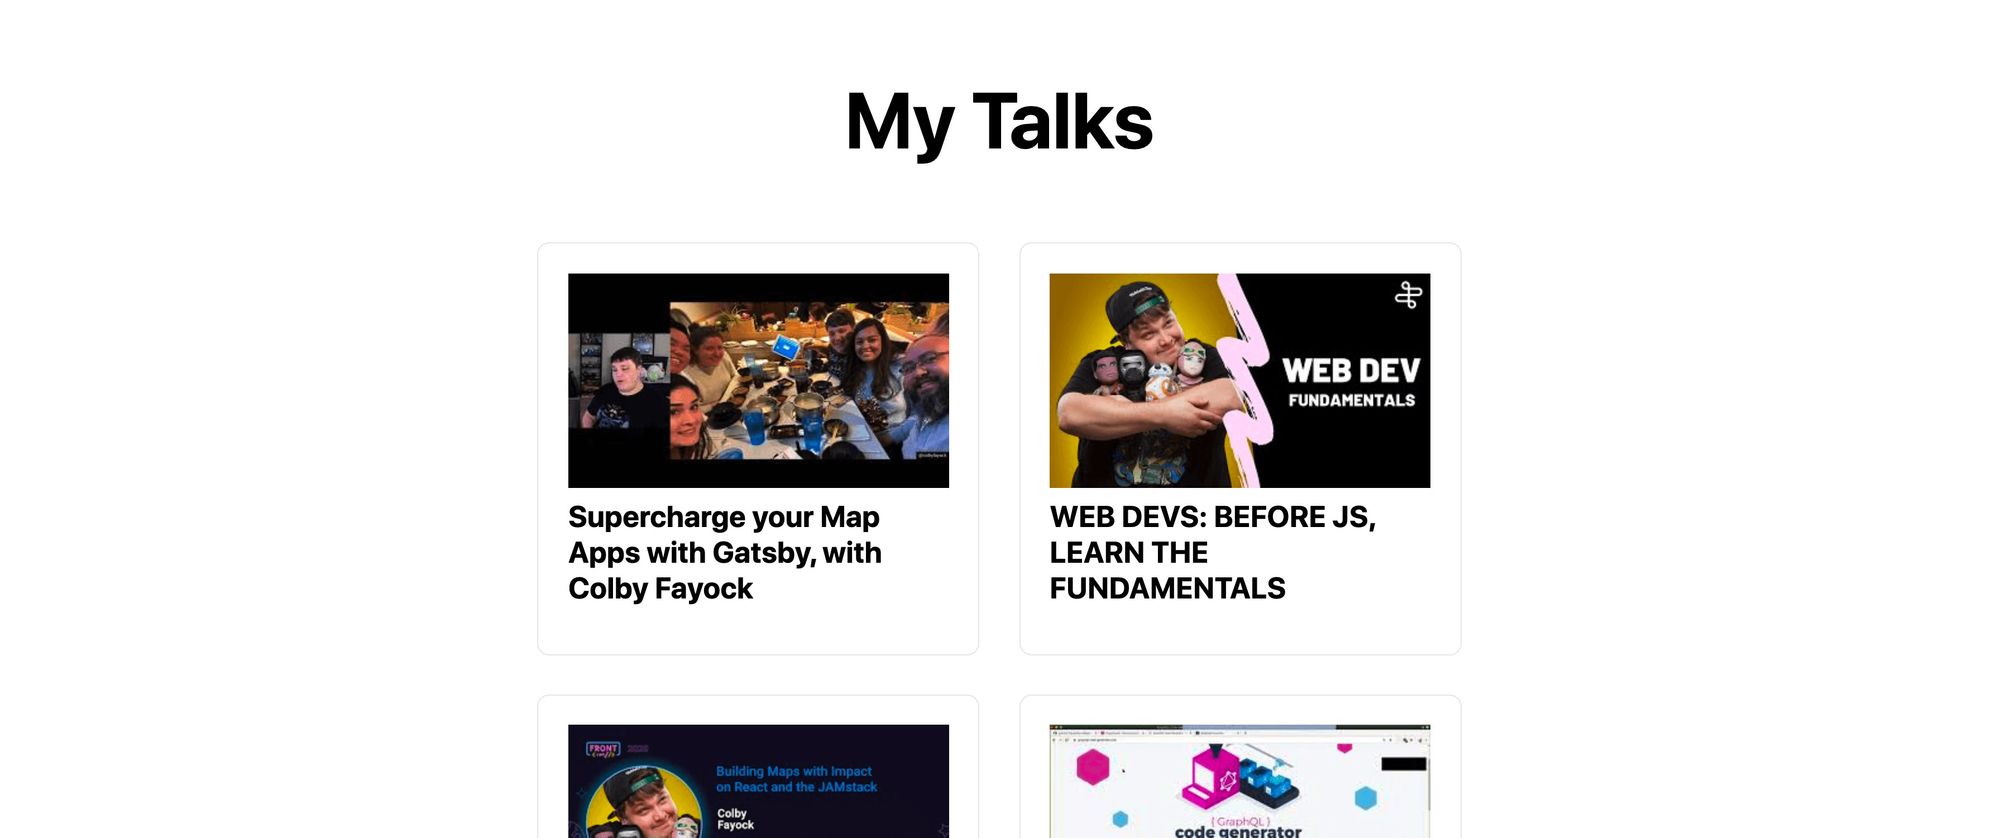
We’ll take those videos and we’ll display their thumbnails on a page that links to the video.
Step 0: Getting started with Next.js
To spin up an app, we’re going to use Next.js. Using yarn or npm, we can easily create a new app that will let us dive right into the code.
So to get started, navigate to where you want to create your project and run:
yarn create next-app
# or
npx create-next-app
That script will prompt you for a project name. I’m going to use “my-youtube-playlist”, and it will install all of the dependencies needed to get started.
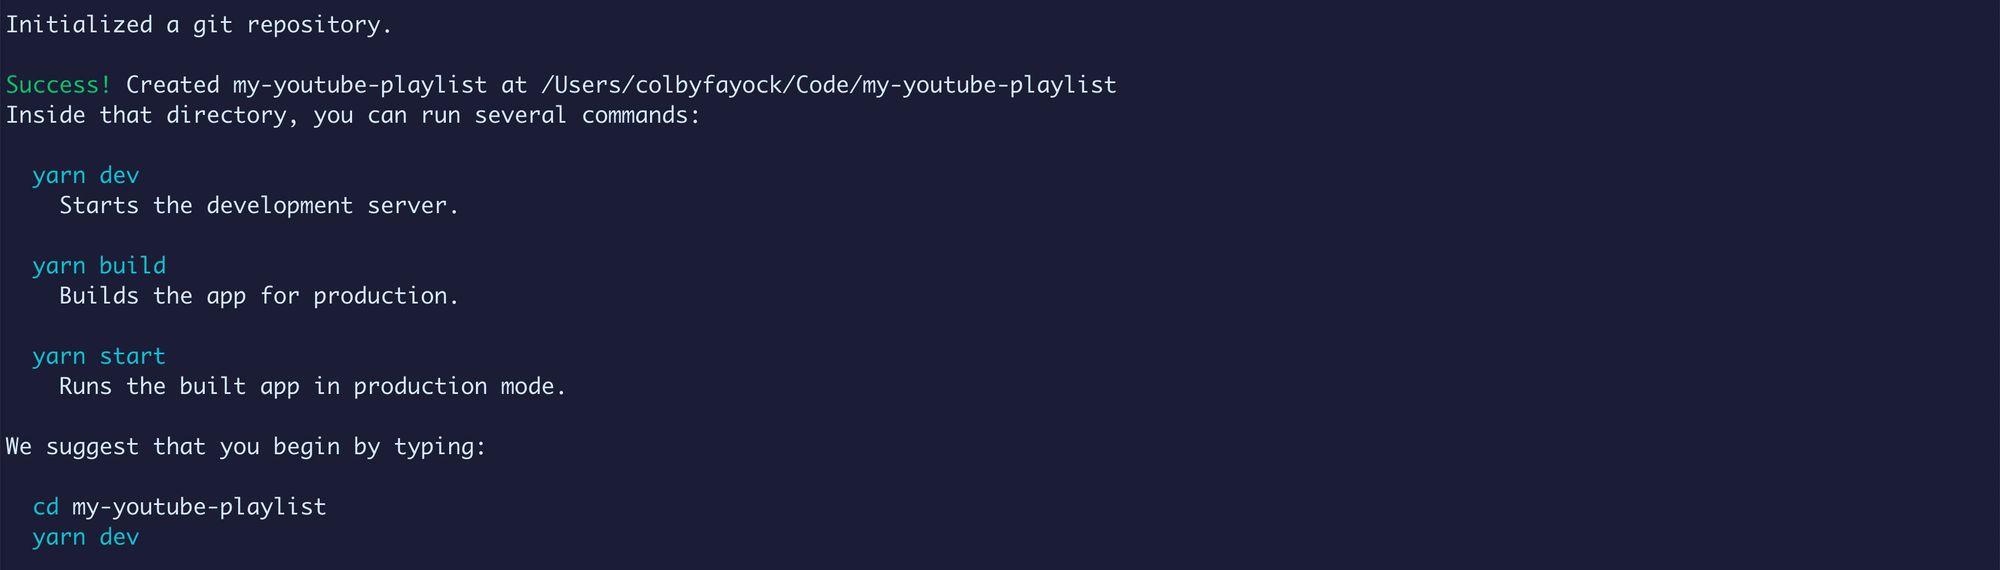 Successfully created a new app with Next.js
Then navigate to that directory and run yarn dev to start your development server and we’re ready to go.
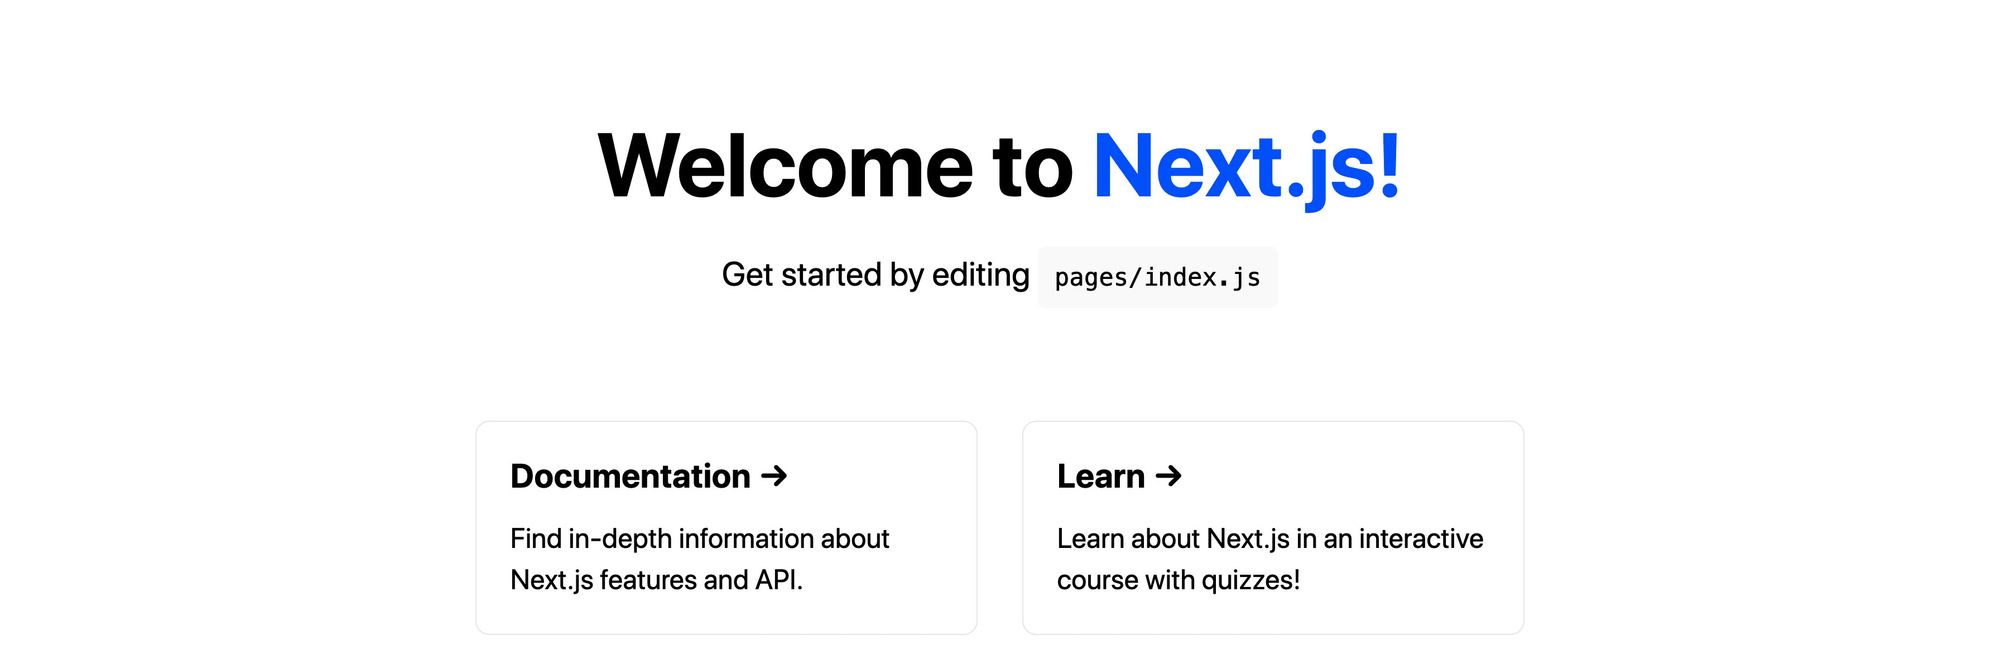 Next.js default page
Step 1: Creating a Google Developer project
To use the API, we’re going to need a new project in the Google Developer console that will allow us to generate an API key to use the service.
First, head over to: https://console.developers.google.com/.
Once there and logged in with your Google account, we’ll want to create a new project.
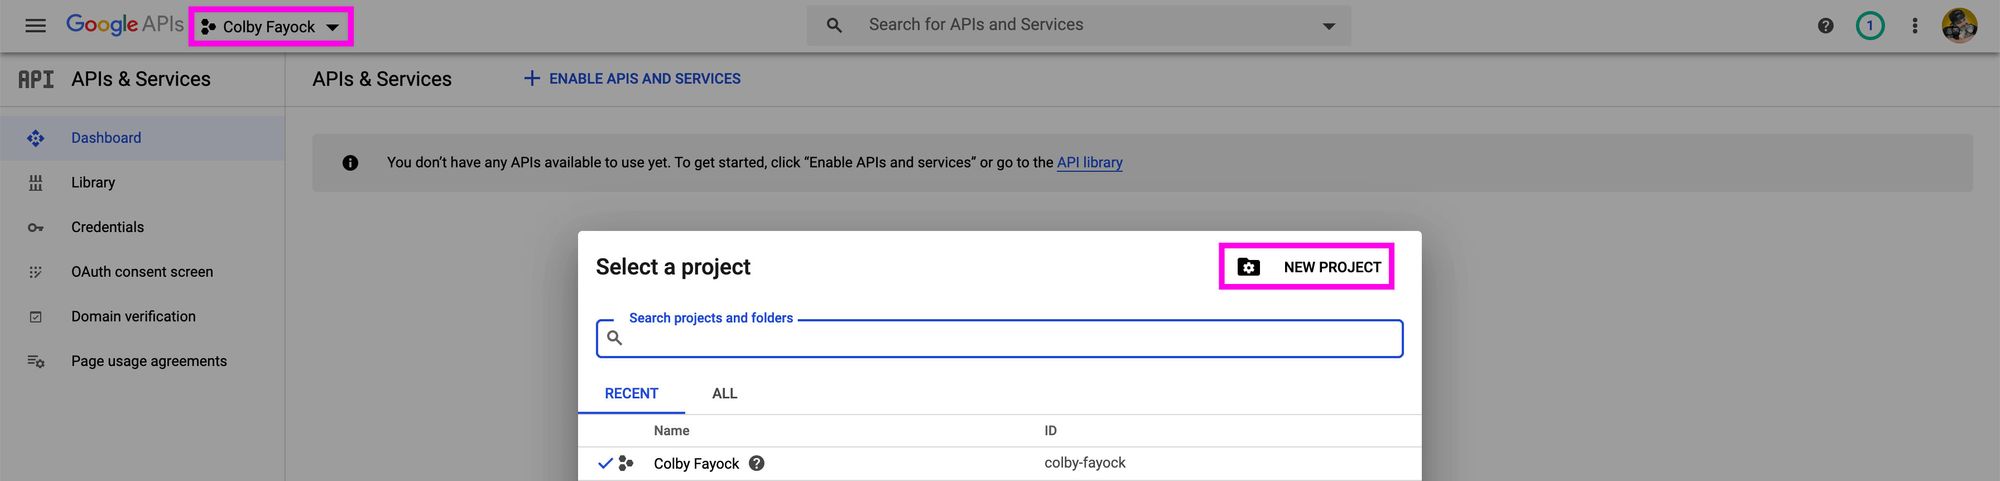 Creating a new project in Google Developer Console
At this point, you can name your project whatever you’d like. I’m going with “My YouTube Playlist”. Then click Create.
By default, Google won’t drop you into the new project. It kicks off a job to create that project, but once it finishes, you can open back up the project selector and select your new project.
 Selecting your project
Next, we want to create an API key. Navigate to Credentials, click Create Credentials, and then select API key.
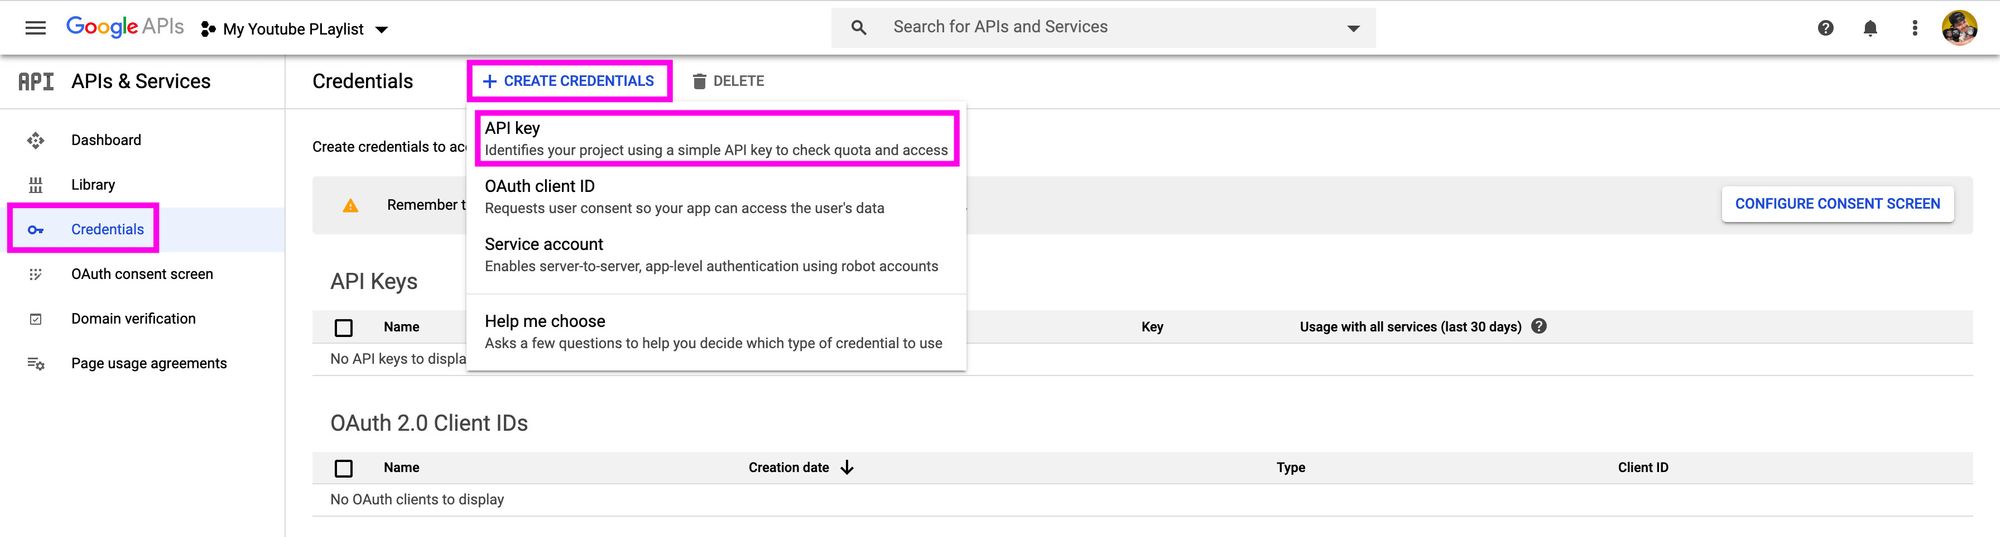 Creating an API Key credential
This will create a new API key that you’ll want to copy and save for later.
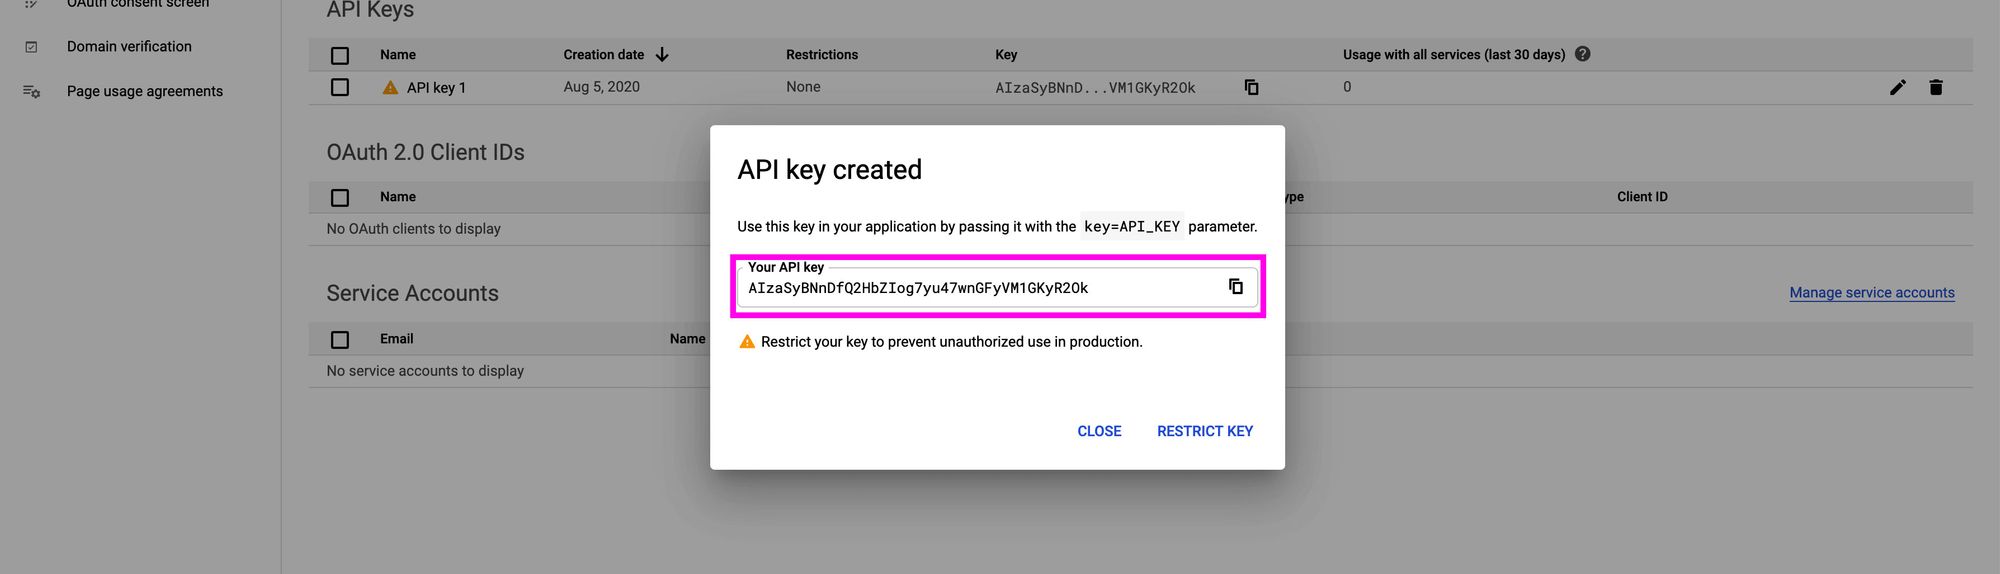 Copying your new API key
Note: This API key should be kept secret. If you expose this or add it somewhere available to the public like GitHub, others can abuse it and leave you with a bill to pay.
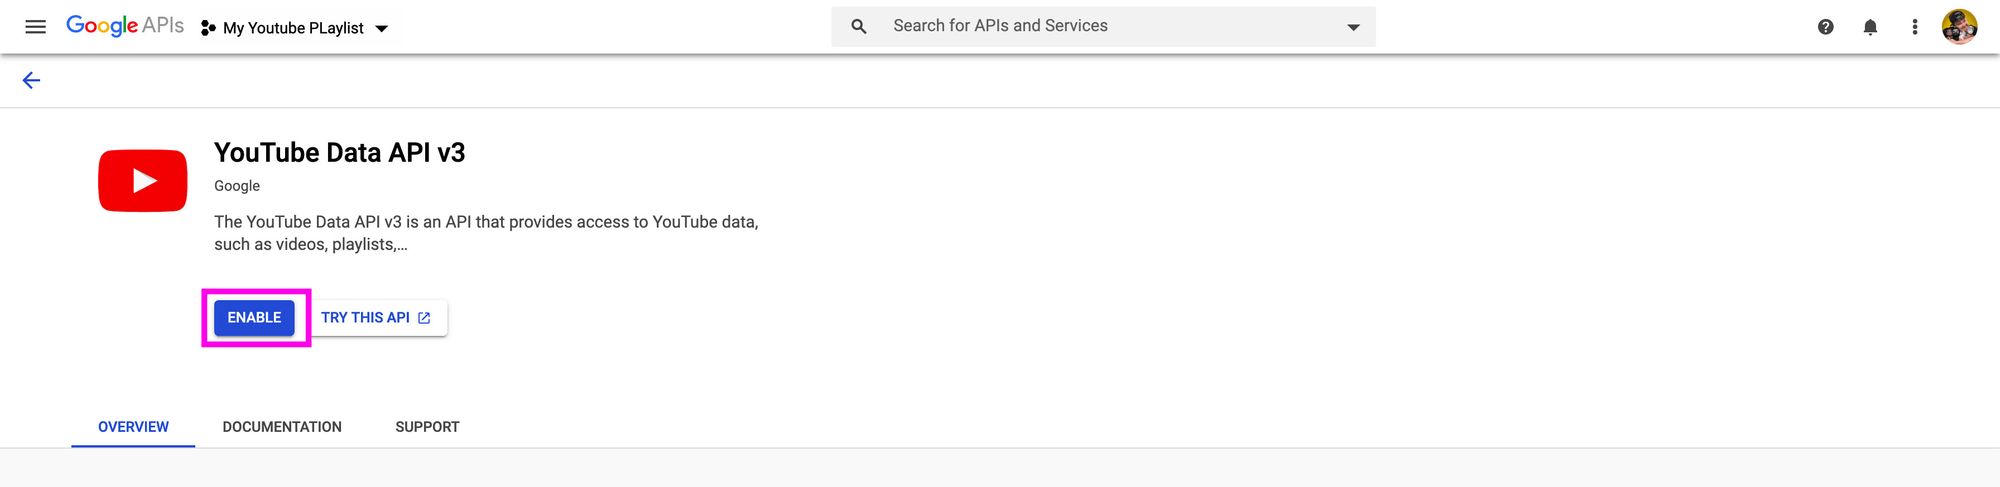
Finally, we need to add the YouTube API as a service. Navigate to Library in the sidebar, search for “YouTube”, and then select YouTube Data API v3.
 Searching for YouTube API in the Google API Library
Finally after that page loads, click Enable, which will bring you to a new dashboard page and you’ll be ready to go.
 Enabling YouTube Data API v3
Step 2: Requesting playlist items from the YouTube API
To request our data, we’re going to use the getServerSideProps function.
First, open up the pages/index.js file and add the following above the Home component.
const YOUTUBE_PLAYLIST_ITEMS_API = 'https://www.googleapis.com/youtube/v3/playlistItems';

export async function getServerSideProps() {
  const res = await fetch(`${YOUTUBE_PLAYLIST_ITEMS_API}`)
  const data = await res.json();
  return {
    props: {
      data
    }
  }
}
Here’s what we’re doing:
- We’re creating a new constant that stores our API endpoint
- We’re creating and exporting a new
getServerSidePropsfunction - Inside that function, we fetch our endpoint
- We then transform that to JSON
- Finally, we return the data as props in our object
Now, if we destructure the data prop from Home and console log out that data like the following:
export default function Home({ data }) {
  console.log('data', data);
We can now see that we get an error:
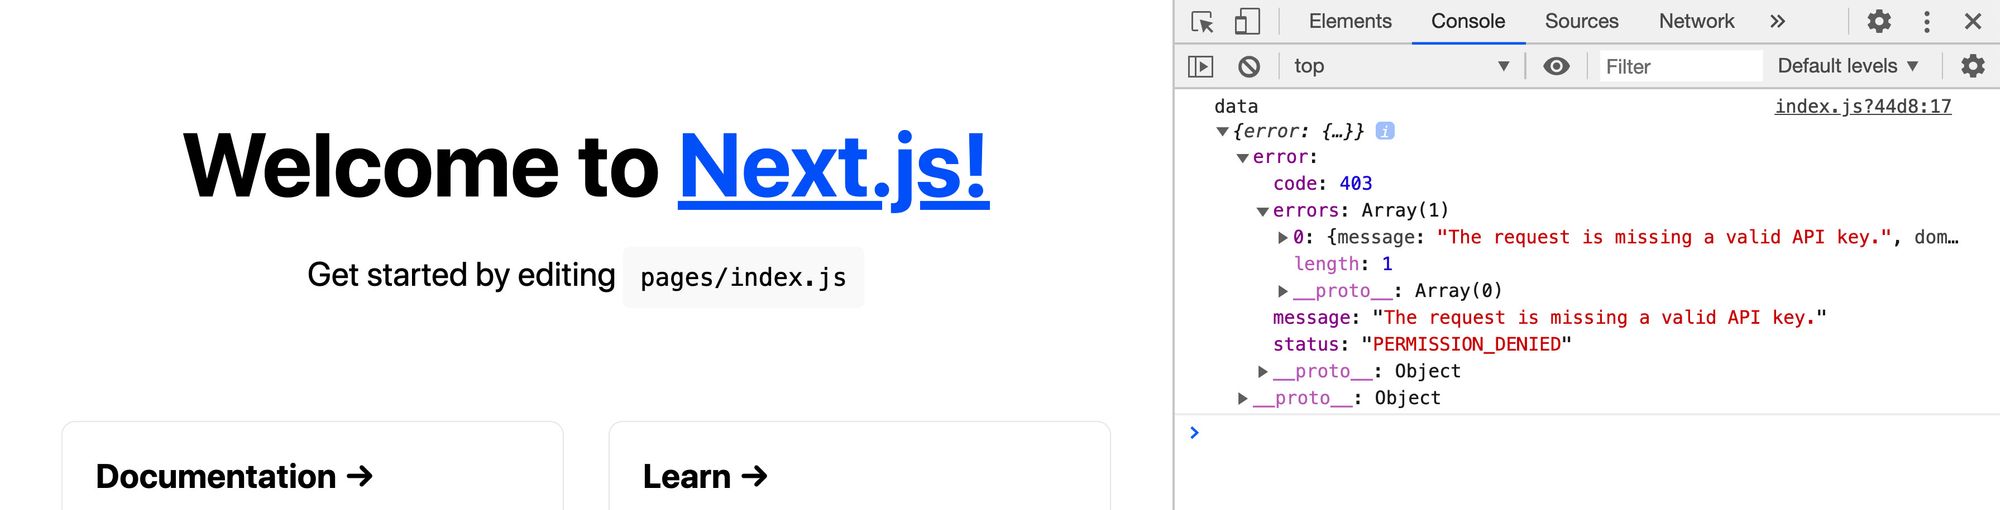 Request error requiring API key
We’re not using our API key, so let’s use that.
Create a new file in the root of the project called .env.local and add the following content:
YOUTUBE_API_KEY="[API Key]"
Make sure to replace [API Key] with your API key from Step 1.
At this point, you’ll want to restart your server so Next.js can see the new variable.
Now, update the getServerSideProps function to add your key to the API request:
export async function getServerSideProps() {
  const res = await fetch(`${YOUTUBE_PLAYLIST_ITEMS_API}?key=${process.env.YOUTUBE_API_KEY}`)
And if we reload the page, again, we get an error:
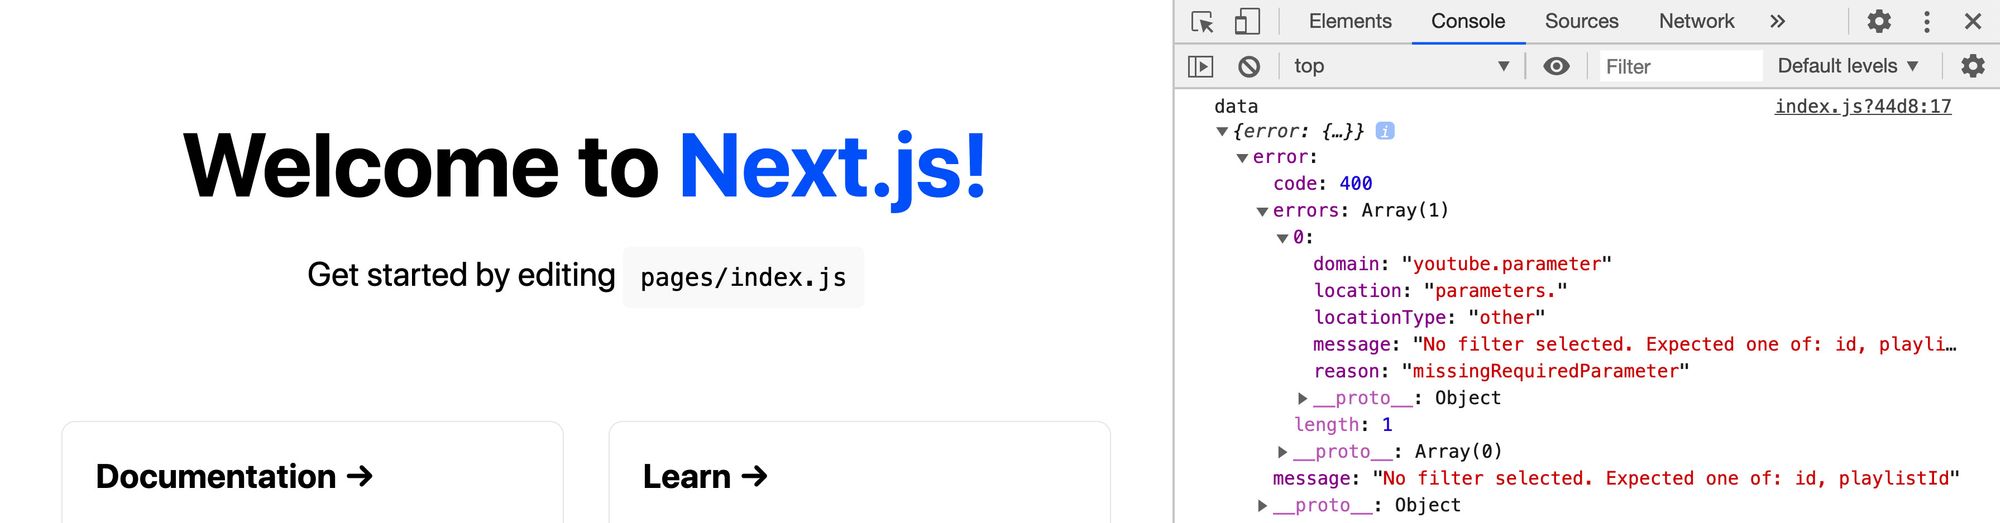 Request error requiring API parameters
Now, we’re missing the playlist ID and the filters we want to grab our data.
Using the parameters from the playlist items API, let’s update our API endpoint again:
const res = await fetch(`${YOUTUBE_PLAYLIST_ITEMS_API}?part=snippet&maxResults=50&playlistId=[Playlist ID]&key=${process.env.YOUTUBE_API_KEY}`)
Here, we’re adding:
part=snippet: this tells the API we want the snippetmaxResults=50: this sets the maximum number of playlist items that get returned to 50playlistId=[Playlist ID]: this adds the parameter to configure the playlist ID. Here, you should update that value to the playlist ID of your choice.
Note: you can find the playlist ID in the URL of the playlist you want to use.
And finally, when we reload the page, we have our data:
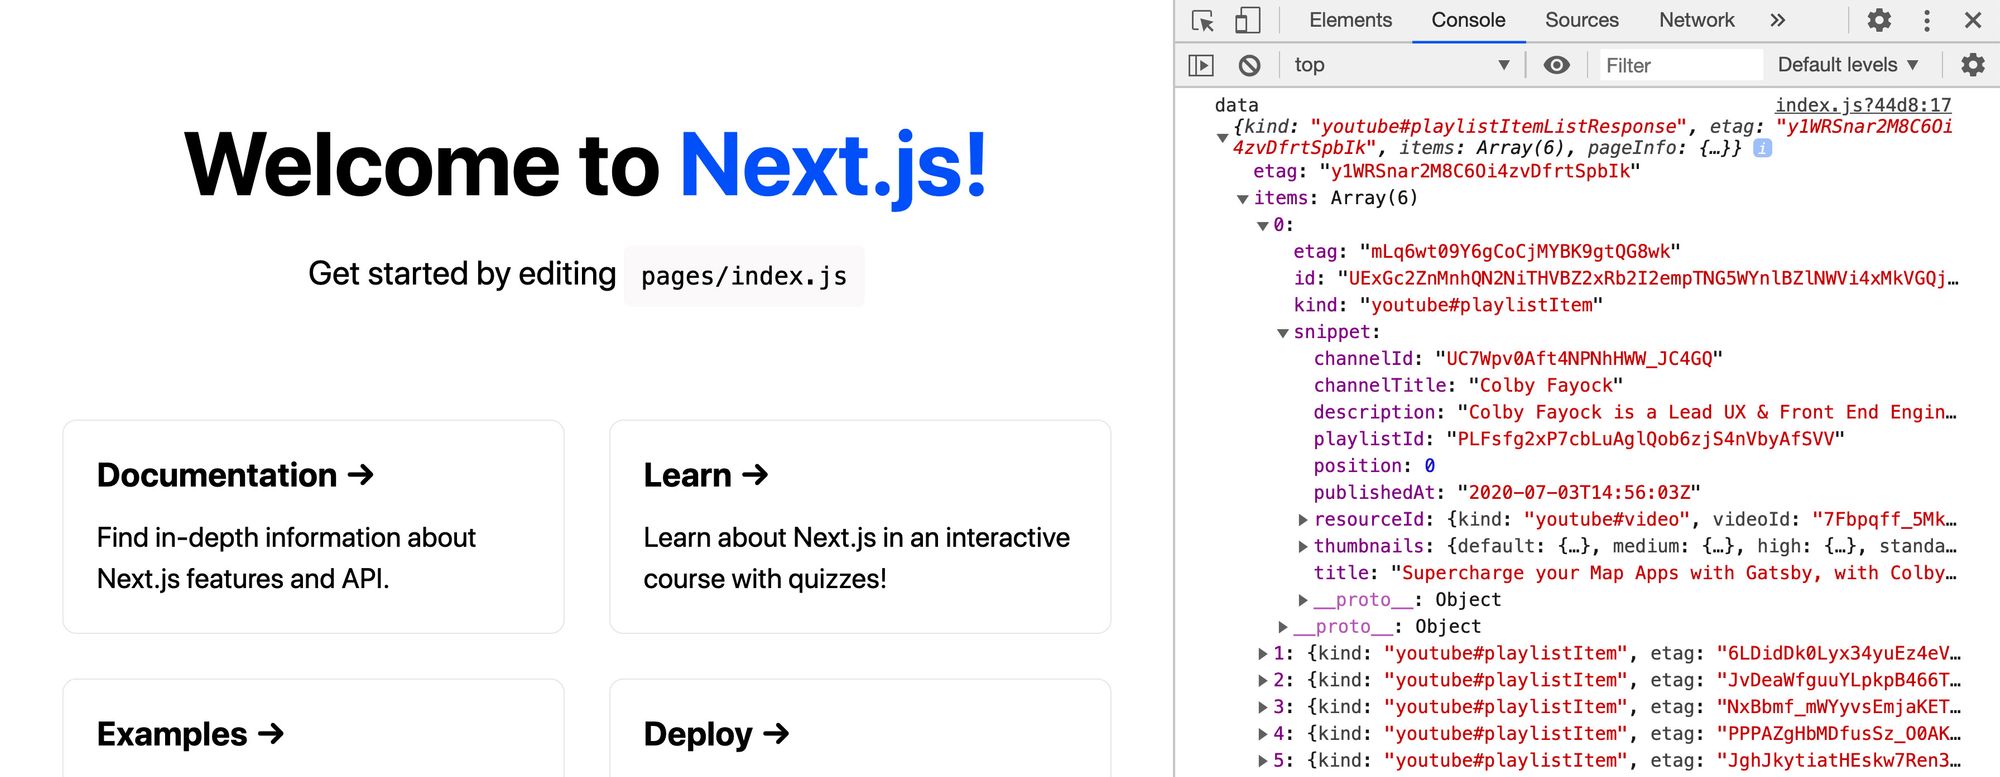 Successfully requested playlist items
Step 3: Showing YouTube playlist videos on the page
Now that we have our data, we want to display it.
To make use of what we already have from Next.js, we can transform the existing grid into a grid of YouTube thumbnails.
Let’s replace the entire <div> with the className of styles.grid to:
<ul className={styles.grid}>
  {data.items.map(({ id, snippet = {} }) => {
    const { title, thumbnails = {}, resourceId = {} } = snippet;
    const { medium } = thumbnails;
    return (
      <li key={id} className={styles.card}>
        <a href={`https://www.youtube.com/watch?v=${resourceId.videoId}`}>
          <p>
            <img width={medium.width} height={medium.height} src={medium.url} alt="" />
          </p>
          <h3>{ title }</h3>
        </a>
      </li>
    )
  })}
</ul>
Here’s what we’re doing:
- We’re changing the
<div>to a<ul>so it’s more semantic - We create a map through the items of our playlist to dynamically create new items
- We’re destructuring our data grabbing the id, title, thumbnail, and video ID
- Using the ID, we add a key to our
<li> - We also move the
classNameofstyles.cardfrom the<a>to the<li> - For our link, we use the YouTube video ID to create the video URL
- We add our thumbnail image
- We use our
titlefor the<h3>
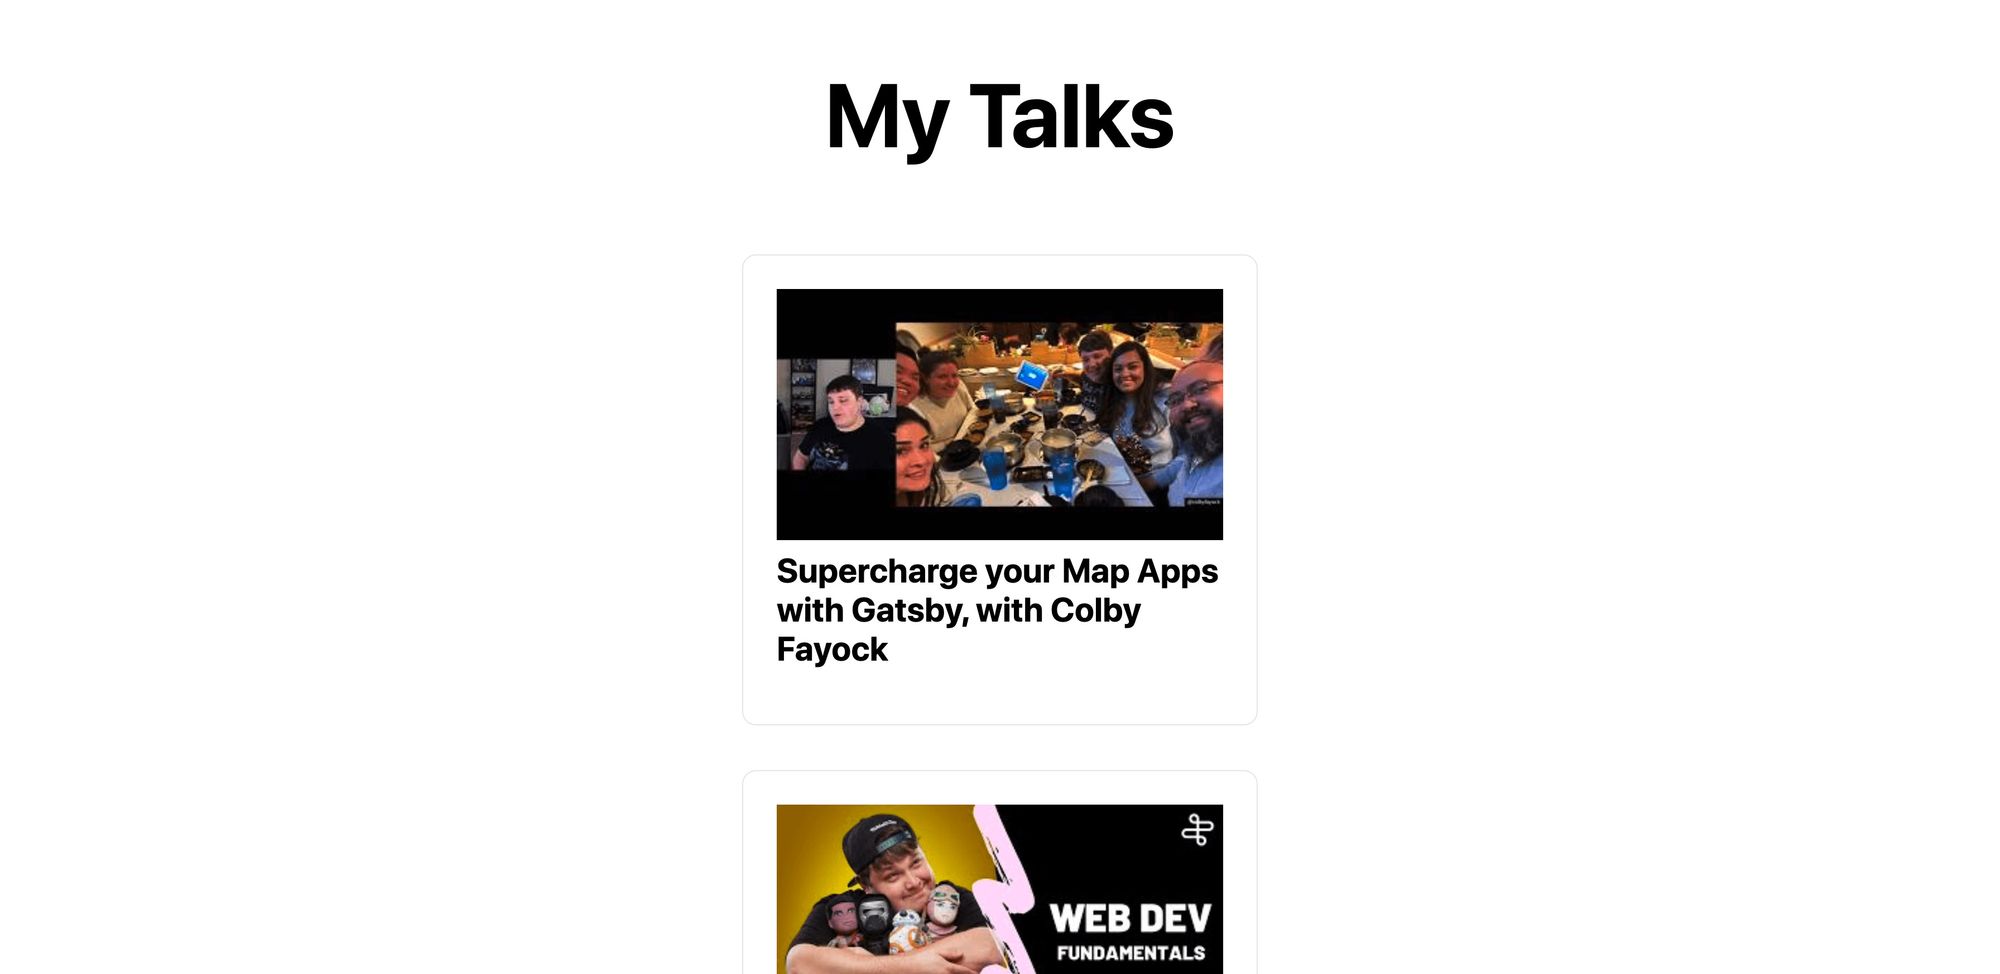
And if we reload the page, we can see that our videos are there, but the styles are a bit off.
 Displaying playlist items on the page
To fix this, we can start by adding the following styles to .grid inside of the Home.module.css file:
list-style: none;
padding: 0;
margin-left: 0;
We can also change
align-items: center;
to
align-items: flex-start;
which will help fix the alignment of our videos.
But we’ll notice we still don’t have two columns like the original Next.js layout.
 Removing default HTML list styles
Under our .grid class that we just updated, add the following:
.grid img {
  max-width: 100%;
}
This makes sure all of our images don’t exceed the container. This will prevent the overflow and will let our images settle in to two columns.
 Fixing column sizes
And that gives us our playlist videos.
What else can we do?
Embed a player and show that video on click
YouTube also gives controls for their own player. So using some JavaScript, we can take advantage and when someone clicks one of our video thumbnails, we can show an embedded player and play that video.
YouTube Player API Reference for iframe Embeds
Get analytics data
While YouTube provides some analytics in its dashboard, maybe you want something more advanced.
You can use the Analytics and Reporting APIs to get more insight into your channel and videos.
