

When you want to add some style to your application, you likely look for ways to make your User Interface stand out.
Whether it is using a specific font or a different color palate, you want to make the user feel attracted to your UI.
One way to customize is to update your icons. If you are a mobile developer, regardless of the platform you develop for, there is a straightforward process for adding icons to your application.
In Flutter, it’s not that complicated, but there are some things you should be aware of so that you don’t make time-consuming mistakes.
How to Customize the Application Launcher Icon
Instead of using the generic application icon Flutter provides, you can create your own. To do that, we will need to use a package called Flutter Launcher Icons. We’ll go through creating one step by step.
This is how your launcher icon looks by default:

Let’s assume we want this image to be our application launcher icon:

First, add the image you would like to use as that icon inside your project under the assets folder (if you don’t have an assets folder, create one):
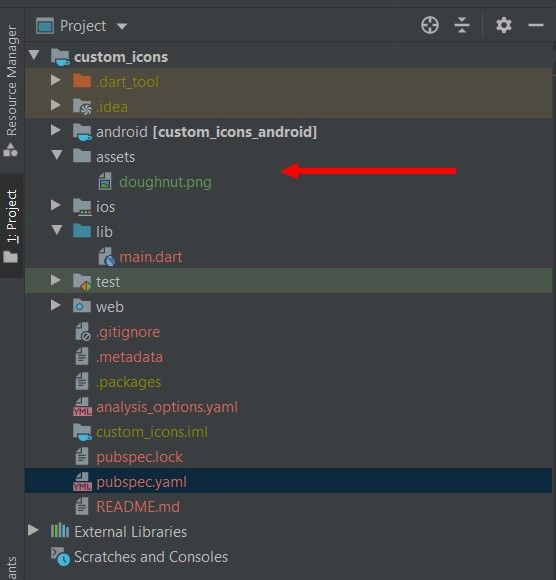 Our icon’s location inside the project
Then add the dependency to your pubspec.yaml file under dev_dependencies:
dev_dependencies:
  flutter_launcher_icons: "^0.9.2"
Add this configuration inside your pubspec.yaml file:
flutter_icons:
  android: "launcher_icon"
  ios: true
  image_path: "assets/doughnut.png"
The flutter_icons configuration has several keys to alter what is going to be rendered and for which platform.
- Android/iOS – specify for which platform you want to generate an icon. You can also write the file name instead of true.
- image_path – the path to the asset you wish to make into the application launcher icon. For example, "assets/doughnut.png".
There are more configurations available, but we won’t delve into them here. You can find out more by going here.
Now, run flutter pub get in the terminal or click Pub get inside the IDE.
Run the command below in the terminal:
flutter pub run flutter_launcher_icons:main
Run your application and you should see that the launcher icon has changed.

How to Generate Custom Icons in Flutter
We will be able to generate custom icons through FlutterIcon.com. It allows us to either:
- Upload a SVG that gets converted into an icon
- Choose from a huge selection of icons from a different set of icon packages
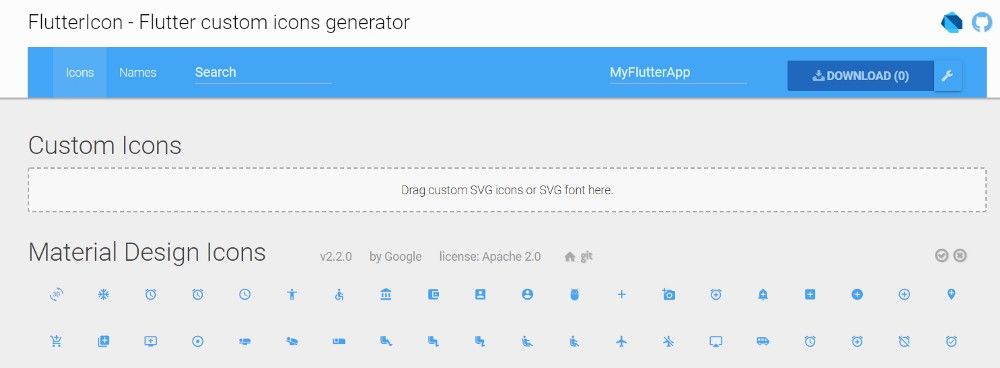
☝️ There is a package called FlutterIcon that has all of the icons shown, but due to it’s heavy size, I recommended only choosing the icons that you need and not using it.
Let’s demonstrate how to import custom icons into your application using this website.
Imagine we have the following form in our application:
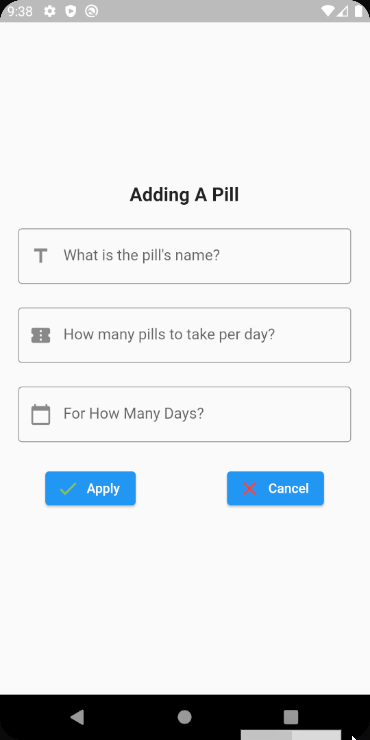
You can see that we used icons for each TextFormField. Below is the code for the first TextFormField:
TextFormField(
  controller: pillNameTextEditingController,
  decoration: const InputDecoration(
      border: OutlineInputBorder(),
      hintText: 'What is the pill\'s name?',
      prefixIcon: Icon(Icons.title)
  ),
  validator: (value) {
    if (value == null || value.isEmpty) {
      return 'Please enter a pill name';
    }
    return null;
  }
)
How about we change the first TextFormField’s icon into something more relevant?
On FlutterIcon.com:
- Choose the icons that you want to use/upload a SVG file
- Give a meaningful name to your icon class (We’ll call our class CustomIcons)
- Press Download

In the .zip folder that you downloaded, there are several files:
- A fonts folder with a TTF file with the name of the class you chose
- A config.json file that's used to remember what icons you chose
- A dart class with the name of the class you chose

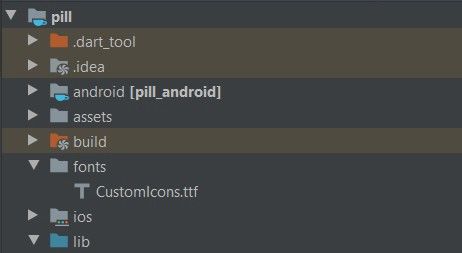
Inside your project, import the .ttf file into a folder called fonts under the root directory. It should look like this:
Place the .dart class inside your lib folder. If you take a look inside the dart file, you will see something similar (you might see more IconData objects if you chose more than one icon to download):
import 'package:flutter/widgets.dart';

class CustomIcons {
  CustomIcons._();

  static const _kFontFam = 'CustomIcons';
  static const String? _kFontPkg = null;

  static const IconData pill = IconData(0xea60, fontFamily: _kFontFam, fontPackage: _kFontPkg);
}
Add the following to your pubspec.yaml file:
fonts:
      - family: CustomIcons
        fonts:
          - asset: fonts/CustomIcons.ttf
Run flutter pub get in the terminal or click Pub get inside the IDE.
Go to the place where you want to use your custom icons and use it like this:
n.dart
TextFormField(
  controller: pillNameTextEditingController,
  decoration: const InputDecoration(
      border: OutlineInputBorder(),
      hintText: 'What is the pill\'s name?',
      prefixIcon: Icon(CustomIcons.pill)
  ),
  validator: (value) {
    if (value == null || value.isEmpty) {
      return 'Please enter a pill name';
    }
    return null;
  }
)

Troubleshooting Custom Icons in Flutter
If your custom icons are showing up as squares with X’s in them, something is not right. You might also see in the logger the following warnings:
Warning: No fonts specified for font CustomIcons
Warning: Missing family name for font.
This could be for several reasons:
- Make sure your pubspec.yaml file is valid. Meaning there are no extra spaces, indention, and so on. You can use this tool for it.
- Make sure that you have correctly referenced your font in your pubspec.yaml file.
- Make sure that you have placed your .ttf file inside a fonts directory under the root directory of your project (not inside the assets directory).
- Uninstall your application and reinstall it on your device.
If you’d like to take a look at a real application using both types of icons, you can check it out here:
And you can see the source code here:
Thank you for reading!