

When you add localization to a website you're making it available in multiple languages. This tutorial aims to teach you how to do that to a small react app using react-i18next.
The way it works is simple. Instead of putting the text you want to display in the components, it all goes into a JSON file.
You then use the keys from the file in the components to get the text. You can add additional JSON files with the same keys and translated values for each desired language. Whatever language is set will determine which JSON file is used as the text for the app.
Follow the steps below to learn how to add this functionality to a React app.
Clone the boilerplate
If you want to code along, you can clone the boilerplate from GitHub or open the boilerplate on replit. It's a small React app with two pages and a few components:
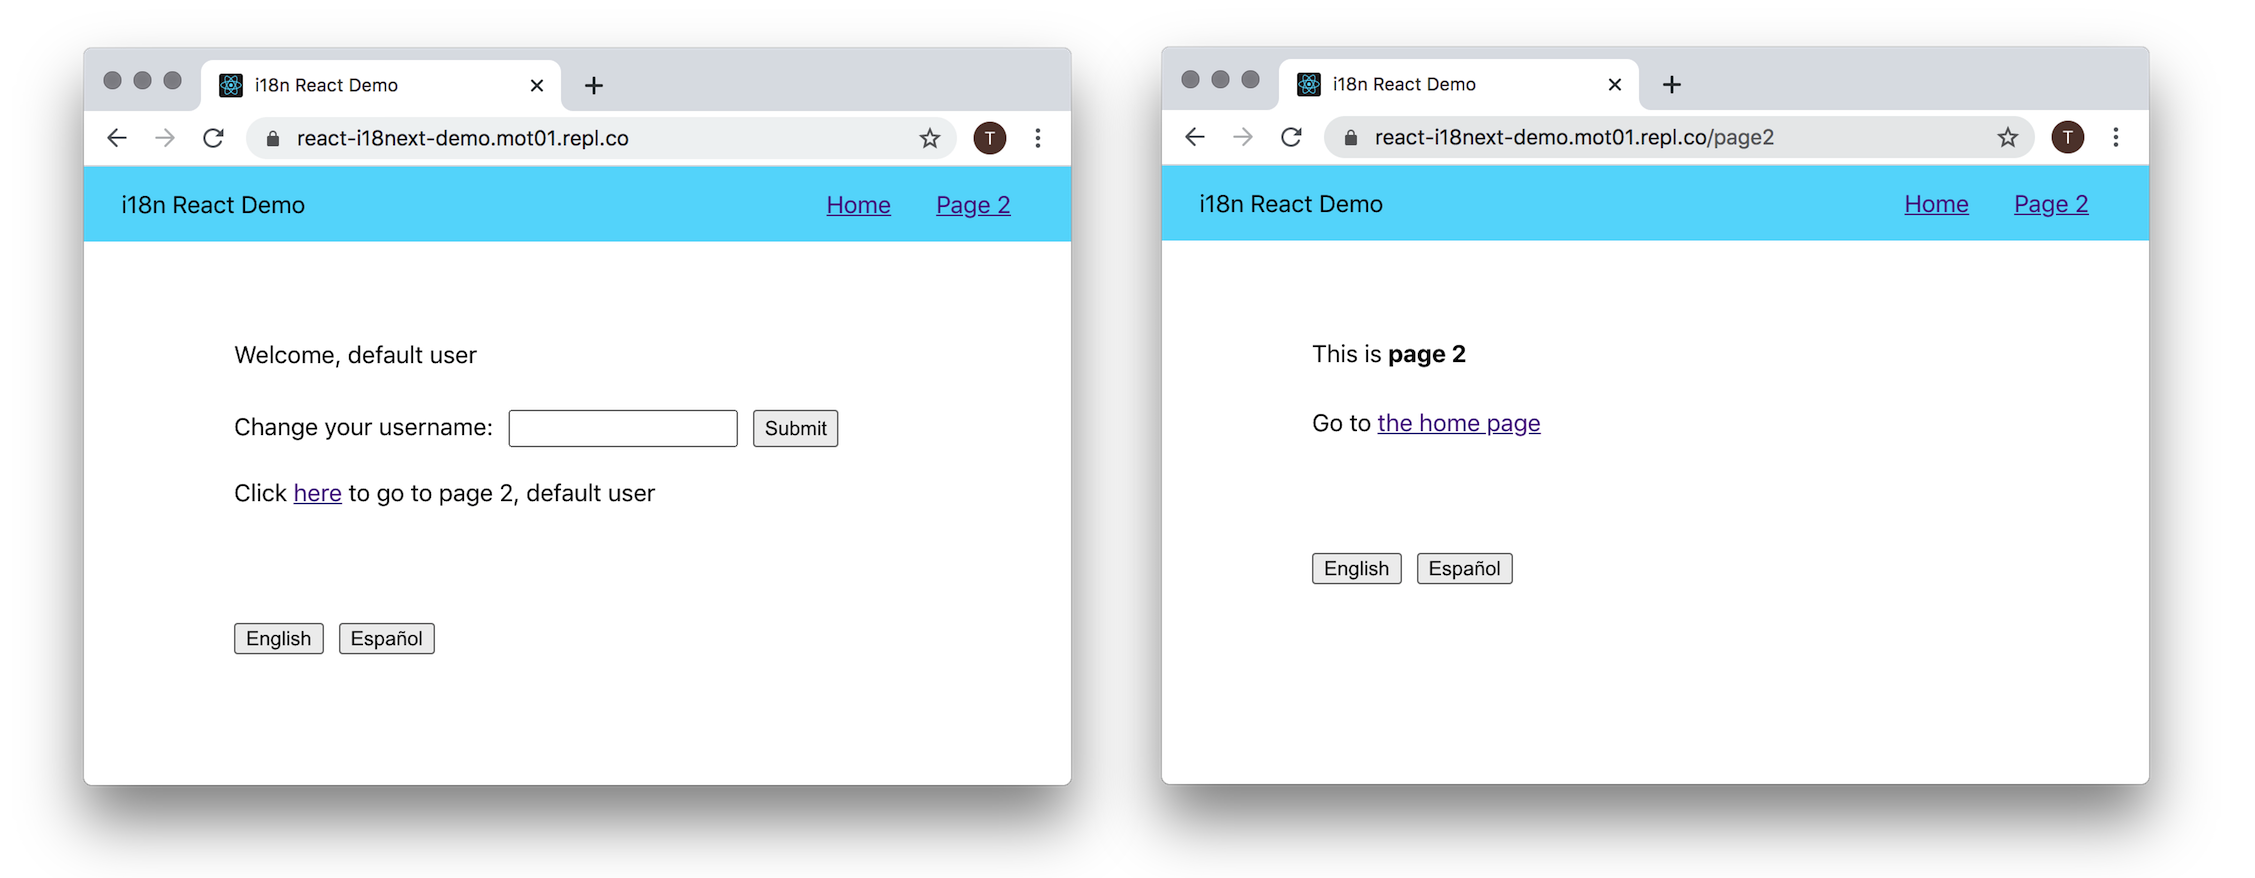
The goal is to make the app available in English and Spanish.
If you are following along, I recommend taking a quick look at the components and file structure to get familiar with the code. The JS files in the src folder are the important ones you will be changing. The Nav, Home, and Page2 components contain all the text that needs to be translated.
Add the dependencies
react-i18next is based on i18next, so you will need both packages as dependencies to translate the app. You can add them with:
npm install --save react-i18next i18next
If you are following along, start the app with npm start so you can give the two pages a look.
Create the file structure
In the src folder, create an i18n folder to hold all the information related to translating the app. Here’s the structure I used that is pretty common:
src
+-- i18n
    +-- locales
    |    +-- en
    |        +-- translations.json
    |    +-- es
    |        +-- translations.json
    +-- config.js
The config.js file contains the set up for the i18n instance. The two JSON files will hold the text that goes in the app. en for English and es for Spanish. If you are following along, create the file structure in the boilerplate.
Configure the i18n instance
The i18n instance will hold all of your translations, the current language, and other info and methods needed. You can configure it in the config.js file like this:
import i18n from 'i18next';
import { initReactI18next } from 'react-i18next';

i18n.use(initReactI18next).init({
  fallbackLng: 'en',
  lng: 'en',
  resources: {
    en: {
      translations: require('./locales/en/translations.json')
    },
    es: {
      translations: require('./locales/es/translations.json')
    }
  },
  ns: ['translations'],
  defaultNS: 'translations'
});

i18n.languages = ['en', 'es'];

export default i18n;
At the top, import the necessary dependencies. Next, the use(initReactI18next) will bind react-i18next to the i18n instance.
The first two properties of the init object parameter are a fallback language (fallbackLng) and default language (lng). I set both of these to English (en).
The resources are the JSON files with the translations that you created in the last step. The namespaces (ns) and default namespace (defaultNS) are the keys from the resources object.
You can split your translations into multiple files (namespaces) if you have a large app to simplify the files. In which case, you would add more than just the one file in the resources object and add it to the namespaces array. This app is small, so all the translations can go in one file.
Add the i18n instance to your app
In the index.js file of the boilerplate, which contains the entire app, import the i18n instance you created like this:
import './i18n/config';
Next, add an empty object to your two translations.json files so you don’t get any errors. You will fill in the keys later.
Translate a functional component with the useTranslation hook
The Nav.js file is the first component to translate. It’s a functional component, so you can use the useTranslation hook. Import it at the top with import { useTranslation } from 'react-i18next'.
Next, instead of using the implicit return with the component, add curly brackets and the return statement so you can declare a variable. Get the t function from the hook with const { t } = useTranslation();.
All together, it should look like something this:
import { useTranslation } from 'react-i18next';

const Nav = () => {
  const { t } = useTranslation();

  return (
    …
  );
}
The text you want to translate in this component is Home and Page 2. In your English translations.json file, add two properties to the object:
{
  "home": "Home",
  "page2": "Page 2"
}
Now, you can pass those keys to the t function to get the text. In the Nav.js component, use the t function to translate Home and Page 2 to the English text like this: t('key-from-json-file').
Here’s how those lines should look:
import { useTranslation } from ‘react-i18next;

const Nav = () => {
  const { t } = useTranslation();

  return (
    …

    <Link to="/">{t('home')}</Link>
    <Link to="/page2">{t('page2')}</Link>
  );
}
Preview in Spanish
The two nav buttons should be working for English. Add the same two keys to the Spanish JSON file so you can see what it will look like in Spanish. Here’s the translations:
{
  "home": "Casa",
  "page2": "Página 2"
}
After that, go to the config.js file, set the lng (default language) to es and reload the page. The nav links should show up in Spanish. When you are done, you can set the default language back to en.
Translate a class component using withTranslation
In the Home.js file, there are three sentences and a button to translate. You can use the t function again for most of them, but this one is a Class component so you need to use the withTranslation higher order component (HOC). Import it at the top with import { withTranslation } from 'react-i18next';.
Then, at the bottom of the file, export it with export default withTranslation()(Home);. Now the t function will be passed into the component’s props for use.
In the render method, get the function with const { t } = this.props. The code should look something like this:
import { withTranslation } from 'react-i18next';

class Home extends Component {
  …

  render() {
    const { t } = this.props;

    …
  }
}

export default withTranslation()(Home);
The first line to translate, Welcome, {username}, has a variable. You can pass an object to the t function with your variable like this: t('key-from-json-file', { variable: value }). It would look like this in the component:
<p>{t('welcome', { username: username })}</p>
Add that in place of of the "welcome" line. Then, in the English JSON file, add the new key: "welcome": "Welcome, {{username}}". The username variable passed to the t function will be placed in the string for you.
Also, add the property to the Spanish file: "welcome": "Bienvenido {{username}}". Follow the instructions from before if you want to preview it in Spanish.
Challenge yourself
You should be able to translate a few things on your own now. Try to do the next two lines, Change your username: and Submit, like the others.
Here are the properties for the English JSON file:
"change-username": "Change your username:",
"submit": "Submit"
And the Spanish translations:
"change-username": "Cambia tu nombre de usuario:",
"submit": "Enviar"
Add the above in the two JSON files. Then, translate the label and button text with the t function.
When you are done, the render part of Home.js should look like this:
render() {
  const { username } = this.state;
  const { t } = this.props;

  return (
    <div className='body'>
      <p>{t('welcome', {username: username})}</p>

      <div>
        <label>{t('change-username')}</label>
        <input type='text' onChange={this.updateUsername.bind(this)} />
        <button onClick={this.setUsername.bind(this)}>
          {t('submit')}
        </button>
      </div>

      <p>Click <Link to='/page2'>here</Link> to go to page 2, {username}</p>
    </div>
  );
}
Change the lng in config.js to en or es and reload the app to test the languages.
Translate basic nested elements with the Trans Component
Leave the last line on the home page for now and head over to the Page2.js file. The two sentences to translate contain other elements – a strong tag and a Link component.
The general rule is to use the t function from the previous examples when you can, but if you have elements or other components in the text, you will need to use the Trans component.
First, import Trans and withTranslation from react-i18next. Then, export the component using withTranslation again. It should look like this:
import { Trans, withTranslation } from 'react-i18next';

const Page2 = () => (
  …
);

export default withTranslation()(Page2);
If you have basic HTML tags in your text, you can wrap the Trans component around the key from your JSON file, and the tags will be added to the text.
Change the first <p> in the component to this:
<p><Trans>this-is-page2</Trans></p>
Then, add the key to the two translation.json files. For English:
"this-is-page2": "This is <strong>page 2</strong>"
And the Spanish JSON:
"this-is-page2": "Esta es la <strong>página 2</strong>"
The above will translate the first line of Page2.js. Default basic tags you can use with this method are br, strong, i, and p, but that list can be expanded in the config. Set the language in the config to Spanish to make sure it's working.
Translate complex nested elements with Trans
The next line has a nested Link component, so it's a little trickier. You need to use Trans again, but pass the key in its props as i18nKey and keep the Link as its child. The Link doesn’t need to have any text. Here’s how that looks:
<Trans i18nKey='go-to-home'>
  <Link to='/'></Link>
</Trans>
Be sure to keep the <p> tags. Add the associated property to the English JSON:
"go-to-home": "Go to <0>the home page</0>"
And the Spanish version:
"go-to-home": "Ir a la <0>pagina principal</0>"
The <0> tags represent the first child of the Trans component, in this case, Link. If there was another child, it would use <1> tags, and so on.
Change the language in the config if you want to see the two different locales.
Translate complex nested elements with a variable
One more line to translate. The last line in the Home.js file contains a nested Link element and a variable. You need to use Trans again so add it to the existing import at the top.
If you need to use a variable with Trans, it can be placed inside the element. So the last line:
<p>Click <Link to='/page2'>here</Link> to go to page 2, {username}</p>
Can be translated like this:
<Trans i18nKey='go-to-page2'>
  <Link to='/page2'></Link>
  {{username}}
</Trans>
The key is passed to Trans as a prop like before. The nested Link element and the {{ username }} variable need to be somewhere in the component, it doesn't matter where.
Be sure to add the values to the JSON files. For English:
"go-to-page2": "Click <0>here</0> to go to page 2, {{username}}"
And Spanish:
"go-to-page2": "Haga clic <0>aquí</0> para ir a la página 2, {{username}}"
How to change languages
All the desired text should be available in both English and Spanish now. The last thing to do is to make it easy to switch between languages.
The Footer.js file has a few buttons and a changeLanguage function. Import the useTranslation hook from react-i18next at the top of the file. At the top of the Footer component, get the i18n instance from it like this: const { i18n } = useTranslation();.
Finally, in the changeLanguage function, use the i18n.changeLanguage() method, passing e.target.value to it, to change the langauge.
All together, it looks like this:
import { useTranslation } from 'react-i18next';

const Footer = () => {
  const { i18n } = useTranslation();

  function changeLanguage(e) {
    i18n.changeLanguage(e.target.value);
  }

  return(
    <div className='footer'>
      <button onClick={changeLanguage} value='en'>English</button>
      <button onClick={changeLanguage} value='es'>Español</button>
    </div>
  )
}
Now, you should be able to switch languages by clicking the buttons on each page.
How to add languages
From here, the app is ready to be translated into any language quite easily. You just need to add another language to the config, and the JSON file with the translated text to go with it.
Conclusion
Hopefully, this gave you some insight into how to rapidly expand a React application into many world languages.
There are many more features and details with these tools. See the links below for more info.
Helpful Links
- View a demo of the finished project
- View the source code for the finished project
- The react-i18next documentation goes into more detail on some of the translation methods, server side rendering, testing, and additional uses with React.
- The i18next documentation has helpful information on additional configuration, the API, translating complex text, and additional features.