
By Daniel Barker
TL;DR
Are you struggling to automate the install of Anaconda on AWS (Amazon Web Services) EC2 instances and install necessary Python packages for your project? I was — so I wrote a simple bash script to handle it.
Read on for a quick tutorial or check out the Github repo containing the script and CloudFormation template.
For some reason I don’t understand, Amazon insists on using Python 2 on their standard Amazon Linux 2 EC2 instances. Of course, on a project I’ve recently been working on, I needed Python3. Per usual, virtual environments to the rescue.
Normally, I would just install Anaconda and be good-to-go. However, my project also makes heavy use of AWS’s CloudFormation tools to automatically deploy stacks of resources from a template, so I needed a way of automating the install. I also wanted the freshly-minted EC2 instances to have the AWS CLI and Boto3 Python package installed.
Fortunately, AWS provides a ‘UserData’ key when provisioning EC2 instances that can run user defined bash commands and run shell scripts.
As often is the case, something that I thought would be simple ended up taking up several hours, but hopefully this script will help save you the same headache. Here’s a quick tutorial on how to use the script and template, which you can get at this link:
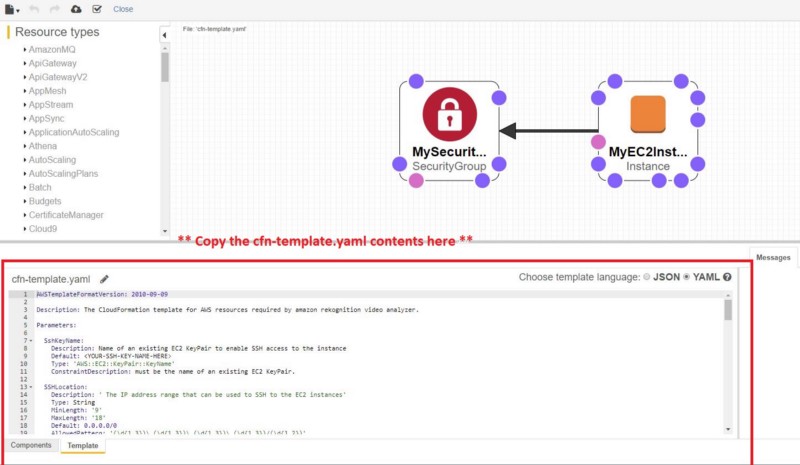
Step 1: Open the CloudFormation Template in the AWS Console
Get the template file from the repo link above, and open it in the CloudFormation designer.
Click ‘create stack’ in the upper left corner, and input the necessary parameters (your AWS API key/secret, SSH Key Name, etc.)
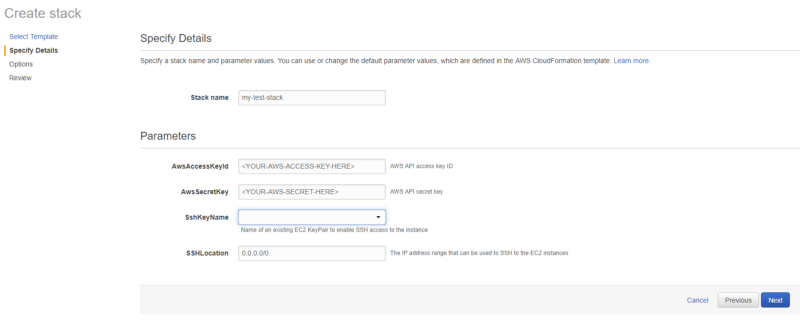
Click through the rest of the prompts with ‘next’ and then create the stack. You should get a ‘CREATE_IN_PROGRESS’ message like the one below…
…And then a ‘CREATE_COMPLETE’ when finished (this can take quite a bit of time — 10 minutes often — Anaconda is quite a hefty install):
Step 2: SSH into your new instance to verify the install
Using your favorite SSH client, log in to your new instance. You should be able to quickly check that Anaconda successfully installed by typing:
conda activate python3
Verify that the prompt on the SSH client changes to show the ‘python3’ activate being active. Also, you can verify that the AWS CLI properly installed by typing:
cd ~/.awsls
You should see the ‘credentials’ file created in that directory.
If you meet the above checks, you should be done. Good luck with the rest of your project!