

Every day, we perform hundreds of small tasks. On their own, they don’t take much time. But they can add up, especially if you consider that time for a whole year.
But we’re technologists and it’s 2020. How can we use tools like Zapier to make robots do these things for us?
- What is Zapier?
- What can we do with Zapier Zaps?
- Zap 1: Get a text if it’s going to rain with Zapier
- Zap 2: Print a test every week with Google Cloud Print
- Zap 3: Smashing Magazine Job Alerts with Gmail
What is Zapier?
Zapier is an automation tool that connects all of the apps you love and builds powerful fully automated workflows. Whether it’s automating sending an email or making sure that new blog post gets a tweet, we can remove the manual steps of mundane tasks to focus on other things that art important.
Each time you create a new workflow, you’re creating a “Zap”. It’s essentially Zapier’s way to give a name to the workflow you create.
What can we do with Zapier Zaps?
The brilliant part about Zapier is each app integration makes its API available via Zapier to other app integrations giving you a ton of options to connect and build powerful workflows.
Particularly, we’re going to learn how to do a few things:
- Sending a text every morning if it’s going to rain
- Set up a weekly print job to keep your ink fresh
- Receive emails for new jobs on Smashing Magazine’s job board
While each of these tasks are small, they end up saving you a lot of time. And if you’re creative, you can build upon these workflows to customize a whole lot more.
Getting started with a Zapier account
Before we get into setting up workflows, you’ll need an account.
Signing up for Zapier is free and you get 5 free Zaps to start, so we don’t have to worry about cost here.
Now let’s get into the Zaps.
Zap 1: Get a text if it’s going to rain with Zapier
To get an idea of how this works, we’ll start with something simple. We’re going to set up a Zap that will send us a text message if the weather predicts rain.
To get started, click the big Make a Zap button on the top left of the page when you’re logged into your account.
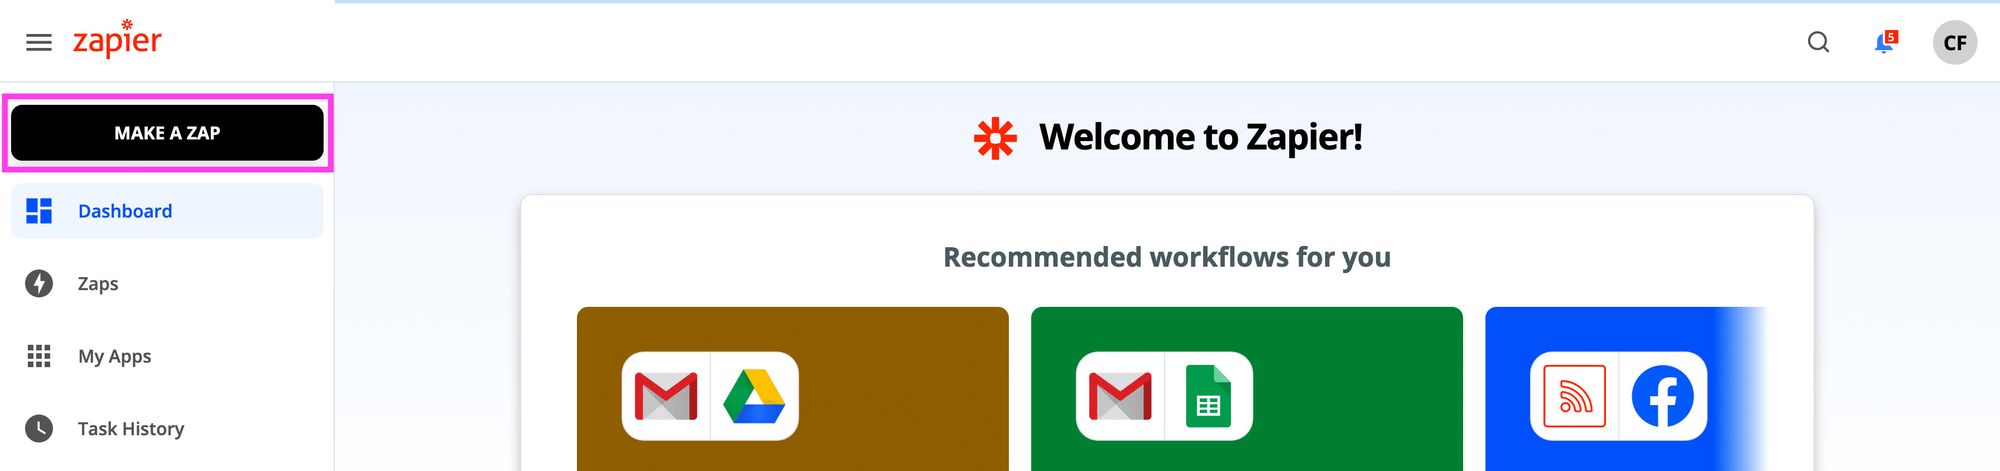 Making a new Zap
Here, Zapier wants to know the first app we want to connect. Since we’re going to base our Zap on the weather, search for “weather” and select Weather by Zapier.
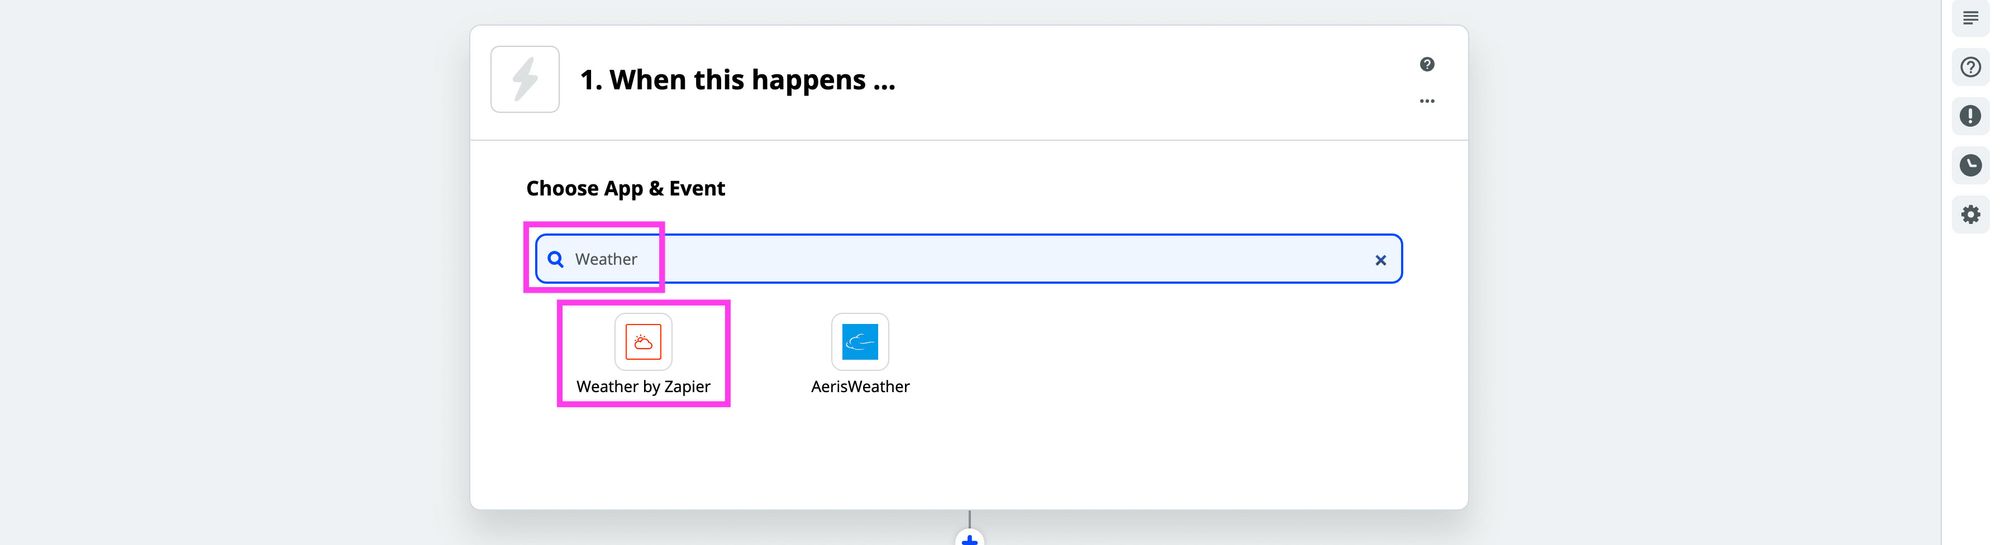 Selecting the Weather by Zapier integration
It will then ask you to choose a Trigger Event, where you’ll select “Will It Rain Today?”, then you can click the Continue button.
 Choosing the Will it Rain Today? event
When choosing Weather as an event, it requires a little bit of information to give us a personalized prediction. Particularly, it requires your Latitude and Longitude, which we can look up using latlong.net.
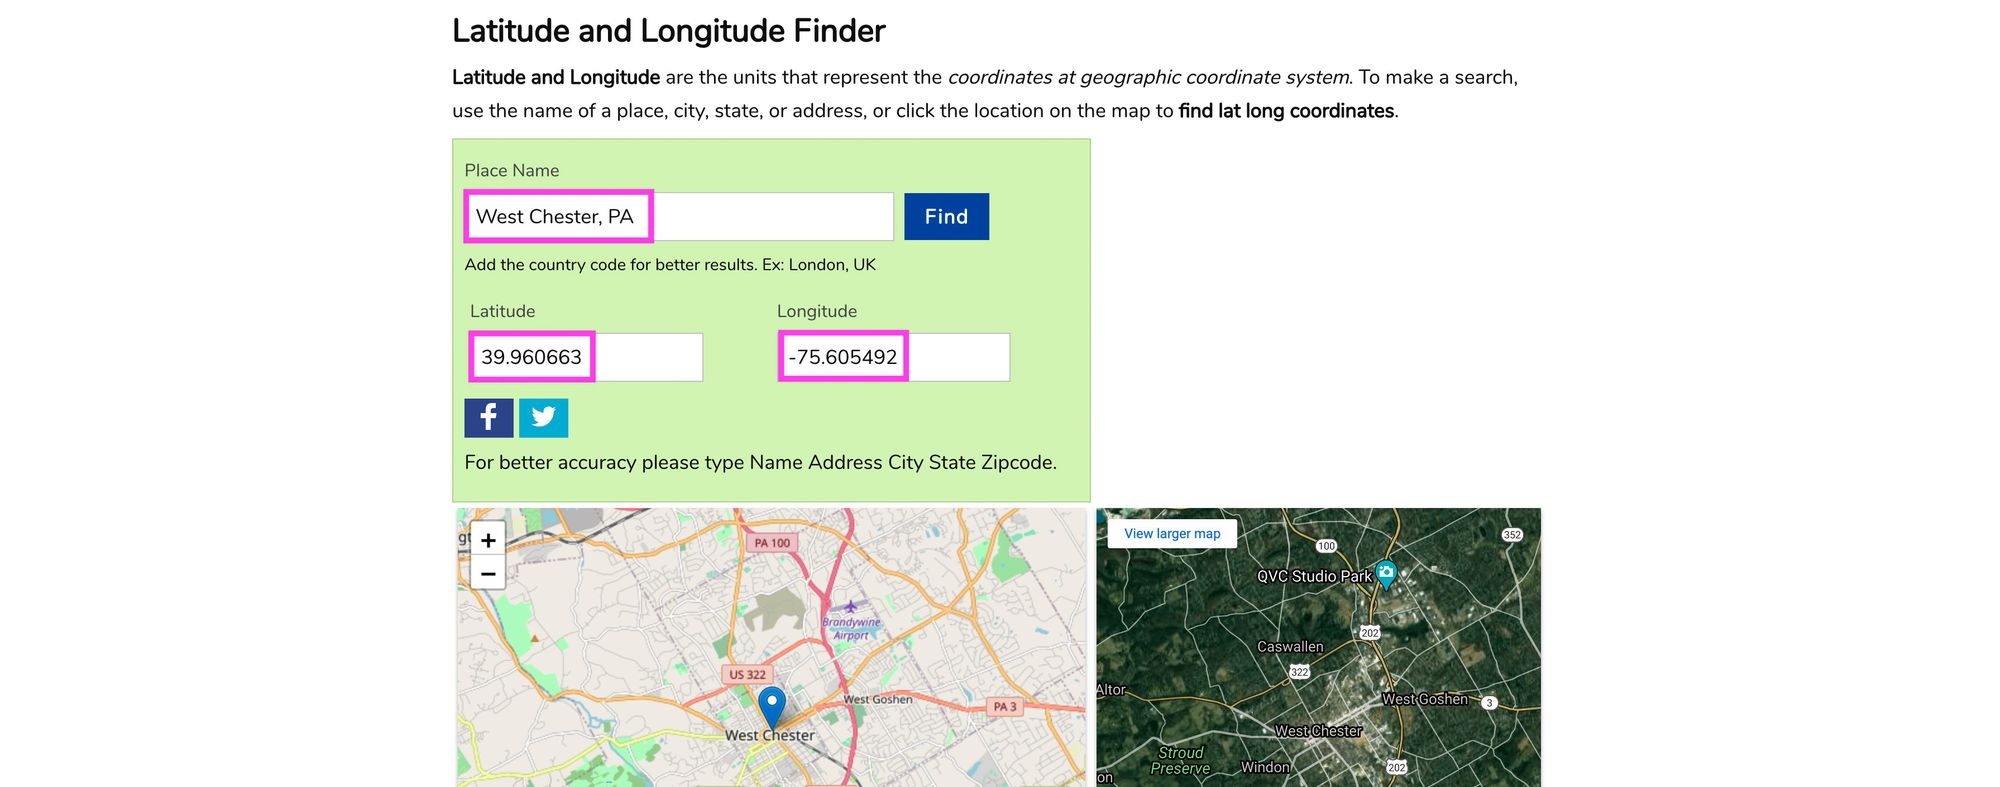 Finding latitude and longitude with latlong.net
You can then enter your Latitude and Longitude into the Customize Forecast screen of Zapier, select your Units which defaults to Fahrenheit, and then click the big Continue button.
 Configuring forecast with latitude and longitude
At this point, you can click Test Trigger, which simply makes sure it’s working, and click Continue again.
Now we’re going to tell Zapier what to do with the information once it knows it’s going to rain.
In the "Do this..." panel, search for “sms” and select SMS by Zapier.
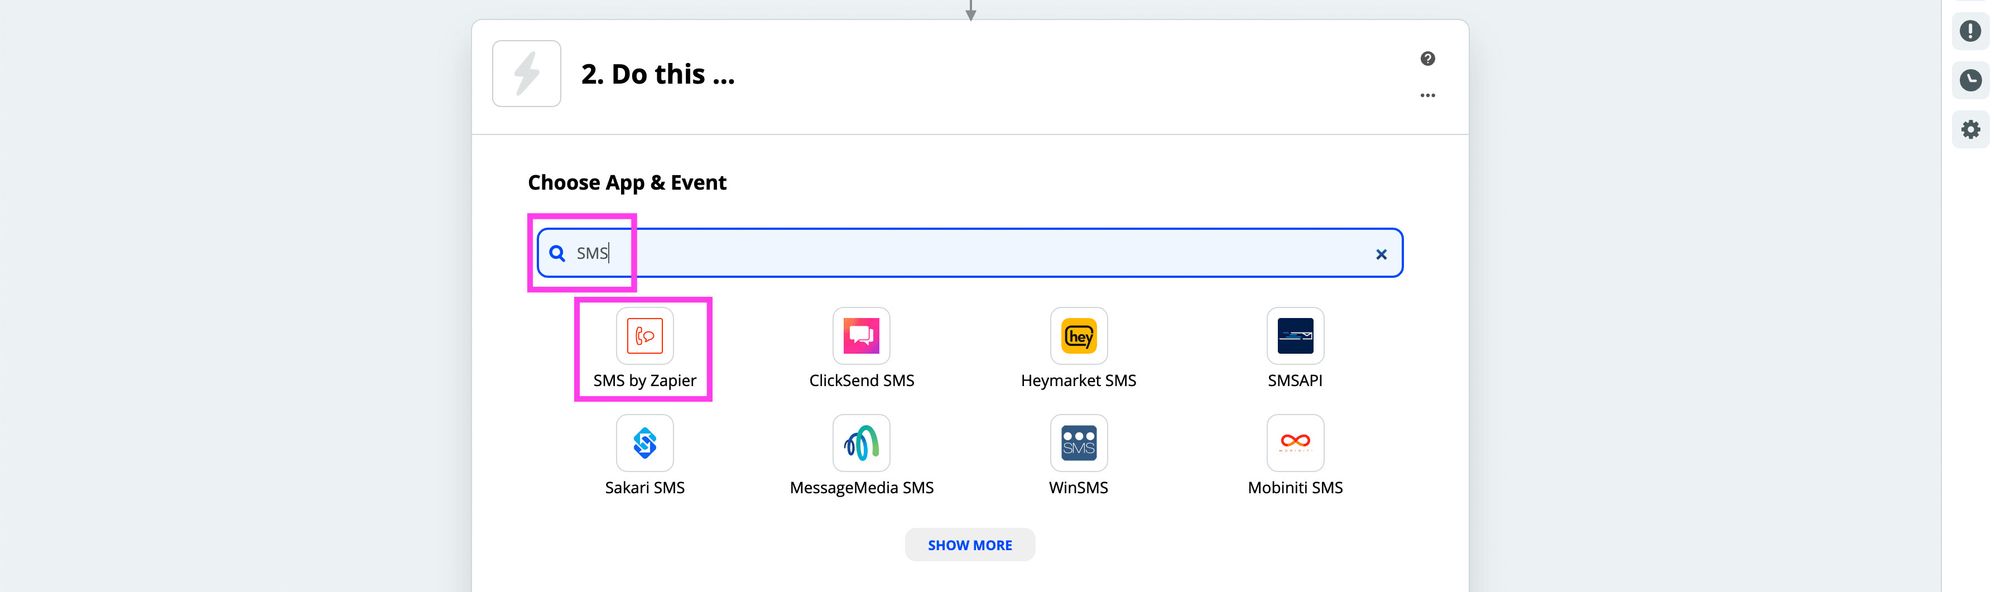 Selecting SMS by Zapier
We’re going to leave the App and Event as the defaults, so the next screen you can just click Continue.
 SMS App and Event
Now, for Zapier to send you a text, it needs to verify that your phone number belongs to you or that the phone number is knowingly signing up for these texts. To do that, it sends you a one-time PIN that you’ll enter.
So click Sign in to SMS by Zapier, which will open a popup window.
Here, enter your phone number, and choose Sms or Call as the verification method at which point it will contact you with a PIN.
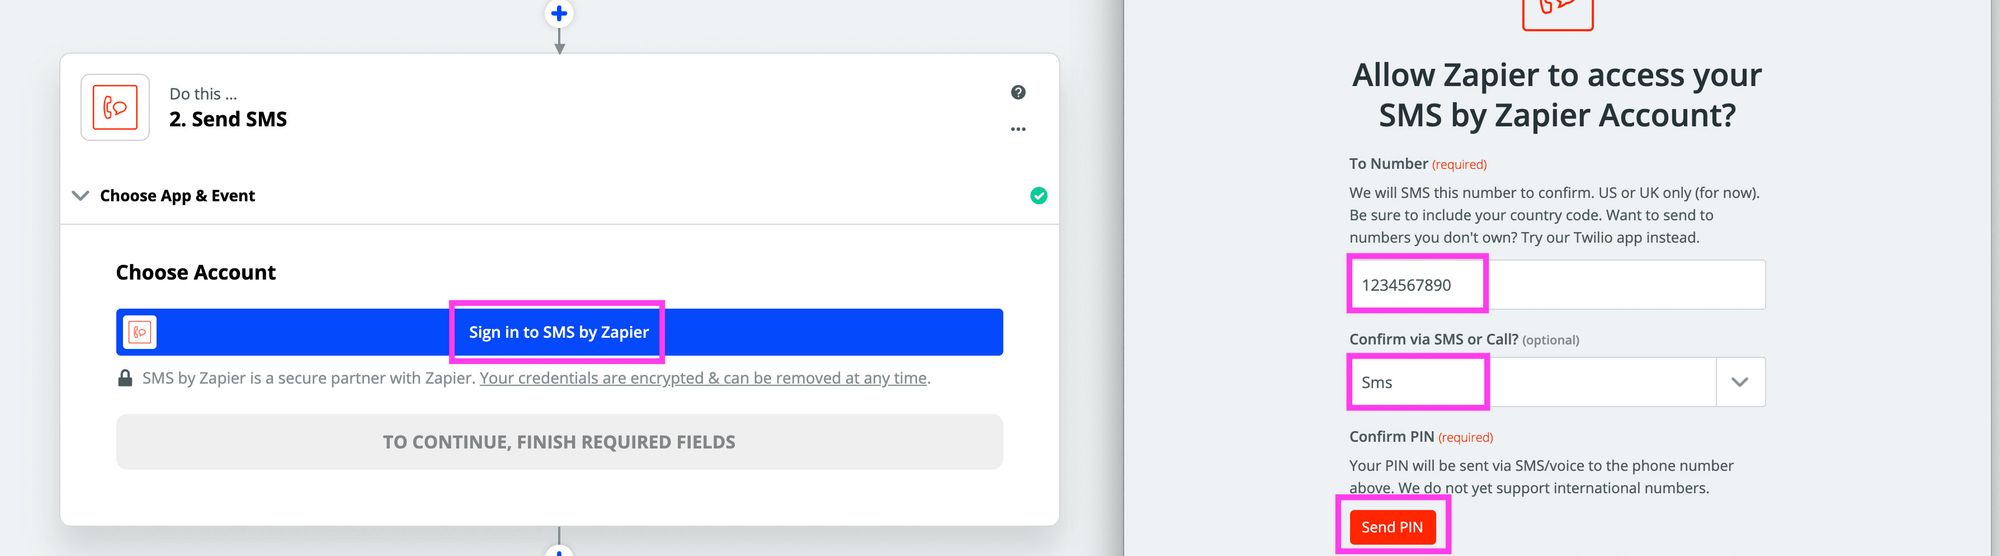 Sign in to SMS by Zapier and send a PIN
With that PIN, enter it into the field and click Continue.
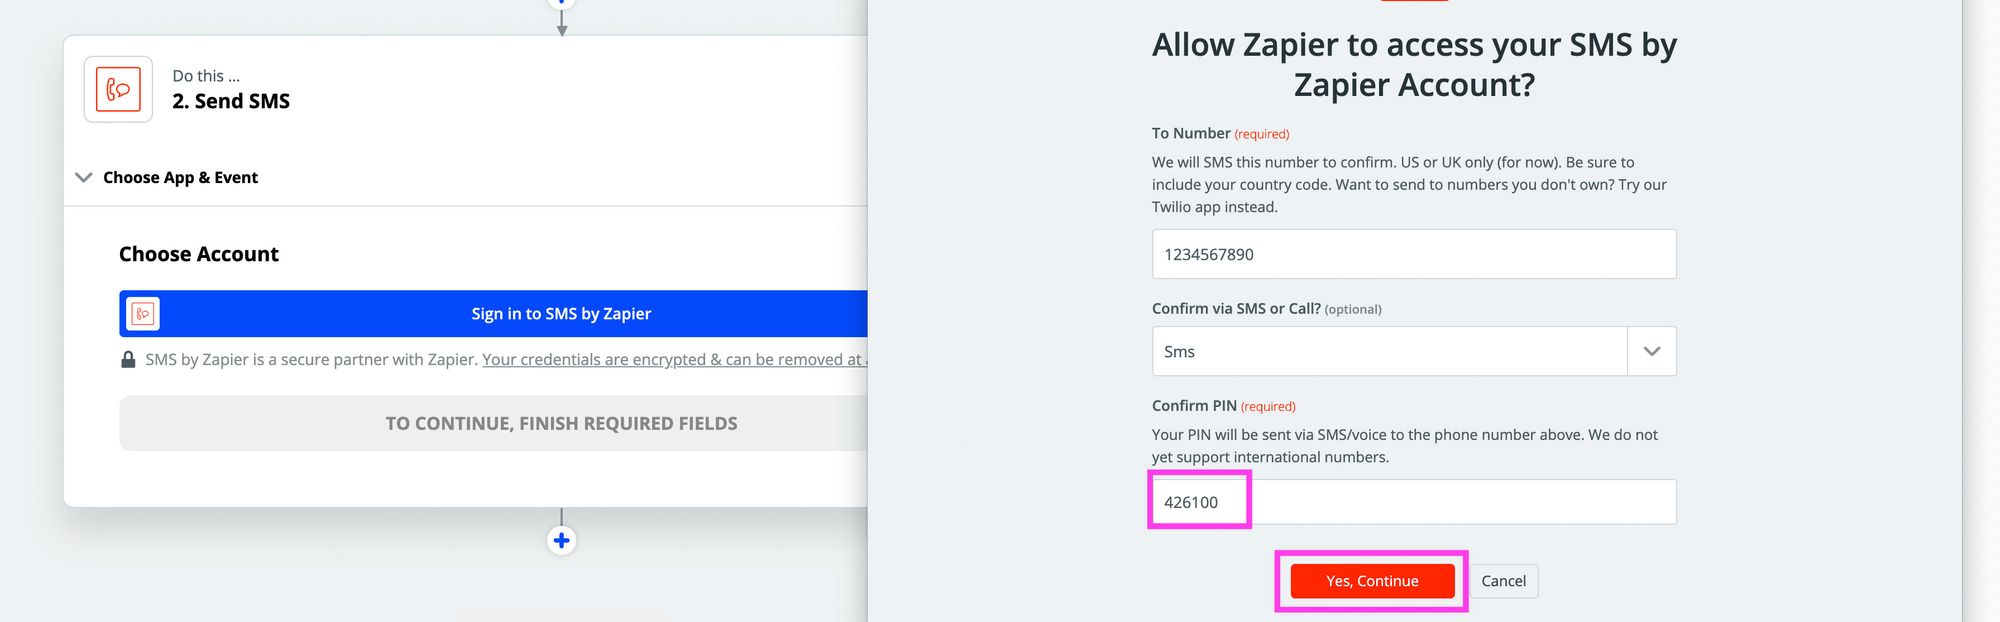 Entering the SMS verification PING
At this point the window will close and move you back to the original flow. Here, click Continue again.
Now we get to customize the text that we receive.
In the From Number field, Zapier gives a bunch of phone numbers you can use. You can either select one number to always send from, which you can set up as a contact so you know it’s Zapier, or you can select Random, which will use a random number every time.
Then, click inside of Message, and it will bring up some options. I want to know everything possible if it’s going to rain, including the probability, max temperature, and summary, so we can select all or as much as we want and again click Continue.
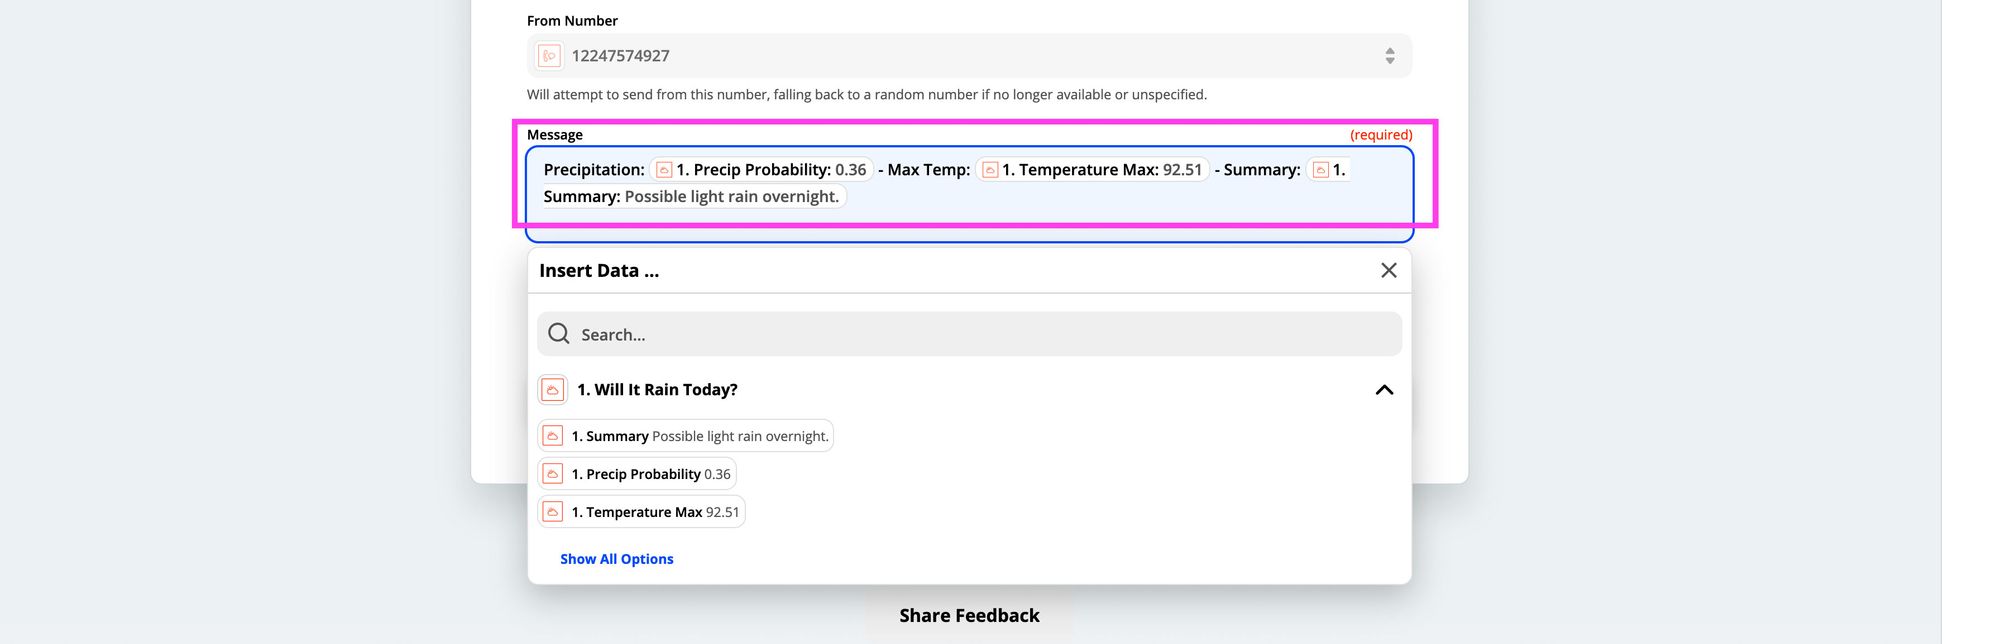 Configuring Weather message
Finally we get to test if our Zap worked. At this point everything should be configured, so click the Test & Review button and you should receive a sample text!
Note: If you choose a single From Number, you might be limited in how frequent you can receive texts, so if you don’t get it right away, that might be why. Setting random helps prevent that issue, but the the number isn’t consistent.
And once you’re happy with the configuration, you can click Turn On Zap.
 Turning on the SMS Zap
You’ll now get texts in the morning if the weather is predicting rain!
Zap 2: Print a test every week with Google Cloud Print
This one doesn’t sound exciting, but have you ever gone through a long period of time where you didn’t print something, only to end up with dried out printer heads or worse yet, a now unsalvageable printer?
We can avoid this by simply running a weekly print job that keeps our printer ink nice and fresh.
For this, we’ll use Google Cloud Print. To make this work, you’ll need to already have this configured with your Google account.
Let’s create a new Zap and this time for our “When this happens…” search for and select Schedule by Zapier.
 Selecting Schedule by Zapier
We can then select a Trigger Event of Every Week and click Continue.
 Setting Trigger Event as Every Week
Next, you can choose the Day Of The Week and Time Of Day you’d like to print. I personally run this job weekly at 8pm on Sundays right before the start of a new week. Once configured, click Continue.
 Configuring Zapier schedule
At this point, we can click Test trigger, which just like before makes sure it’s working properly, and then we can click Continue.
Now, for our “Do this…” we want to print, so search for and select Google Cloud Print.
 Selecting Google Cloud Print
And for the action, select Submit Print Job.
 Setting Submit Print Job as Action Event
At this point, you’ll need to sign into Google Cloud Print. This will open a window and have you log in through Google so that Zapier can interface with the service.
Once connected, click Continue.
Now we can configure out print job. Here we’ll want to define what we print.
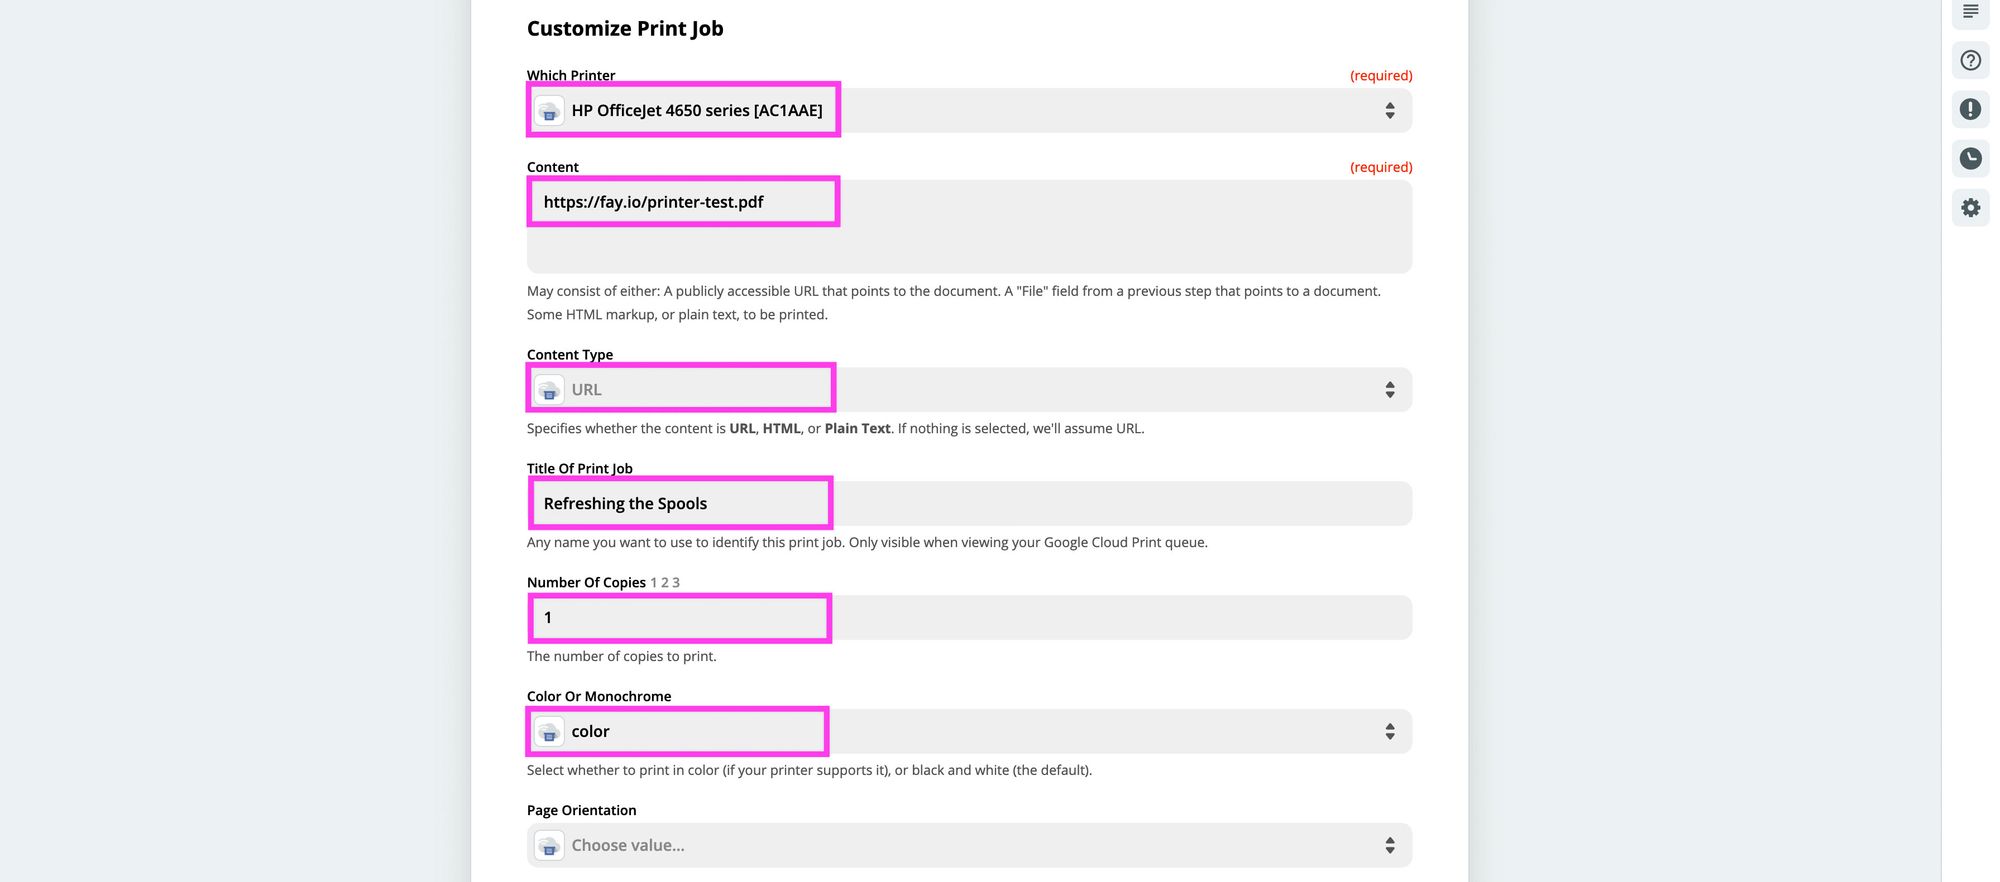 Configuring Print Job in Zapier
In the above, we’re configuring:
- Which Printer: the printer we want to print to connected to Google Cloud Print
- Content: this can be a URL to a document, HTML, or plain text. I’m using a URL which is a simple test page I made that has some color in it
- Content Type: you’ll want to set this depending on what you set in Content. If you set a URL like I did, it should be URL
- Title Of Print Job: the name of the job so you can see it in the print logs
- Number of Copies: probably just want 1 so it doesn’t waste ink and paper
- Color or Monochrome: you’ll want to explicitly set this if you want color. The idea is to refresh all of the ink cartridges, so only printing black won’t help the color ink, so in my case, I selected color
The rest of the fields are optional, feel free to customize to your liking.
With our configuration set, click Continue, and similar to before, we can click Test to see our print job in action and if we’re happy, we can click Turn on Zap!
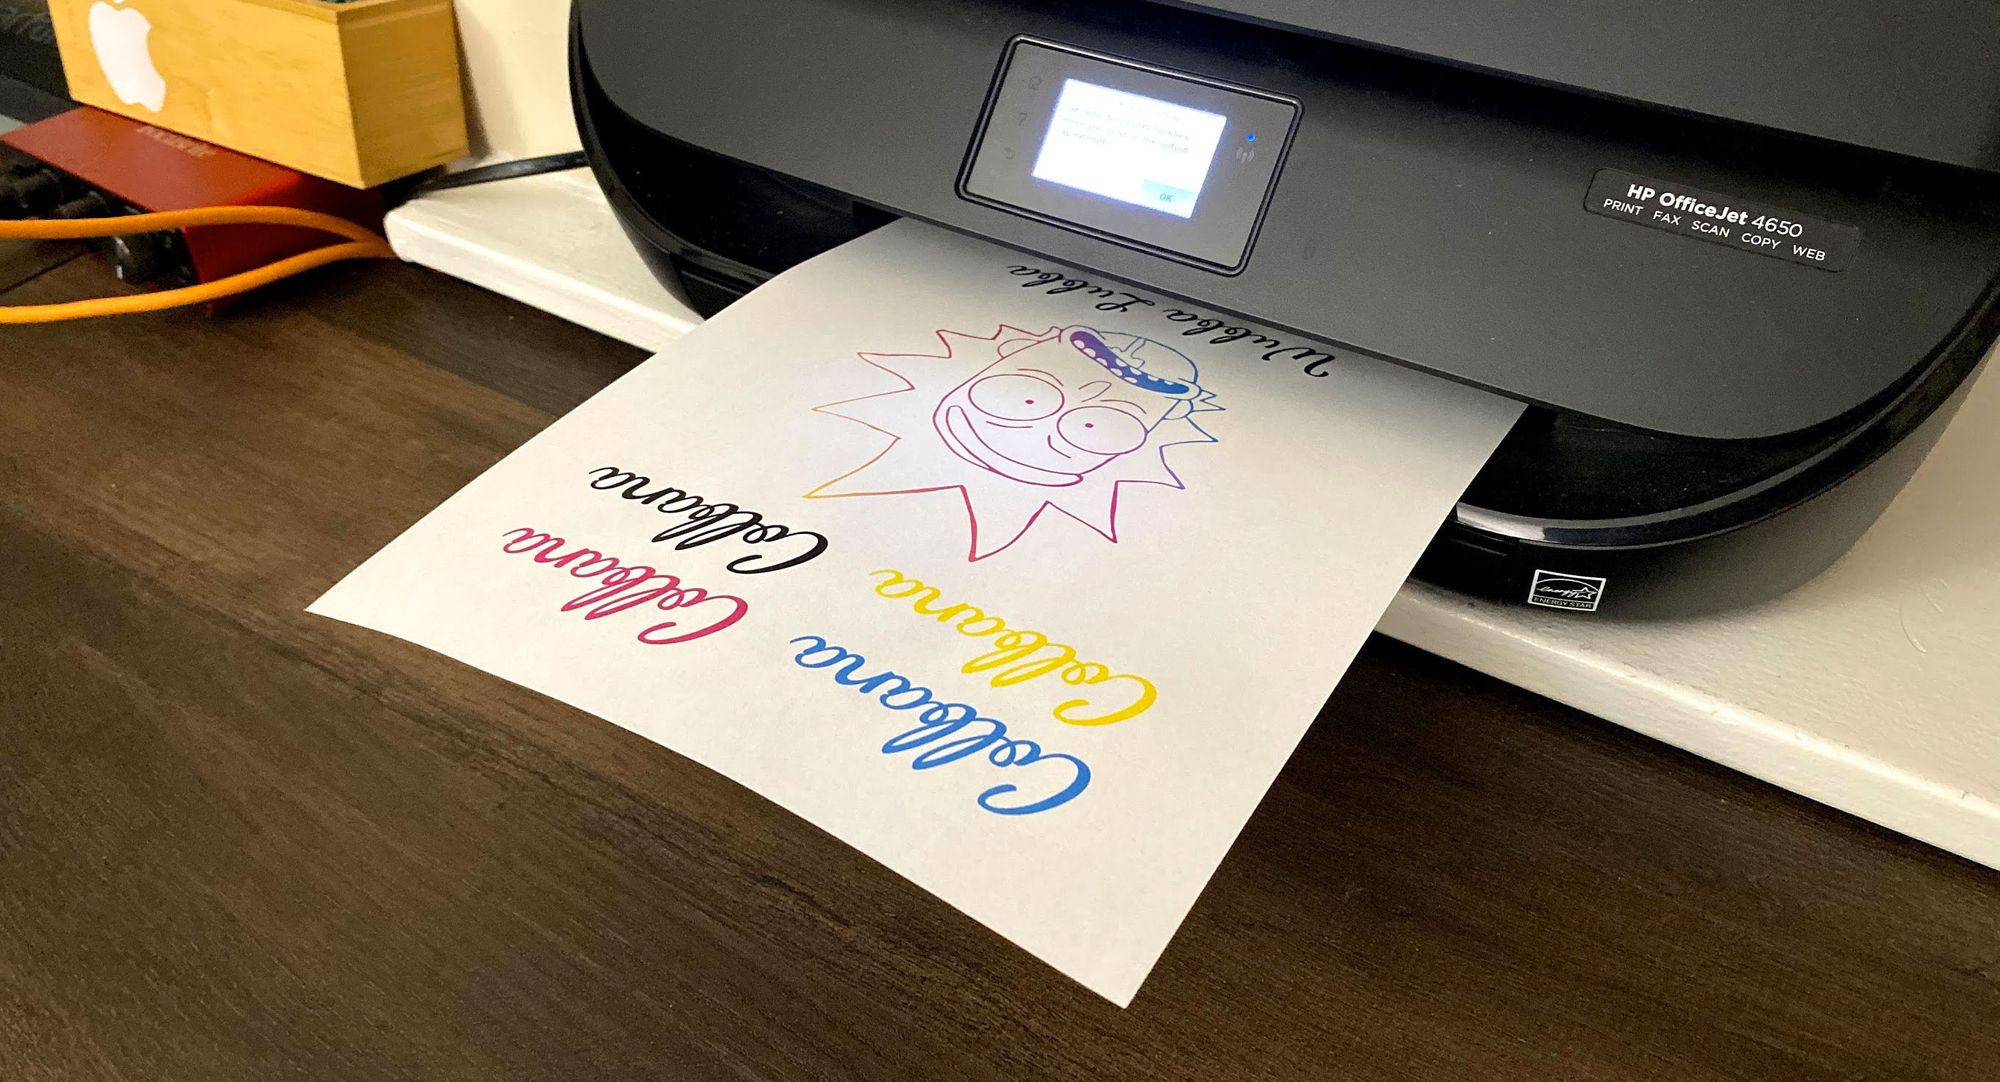 Test print from Zapier print job
If you want to use the same document, you can find it here: https://fay.io/printer-test.pdf
Zap 3: Smashing Magazine Job Alerts with Gmail
If we’re looking for a job, it can be a pain to have to visit every job board every day (or every hour, am I right?). But we can automate this process when the job board supports it.
Luckily, job boards like Smashing Magazine and a whole lot of others provide RSS feeds which we can hook right in to Zapier to automate getting an email whenever a new job is posted.
To get started, let’s create a new Zap, and this time, search for RSS and select RSS by Zapier.
 Selecting RSS by Zapier
For our Trigger Event, select New Item in Feed, then click Continue.
 Setting New Item in Feed as Trigger Event
At this point, we want to enter a feed URL. This will be the URL to the XML RSS feed that websites make available. For Smashing Magazine, you can find it here:
https://www.smashingmagazine.com/jobs/feed
So enter that URL above into Feed URL (you can leave Username and Password blank), and keep Different GUID selected for What Triggers A New Feed Item. Then click Continue.
 Setting RSS Feed URL
Same as usual, now you can test the trigger to make sure it works. If the RSS feed is valid, this will be smooth, otherwise you might see an error. The above URL should be valid!
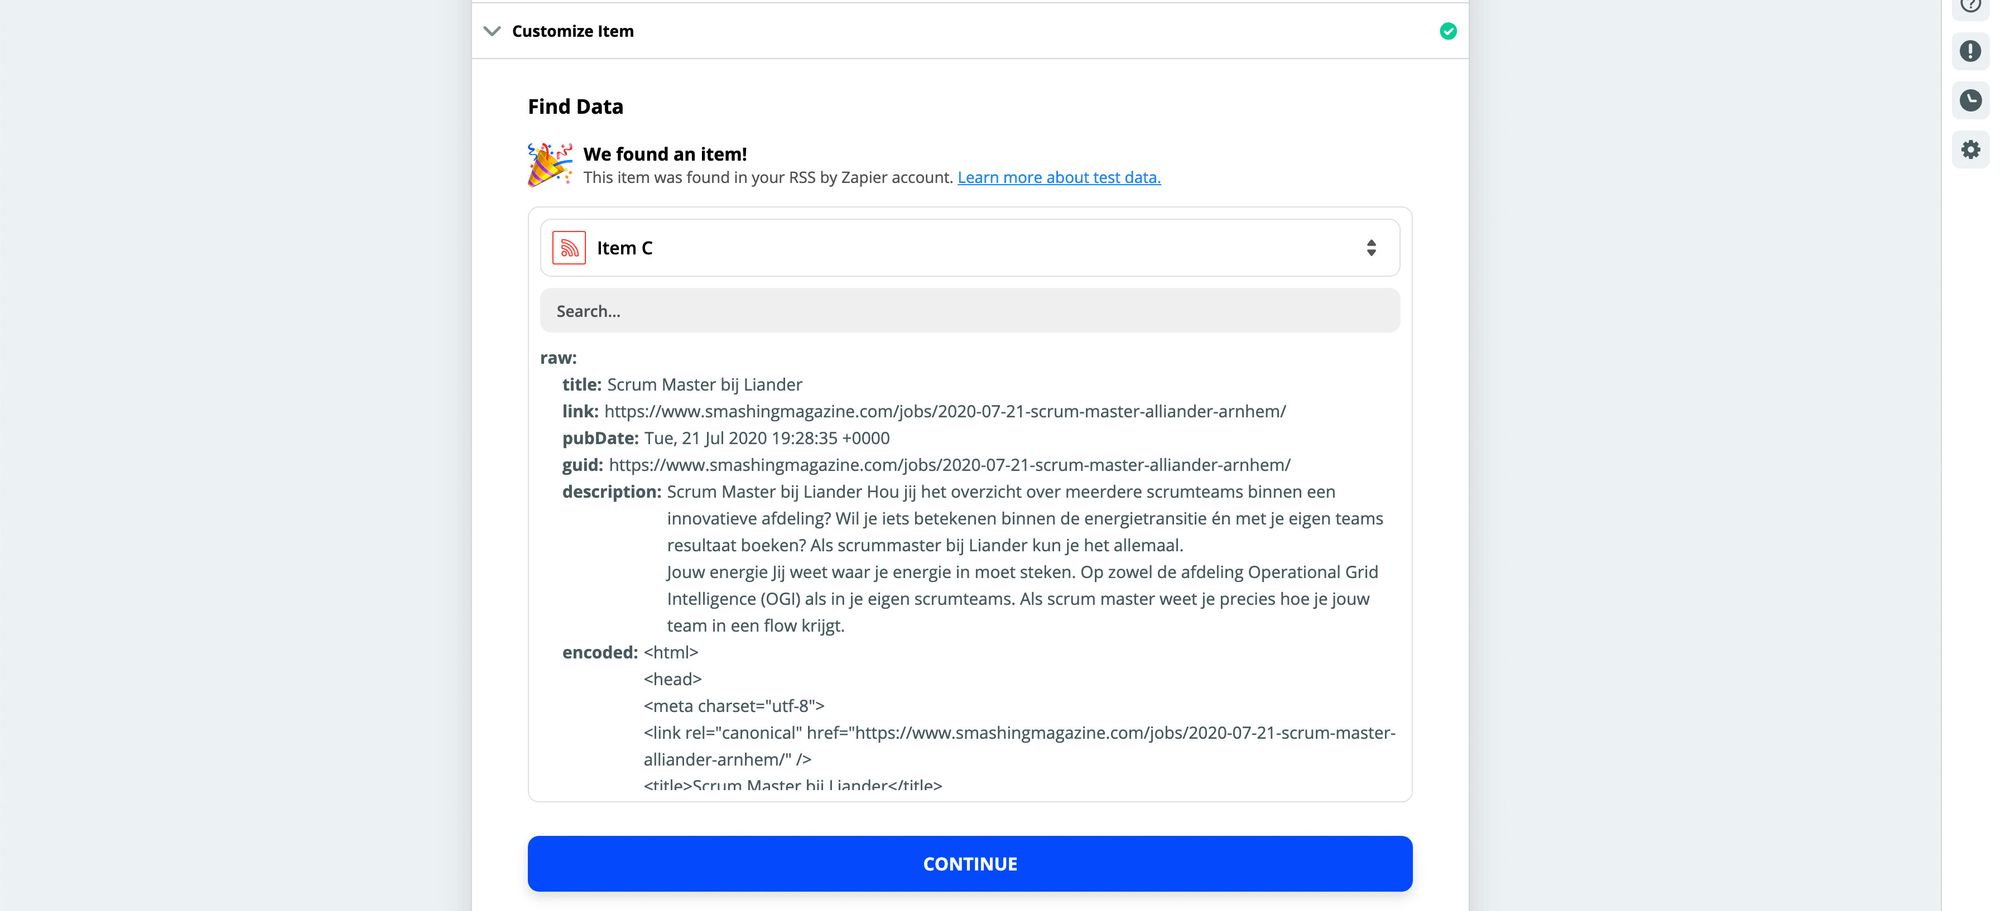 Testing the RSS feed
Next, we need to choose what we want to do with the new item. Since we want it emailed, we can choose our email service, which in my case is Gmail.
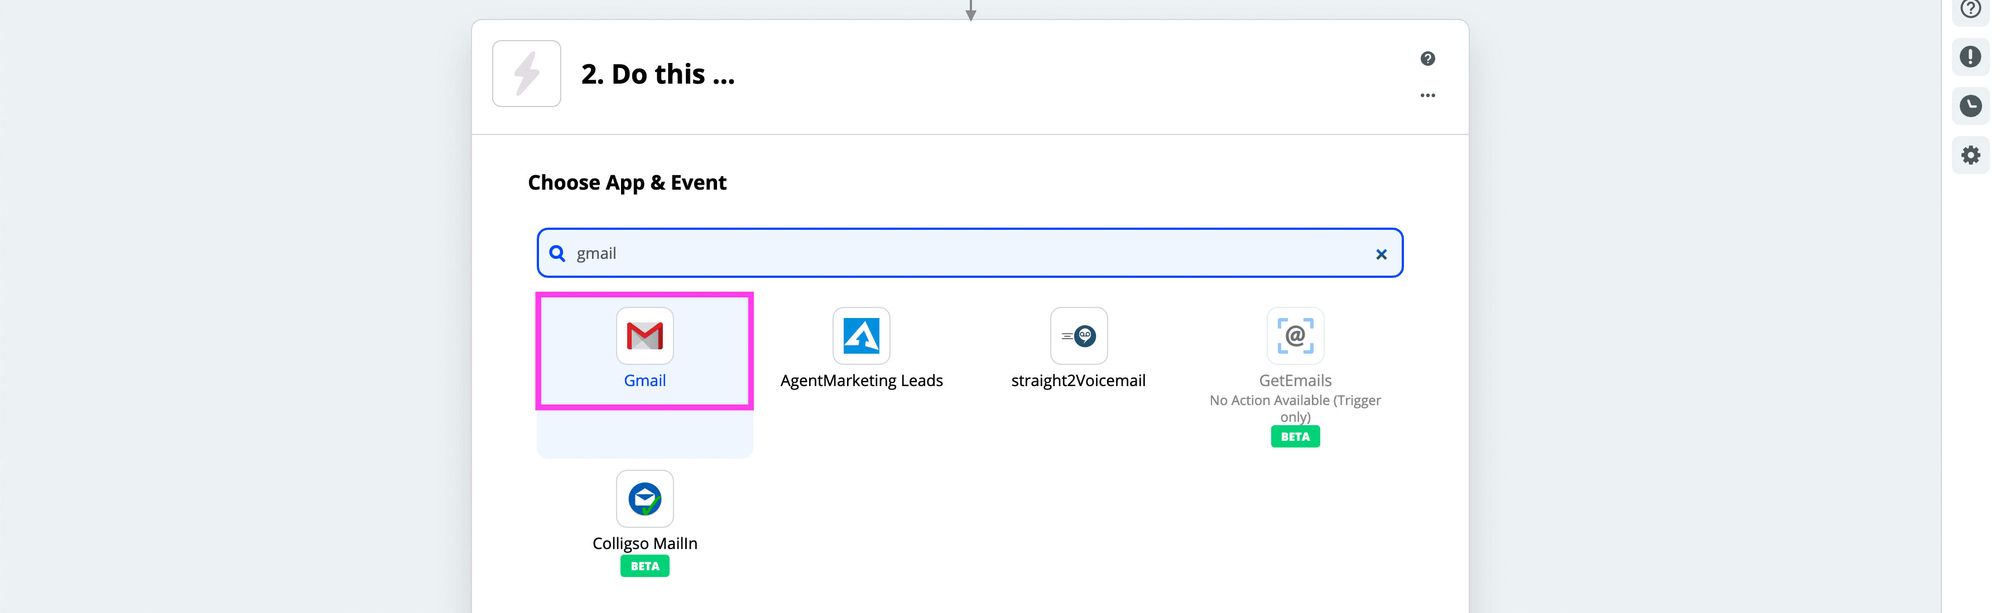 Selecting Gmail in Zapier
For our action, we want to Send Email.
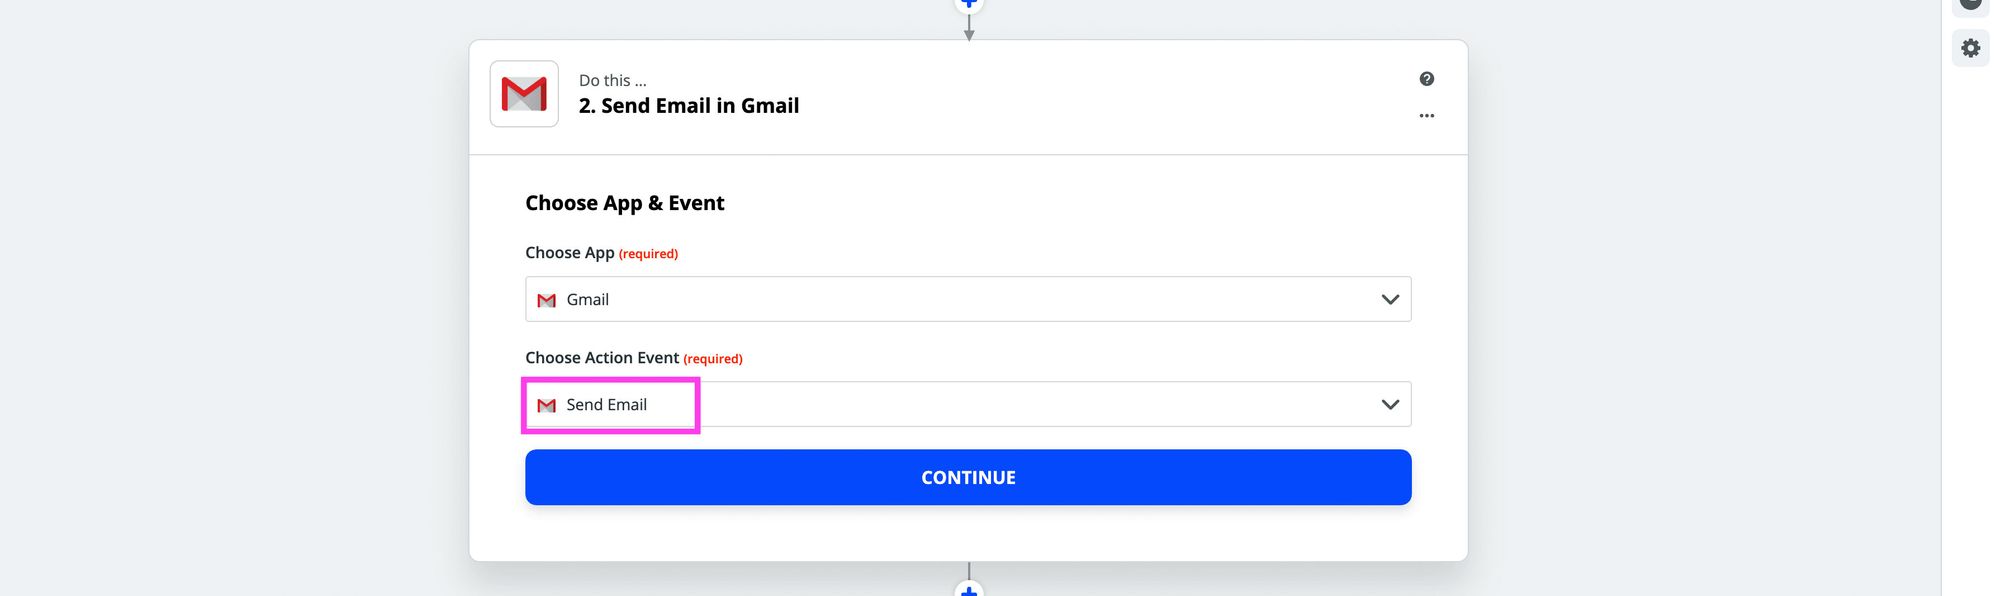 Setting Action Event as Send Email
Next, you want to sign in to your account, similar to what we did with Google Cloud Print. This should be your Google account that you use Gmail with.
 Sign in to Gmail
Now when we customize our email, we want to include the following:
- To: wherever you want these sent to, probably the same account you signed into Gmail with
- From: select your Gmail account
- From Name: can be anything you’ll recognize, like I’ll use Colbybot
- Subject: can be whatever you’d like, but a helpful idea could be “New Job Alert:" followed by selecting the title from the dropdown selection
- Body Type: you can leave as Plain
- Body: I would recommend including all tokens you’ll find helpful including the Title, Description, and Link
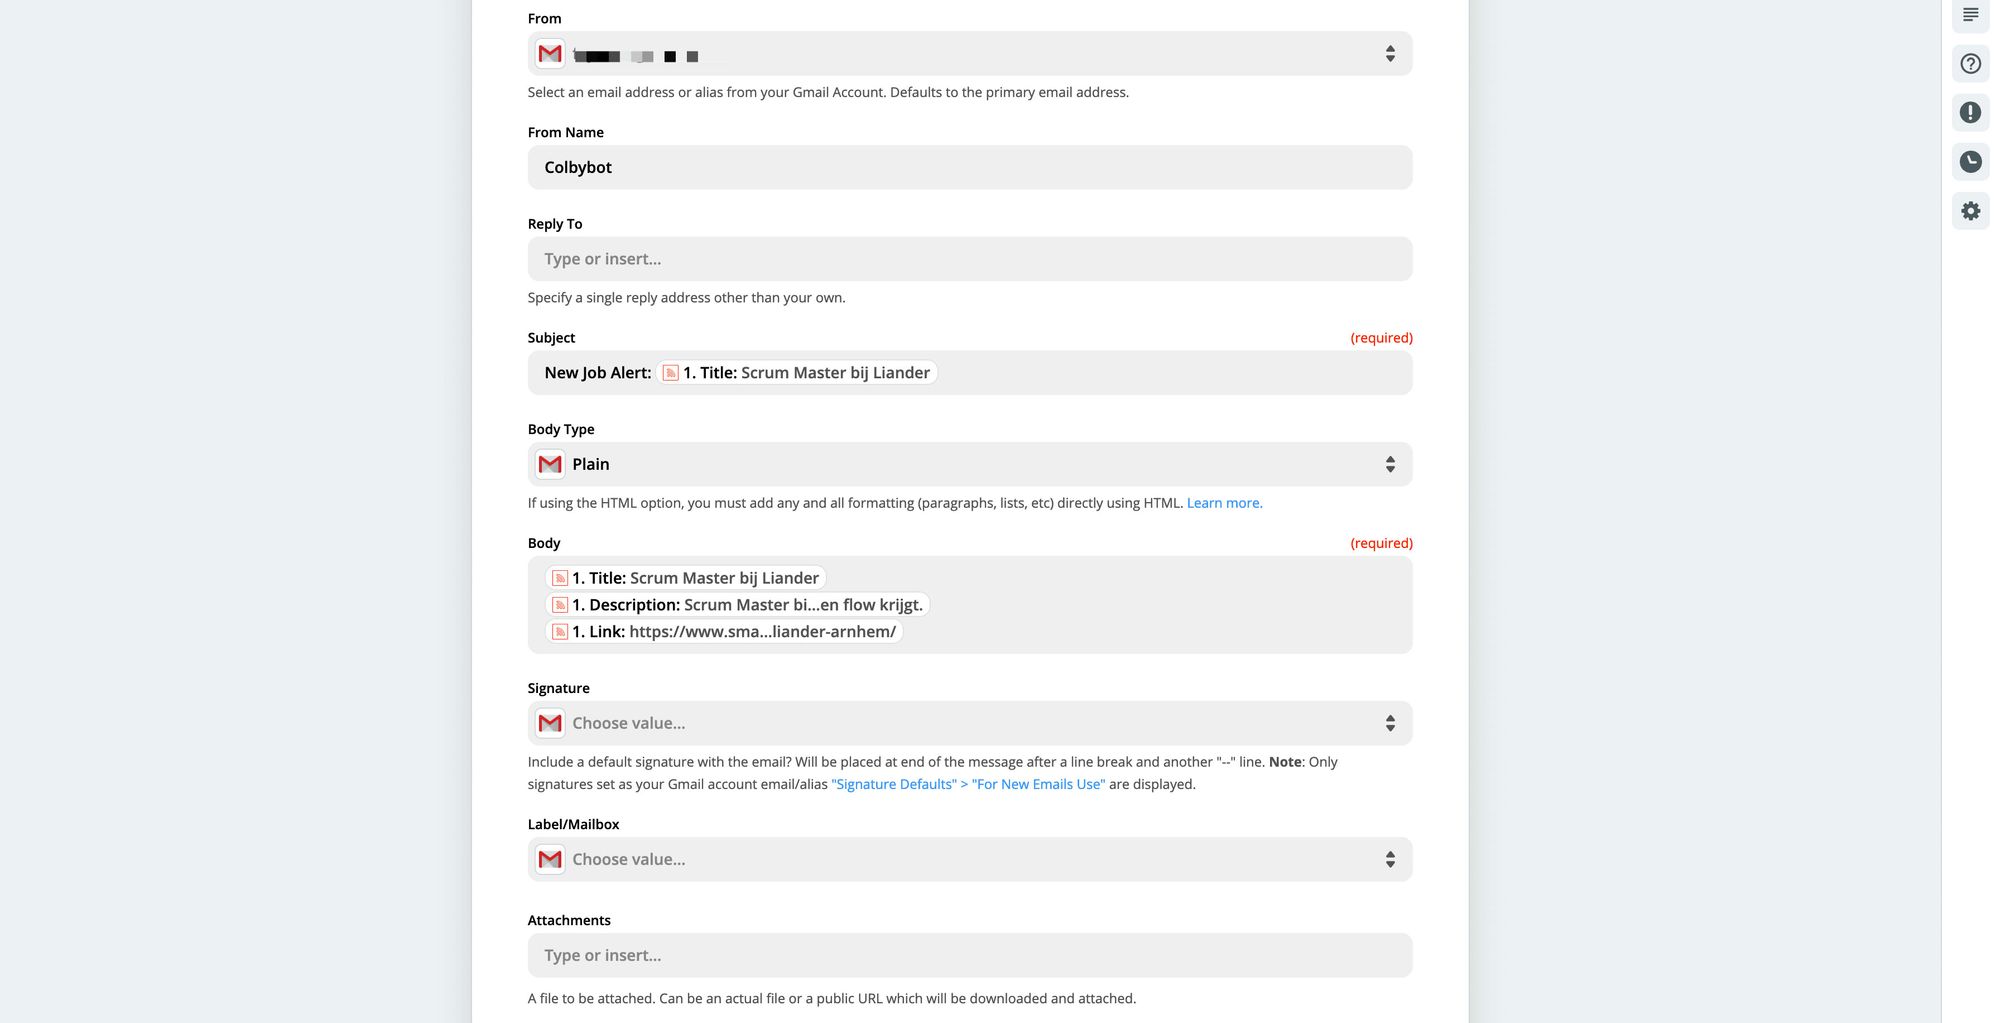 Configuring job notification email
Once you’re done configuring, you can hit continue. Then, similar to before, click Test & Review, and you should receive your test email.
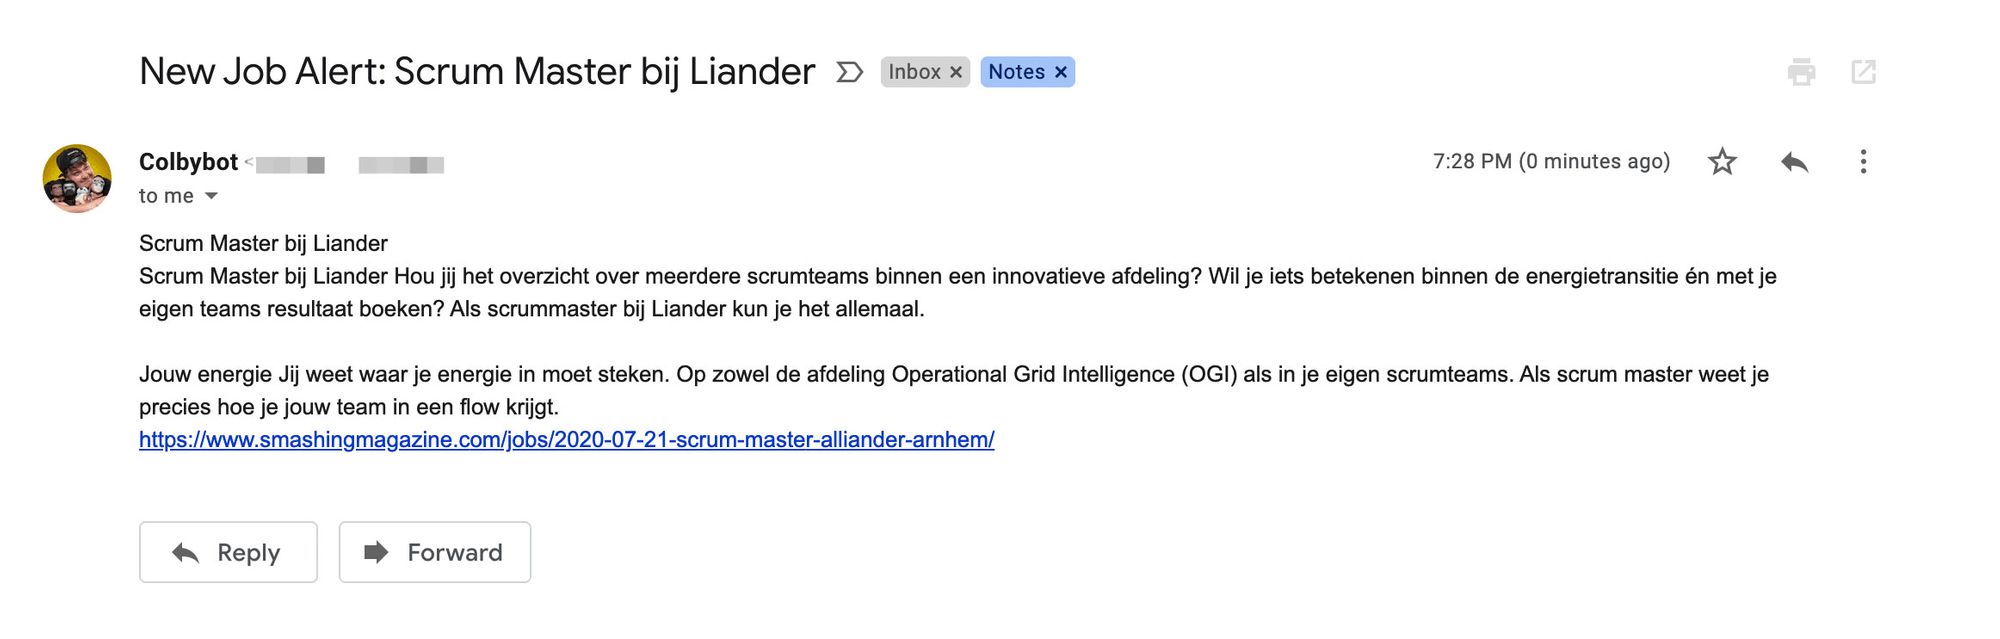 Test job alert email
Finally if you’re happy with the configuration, turn on the Zap, and enjoy your job search!
What else can you do?
More Ideas
Here’s more ideas to get you moving in the right direction:
- Post Tweets to Slack: every time an account tweets or someone from a list of accounts tweets, post that tweet to Slack
- File Github Bugs to Jira: whenever someone tags a Github Issue with a label of “bug”, create a new ticket in Jira with that Issue details
- Post RSS Items to Twitter: do you write your own content? Set up an RSS feed to automatically post a tweet with your new blog post
Not Google Assistant
The only thing that it’s missing for me right now is Google Assistant, otherwise I would have included some Zap ideas for that. IFTTT supports Google Assistant for simpler flows, but Zapier can get more powerful.
Webhooks
Zapier supports web hooks — meaning you can really do whatever you want. Though this is a premium feature, you can set up some custom workflows based off of new data Zapier sees or accept requests that you post to trigger other automations.
What's your favorite Zap?
Love hearing new creative ways to use Zapier. Share with me on Twitter!
