
By Al-amin Nowshad
As developers, we kind of live with CLI tools. From git to cloud shells — we are using these tools everywhere. So, it’s time to make your own. We’ll use Heroku’s great oclif framework in the process.
What’s oclif?
It’s an open framework to build CLI tools quickly, and it’s provided by the well-known Heroku.
What’s gonna be built?
We’ll make a todo list command that can have four actions:
- Add a new task
- View all tasks
- Update task
- Remove a task
Initialize our project
Oclif can generate two types of projects —
- Projects that have one command.
- Projects that might have multiple commands, including nested ones.
In this article, we’re gonna need a multiple commands project, so let’s generate it:
npx oclif multi todocli
Running this command and following the instructions will initialize a fresh project named todocli inside the current directory.
Now, let’s go inside the directory and run help:
cd todocli && ./bin/run --help
This will print the results below:
> USAGE $ todocli [COMMAND] COMMANDS hello help display help for todocli
This shows available commands and their documentation.
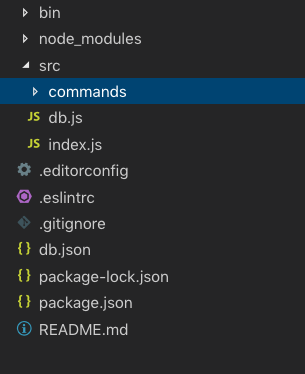
Project Structure
Inside src directory we can find a directory named commands. This directory holds all the commands with their relative file names. For example, if we have a command hello we’ll have a file named hello.js inside this directory and the command will work without any more setup. Let’s remove hello.js as we won’t be needing it.
Setup database
To store our tasks we need a storage system. For simplicity, we’ll use lowdb which is a pretty simple json file storage system. Sweet for this project ?
Let’s install it:
npm install lowdb --save
Let’s create a db.json file inside our project root directory. This file will hold our data. Then we need to install lowdb. Now, we’ll create a file called db.js inside the src directory. This file will hold our database stuff.
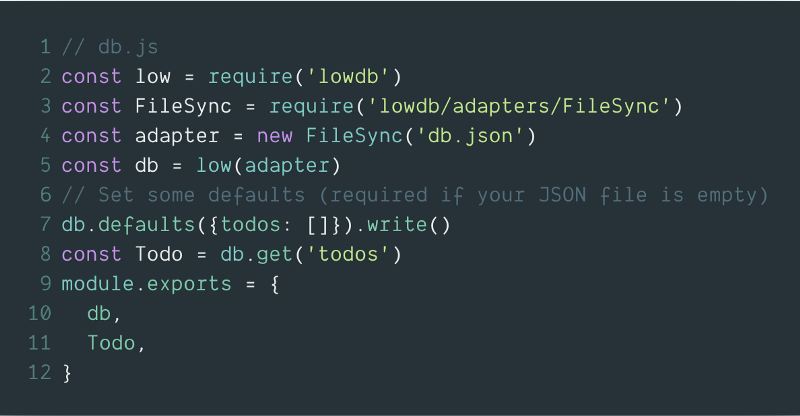
Here, we’re simply loading the required library and file at first, then defining an empty todos array as our base collection (it’s like a table if you’re thinking like SQL databases).
Adding tasks
oclif provides us with a smooth command generation functionality. Let’s run the following:
oclif command add
This will create a file named add.js inside src/commands directory. Let’s replace that file’s content with the code below:
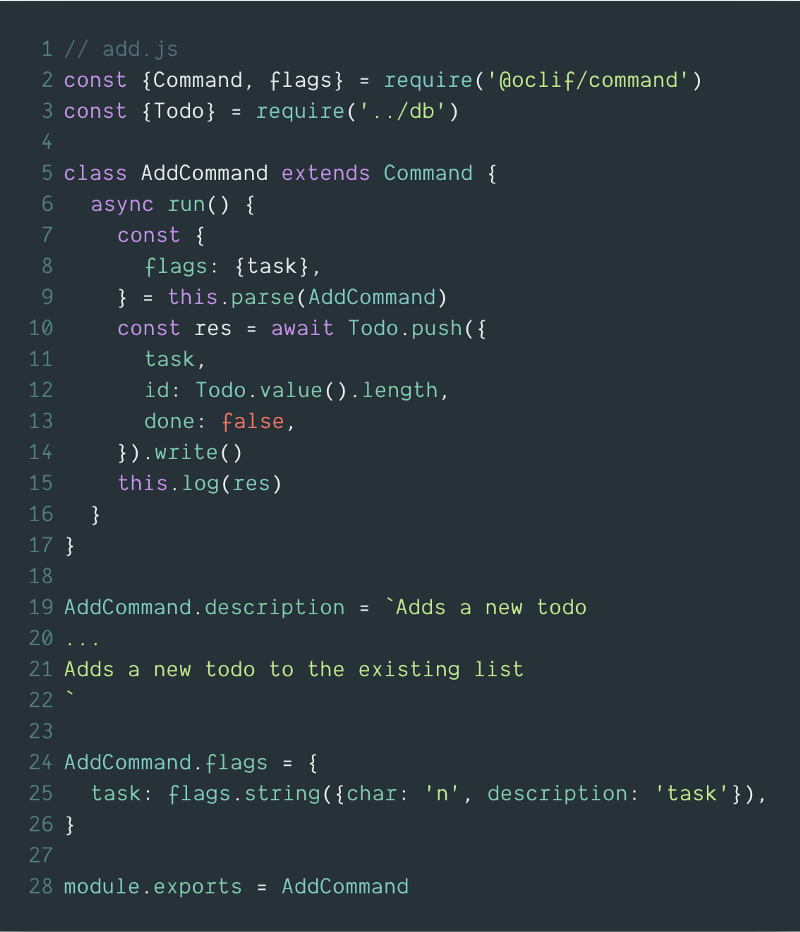
The file has a few key components:
- a run function that executes the main functionality of this command,
- a description, that’s the documentation for the command, and
- flags, which describes the flags passed to the command.
Here, we have a flag named task which has a string type. We can run the command
./bin/run add --task="welcome task"
This command will add a task to our database and print the response of that operation.
Showing tasks
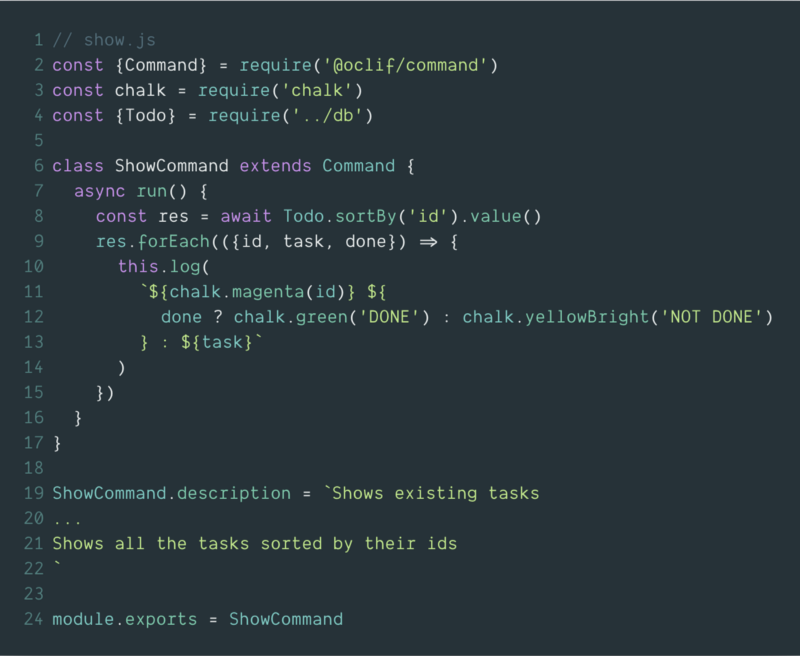
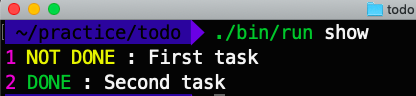
Here inside show.js , we’re showing all the tasks in ascending order. We’ve added a little color with chalkjs to give our command results a better look.
Updating Tasks
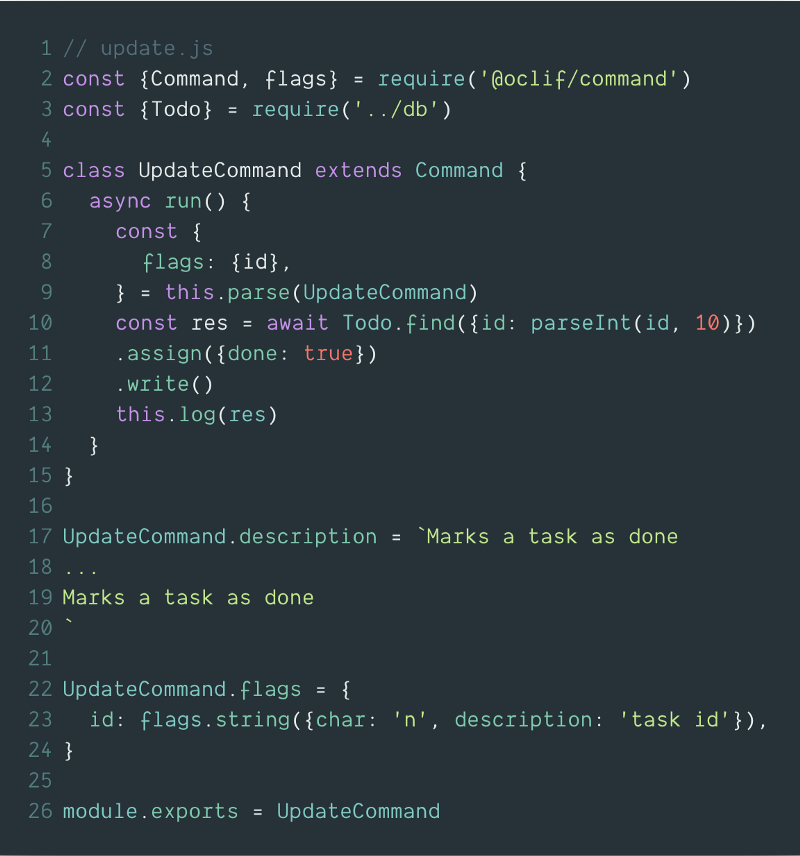
For simplicity, we’re now just setting tasks as done for our update part. We’ve to just passed the task’s id as a flag .
./bin/run update --id=1
This will set the done = true for the task with id = 1 .
Removing tasks

Removing is pretty straightforward: we pass id as a flag, and then remove the related task from our database.
Almost Done!
And just like that, we’ve made our very simple todocli. Now if we want to use it like any other normal CLI tool or let our friends use it, we need to make it an npm package. So actually let’s publish it on npm.
Build and Publish to npm
First of all, make sure you have a npm account. Then you need to login running the command
npm login
Then inside the project directory run
npm run prepack
This will pack the project and make it npm-ready with a generated readme from the descriptions and flags.
Now, publish it on npm:
npm publish
If everything goes well, then the module has been published on npm successfully. If it doesn’t work, check the project name and version.
Now, we can use it like any other npm tool with the global installation:
npm install -g todocli
And then anyone can just use these commands anytime, almost anywhere ?
> todocli add --task="Great task!!!"> todocli show> todocli update --id=1> todocli remove --id=1
If you’ve come this far following the whole article, congratulations ? You are awesome. Now, you can do a little task:
Task
The id assigning of the tasks is not a proper one, can you fix it? Let me know how you solve it in the response section.
Good luck, and thanks for reading :)
oclif : https://oclif.io
lowdb: https://github.com/typicode/lowdb