

Flutter has been getting more and more popular lately. You can use it to build complex applications that work smoothly on MacOS, Windows, and Linux.
But building these applications is not always a simple process. You often have to refactor your code to maintain the app’s performance.
One such refactoring technique is extracting duplicated code and components and reusing them in multiple places.
In this tutorial, you'll learn how to replace a duplicated component by building a custom widget in Flutter.
What is a Custom Widget?
In Flutter, a custom widget refers to a user-defined widget that encapsulates a specific set of functionalities or visual representations.
Custom widgets are the building blocks of a Flutter application. They allow developers to create reusable UI components that can be used throughout the application.
If you're switching from React Native, you can think about custom widgets as custom React components. And what we call props in React are called parameters in Flutter.
Why Use Custom Widgets?
Custom widgets help you encapsulate complex UI elements. They also promote code re-usability and enhance the maintainability of your Flutter applications.
There are a number of reasons to build build custom widgets in Flutter. Let's look at some of them.
Code Reusability
Custom widgets allow developers to encapsulate complex functionality and appearance into reusable components.
Once created, custom widgets can be used multiple times throughout the application, reducing code duplication and promoting a modular development approach.
Maintainability
Custom widgets contribute to the maintainability of the codebase. By encapsulating specific functionality or visual representation, custom widgets create a separation of concerns. This separation makes it easier to locate, modify, and debug code related to a particular UI component.
Consistent UI
They also enable developers to define a consistent and unified UI design across their application.
Abstraction
And finally, custom widgets provide a level of abstraction that hides the implementation details and complexity of a particular UI element.
You can create high-level widgets that expose a simplified interface and handle the internal logic. This allows other developers to use the widget without worrying about its internal workings. This abstraction promotes modularity, making it easier to understand, test, and maintain the code.
How to Build a Custom Widget in Flutter
Let’s start building our custom widget.
Clone the Repo
Instead of starting from the scratch, I’ve created a Flutter app in GitHub and added duplicated code/components in that repo. Let’s begin from there.
Pull the code from GitHub by running the below command:
git clone https://github.com/5minslearn/Flutter-Custom-Widget.git

or

git clone git@github.com:5minslearn/Flutter-Custom-Widget.git
 Clone the Flutter Custom Widget repo from GitHub
By default, it’ll be in the master branch. I’m switching to a refactor branch (you don’t need to) because I want you all to have a look at my initial and final code. The initial code will be in the master branch and the final code will be in the refactor branch.
Run the following command to install all the dependencies:
cd Flutter-Custom-Widget/
flutter pub get
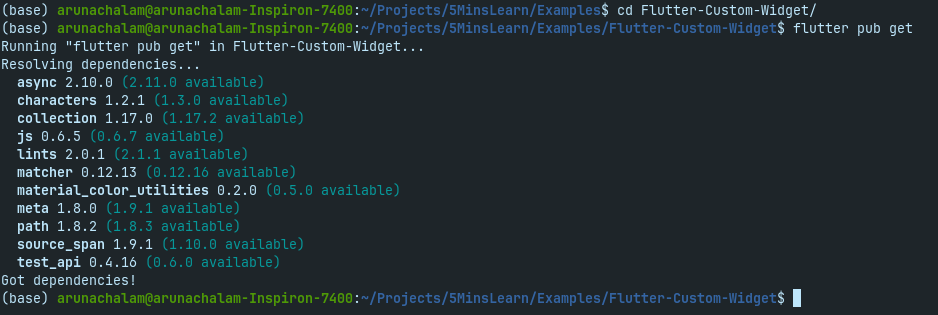 Install Flutter dependencies
Run the App
Open the repo in Visual Studio Code and spin up your emulator (you may connect your mobile device, too). Once your emulator is up and running, press F5 to run the app in the emulator.
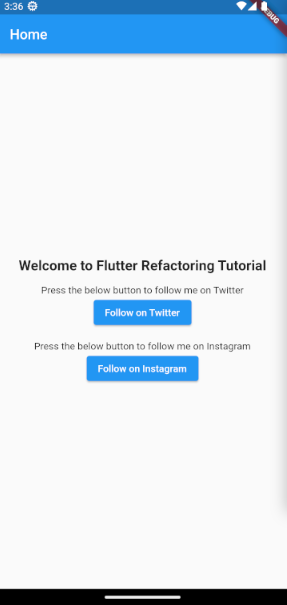
Here’s the view of your app on the first run.
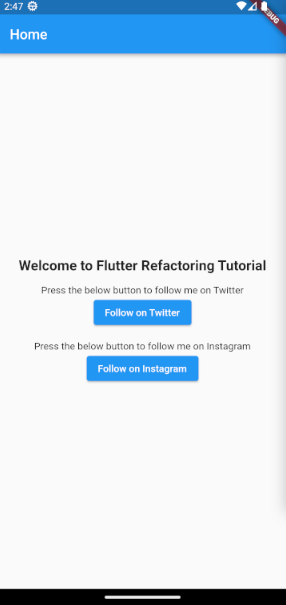 Initial app run screen
If you’ve come this far, that’s great.
Analyze the Code
Let’s look at the code. Open the lib/main.dart file.
We have a MyApp class called at the beginning. This in-turn calls the MyHomePage class.
This is our code for the entire UI which is defined in _MyHomePageState class:
class _MyHomePageState extends State<MyHomePage> {
  @override
  Widget build(BuildContext context) {
    return Scaffold(
      appBar: AppBar(
        title: Text(widget.title),
      ),
      body: Center(
        child: Column(
          mainAxisAlignment: MainAxisAlignment.center,
          children: [
            const Text('Welcome to Flutter Refactoring Tutorial',
                style: TextStyle(fontWeight: FontWeight.bold, fontSize: 20)),
            const SizedBox(height: 16),
            const Text('Press the below button to follow me on Twitter'),
            ElevatedButton(
              onPressed: () {
                ScaffoldMessenger.of(context).showSnackBar(
                  const SnackBar(
                    content: Text("Pressed Follow on Twitter button"),
                    duration: Duration(seconds: 1),
                  ),
                );
                // Open Twitter app
              },
              child: const Text("Follow on Twitter"),
            ),
            const SizedBox(height: 16),
            const Text('Press the below button to follow me on Instagram'),
            ElevatedButton(
              onPressed: () {
                ScaffoldMessenger.of(context).showSnackBar(
                  const SnackBar(
                    content: Text("Pressed Follow on Instagram button"),
                    duration: Duration(seconds: 1),
                  ),
                );
                // Open Instagram app
              },
              child: const Text("Follow on Instagram"),
            ),
          ],
        ),
      ),
    );
  }
}
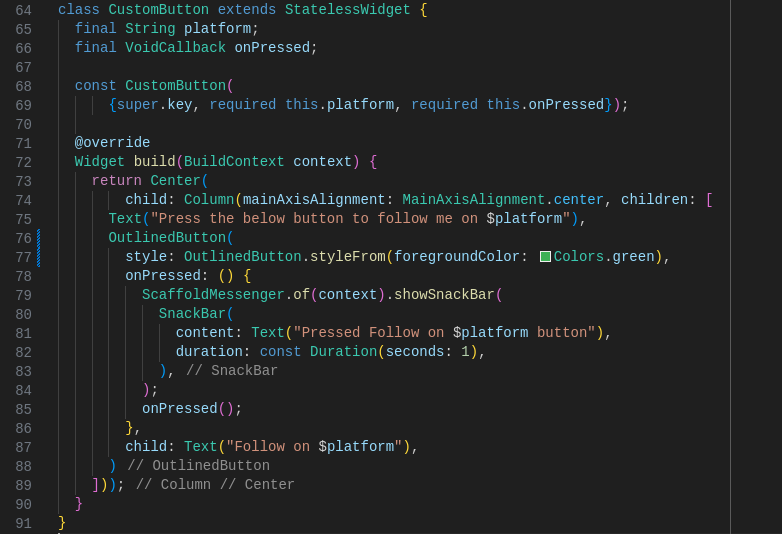
And so you can reference the line numbers, here's a visual:
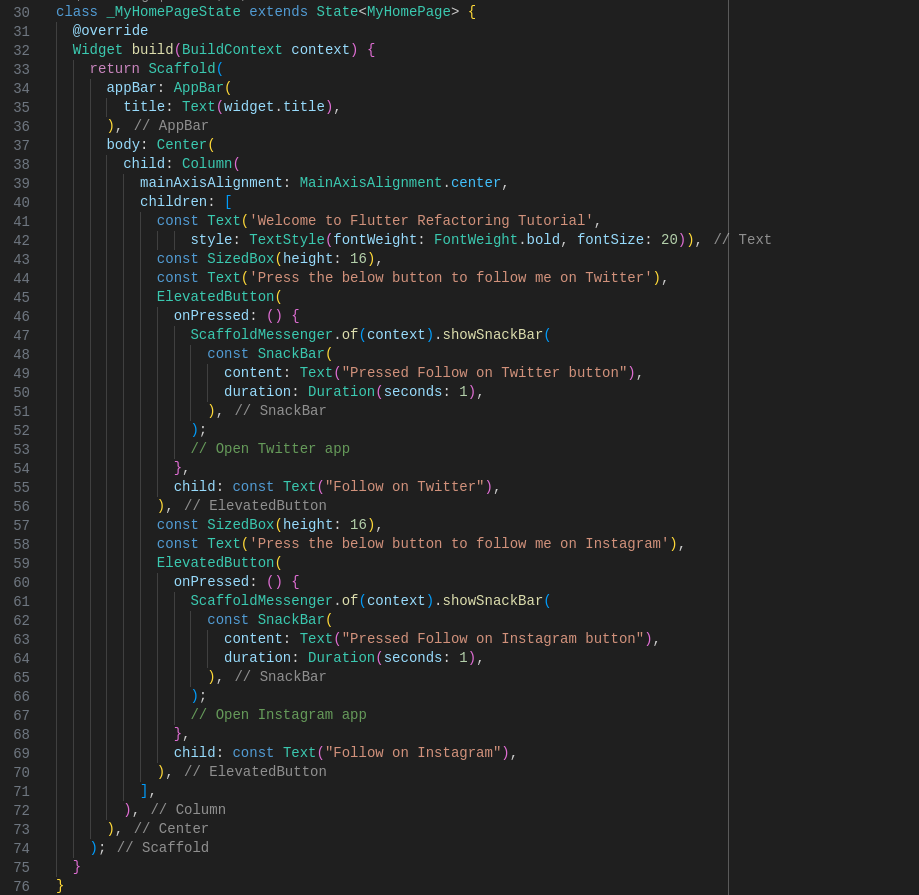 Code for the app UI
If you’re someone who loves writing clean code, you would definitely say that this is ugly code.
Here’s the reason for it. Look at the code carefully – lines 44 to 56 and lines 58 to 70 are completely duplicated except for a very few handpicked words. For example, the word “Twitter” has been replaced with the word “Instagram”.
The clean coder will definitely refactor this code before working on adding new features/functionalities. Let's follow those clean coding practices now, too.
Refactor the Code and Build a Custom Widget
We have to extract the text and button into a separate component. This component should accept the platform and onPressed as its parameters. We can template out the common text from them.
So, our code to build the custom widget looks like this:
class CustomButton extends StatelessWidget {
  final String platform;
  final VoidCallback onPressed;
  const CustomButton(
      {super.key, required this.platform, required this.onPressed});
  @override
  Widget build(BuildContext context) {
    return Center(
        child: Column(mainAxisAlignment: MainAxisAlignment.center, children: [
      Text("Press the below button to follow me on $platform"),
      ElevatedButton(
        onPressed: () {
          ScaffoldMessenger.of(context).showSnackBar(
            SnackBar(
              content: Text("Pressed Follow on $platform button"),
              duration: const Duration(seconds: 1),
            ),
          );
          onPressed();
        },
        child: Text("Follow on $platform"),
      )
    ]));
  }
}
As we discussed above, the template text and accept platform and onPressed parameters. We replaced platform wherever we need and call the onPressed method as the extension of showing a snack bar.
Add the above code at the very end of the main.dart file.
Integrate the Custom Widget
Let’s integrate our custom widget into our code.
Pick the first block of code from the line 44 to 56 as shown below
            const Text('Press the below button to follow me on Twitter'),
            ElevatedButton(
              onPressed: () {
                ScaffoldMessenger.of(context).showSnackBar(
                  const SnackBar(
                    content: Text("Pressed Follow on Twitter button"),
                    duration: Duration(seconds: 1),
                  ),
                );
                // Open Twitter app
              },
              child: const Text("Follow on Twitter"),
            ),
Replace it with the following code:
CustomButton(
  platform: 'Twitter',
  onPressed: () {
    // Open Twitter App
  },
),
Similarly, pick the next block of code from the line 58 to 70 as shown below
            const Text('Press the below button to follow me on Instagram'),
            ElevatedButton(
              onPressed: () {
                ScaffoldMessenger.of(context).showSnackBar(
                  const SnackBar(
                    content: Text("Pressed Follow on Instagram button"),
                    duration: Duration(seconds: 1),
                  ),
                );
                // Open Instagram app
              },
              child: const Text("Follow on Instagram"),
            ),
Replace it with the following code:
CustomButton(
  platform: 'Instagram',
  onPressed: () {
    // Open Instagram App
  },
),
Here's the final code of _MyHomePageState class after we complete our refactoring process.
class _MyHomePageState extends State<MyHomePage> {
  @override
  Widget build(BuildContext context) {
    return Scaffold(
      appBar: AppBar(
        title: Text(widget.title),
      ),
      body: Center(
        child: Column(
          mainAxisAlignment: MainAxisAlignment.center,
          children: [
            const Text('Welcome to Flutter Refactoring Tutorial',
                style: TextStyle(fontWeight: FontWeight.bold, fontSize: 20)),
            const SizedBox(height: 16),
            CustomButton(
              platform: 'Twitter',
              onPressed: () {
                // Open Twitter App
              },
            ),
            const SizedBox(height: 16),
            CustomButton(
              platform: 'Instagram',
              onPressed: () {
                // Open Instagram App
              },
            ),
          ],
        ),
      ),
    );
  }
}
And again, here's the screenshot for line number reference:
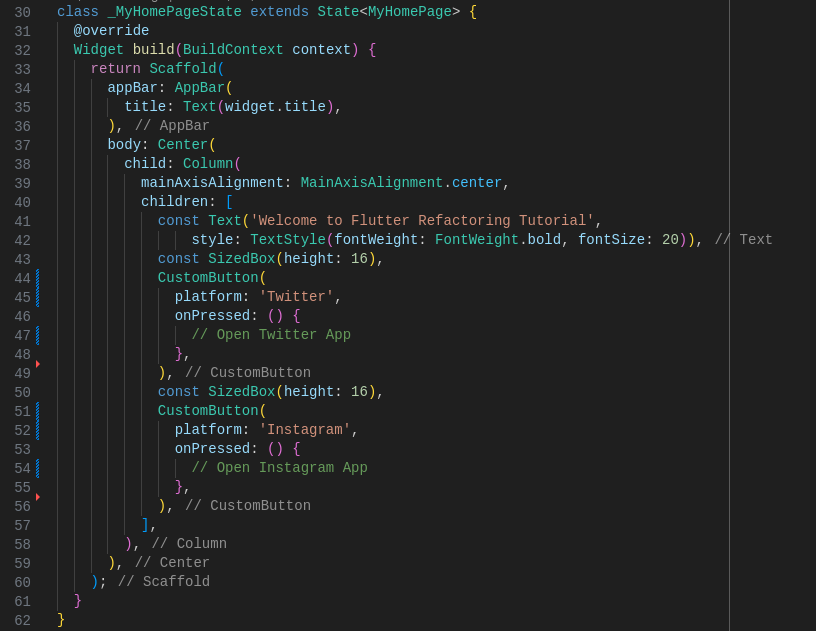 After refactoring your code
Run your app now.
Unfortunately, you’ll not notice any change in the UI. But your underlying code has changed. That’s exactly what refactoring is.
Quoting from Martin Fowler,
Refactoring is a disciplined technique for restructuring an existing body of code, altering its internal structure without changing its external behavior. – https://refactoring.com/
 Final app
You may be wondering something after looking at the above code. Lines 43 and 50 also contain the same code (const SizedBox(height: 16),). So why don’t we include that into the component?
That’s great if you had this question.
There is no need for the custom widget component to include the SizedBox component. This is because the SizedBox component is added in the Home page to give some space between each component. But it's not necessary that whenever we use this button, we give a space at the top/bottom of the widget.
Still, if such cases arise, you can add the SizedBox widget inside your custom widget.
Why Build a Custom Widget?
You might not see a direct benefit right away. But you may experience it in the future. Here’s a quick example for you.
Let’s assume you’ve built this app for a client. It has become a complex app and you’ve used this custom widget around 20 places in your app. The app is released and people enjoy using it.
About 6 months later, your client come back to you with the next version of changes. One of the items in the huge list is, “We’re coming up with a slight change in theme. Replace all the social media referral buttons so that they're an outlined shape and change the color to green”.
It is one simple configuration change in the custom widget. But imagine if you hadn't built the custom widget and had to copy/pasted the same code in all the 20 places. Then you'd have to carefully look at each place and replace each instance with care without touching other pieces of code.
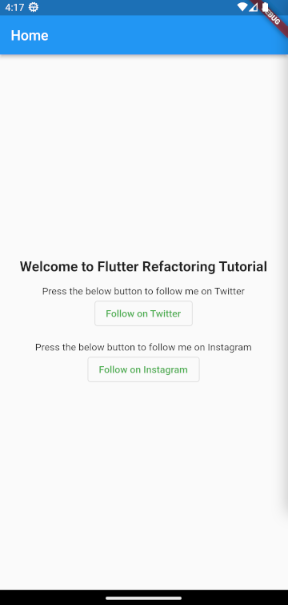
These are the only 2 lines we have to change in our custom widget in this example:
OutlinedButton(
        style: OutlinedButton.styleFrom(foregroundColor: Colors.green),
 Changes in our custom widget
But if you hadn't refactored your code, you'd have to make this change in 20 places.
 Small change reflects everywhere
I’ve pushed my code to the same GitHub repo. Refer to the master branch for the non-refactored code and the refactor branch for the refactored code.
Use Cases for Custom Widgets
Always use custom widgets for their specific use cases. For example, in our case, it is for Social media redirects. This widget should not be used in places which are unrelated to its context.
If you do, remember the above case where the client requirement was to change the design of only the social media referral buttons...but our change would be applied to all the other places where this widget was used. This would lead to unexpected bugs.
You should always write unit test cases for Custom Widgets which will help you mitigate any bugs earlier.
One more tip is to name your component in a more readable way. This helps other developers know what the widget does just by reading its name.
In our case, I've named it CustomButton which makes no sense. Instead, some good alternatives would be SocialMediaButton, SocialButton, and so on which fit into our use case.
Conclusion
In this tutorial, you learned about building a custom widget by removing duplicated code/components.
Building custom widgets in Flutter promotes code reusability, maintainability, consistency, abstraction, flexibility, and community collaboration.
Custom widgets are a powerful tool in the Flutter developer’s toolkit, enabling you to create beautiful and functional user interfaces while maximizing efficiency and maintainability.
If you wish to learn more about Flutter, subscribe to my email newsletter (https://5minslearn.gogosoon.com/) and follow me on social media.