
The Jamstack architecture is a modern approach to an old idea: making fast, static websites, but making them dynamic with tools like JavaScript.
How can we leverage the web framework Next.js and hosting platform Vercel to build and deploy performant and reliable web apps?
Note: This is a preview of my Jamstack Handbook, a guide to everything you need to know about the Jamstack. It has 3 tutorials, including this one. Get your copy and learn how to build fast, dynamic apps with JavaScript and the static web.
- What will we build?
- Step 1: Getting started with a Next.JS React app
- Step 2: Setting up the project with Git
- Step 3: Deploying Next.js with Vercel
- What did we just deploy?
- Understanding modern CI / CD with Git
- Make a change and watch it automatically deploy
- What did we learn?
Next.js is a web framework that’s built and maintained by Vercel. Next.js makes it easy to spin up a new React application and provides a ton of features out of the box like server side rendering (SSR) and static site generation (SSG).
What will we build?
Our project itself will be relatively simple. We’re going to use the default Next.js Starter as a way to easily bootstrap the project, learn how to configure Next.js to statically compile, and then deploy that project with our customizations to Vercel.
A Starter is a template that allows developers to recreate that template from the command line. When installing the starter, the framework will set up the project and install all dependencies.
Step 1: Getting started with a Next.JS React app
To get started, we first want to navigate to the directory we want to create our project in.
We’ll use a Starter to create our project. To do this, we have two options for a package manager to use: yarn or npm. You can choose whichever you feel more comfortable with for the remainder of the walkthrough.
yarn create next-app
# or
npx create-next-app
 Creating a new Next.js app
When running this command, Next.js will first ask you for a project name. Here we can use any name we want to identify the project. I’m going to use my-nextjs-app.
 Naming a Next.js project
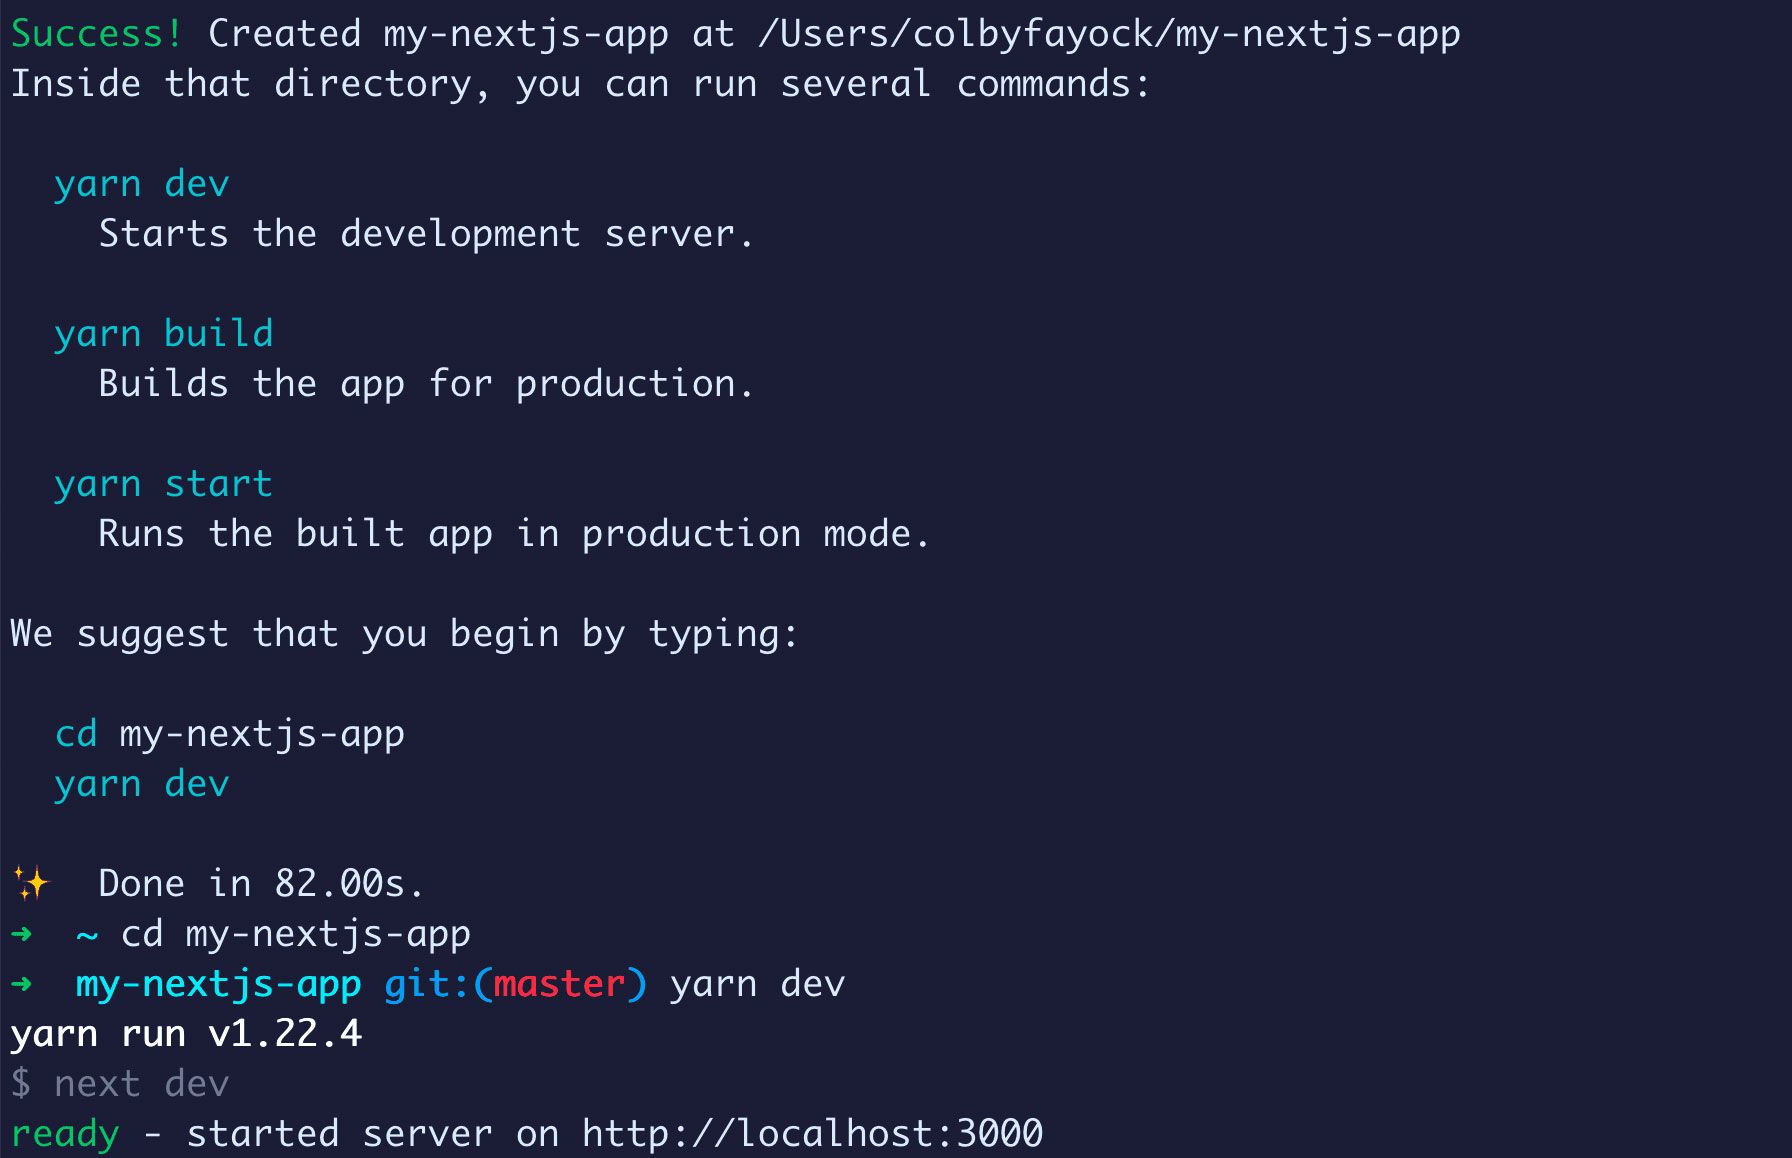
Once installation is finished, we’re now ready to get started with Next.js.
Navigate in your terminal to the new directory where your project is located and run:
yarn dev
# or
npm run dev
This will start your development server, which will make your new site available at http://localhost:3000.
 Starting Next.js development server
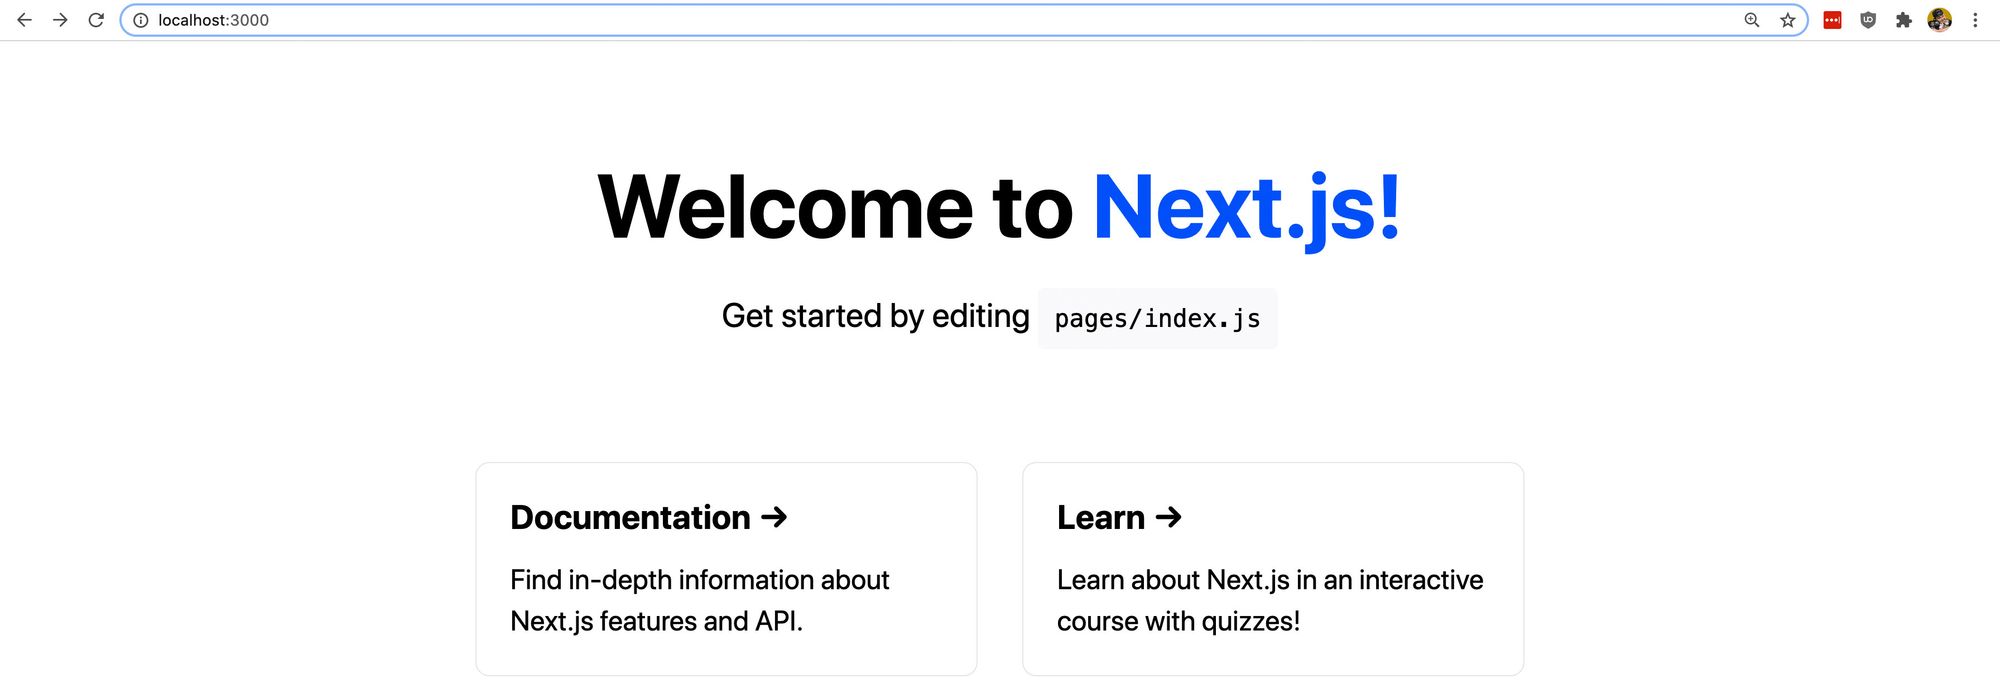
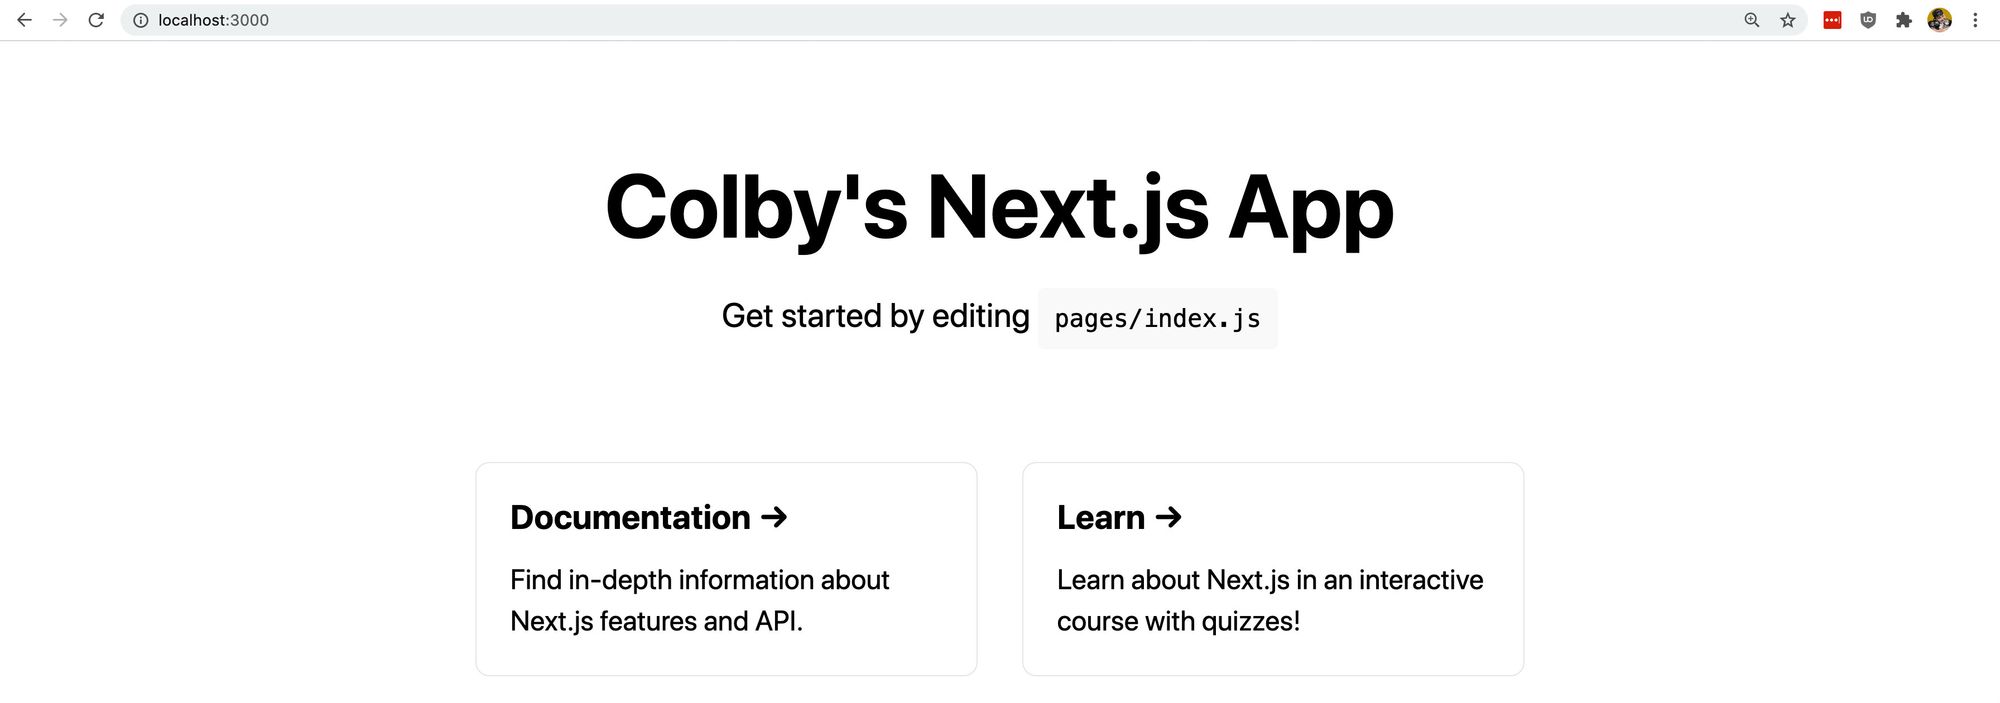
If you open up your http://localhost:3000 address, you should now see the Next.js default project!
 New Next.js app
Step 2: Setting up the project with Git
You'll want to set this next step up on your own. Create a new repository with your favorite Git provider that’s supported by Vercel.
At the time of writing this, Vercel supports GitHub, Gitlab, and Bitbucket.
If you’re choosing a provider for the first time, GitHub is a solid option and is easy to get started.
You’ll then want to add your project to that new repository and push the project up to Git.
Need help? Check out “Adding an existing project to GitHub using the command line” https://docs.github.com/en/github/importing-your-projects-to-github/adding-an-existing-project-to-github-using-the-command-line
For the rest of this walkthrough, I’ll be referencing GitHub, but the instructions should be the same for any supported provider.
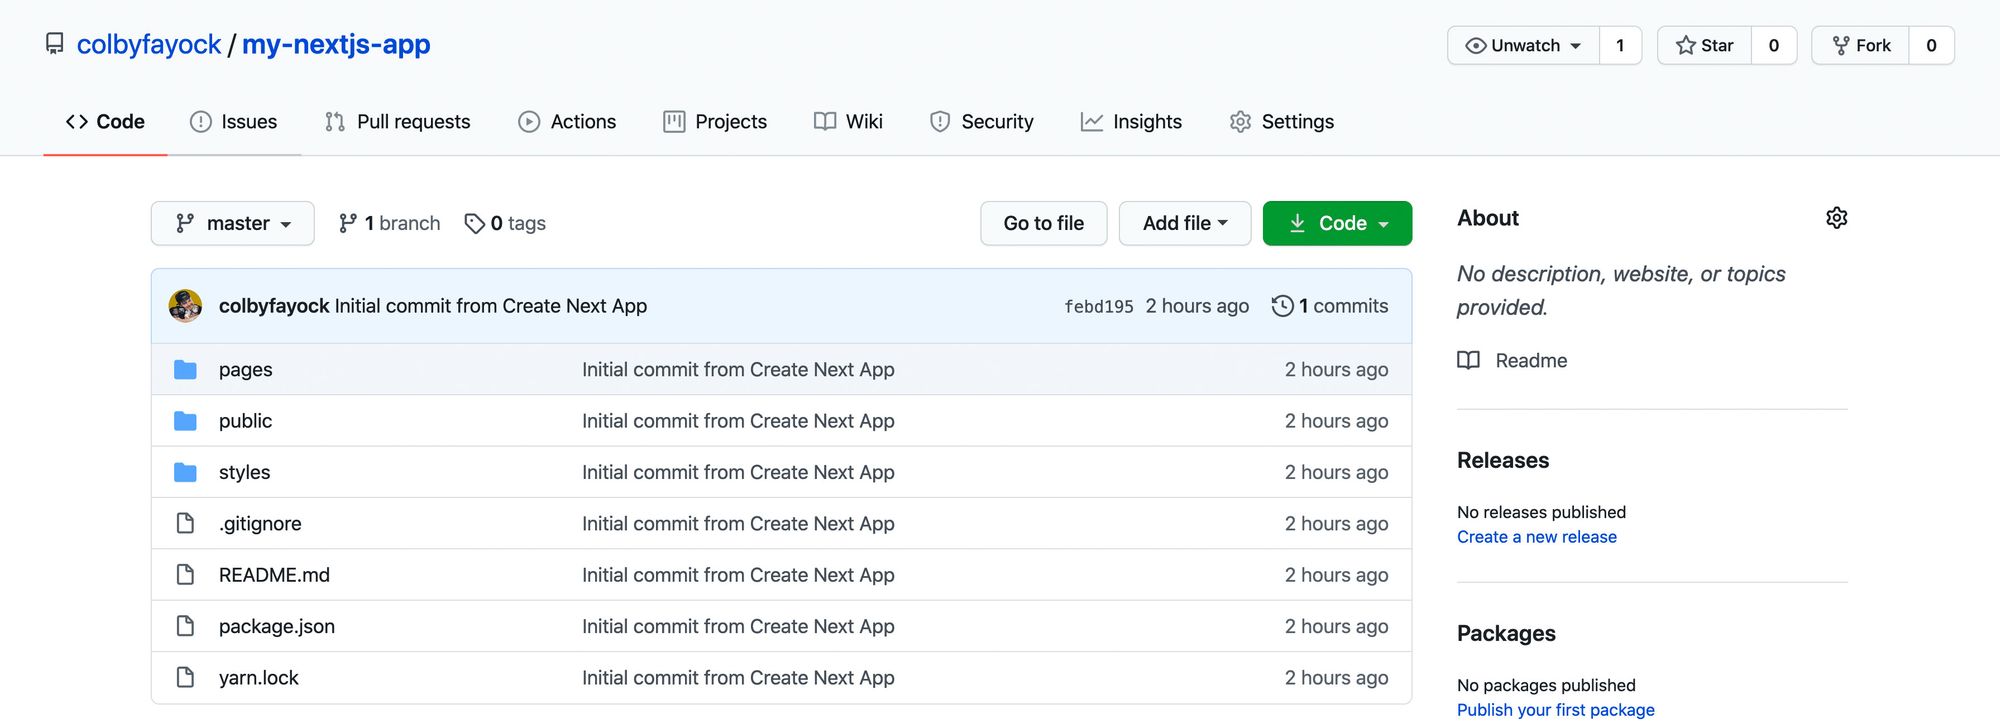 Next.js app on GitHub
Step 3: Deploying Next.js with Vercel
Once your project is set up with GitHub, navigate to vercel.com and log in.
If you don’t already have a Vercel account, you should create one now. I would recommend creating an account with your GitHub account as it will help you import your project.
Inside the Vercel dashboard, click Import Project.
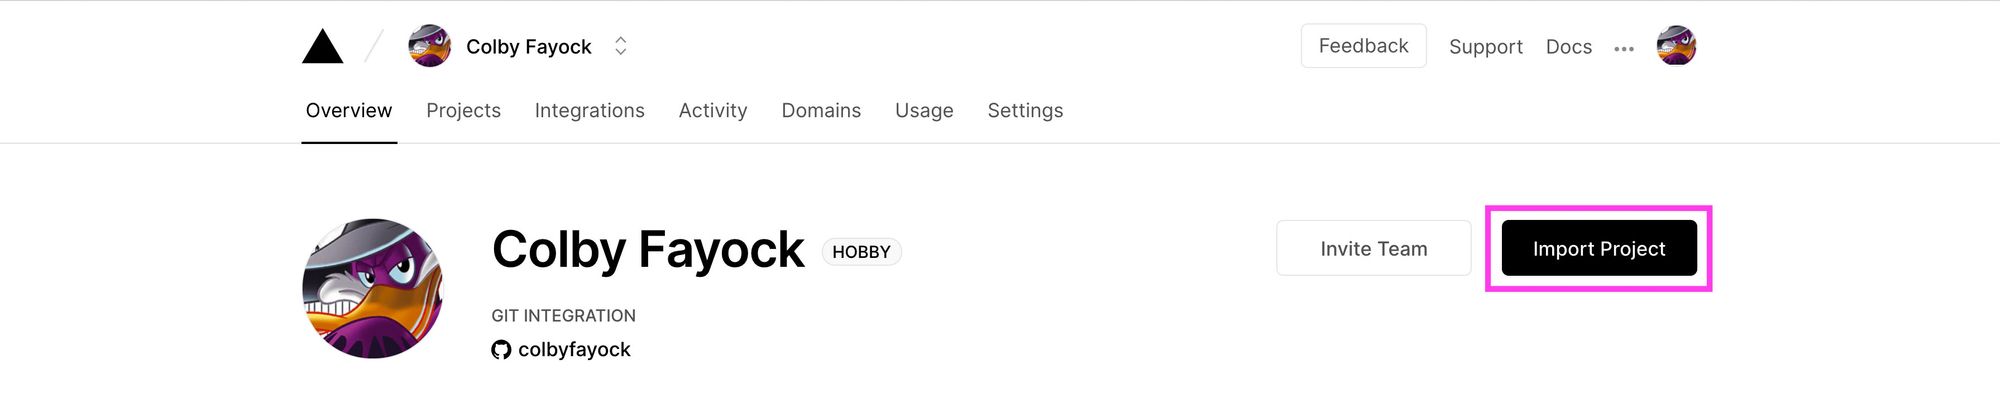 Import project to Vercel
Next, under Import Git Repository, click Continue.
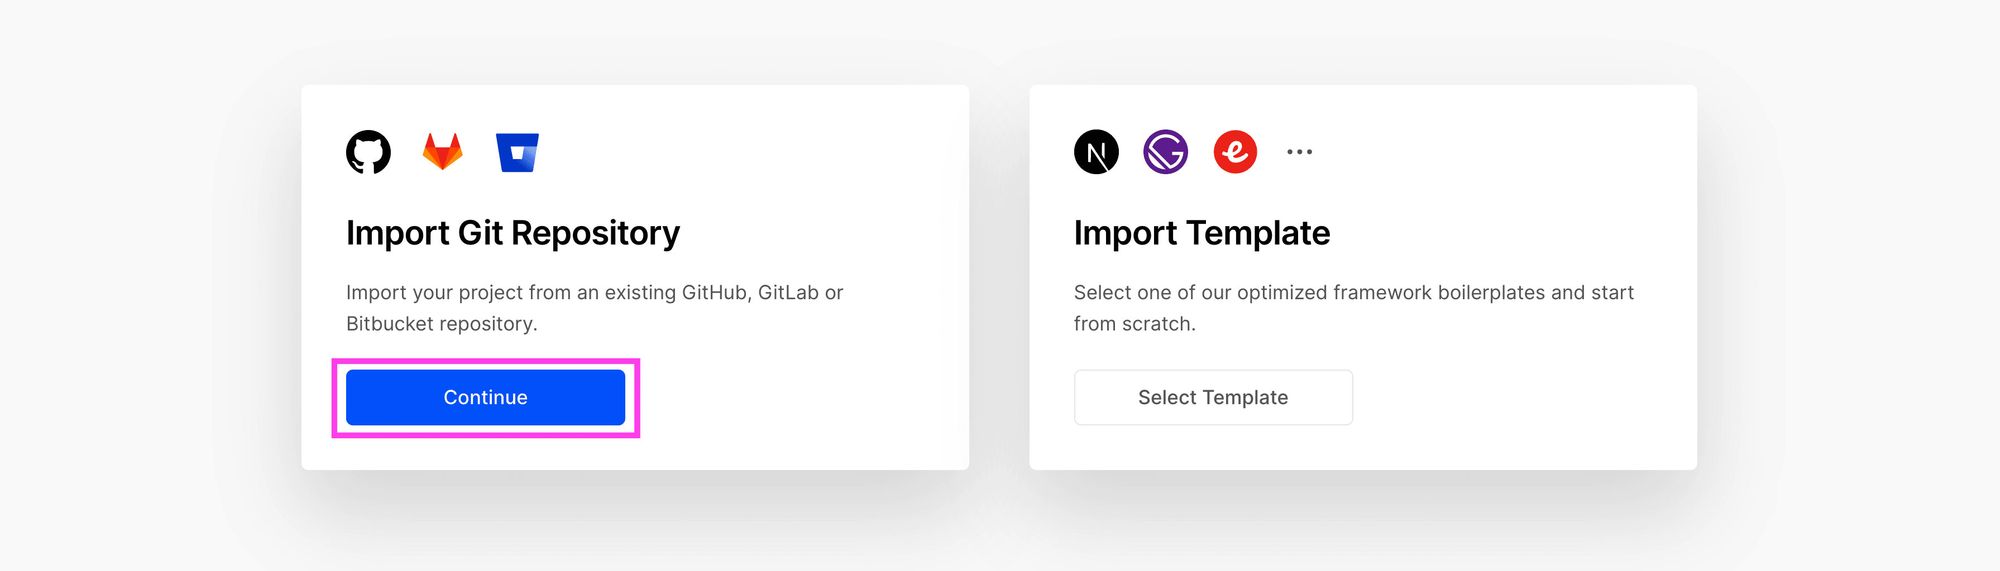 Import Git repository to Vercel
Vercel will now ask for the repository URL. This will be the homepage for the repository you just created for your project.
 Add Git repo URL to Vercel
After you click Continue, Vercel has already detected that your project uses Next.js. This means that we don’t need to set up and custom configurations, and we can hit Deploy!
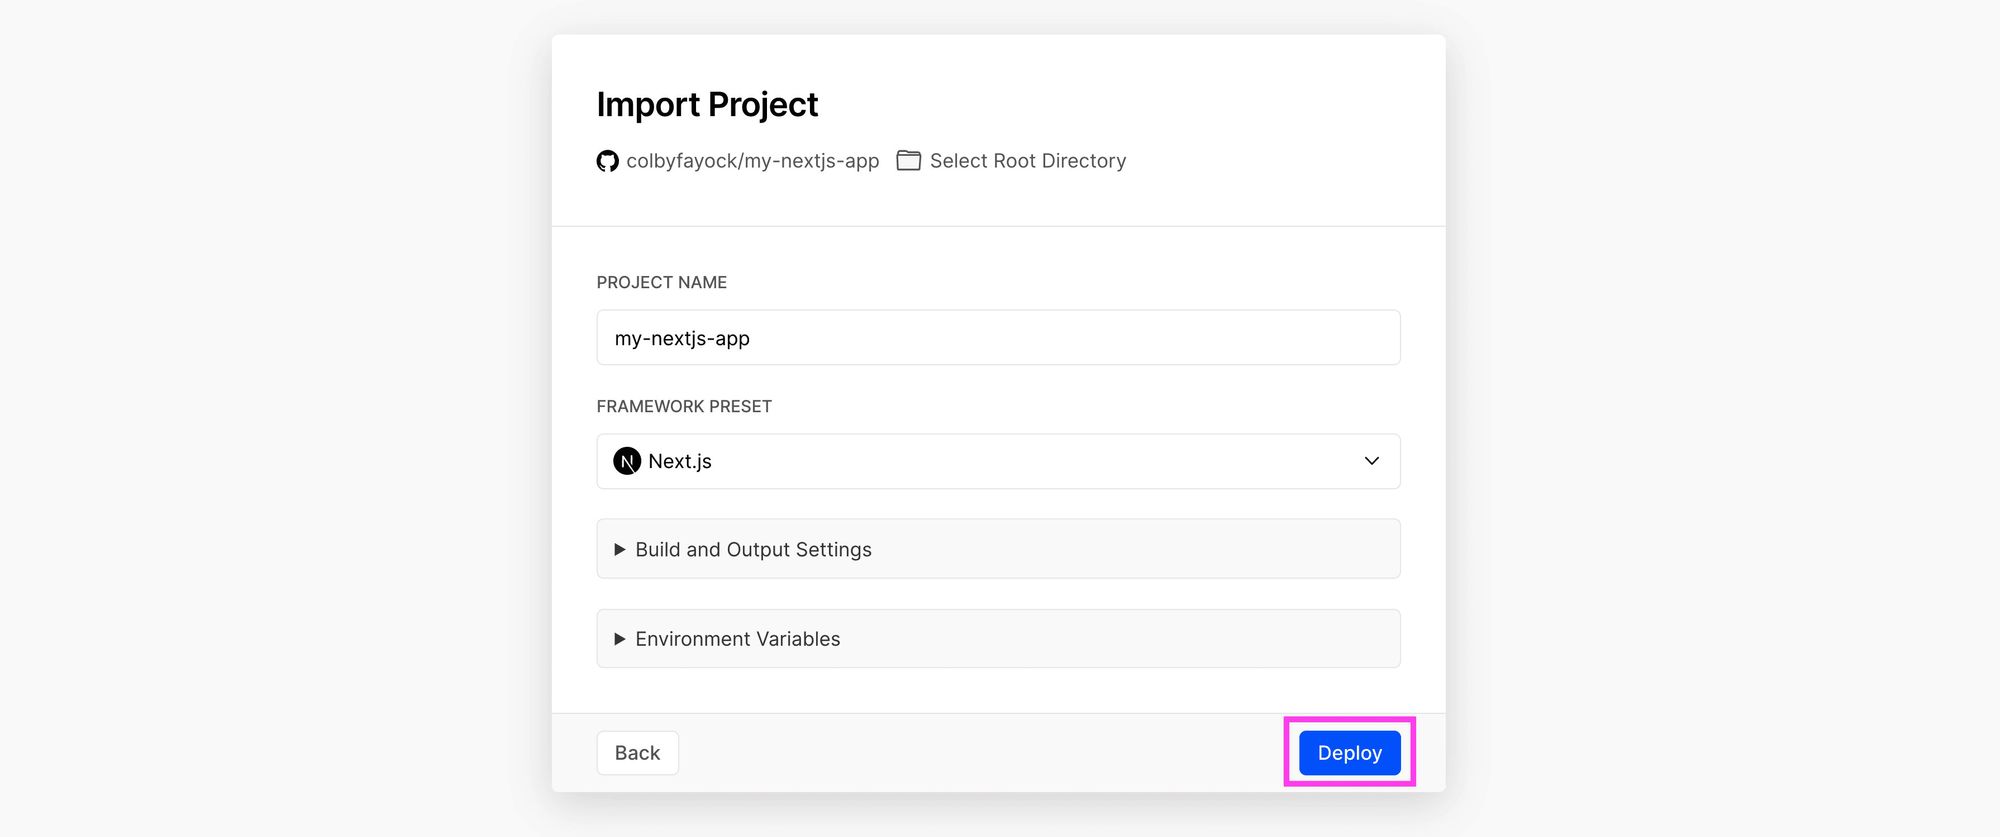 Deploy Next.js project to Vercel
At this point, Vercel will get to work and start to build the new project and deploy it to their infrastructure.
Once it’s finished, it will congratulate you and give you a link to visit your site.
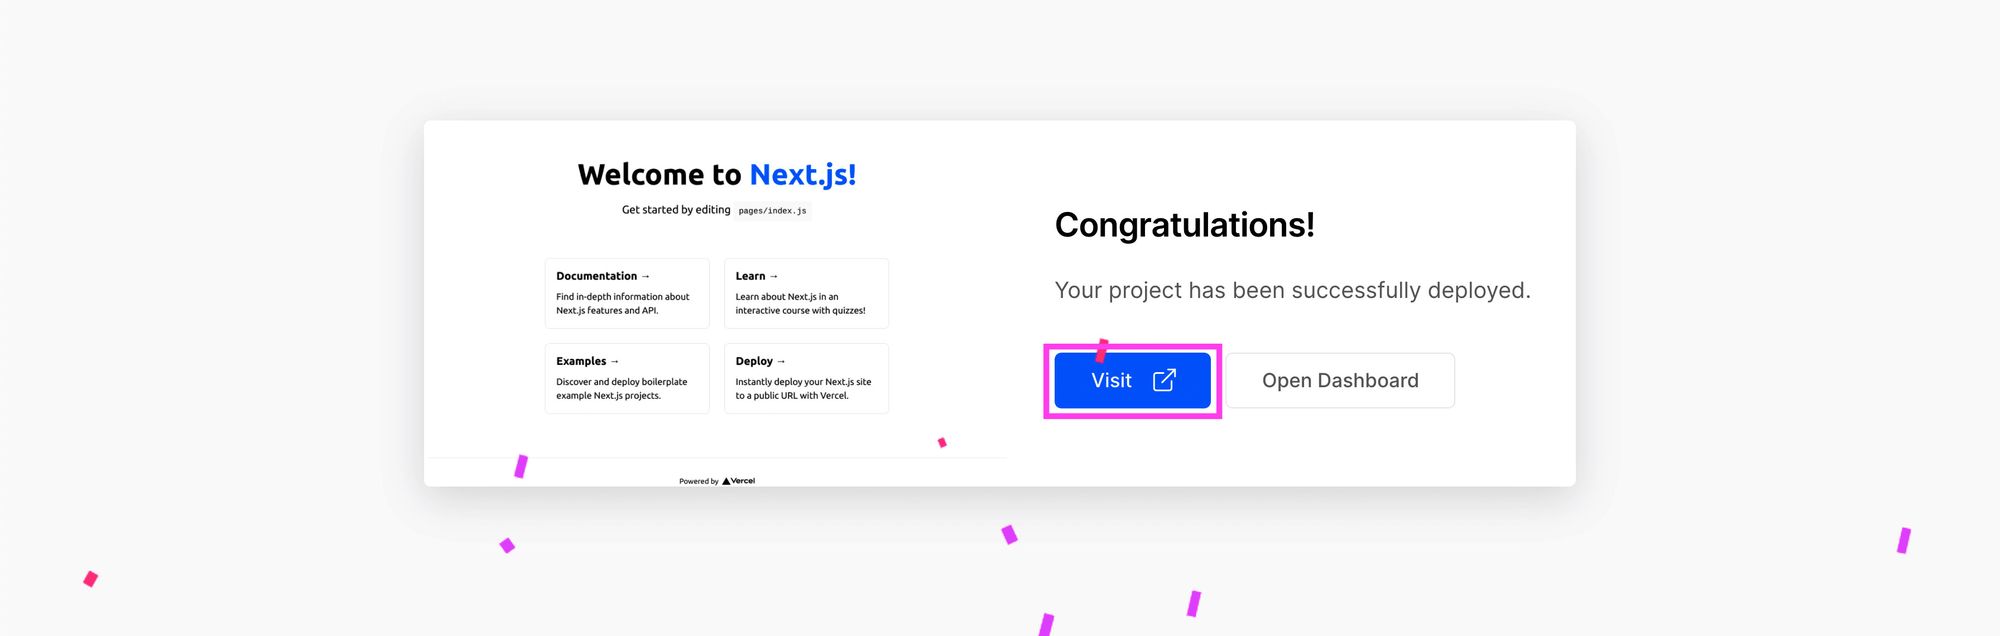 Vercel project successfully deployed
Click Visit and you’ll be directed to your project live on the internet:
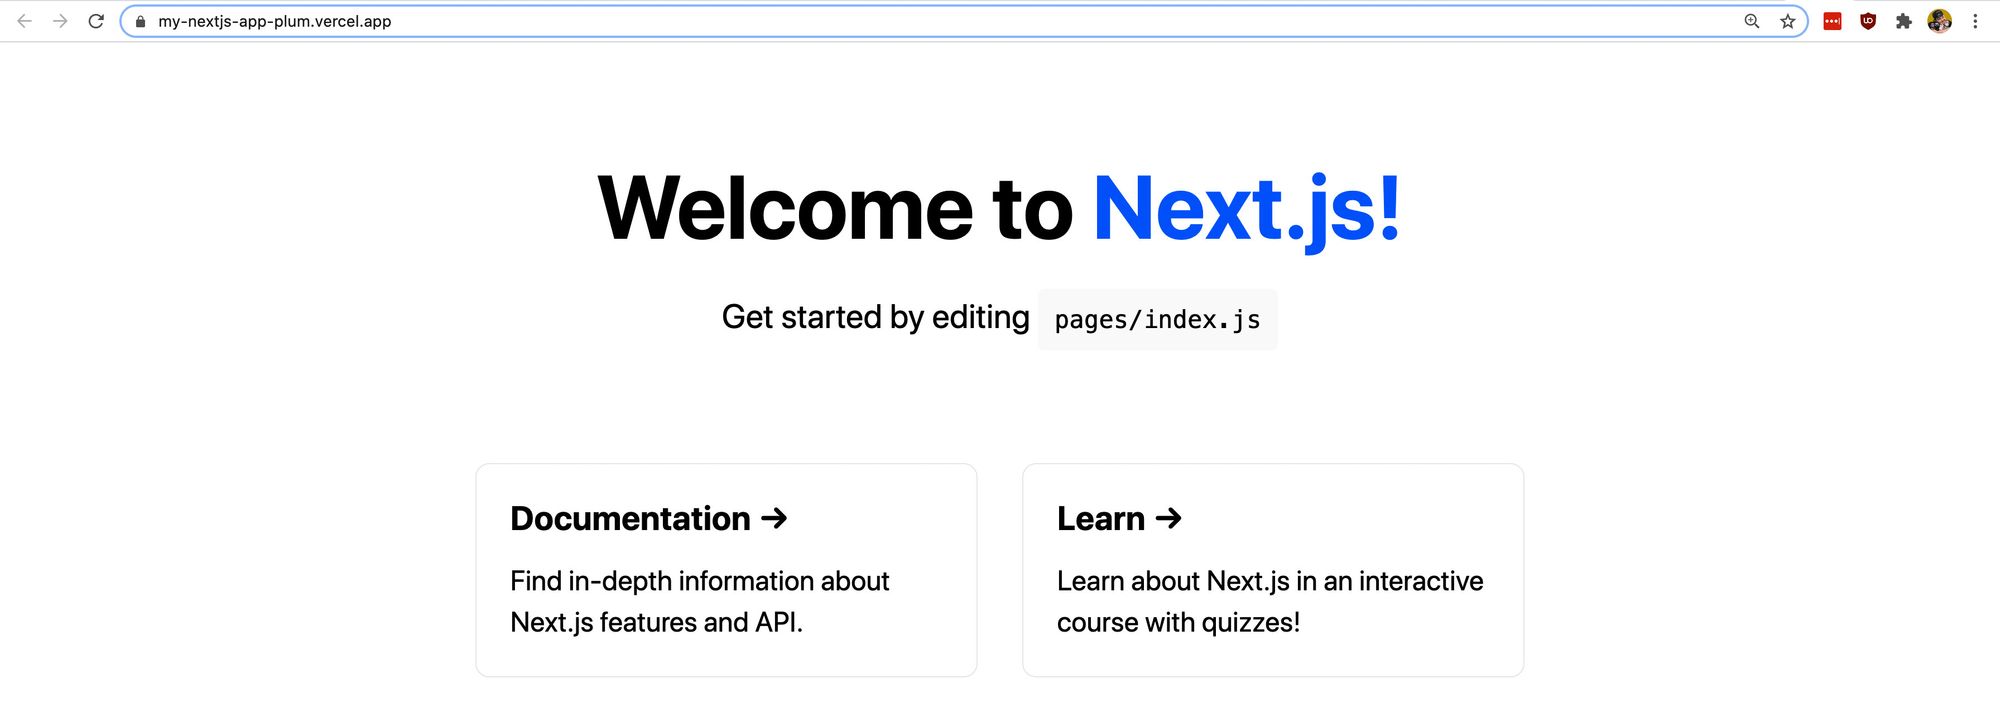 Next.js app live
What did we just deploy?
We just created a new React app with Next.js and deployed it to Vercel.
We’ll walk through each specific step:
- Create Next App: We first created a new Next.js project on our computer. This provided us with a new React application complete with dependencies and code to get started with a basic website.
- Add Project to Git: We added our new Next.js project to a Git repository online that’s supported by Vercel. This allows us to easily interface with the project with other services like Vercel.
- Connect Git to Vercel: We imported our project from Git into Vercel. This allowed Vercel to interact with our code.
- Build & Deploy with Vercel: Vercel downloaded our code, was able to recognize it was a Next.js project, built our project, and deployed the compiled output to its infrastructure and made it available on the web.
If you were waiting for more steps to get your project out to the world, there are none! The entry point for publishing a new React project is now lower than it’s ever been and Next.js and Vercel are helping you get there.
Understanding modern CI / CD with Git
Another benefit of modern infrastructure providers like Vercel, is that when utilizing GitHub as a service connection, Vercel can watch for changes on our main branch.
Once Vercel recognizes that a change was made, it will download the latest code and re-run the same process as we did the first time (aside from any caching and optimization).
This means that any time we have new changes to our production branch, they’ll automatically be deployed.
Make a change and watch it automatically deploy
To test out the automatic deployments, let’s make a change to our project.
Inside our project, let’s make a change to some of the page content inside of pages/index.js. I’m going to change the title to “Colby’s Next.js Project”.
<h1 className={styles.title}>
  Colby's Next.js App
</h1>
 Next.js app with change
Next, commit this change to your main Git branch and push it up to GitHub.
If you wait a few seconds and navigate back to vercel.com, find your project and click on the Deployments tab.
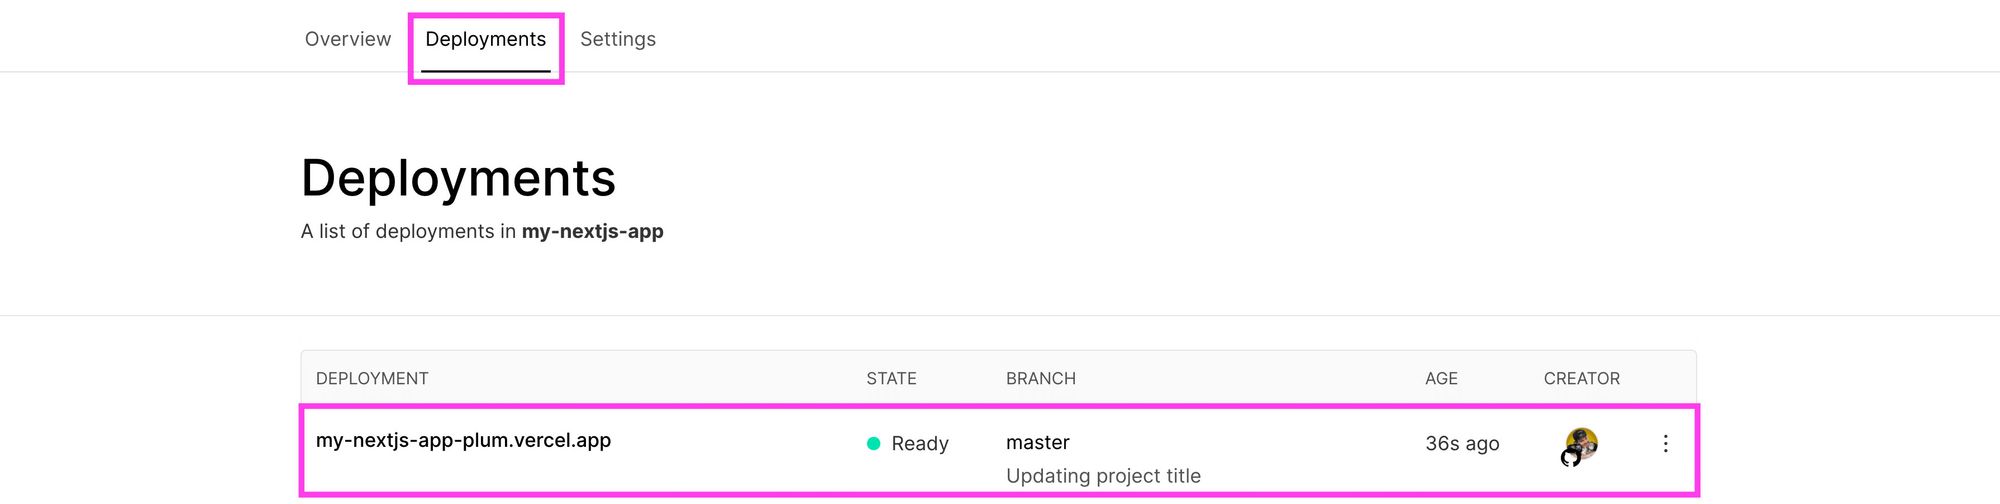 Vercel deployment when change detected
You’ll see that your project is now running or might have already finished if you weren’t quick enough. Now if you open your website link again, you’ll see the changes deployed!
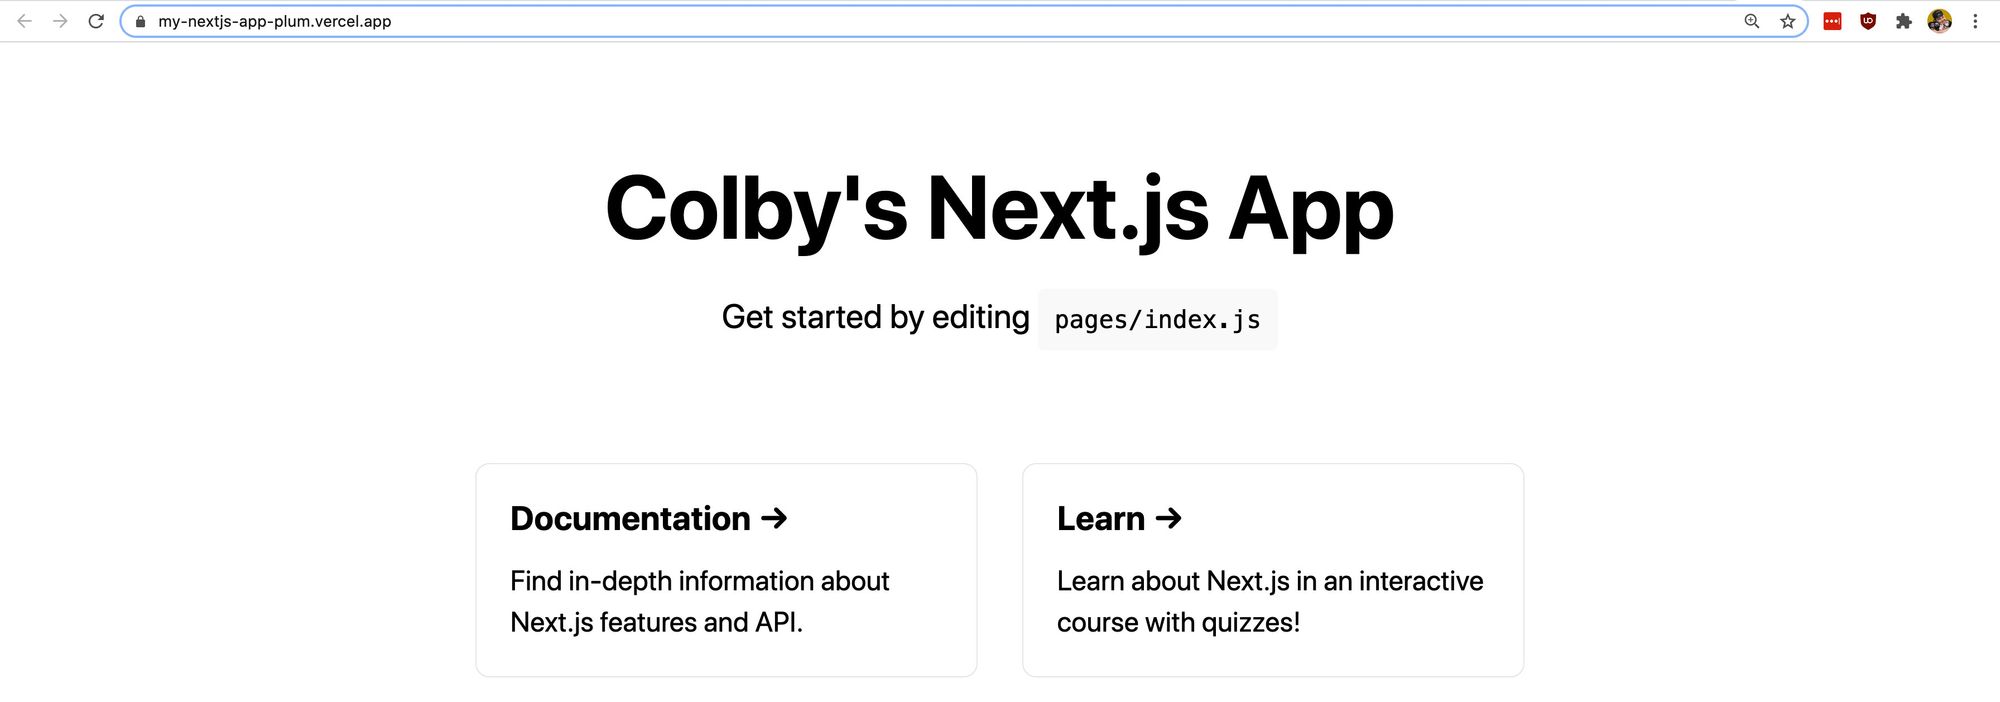 Deployed changed Next.js app to Vercel
What did we learn?
Next.js is a web framework that allows us to quickly and easily spin up a new React application.
This, along with other similar frameworks, can be useful to get immediately productive instead of spending time building the project framework ourselves.
Vercel is a hosting and deployment platform that allows us to integrate with our favorite supported Git provider. Once connected, Vercel will download our project, build our project, and deploy the output to the internet.
Modern infrastructure tools like Vercel will watch for changes on our Git repository and will build and deploy our project so that we’re always seeing the latest version.
Learn more about the Jamstack!
You can learn more about the Jamstack, including 2 more in depth tutorials, with my Jamstack Handbook.
 Order at jamstackhandbook.com
