
By Neo Ighodaro
When building a chat application, it is essential to have an online presence feature. It is essential because your users will like to know when their friends are online, and are more likely to respond to their messages in real time.
In this article, we will be building a messenger app with online presence using Pusher Channels, Kotlin, and Node.js.
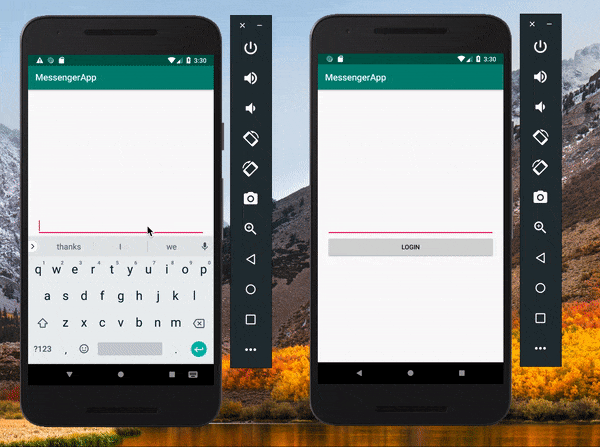
Here is a demo of what we will build:
Prerequisites
To follow along you need the following requirements:
- A Pusher Channel app. You can create one here.
- Android Studio installed on your machine. You can check here for the latest stable version. A minimum of version 3.0 is recommended.
- Basic knowledge of Android development and the Android Studio IDE.
- Basic knowledge of Kotlin. Here are the official docs.
- Node.js and NPM (Node Package Manager) installed on your machine. Download here.
- Mongo DB installed on your machine. You can install it following the instructions here.
Some familiarity with Android development is also required.
Building the backend server
Our server will be built using Node.js. To start, create a new project directory:
$ mkdir backend-server
Next, create a new index.js file inside the project directory and paste the following code:
// File: ./index.js var express = require('express'); var bodyParser = require('body-parser'); const mongoose = require('mongoose'); var Pusher = require('pusher');
var app = express();
app.use(bodyParser.json()); app.use(bodyParser.urlencoded({ extended: false }));
var pusher = new Pusher({ appId: 'PUSHER_APP_ID', key: 'PUSHER_APP_KEY', secret: 'PUSHER_APP_SECRET', cluster: 'PUSHER_APP_CLUSTER' });
mongoose.connect('mongodb://127.0.0.1/db');
const Schema = mongoose.Schema; const userSchema = new Schema({ name: { type: String, required: true, }, count: {type: Number} });
var User = mongoose.model('User', userSchema); userSchema.pre('save', function(next) { if (this.isNew) { User.count().then(res => { this.count = res; // Increment count next(); }); } else { next(); } });
module.exports = User;
var currentUser;
/* ================================= We will add our endpoints here!!! ================================= */
var port = process.env.PORT || 5000;
app.listen(port);
In the snippet above, we initialized Pusher, Express, and MongoDB. We are using Moongose to connect to our MongoDB instance.
_Replace the
PUSHER_APP_*keys with the ones on your Pusher dashboard._
Now let’s add our endpoints. The first endpoint we will add will be to log a user in. Paste the code below in your index.js file below the currentUser declaration:
// File: ./index.js
// [...]
app.post('/login', (req,res) => { User.findOne({name: req.body.name}, (err, user) => { if (err) { res.send("Error connecting to database"); }
// User exists if (user) { currentUser = user; return res.status(200).send(user) }
let newuser = new User({name: req.body.name});
newuser.save(function(err) { if (err) throw err; });
currentUser = newuser; res.status(200).send(newuser) }); })
// [...]
This endpoint receives a username with the request, and either creates a new user or returns the data of the existing user.
Let’s add the next endpoint below the one above:
// File: ./index.js
// [...]
app.get('/users', (req,res) => { User.find({}, (err, users) => { if (err) throw err; res.send(users); }); })
// [...]
This second endpoint fetches all the users from the database and returns them.
Since we will be using a Pusher presence channel, we need an endpoint to authenticate the user. In the same file, paste this code below the endpoint above:
// File: ./index.js
// [...]
app.post('/pusher/auth/presence', (req, res) => { let socketId = req.body.socket_id; let channel = req.body.channel_name;
let presenceData = { user_id: currentUser._id, user_info: {count: currentUser.count, name: currentUser.name} };
let auth = pusher.authenticate(socketId, channel, presenceData);
res.send(auth); });
// [...]
Since we are going to be using private channels, we need an endpoint for authentication. Add the following endpoint below the endpoint above:
// File: ./index.js
// [...]
app.post('/pusher/auth/private', (req, res) => { res.send(pusher.authenticate(req.body.socket_id, req.body.channel_name)); });
// [...]
Finally, the last endpoint will be to trigger an event `new-message` to a channel. Add the endpoint below the last one:
// File: ./index.js
// [...]
app.post('/send-message', (req, res) => { let payload = {message: req.body.message, sender_id: req.body.sender_id} pusher.trigger(req.body.channel_name, 'new-message', payload); res.send(200); });
// [...]
After adding all the endpoints, install the necessary npm packages by running this command:
$ npm install express body-parser mongoose pusher
Before you run your application, make sure MongoDB is running already using this command:
$ mongod --dbpath C:\MongoDB\data\db # Windows $ mongod --dbpath=/path/to/db/directory # Mac or Linux
Now you can run your application using the command below:
$ node index.js
Your app will be available here: http://localhost:5000.
Building our Android application
Create your Android project. In the wizard, enter your project name — let’s say MessengerApp.
Next, enter your package name. You can use a minimum SDK of 19 then choose an Empty Activity.
On the next page, change the Activity Name to LoginActivity. After this, Android Studio will build your project for you.
Now that we have the project, let’s add the required dependencies for our app. Open your app module build.gradle file and add these:
// File ../app/build.gradle dependencies { // [...]
implementation 'com.android.support:design:28+' implementation 'com.pusher:pusher-java-client:1.6.0' implementation "com.squareup.retrofit2:retrofit:2.4.0" implementation "com.squareup.retrofit2:converter-scalars:2.4.0" implementation 'com.squareup.retrofit2:converter-gson:2.3.0' }
Notably, we added the dependencies for Retrofit and Pusher. Retrofit is an HTTP client library used for network calls. We added the design library dependency too as we want to use some classes from it. Sync your gradle files to pull in the dependencies.
Next, let’s prepare our app to make network calls. Retrofit requires an interface to know the endpoints to be accessed.
Create a new interface named ApiService and paste this:
// File: ./app/src/main/java/com/example/messengerapp/ApiService.kt import okhttp3.RequestBody import retrofit2.Call import retrofit2.http.Body import retrofit2.http.GET import retrofit2.http.POST
interface ApiService {
@POST("/login") fun login(@Body body:RequestBody): Call<UserModel>
@POST("/send-message") fun sendMessage(@Body body:RequestBody): Call<String>
@GET("/users") fun getUsers(): Call<List<UserModel>> }
Here, we have declared three endpoints. They are for logging in, sending messages, and fetching users.
In some of our responses, we return Call<UserModel>. Let’s create the UserModel. Create a new class called UserModel and paste the following:
// File: ./app/src/main/java/com/example/messengerapp/UserModel.kt import com.google.gson.annotations.Expose import com.google.gson.annotations.SerializedName
data class UserModel(@SerializedName("_id") @Expose var id: String, @SerializedName("name") @Expose var name: String, @SerializedName("count") @Expose var count: Int, var online:Boolean = false)
Above, we used a data class so that some other functions required for model classes such as toString and hashCode are added to the class by default.
We are expecting only the values for the id and name from the server. We added the online property so we can update later on.
Next, create a new class named RetrofitInstance and paste in the following code:
// File: ./app/src/main/java/com/example/messengerapp/RetrofitInstance.kt import okhttp3.OkHttpClient import retrofit2.Retrofit import retrofit2.converter.gson.GsonConverterFactory import retrofit2.converter.scalars.ScalarsConverterFactory
class RetrofitInstance {
companion object { val retrofit: ApiService by lazy { val httpClient = OkHttpClient.Builder() val builder = Retrofit.Builder() .baseUrl("http://10.0.2.2:5000/") .addConverterFactory(ScalarsConverterFactory.create()) .addConverterFactory(GsonConverterFactory.create())
val retrofit = builder .client(httpClient.build()) .build() retrofit.create(ApiService::class.java) } } }
RetrofitInstance contains a class variable called retrofit. It provides us with an instance for Retrofit that we will reference in more than one class.
Finally, to request for the internet access permission update the AndroidManifest.xml file like so:
// File: ./app/src/main/ApiService.kt <manifest xmlns:android="http://schemas.android.com/apk/res/android" package="com.example.messengerapp">
<uses-permission android:name="android.permission.INTERNET" /> [...]
</manifest>
Now we can make requests using Retrofit.
The next feature we will implement is login. Open the already created LoginActivity layout file activity_login.xml file and paste this:
// File: ./app/src/main/res/layout/activity_login.xml <?xml version="1.0" encoding="utf-8"?> <android.support.constraint.ConstraintLayout xmlns:android="http://schemas.android.com/apk/res/android" xmlns:app="http://schemas.android.com/apk/res-auto" xmlns:tools="http://schemas.android.com/tools" android:layout_width="match_parent" android:layout_height="match_parent" android:layout_margin="20dp" tools:context=".LoginActivity">
<EditText android:id="@+id/editTextUsername" android:layout_width="match_parent" android:layout_height="wrap_content" app:layout_constraintBottom_toBottomOf="parent" app:layout_constraintLeft_toLeftOf="parent" app:layout_constraintRight_toRightOf="parent" app:layout_constraintTop_toTopOf="parent" />
<Button android:id="@+id/loginButton" android:layout_width="match_parent" android:layout_height="wrap_content" android:text="Login" app:layout_constraintTop_toBottomOf="@+id/editTextUsername" />
</android.support.constraint.ConstraintLayout>
This layout contains an input field to take the username, and a button to make a login request.
Next, open the LoginActivity.Kt file and paste in this:
// File: ./app/src/main/java/com/example/messengerapp/LoginActivity.kt import android.content.Intent import android.os.Bundle import android.support.v7.app.AppCompatActivity import android.util.Log import kotlinx.android.synthetic.main.activity_login.* import okhttp3.MediaType import okhttp3.RequestBody import org.json.JSONObject import retrofit2.Call import retrofit2.Callback import retrofit2.Response
class LoginActivity : AppCompatActivity() {
override fun onCreate(savedInstanceState: Bundle?) { super.onCreate(savedInstanceState) setContentView(R.layout.activity_login) loginButton.setOnClickListener { if (editTextUsername.text.isNotEmpty()) { loginFunction(editTextUsername.text.toString()) } } }
private fun loginFunction(name:String) { val jsonObject = JSONObject() jsonObject.put("name", name)
val jsonBody = RequestBody.create( MediaType.parse("application/json; charset=utf-8"), jsonObject.toString() )
RetrofitInstance.retrofit.login(jsonBody).enqueue(object:Callback<UserModel> { override fun onFailure(call: Call<UserModel>?, t: Throwable?) { Log.i("LoginActivity",t!!.localizedMessage) }
override fun onResponse(call: Call<UserModel>?, response: Response<UserModel>?) { if (response!!.code() == 200) { Singleton.getInstance().currentUser = response.body()!! startActivity(Intent(this@LoginActivity,ContactListActivity::class.java)) finish() } } }) } }
In the LoginActivity.Kt file, we set up a listener for our login button so that, when it is clicked, we can send the text to the server for authentication. We also stored the logged in user in a singleton class so that we can access the user’s details later.
Create a new class called Singleton and paste in this:
// File: ./app/src/main/java/com/example/messengerapp/RetrofitInstance.kt class Singleton { companion object { private val ourInstance = Singleton() fun getInstance(): Singleton { return ourInstance } } lateinit var currentUser: UserModel }
Singletongives us access to the currentUser, which is the logged in user.
Next, let’s create a new activity named ContactListActivity. For now, leave the class empty and open the corresponding layout file named activity_contact_list , and paste in the following:
// File: ./app/src/main/res/layout/activity_contact_list.xml <?xml version="1.0" encoding="utf-8"?> <android.support.constraint.ConstraintLayout xmlns:android="http://schemas.android.com/apk/res/android" xmlns:app="http://schemas.android.com/apk/res-auto" xmlns:tools="http://schemas.android.com/tools" android:layout_width="match_parent" android:layout_height="match_parent" tools:context=".ContactListActivity">
<android.support.v7.widget.RecyclerView android:layout_width="match_parent" android:id="@+id/recyclerViewUserList" android:layout_height="match_parent"/>
</android.support.constraint.ConstraintLayout>
The layout contains a recycler view, which will give us all the lists of our contacts fetched from the database. Since we are displaying items in a list, we will need an adapter class to manage how items are inflated to the layout.
Create a new class named ContactRecyclerAdapter and paste in this:
// File: ./app/src/main/java/com/example/messengerapp/ContactRecyclerAdapter.kt import android.support.v7.widget.RecyclerView import android.view.LayoutInflater import android.view.View import android.view.ViewGroup import android.widget.ImageView import android.widget.TextView import java.util.*
class ContactRecyclerAdapter(private var list: ArrayList<UserModel>, private var listener: UserClickListener) : RecyclerView.Adapter<ContactRecyclerAdapter.ViewHolder>() {
override fun onCreateViewHolder(parent: ViewGroup, viewType: Int): ViewHolder { return ViewHolder(LayoutInflater.from(parent.context) .inflate(R.layout.user_list_row, parent, false)) }
override fun onBindViewHolder(holder: ViewHolder, position: Int) = holder.bind(list[position])
override fun getItemCount(): Int = list.size
fun showUserOnline(updatedUser: UserModel) { list.forEachIndexed { index, element -> if (updatedUser.id == element.id) { updatedUser.online = true list[index] = updatedUser notifyItemChanged(index) }
} }
fun showUserOffline(updatedUser: UserModel) { list.forEachIndexed { index, element -> if (updatedUser.id == element.id) { updatedUser.online = false list[index] = updatedUser notifyItemChanged(index) } } }
fun add(user: UserModel) { list.add(user) notifyDataSetChanged() }
inner class ViewHolder(itemView: View) : RecyclerView.ViewHolder(itemView) { private val nameTextView: TextView = itemView.findViewById(R.id.usernameTextView) private val presenceImageView: ImageView = itemView.findViewById(R.id.presenceImageView)
fun bind(currentValue: UserModel) = with(itemView) { this.setOnClickListener { listener.onUserClicked(currentValue) } nameTextView.text = currentValue.name if (currentValue.online){ presenceImageView.setImageDrawable(this.context.resources.getDrawable(R.drawable.presence_icon_online)) } else { presenceImageView.setImageDrawable(this.context.resources.getDrawable(R.drawable.presence_icon))
}
} }
interface UserClickListener { fun onUserClicked(user: UserModel) } }
This adapter has some overridden methods and some custom methods.
The onCreateViewHolder inflates how each row will look like. onBindViewHolder binds the data to each item by calling the bind method in the inner ViewHolder class. The getItemCount gives the size of the list.
For our custom methods, showUserOffline updates the user and shows when they are offline. While showUserOnline does the opposite. Finally, we have the add method, which adds a new contact to the list and refreshes it.
In the adapter class above, we used a new layout named user_list_row. Create a new layout user_list_rowand paste this:
// File: ./app/src/main/res/layout/user_list_row.xml <?xml version="1.0" encoding="utf-8"?> <LinearLayout android:orientation="horizontal" xmlns:android="http://schemas.android.com/apk/res/android" xmlns:app="http://schemas.android.com/apk/res-auto" xmlns:tools="http://schemas.android.com/tools" android:layout_width="match_parent" android:layout_height="wrap_content" android:layout_margin="20dp" android:gravity="center" tools:context=".LoginActivity">
<ImageView android:id="@+id/presenceImageView" android:layout_width="15dp" android:layout_height="15dp" app:srcCompat="@drawable/presence_icon" />
<TextView android:layout_width="match_parent" android:layout_height="wrap_content" tools:text="Neo" android:textSize="20sp" android:layout_marginStart="10dp" android:id="@+id/usernameTextView" app:layout_constraintTop_toBottomOf="@+id/editTextUsername" />
</LinearLayout>
This layout is the visual representation of how each item on the layout will look like. The layout has an image view that shows the users online status. The layout also has a textview that shows the name of the contact beside the icon. The icons are vector drawables. Let’s create the files.
Create a new drawable named presence_icon_online and paste in this:
// File: ./app/src/main/res/drawable/presence_icon_online.xml <vector android:height="24dp" android:tint="#3FFC3C" android:viewportHeight="24.0" android:viewportWidth="24.0" android:width="24dp" xmlns:android="http://schemas.android.com/apk/res/android"> <path android:fillColor="#FF000000" android:pathData="M12,2C6.48,2 2,6.48 2,12s4.48,10 10,10 10,-4.48 10,-10S17.52,2 12,2z"/> </vector>
Create another drawable named presence_icon and paste in this:
// File: ./app/src/main/res/drawable/presence_icon.xml <vector android:height="24dp" android:tint="#C0C0C6" android:viewportHeight="24.0" android:viewportWidth="24.0" android:width="24dp" xmlns:android="http://schemas.android.com/apk/res/android"> <path android:fillColor="#FF000000" android:pathData="M12,2C6.48,2 2,6.48 2,12s4.48,10 10,10 10,-4.48 10,-10S17.52,2 12,2z"/> </vector>
Next, open the ContactListActivity class and paste in this:
// File: ./app/src/main/java/com/example/messengerapp/ContactListActivity.kt import android.content.Intent import android.os.Bundle import android.support.v7.app.AppCompatActivity import android.support.v7.widget.LinearLayoutManager import android.util.Log import com.pusher.client.Pusher import com.pusher.client.PusherOptions import com.pusher.client.channel.PresenceChannelEventListener import com.pusher.client.channel.User import com.pusher.client.util.HttpAuthorizer import kotlinx.android.synthetic.main.activity_contact_list.* import retrofit2.Call import retrofit2.Callback import retrofit2.Response
class ContactListActivity : AppCompatActivity(), ContactRecyclerAdapter.UserClickListener {
private val mAdapter = ContactRecyclerAdapter(ArrayList(), this)
override fun onCreate(savedInstanceState: Bundle?) { super.onCreate(savedInstanceState) setContentView(R.layout.activity_contact_list) setupRecyclerView() fetchUsers() subscribeToChannel() }
}
In ContactListActivity, we initialized the ContactRecyclerAdapter, then called three functions in the onCreate method. Let’s create these new functions.
In the same class, add the following methods:
private fun setupRecyclerView() { with(recyclerViewUserList) { layoutManager = LinearLayoutManager(this@ContactListActivity) adapter = mAdapter } }
private fun fetchUsers() { RetrofitInstance.retrofit.getUsers().enqueue(object : Callback<List<UserModel>> { override fun onFailure(call: Call<List<UserModel>>?, t: Throwable?) {} override fun onResponse(call: Call<List<UserModel>>?, response: Response<List<UserModel>>?) { for (user in response!!.body()!!) { if (user.id != Singleton.getInstance().currentUser.id) { mAdapter.add(user) } } } }) }
private fun subscribeToChannel() {
val authorizer = HttpAuthorizer("http://10.0.2.2:5000/pusher/auth/presence") val options = PusherOptions().setAuthorizer(authorizer) options.setCluster("PUSHER_APP_CLUSTER")
val pusher = Pusher("PUSHER_APP_KEY", options) pusher.connect()
pusher.subscribePresence("presence-channel", object : PresenceChannelEventListener { override fun onUsersInformationReceived(p0: String?, users: MutableSet<User>?) { for (user in users!!) { if (user.id!=Singleton.getInstance().currentUser.id){ runOnUiThread { mAdapter.showUserOnline(user.toUserModel()) } } } }
override fun onEvent(p0: String?, p1: String?, p2: String?) {} override fun onAuthenticationFailure(p0: String?, p1: Exception?) {} override fun onSubscriptionSucceeded(p0: String?) {}
override fun userSubscribed(channelName: String, user: User) { runOnUiThread { mAdapter.showUserOnline(user.toUserModel()) } }
override fun userUnsubscribed(channelName: String, user: User) { runOnUiThread { mAdapter.showUserOffline(user.toUserModel()) } } }) }
override fun onUserClicked(user: UserModel) { val intent = Intent(this, ChatRoom::class.java) intent.putExtra(ChatRoom.EXTRA_ID,user.id) intent.putExtra(ChatRoom.EXTRA_NAME,user.name) intent.putExtra(ChatRoom.EXTRA_COUNT,user.count) startActivity(intent) }
Replace the PUSHER_APP_* keys with the values on your dashboard.
setupRecyclerViewassigns a layout manager and an adapter to the recycler view. For a recycler view to work, you need these two things.fetchUsersfetches all the users from the server and displays on the list. It exempts the current user logged in.subcribeToChannelsubscribes to a presence channel. When you subscribe to one, theonUsersInformationReceivedgives you all the users subscribed to the channel including the current user. So, in that callback, we call theshowUserOnlinemethod in the adapter class so that the icon beside the user can be changed to signify that the user is online.onUserClickedis called when a contact is selected. We pass the details of the user to the next activity calledChatRoom.
In the previous snippet, we used an extension function to transform the User object we receive from Pusher to our own UserModel object. Let’s define this extension.
Create a new class called Utils and paste this:
// File: ./app/src/main/java/com/example/messengerapp/Utils.kt import com.pusher.client.channel.User import org.json.JSONObject
fun User.toUserModel():UserModel{ val jsonObject = JSONObject(this.info) val name = jsonObject.getString("name") val numb = jsonObject.getInt("count") return UserModel(this.id, name, numb) }
Now, since we referenced a ChatRoom activity earlier in the onUserClicked method, let’s create it.
Create a new activity called ChatRoom. The activity comes with a layout file activity_chat_room. Paste this into the layout file:
// File: ./app/src/main/res/layout/activity_chat_room.xml <?xml version="1.0" encoding="utf-8"?> <android.support.constraint.ConstraintLayout xmlns:android="http://schemas.android.com/apk/res/android" xmlns:app="http://schemas.android.com/apk/res-auto" xmlns:tools="http://schemas.android.com/tools" android:layout_width="match_parent" android:layout_height="match_parent" tools:context=".ChatRoom">
<android.support.v7.widget.RecyclerView android:id="@+id/recyclerViewChat" android:layout_width="match_parent" android:layout_height="match_parent" />
<EditText android:id="@+id/editText" android:layout_width="0dp" android:layout_height="wrap_content" android:layout_margin="16dp" android:hint="Enter a message" app:layout_constraintBottom_toBottomOf="parent" app:layout_constraintEnd_toStartOf="@+id/sendButton" app:layout_constraintStart_toStartOf="parent" />
<android.support.design.widget.FloatingActionButton android:id="@+id/sendButton" android:layout_width="wrap_content" android:layout_height="wrap_content" android:layout_gravity="end|bottom" android:layout_margin="16dp" android:src="@android:drawable/ic_menu_send" app:layout_constraintEnd_toEndOf="parent" app:layout_constraintBottom_toBottomOf="parent" />
</android.support.constraint.ConstraintLayout>
The layout above contains a recycler view for the chat messages, an edit text to collect new messages, and a floating action button to send the message.
Next, create a new class called ChatRoomAdapter and paste in the following:
// File: ./app/src/main/java/com/example/messengerapp/ChatRoomAdapter.kt import android.support.v7.widget.CardView import android.support.v7.widget.RecyclerView import android.view.LayoutInflater import android.view.View import android.view.ViewGroup import android.widget.RelativeLayout import android.widget.TextView import java.util.*
class ChatRoomAdapter (private var list: ArrayList<MessageModel>) : RecyclerView.Adapter<ChatRoomAdapter.ViewHolder>() {
override fun onCreateViewHolder(parent: ViewGroup, viewType: Int): ViewHolder { return ViewHolder(LayoutInflater.from(parent.context) .inflate(R.layout.chat_item, parent, false)) }
override fun onBindViewHolder(holder: ViewHolder, position: Int) = holder.bind(list[position])
override fun getItemCount(): Int = list.size
fun add(message: MessageModel) { list.add(message) notifyDataSetChanged() }
inner class ViewHolder(itemView: View) : RecyclerView.ViewHolder(itemView) { private val messageTextView: TextView = itemView.findViewById(R.id.text) private val cardView: CardView = itemView.findViewById(R.id.cardView)
fun bind(message: MessageModel) = with(itemView) { messageTextView.text = message.message val params = cardView.layoutParams as RelativeLayout.LayoutParams if (message.senderId==Singleton.getInstance().currentUser.id) { params.addRule(RelativeLayout.ALIGN_PARENT_RIGHT) } } } }
This adapter works in a similar fashion as the one we created earlier. One difference, though, is that the show online and offline methods are not needed here.
Next, create another class — named MessageMode— and paste in this:
// File: ./app/src/main/java/com/example/messengerapp/MessageModel.kt data class MessageModel(val message: String, val senderId: String)
The chat_item layout used in the onCreateViewHolder method of the adapter class represents how each layout will look like. Create a new layout called chat_item and paste in this:
// File: ./app/src/main/res/layout/chat_item.xml <?xml version="1.0" encoding="utf-8"?> <RelativeLayout xmlns:android="http://schemas.android.com/apk/res/android" xmlns:app="http://schemas.android.com/apk/res-auto" android:layout_width="wrap_content" android:layout_height="wrap_content" android:layout_margin="16dp" android:orientation="vertical">
<android.support.v7.widget.CardView android:id="@+id/cardView" android:layout_width="wrap_content" android:layout_height="wrap_content" android:layout_gravity="start" app:cardCornerRadius="8dp" app:cardUseCompatPadding="true">
<LinearLayout android:layout_width="wrap_content" android:layout_height="wrap_content" android:gravity="start" android:orientation="vertical" android:padding="8dp">
<TextView android:id="@+id/text" android:layout_width="wrap_content" android:layout_height="wrap_content" android:layout_gravity="center_vertical|start" android:layout_marginBottom="4dp" android:textStyle="bold" />
</LinearLayout>
</android.support.v7.widget.CardView>
</RelativeLayout>
Updating the ChatRoom class
Finally, open the ChatRoom activity class and paste in this:
// File: ./app/src/main/java/com/example/messengerapp/ChatRoom.kt import android.app.Activity import android.os.Bundle import android.support.v7.app.AppCompatActivity import android.support.v7.widget.LinearLayoutManager import android.util.Log import android.view.View import android.view.inputmethod.InputMethodManager import com.pusher.client.Pusher import com.pusher.client.PusherOptions import com.pusher.client.channel.PrivateChannelEventListener import com.pusher.client.util.HttpAuthorizer import kotlinx.android.synthetic.main.activity_chat_room.* import okhttp3.MediaType import okhttp3.RequestBody import org.json.JSONObject import retrofit2.Call import retrofit2.Callback import retrofit2.Response import java.lang.Exception import java.util.*
class ChatRoom : AppCompatActivity() {
companion object { const val EXTRA_ID = "id" const val EXTRA_NAME = "name" const val EXTRA_COUNT = "numb" }
private lateinit var contactName: String private lateinit var contactId: String private var contactNumb: Int = -1 lateinit var nameOfChannel: String val mAdapter = ChatRoomAdapter(ArrayList())
override fun onCreate(savedInstanceState: Bundle?) { super.onCreate(savedInstanceState) setContentView(R.layout.activity_chat_room) fetchExtras() setupRecyclerView() subscribeToChannel() setupClickListener() } }
In this file, we declared constants used to send data to the activity through intents. We also initialized variables we will use later, like the adapter and the contact details. We then called some additional methods in the onCreatemethod. Let’s add them to theChatRoom class.
Add the fetchExtras method defined below to the class. The method gets the extras sent from the chatroom activity.
private fun fetchExtras() { contactName = intent.extras.getString(ChatRoom.EXTRA_NAME) contactId = intent.extras.getString(ChatRoom.EXTRA_ID) contactNumb = intent.extras.getInt(ChatRoom.EXTRA_COUNT) }
The next method is setupRecyclerView . This initializes the recycler view with an adapter and a layout manager. Paste this function into the same class as before:
private fun setupRecyclerView() { with(recyclerViewChat) { layoutManager = LinearLayoutManager(this@ChatRoom) adapter = mAdapter } }
The next method is subscribeToChannel . This method subscribes the user to a private channel with the selected contact. Paste the following code into the same class as before:
private fun subscribeToChannel() { val authorizer = HttpAuthorizer("http://10.0.2.2:5000/pusher/auth/private") val options = PusherOptions().setAuthorizer(authorizer) options.setCluster("PUSHER_APP_CLUSTER")
val pusher = Pusher("PUSHER_APP_KEY", options) pusher.connect()
nameOfChannel = if (Singleton.getInstance().currentUser.count > contactNumb) { "private-" + Singleton.getInstance().currentUser.id + "-" + contactId } else { "private-" + contactId + "-" + Singleton.getInstance().currentUser.id }
Log.i("ChatRoom", nameOfChannel)
pusher.subscribePrivate(nameOfChannel, object : PrivateChannelEventListener { override fun onEvent(channelName: String?, eventName: String?, data: String?) { val obj = JSONObject(data) val messageModel = MessageModel(obj.getString("message"), obj.getString("sender_id"))
runOnUiThread { mAdapter.add(messageModel) } }
override fun onAuthenticationFailure(p0: String?, p1: Exception?) {} override fun onSubscriptionSucceeded(p0: String?) {} }, "new-message") }
Replace the PUSHER_APP_* keys with the values on your dashboard.
The code above allows a user to subscribe to a private channel. A private channel requires authorization like the presence channel. However, it does not expose a callback that is triggered when other users subscribe.
Next method to be added is setupClickListener. Paste the method into the same class as before:
private fun setupClickListener() { sendButton.setOnClickListener{ if (editText.text.isNotEmpty()) { val jsonObject = JSONObject() jsonObject.put("message",editText.text.toString()) jsonObject.put("channel_name",nameOfChannel) jsonObject.put("sender_id",Singleton.getInstance().currentUser.id)
val jsonBody = RequestBody.create( MediaType.parse("application/json; charset=utf-8"), jsonObject.toString() )
RetrofitInstance.retrofit.sendMessage(jsonBody).enqueue(object: Callback<String>{ override fun onFailure(call: Call<String>?, t: Throwable?) {} override fun onResponse(call: Call<String>?, response: Response<String>?) {} })
editText.text.clear() hideKeyBoard() }
} }
The method above assigns a click listener to the floating action button to send the message to the server. After the message is sent, we clear the text view and hide the keyboard.
Add a method to the same class for hiding the keyboard like this:
private fun hideKeyBoard() { val imm = getSystemService(Activity.INPUT_METHOD_SERVICE) as InputMethodManager var view = currentFocus
if (view == null) { view = View(this) }
imm.hideSoftInputFromWindow(view.windowToken, 0) }
That’s all for the application. Now you can run your application in Android Studio and you should see the application in action.
Make sure the Node.js API we built earlier is running before running the Android application.

Conclusion
In this article, you have been introduced to some Pusher capabilities such as the private and presence channel.
We learned how to authenticate our users for the various channels.
We used these channels to implement a private chat between two persons and an online notification for a contact.
The source code to the application built in this article is available on GitHub.
This post first appeared on the Pusher Blog.