

Deno is a runtime for JavaScript and TypeScript. The creator of Node.js built it, and while Node is built with C and C++, Deno is built with the Rust language.
You might be wondering what some of the main differences between Node and Deno are. Well, Rust is a low-level language similar to C and Java. It helps make Deno super fast, and Deno is also more secure than Node.
In this article, we will build a static markdown blog with Deno in less than five minutes. In the end, we'll deploy the markdown blog with Deno deploy.
We'll use Deno's third-party blog package created by Ryan Dahl and another contributor for the blog
With the Deno blog module, you can create a fantastic blazing-fast blog. Then you can set up and deploy the blog with two lines of code. And it takes less than five minutes to configure it.
What is markdown?
Markdown is a lightweight markup language. It helps create consistently formatted text. To start working in markdown, you need an IDE that supports markdown and you'll need to create a file with a .md extension. Markdown typically supports written documents, blogs, and so on.
Some examples of documents written in Markdown are GitHub and npm READMEs, the React.js, and many more.
The Deno blog module (Package) comes with markdown support and lets you create a static blog. This module comes with lots of features, like:
- Markdown support.
- Auto refresh. Any change in a markdown file automatically builds and reloads your website in the browser.
- You can customize the header and add comments and a footer section.
- It supports SEO, SEO markup, and an inbuilt feed (sitemap).
- iFrames support with markdown files.
- It has built-in Preact, TypeScript, and Tailwind CSS support.
- It allows multiple authors
- It has middleware and redirects pathname support
- It comes with server-side Google Analytics support
Here's a demo of the blog we'll build and deploy:
 deno blog demo
All the code is available on GitHub.
Here are the steps we'll follow:
- How to install and setup the blog
- How to understand the folder structure
- How to start the local developer server
- How to add more configuration to the blog.
- How to deploy with Deno
How to Install and Setup the Blog
First, you'll need to install the Deno blog module. The blog module comes with the init command to create a new blog setup. It looks like this:
deno run -r --allow-read --allow-write https://deno.land/x/blog/init.ts my-deno-demo-blog-name
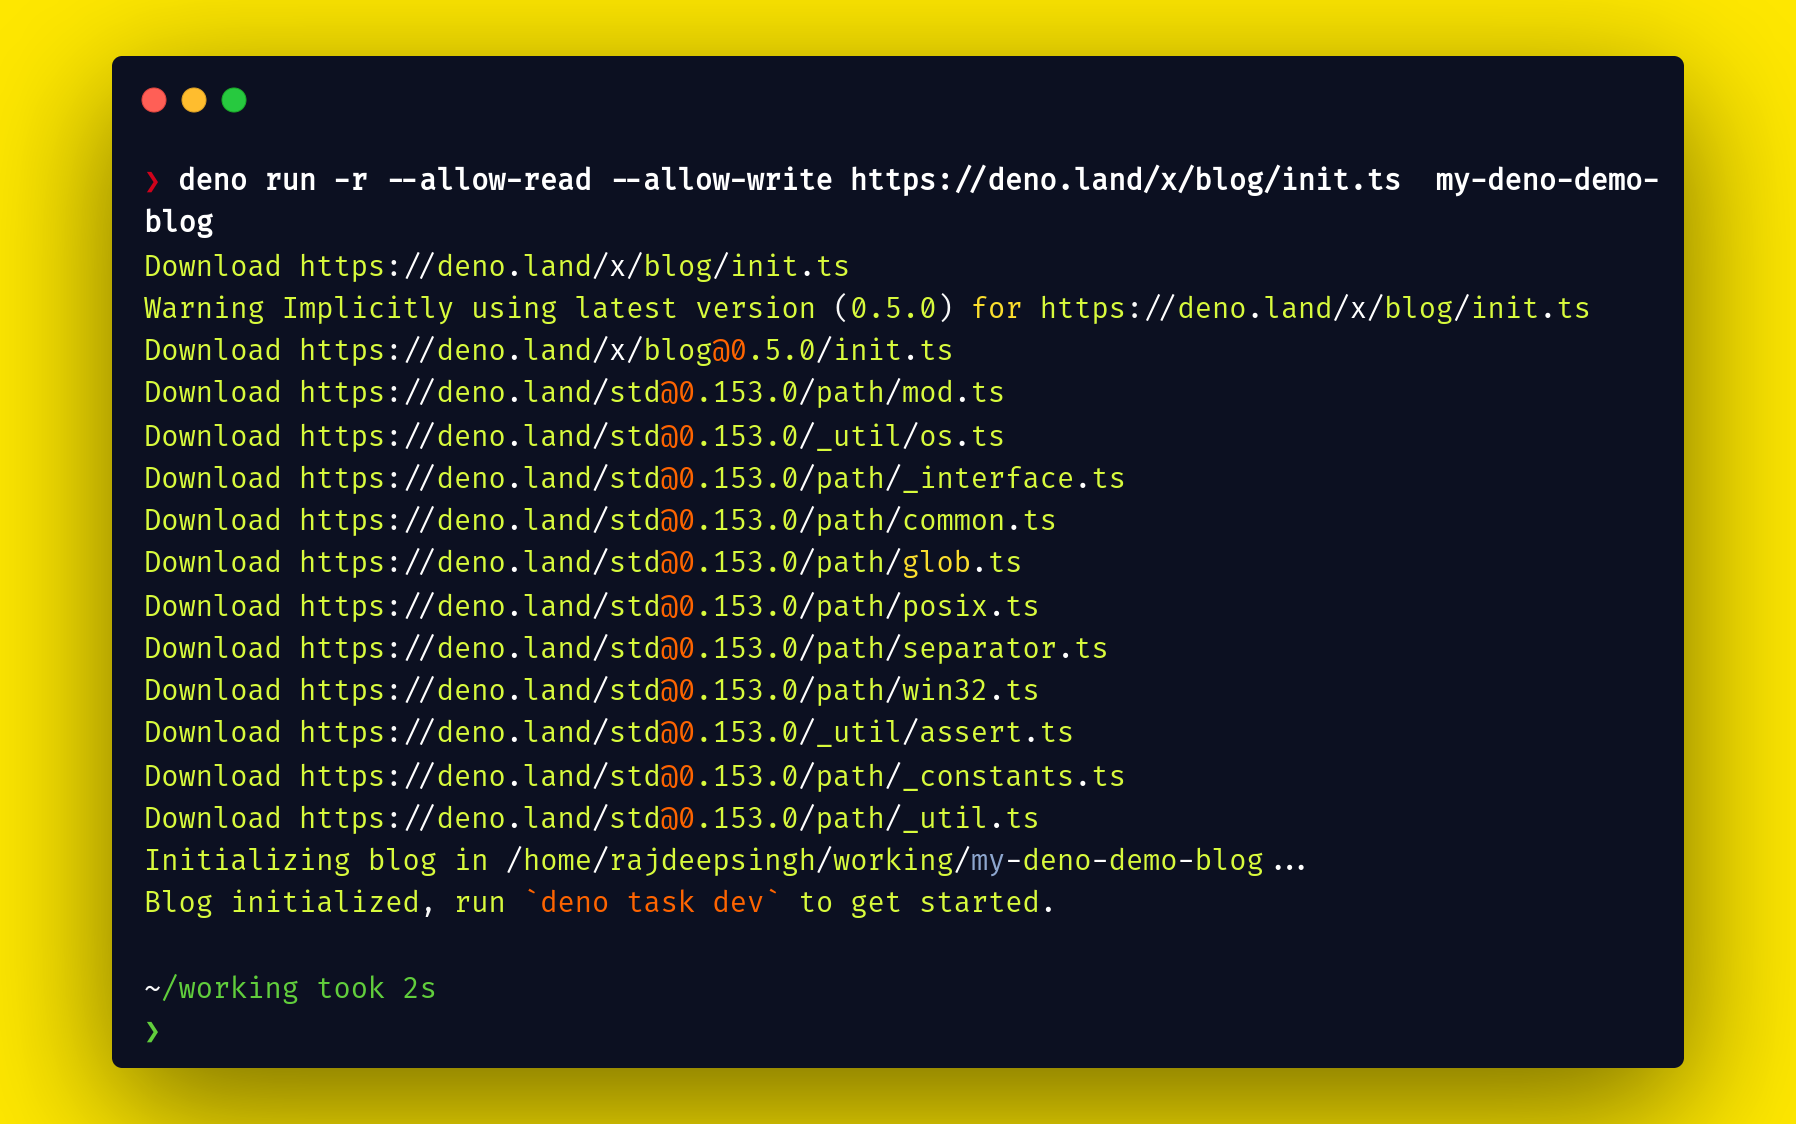 Create a blog setup with the deno blog module
How to Understand the Folder Structure
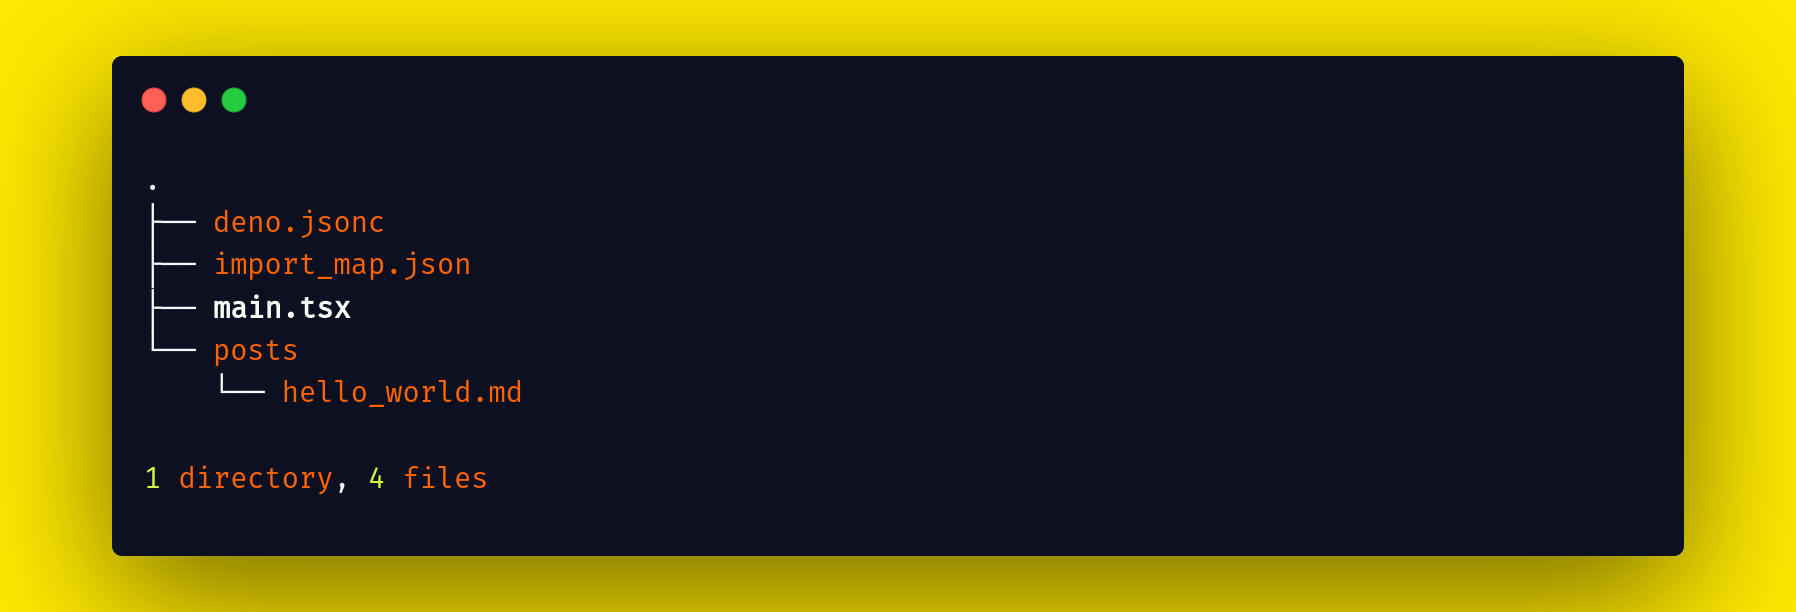
The beauty of Deno is that you only need a few files to start a project. For the markdown blog, you need only four files:
 deno folder structure
Let's go through each file in the above folder structure:
- In the
deno.jsoncfile you add tasks and the importMap file. Tasks are similar to scripts in Node, and in the importMap section, you pass a JSON file that contains all your import packages from Deno. - The
import_map.jsonfile contains imports of all packages which you need to run your project. - The
postsfolder contains all markdown files. - The
main.tsxfile contains all configurations for the blog module.
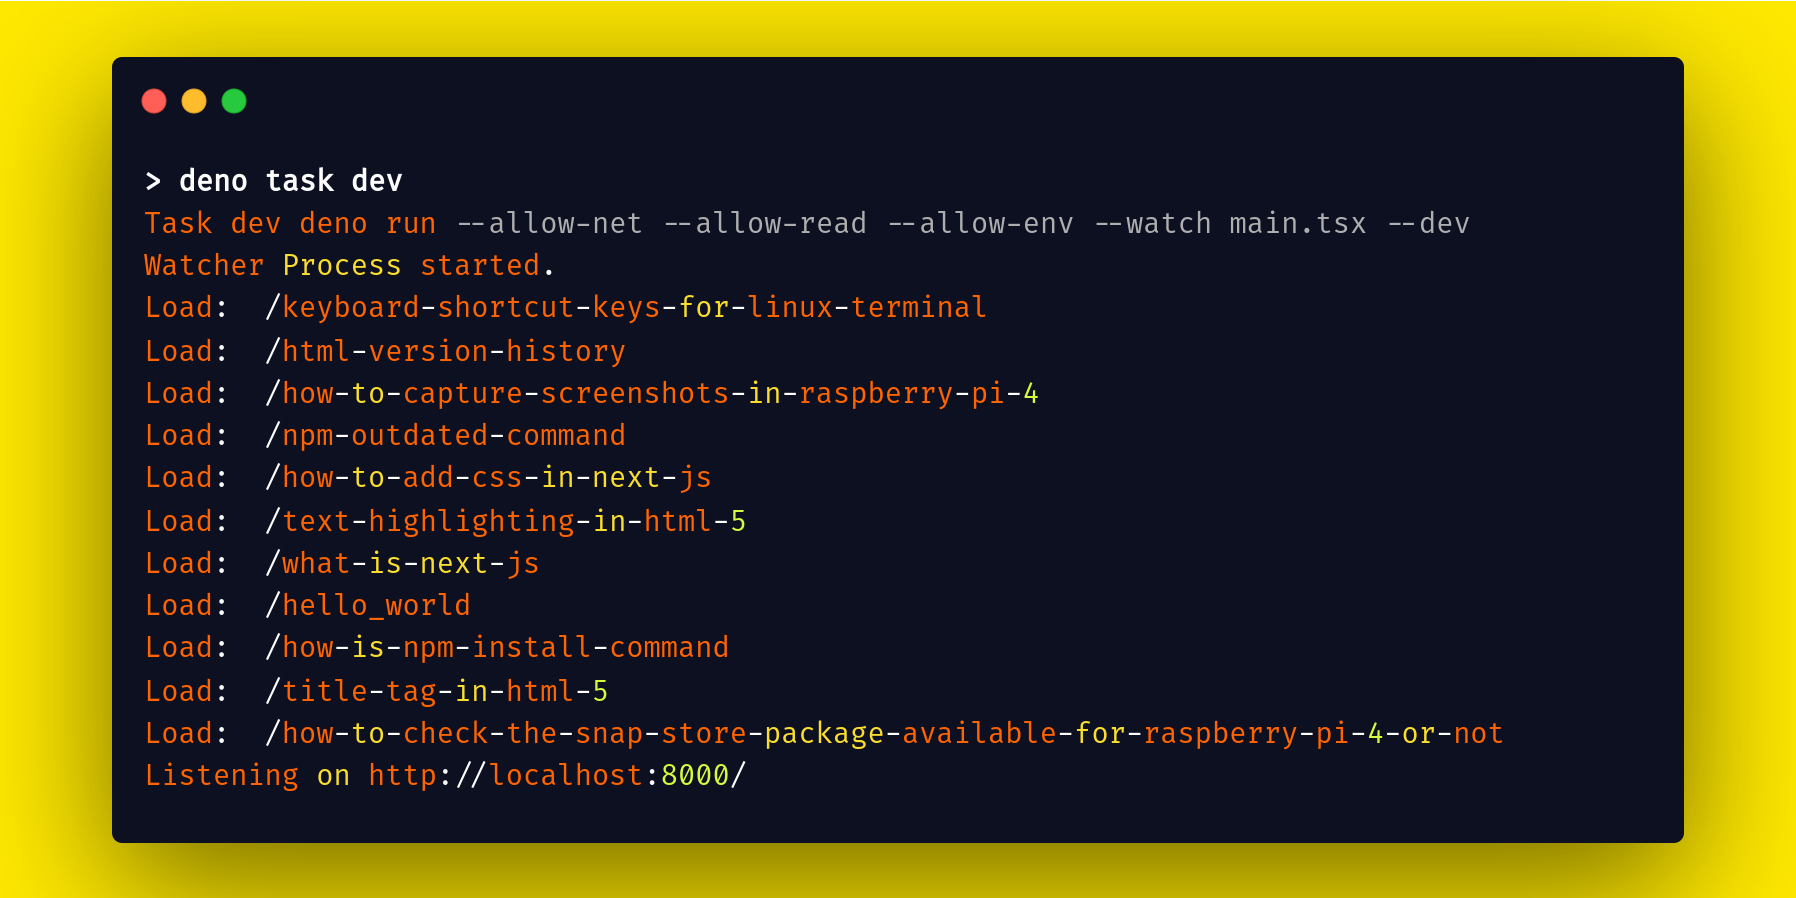
How to Start the Local Developer Server
After installation is complete, run the local development server with the deno task dev command.
 Run deno local development server
How to Add More Configuration to the Blog
The blog module default comes with the following configuration in the main.tsx file. You can easily change blog configurations according to your requirements.
// main.tsx

import blog, { ga, redirects, h } from "blog";

blog({
  title: "My Blog",
  description: "This is my new blog.",
  // header: <header>Your custom header</header>,
  // section: <section>Your custom section</section>,
  // footer: <footer>Your custom footer</footer>,
  avatar: "https://deno-avatar.deno.dev/avatar/blog.svg",
  avatarClass: "rounded-full",
  author: "An author",

  // middlewares: [

    // If you want to set up Google Analytics, paste your GA key here.
    // ga("UA-XXXXXXXX-X"),

    // If you want to provide some redirections, you can specify them here,
    // pathname specified in a key will redirect to pathname in the value.
    // redirects({
    //  "/hello_world.html": "/hello_world",
    // }),

  // ]
});
Custom configuration
 Demo of custom configuration
With custom configuration, you can make your website look however you want – even like the example above. In addition, you can quickly add more custom configurations to your blog.
For example, you can change the default header, footer, title, author, theme, custom style, links, section, and so on. Here's some code to do that:
// main.tsx

/** @jsx h */
import blog, { h } from "blog";
import { Section } from './components/Section.jsx';

blog({
  author: "Rajdeep singh",
  title: "Hello, my name is Rajdeep Singh",
  description: "Nice to meet you",
  avatar:"assets/logos/profile.jpg",
  avatarClass: "rounded-full",
  coverTextColor:"white",
  links: [
    { title: "Email", url: "mailto:officialrajdeepsingh@gmail.com" },
    { title: "GitHub", url: "https://github.com/officialrajdeepsingh" },
    { title: "Twitter", url: "https://twitter.com/Official_R_deep" },
    { title: "Linkedin", url: "https://www.linkedin.com/in/officalrajdeepsingh/" },
  ],
  lang: "en",
  favicon: "favicon.ico",
  section: <Section/>,
  theme:"auto",
  cover:"assets/logos/backgroundbanner.png",
  ogImage: {
    url: "http://localhost:8000/assets/logos/Frame.png",
    twitterCard:  "summary_large_image"
  },
  style:".markdown-body ul, .markdown-body ol { list-style: disc !important;}"
});
Markdown files support various types of frontMatter. The most common and widely used fontMatter types are:
- YAML: YAML is identified by opening and closing
---. - JSON: JSON is identified by '
{' and '}'. - TOML: TOML is identified by opening and closing
+++.
The most common frontMatter is YAML. The YAML frontMatter support markdown file is everywhere. But the Deno blog module only supports yml frontMatter.
 yml front matter example
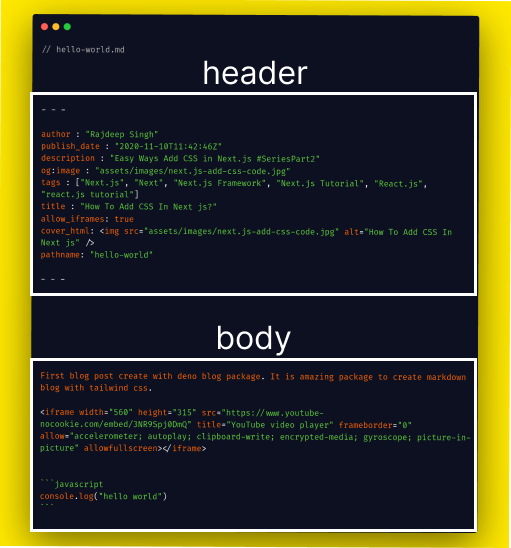
The Markdown file is divided into two sections. The first section is the header (frontMatter), and the second is the body section.
The header section contains all metadata for the article. All the metadata is written inside three dashes (---) both opening and closing – for example, post title, tag, description, publish date, and so on.
Finally, in the body section, you write your article body and explain it.
// hello-world.md

---
author : "Rajdeep Singh"
publish_date : "2020-11-10T11:42:46Z"
description : "Easy Ways Add CSS in Next.js #SeriesPart2"
og:image : "assets/images/next.js-add-css-code.jpg"
tags : ["Next.js", "Next", "Next.js Framework", "Next.js Tutorial", "React.js", "react.js tutorial"]
title : "How To Add CSS In Next js?"
allow_iframes: true
cover_html: <img src="assets/images/next.js-add-css-code.jpg" alt="How To Add CSS In Next js" />
pathname: "hello-world"
---

First blog post created with the Deno blog package. It is an amazing package you can use to create markdown blogs with Tailwind CSS.

<iframe width="560" height="315" src="https://www.youtube-nocookie.com/embed/3NR9Spj0DmQ" title="YouTube video player" frameborder="0" allow="accelerometer; autoplay; clipboard-write; encrypted-media; gyroscope; picture-in-picture" allowfullscreen></iframe>


```javascript
console.log("hello world")
The Deno blog module supports the following YML FrontMatter fields in a markdown file:

1. author (string): The `author` contains the names of the authors. For example, `author : "Rajdeep singh , deno"`
2. publish_date(Date):  The `publish_date` is required for the article.
3. description (string): The `description` is required for the description.
4. og:image(string): The `og:image` is not required. It is used for `<meta property="og:image" content="assets/images/Title-tag-In-HTML-5.jpg">`
5. tags(string[]): The `tags` are just keywords used for SEO. They're not compulsory.
6. title(string): The `title` is required for the heading.
7. allow_iframes( boolean ): the `allow_iframes` allows you to use `iframe` HTML.
8. pathname( string ): pathname is not required. For example, `http://yourdomain.com/hello-world` after your domain `hello-world` is your pathname
9. cover_html(string): The `cover_html` contains the HTML for the blog.
author : "Rajdeep Singh , Rajvinder singh"
publish_date : "2022-03-20T13:09:24Z"
description : "Npm install command help to install package from npmjs.org"
og:image : "assets/images/npm-init-command-1.png"
tags : ["npm-test", "npm-cli", "npm install command"]
title : "What is the npm install command?"
allow_iframes: true
pathname:"/how-is-npm-install-command"
cover_html: 
These are all the supported fields by YML frontMatter for markdown files:
title, author, publish_date, description, og:image, tags, allow_iframes, pathname, cover_html
This is the required field for markdown files:
title ```
Without a title filed, the blog module produces an error Uncaught TypeError: Cannot read properties of undefined (reading 'snippet').
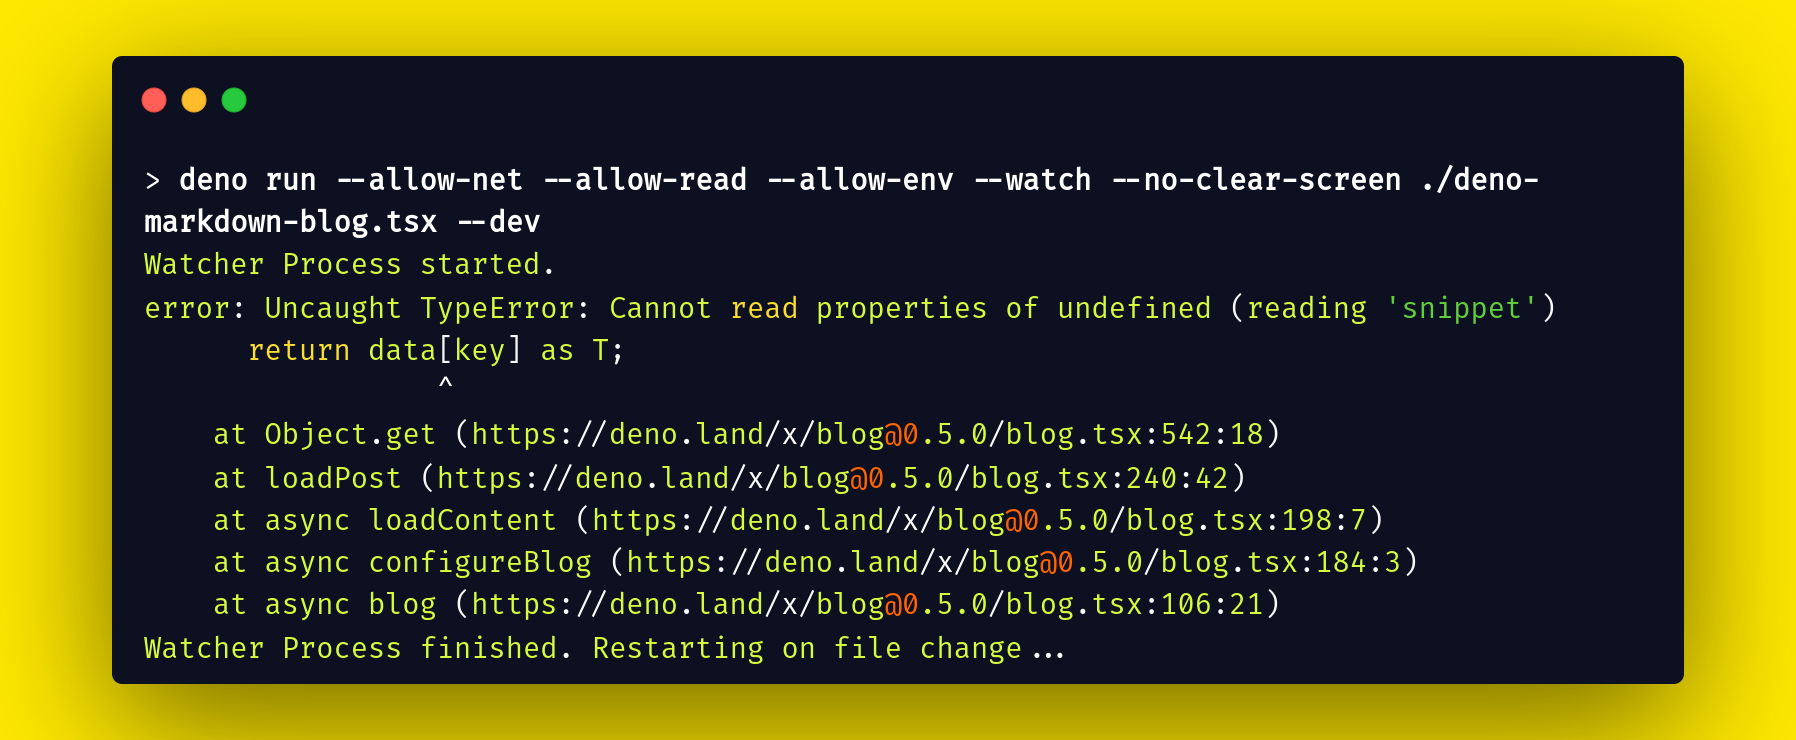 Error: Uncaught TypeError: Cannot read properties of undefined (reading 'snippet')
How to Deploy Your Blog with Deno
The final step is to deploy our static blog in Deno. Currently, the Deno blog module only supports Deno for deployment. But Deno deploy provides a similar interface to Netlify and Vercel. So you can easily understand the dashboard if you've worked with those tools before.
To deploy a new blog on Deno, you need two things. The first is an account on Deno deploy, and the second is a GitHub account. With a GitHub repository to help manage your articles, it is a straightforward process similar to Vercel and Netlify.
Deployment steps:
Here are the steps to deploy your blog with Deno deploy (we'll go through each one in detail below):
- First, login to your account on Deno deploy
- Click to create a new project
- Configure the GitHub repository and environment variables
- Deploy the static blog
Login to your account on Deno deploy
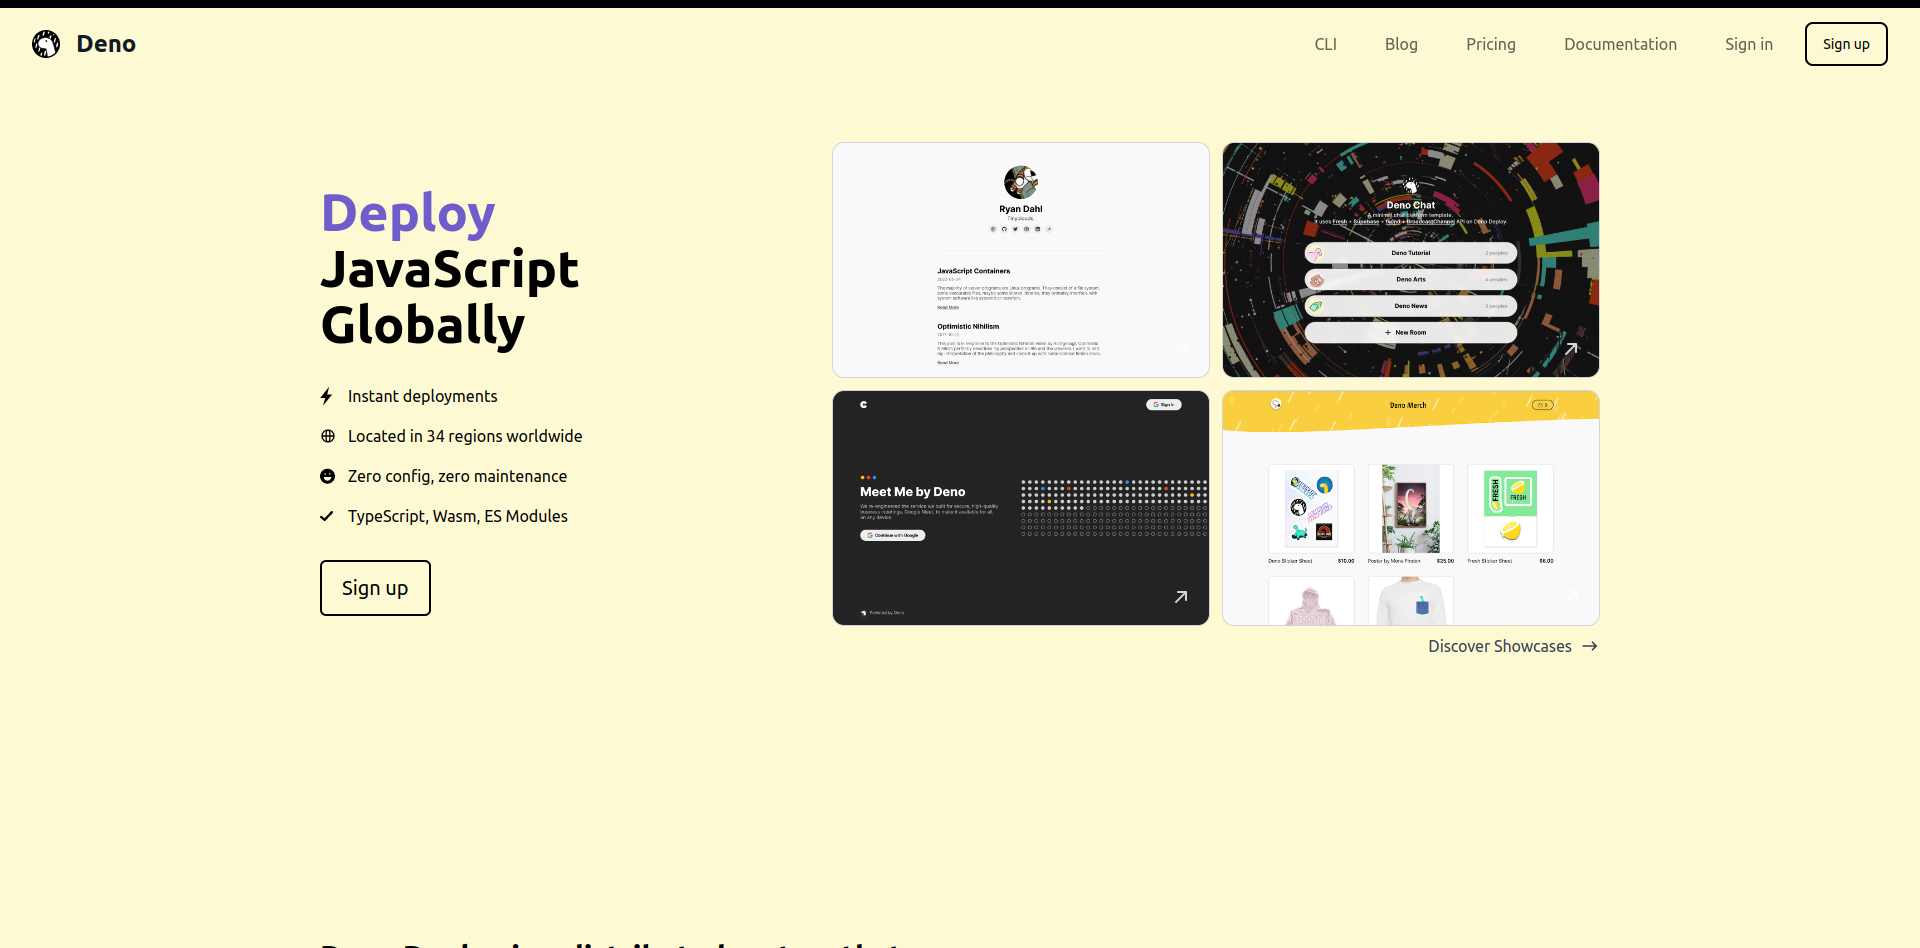
First, go to the Deno deploy website and create a new account if you don't have one already. If you do, then login to your account.
 deno deploy website
Click to create a new project
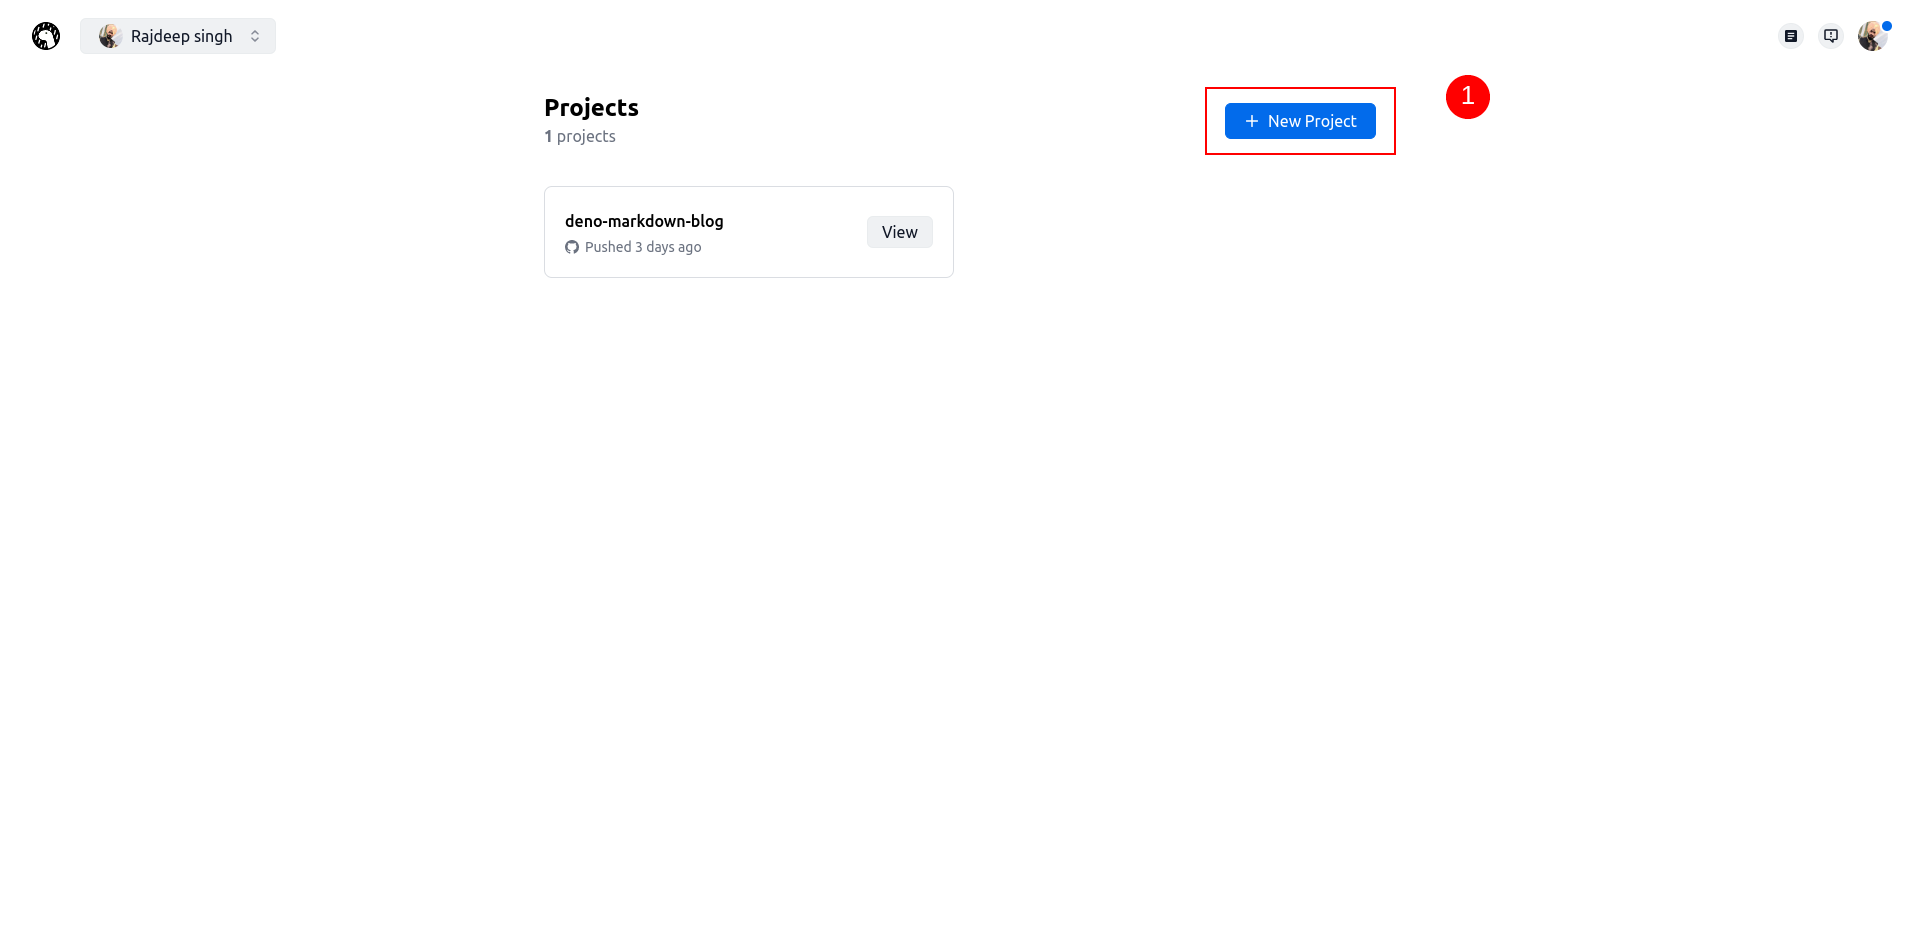
After successfully logging in, you can now access the Deno dashboard and click on the "+ new project" button.
 Create a new project with deno deploy
Configure the GitHub repository and environment variables
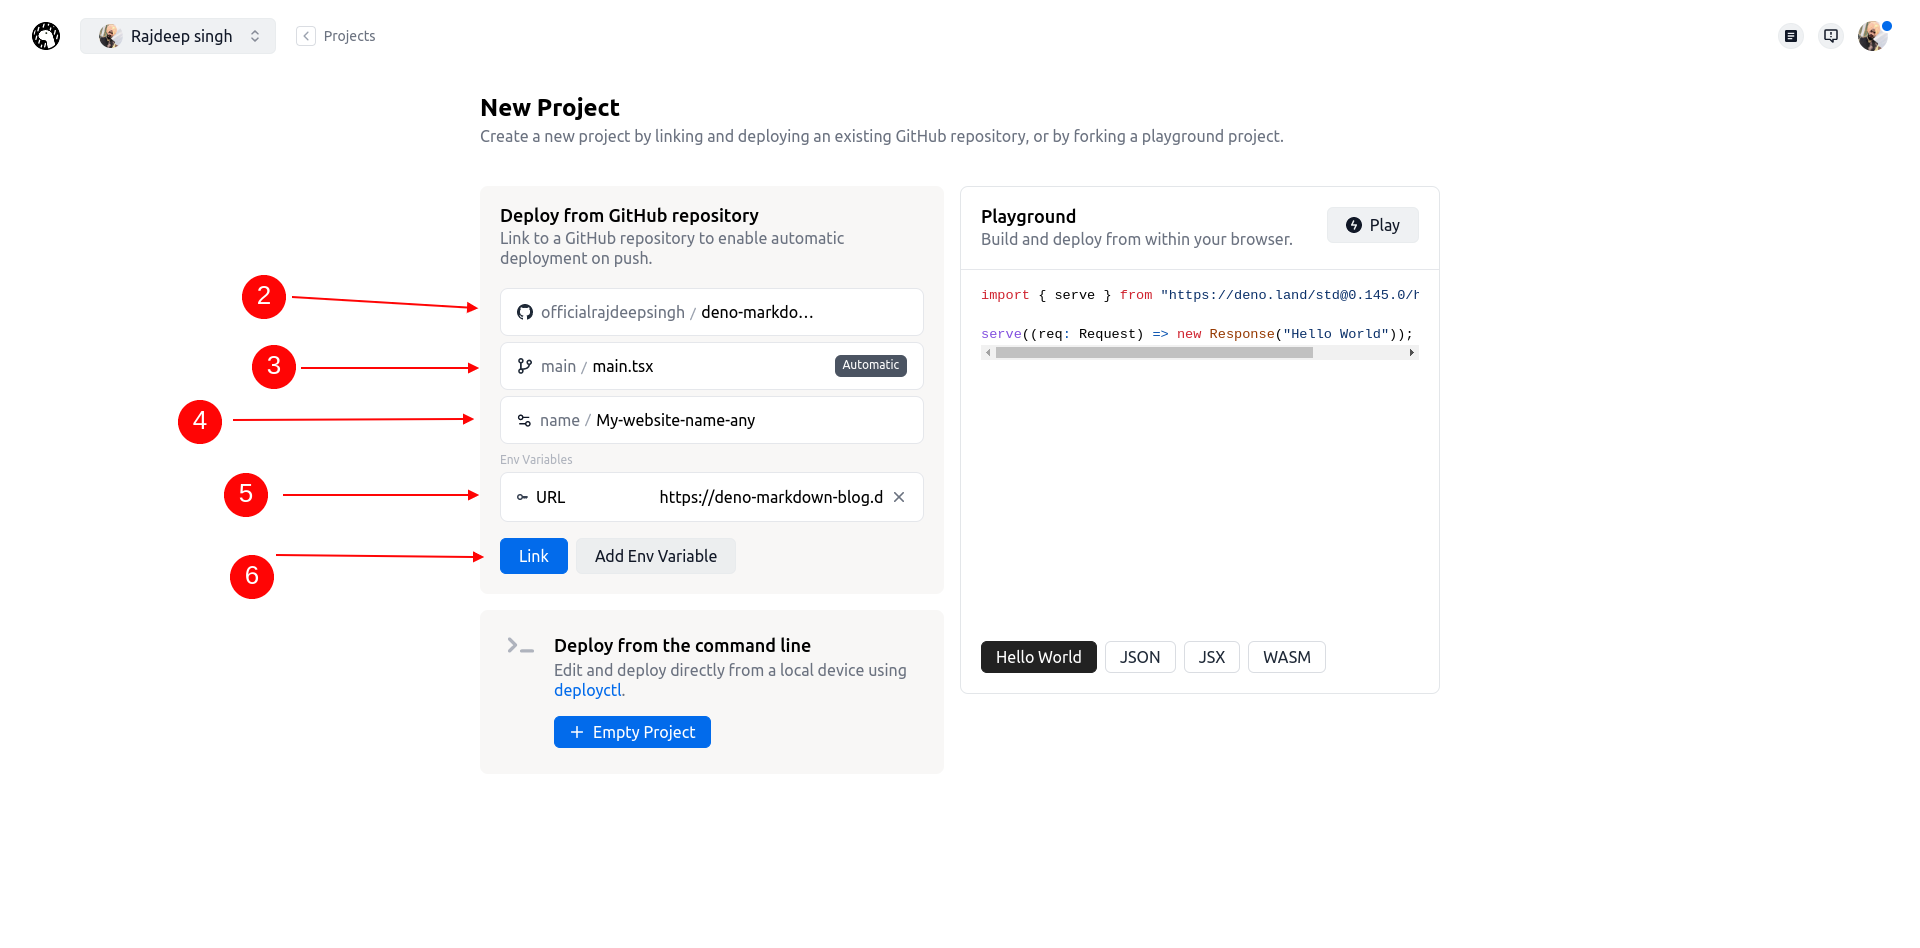
After clicking on the new project button, you'll be redirected to the project configuration page. Your project page will look like the below. Just fill in all the details:
 Fill out your new project configuration and link to GitHub
The first time click the GitHub button. After that, Deno deploys and asks for permission for a GitHub account. After granting all the permissions, your project page looks like this:
 After finishing the information
- After opening the project page, you fill in all the required information.
- Then, in the second step, select the GitHub repository.
- After selecting the GitHub repository, select a branch, then choose
main.tsxfile. - Give any project name, but make sure you name is in lowercase letters – for example, my-new-website. Otherwise, you'll get a capital case error.
- Click on the environment variable and add an environment (if you have one - otherwise, skip it).
And that's it - you've done all the configuration successfully. Now click on the link button.
Deployment is finished
After deployment is finished, you'll see the website dashboard. Click on the view button to view your production-ready website.
 Your website dashboard with deno looks like this after successful website deployment.
Here's a tip to help you manage all your markdown files and speed up your written work. The VS Code code editor has a free, open-source FrontMatter VS Code extension. It's a great tool to manage all your markdown files inside VS Code with the FrontMatter dashboard.
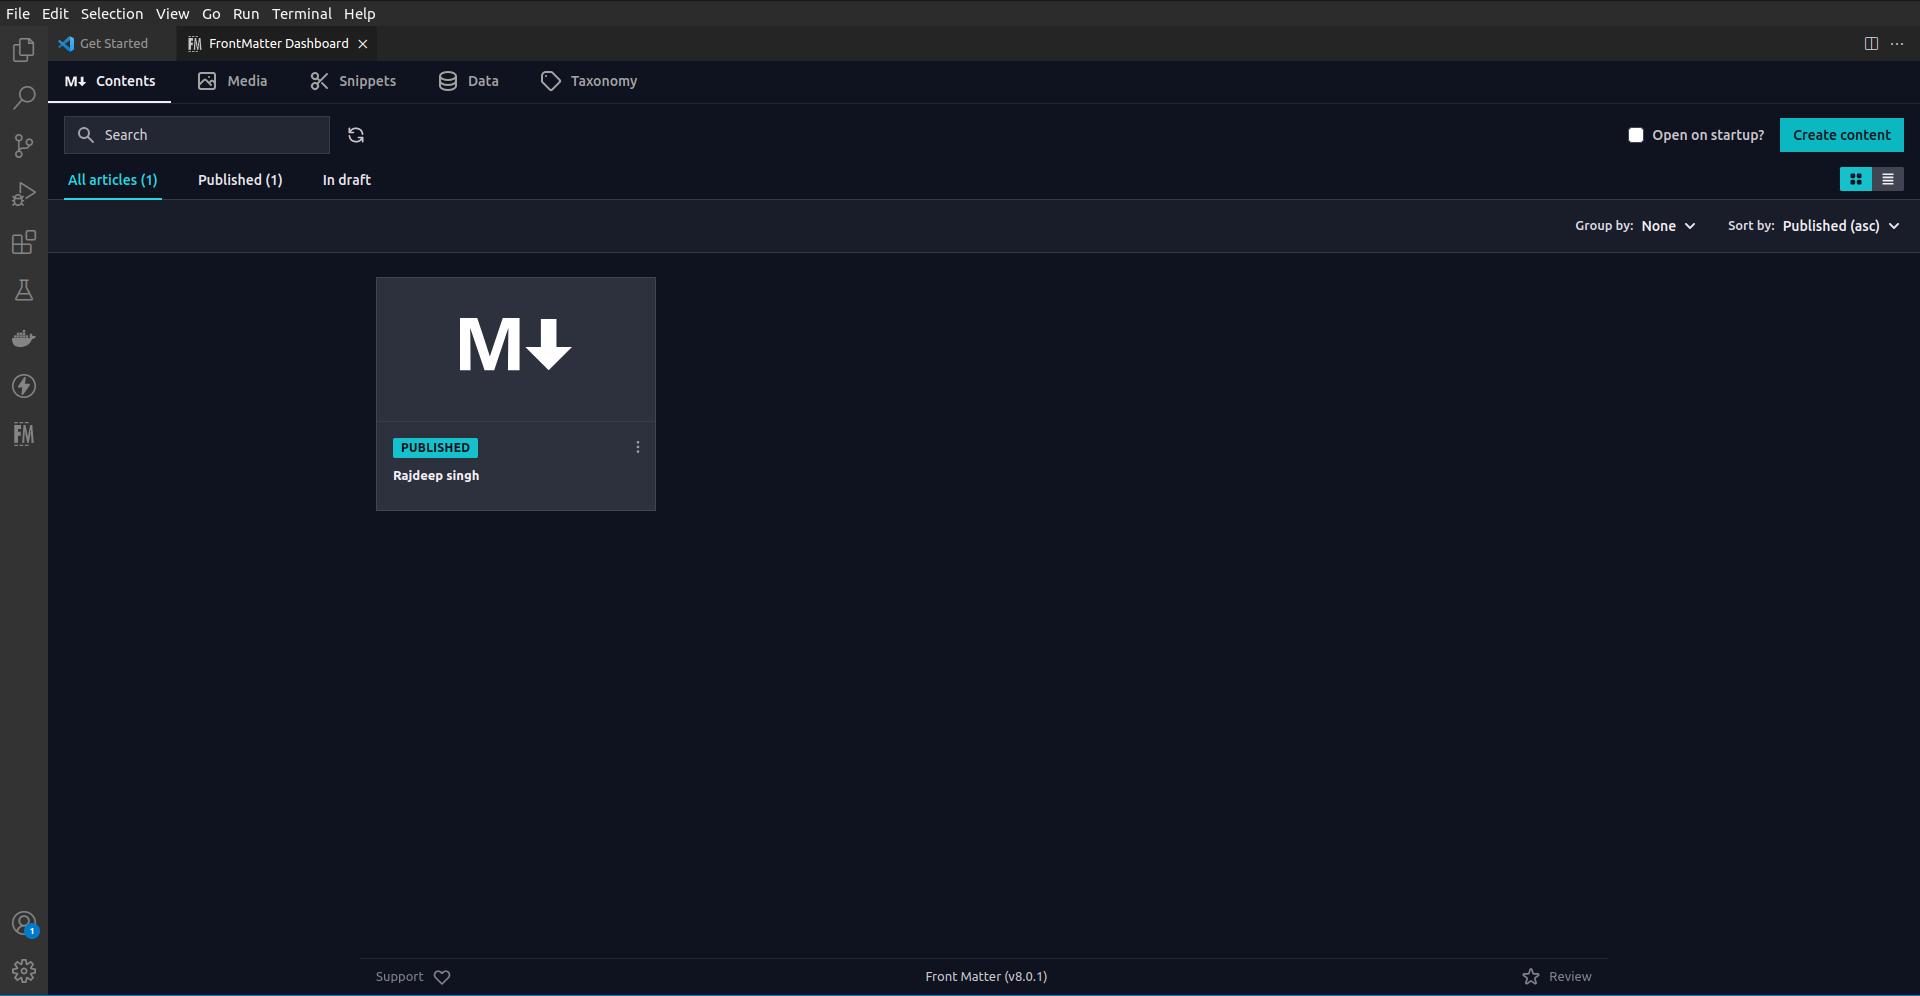 Manage markdown files with VS Code extension
Conclusion
The Deno blog module is an excellent library for creating a personal blog in five minutes and deploying it with Deno. Deno deployment is speedy. It takes less than ten seconds.
I think the Deno blog module is best for personal use because you do not need to customize many things. You only customize the header, footer, and various sections.
Thank you for reading!
References to help you setup your blog:
- https://deno.land/
- https://deno.com/deploy
- https://deno.land/x/blog
- https://deno.land/x/dotenv
- https://frontmatter.codes/