
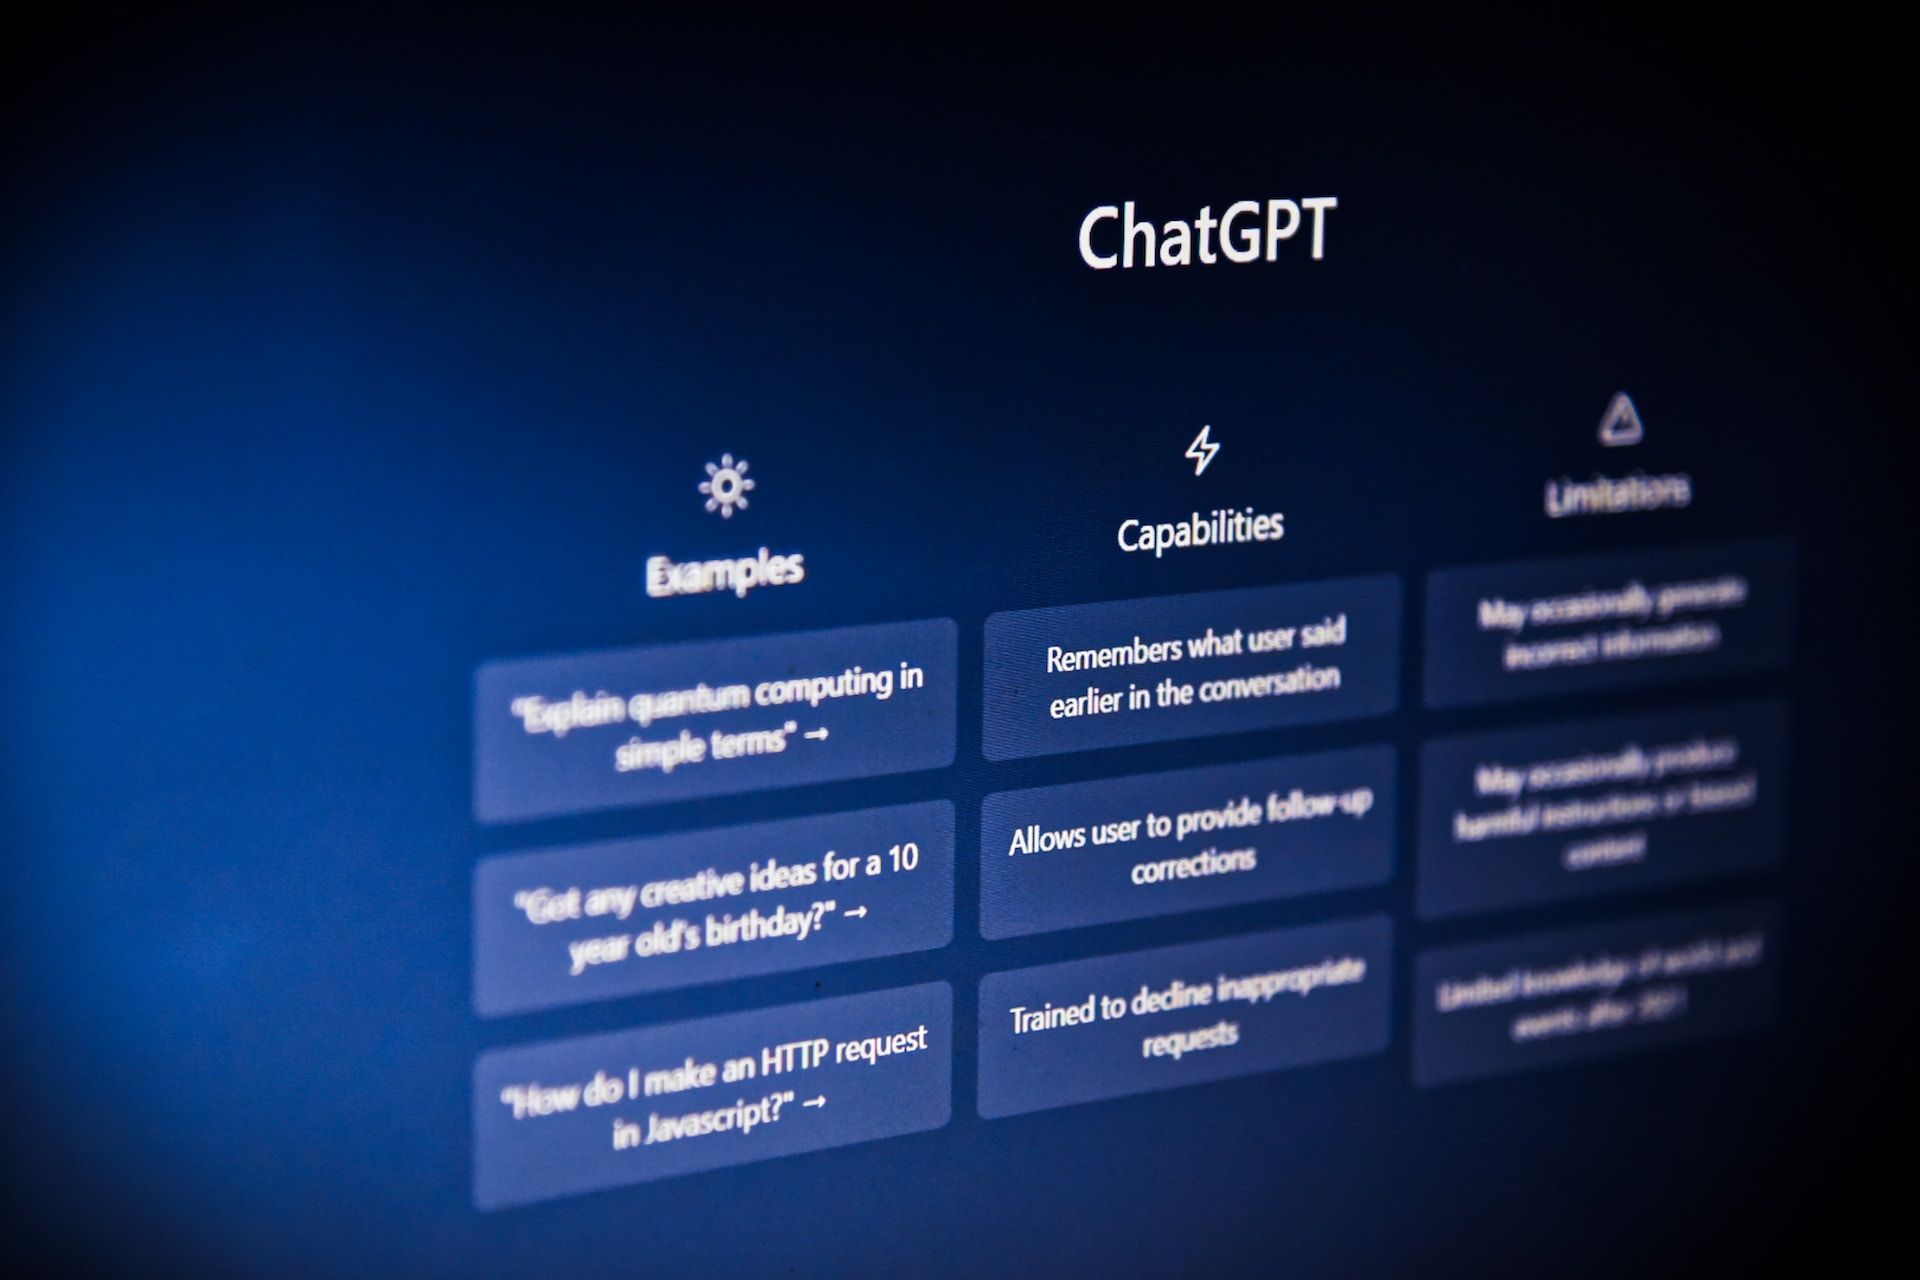
OpenAI's ChatGPT is a great tool for getting information as quickly as possible for your coding projects. Even better, you can now integrate the artificial intelligence-powered chat capability of OpenAI's models directly into your application.
Recently, the OpenAI team expanded their API by giving developers access to their pretrained AI models (DALL-E, Codex, and GPT-3). This means that you can send a question to the API, get the response, and use the data in your application, all within seconds.
In this article, you'll learn how to create an OpenAI account, retrieve your API keys and query OpenAI's GPT-3 model from your Node.js application. Let's dive right in!
How to Sign Up for a ChatGPT Account
The first thing you need to do is sign up for an OpenAI account if you don't already have one. Once you're in, you'll be redirected back to the homepage.
At the top right corner of the page, click on your profile image, then click on Manage Account. On the sidebar, click API Keys and then click the create new secret key button to generate a secret key:
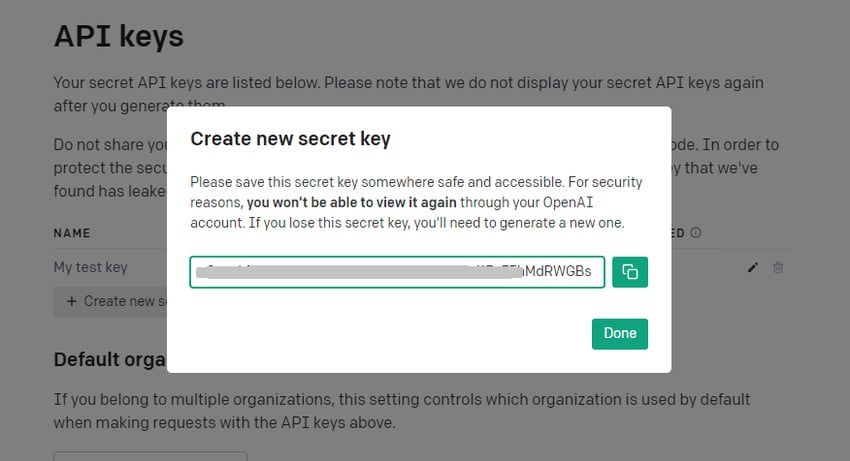
Screenshot of secret key
Copy the secret key and paste it somewhere safe and accessible because you'll need it later to connect your application with the OpenAI API.
With the key safely stored, the next step is to create a Node.js project and spin up an Express server on top of it. Let's start with the installation and basic setup.
How to Set up the Project
To follow along with this project, you need to have Node.js and npm installed on your local machine. The latest version of Node.js comes with npm, and it's available on the official Node.js website.
Start by creating an empty directory in your computer. Next, launch the command prompt and cd into the folder you just created:
cd path/to/project
Once pointed to the directory, run the following command to create a Node project:
npm init -y
Next, run the following command to install express and openai libraries from npm:
npm i express openai
The next step is to create the server.
How to Create an Express Server
For now, this server will only serve the static files. We'll implement the chat API towards the end of this article.
Start by creating a file named server.js inside the root folder of your project. Next, open the file with a code editor and add the following code:
const express =  require('express')
const app = express()

app.use(express.static('public'))

app.listen(5000, ()=> {
    console.log("Server is active")
})
With this code, you've created a web server that serves static files (i.e. HTML, CSS) from the /public folder.
Next, we'll create the HTML file that renders the chat interface on the web page, as well as the stylesheet file and the JavaScript file.
How to Create the Chatbot
Start by creating a folder named public inside the root of your project. Then inside the /public directory, create a file named index.html.
Open the file with a text editor and add the following markup in the file:
<!DOCTYPE html>
<html lang="en">
<head>
    <meta charset="UTF-8">
    <meta name="viewport" content="width=device-width, initial-scale=1.0">
    <title>Document</title>
</head>
<body>
    <div id="chat-area">

    </div>

    <div class="submit-form">
        <div class="input">
            <textarea name="input" id="input" cols="40" rows="3"></textarea>
            <button id="btn">Submit</button>
        </div>
    </div>

</body>
</html>
As you can see above, the page comprises of the chat area (where the messages are displayed) and the submit area (comprising the text area and the submit button).
To style the page, add the following stylesheet between the opening and closing <head> tags in your /public/index.html file:
    <style>
        #chat-area {
            margin: 0 auto;
            width: 80%;
            height: 500px;
            overflow:scroll;
            border: 1px solid gray;
            border-radius: 4px;
        }

        .input {
            width: 100%;
        }

        .submit-area{
            justify-content: center;
            display: flex;
            margin: 20px auto;
            width: 80%;
        }

        textarea {
            width: 100%;
        }

        .box {
            width: 96%;
            margin: 0 auto;
            padding: 10px 10px;
            background-color: #C4DBFE;
            margin: 10px auto;
        }

        .answer {
            background-color: aquamarine;
        }

        button {
            background-color: #004089;
            color: white;
            padding: 10px 10px;
            border-radius: 5px;
            border: none;
        }
    </style>
If you save the file and check the browser, you should find your page like this:

Screenshot of the page
The chat area is empty for now because we haven't submitted any messages yet. To do that, we need to bring in JavaScript.
How to Add Front-end JavaScript
When the user inputs a message in the text area and clicks on the submit button, we'll send the message to the backend, get the response from the API and display it on the page.
Start by adding an empty script element within the <body> tags in index.html:
<script>

</script>
Inside the script tags, we're to call the getResponse() function whenever the user clicks on the submit button:
const btn = document.getElementById("btn")

btn.addEventListener('click', getResponse)
The getResponse function essentially gets the user's question, sends it to our Node.js backend to fetch the answer, and displays the response on the page.
Inside the function, we start by accessing the prompt submitted by the user:
async function getResponse() {
  var inputText = document.getElementById("input").value
  const parentDiv = document.getElementById("chat-area")

  // The remaining code goes inside this function
}
If the value of the text area is empty, we simply return nothing:
if(inputText === '') { return }
Otherwise, we first add the question to the chat area in the UI:
const question = document.createElement('div')
question.innerHTML = inputText
question.classList.add("box")
parentDiv.appendChild(question)
Next, we reset the text area so it's blank:
document.getElementById("input").value = ''
Then we send the question to our server so that the server can send it to the OpenAI API and send us back a response:
let res = await fetch('http://localhost:5000/chat',
  {
    method: 'POST',
    headers: {
      "Content-Type": 'application/json'
    },
    body: JSON.stringify({
      question: inputText
    })
  }
)

const data = await res.json()
If the response has a message property, we add the message content to the chat area in the UI:
if(data.message) {
  const answer = document.createElement('div')
  answer.innerHTML = data.message
  answer.classList.add("box", "answer")
  parentDiv.appendChild(answer)
}
Now the frontend is all set. Let's move our focus back to the backend.
How to Send the API Response to the Client
Our backend will serve as the middleman between the frontend and OpenAI's API. Basically, we'll get the prompt from the client, send it to the API, and send the response back to the client.
In server.js, import these at the top of the file:
const { OpenAI } = require("openai")
Next, create an instance of the openai connection using the API key you generated earlier:
const openai = new OpenAI({
    // replace your-api-key with your API key from ChatGPT
    apiKey: 'your-api-key'
})
Finally, create the route:
app.post('/chat', async (req, res)=> {
  try {
    const resp = await openai.chat.completions.create({
      model: "gpt-3.5-turbo",
        messages: [
          { role: "user", content: req.body.question}
        ]
    })

    res.status(200).json({message: resp.choices[0].message.content})
  } catch(e) {
      res.status(400).json({message: e.message})
  }
})
Save the file changes, then go to your browser and submit a question. You should get back a response after a few seconds.
You can ask as many questions as you want, but you'll have to wait for a response to each question from the backend.
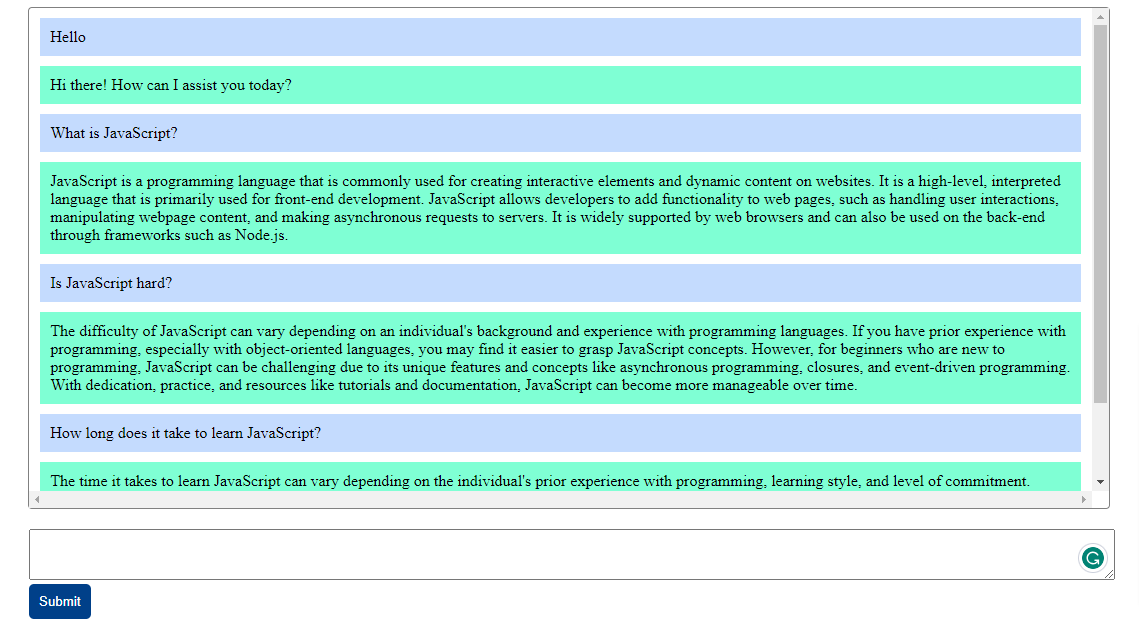
Screenshot of the questions and corresponding answers from ChatGPT
If any error is encountered, check the console in your browser to inspect the error message.
Conclusion
OpenAI's API offers you a way to include AI-powered chatbots in your application using JavaScript or even HTMX (if you're knowledgeable of HTML but not JavaScript).