By Neo Ighodaro
Here is a screen recording of what our application will be able to do once we are done building it:
Requirements we will need to build our application
Before we get started, we need to have a few things in place first. Some of the requirements are as follows:
- Knowledge of PHP & the Laravel framework.
- Knowledge of JavaScript (ES6).
- Knowledge of Vue.js.
- PHP 7.0+ installed locally on your machine.
- Laravel CLI installed locally.
- Composer installed locally.
- NPM and Node.js installed locally.
- A Pusher application. Create one on pusher.com.
Once you have verified that you have the above requirements, we can start creating our application.
Setting up our prototype feedback application
Let us get started with setting up our application. Create a new Laravel application using the command below:
$ laravel new your_application_name
When the installation is complete, cd to the application directory. Open the .env file and let us make a couple of changes in the file.
Setting up our Database and Migrations
The first thing to do is set up our database and create its migrations. Let’s start by setting up the database. Replace the configuration items below:
DB_CONNECTION=mysqlDB_HOST=127.0.0.1DB_PORT=3306DB_DATABASE=homesteadDB_USERNAME=homesteadDB_PASSWORD=secret
with:
DB_CONNECTION=sqlite
This will now make the application use SQLite as its database choice. In your terminal, run the command below to create a new SQLite database:
$ touch database/database.sqlite
Now let’s create some migrations which will create the required tables to the database. In your terminal, run the following command to create the migrations we will need:
$ php artisan make:model Photo --migration --controller$ php artisan make:model PhotoComment --migration
The above command will create a model and then the --migration and --controller flags will instruct it to create a migration and a controller alongside the model.
For now, we are interested in the Model and the migration. Open the two migration files created in the ./database/migrations directory. First, we’ll edit the CreatePhotosTable class. Replace the content of the up method with the following below:
public function up(){ Schema::create('photos', function (Blueprint $table) { $table->increments('id'); $table->string('url')->unique(); $table->string('image')->unique(); $table->timestamps(); });}
This will create the photos table when the migrations are run using the artisan command. It will also create new columns inside the table, as specified above.
Open the second migration class, CreatePhotoCommentsTable, and replace the up method with the contents below:
public function up(){ Schema::create('photo_comments', function (Blueprint $table) { $table->increments('id'); $table->unsignedInteger('photo_id'); $table->text('comment'); $table->integer('top')->default(0); $table->integer('left')->default(0); $table->timestamps(); $table->foreign('photo_id')->references('id')->on('photos'); });}
This will create the table photo_comments when the migration is run, and will also create a foreign key to the photos table.
Now go to your terminal and run the command below to run the migrations:
$ php artisan migrate
This should now create the database tables.
Setting up the models
Now that we have run our migrations, we need to make some changes to our model file so that it can work better with the table.
Open the Photo model and replace the contents with the following:
<?phpnamespace App;use Illuminate\Database\Eloquent\Model;class Photo extends Model{ protected $with = ['comments']; protected $fillable = ['url', 'image']; public function comments() { return $this->hasMany(PhotoComment::class); }}
In the above, we have added the fillable property which stops us from having mass assignment exceptions when trying to update those columns using Photo::create. We also set the with property which just eager loads the comments relationship.
We have defined an Eloquent relationship comments that just says the Photo has many PhotoComments.
Open the PhotoComment model and replace the contents with the following:
<?phpnamespace App;use Illuminate\Database\Eloquent\Model;class PhotoComment extends Model{ protected $fillable = ['photo_id', 'comment', 'top', 'left']; protected $appends = ['position']; public function getPositionAttribute() { return [ 'top' => $this->attributes['top'], 'left' => $this->attributes['left'] ]; }}
Just like the Photo model, we have defined the fillable property. We also use Eloquent accessors to configure a new property called position which is then appended because we specified that in the appends property.
Setting up the frontend for our application
The next thing we want to do is set up the front end of our application. Let’s start by installing a few NPM packages that we will need in the application. In your Terminal app, run the command below to install the necessary packages:
$ npm install --save laravel-echo pusher-js vue2-dropzone@^2.0.0$ npm install
This will install Laravel Echo, the Pusher JS SDK, and vue-dropzone. We will need these packages to handle realtime events later.
When the packages have been installed successfully, we can now start adding some HTML and JavaScript.
Open the ./routes/web.php file and let’s add some routes. Replace the contents of the file with the contents below:
<?phpRoute::post('/feedback/{image_url}/comment', 'PhotoController@comment');Route::get('/feedback/{image_url}', 'PhotoController@show');Route::post('/upload', 'PhotoController@upload');Route::view('/', 'welcome');
In the code above, we have defined a few routes. The first one will be handling POSTed feedback. The second route will display the image that is to receive feedback. The third route will handle uploads, and the final route will display the homepage.
Now open the ./resources/views/welcome.blade.php file and in there replace the contents with the following HTML code:
<!doctype html><html lang="{{ app()->getLocale() }}"><head> <meta charset="utf-8"> <meta http-equiv="X-UA-Compatible" content="IE=edge"> <meta name="viewport" content="width=device-width, initial-scale=1"> <meta name="csrf-token" content="{{csrf_token()}}"> <title>Upload to get Feedback</title> <link href="https://fonts.googleapis.com/css?family=Roboto:400,600" rel="stylesheet" type="text/css"> <link href="https://fonts.googleapis.com/icon?family=Material+Icons" rel="stylesheet"> <link rel="stylesheet" href="{{ asset('css/app.css') }}"></head><body> <div id="app"> <div class="flex-center position-ref full-height"> <div class="content"> <uploadarea></uploadarea> </div> </div> </div> <script src="js/app.js"></script></body></html>
This is a simple HTML document, and if you look closely, you will see a reference to an uploadarea tag which does not exist in HTML but is instead a Vue component.
Open the ./resources/assets/sass/app.scss file and paste the following code below the import statements:
html, body { background-color: #fff; color: #636b6f; font-family: 'Roboto', sans-serif; font-weight: 100; height: 100vh; margin: 0;}.full-height { height: 100vh;}.flex-center { align-items: center; display: flex; justify-content: center;}.position-ref { position: relative;}.content { text-align: center;}.m-b-md { margin-bottom: 30px;}.dropzone.dz-clickable { width: 100vw; height: 100vh; .dz-message { span { font-size: 19px; font-weight: 600; } }}#canvas { width: 90%; margin: 0 auto; img { width: 100%; }}.modal { text-align: center; padding: 0!important; z-index: 9999; }.modal-backdrop.in { opacity: 0.8; filter: alpha(opacity=80);}.modal:before { content: ''; display: inline-block; height: 100%; vertical-align: middle; margin-right: -4px;}.modal-dialog { display: inline-block; text-align: left; vertical-align: middle;}.image-hotspot { position: relative; > img { display: block; height: auto; transition: all .5s; }}.hotspot-point { z-index: 2; position: absolute; display: block; span { position: relative; display: flex; justify-content: center; align-items: center; width: 1.8em; height: 1.8em; background: #cf00f1; border-radius: 50%; animation: pulse 3s ease infinite; transition: background .3s; box-shadow: 0 2px 10px rgba(#000, .2); &:after { content: attr(data-price); position: absolute; bottom: 130%; left: 50%; color: white; text-shadow: 0 1px black; font-weight: 600; font-size: 1.2em; opacity: 0; transform: translate(-50%, 10%) scale(.5); transition: all .25s; } } svg { opacity: 0; color: #cf00f1; font-size: 1.4em; transition: opacity .2s; } &:before, &:after { content: ''; position: absolute; top: 0; left: 0; width: 100%; height: 100%; border-radius: 50%; pointer-events: none; } &:before { z-index: -1; border: .15em solid rgba(#fff, .9); opacity: 0; transform: scale(2); transition: transform .25s, opacity .2s; } &:after { z-index: -2; background:#fff; animation: wave 3s linear infinite; } &:hover{ span { animation: none; background: #fff; &:after { opacity: 1; transform: translate(-50%, 0) scale(1); } } svg { opacity: 1; } &:before { opacity: 1; transform: scale(1.5); animation: borderColor 2s linear infinite; } &:after { animation: none; opacity: 0; } }}@-webkit-keyframes pulse{ 0%, 100% { transform: scale(1); } 50% { transform: scale(1.1); }}@keyframes pulse{ 0%, 100% { transform: scale(1); } 50% { transform: scale(1.1); }}.popover { min-width: 250px;}
Save the file and exit. Now let’s move on to creating our Vue components.
Using Vue to create the functionalities of our prototype feedback app
Open the ./resources/assets/js/app.js file and in there we’ll create our Vue component. In this file find the line below:
Vue.component('example', require('./components/Example.vue'));
and replace it with:
Vue.component('uploadarea', require('./components/UploadArea.vue'));Vue.component('feedback', require('./components/FeedbackCanvas.vue'));
Now let’s create our first Vue component. In the ./resources/assets/js/components directory create a file called UploadArea.vue. In the new file paste in the following:
<template> <dropzone ref="dropzone" id="dropzone" url="/upload" accepted-file-types="image/*" v-on:vdropzone-success="showImagePage" :headers="csrfHeader" class="flex-center position-ref full-height"> <input type="hidden" name="csrf-token" :value="csrfToken"> </dropzone></template><script>import Dropzone from 'vue2-dropzone';const LARAVEL_TOKEN = document.head.querySelector('meta[name="csrf-token"]').contentexport default { components: { Dropzone }, data() { return { csrfToken: LARAVEL_TOKEN, csrfHeader: { 'X-CSRF-TOKEN': LARAVEL_TOKEN } } }, methods: { showImagePage: (file, response) => { if (response.url) { return window.location = `/feedback/${response.url}`; } } }, mounted () { this.$refs.dropzone.dropzone.on('addedfile', function (file) { if (this.files.length > 1) { this.removeFile(this.files[0]) } }) }}</script>
In the template section, we are simply using the Vue dropzone package to define an area through which files can be uploaded. You can view the documentation here.
In the script section, we get the Laravel CSRF token from the header of the page and import the Dropzone component into our current Vue component.
In the methods property, we define a showImagePage method that just redirects the user to the image page after the image has been successfully uploaded. In the mounted method, we limit the dropzone file to allow one file upload at a time.
Let us create our next Vue component. In the ./resources/assets/js/components directory, create a new file called FeedbackCanvas.vue and paste in the following:
<template> <div class="feedback-area"> <div class="content"> <div id="canvas"> <div class="image-hotspot" id="imghotspot"> <transition-group name="hotspots"> <a href="#" class="hotspot-point" v-for="(comment, index) in image.comments" v-bind:style="{ left: comment.position.left+'%', top: comment.position.top+'%' }" :key="index" @click.prevent data-placement="top" data-toggle="popover" :data-content="comment.comment" > <span> <svg class="icon icon-close" viewBox="0 0 24 24"> <path d="M18.984 12.984h-6v6h-1.969v-6h-6v-1.969h6v-6h1.969v6h6v1.969z"></path> </svg> </span> </a> </transition-group> <img ref="img" :src="'/storage/'+image.image" id="loaded-img" @click="addCommentPoint"> </div> </div> </div> <add-comment-modal :image="image"></add-comment-modal> </div></template>
We have defined the template for our Vue component. This is the area where the image will be displayed and where feedback will be given.
Let’s break some parts of it down a little. The a tag has a bunch of attributes set to it. The v-for loops through each comment/feedback the image has.
The v-bind:style applies a style attribute to the a tag using the left and top properties of the comment/feedback. We also have the :data-content, data-toggle and data-placement which Bootstrap needs for its Popovers.
The img tag has the @click event that fires the function addCommentPoint when an area of the image is clicked. And finally, there’s a Vue component add-comment-modal that accepts a property image. This component will display a form so anyone can leave a comment.
In this same file, after the closing template tag, paste in the following code:
<script> let AddCommentModal = require('./AddCommentModal.vue') export default { props: ['photo'], components: { AddCommentModal }, data() { return { image: this.photo } }, mounted() { let vm = this Echo.channel(`feedback-${this.photo.id}`) .listen('.added', (e) => { // Look through the comments and if no comment matches the // existing comments, add it if (vm.image.comments.filter((comment) => comment.id === e.comment.id).length === 0) { vm.image.comments.push(e.comment) $(document).ready(() => $('[data-toggle="popover"]').popover()) } }) }, created() { /** Activate popovers */ $(document).ready(() => $('[data-toggle="popover"]').popover()); /** Calculates the coordinates of the click point */ this.calculateClickCordinates = function (evt) { let rect = evt.target.getBoundingClientRect() return { left: Math.floor((evt.clientX - rect.left - 7) * 100 / this.$refs.img.width), top: Math.floor((evt.clientY - rect.top - 7) * 100 / this.$refs.img.height) } } /** Removes comments that have not been saved */ this.removeUnsavedComments = function () { var i = this.image.comments.length while (i--) { if ( ! this.image.comments[i]['id']) { this.image.comments.splice(i, 1) } } } }, methods: { addCommentPoint: function(evt) { let vm = this let position = vm.calculateClickCordinates(evt) let count = this.image.comments.push({ position }) // Show the modal and add a callback for when the modal is closed let modalElem = $("#add-modal") modalElem.data({"comment-index": count-1, "comment-position": position}) modalElem.modal("show").on("hide.bs.modal", () => vm.removeUnsavedComments()) } }, }</script>
? The*
*created**and**mounted**methods are hooks that are called automatically during the creation of the Vue component. You can learn about the Vue lifecycle here.**
In the mounted method, we use Laravel Echo to listen to a Pusher channel. The channel name depends on the ID of the image currently being viewed. Each image will have broadcasts on a different channel based on the ID of the image.
When the added event is triggered on the feedback-$id channel, it looks through the available image.comments and, if the comment broadcasted does not exist, it adds it to the comments array.
In the create method, we activate Bootstrap popovers, define a function that calculates the coordinates of the click point, and we define a function that removes comments that have not been saved from the image.comments array.
Under methods we define the addCommentPoint method which calculates the click coordinates, and then launches a new Bootstrap modal which is going to be created in the add-comment-modal Vue component.
For Laravel Echo to work, we need to open the ./resources/assets/js/bootstrap.js file and add the code below at the bottom of the file:
import Echo from 'laravel-echo'window.Pusher = require('pusher-js');window.Echo = new Echo({ broadcaster: 'pusher', key: 'PUSHER_KEY', encrypted: true, cluster: 'PUSHER_CLUSTER'});
You should replace PUSHER_KEY and PUSHER_CLUSTER with the key and cluster for your Pusher application.
Now lets create our next Vue component, AddCommentModal.vue. It is already referenced in our FeedbackCanvas.vue Vue component.
Create an AddCommentModal.vue file in the same directory as our other Vue components. In this file, paste in the code below:
<template> <div id="add-modal" class="modal fade" role="dialog" data-backdrop="static" data-keyboard="false"> <div class="modal-dialog"> <div class="modal-content"> <form method="post" :action="'/feedback/'+photo.url+'post'" @submit.prevent="submitFeedback()"> <div class="modal-header"> <h4 class="modal-title">Add Feedback</h4> </div> <div class="modal-body"> <textarea name="feedback" id="feedback-provided" cols="10" rows="5" class="form-control" v-model="feedback" placeholder="Enter feedback..." required minlength="2" maxlength="2000"></textarea> </div> <div class="modal-footer"> <button type="submit" class="btn btn-primary pull-right">Submit</button> <button type="button" class="btn btn-default pull-left" data-dismiss="modal">Cancel</button> </div> </form> </div> </div> </div></template><script>export default { props: ['image'], data() { return { photo: this.image, feedback: null } }, methods: { submitFeedback: function () { let vm = this let modal = $('#add-modal') let position = modal.data("comment-position") // Create url and payload let url = `/feedback/${this.photo.url}/comment`; let payload = {comment: this.feedback, left: position.left, top: position.top} axios.post(url, payload).then(response => { this.feedback = null modal.modal('hide') vm.photo.comments[modal.data('comment-index')] = response.data $(document).ready(() => $('[data-toggle="popover"]').popover()) }) } }}</script>
In the template section, we have defined a typical Bootstrap modal. In the modal form, we have attached a call to submitFeedback() which is triggered when the form is submitted.
In the script section, we have defined the submitFeedback() method in the methods property of the Vue component. This function simply sends a comment to the backend for storage. If there is a favorable response from the API, the Bootstrap modal is hidden and the comment is appended to the image.comments array. The Bootstrap popover is then reloaded so it picks up the changes.
With that final change, we have defined all our Vue components. Open your terminal and run the command below to build your JS and CSS assets:
$ npm run dev
Great! Now let’s build the backend.
Creating the Endpoints for our prototype feedback application
In your terminal, enter the command below:
$ php artisan make:event FeedbackAdded
This will create an event class called FeedbackAdded. We will use this file to trigger events to Pusher when we add some feedback.This will make feedback appear in realtime to anyone looking at the image.
Open the PhotoController class and replace the contents with the code below:
<?phpnamespace App\Http\Controllers;use App\Events\FeedbackAdded;use App\{Photo, PhotoComment};class PhotoController extends Controller{ public function show($url) { $photo = Photo::whereUrl($url)->firstOrFail(); return view('image', compact('photo')); } public function comment(string $url) { $photo = Photo::whereUrl($url)->firstOrFail(); $data = request()->validate([ "comment" => "required|between:2,2000", "left" => "required|numeric|between:0,100", "top" => "required|numeric|between:0,100", ]); $comment = $photo->comments()->save(new PhotoComment($data)); event(new FeedbackAdded($photo->id, $comment->toArray())); return response()->json($comment); } public function upload() { request()->validate(['file' => 'required|image']); $gibberish = md5(str_random().time()); $imgName = "{$gibberish}.".request('file')->getClientOriginalExtension(); request('file')->move(public_path('storage'), $imgName); $photo = Photo::create(['image' => $imgName, 'url' => $gibberish]); return response()->json($photo->toArray()); }}
In the above, we have a show method which shows an image so people can leave feedback on it. Next, there is the comment method that saves a new comment on an image. The final method is the upload method that simply uploads an image to the server and saves it to the database.
Let us create the view for the show method. Create a new file in the ./resources/views directory called image.blade.php. In this file, paste the code below:
<!doctype html><html lang="{{ app()->getLocale() }}"><head> <meta charset="utf-8"> <meta http-equiv="X-UA-Compatible" content="IE=edge"> <meta name="viewport" content="width=device-width, initial-scale=1"> <meta name="csrf-token" content="{{csrf_token()}}"> <title>Laravel</title> <link href="https://fonts.googleapis.com/css?family=Roboto:400,600" rel="stylesheet" type="text/css"> <link href="https://fonts.googleapis.com/icon?family=Material+Icons" rel="stylesheet"> <link rel="stylesheet" href="{{ asset('css/app.css') }}"></head><body> <div id="app"> <feedback :photo='@json($photo)'></feedback> </div> <script src="{{asset('js/app.js')}}"></script></body></html>
In the above, the only thing that stands out is the feedback tag. It is basically in reference to the feedback Vue component we built earlier in the article. Every other thing is just basic Blade and HTML.
Now that we have created the view, we need to add the directory for uploads defined in the upload method. In your terminal, run the command below:
$ php artisan storage:link
This command will create a symlink from the ./storage directory to the ./public/storage directory. If you look in the ./public directory you should see the symlink.
Now that we have created the backend to support our web application, we need to add Pusher to the backend so that the comments made are broadcasted and can be picked up by other people browsing the image.
Adding realtime functionality to the prototype feedback app using Pusher
Open your terminal and enter the command below to install the Pusher PHP SDK:
$ composer require pusher/pusher-php-server "~3.0"
Open the .env file and scroll to the bottom and configure the Pusher keys as seen below:
PUSHER_APP_ID="PUSHER_ID"PUSHER_APP_KEY="PUSHER_KEY"PUSHER_APP_SECRET="PUSHER_SECRET"
Also in the same file, look for the BROADCAST_DRIVER and change it from log to pusher.
Next, open the ./config/broadcasting.php and scroll to the pusher key. Replace the options key of that configuration with the code below:
// ...'options' => [ 'cluster' => 'PUSHER_CLUSTER', 'encrypted' => true], // ...
_? Remember to replace theP
USHER_ID,PUSHER_KEY,PUSHER_SECRETandPUSHER_CLUSTERwith the values from your Pusher application._
Now, open the FeedbackAdded class and replace the contents with the code below:
<?phpnamespace App\Events;use Illuminate\Broadcasting\Channel;use Illuminate\Queue\SerializesModels;use Illuminate\Foundation\Events\Dispatchable;use Illuminate\Broadcasting\InteractsWithSockets;use Illuminate\Contracts\Broadcasting\ShouldBroadcast;class FeedbackAdded implements ShouldBroadcast{ use Dispatchable, InteractsWithSockets, SerializesModels; public $comment; public $photo_id; public function __construct(int $photo_id, array $comment) { $this->comment = $comment; $this->photo_id = $photo_id; } public function broadcastOn() { return new Channel("feedback-{$this->photo_id}"); } public function broadcastAs() { return 'added'; }}
In the class above, we define the comment object and the photo_id which will be used to compose the channel name in the broadcastOn method. We also define the broadcastAs method, which will allow us to customize the name of the event being sent to Pusher.
That’s all. Now, let’s run our application. In your terminal, run the code below:
$ php artisan serve
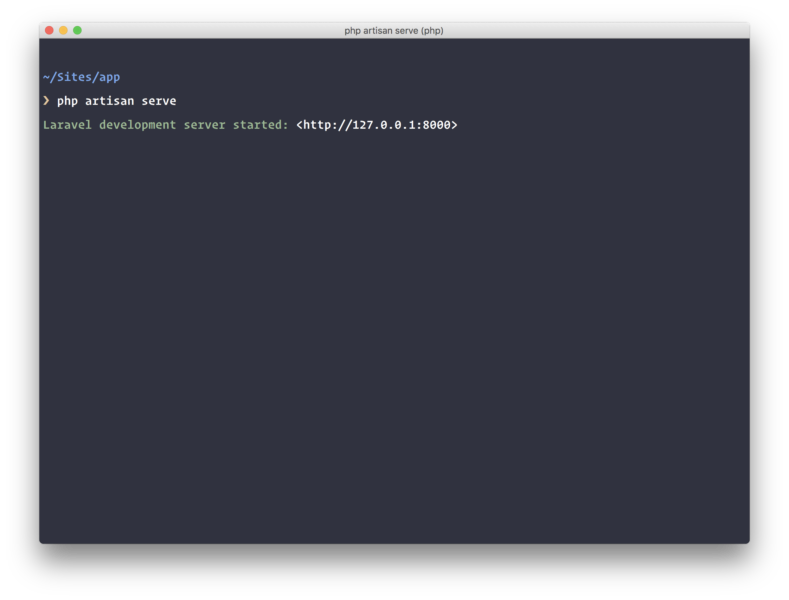
This should start a new PHP server and you can then use that to test your application. Go to the URL given and you should see your application.
Conclusion
In this article, we have successfully created a prototype application’s feedback feature that will allow designers to share their designs with others and receive feedback on them.
If you have questions or feedback, please leave them as a comment below. The source code to the application is available on GitHub.
This post first appeared on the Pusher blog.