
By Yazeed Bzadough
One of my projects uses a library called Fixed-Data-Table-2 (FDT2), and it’s great for efficiently rendering tons of rows of data.
Their documentation demonstrates a responsive table that resizes based on the browser’s width and height.
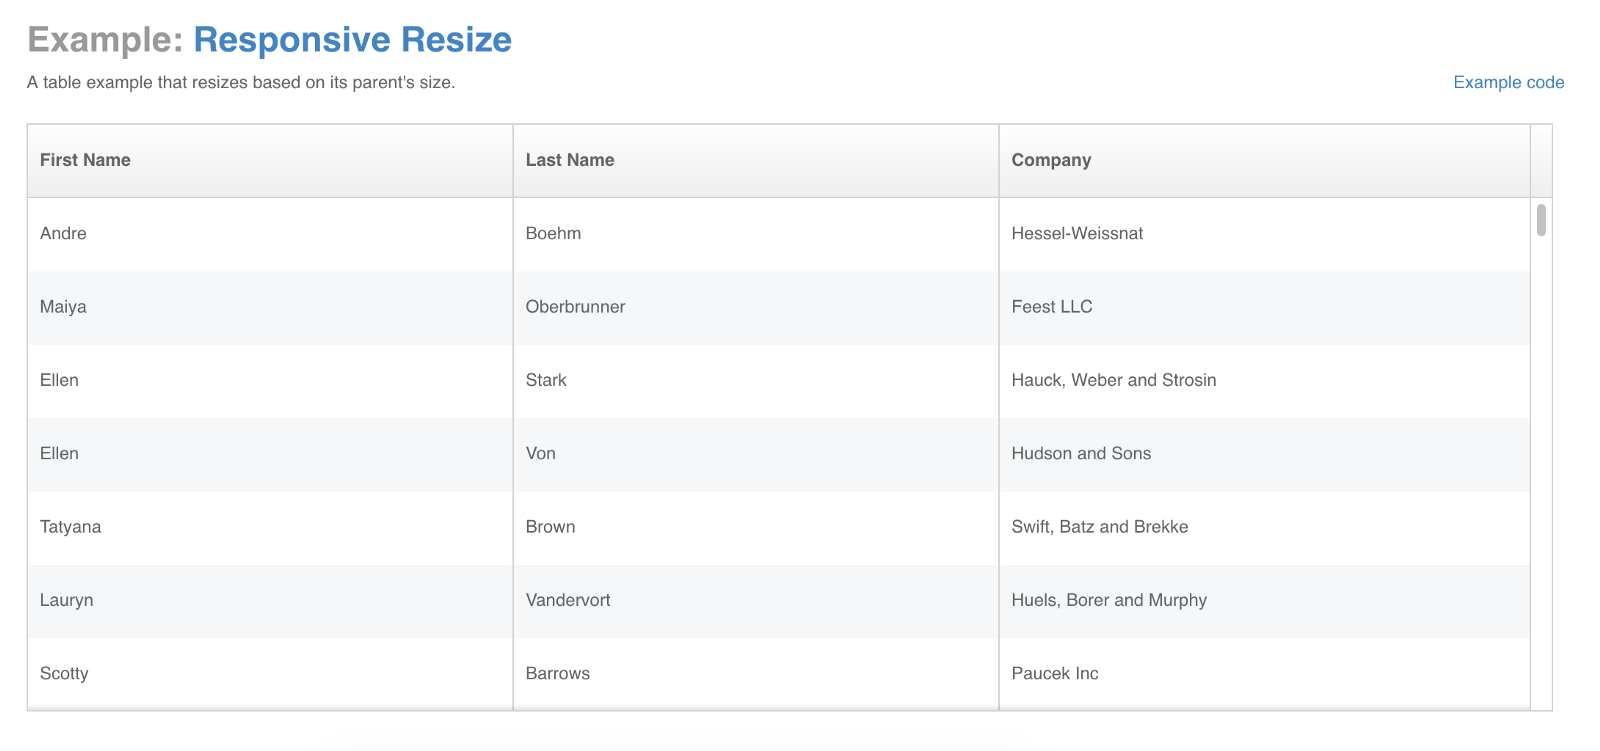
I thought it’d be cool to share this example using React Hooks.
What are React Hooks?
They’re functions that give you React features like state and lifecycle hooks without ES6 classes.
Some benefits are
- isolating stateful logic, making it easier to test
- sharing stateful logic without render props or higher-order components
- separating your app’s concerns based on logic, not lifecycle hooks
- avoiding ES6 classes, because they’re quirky, not actually classes, and trip up even experienced JavaScript developers
For more detail see React’s official Hooks intro.
WARNING: Don’t use in production!
At the time of this writing, Hooks are in alpha. Their API can change at any time.
I recommend you experiment, have fun, and use Hooks in your side projects, but not in production code until they’re stable.
The goal
We’ll be building a responsive Fixed-Data-Table. It won’t be too narrow or too wide for our page, it’ll fit just right!
Setup
Here are the GitHub and CodeSandbox links.
git clone https://github.com/yazeedb/Responsive-FDT2-Hooks/
cd Responsive-FDT2-Hooks
npm install
The master branch has the finished project, so checkout the start branch if you wish to follow along.
git checkout start
And run the project.
npm start
The app should be running on localhost:3000. Let’s start coding.
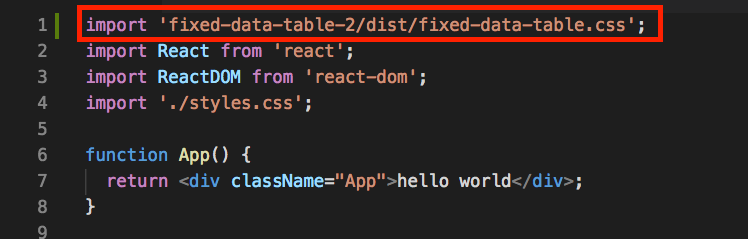
Importing table styles
First you’ll want to import FDT2’s stylesheet in index.js, so your table doesn’t look whacky.
Generating fake data
Our table needs data, right? Create a file in src folder called getData.js.
We’ll use the awesome faker.js library to generate our data. It already came with your npm install.
Here’s the source if you want to copy/paste.
import faker from 'faker';

const createFakeRowData = () => ({
  firstName: faker.name.firstName(),
  lastName: faker.name.lastName(),
  email: faker.internet.email(),
  city: faker.address.city(),
  salary: faker.random
    .number({
      min: 50000,
      max: 500000
    })
    .toLocaleString('en-US', {
      style: 'currency',
      currency: 'USD'
    })
});

export default () => Array.from({ length: 2000 }, createFakeRowData);
createFakeRowData returns an object with a full name, email, city, and salary in US dollars.
Our exported function returns 2000 of them.
The unresponsive table
We have our data, let’s code up the table now.
At the top of index.js, import our data and FDT2 components.
import { Table, Column, Cell } from 'fixed-data-table-2';
import getData from './getData';
And use them like so.
function App() {
  const data = getData();

  return (
    <div className="App">
      <Table
        rowHeight={50}
        rowsCount={data.length}
        headerHeight={50}
        width={1000}
        height={500}
      >
        <Column
          columnKey="firstName"
          header={<Cell>First Name</Cell>}
          width={130}
          cell={({ rowIndex, columnKey }) => {
            return <Cell>{data[rowIndex][columnKey]}</Cell>;
          }}
        />
        <Column
          columnKey="lastName"
          header={<Cell>Last Name</Cell>}
          width={130}
          cell={({ rowIndex, columnKey }) => {
            return <Cell>{data[rowIndex][columnKey]}</Cell>;
          }}
        />
        <Column
          columnKey="email"
          header={<Cell>Email</Cell>}
          width={320}
          cell={({ rowIndex, columnKey }) => {
            return <Cell>{data[rowIndex][columnKey]}</Cell>;
          }}
        />
        <Column
          columnKey="city"
          header={<Cell>City</Cell>}
          width={180}
          cell={({ rowIndex, columnKey }) => {
            return <Cell>{data[rowIndex][columnKey]}</Cell>;
          }}
        />
        <Column
          columnKey="salary"
          header={<Cell>Salary</Cell>}
          width={180}
          cell={({ rowIndex, columnKey }) => {
            return <Cell>{data[rowIndex][columnKey]}</Cell>;
          }}
        />
      </Table>
    </div>
  );
}
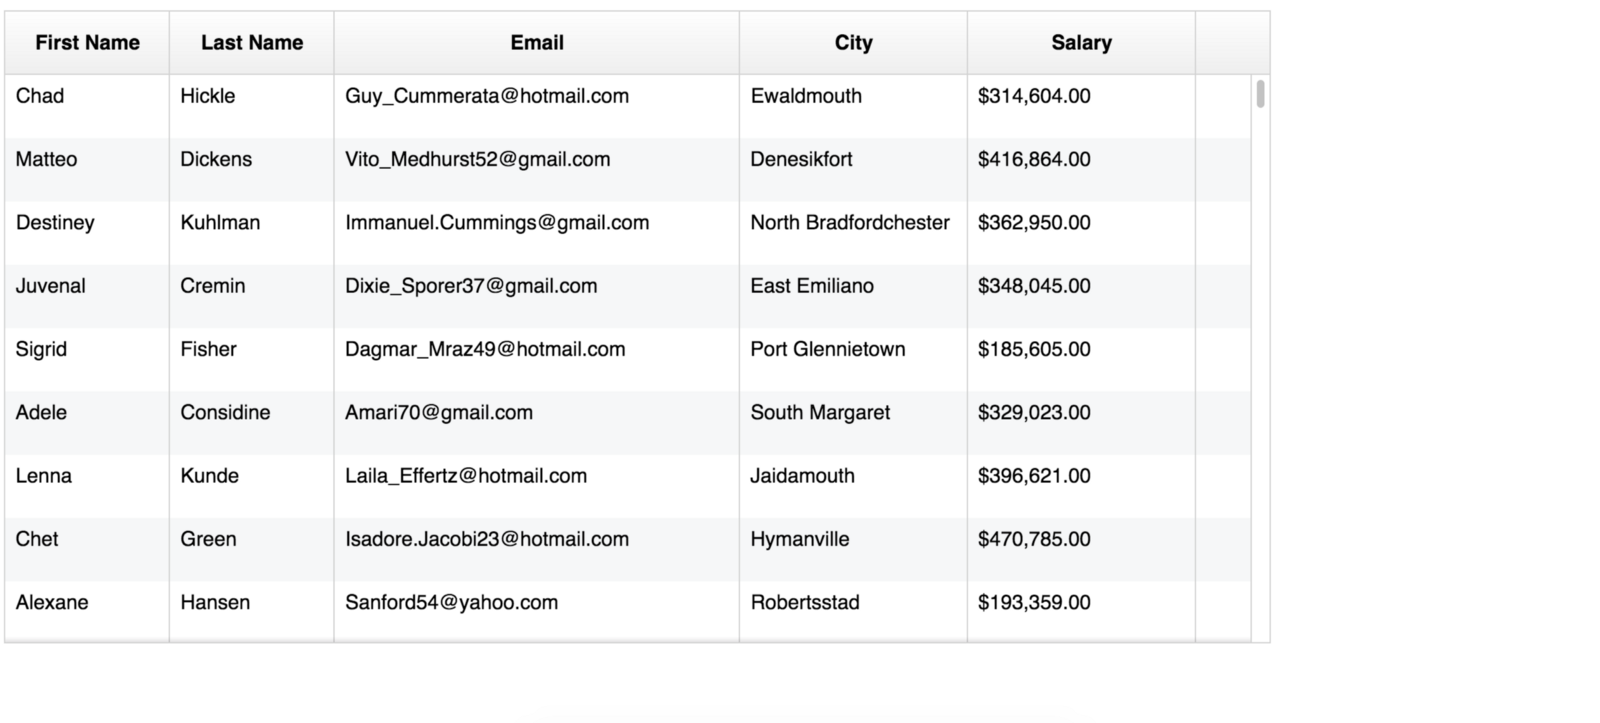
We configure the table with our data and create a Column for each field we want displayed.
getData objects contain a first/last name, email, city, and salary, so we need a column for each.
Our UI is now looking like this.
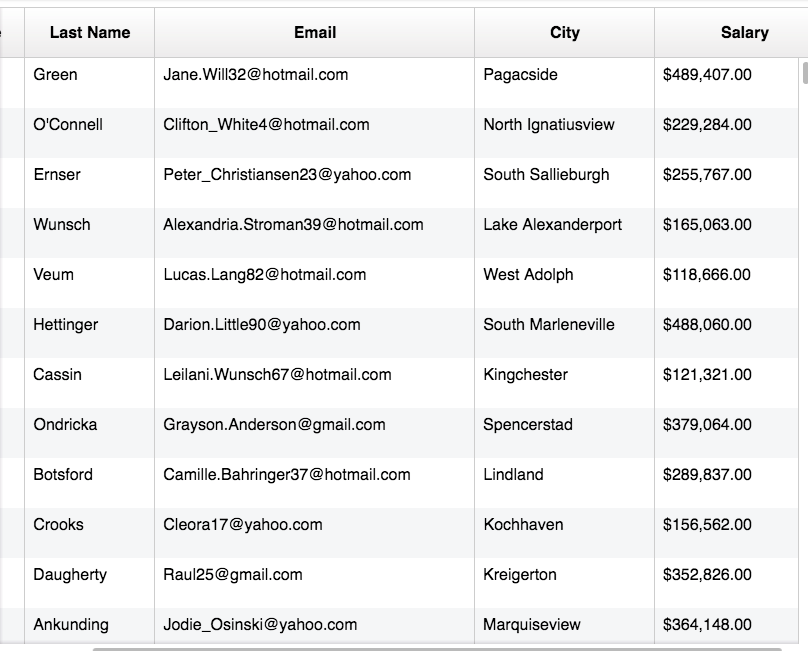
Try resizing your browser window, you’ll notice it isn’t responsive at all. It’s either too big or too small for your viewport and can leave excess space.
Escape to the impure
As we’ve learned, React’s declarative nature lets you write your UI using pure, deterministic, and easily testable functions.
The same input should always return the same output.
However, we sometimes need to visit the “impure” world, for DOM manipulation, adding events such as listeners, subscriptions, and timers.
HOCS and render props
Render props and higher-order components (HOCS) are the standard solution, but have some tradeoffs that Hooks are now trying to solve.
Using Hooks
Hooks are the new escape hatch to use imperative code. In our case, getting the window size is the effect we’re after.
Create a new file called useWindowSize.js.
We’ll need two things to achieve this:
- Listen to the window’s
resizeevent, so we’re notified of when it changes - Save the width/height to share with our table
Two hooks can help:
useEffectuseState
useEffect
This will likely replace your componentDidMount, componentDidUpdate, and componentWillUnmount lifecycle hooks once it’s stabilized.
useEffect's perfect for most initialization logic and reading the DOM.
It’s where we’ll set up our window resize event listeners.
For more detail, see the official docs.
useState
Super simple, this Hook returns a stateful value and a function to update it. Once we capture the window’s width/height, we’ll have useState track it.
Writing our custom Hook
According to the official docs:
A custom Hook is a JavaScript function whose name starts with ”use” and that may call other Hooks.
Our custom hook will be called useWindowSize, and it’ll call the useState and useEffect hooks.
This Hook’s mainly from Gabe Ragland’s useWindowSize on useHooks.com.
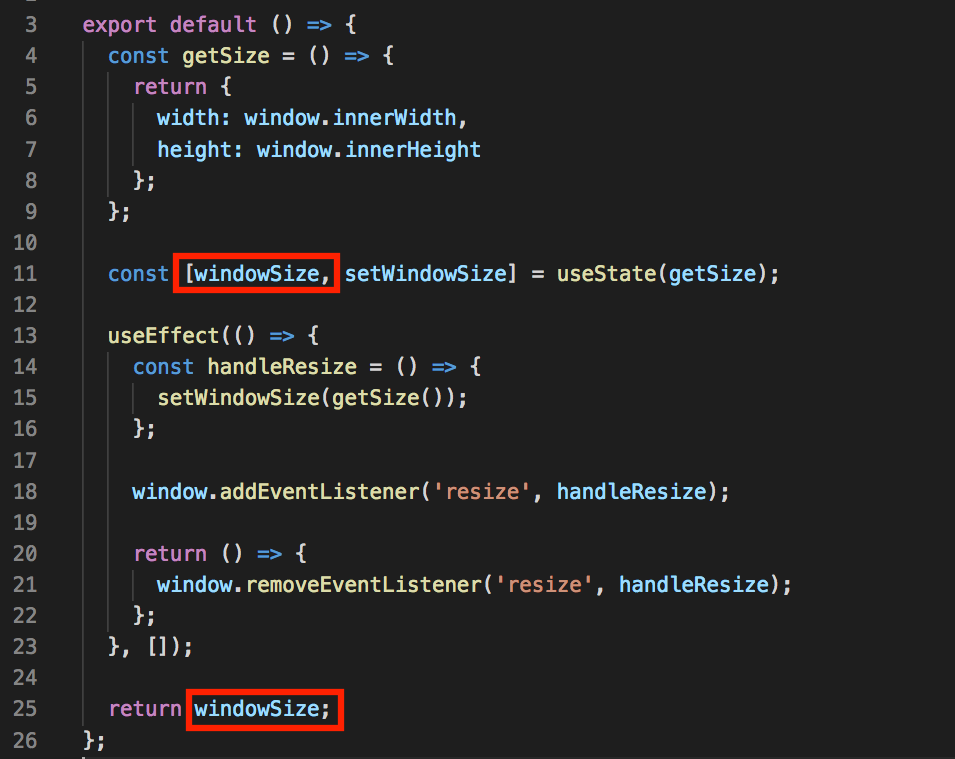
// `useWindowSize.js`

import { useState, useEffect } from 'react';

export default () => {
  const getSize = () => {
    return {
      width: window.innerWidth,
      height: window.innerHeight
    };
  };

  const [windowSize, setWindowSize] = useState(getSize);

  useEffect(() => {
    const handleResize = () => {
      setWindowSize(getSize());
    };

    window.addEventListener('resize', handleResize);

    return () => {
      window.removeEventListener('resize', handleResize);
    };
  }, []);

  return windowSize;
};
Let’s break this down.
Getting the window size
const getSize = () => {
  return {
    width: window.innerWidth,
    height: window.innerHeight
  };
};
getSize simply returns the window’s innerWidth and innerHeight.
Initializing useState
const [windowSize, setWindowSize] = useState(getSize);
useState can take an initial value or a function that returns a value.
In this case we want the window’s dimensions to start, so getSize is the perfect initializer.
useState then returns an array, the first index is the value and the second index is the updater function.
Configuring useEffect
useEffect(() => {
  const handleResize = () => {
    setWindowSize(getSize());
  };

  window.addEventListener('resize', handleResize);

  return () => {
    window.removeEventListener('resize', handleResize);
  };
}, []);
useEffect takes a function that will run your desired effect.
Whenever the window size changes, handleResize sets the state by giving setWindowSize the latest width/height.
Cleanup Logic
Our effect function then returns a new function, which useEffect recognizes as cleanup logic.
return () => {
  window.removeEventListener('resize', handleResize);
};
When we leave the page or somehow unmount our component, this cleanup function runs and removes the resize event listener. This helps prevent memory leaks.
useEffect’s Second Argument
useEffect's first argument is the function handling our logic, but we also gave it a second argument: an empty array.
useEffect(() => { ... }, []); // empty array
Why an empty array?
useEffect's second argument is an array of values to watch over. If any of those values change useEffect runs again.
We’re just setting/removing event listeners, which only needs to happen once.
An empty array is how we communicate “just run once” to useEffect.
Empty array = no values ever change = just run once
Return windowSize
Now that our effect’s set up, just return windowSize. As the browser’s resized, windowSize will be updated.
Using our custom Hook
Time to throw our Hook at Fixed-Data-Table2!
Back in index.js, go ahead and import useWindowSize.
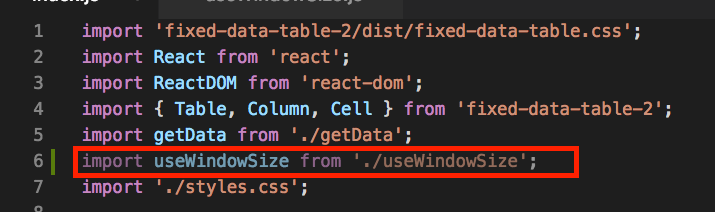
And use it like so.
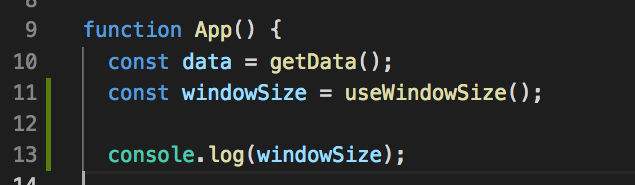
For fun you can console.log(windowSize) and watch it update in real-time.
Cool, we get back an object of the window’s width and height!
Instead of hardcoding our table’s width and height, we can use our Hook’s exposed state.
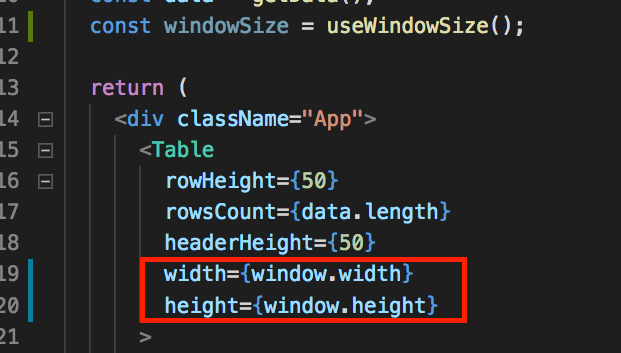
Now your table should adjust to the window’s dimensions.
I hope you enjoyed this tutorial!