By Feedier by Alkalab
Today, we are going to see how to create a very simple WordPress plugin for any web app that needs to insert a piece of code to your site.
 _Credits: [https://unsplash.com/photos/I8OhOu-wLO4](https://unsplash.com/photos/I8OhOu-wLO4" rel="noopener" target="blank" title=")
To follow this tutorial, you need some knowledge of these basics:
- PHP and OOP
- JavaScript (we’ll use jQuery and Ajax)
- WordPress development (as most functions are from the WordPress core).
You can find a working result of this tutorial on this Github repository.
These web apps could be anything, like CrazyEgg, Freshbook, Google Analytics, Facebook Pixel, or Feedier. Why? They all need to inject some HTML / JavaScript code to your site for various purposes.
This “code” is always parametrized with variables, and is usually a pain for the site owner. This is because you need to edit the theme’s templates. So, how about we create a plugin to do that for us? Okay, let’s do it!
Step 1: Find your web app
The goal of this tutorial is to create a WordPress plugin that adds a WordPress admin page. Plus, we’ll also add some settings to configure the app’s in-site widget and inject the HTML / JS code in our web page automatically. Nothing fancy, just something that works fine.
Please note: we do need a web application for this tutorial. We will use Feedier for this example. However, if you have another web application that you’d like to use in this tutorial, please do. Just rename anything named “feedier” with your app’s name and adapt the settings to what that app needs. Most of them will give you a snippet to add to your site in order to make it work.
Here’s a quick briefing of Feedier if you’ve never heard of it:
- It’s a feedback collector tool, using surveys to understand your users
- It’s very flexible
- It’s free!
- Has a good API (very important here)
- Has an in-site widget (very important here)
- Lets you reward your customers
- Lets you create conditional questions
- Has a complete analytic report dashboard
- Lets you manage feedback individually
Here is the widget we want to add automatically:
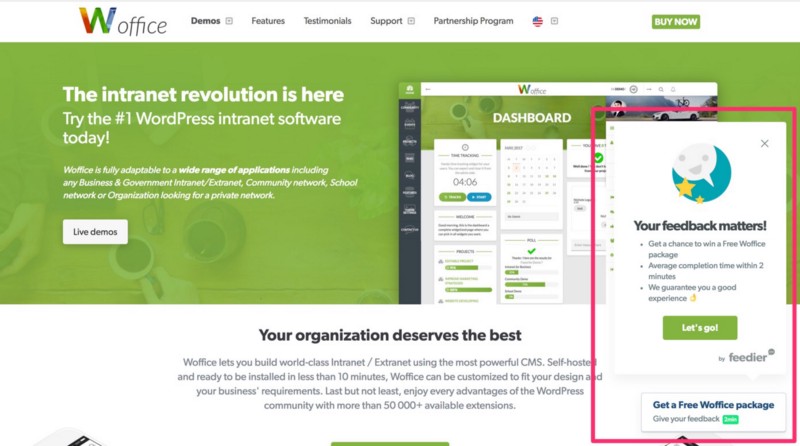 Preview of the widget on woffice.io
If you signed up for Feedier, then you can simply find the code in the Share tab of your survey:
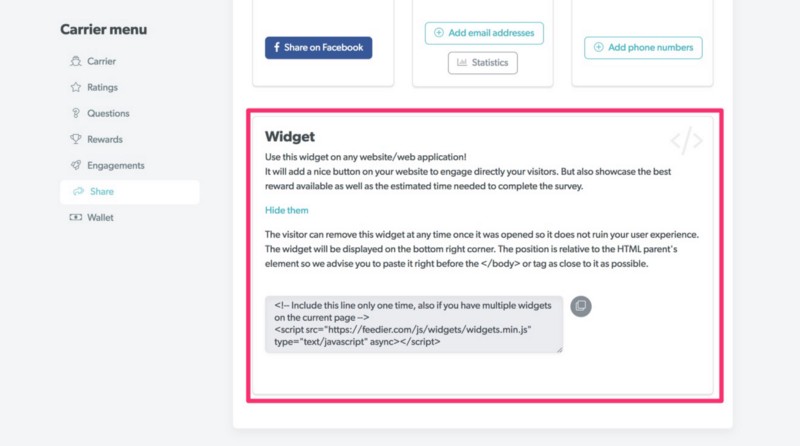 _Grab the snippet from [feedier.com](https://feedier.com/?utm_medium=article&utm_source=medium&utm_campaign=medium-wordpress-awareness-2018-05-21&utm_content=how-to-create-a-wordpress-plugin-for-your-web-app" rel="noopener" target="blank" title=")
Step 2: Setup our plugin and its architecture
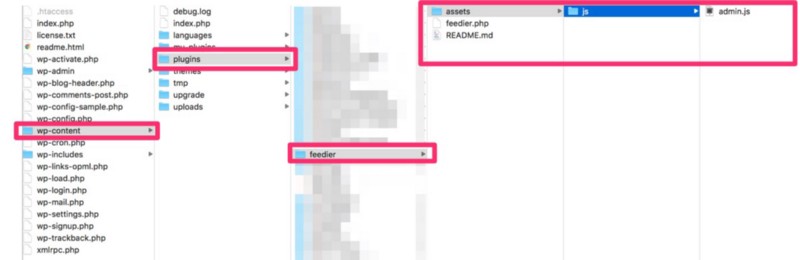
WordPress plugin are by design very simple. Our plugin will only need two files.
- feedier.php: main plugin’s PHP file.
- assets/js/admin.js: JavaScript script to save the options using Ajax.
You can create a new “feedier” directory (or name of your web app) in your wp-content/plugins/ folder.
The most important file will be the plugin’s feedier.php class. Here is its structure:
We are doing a few things here:
- Declaring our plugin using the header comments
- Defining a few handy constants to be able to find the plugin’s URL and PATH easily
- Declaring our plugin class that will contain everything we need in this plugin. We just need a constructor method for now.
You should already see the plugin in your Plugins page, even though it’s not doing anything yet:
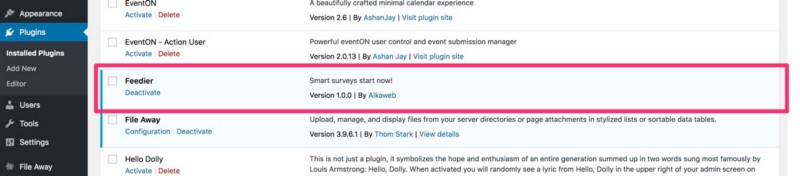 Activate the plugin from WordPress admin panel
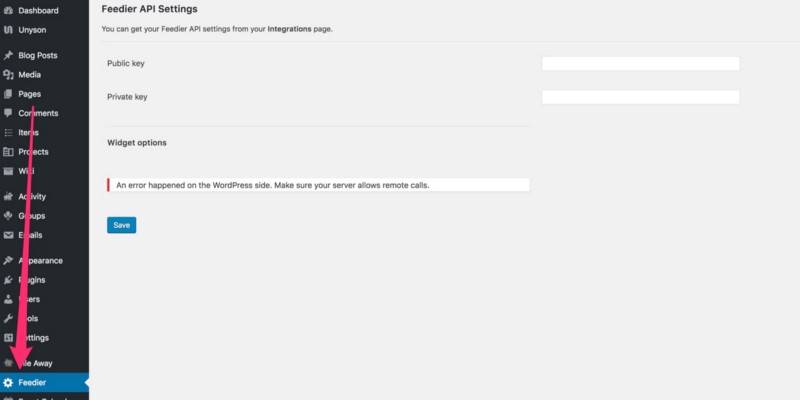
Step 3: Create our admin page
For this part, we will add a new Feedier admin page to our WordPress site and dynamically fetch our surveys from Feedier’s API.
In our class’ constructor, let’s register three new actions which are required to add an admin page on WordPress:
- addAdminMenu will add a new page in the WordPress left menu. There will be also a callback to another method containing the page’s content.
- storeAdminData will be called whenever the user clicks the “Save settings” button.
- addAdminScripts will register a new JavaScript file to our WordPress admin in order to save the form’s data. But it also exchanges some variables between the PHP side and JavaScript side.
The first step is very easy. We just register the page, like this:
As you can see, we use WordPress localization functions for all strings. Note that the
array($this, ‘adminLayout’)
is where we call another method containing the page’s content. The form needs to be adapted to your web app.
Here, we first need to get the public and private Feedier API keys. Once saved, we are going to use the private key to dynamically retrieve our surveys. Whenever we get the surveys and not an API error, we display some new options to configure the widget.
At the beginning of this method, you can see that we are first getting the saved data with:
$data = $this->getData();
And getting the surveys from the Feedier API:
$surveys = $this->getSurveys($data[‘private_key’]);
So let’s declare the first one:
This function just reads our plugin’s option and gives us an array back so we can save multiple values in the same option.
To get the second method working, we need the Feedier private key. This depends on the first one to access this key saved in the option:
The Feedier API is documented here, so you can see what you will get in the response.
At this moment, we have a complete new Admin page. But nothing happens when we click on the save button, because there is no saving mechanism — yet.
Good enough, let’s save our data!
As mentioned before, we will save our data using AJAX. Therefore, we need to register a new JavaScript file and exchange data using the wp_localize_script() function:
We also need to add a new file /assets/js/admin.js. That will simply make an Ajax call, and WordPress will automatically route the request correctly to the right method (already done in the constructor). You can read more about how WordPress smartly handles AJAX requests here.
At this very moment, we can click the save button and the above script will make an HTTP POST request to WordPress. We also append an action parameter containing: store_admin_data (which we declared at the beginning at this part in the constructor):
add_action( ‘wp_ajax_store_admin_data’, array( $this, ‘storeAdminData’ ) );
The method storeAdminData will receive the POST request and save the values we need in our WordPress option.
A few notes on the above method:
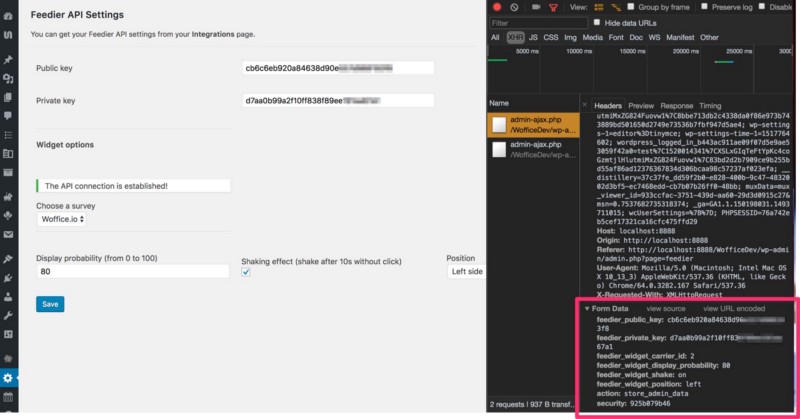
- We use a “WordPress nonce” to handle the security and make sure this is coming from the website and not a hacker faking the request.
- We identify the fields we need to save using a “feedier_” prefix. Once received, we loop through all the $_POST data and only save those fields. We also remove the prefix before saving every field.
That’s it for the saving process. When we click save, we can see a POST request and our data being saved on the database within the wp_options table.
Perfect, we are done with the admin page.
Step 4: Insert the dynamic code automatically into our pages
Now that we have our options saved, we can create a dynamic widget that will depend on the options set by the user though our admin page. We already know what the web app expects from us.
Something like:
<div class=”feedier-widget” data-type=”engager” data-position=”right” data-carrier-id=”x” data-key=”xxxxxxxxxxxxxxxxx”></div>
<! — Include this line only one time, also if you have multiple widgets on the current page →
<script src=”https://feedier.com/js/widgets/widgets.min.js" type=”text/javascript” async></script>
Thus, the first thing we want to do is to create a new method to our plugin that will print this code depending on the variables set by the user. So, using the architecture we already set up in the last part:
Now, we just need to call this function on every page load to add it at the bottom of the page. To do this, we’ll hook our method to the wp_footer action. By registering a new action into our class’ constructor:
That’s it!
Any questions, feedback, or ideas? Let me know in the comments!
You can find a working version of this tutorial on this Github repository.
2Fwebd/feedier-wordpress-plugin
_Contribute to feedier-wordpress-plugin development by creating an account on GitHub._pxlme.me
Note that this is first version of the plugin, and many things can be improved. I’m open to suggestions and improvements. ?
We are building Feedier. It becomes a no-brainer to collect feedback and build relationships with your customers!
Feedier - Next generation feedback
_Meet Feedier, the next generation customer feedback software that lets you collect valuable feedback. Reward, engage…_feedier.com
Convinced? Sign up for free at feedier.com ?
 _[Feedier.com](https://feedier.com/?utm_medium=article&utm_source=medium&utm_campaign=medium-wordpress-awareness-2018-05-21&utm_content=how-to-create-a-wordpress-plugin-for-your-web-app" rel="noopener" target="blank" title="), the next generation feedback application. Start for free now!
Don’t forget to clap our article and subscribe to get more amazing articles if you liked it?. You can also find us on Twitter.
This article was initially published on our blog here.