

Custom React hooks are an essential tool that let you add special, unique functionality to your React applications.
In many cases, if you want to add a certain feature to your application, you can simply install a third-party library that is made to solve your problem. But if such a library or hook doesn't exist, what do you do?
As a React developer, it's important to learn the process of creating custom hooks to solve problems or add missing features within your own React projects.
In this step-by-step guide, I will show you how to create your own custom React hooks by breaking down three hooks I've made for my own applications, along with what problems they were created to solve.
1. useCopyToClipboard Hook
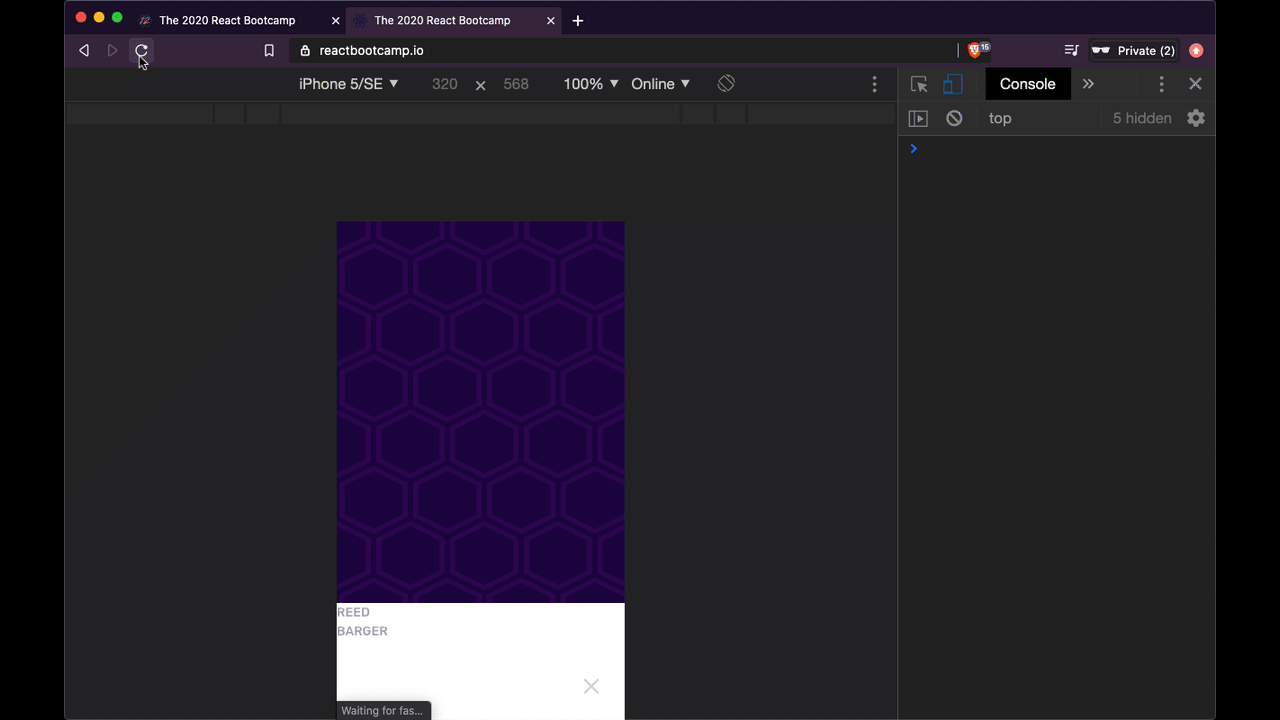
On a past version of my website, reedbarger.com, I allowed users to copy code from my articles with the help of a package called react-copy-to-clipboard.
A user just hovers over the snippet, clicks the clipboard button, and the code is added to their computer's clipboard to enable them to paste and use the code, wherever they like.
Instead of using a third party library, however, I wanted to recreate this functionality with my own custom React hook. As with every custom react hook I create, I put it a dedicated folder, usually called utils or lib, specifically for functions that I can reuse across my app.
We'll put this hook in a file called useCopyToClipboard.js and I'll make a function of the same name.
There are various ways that we can copy some text to the user's clipboard. I prefer to use a library for this, which makes the process more reliable, called copy-to-clipboard.
It exports a function, which we will call copy.
// utils/useCopyToClipboard.js
import React from "react";
import copy from "copy-to-clipboard";

export default function useCopyToClipboard() {}
Next we will create a function that will be used for copying whatever text wants to be added to the user's clipboard. We will call this function handleCopy.
How to make the handleCopy function
Within the function, we first need to make sure it only accepts data that is of type string or number. We will set up an if-else statement, which will make sure that the type is either the string or number. Else, we will log an error to the console that tells the user you cannot copy any other types.
import React from "react";
import copy from "copy-to-clipboard";

export default function useCopyToClipboard() {
  const [isCopied, setCopied] = React.useState(false);

  function handleCopy(text) {
    if (typeof text === "string" || typeof text == "number") {
      // copy
    } else {
      // don't copy
      console.error(
        `Cannot copy typeof ${typeof text} to clipboard, must be a string or number.`
      );
    }
  }
}
Next we take the text and convert it to a string, which we will then pass to the copy function. From there, we return the handleCopy function from the hook to wherever we like in our application.
Generally, the handleCopy function will be connected to an onClick of a button.
import React from "react";
import copy from "copy-to-clipboard";

export default function useCopyToClipboard() {
  function handleCopy(text) {
    if (typeof text === "string" || typeof text == "number") {
      copy(text.toString());
    } else {
      console.error(
        `Cannot copy typeof ${typeof text} to clipboard, must be a string or number.`
      );
    }
  }

  return handleCopy;
}
Additionally, we want some state that represents whether the text was copied or not. To create that, we will call useState at the top of our hook and make a new state variable isCopied, where the setter will be called setCopy.
Initially this value will be false. If the text is successfully copied, we will set copy to true. Else, we will set it to false.
Finally, we will return isCopied from the hook within an array along with handleCopy.
import React from "react";
import copy from "copy-to-clipboard";

export default function useCopyToClipboard(resetInterval = null) {
  const [isCopied, setCopied] = React.useState(false);

  function handleCopy(text) {
    if (typeof text === "string" || typeof text == "number") {
      copy(text.toString());
      setCopied(true);
    } else {
      setCopied(false);
      console.error(
        `Cannot copy typeof ${typeof text} to clipboard, must be a string or number.`
      );
    }
  }

  return [isCopied, handleCopy];
}
How to use useCopyToClipboard
We can now use useCopyToClipboard within any component that we like.
In my case I will use it with a copy button component which received the code for our code snippet.
To make this work, all we need to do is add an on click to the button. And in the return of a function called handle copy with the code asked to it as text. And once it's copied it's true. We can show a different icon indicating a copy was successful.
import React from "react";
import ClipboardIcon from "../svg/ClipboardIcon";
import SuccessIcon from "../svg/SuccessIcon";
import useCopyToClipboard from "../utils/useCopyToClipboard";

function CopyButton({ code }) {
  const [isCopied, handleCopy] = useCopyToClipboard();

  return (
    <button onClick={() => handleCopy(code)}>
      {isCopied ? <SuccessIcon /> : <ClipboardIcon />}
    </button>
  );
}
How to add a reset interval
There's one improvement we can make to our code. As we've currently written our hook, isCopied will always be true, meaning we will always see the success icon:
If we want to reset our state after a few seconds you can pass a time interval to useCopyToClipboard. Let's add that functionality.
Back in our hook, we can create a parameter called resetInterval, whose default value is null, which will ensure that the state will not reset if no argument is passed to it.
We will then add useEffect to say that if the text is copied and we have a reset interval, we will set isCopied back to false after that interval using a setTimeout.
Additionally, we need to clear that timeout if our component that the hook is being used in unmounts (meaning our state is no longer there to update).
import React from "react";
import copy from "copy-to-clipboard";

export default function useCopyToClipboard(resetInterval = null) {
  const [isCopied, setCopied] = React.useState(false);

  const handleCopy = React.useCallback((text) => {
    if (typeof text === "string" || typeof text == "number") {
      copy(text.toString());
      setCopied(true);
    } else {
      setCopied(false);
      console.error(
        `Cannot copy typeof ${typeof text} to clipboard, must be a string or number.`
      );
    }
  }, []);

  React.useEffect(() => {
    let timeout;
    if (isCopied && resetInterval) {
      timeout = setTimeout(() => setCopied(false), resetInterval);
    }
    return () => {
      clearTimeout(timeout);
    };
  }, [isCopied, resetInterval]);

  return [isCopied, handleCopy];
}
Finally, the last improvement we can make is to wrap handleCopy in the useCallback hook in order to ensure that it will not be recreated every time there is a rerender.
Final Result
And with that, we have our final hook which allows the state to be reset after a given time interval. If we pass one to it, we should see a result like what we have below.
import React from "react";
import ClipboardIcon from "../svg/ClipboardIcon";
import SuccessIcon from "../svg/SuccessIcon";
import useCopyToClipboard from "../utils/useCopyToClipboard";

function CopyButton({ code }) {
  // isCopied is reset after 3 second timeout
  const [isCopied, handleCopy] = useCopyToClipboard(3000);

  return (
    <button onClick={() => handleCopy(code)}>
      {isCopied ? <SuccessIcon /> : <ClipboardIcon />}
    </button>
  );
}
2. usePageBottom Hook
In React apps, sometimes it is important to know when your user has scrolled to the bottom of a page.
In apps where you have an infinite scroll, such as Instagram for example, once the user hits the bottom of the page, you need to fetch more posts.

Let’s take a look at how to create a usePageBottom hook ourselves for similar use cases like creating an infinite scroll.
We’ll begin by making a separate file, usePageBottom.js, in our utils folder and we'll add a function (hook) with the same name:
// utils/usePageBottom.js
import React from "react";

export default function usePageBottom() {}
Next, we’ll need to calculate when our user hits the bottom of the page. We can determine this with information from the window. In order to access this, we’re going to need to make sure our component that the hook is called within is mounted, so we’ll use the useEffect hook with an empty dependencies array.
// utils/usePageBottom.js
import React from "react";

export default function usePageBottom() {
  React.useEffect(() => {}, []);
}
The user will have scrolled to the bottom of the page when the window’s innerHeight value plus the document’s scrollTop value is equal to the offsetHeight. If those two values are equal, the result will be true, and the user has scrolled to the bottom of the page:
// utils/usePageBottom.js
import React from "react";

export default function usePageBottom() {
  React.useEffect(() => {
    window.innerHeight + document.documentElement.scrollTop ===
    document.documentElement.offsetHeight;
  }, []);
}
We’ll store the result of this expression in a variable, isBottom and we’ll update a state variable called bottom, which we’ll ultimately return from our hook.
// utils/usePageBottom.js
import React from "react";

export default function usePageBottom() {
  const [bottom, setBottom] = React.useState(false);

  React.useEffect(() => {
    const isBottom =
      window.innerHeight + document.documentElement.scrollTop ===
      document.documentElement.offsetHeight;
    setBottom(isButton);
  }, []);

  return bottom;
}
Our code as is, however, won’t work. Why not?
The issue lies in the fact that we need to calculate isBottom whenever the user is scrolling. As a result, we need to listen for a scroll event with window.addEventListener. We can reevaluate this expression by creating a local function to be called whenever the user scrolls, called handleScroll.
// utils/usePageBottom.js
import React from "react";

export default function usePageBottom() {
  const [bottom, setBottom] = React.useState(false);

  React.useEffect(() => {
    function handleScroll() {
      const isBottom =
        window.innerHeight + document.documentElement.scrollTop
        === document.documentElement.offsetHeight;
      setBottom(isButton);
    }
    window.addEventListener("scroll", handleScroll);
  }, []);

  return bottom;
}
Finally, since we have an event listener that is updating state, we need to handle the event that our user navigates away from the page and our component is removed. We need to remove the scroll event listener that we added, so we don’t attempt to update a state variable that no longer exists.
We can do this by returning a function from useEffect along with window.removeEventListener, where we pass a reference to the same handleScroll function. And we’re done.
// utils/usePageBottom.js
import React from "react";

export default function usePageBottom() {
  const [bottom, setBottom] = React.useState(false);

  React.useEffect(() => {
    function handleScroll() {
      const isBottom =
        window.innerHeight + document.documentElement.scrollTop
        === document.documentElement.offsetHeight;
      setBottom(isButton);
    }
    window.addEventListener("scroll", handleScroll);
    return () => {
      window.removeEventListener("scroll", handleScroll);
    };
  }, []);

  return bottom;
}
Now we can simply call this code in any function where we want to know whether we’ve hit the bottom of the page or not.
Within my Gatsby site, I have a header, and as I decrease the size of the page, I want to show fewer links.
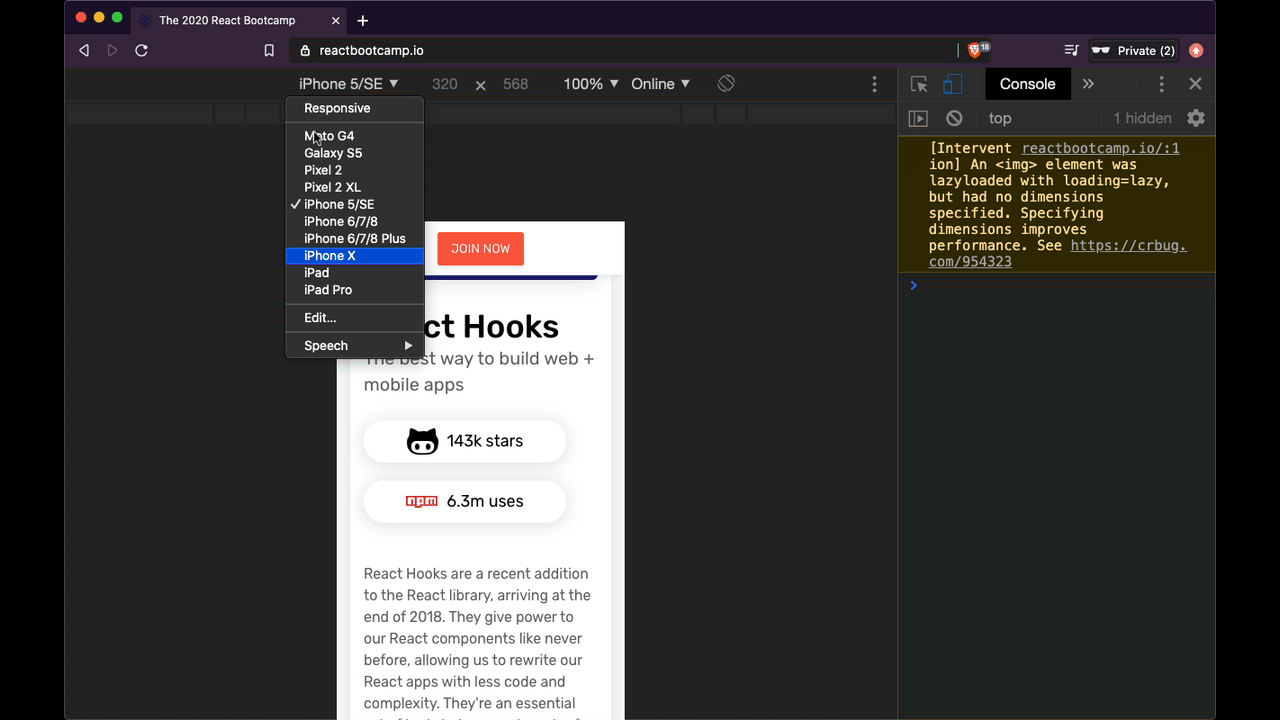
To do this we could use a media query (CSS), or we could use a custom React hook to give us the current size of the page and hide or show the links in our JSX.
Previously, I was using a hook from the a library called react-use. Instead of bringing an entire third-party library, I decided to create my own hook that would provide the dimensions of the window, both the width and height. I called this hook useWindowSize.
How to create the hook
First, we’ll create a new file .js in our utilities (utils) folder, the same name as the hook useWindowSize. I’ll import React (to use hooks) while exporting the custom hook.
// utils/useWindowSize.js

import React from "react";

export default function useWindowSize() {}
Now since I’m using this within a Gatsby site, which is server-rendered, I need to get the size of the window. But we may not have access to it because we’re on the server.
To check and make sure we’re not on the server, we can see if type of window is not equal to the string undefined.
In which case we can return to a default width and height for a browser, say, 1200 and 800 within an object:
// utils/useWindowSize.js

import React from "react";

export default function useWindowSize() {
  if (typeof window !== "undefined") {
    return { width: 1200, height: 800 };
  }
}
How to get the width and height from window
And assuming we are on the client and can get the window, we can take the useEffect hook to perform a side effect by interacting with window. We’ll include an empty dependencies array to make sure the effect function is called only once the component (that this hook is called in) is mounted.
To find out the window width and height, we can add an event listener and listen for the resize event. And whenever the browser sizes changes, we can update a piece of state (created with useState), which we’ll call windowSize, and the setter to update it will be setWindowSize.
// utils/useWindowSize.js

import React from "react";

export default function useWindowSize() {
  if (typeof window !== "undefined") {
    return { width: 1200, height: 800 };
  }

  const [windowSize, setWindowSize] = React.useState();

  React.useEffect(() => {
    window.addEventListener("resize", () => {
      setWindowSize({ width: window.innerWidth, height: window.innerHeight });
    });
  }, []);
}
When the window is resized, the callback will be called and the windowSize state will be updated with the current window dimensions. To get that, we set the width to window.innerWidth, and height to window.innerHeight.
How to add SSR support
However, the code as we have it here will not work. This is because a key rule of hooks is that they cannot be called conditionally. As a result, we cannot have a conditional above our useState or useEffect hook before they are called.
So to fix this, we’ll set the initial value of useState conditionally. We’ll create a variable called isSSR, which will perform the same check to see if the window is not equal to the string undefined.
And we’ll use a ternary to set the width and height by first checking to see if we’re on the server. If we are we’ll use the default value, and if not, we’ll use window.innerWidth and window.innerHeight.
// utils/useWindowSize.js

import React from "react";

export default function useWindowSize() {
  // if (typeof window !== "undefined") {
  // return { width: 1200, height: 800 };
  // }
  const isSSR = typeof window !== "undefined";
  const [windowSize, setWindowSize] = React.useState({
    width: isSSR ? 1200 : window.innerWidth,
    height: isSSR ? 800 : window.innerHeight,
  });

  React.useEffect(() => {
    window.addEventListener("resize", () => {
      setWindowSize({ width: window.innerWidth, height: window.innerHeight });
    });
  }, []);
}
Then, finally, we need to think about when our components unmount. What do we need to do? We need to remove our resize listener.
How to remove the resize event listener
You can do that by returning a function from useEffectand. We will remove the listener with window.removeEventListener.
// utils/useWindowSize.js

import React from "react";

export default function useWindowSize() {
  // if (typeof window !== "undefined") {
  // return { width: 1200, height: 800 };
  // }
  const isSSR = typeof window !== "undefined";
  const [windowSize, setWindowSize] = React.useState({
    width: isSSR ? 1200 : window.innerWidth,
    height: isSSR ? 800 : window.innerHeight,
  });

  React.useEffect(() => {
    window.addEventListener("resize", () => {
      setWindowSize({ width: window.innerWidth, height: window.innerHeight });
    });

    return () => {
      window.removeEventListener("resize", () => {
        setWindowSize({ width: window.innerWidth, height: window.innerHeight });
      });
    };
  }, []);
}
But we need a reference to the same function, not two different ones as we have here. To do that, we’ll create a shared callback function to both of the listeners called changeWindowSize.
And finally, at the end of the hook, we will return our windowSize state. And that’s it.
// utils/useWindowSize.js

import React from "react";

export default function useWindowSize() {
  const isSSR = typeof window !== "undefined";
  const [windowSize, setWindowSize] = React.useState({
    width: isSSR ? 1200 : window.innerWidth,
    height: isSSR ? 800 : window.innerHeight,
  });

  function changeWindowSize() {
    setWindowSize({ width: window.innerWidth, height: window.innerHeight });
  }

  React.useEffect(() => {
    window.addEventListener("resize", changeWindowSize);

    return () => {
      window.removeEventListener("resize", changeWindowSize);
    };
  }, []);

  return windowSize;
}
Final Result
To use the hook, we just need to import it where we need it, call it, and use the width wherever we want to hide or show certain elements.
In my case, this is at the 500px mark. There, I want to hide all of the other links and only show the Join Now button, like you see in the example above:
// components/StickyHeader.js

import React from "react";
import useWindowSize from "../utils/useWindowSize";

function StickyHeader() {
  const { width } = useWindowSize();

  return (
    <div>
      {/* visible only when window greater than 500px */}
      {width > 500 && (
        <>
          <div onClick={onTestimonialsClick} role="button">
            <span>Testimonials</span>
          </div>
          <div onClick={onPriceClick} role="button">
            <span>Price</span>
          </div>
          <div>
            <span onClick={onQuestionClick} role="button">
              Question?
            </span>
          </div>
        </>
      )}
      {/* visible at any window size */}
      <div>
        <span className="primary-button" onClick={onPriceClick} role="button">
          Join Now
        </span>
      </div>
    </div>
  );
}
This hook will work on any server-rendered React app, such as Gatsby and Next.js.
3. useDeviceDetect Hook
I’m in the process of building a new landing page for a course of mine, and I experienced a very strange error on mobile devices. On desktop computers, the styles looked great.
But when I looked at on mobile, everything was out of place and broken.
I tracked the problem down to one library called react-device-detect which I was using to detect whether users had a mobile device or not. If so, I would remove the header.
// templates/course.js
import React from "react";
import { isMobile } from "react-device-detect";

function Course() {
  return (
    <>
      <SEO />
      {!isMobile && <StickyHeader {...courseData} />}
      {/* more components... */}
    </>
  );
}
The problem was that this library doesn’t have support for server-side rendering, which is what Gatsby uses by default. So I needed to create my own solution to check when a user was on a mobile device. And for that, I decided to make a custom hook with the name useDeviceDetect.
How I created the Hook
I created a separate file for this hook in my utils folder with the same name, useDeviceDetect.js. Since hooks are just shareable JavaScript functions, which leverage React hooks, I created a function called useDeviceDetect and imported React.
// utils/useDeviceDetect.js
import React from "react";

export default function useDeviceDetect() {}
How to get the user agent from window
The way that we can make sure whether we can get information about the user’s device is through the userAgent property (located on the navigator property of window).
And since interacting with the window API as an API / external resource would be classed as a side effect, we need to get access to the user agent within the useEffect hook.
// utils/useDeviceDetect.js
import React from "react";

export default function useDeviceDetect() {
  React.useEffect(() => {
    console.log(`user's device is: ${window.navigator.userAgent}`);
    // can also be written as 'navigator.userAgent'
  }, []);
}
Once the component mounts, we can use typeof navigator to determine if we are on the client or server. If we’re on the server, we won’t have access to the window. typeof navigator will be equal to the string undefined since it’s not there. Otherwise, if we’re on the client, we’ll be able to get our user agent property.
We can express all this using a ternary to get the userAgent data:
// utils/useDeviceDetect.js
import React from "react";

export default function useDeviceDetect() {
  React.useEffect(() => {
    const userAgent =
      typeof navigator === "undefined" ? "" : navigator.userAgent;
  }, []);
}
How to check if userAgent is a mobile device
userAgent is a string value which will be set to any one of the following device names if they are using a mobile device:
Android, BlackBerry, iPhone, iPad, iPod, Opera Mini, IEMobile, or WPDesktop.
All we have to do is take the string we get and use the .match() method with a regex to see whether it’s any one of these strings. We’ll store it in a local variable called mobile.
We’ll store the result in state with the useState hook, which we’ll give an initial value of false. For it, we’ll create a corresponding state variable isMobile, and the setter will be setMobile.
// utils/useDeviceDetect.js
import React from "react";

export default function useDeviceDetect() {
  const [isMobile, setMobile] = React.useState(false);

  React.useEffect(() => {
    const userAgent =
      typeof window.navigator === "undefined" ? "" : navigator.userAgent;
    const mobile = Boolean(
      userAgent.match(
        /Android|BlackBerry|iPhone|iPad|iPod|Opera Mini|IEMobile|WPDesktop/i
      )
    );
    setMobile(mobile);
  }, []);
}
So once we get the mobile value we will set it in state. Then finally we will return an object from the hook so we can add more values in the future if we want to choose to add more functionality to this hook.
Within the object, we’ll add isMobile as a property and value:
// utils/useDeviceDetect.js
import React from "react";

export default function useDeviceDetect() {
  const [isMobile, setMobile] = React.useState(false);

  React.useEffect(() => {
    const userAgent =
      typeof window.navigator === "undefined" ? "" : navigator.userAgent;
    const mobile = Boolean(
      userAgent.match(
        /Android|BlackBerry|iPhone|iPad|iPod|Opera Mini|IEMobile|WPDesktop/i
      )
    );
    setMobile(mobile);
  }, []);

  return { isMobile };
}
Final Result
Back in the landing page we can execute the hook and simply get that property from the destructured object and use it where we need it.
// templates/course.js
import React from "react";
import useDeviceDetect from "../utils/useDeviceDetect";

function Course() {
  const { isMobile } = useDeviceDetect();

  return (
    <>
      <SEO />
      {!isMobile && <StickyHeader {...courseData} />}
      {/* more components... */}
    </>
  );
}
Conclusion
As I've attempted to illustrate through each of these examples, custom React hooks can give us the tools to fix our own problems when third-party libraries fall short.
I hope that this guide has given you a better idea of when and how to create your own React hooks. Feel free to use any of these hooks and above code in your own projects and as the inspiration for your own custom React hooks.
Become a Professional React Developer
React is hard. You shouldn't have to figure it out yourself.
I've put everything I know about React into a single course, to help you reach your goals in record time:
Introducing: The React Bootcamp
It’s the one course I wish I had when I started learning React.
Click below to try the React Bootcamp for yourself:
 Click to get started