
By Stan Georgian
When it comes to deploying an application, there are usually two options: a VPS or a PaaS (platform as a service). This article will show you a recipe for deploying an application to production on a PaaS like Heroku.
Step 1 - Create the project
The first step is to create a simple structure for our project with some basic files. For this article, I’ll create a demo server with NodeJS.
In a new folder I’ll open a terminal and run the command npm init -y in order to create a new project. The dummy server will be written in Express, so we need to run the npm install express command to install this module.
Once this library is installed, we can create a new file for our project, named app.js. Inside it we'll write the code for our simple server:
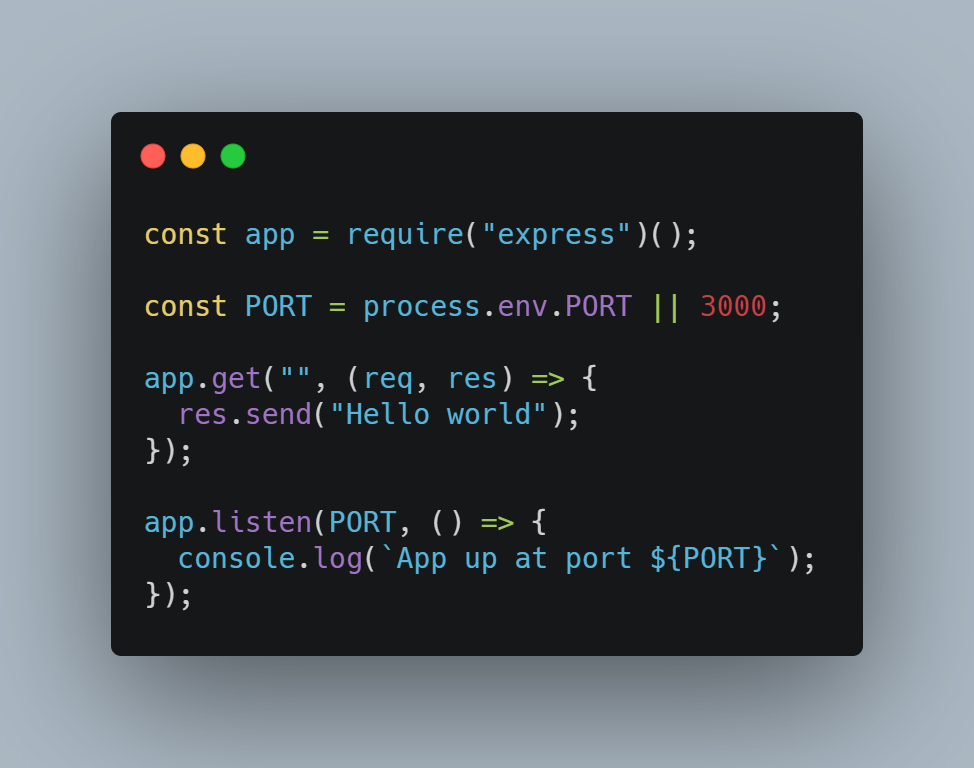 [RAW](https://carbon.now.sh/?bg=rgba(171%2C%20184%2C%20195%2C%201)&t=seti&wt=none&l=javascript&ds=true&dsyoff=20px&dsblur=68px&wc=true&wa=true&pv=56px&ph=56px&ln=false&fl=1&fm=Hack&fs=14px&lh=133%25&si=false&es=2x&wm=false&code=const%2520app%2520%253D%2520require(%2522express%2522)()%253B%250A%250Aconst%2520PORT%2520%253D%2520process.env.PORT%2520%257C%257C%25203000%253B%250A%250Aapp.get(%2522%2522%252C%2520(req%252C%2520res)%2520%253D%253E%2520%257B%250A%2520%2520res.send(%2522Hello%2520world%2522)%253B%250A%257D)%253B%250A%250Aapp.listen(PORT%252C%2520()%2520%253D%253E%2520%257B%250A%2520%2520console.log(%2560App%2520up%2520at%2520port%2520%2524%257BPORT%257D%2560)%253B%250A%257D)%253B)
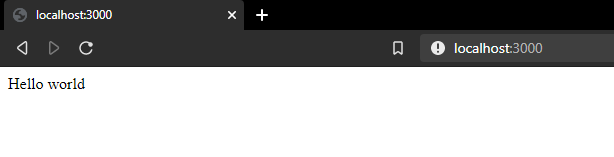
We can start the application by running node app.js. Then we can try it out at the following URL http://localhost:3000. At this point you should see the message Hello World in the browser.
Step 2 - Version control system
The next step is to choose a version control system and to place our code in a development platform in a repository.
The most popular version control system is Git along with Github as a development platform, so that's what we'll use here.
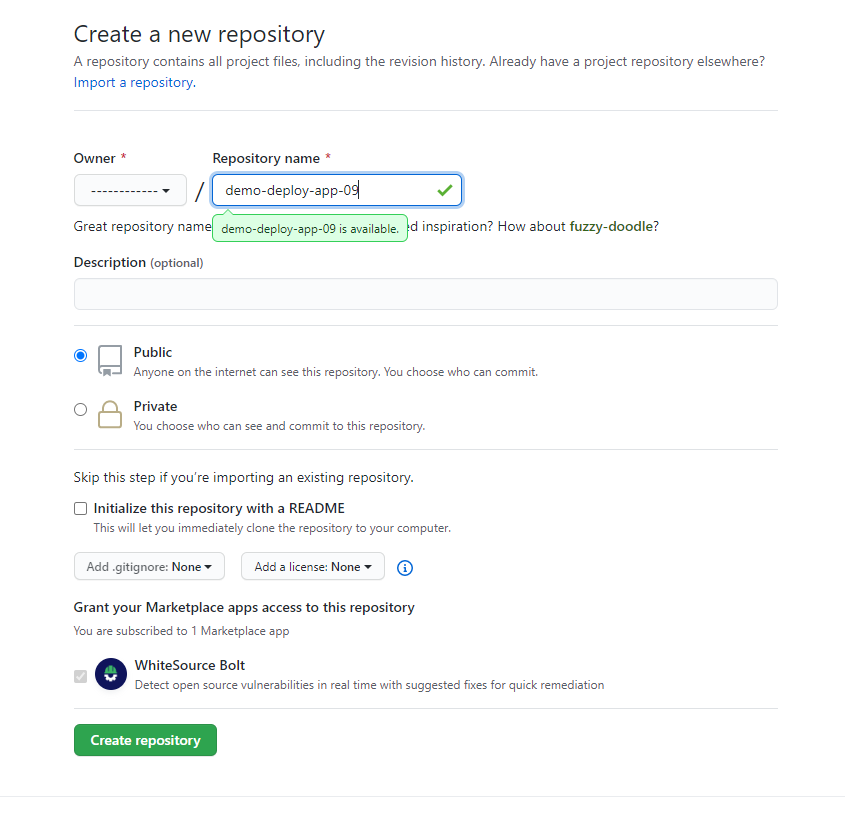
On GitHub, go ahead and create a new repository for your application, like this:
To upload your local code into a repository, you need to run the commands that are listed on Github after you click Create repository button:
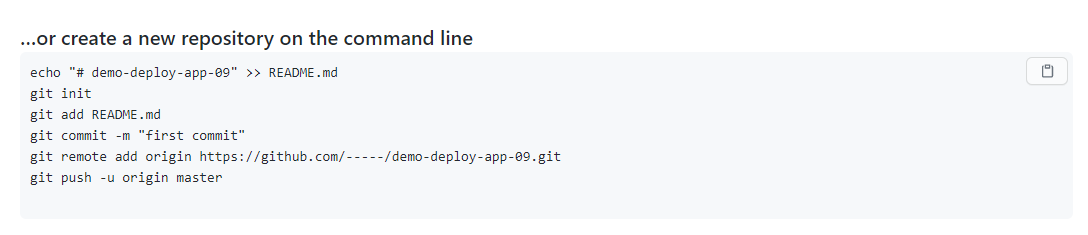 Commands to upload our code to the Github repo
! Before we do this, we must ignore some files. We want to upload to the repository only the code that we write, without the dependencies (the installed modules).
For that, we need to create a new file .gitignore and inside it write the file that we want to ignore.
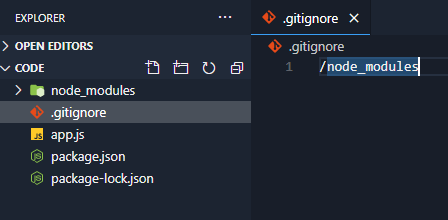 Folder structure and .gitignore file
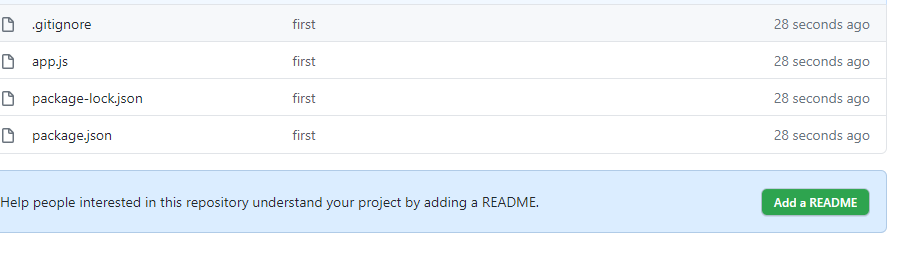
Now, we can write the commands listed in the picture above (the one from GitHub).
If you ran the commands correctly, then it'll be on your repository’s page. If you refresh it you should see your files, except the one that you explicitly ignored, namely node_modules.
Step 3 - Link the repository with Heroku
At this step, we can link the repository from Github to our Heroku application.
First, create a new application on Heroku and follow the steps listed on the platform.
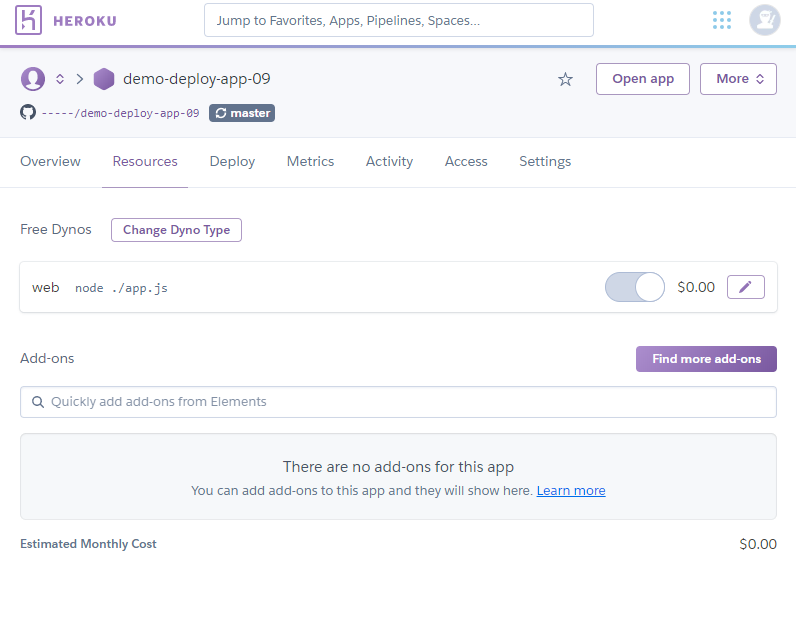
Once the application has been created, a window similar to this should appear:
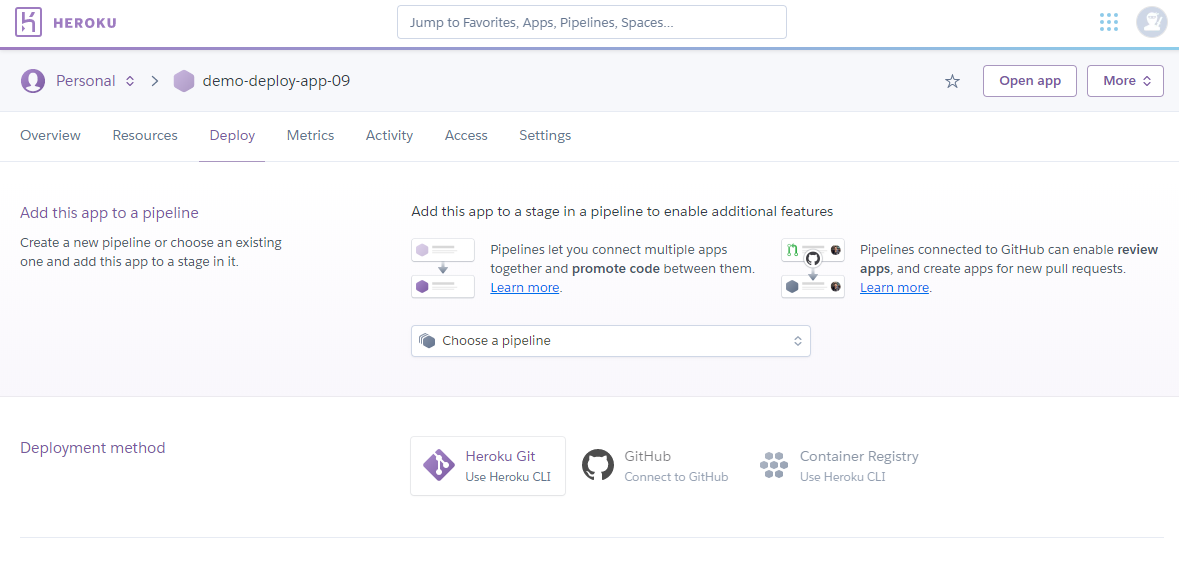 App dashboard
Now, if you look at the navigation at the top, you'll see Overview, Resources, Deploy, Metrics and so on. Be sure that Deploy is selected. Then on the second row, click on the GitHub icon.
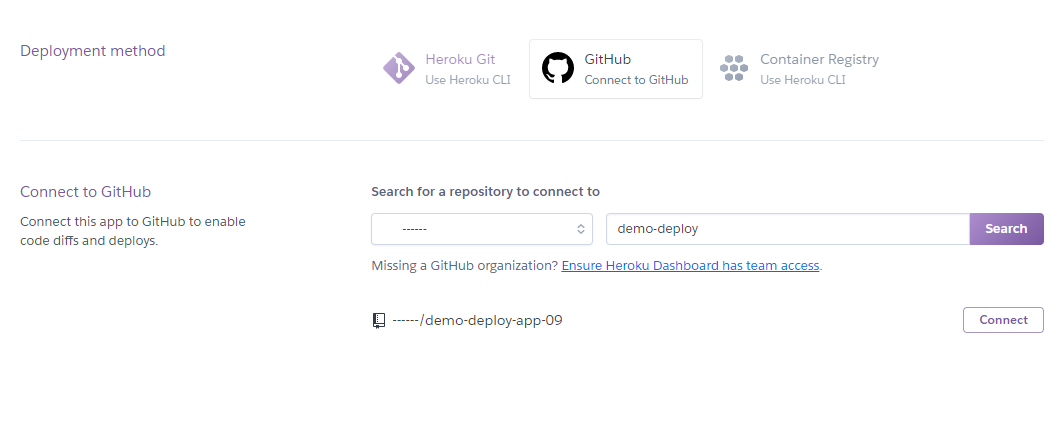 Click connect
Search for the desired application, which is demo-deploy-app-09 in our case. Then click Connect.
 Deploy Branch
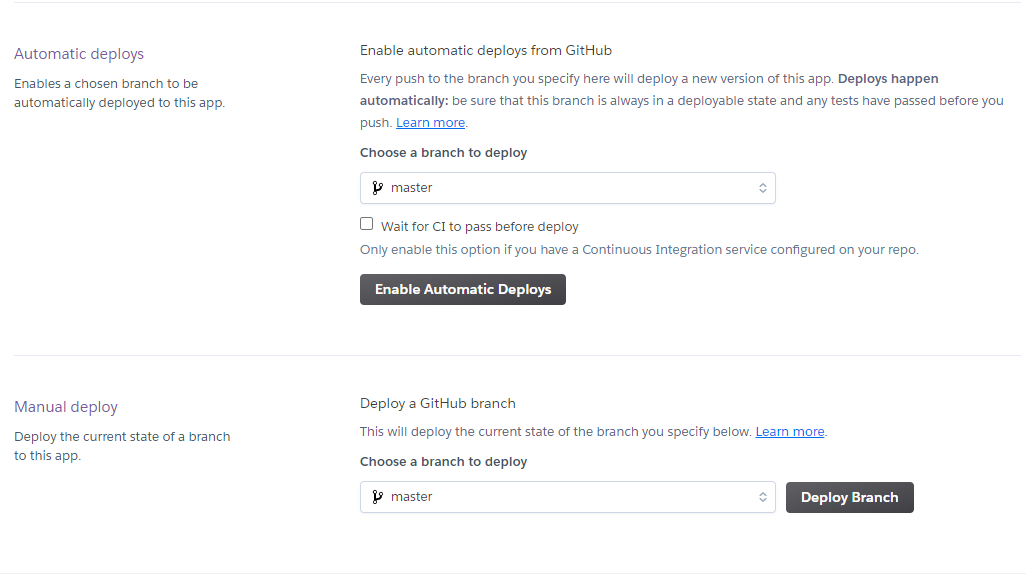
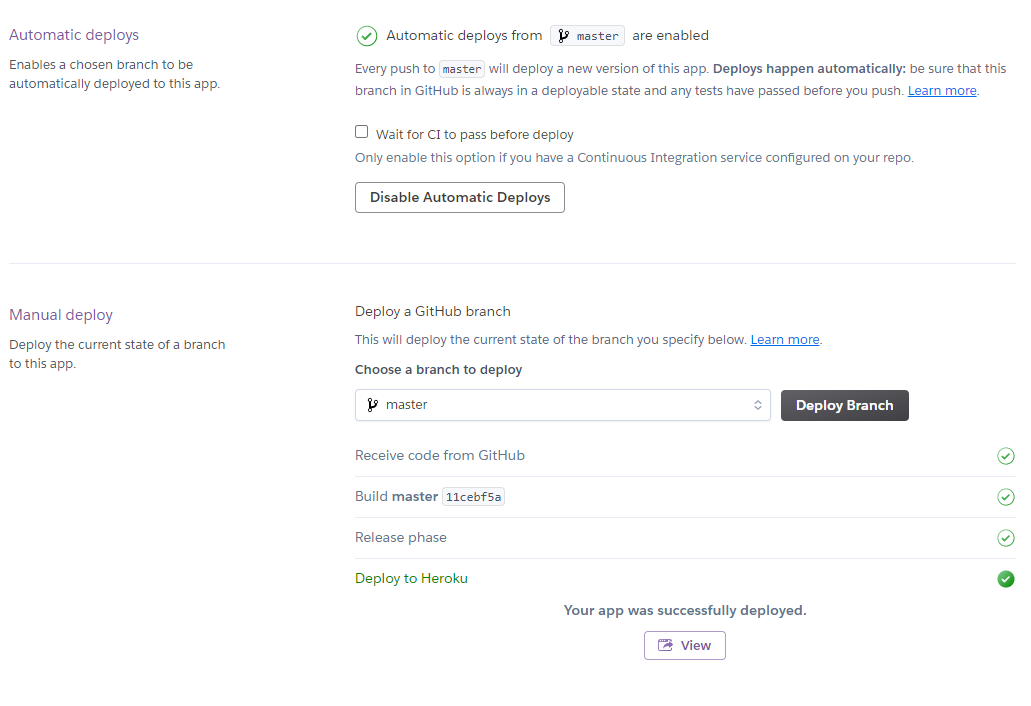
Once the application is successfully connected with your Heroku account, you can click Deploy Branch to deploy your application.
If you want, you can also select the option Enable Automatic Deploys which will automatically pull the code from your Github repository every time you make a push to that repository.
Once the application has been deployed, you can click on View to open your application.
Step 4 - Configure Heroku to properly run the application
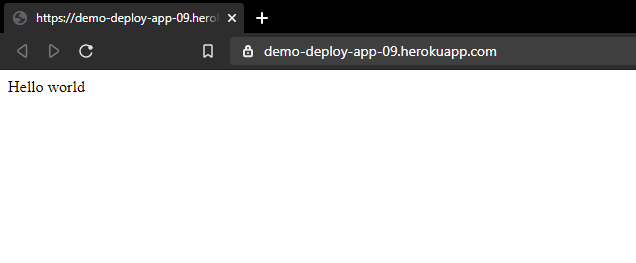
If you open the application at this point, you should see something like this:
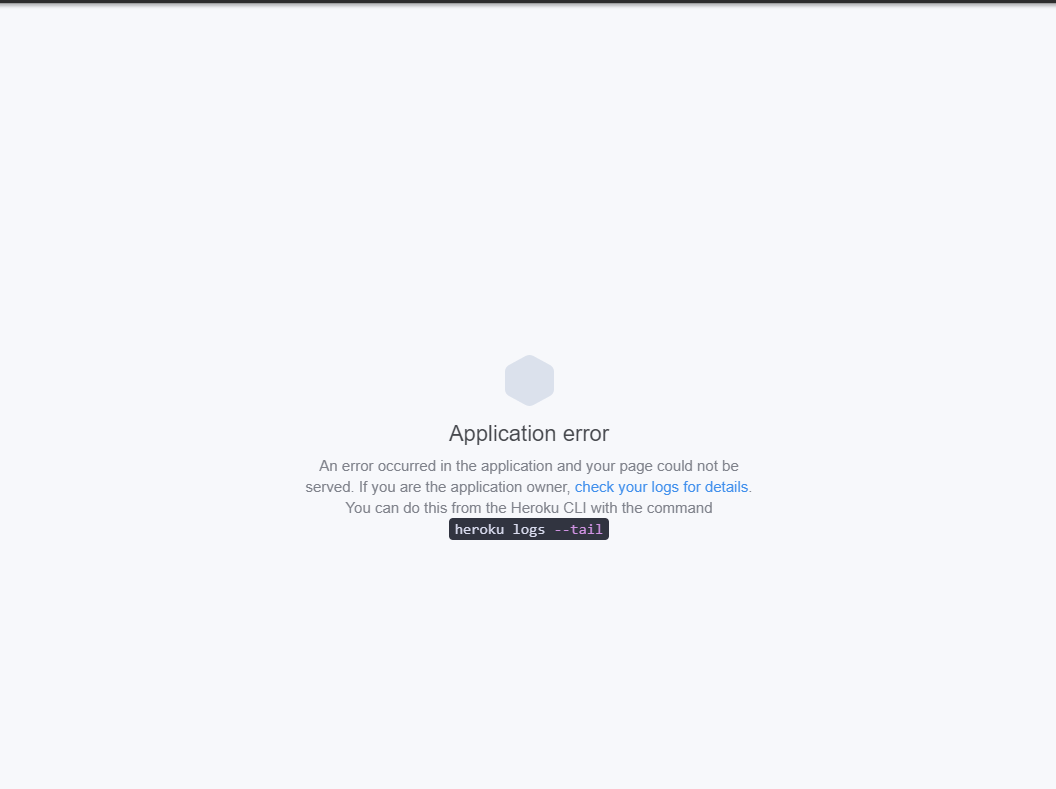
That’s right, an error. That’s because Heroku doesn’t know how to start our application.
If you remember, we ran the command node app.js to start the application locally.
Heroku has no way of knowing what commands it needs to run to start the application, and that's why it threw an error.
To solve this problem, we must create a new file named Procfile with the following content: web: node ./app.js.
To update our application, all we need to do is push a new commit to GitHub. If we have enabled the Automatic Deploys option, then the code will be automatically pulled to Heroku. Otherwise we need to click on Deploy Branch again.
Once the application is rebuilt, we should see it working like so:
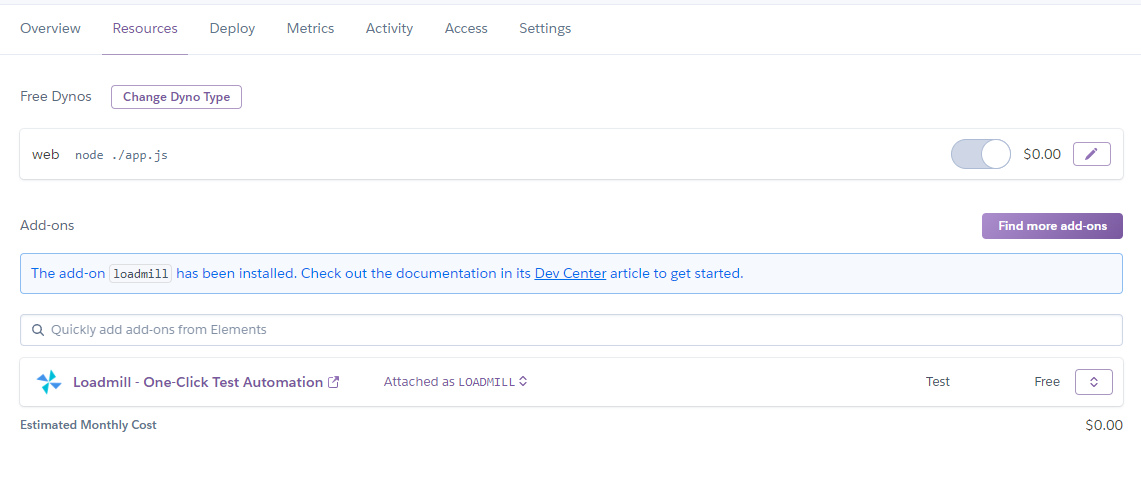
Step 5 - How to add an add-on
One key benefit that Heroku provides is the fact that you can easily add resources in the form of add-ons to your project. These external resources come in the form of databases, logging & monitoring tools, CI and CD tools, or testing tools.
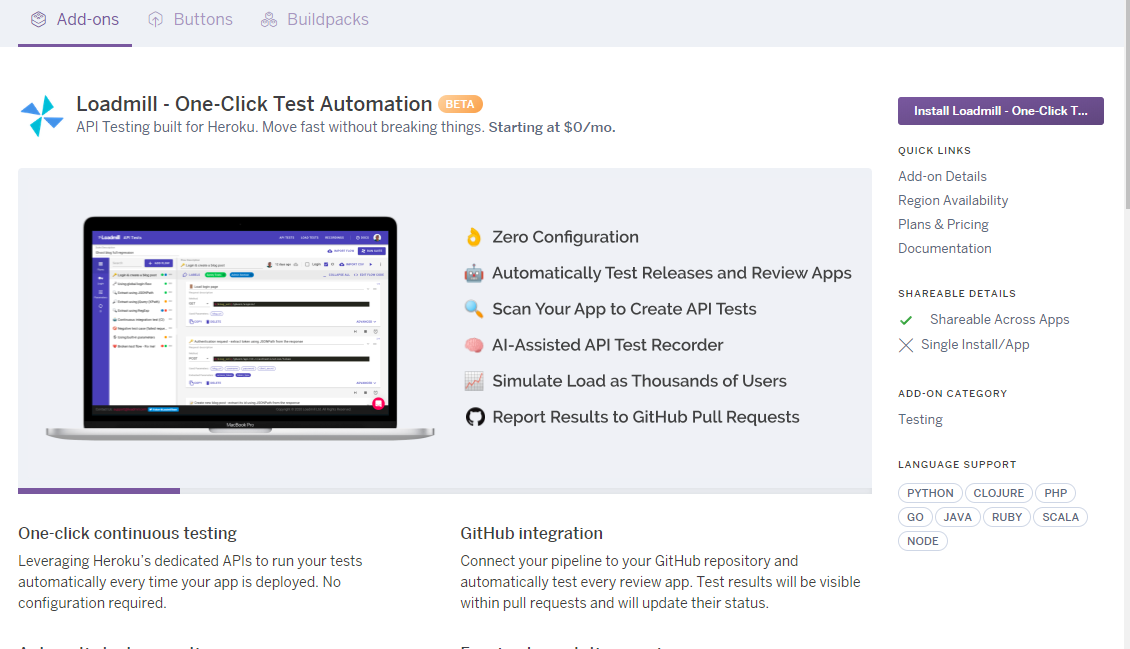
So now let's see how to add a new resource to your project. First, we'll go to Resources, and from there we'll add a new tool for testing.
Go ahead and click on Find more add-ons and then search for Loadmill.
Loadmill is a testing tool which is really great for regression testing and load testing.
Go ahead and click on Install…. Then choose the application you want to link.
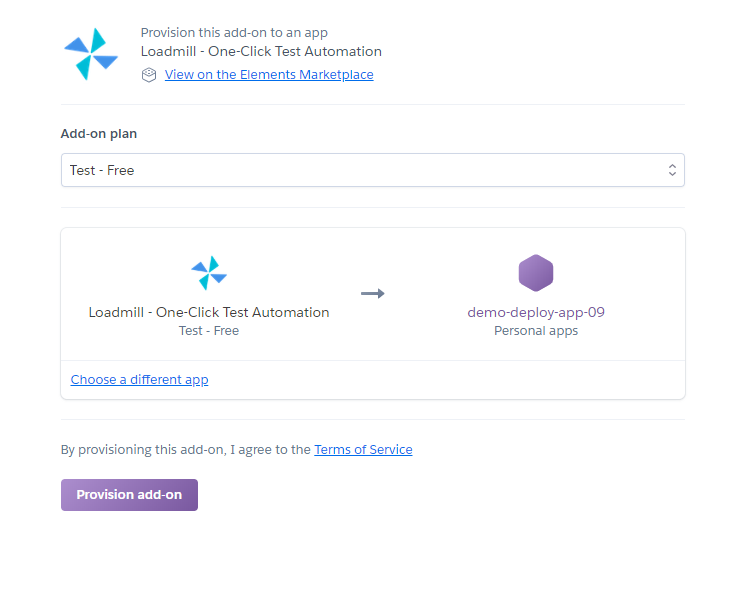
At this step, Heroku will automatically create a new account for you on the provisioned platform.
On the resources tab, you can see the newly added resource:
If you go ahead and access this add-on, you should see its dashboard with an intro tutorial and a demo test created for you.
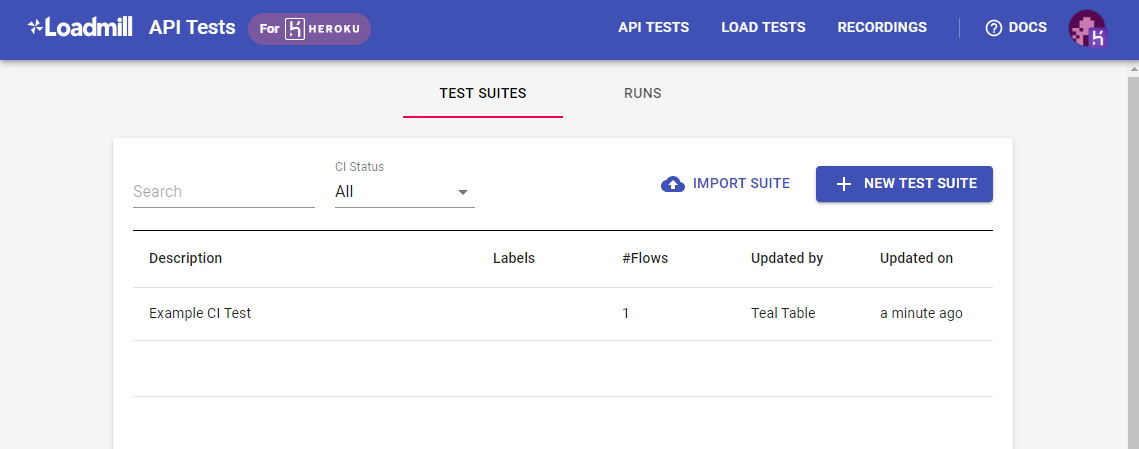 Loadmill dashboard
Conclusion
Heroku allows developers to quickly and almost painlessly deploy an application on a web server.
It also provides a lot of plugins that you can integrate into your application.
A PaaS solution will always allow you to move faster than the solution with a VPS where you have to configure everything from the ground up.