

It's simple to remove red eyes from photos using Photoshop. This tutorial will show you how to remove red eye in three easy steps.
Step One: Open your photo with red eye in Photoshop.

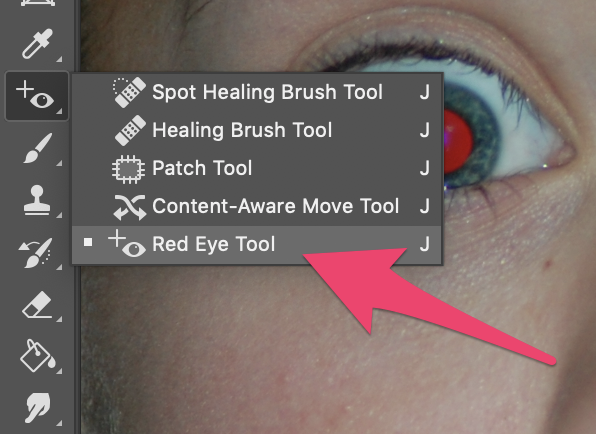
Step Two: Select the Red Eye Tool.
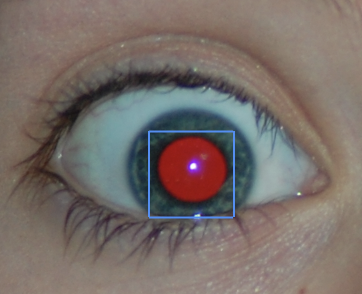
Step Three: Click anywhere in the red part of each eye with the Red Eye Tool.

You're done!
Not good enough?
If the results are not exactly what you are looking for, there are a few things you can do to improve the results.
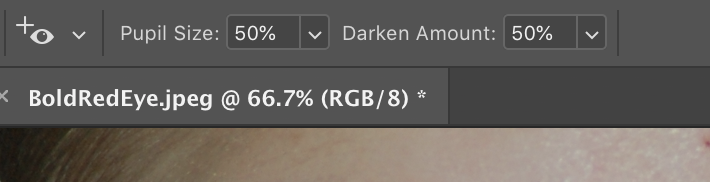
You can modify the Pupil Size and Darken Amount settings. Usually you won't need to change these but sometimes it can help.
The Pupil Size setting changes how big of an area will darken. The Darken Amount setting will change how dark the red area becomes.
Sometimes just clicking a red eye will not make the entire red area dark. You can also click and drag using the Red Eye Tool to indicate the entire area that contains red. Try selecting an area if just clicking the red eye does not work correctly.
Since all pictures are slightly different, you may have to experiment with the settings until you get the look that you want. You can also try clicking different areas of the red eye or selecting different sizes of the red eye.