
GitHub is a great application that helps you manage your Git repositories. You can also use it to contribute to the open source ecosystem and collaborate with other contributors.
Public repositories on GitHub often get lots of attention from contributors, and this helps enhance the project.
So how can you easily work on a public repo? The repository forking tool lets contributors copy the source code repository locally and make any changes they would like.
But if you're going to use this tool as a beginner, you need to understand the workflow of repository forking so you can seamlessly work with other public repositories.
In this article, we will learn about how to fork a repo with practical examples and storytelling. If you like to learn from video content, this article is also available as a YouTube video.
What is GitHub Repository Forking?
Suppose you love working on a particular framework or library like React.js. One fine day, you figure out a way that you can enhance the functionality of React yourself.
React's source code is available as a public repository on GitHub, so you can make a local copy of it by forking it.
Once you get the local copy of the code, you can make the relevant changes and ask the React community to review your changes.
After reviewing your code changes, the React community may approve them or ask you for more changes. They are most likely to take your code changes after approval.
So, let's understand the entire forking workflow with the story of two developers, Tom and Hari.
A Complete Forking Workflow
Tom and Hari are two developers who have their individual GitHub accounts. Tom is working on an outstanding project, and he manages its source code in a public repository called /tom/repo. Hari is amazed by the idea and wants to contribute to the project.
Now there are two ways Hari can approach it.
- Hari asks Tom, "Hey Tom, I want to contribute to your project. Could you please add me as a Contributor?". Well, Tom may or may not agree. As the project is already available as a public repository, he may just ask to fork it and use it.
- The second way is if Hari just forks the repo himself and starts working. He doesn't have to wait to talk to Tom and get Tom to add him as a contributor specifically.
This second approach of forking a repository directly is more convenient for any contributor. So how does it work? Let's understand the workflow in steps.
- Hari forks the repository
/tom/repo. We call the/tom/reporepository theUpstream Repository. - The repository is now available in Hari's GitHub account as
/hari/repo. We call thehari/repotheForked Repository. Also, it is an exact copy of the upstream repository. This repository is entirely detached from Tom's repo and Hari can start making any changes he wants. Hari will first clone the repository and start making changes to do that. - Hari makes the required changes and pushes the changes to the forked repository.
- Finally, Hari creates a
Pull Requestfrom the forked repository to the upstream repository. Tom reviews the pull request at his convenience to approve and merge it if all goes well.
That's the entire workflow—simple and straightforward ways to contribute to the public repository. A picture is worth thousands of words. Here is a demonstration of the workflow we discussed.
 Workflow - Forking a Repository
How to Fork a Repo in GitHub
Forking a repository is the matter of clicking a button.
To follow along, browse to a public repository that you want to fork. At the top right of the page, you will find the Fork button. Click on the button and wait for a few seconds. You will see that the newly forked repository gets created under your GitHub account.
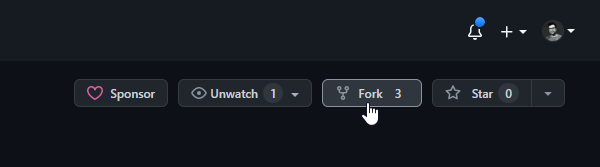 Fork Button
Follow the steps we learned above after forking the repository to start contributing.
Let's Practice Forking
As a newbie, do you want to practice forking to be more confident? Let's do that. You can perform these tasks to practice forking.
- Browse to this public repository: https://github.com/atapas/fork-me
- Create a folder with the same name as your GitHub user-id (it is atapas for me).
- Add a
Readme.mdfile inside the folder with any text of your choice. - Create a
Pull Requestupstream. I shall review and merge it if all is well.
Don't worry if you go wrong. Keep trying, you will get it. It will be like a practice playground of contributing to an open-source repository.
In Summary
- Git is a version control tool widely used by the developer community. If you are a beginner to Git, learn about it from here.
- GitHub is a popular application for managing Git repositories. Anyone can contribute to a public repository.
- Forking is an excellent tool for copying source code from someone's repository to your repository and contributing to it.
- The forking workflow is simple to learn and get started.
Before We End...
I hope you found the article helpful. Please practice forking and contribute to open source projects. My DMs are open on Twitter if you want to discuss further.
Let's connect. I share my learnings on JavaScript, Web Development, Career, and Blogging on these platforms as well:
See you soon with my next article. Until then, please take care of yourself, and stay happy.