
By Ben Gubler
I first came across this idea on this website. Since the tutorial there is a few years old, I wrote a new tutorial with updated code.
If you’re in a hurry, you can find the completed code here.
We all know about them or use them — the shiny badges at the top of nearly every ReadMe that say things like “build: passing”, or “size: 10KB”. This guide will teach you how to generate your own badges, with nothing but Node.js, ExpressJS, and Squirrelly.
Now for the tutorial
Prerequisites
This tutorial assumes you have Node.js and npm (or yarn) already installed. If you don’t, go to the Node site here (it installs with npm by default).
Setup
First, create a new directory and cd into it:
mkdir badge-generator && cd badge-generator
Next, install the necessary dependencies, Express and Squirrelly.
With npm:
npm install express squirrelly
Or for those who use yarn:
yarn add express squirrelly
Creating the server
We’ll only need two files for our program, index.js and template.svg (which we’ll create next).
Create a file named index.js and paste the following code:
This opens a server on port 8080, and listens to requests. By the end of this tutorial, you’ll be able to make a request to http://localhost:8080/left-text/right-text/color and have an awesome-looking SVG badge returned! Yay! But what’s the part of the code with Sqrl about?
var badge = Sqrl.renderFile(path.join(__dirname, 'template.svg'), req.params)
This is where Squirrelly comes in. We want to serve an SVG image file, but the content (width, length, and text) of the image will be different each time. Squirrelly is a template engine, a program that takes a file or string called a template and inserts the data. It also does some other fancy stuff, like handling caching, but we won’t need to worry about that.
The code above reads the file named template.svg , then uses req.params (an object that contains the paths) to fill the template. In this case, req.params will look like:
{ left: "first-part-of-the-url-path", right: "second-part-of-the-url-path", color: "third-part"}
Creating a template
Create a new file called template.svg, and paste the following code:
You can read the full Squirrelly docs here, but essentially, anything between double brackets: {{ and }} will be replaced by its actual value.
But wait: we only passed in left , right , and color — where did we get leftWidth and rightWidth from? That’s what the code below (at the top of the template) does; using the js helper (which lets you write JS inside of a template), it defines a new variable, called leftWidth .
{{js(options.leftWidth = options.left.length * 10)/}}
There’s one more thing to do. Notice that line 18 looks like this:
<rect ...stuff... fill="{{returnColor(options.color)/}}"/>
With SVG images, the fill attribute must either contain one of a few predefined colors that don’t look that great, or an RGB or hex color. We want to use hex codes, but there’s a catch: you’ll notice that if you enter http://localhost:8080/some/text/#fff into a browser, it thinks the hex code at the end is the hash at the end of the url, and Express doesn’t recognize it.
What we’re going to do is create a helper (called returnColor) that will translate color words, like ‘brightgreen’, ‘green’, and ‘red’, into hex color codes. Paste the following anywhere into index.js:
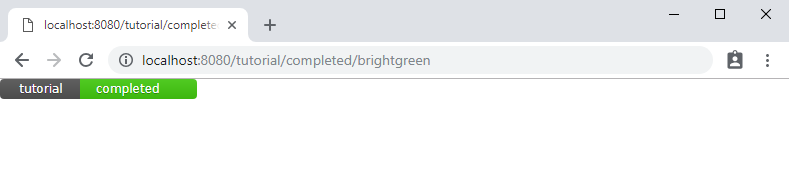
See if it works
Type node index.js into your terminal, then go to http://localhost:8080/test/badge/brightgreen. If all went well, you should see a badge!
If anything throws an error, compare your code to the working code here.
You can find more information about Squirrelly below.
Squirrelly Documentation
_Squirrelly is only 2KB gzipped, has 0 dependencies, and is blazing fast._squirrelly.js.org
Thanks for reading this guide. I hope it was helpful!