
You might have seen a tool with the logo of a whale lifting some square containers. Yes, I am talking about Docker.
The Docker logo actually symbolizes software that brings together a huge amount of organized information, hinting at its convenience.
Many enterprise applications use Docker-based deployments (also called containerized deployments) these days. So it's a good skill to have as a developer.
This tutorial will be the best fit for those who know nothing apart from the term "Docker".
In this article, you'll learn about the fundamentals of Docker, build your own Docker image, and publish it to the Docker Hub.
Why Do You Need Docker?
Let's understand why we need Docker with a simple example.
Let's assume you're joining a new company and you have been assigned to an extremely huge project to work on. You received a brand new laptop and are ready to put on your development shoes.
The first step whenever you are onboarded into a project is to set up the development environment. Since it's a huge enterprise project, it consumes a bunch of time to set up the development environment. You may need to install project-specific dependencies, tools, and many more.
In the middle, you may face errors that you can mostly solve by following the README guide, but a couple of them might happen for the first time (might happen due to laptop configuration) and you have to solve them on your own.
Imagine if you have to follow the same process for large teams with tons of members. It would be horrible to handle right?
This is where Docker comes in really handy. Docker will create containerized applications that run on any type of environment that have all the dependencies within it. So setting up the development environment is just one command away. Docker has many use cases – this scenario is just one of them.
By using Docker we can standardize application operations, ship code faster, and seamlessly deploy to production.
How Does Docker Work?
Docker provides a standardized way to develop, test, and deploy code.
You can think about Docker as a super-powered advanced virtual machine. Let’s learn more about it with an example.
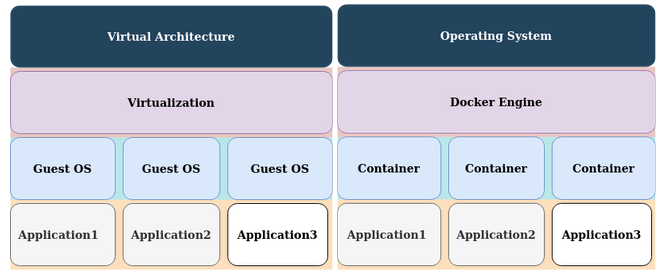 Comparison between Virtual Machine and Docker
Before getting started to work on Docker, we should understand some fundamentals of how it works. They are:
- Docker Engine
- Docker Container
- Docker Image
What is Docker Engine?
The Docker engine is an open-source containerization technology you can use to build a containerizing application. W
e can use the Docker engine on a variety of platforms through Docker Desktop or Binary Installation. To simplify, the software that hosts the containers is called Docker Engine.
What is a Docker Container?
A container is a standard unit of software that packages up the code and all required dependencies needed to run an application on different platforms or computing environments.
Containers are fully isolated from the computing environment, so applications run quickly and reliably from one computing environment to another.
Docker containers are built from container images.
What is a Docker image?
A Docker container image is a lightweight, standalone, executable package of software that includes everything needed to run an application. It includes code, runtime, system tools, system libraries, and settings.
As we discussed, containers are built from images. Images become containers when they starts running on a Docker Engine.
Use Cases for Docker
Docker gives you the ability to run an application in any type of environment which is completely isolated from the current environment. This isolated environment is called a container.
This isolation and security allow us to run as many containers as we want in a host. Docker helps developers to work in a standardized environment using local containers which provide all the packages and dependencies to run an application.
Let's see a few use cases of Docker:
- Developers can write code locally and share their work using Docker containers
- You can use Docker to deploy your applications into a test/production environment and execute automated and manual tests
- When developers need to fix something, they can easily make the changes and push the Docker image to the testing or production environment
Just like Git, we can use Docker when we're making changes to our projects. If we make any changes we can just push the Docker images and pull them into the host machine. No more changes need to be done in the host server.
Here are the deployment steps you'd go through if you're not using Docker:
- Pull/clone the code from Git
- Install dependencies, run migrations, and so on in the host machine.
- Start the application
These steps have to be repeated on every server whether it is a testing or production environment.
Here is the deployment steps using Docker:
- Pull the docker image (
docker pull) - Run the container in the host machine (
docker run)
What is Docker Hub?
Docker Hub is the largest community for Docker images. It allows you to share the container images among your team, or the Docker community. Docker Hub is sort of like GitHub. Here, Docker images reside instead of the project's code.
You can pull the open-source Docker images also. To use this you have to create an account in Docker hub.
Now that you know a bit about how Docker works and why it's useful, let's learn how to containerize an application.
How to Containerize a NodeJS Application using Docker
Prerequisites:
- A Basic understanding of NodeJS Applications
- Docker desktop application
You can install the Docker Desktop application by following their original documentation.
You can verify if Docker is installed on your machine by querying it's version like this:
docker -v
 Find Docker Version
Let's start our implementation.
Instead of starting over from scratch, I have created a super simple Express API that exposes only one endpoint. I pushed the code to a public repo on GitHub. You can clone the repo by running the below command:
git clone https://github.com/5minslearn/node_with_docker.git
This is the project's structure:
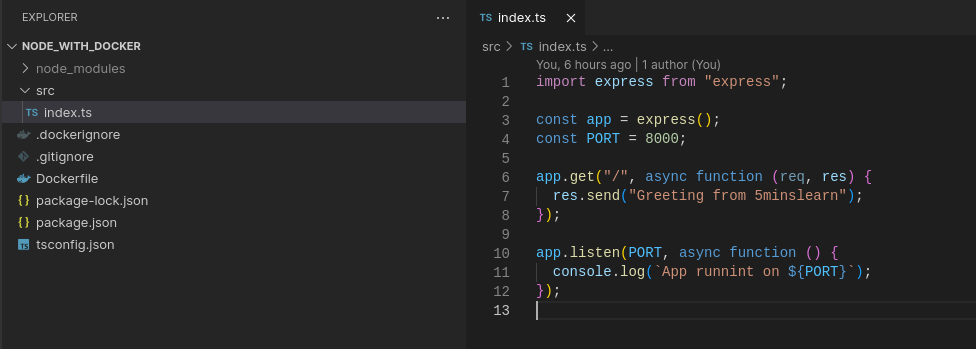 Simple NodeJS Project Structure
I have created only one endpoint ("/") and calling it will return "Greeting from 5minslearn". I've simplified this as much as possible to allow us to focus more on Docker.
How to Create a Dockerfile
Now, you'll need to create a file named "Dockerfile" in the root directory. It is the default file name for the Docker engine. Paste the following code into the file:
FROM node:latest
WORKDIR /app
COPY . /app
RUN npm install
EXPOSE 8000
CMD ["npm","start"]
Let's understand these commands line by line.
Defining the parent image is the first step of Docker engine. You have to define the parent image from which you're building the project. In our case it's Node.
There are a lot of parent images available in Docker Hub. You have to define the Image Variant next to the parent image. I always prefer to use the latest node image.
FROM node:latest
The second step is to define the working directory in Docker. Let's define our working directory as the app directory.
WORKDIR /app
Copy the project to the app directory. Make sure you exclude the node_modules directory. We will see how to ignore files/folders in the upcoming steps.
COPY . /app
In the above command, the . indicates that all the files and directories are to be copied to the app folder.
The next step is to install the required dependencies with this command:
RUN npm install
RUN is an image build step. The state of the container after a RUN command will be committed to the container image. A Dockerfile can have many RUN steps that can layer on top of one another to build the image.
Expose the port in which application should run.
EXPOSE 8000
The EXPOSE instruction informs Docker that the container listens on the specified network ports at runtime.
Finally run the execution command:
CMD ts-node src/index.ts
CMD is the command the container executes by default when we launch the built image.
Tip: I recommend that you install the Docker extension if you're using VS Code. It'll help you with its solid suggestions.
 VS Code
 Docker extension
How to Ignore Files So They're Not Copied into the Docker Container
You have to exclude the unwanted files from being copied into the container. The .dockerignore file helps you with that. It works like .gitignore for Git.
You can define all the files you have to ignore and don't want to copy.
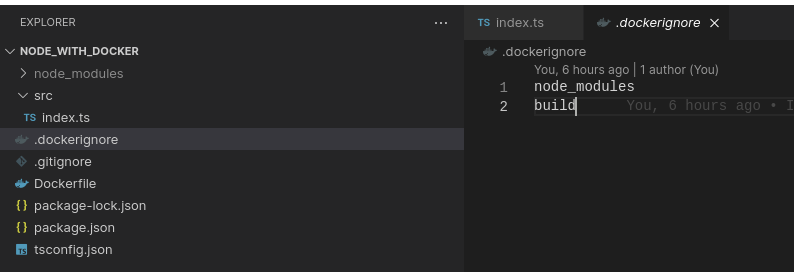 Using
Using .dockerignore to exclude the unwanted files from being copied to the container
Great! You've completed the Docker configuration. Let's run the application.
How to Build Docker Images
You can build a Docker image by running the docker build command. Here's the syntax for it:
docker build -t image_name:version_number .
image_name indicates the container image name and version_number indicates the image version. Did you notice the dot (.) at the end of the command? It indicates that the Docker image should be built from the current directory.
I decided to set the image name as node_with_docker. Remember that the image name has to be prefixed with the Docker hub username. I've created my Docker hub account with the aanandggs username. So, my image name is aanandggs/node_with_docker. You may choose to enter whatever you want.
docker build -t aanandggs/node_with_docker:0.0.1 .
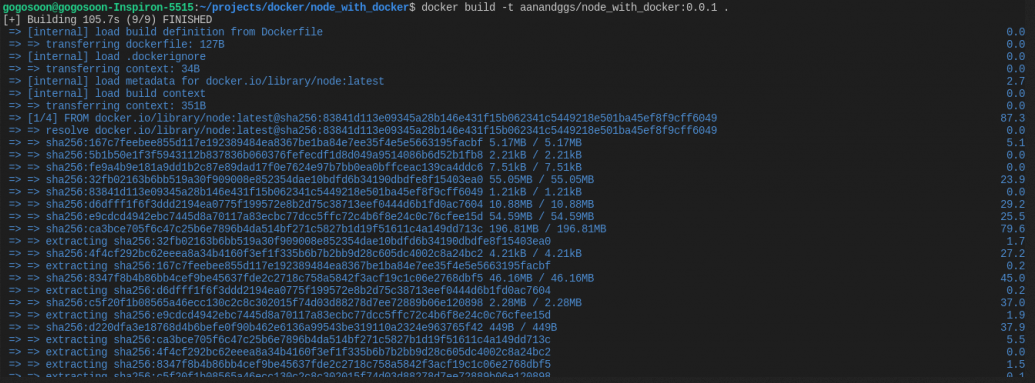 Sample output of building docker image
Once you've built your Docker image, you'll be able to see it on your Docker Desktop.
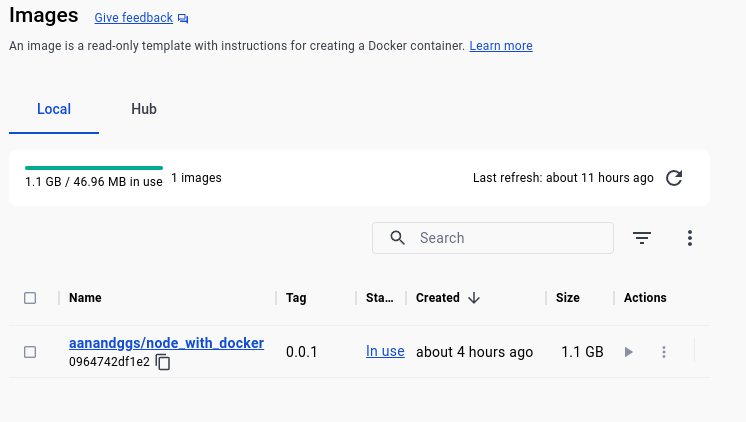 Docker Image in Docker Desktop
How to Run the Docker Image
After we build the Docker image, the next step is to run it. When an image starts running on a Docker Engine, it'll become a container.
Let's run our image which we built in the previous step:
docker container run -d --name <name_of_app> -p <local_port>:<docker_port> <image_name>:<version>
docker container run -d --name docker_with_node -p 8000:8000 aanandggs/node_with_docker:0.0.1
 Docker Command to create and run a container
Let's understand the above command.
We use the docker container run command to create and run a new container from an image.
The -d flag instructs the container to run in the background (detach). It prints the container id.
The --name parameter gives a name to our container.
We use the -p parameter to publish a container’s port to the host. It'll bind the port 8000 of your local machine with the port 8000 of the Docker container.
image_name:version indicates the image and its version that this container should run.
You can have a look at the running containers in the Docker Desktop app.
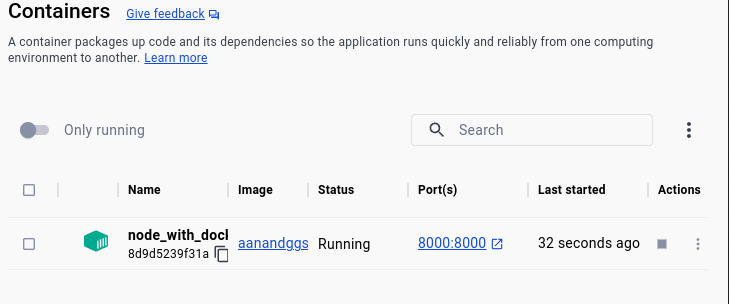 Running Container in Docker Desktop
The Dashboard shows that our app is running. Let's check the output on the browser by trying to access the "/" endpoint. Hit locahost:8000/ on your browser. You should see a message similar to the one in the below screenshot:
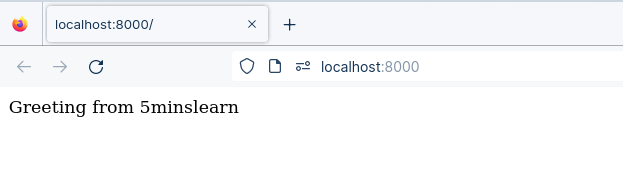 NodeJS App running output
You have successfully run an app with a Docker container.
Note: You can bind any local port to the Docker port. Ensure your local port is not used by any other process.
How to Push the Image to the Docker Hub
Create your profile on Docker Hub. Come back to terminal and run the below command to login to Docker CLI:
docker login
If you face any issues with login, follow this doc to login to the Dockerhub on your machine.
After a successful login, you can push the image to Docker hub.
docker push <docker_image>:<image_version>
docker push aanandggs/node_with_docker:0.0.1
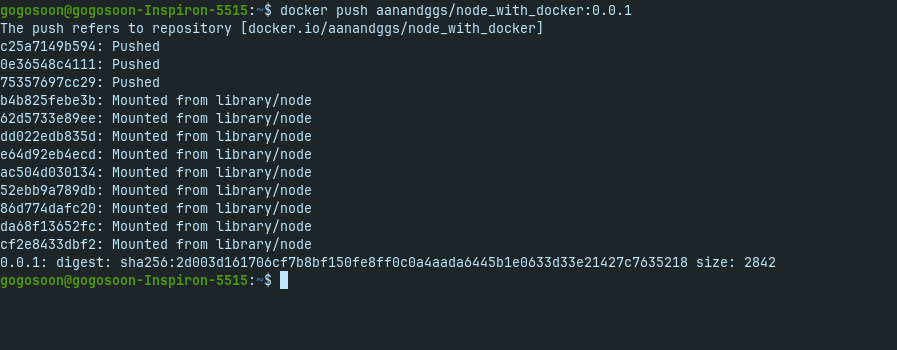 Sample output of pushing image to docker
Hurray! Docker images are uploaded to Docker hub.
You'll be able to see them in the Docker hub console.
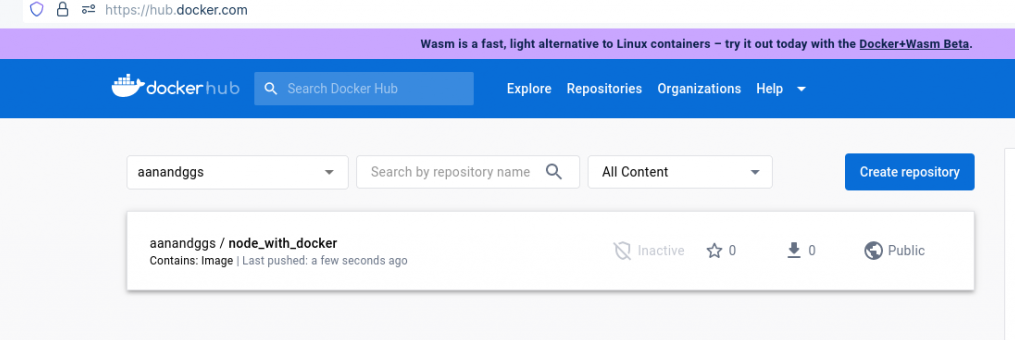 Pushed Docker image in DockerHub
Since our image is public, anyone on the internet can pull the image and run it on their machines without any third-party installation.
Conclusion
In this article, we have learnt the very basics of Docker. Docker is an ocean of information. To fully learn it, you'll need to do more than just reading – you'll need to practice working with it.
Hope you folks enjoyed reading this one. Will see you in another interesting tutorial. Feel free to reach out to me on LinkedIn if you have any queries.
To learn more about Docker, subscribe to my email newsletter on my site (https://5minslearn.gogosoon.com) and follow me on social media.