
By Ankit Sharma
Introduction
In this article, we will learn how to deploy a Blazor application on Firebase. We will create a basic calculator app using Blazor and host it on Firebase. This application will not have any server-side code or web API logic. We will use Visual Studio 2017 to build and publish the application. We will use CLI to deploy the application on Firebase.
Prerequisites
You need to install following prerequisites to create a Blazor application.
- Install the .NET Core 2.1 or above SDK from here
- Install the latest version of Visual Studio 2017 from here
- Install ASP.NET Core Blazor Language Services extension from here
Creating a Blazor application
We will create a basic calculator application for this demo. Since this is a basic calculator, it will take two operands, and support four arithmetic functions — addition, subtraction, multiplication, and division.
Open Visual Studio and select File >> New >> Project. After selecting the project, a “New Project” dialog will open. Select .NET Core inside Visual C# menu from the left panel. Then, select ASP.NET Core Web Application from available project types. Put the name of the project as SampleCalculator and press OK.

After clicking on OK, a new dialog will open asking you to select the project template. You can observe two drop-down menus at the top left of the template window. Select “.NET Core” and “ASP.NET Core 2.1” from these dropdowns. Then, select “Blazor” template and press OK.

This will create your Blazor application. We will now create our calculator component.
Creating the Calculator Component
For this application, we will use the single page component structure. The logic and the UI will be in the same file.
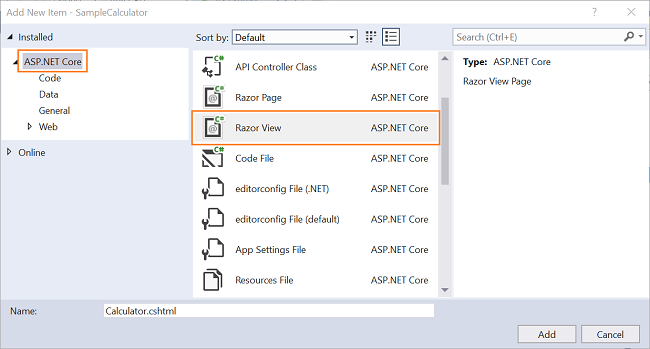
To create our component, right-click on SampleCalculator/Pages folder and then select Add >> New Item. An Add New Item dialog box will open, asking you to select the desired item template from the provided list of items. Select ASP.NET Core from the left panel, and then select Razor View from the templates panel. Put the name of file as Calculator.cshtml and click Add.
Refer to the following screenshot:
Open the Calculator.cshtml file and put the following code into it:
@page "/calculator"<h1>Basic Calculator Using Blazor</h1><hr /><div> <div class="row"> <div class="col-sm-3"> <label class="control-label">First Number</label> </div> <div class="col-sm-4"> <input class="form-control" type="text" placeholder="Enter First Number" bind="@operand1" /> </div> </div> <br /> <div class="row"> <div class="col-sm-3"> <label class="control-label">Second Number</label> </div> <div class="col-sm-4"> <input class="form-control" type="text" placeholder="Enter Second Number" bind="@operand2" /> </div> </div> <br /> <div class="row"> <div class="col-sm-3"> <label class="control-label">Result</label> </div> <div class="col-sm-4"> <input readonly class="form-control" bind="@finalResult" /> </div> </div> <br /> <div class="row"> <div class="col-md-3"> <button onclick="@AddNumbers" class="btn btn-primary"> Add (+) </button> </div> <div class="col-md-3"> <button onclick="@SubtractNumbers" class="btn btnwarning">Subtract (−)</button> </div> <div class="col-md-3"> <button onclick="@MultiplyNumbers" class="btn btn-success">Multiply (X)</button> </div> <div class="col-md-3"> <button onclick="@DivideNumbers" class="btn btn-info">Divide (/)</button> </div> </div></div>@functions {double operand1 { get; set; }double operand2 { get; set; }string finalResult { get; set; }void AddNumbers(){ finalResult = (operand1 + operand2).ToString();}void SubtractNumbers(){ finalResult = (operand1 - operand2).ToString();}void MultiplyNumbers(){ finalResult = (operand1 * operand2).ToString();}void DivideNumbers(){ if (operand2 != 0) { finalResult = (operand1 / operand2).ToString(); } else { finalResult = "Cannot Divide by Zero"; }}}
In the HTML part of the code, we have defined two textboxes to read the operand input from the user. We have a textbox to display the result of arithmetic operations. We have also defined four buttons, one for each arithmetic operation. The onclick event of the buttons will invoke the methods that will provide the output. Once it has performed the corresponding operation on both operands.
In the @functions section, we have defined two properties to bind to the user input value, and another property to display the calculation result. To handle our arithmetic operations, we have defined four methods that will perform the desired operations on the operands and set the value of finalResult that will then bind to the Result field on the UI.
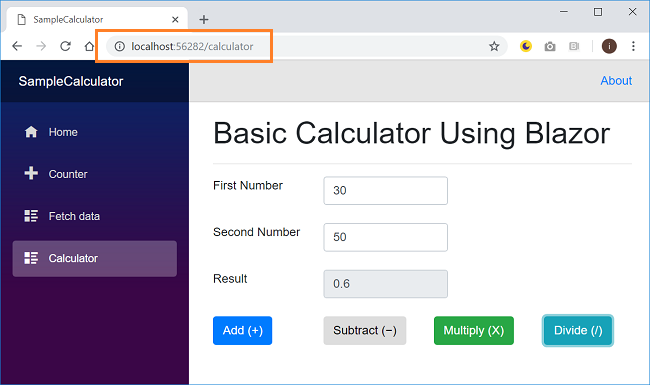
Add the navigation link for this component in Shared/NavMenu.cshtml file. Press F5 to run the application and you can see the output screen as shown in the image below:
This application is still in a development environment. Before hosting it on Firebase, we need to publish it.
Publishing the Blazor application
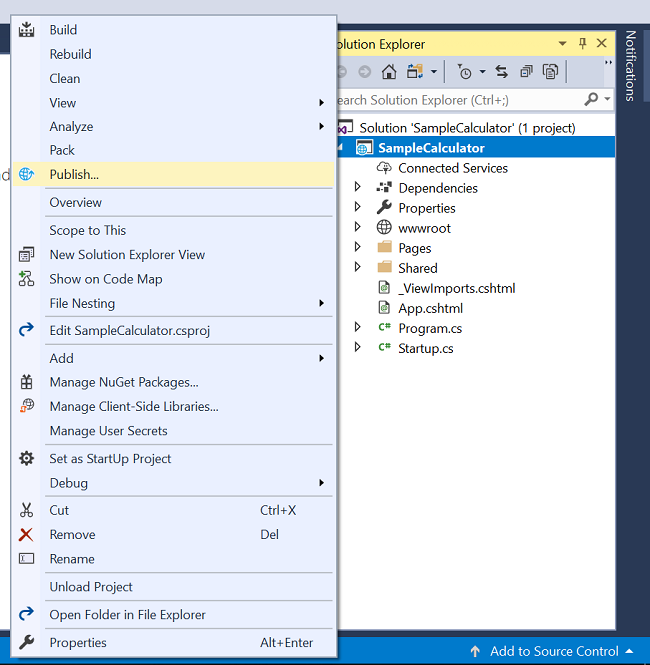
Right click on the project and click publish. Refer to the image below:
You will see a screen similar to below. Select Folder from the left menu and provide a folder path. You can provide any folder path where you want to publish your app.
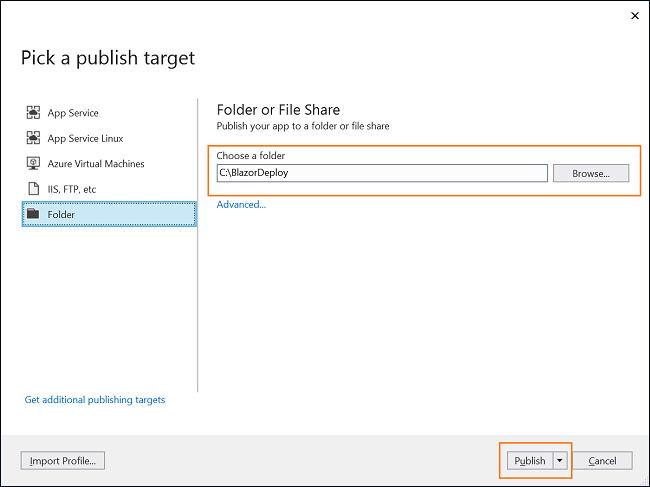
Click on publish. Visual Studio will start publishing your application. If there are no build errors then your application will be published successfully to the folder you have mentioned.
After the publishing is successful, we will proceed to host this application on Firebase.
Adding Project on Firebase
The first step to host any application on Firebase is to add a new project on Firebase console.
Navigate to https://console.firebase.google.com and sign in with your Google account. Click on Add Project link. A pop up window will open as shown in the image below. Provide your project name and click on Create project button at the bottom.
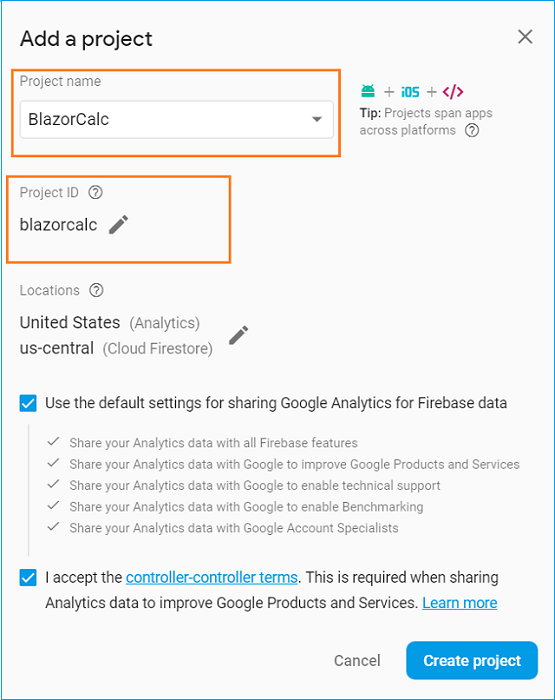
Note the project id here. Firebase project ids are globally unique. You can edit your project id while creating a new project. One the project is created you cannot change your project id. We will use this project id in the next section while initializing our application.
Deploying with Firebase
Open the folder where you have published your Blazor application. Here you can see a folder “SampleCalculator” and a web.config file. Inside “SampleCalculator” we will have another folder with name “dist”. We will publish the contents from this “dist” folder.
Open a command prompt/PowerShell window inside the “SampleCalculator” folder. Now follow the steps mentioned below:
Step 1: Login using Firebase
Execute the following command:
firebase login
It will open a browser window and ask you to login into Firebase. Login using your Google account. Upon successful login navigate back to your CLI.
Step 2: Initializing your application
Execute the following command
firebase init
This command will initialize a firebase project. You will be asked a set of questions. Answer them as shown below:
- Are you ready to proceed? — Press Y
- Which Firebase CLI features do you want to set up for this folder? — select Hosting
- Select a default Firebase project for this directory: — If the project you added in the last section appears in the list, select it, else select “don’t set up a default project”.
- What do you want to use as your public directory? — dist
- Configure as a single-page app (rewrite all URLs to /index.html)? — y
- File dist/index.html already exists. Overwrite? — N
You will get a “Firebase initialization complete!” message.
Step 3: Adding a default project
If you already selected a default project in step 2 then you can skip this step.
If you have not selected a default project then you need to add it manually here. Run the following command:
firebase use --add yourProjectId
In this case, it will be
firebase use --add blazorcalc
You will get a success message as “Now using project blazorcalc”.
Step 4: Deploy on Firebase
Finally, run the following command to deploy your application on Firebase.
firebase deploy
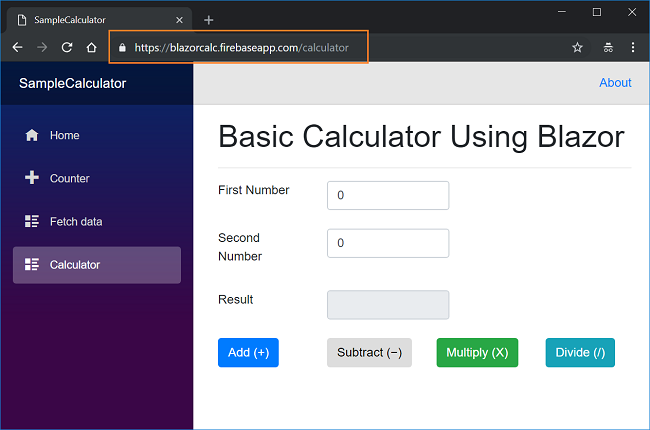
This command will deploy your Blazor application on Firebase and upon success, it will give you a hosting URL.
All the steps mentioned above is shown in the GIF below:
Execution Demo
Open the hosting URL. You can see the application in your browser as shown in the image below:
Article Extension
We can follow the same steps to host an Angular application on Firebase.
Run the following command to build an Angular app for prod.
ng build --prod
It will create the “dist” folder in your application’s root folder. Once you get the “dist” folder follow the same steps as mentioned above.
Conclusion
We learned how to create a sample calculator application using Blazor. We also learned how to deploy this application to Firebase.
You can find the code for this sample calculator application at Github.
Get my book Blazor Quick Start Guide to learn more about Blazor.
Preparing for interviews? Read my article on C# Coding Questions For Technical Interviews
See Also
- BlazorGrid — A Reusable Grid Component For Blazor
- Publishing A Blazor Component To Nuget Gallery
- Deploying a Blazor Application on IIS
- Deploying A Blazor Application On Azure
- CRUD Using Blazor with MongoDB
- Single Page Application Using Server-Side Blazor
Originally published at https://ankitsharmablogs.com/