By Marcia Villalba
Static sites can host all kinds of websites from your personal portfolio, to a company landing page, or even a blog.
The main advantage of static sites is that they are simple to manage. They are also very cost-efficient. And with static sites, you don’t need complex content management services (CMS) that run on servers all the time (even if you don’t have any traffic).
In this post, you will learn how to host a static website in the AWS cloud in 4 steps, using AWS Amplify and Route 53. And the best part? It will cost you almost nothing every month.
What is a static website?
Static websites are website served from a storage server or a content delivery network (CDN). There is no need to have a running server creating the HTML files.
These websites are pre-built as HTML files that are stored somewhere on the internet and then served as they were built.
Static sites can have dynamic content, but it is handled on the client-side using JavaScript or some third party integrations using APIs.
Some benefits of using a static site are:
- They're easy to scale
- If you're using a CDN, loading times are fast
- They're cost-effective
- They're easy to maintain
For example, my personal website is a good example of a static site:

What is AWS?
AWS stands for Amazon Web Services and is the most widely-adopted cloud platform. It has lots of different services to help you to develop and host your applications.
AWS also has data centers around the world and millions of customers use it.
Using the cloud for your applications you will lower the costs, help you become more agile, and allow you to innovate faster than if you were using your own on-premise servers.
Step 1 - Setup your AWS account
The first step in this process is to get an AWS account. You are going to host your static page in the cloud, and for that you must have a valid AWS account.
If you are just now creating your account the free tier should be sufficient for this project. The free tier will give you access to a lot of AWS services for free for the first 12 months.
For example, you will get 5GB of free storage. That is great, as we need storage to save our static site in the cloud.
Keep in mind that having an AWS account is free if you don’t use any services. You won’t be charged for creating the account, and if you don’t use the account nothing will be charged.
To create an AWS account you can follow the steps in this video:
Step 2 - Create your static site and configure it with AWS Amplify
Right now after reading that headline, you might be wondering, what is AWS Amplify?
AWS Amplify is an open-source framework that provides features to help you build cloud-native web and mobile applications. It has 4 components:
- the Amplify CLI
- the Amplify libraries
- the Amplify UI Components, and
- the Amplify Console.
The Amplify CLI helps you configure all the services you need to create a cloud backend to your application using the command-line interface.
The libraries help you integrate your client applications directly with the backend services.
The Amplify UI components are UI libraries specifically for React, React Native, Angular, Ionic, and Vue that will help you develop your cloud-native application easily.
Finally, the Amplify Console is an AWS service that provides a git-based workflow for continuous deployment and for hosting full-stack web and mobile applications.
In this post we are not going to use all the capabilities of AWS Amplify, we are just going to use the Console. But I recommend that you check out some tutorials on how to build more complex applications using AWS Amplify.
Create the static site
Now, you have everything you need to get started with your static site. For this demo, any static HTML will work. I just created a file called index.html and added this code inside of it:
<html>
    <h1>Hello Foobar</h1>
    <p>This is my super simple site</p>
</html>
Upload it to AWS Amplify Console
After we have the static site, the next step is to go to the AWS Amplify service in the AWS console.

Then when that service opens you will see something like this:
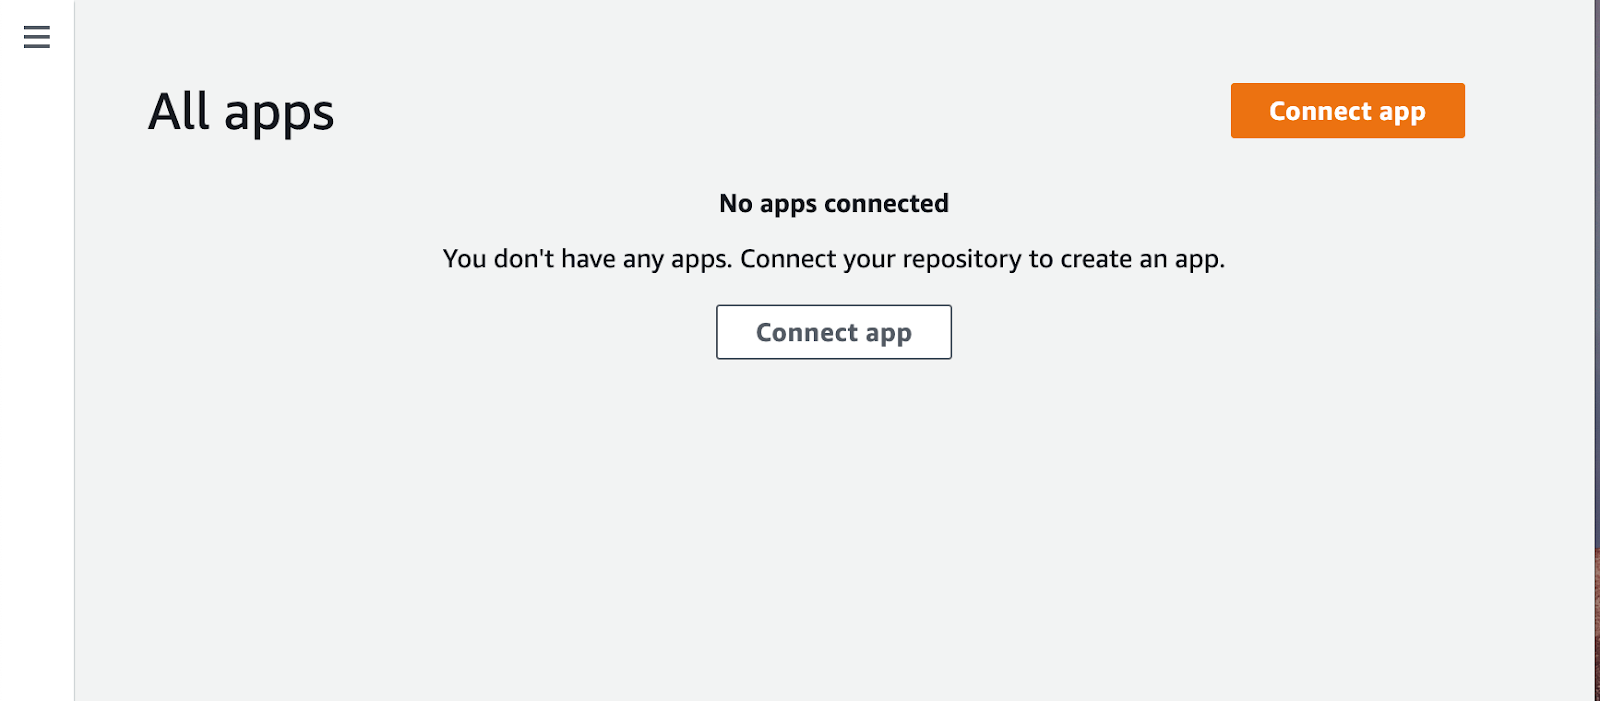
Click the Connect app button and then you will be presented with this page:
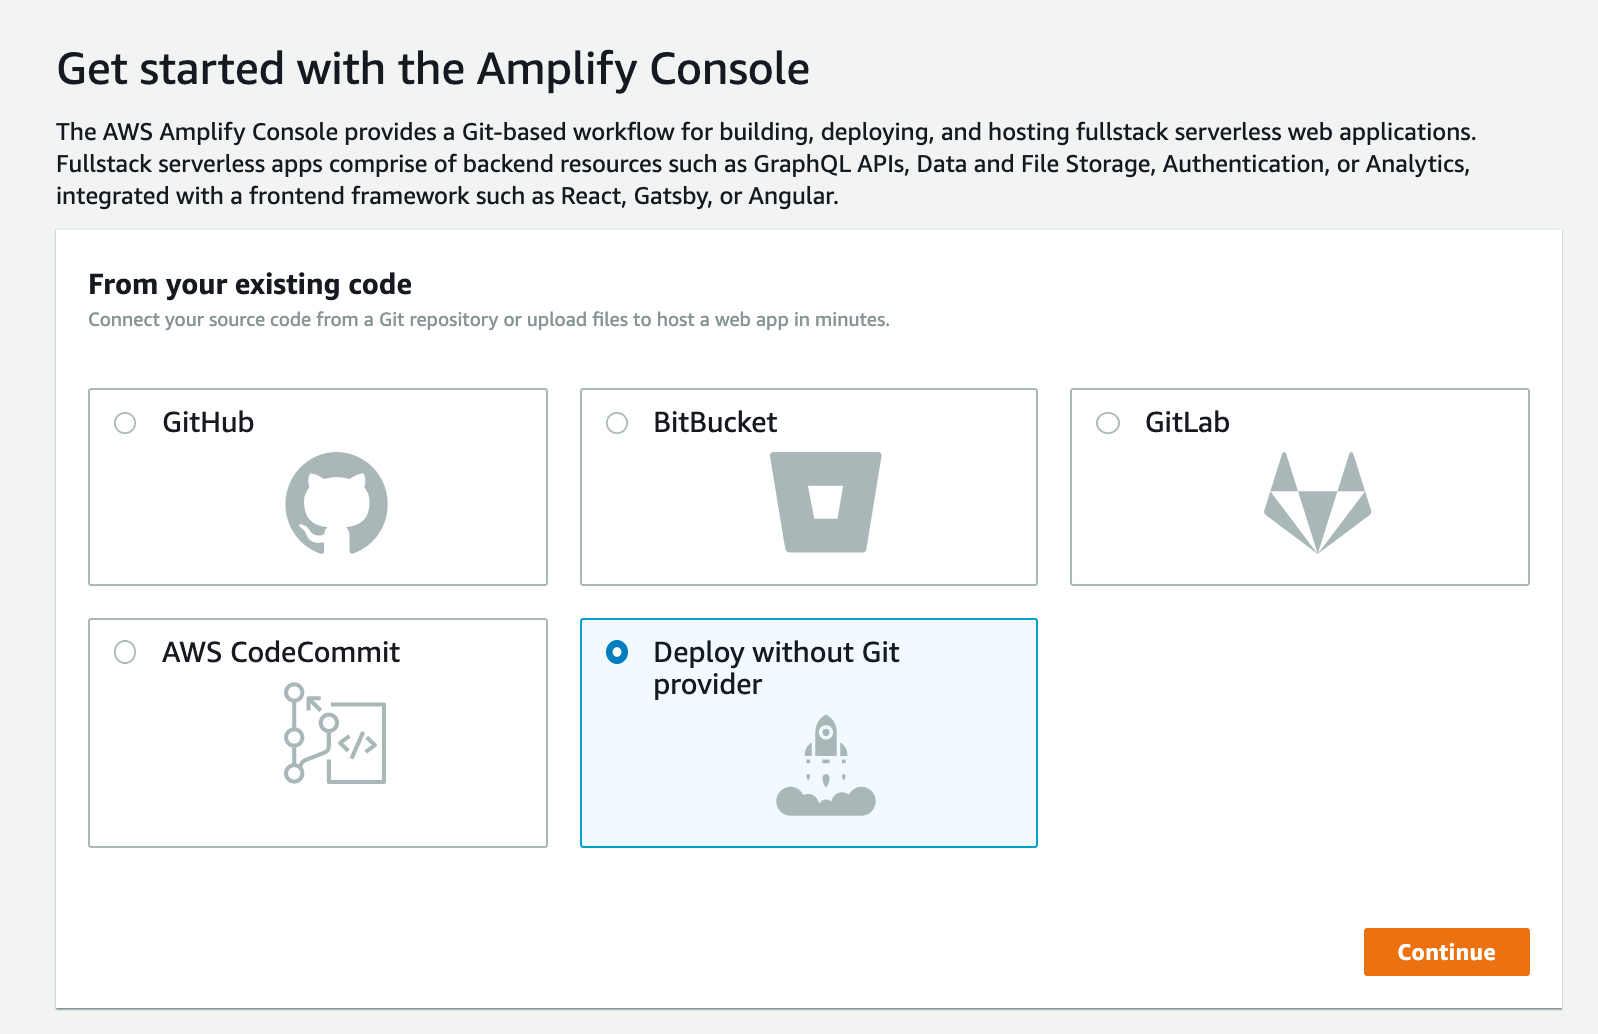
Then you can select Deploy without a Git provider and continue.
You will be presented with a page to manually deploy your app. There, you choose an app name and an environment name and then you can drag your application folder into the browser.
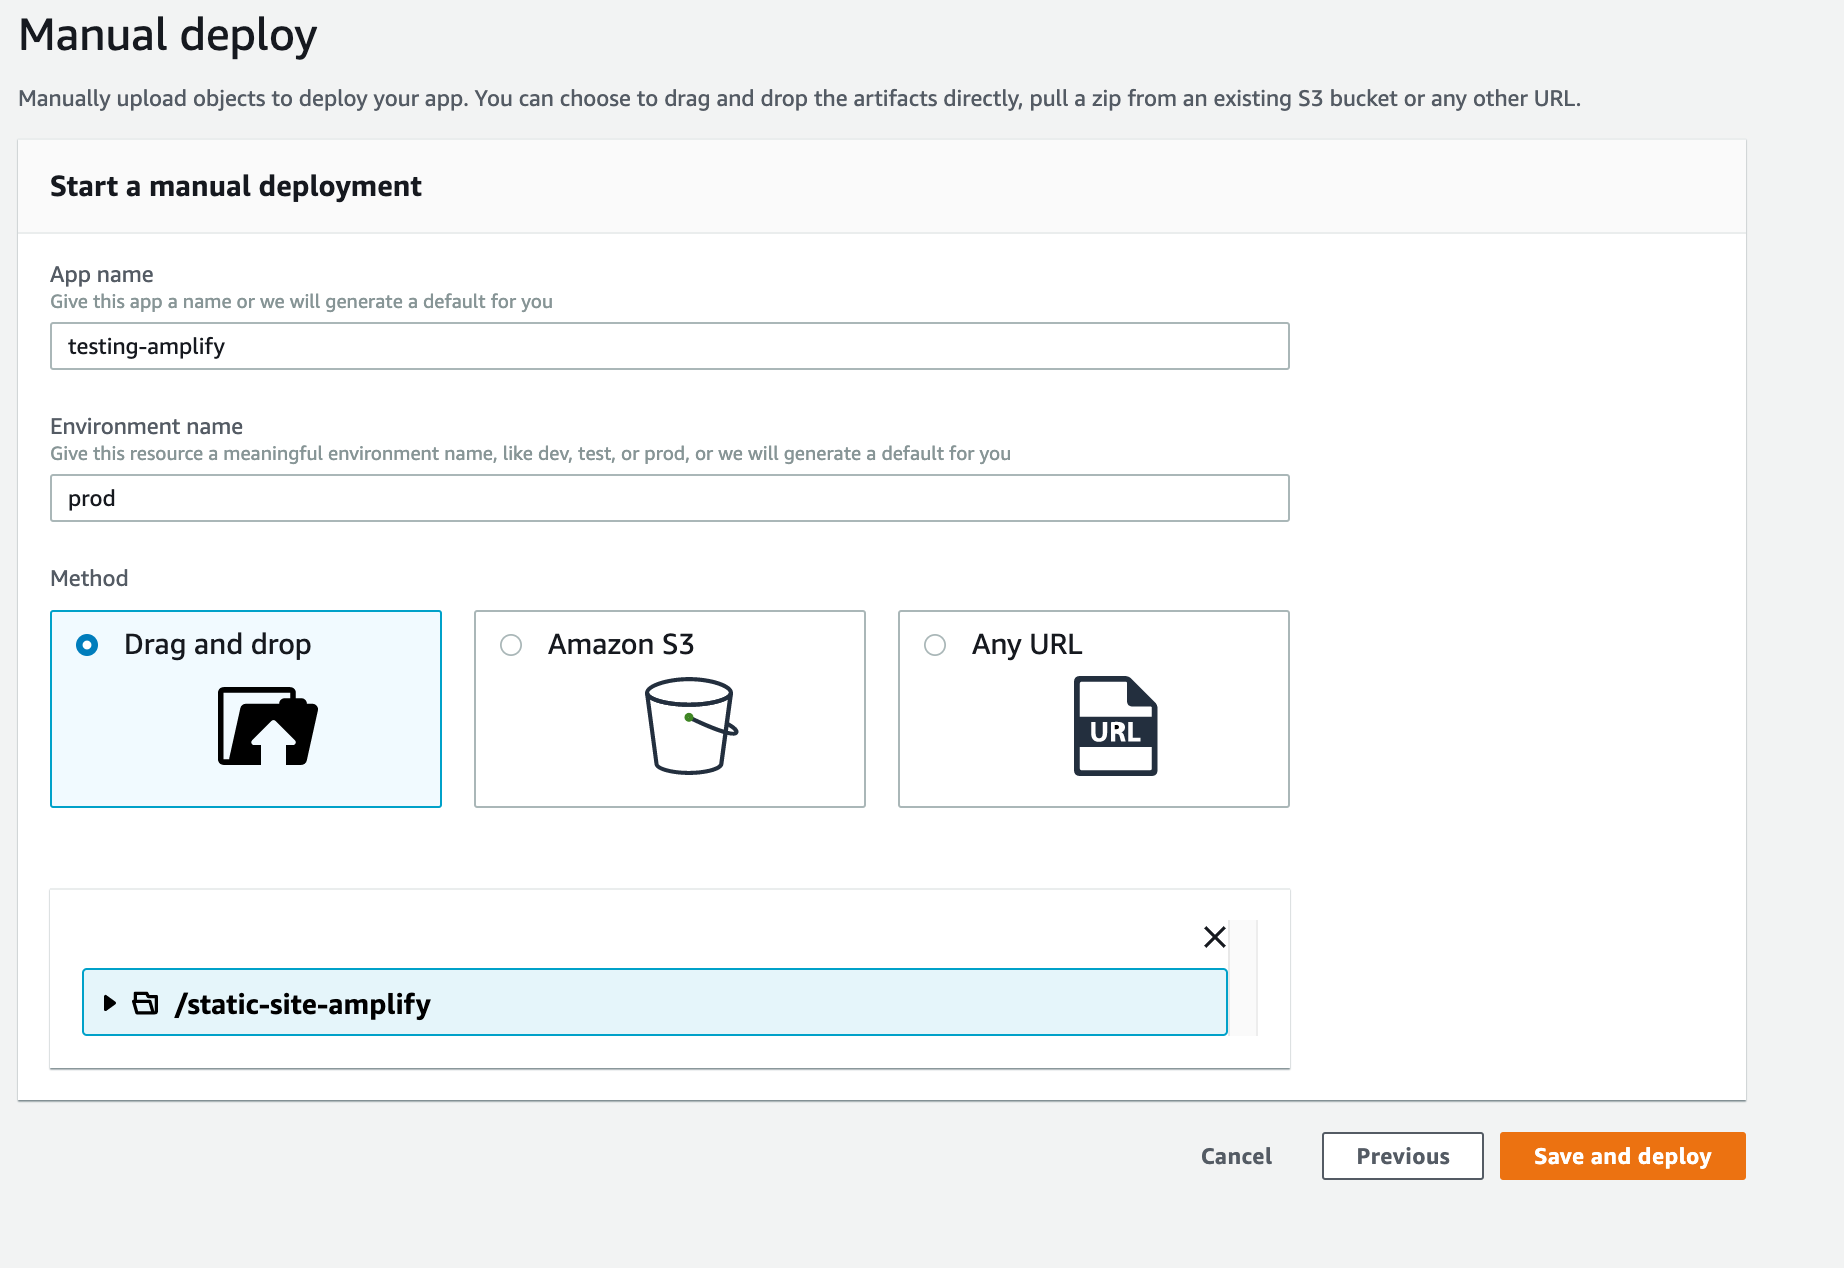 Starting a manual deployment in AWS Amplify
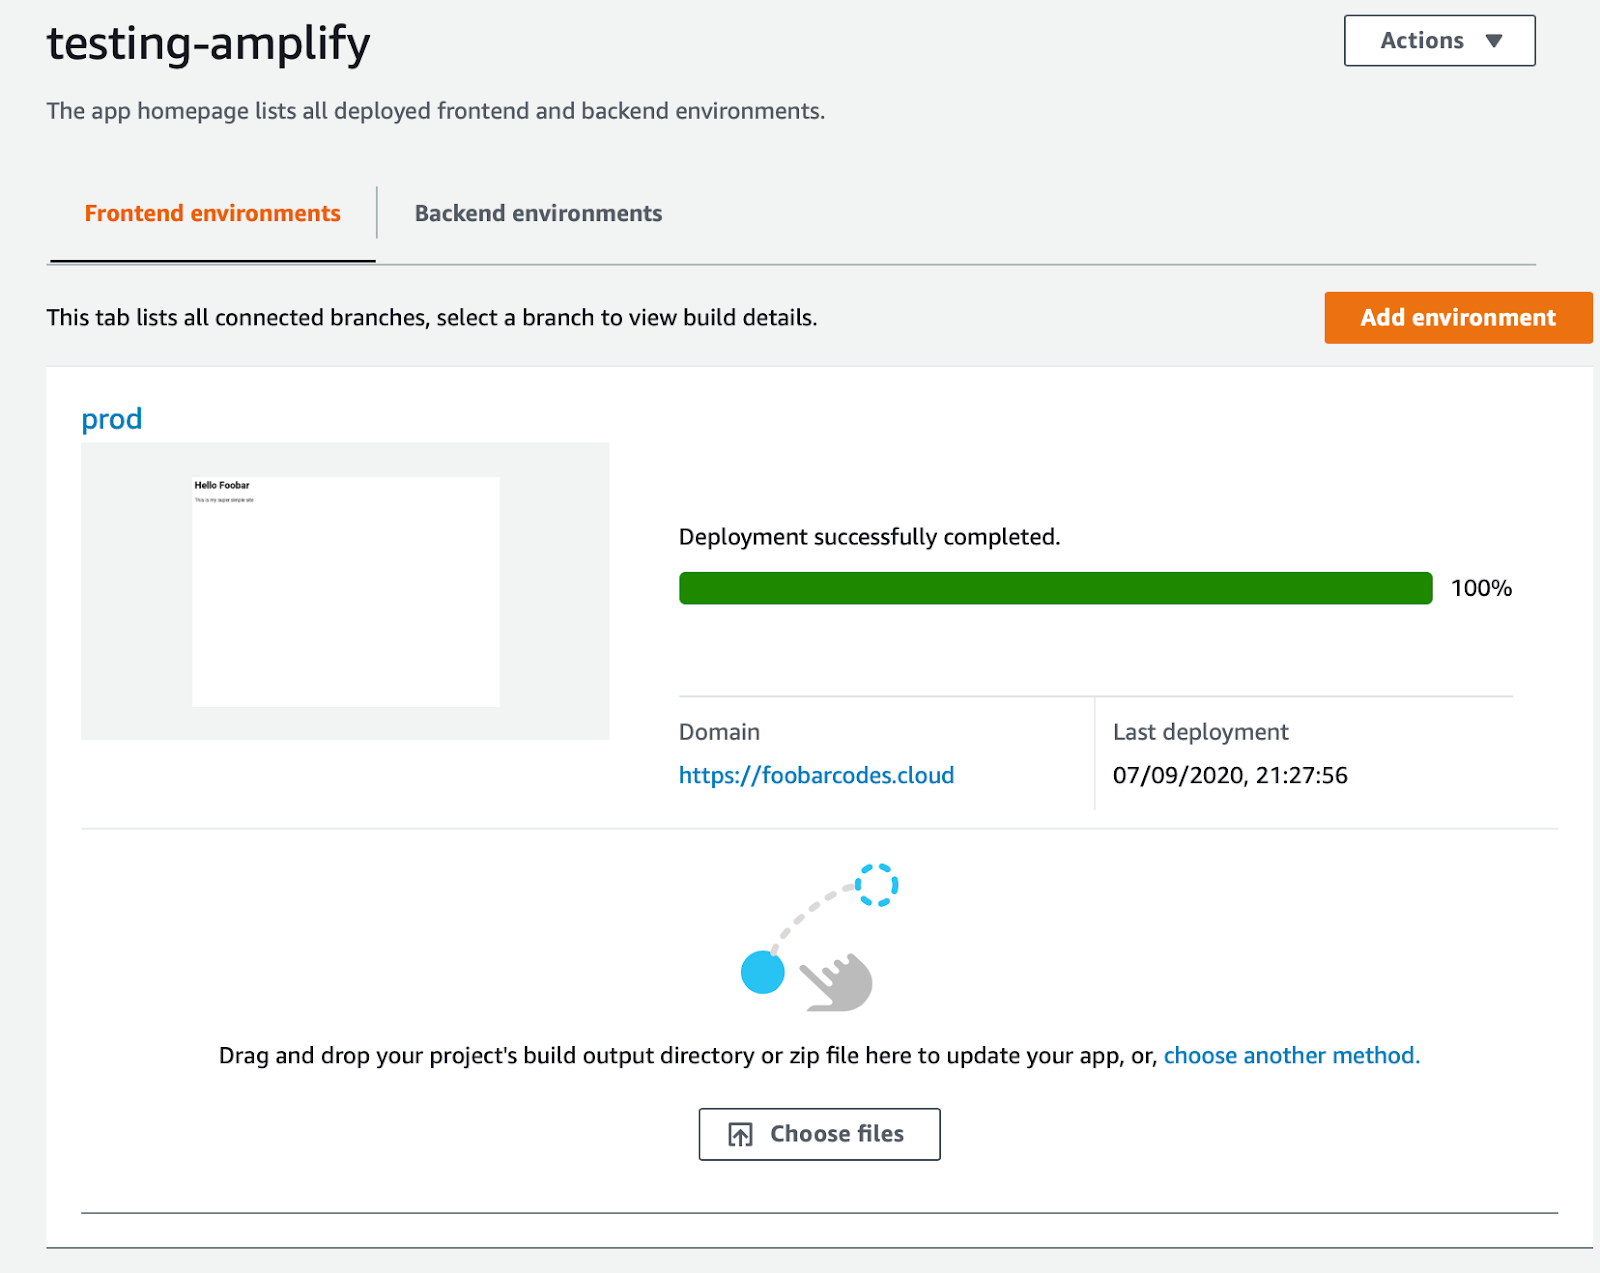
When the application finishes uploading you will see a message that says "Deployment successfully completed".
Now your website is hosted in the cloud. Go to the link that is under the Domain text. That will take you to your just deployed static site.

Step 3 - Buy a domain for your website
Now it is time to get a domain for your website. Sharing that Domain link is not very practical and a domain can be a simpler way to name your website.
For that you need to go inside your AWS account to a service called Route53.

Then when Route 53 opens you can go to a link that says Register domain, and a page like this appears.
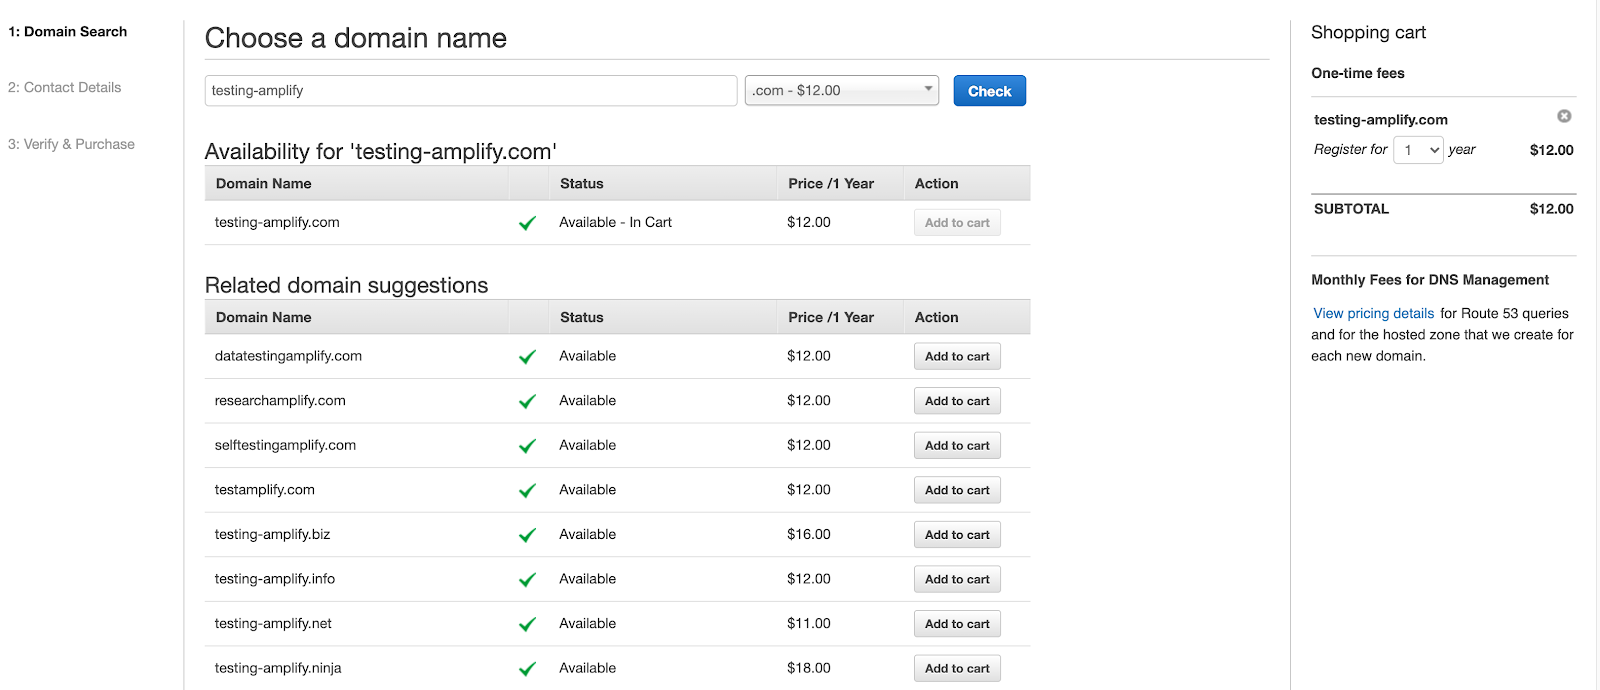
Here you need to choose a domain name. Domains are billed yearly and they have different costs depending on the ending (like .com, .net, and so on).
After you choose a domain name, you can add it to the card. Then just follow the instructions that Route53 provides.
Step 4 - Configure the domain in your AWS Amplify app
Now that you have the domain, it is time to get back to your AWS Amplify app – the one you just configured.
Then in the left, you click on the Domain management link and this page opens:
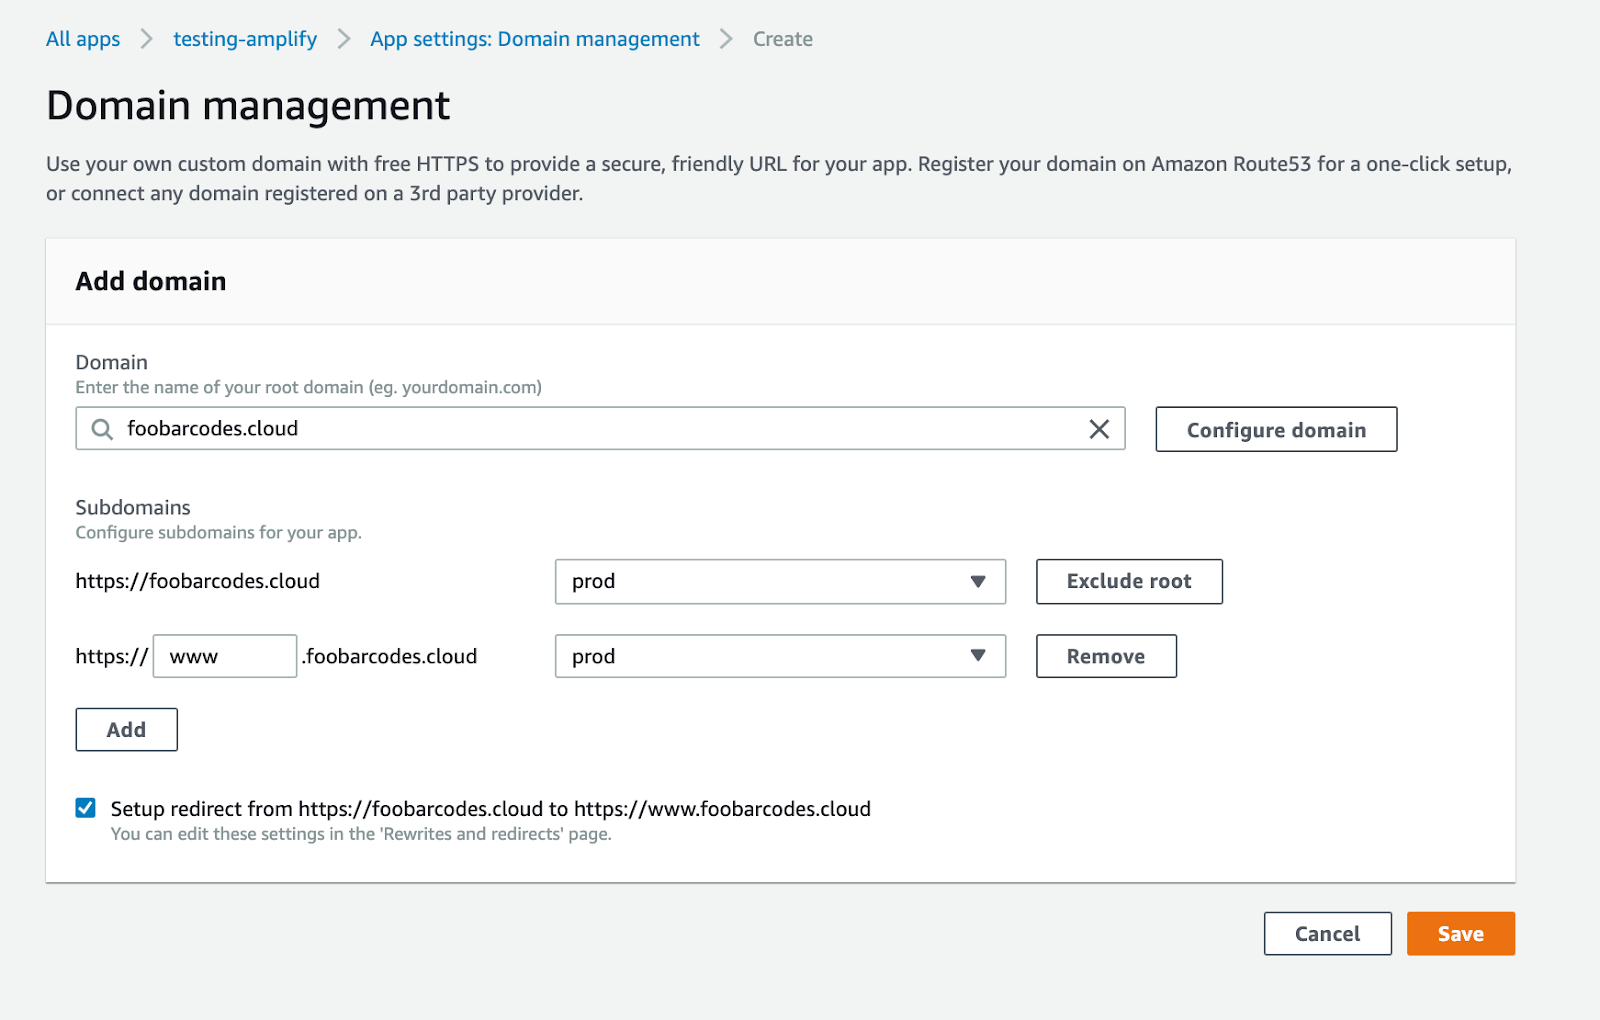
The domain text box will suggest the domain you just registered. Just pick it, accept all the default configurations, and then click Save.
After that, you will be directed to a page where the domain and the SSL certificate will be configured. You don’t need to do anything in that step, just wait until everything is configured. It takes a while so be patient.
Now you are done, so you can go to your new domain and see your static page.
How to update this site
Now every time you need to change something in your static site you need to go to AWS Amplify and update the files. Basically you'll just drop the directory in the Amplify app.
Conclusion
Now you have a static site hosted in the cloud. This site is very scalable and reliable. The site is hosted using the AWS CDN called AWS CloudFormation, so this will make your site very fast for your users.
The total cost of hosting after your AWS account is older than 12 months will be around $0.50 USD to $4 USD per month, depending on how big your site is and how much traffic you get.
The other yearly cost you will have is the domain that can start from $9 USD per year.
And if you want to make this a bit more automated I recommend looking at AWS Amplify automatic deployments using Github.
Thanks for reading.
I’m Marcia Villalba, Developer Advocate for AWS and the host of a YouTube channel called FooBar where I have over 250 video tutorials on Serverless, AWS and software engineer practices.
- Twitter: https://twitter.com/mavi888uy
- Youtube: https://youtube.com/foobar_codes