

If you ask a group of developers what Linux is, most of them will probably say it's an open-source operating system. Those with more technical knowledge will probably call it a kernel.
For me, though, Linux is not just an operating system or a kernel. For me, it's freedom. The freedom of putting together an operating system according to my needs, and that's where Arch Linux comes in.
According to their wiki,
Arch Linux is an independently developed, x86-64 general-purpose GNU/Linux distribution that strives to provide the latest stable versions of most software by following a rolling-release model.
The default installation is a minimal base system, configured by the user to only add what is purposely required.
In other words, Arch Linux is a distribution optimized for x86-64 architecture targeted at experienced Linux users. It lets you have full responsibility and control over your system.
You'll get to choose what packages you want, the kernel (yes there are multiple), the boot-loader, the desktop environment, and so on.
Have you ever heard someone say,
Oh – by the way, I use Arch Linux!
This is because installing Arch Linux on a machine requires you to have proper knowledge of how different parts of a Linux distribution work. So running Arch Linux on your system is kind of a testament to your understanding of Linux.
Speaking from experience, installing Arch Linux is not very different from installing something like Fedora or Ubuntu. It's just that you have to go through the individual steps manually instead of having an installer do the things for you. But once you've gone through the process, you'll start to understand how the other distributions work in general.
In this article, I'll walk you through the entire process of installing and configuring Arch Linux on your machine. I'll also discuss some common tasks and troubleshooting tips near the end.
So come with me and I'll show you how deep the rabbit hole goes.
Table of Contents
- Some Assumptions I'm Making
- How to Create a Bootable Arch Linux USB Drive
- How to Prepare Your Computer for Installing Arch Linux
- How To Install Arch Linux
- How To Configure Arch Linux
- How To Generate the Fstab File
- How To Login to The Newly Installed System Using Arch-Chroot
- How To Configure the Time Zone
- How To Configure the Localization
- How To Configure the Network
- How To Set the Root Password
- How To Create a Non-root User
- How To Install Microcode
- How To Install and Configure a Boot Loader
- How To Install Xorg
- How To Install Graphics Drivers
- How To Install a Desktop Environment
- How To Finalize The Installation
- How To Switch Between Desktop Environments
- How To Manage Packages Using Pacman
- How To Use AUR in Arch Linux
- How To Troubleshoot Common Problems
- How To Use the Live Arch ISO as a Rescue Media
- Further Reading
- Conclusion
Some Assumptions I’m Making
Before I jump into the core of the tutorial, I want to clarify a few things. To make this entire article approachable, I'm making the following assumptions about you and your system:
- You know about Arch Linux at a basic level
- Your computer is using UEFI and not BIOS
- You have a USB drive large enough (4GB) to boot Linux from
- You have some previous experience installing Linux (Ubuntu/Fedora)
- You have enough space to install linux on your HDD or SSD
That's pretty much it. If you have all of the above, you're good to go.
How to Create a Bootable Arch Linux USB Drive
To download Arch Linux, head to https://archlinux.org/download/ and download the latest release (2022.01.01 as of this writing). The ISO should be around 870 megabytes in size.
Once downloaded, you'll need to put it in your USB. You can use the Fedora Media Writer program to do that. Download and install the application on your system. Now connect your USB drive and open the application:

Click on "Custom image" and use the file browser to pick the downloaded Arch Linux ISO file.

The application will now let you pick one of your connected USB drives. Be very careful in selecting the right one if you have multiple USB drives connected to your machine. Now hit the "Write to Disk" button and wait until the process is finished.
How to Prepare Your Computer for Installing Arch Linux
In this step you'll have to make a few changes to your system, otherwise Arch Linux may fail to boot or run properly.
The first change that you'll have to make is disabling secure boot in your UEFI configuration. This feature helps prevent malware attacks during boot but it also prevents the Arch Linux installer from booting.
Detailed instructions on how you can disable this vary depending on your motherboard or laptop brand. You'll have to search the internet yourself to find the right way this time.
The second thing that you should disable is only relevant if you're installing Arch Linux alongside Windows. There is a Windows feature called fast startup that reduces the boot time of your computer by partially hibernating it.
This is generally a nice feature to have but it prevents any other operating system in a dual boot configuration from accessing the hard disk in the process.
To disable this feature, open the start menu and search for "Choose a power plan" as follows:
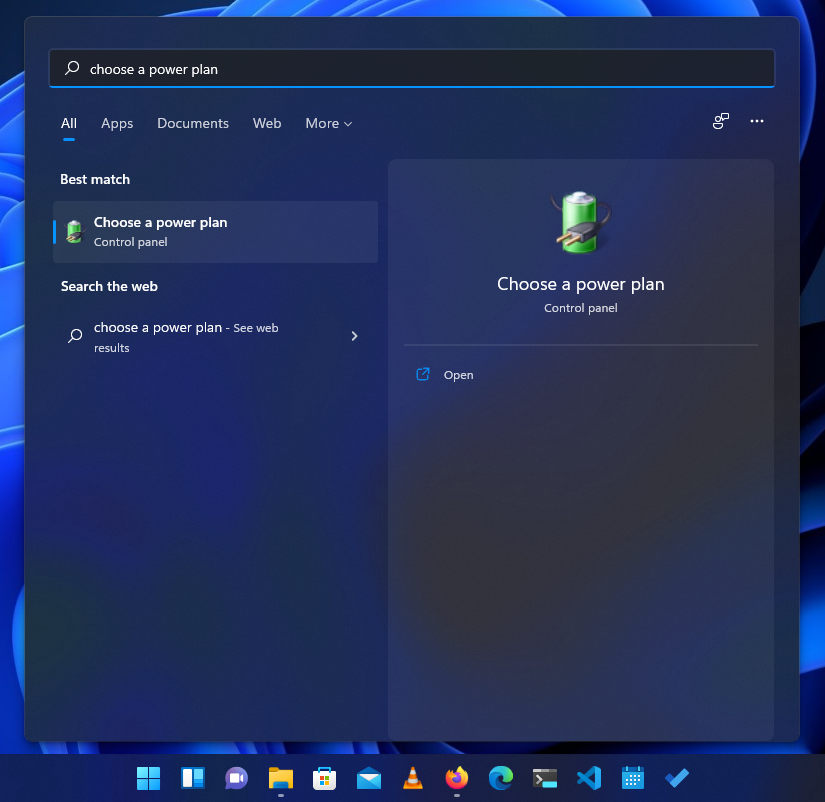
Then on the next window, click on "Choose what the power buttons do" from the left sidebar:

Then on the next window you'll see a list of "Shutdown settings" and the "Turn on fast startup (recommended)" option should be shown as read only there.

Click the "Change settings that are currently unavailable" at the top and you should then be able to change the settings.

Untick the "Turn on fast startup (recommended)" option and press the "Save changes" button at the bottom. From now on the boot process may take a few moments extra but it's all worth it.
In this article, I'll install Arch Linux as my default operating system. So I'll allocate my entire disk space to it.
If you're trying to install it alongside Windows, however, I have a dedicated article on the topic. And in that article, there is a section that discusses the partitioning process in great detail.
How To Install Arch Linux
Assuming that you have a bootable USB drive and your computer is configured properly, you'll have to boot from the USB drive. The process of booting from a USB drive differs from machine to machine.
On my machine, hitting the F12 key during boot takes me to the list of bootable devices. From there I can pick my bootable USB drive. You may already know the appropriate technique for your computer or you may have to research a bit.
Once you've managed to land on the list of connected bootable devices, select your USB drive to boot from and the following menu should show up:
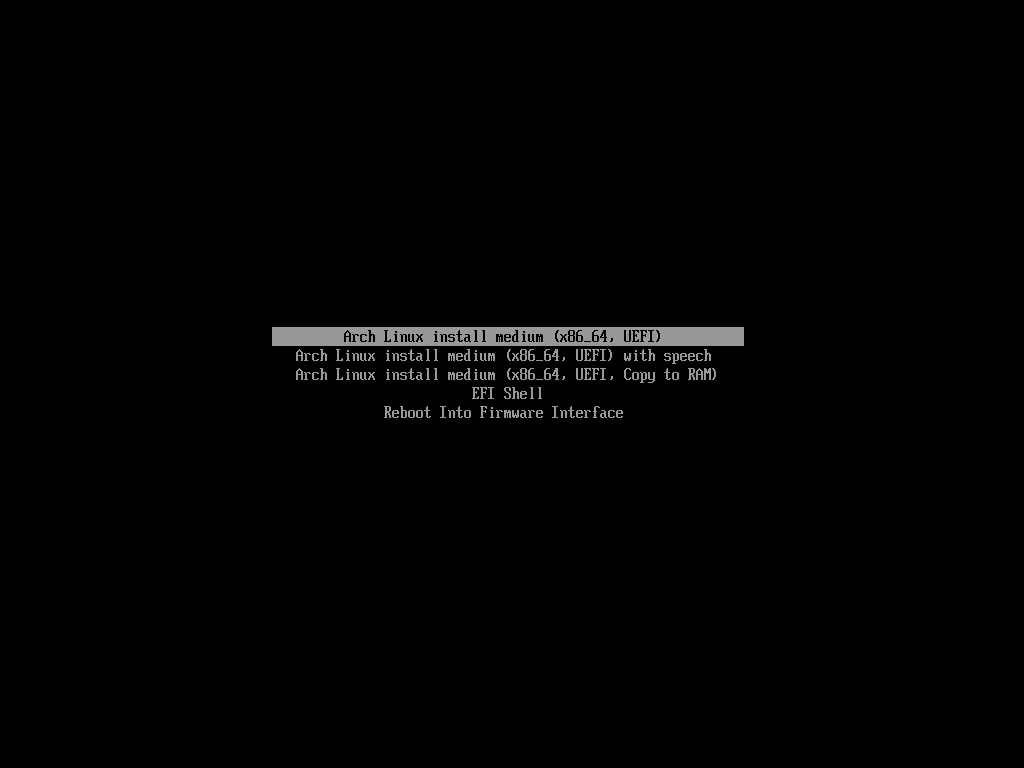
Choose the first one from the list and wait until the Arch installer finishes booting up. Once fully booted up, you'll see something like this:

That's it. That's all you'll get. Unlike other operating systems that you maybe familiar with, the Arch installer doesn't have any graphical user interface to automate the installation.
It rather requires you to invest your time and effort and configure each part of the distribution piece by piece. It may sound daunting but, to be honest, if you understand what you're doing, installing Arch Linux is quite fun.
How To Set the Console Keyboard Layout and Font
As I've already said, the Arch installer doesn't have a graphical user interface so there's going to be a lot of typing. Configuring your keyboard layout and a nice looking font can make the installation process a lot less frustrating.
By default, the console assumes that you have a standard US keyboard layout. This should be fine for most people but just in case if you happen to have a different one, you can change to that.
All the available keymaps are usually kept inside the /usr/share/kbd/keymaps directory in the form of map.gz files. You can see the list of them by using the ls command:
ls /usr/share/kbd/keymaps/**/*.map.gz
This will list out all the available key maps:
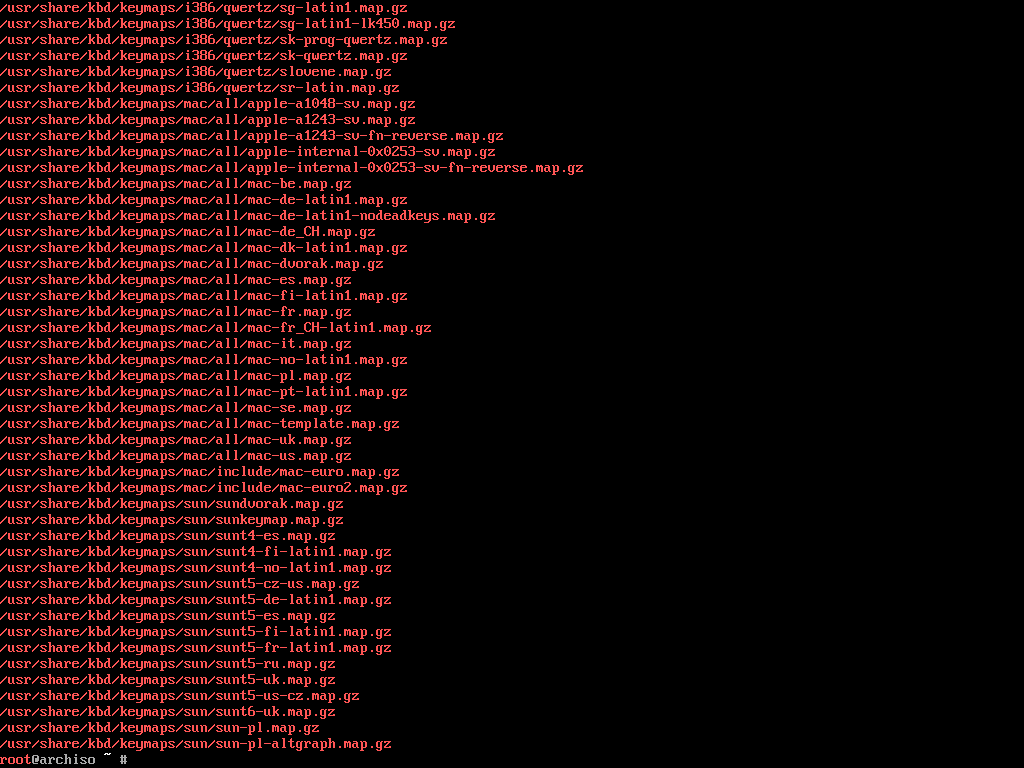
Now for example, if you have the Mac-US keyboard layout, locate the corresponding map.gz file from this list which is the mac-us.map.gz one.
You can use the loadkeys command to load the desired keymap. To set mac-us.map.gz as default, execute the following command:
loadkeys mac-us
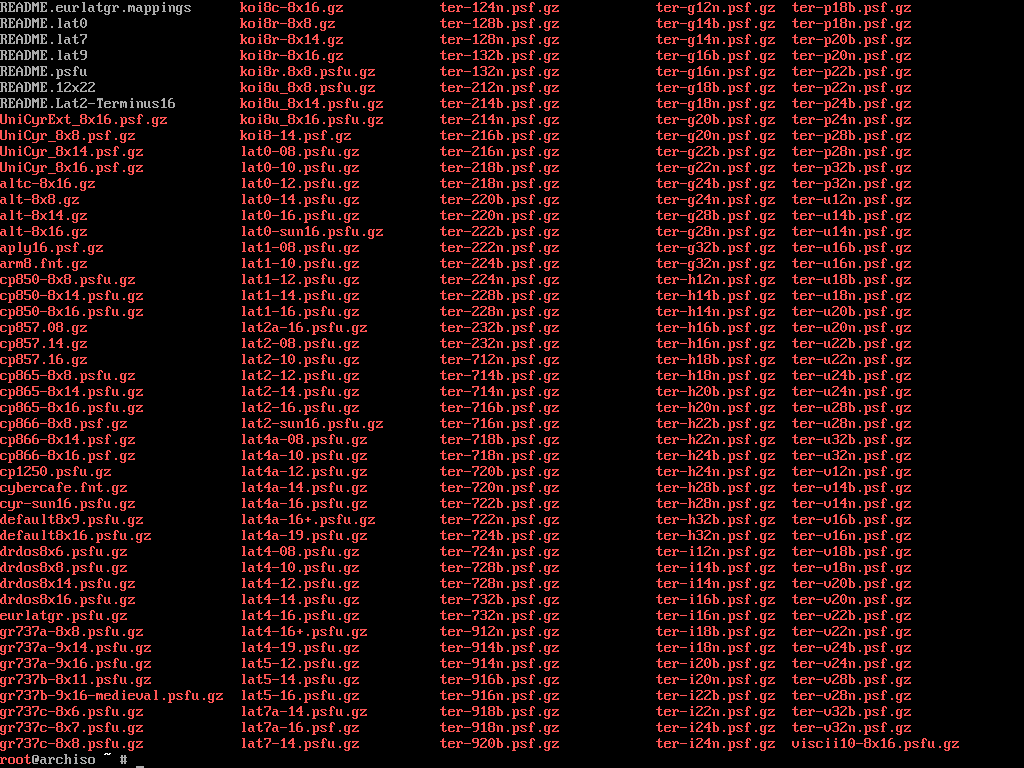
You can also change the console font if you don't like the default one. Just like the keymaps, the console fonts are kept inside the /usr/share/kbd/consolefonts which you can list out using the ls command:
ls /usr/share/kbd/consolefonts
This will list out all the available fonts:
You can now use the setfont command for setting one of these. For example, if you want to set the drdos8x16 as default, execute the following command:
setfont drdos8x16
Both the loadkeys and setfont commands are part of the kbd package containing essential Linux keyboard tools. They have great documentation so if you'd like to learn more, feel free to check it out.
How To Verify the Boot Mode
Now that you have your console configured, the next step is to make sure that you've booted in UEFI mode and not in BIOS mode.
To be honest, this step seems unnecessary to me since it literally says x86_64 UEFI in the live boot menu. But let's do it for the sake of the official Arch installation guide.
To verify the boot mode, execute the following command:
ls /sys/firmware/efi/efivars
If you're in UEFI mode then, it will list out a bunch of files on your screen:
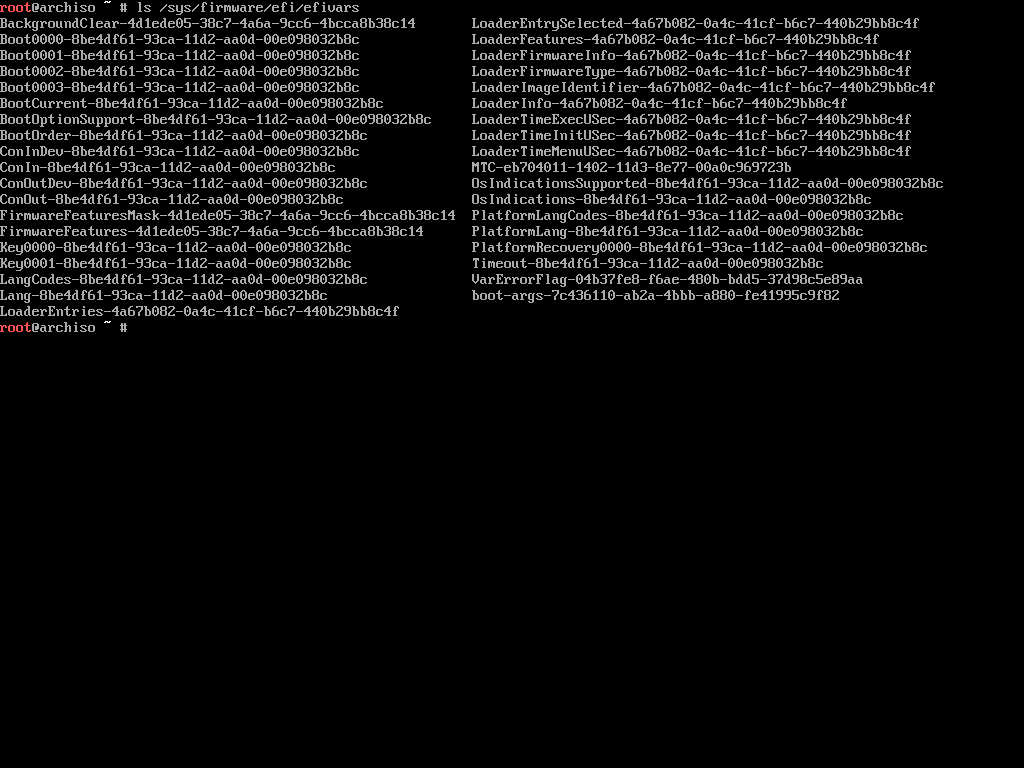
In case of a BIOS boot, the efi directory won't even exist inside the /sys/firmware directory. If you're in UEFI mode, (which you should be if you've followed everything properly) continue to the next step.
How To Connect to the Internet
Unlike a lot of other live distributions, the Arch live environment doesn't come with all necessary packages built into it. It contains a number of bare minimum packages that you can use to install the rest of the system. So, a working internet connection is a must.
If you're using a wired network then you should have a working internet connection from the get go. To test it out, ping any of the public addresses out there:
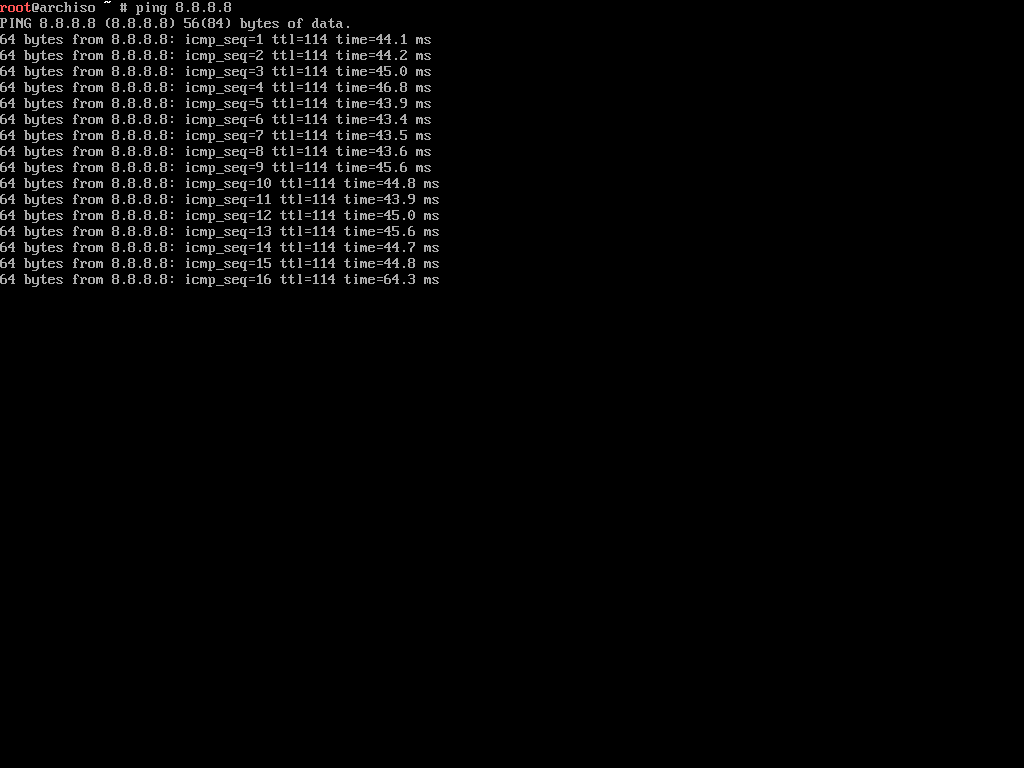
I'm making these screenshots using VirtualBox, so the internet connection works perfectly with the wired connection. But if you have a wireless connection, things can get a bit tricky.
The live environment comes with the iwd or iNet wireless daemon package. You can use this package to connect to a nearby wireless network.
To begin with, execute the following command:
iwctl
This will start an interactive prompt as follows:
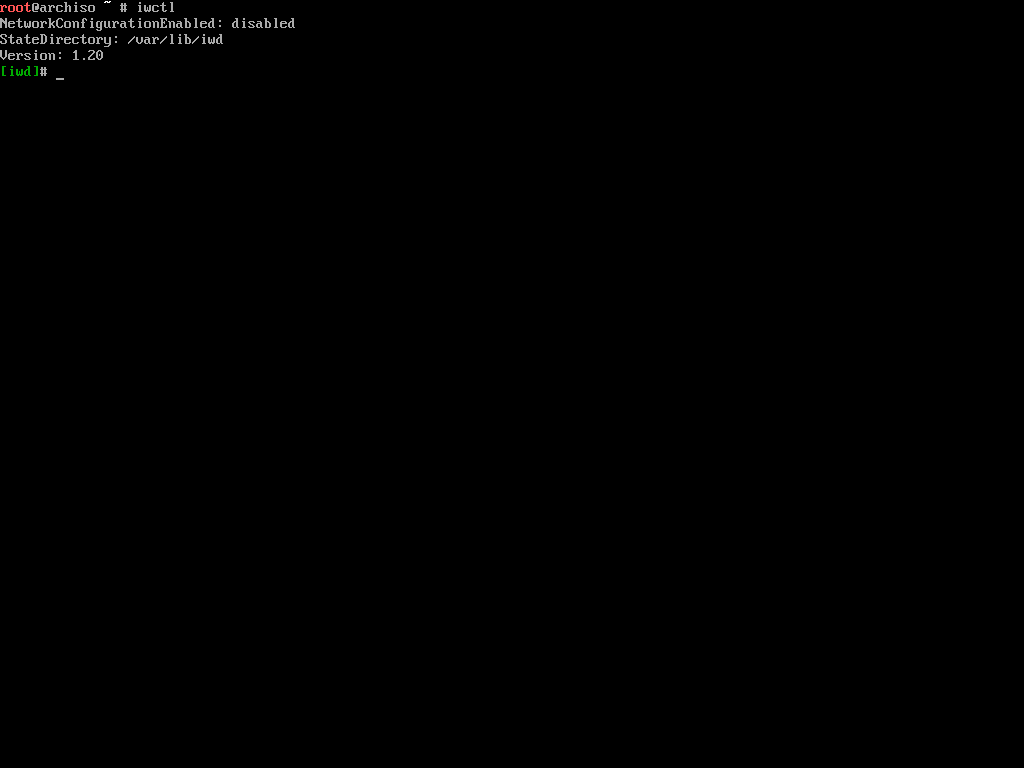
Now execute the following command to see the list of available wireless devices:
device list
This will spit out a list of available wireless devices. By wireless devices I mean any wireless adapter connected to your computer. Let's assume wlan0 is the device name.
To scan for nearby wireless networks using the found device, execute the following command:
# station <device> scan

station wlan0 scan
You may think that this command will print out a list of all the nearby networks, but that's not the case. To see the list of networks, execute the following command:
# station <device> get-networks

station wlan0 get-networks
Now assuming the name of your home network is called Skynet, you can connect to it by executing the following command:
# station <device> connect <SSID>

station wlan0 connect Skynet
The iwctl program will prompt you for the wi-fi password. Put it in carefully and, once connected to the network, exit the program by writing exit and hitting enter. Try pinging a public address once again and make sure that the internet is working fine.
How To Update the System Clock
In Linux, NTP or Network Time Protocol is used for synchronizing computer system clocks over a network. You can use the timedatectl command to enable NTP on your Arch live environment:
timedatectl set-ntp true
This command will start outputting some output and after a few seconds. If you do not see the command cursor show up again, try pressing Enter. I've faced this inconvenience a few times in the past.
How To Partition the Disks
This is probably the most sensitive step of the entire installation process – because if you mess up your partitions, you lose your precious data. So my advice would be to not immediately follow along with this section. Instead, read the whole section first and then follow along.
To begin the partitioning process, you'll have to first know about the different disks connected to your computer. You can use fdisk which is a dialog-driven program for creation and manipulation of partition tables.
fdisk -l
This command will list the partition tables for all the available devices on your computer.
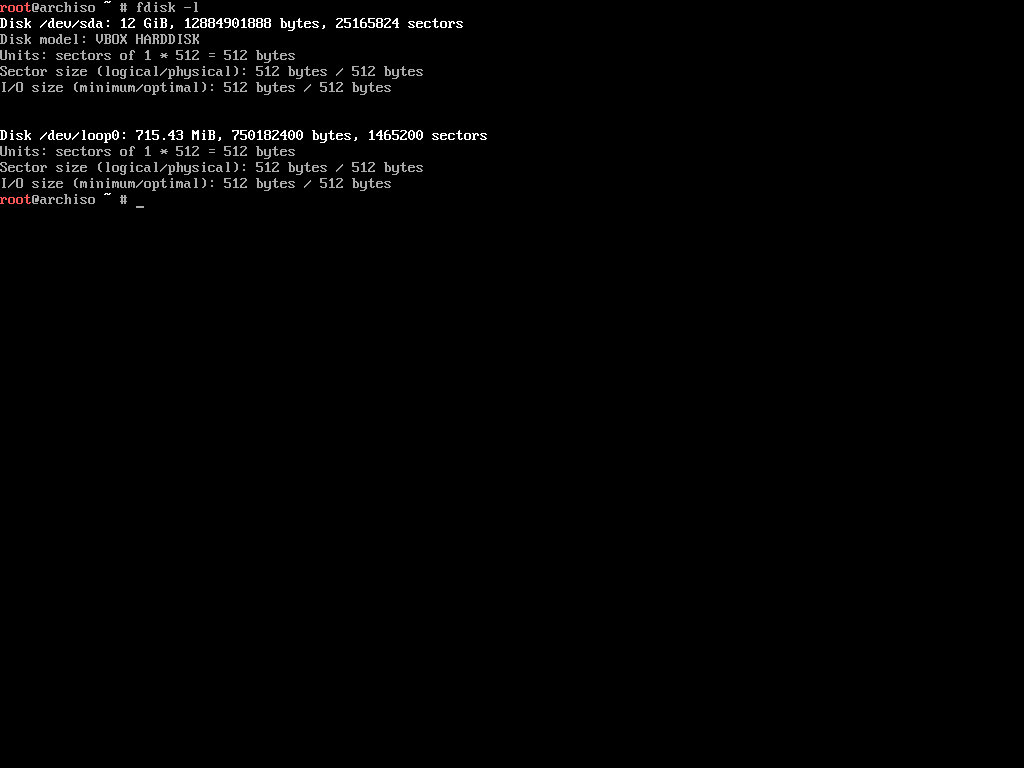
As you can see, there are two devices connected to my computer (virtual machine actually). Depending on the number of devices you have, this list can be longer so ignore any device ending with rom, loop, or airoot when reviewing the list. You can not use those devices for the installation.
So that leaves us with the /dev/sda device. Keep in mind that this can be completely different on your machine. For example, if you have an NVME drive, you may see /dev/nvme0n1 instead.
Once you've decided which device to use, it's a good idea to check if there are any existing partitions inside that device. To do so, you can use the following variation of the same fdisk command:
fdisk /dev/sda -l
Remember to replace /dev/sda with what you have. This command will list out all the partitions inside the given device.
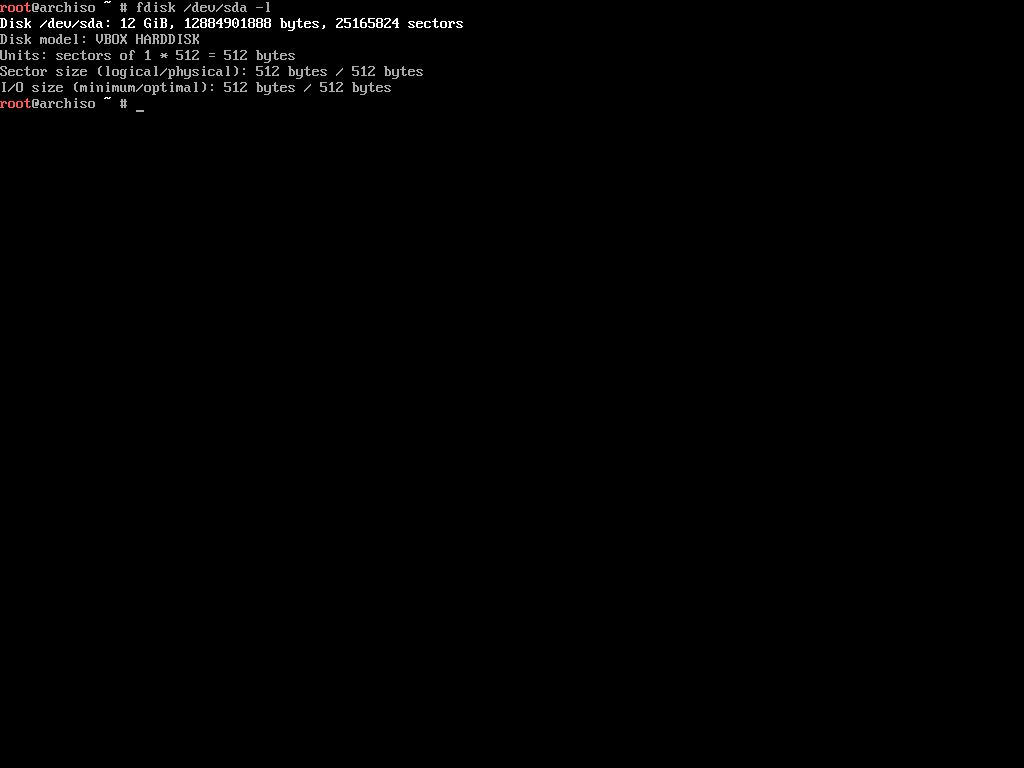
Although there are no partitions in this device, in a real life situation you may have previously created partitions. Those partitions will show up as /dev/sda1, /dev/sda2 or in the case of a NVME drive /dev/nvme0n1p1, /dev/nvme0n1p2 and so on.
The fdisk program can do a lot more than just listing partitions. Consult the corresponding ArchWiki page to know about the tasks you can perform using this program.
There is another program cfdisk which is a curses- (programming library) based disk partition table manipulator for Linux. It's similar in functionality with fdisk but being curses-based means it has an interface which makes it easier to work with.
Execute the following command to start cfdisk on your preferred device:
cfdisk /dev/sda
Remember to replace /dev/sda with what you have. If the device has a previously created partition table, then cfdisk will directly show the list of partitions. Otherwise you'll get to choose a partition table type to begin with:
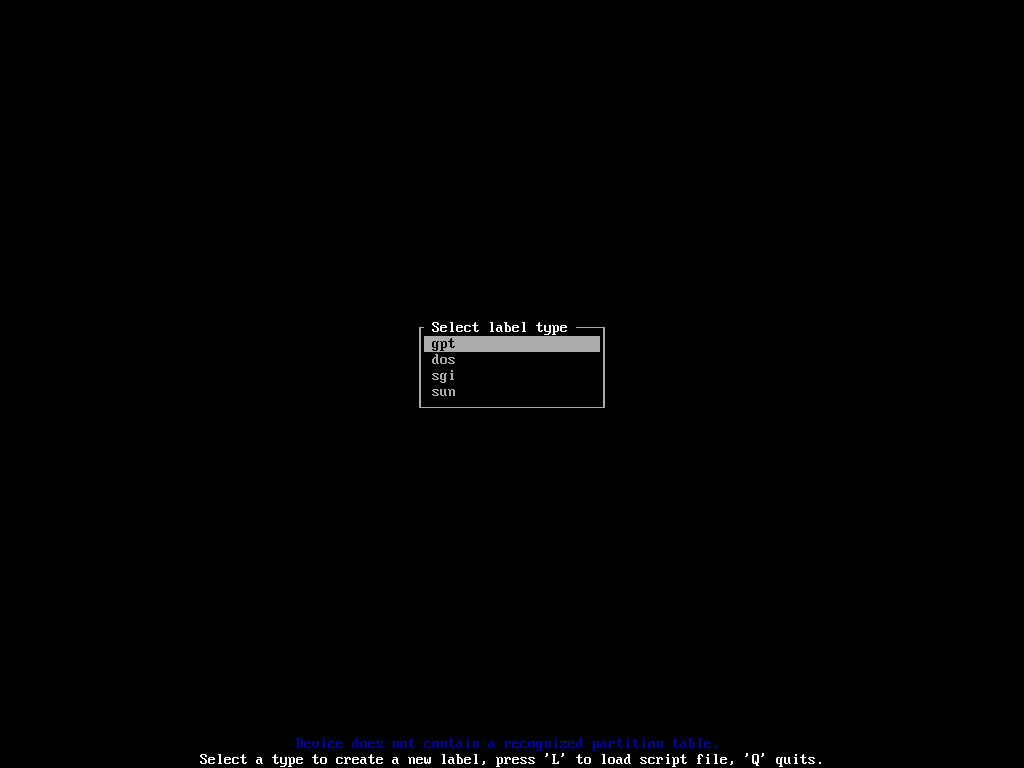
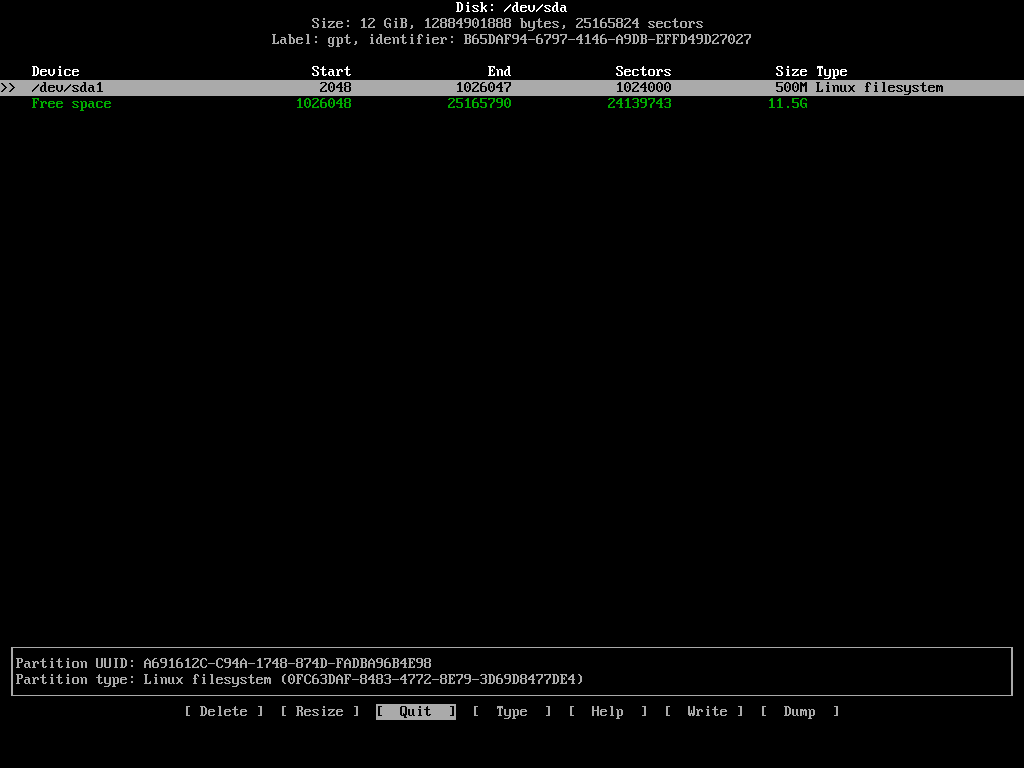
Choose gpt for your UEFI based system. Next, you'll land on the list of partitions and free space on the device:
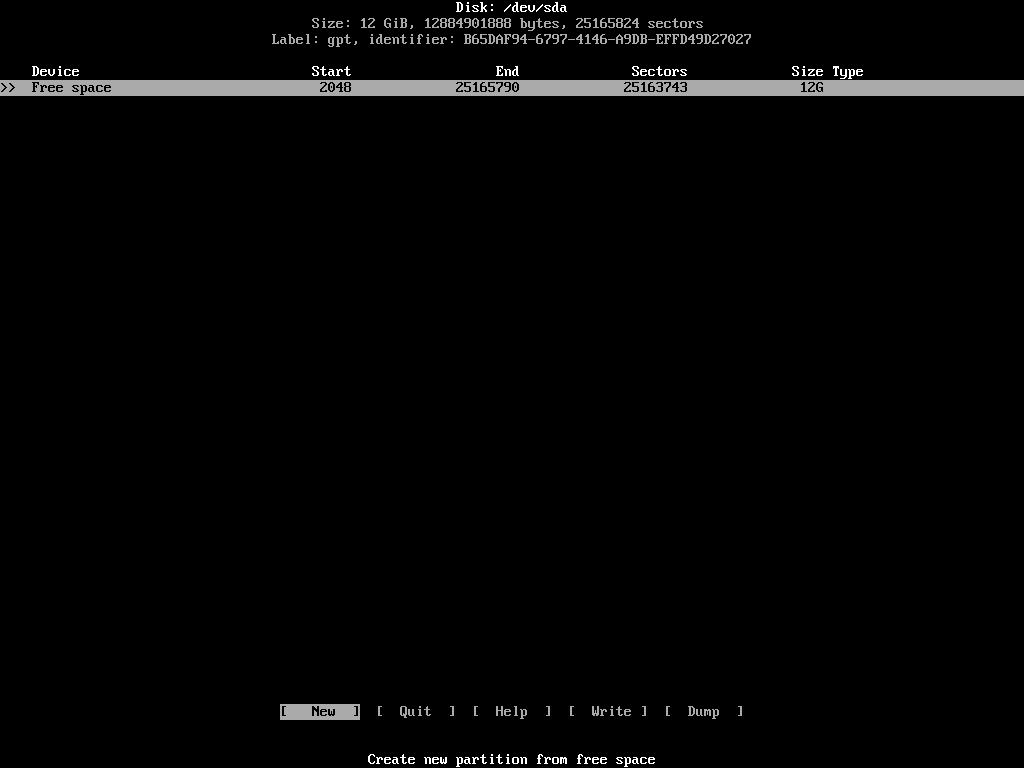
You can move vertically along the list of devices using your up/down arrow keys and move horizontally along the different actions using the left/right arrow keys.
To install Arch, or any other Linux distribution, you'll need three separate partitions. They are as follows:
- EFI system partition – for storing files required by the UEFI firmware.
- ROOT – for installing the distribution itself.
- SWAP – for serving as the overflow space for your RAM.
Make sure the right partition/free space is highlighted in the list and select the [ New ] action.
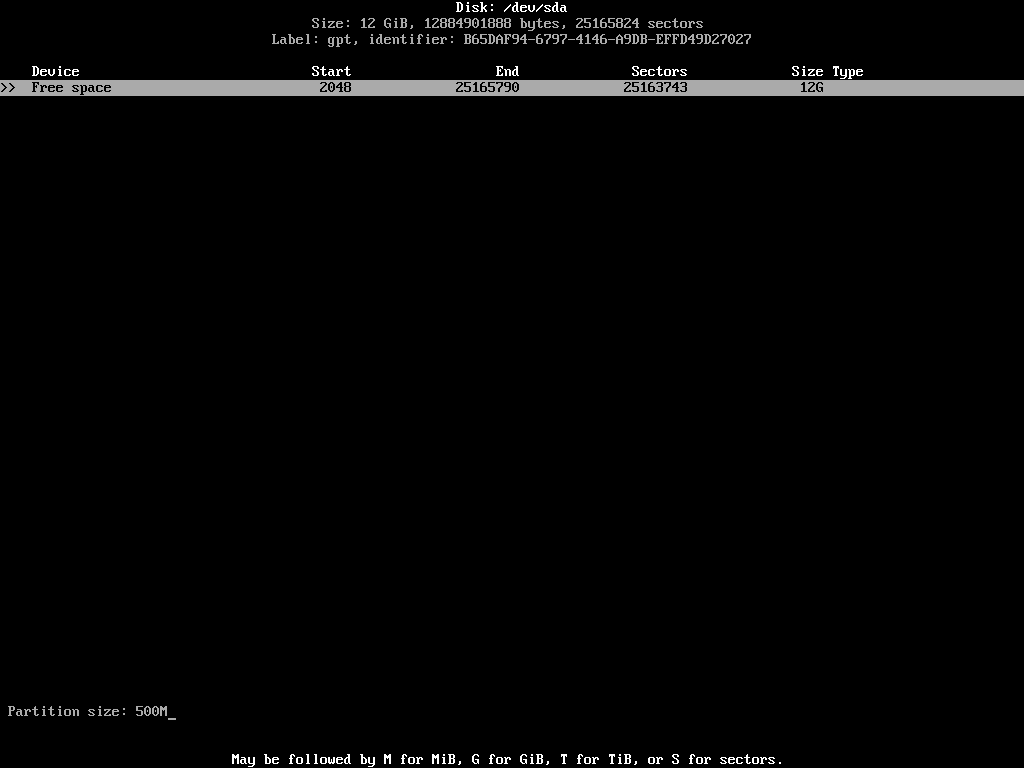
Put the desired partition size. You can use M to denote megabytes, G for gigabytes, and T for terabytes.
For an EFI system partition, you should allocate at least 500MB. Once you've put your desire size, press Enter to finalize. The updated list of partitions may look as follows:
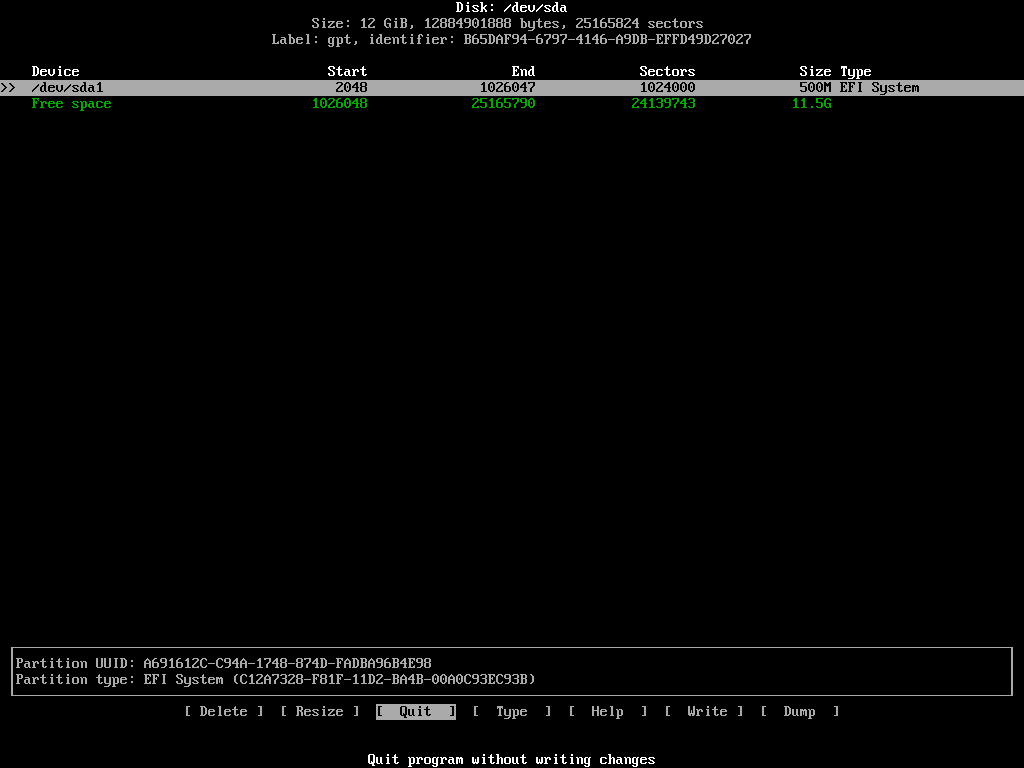
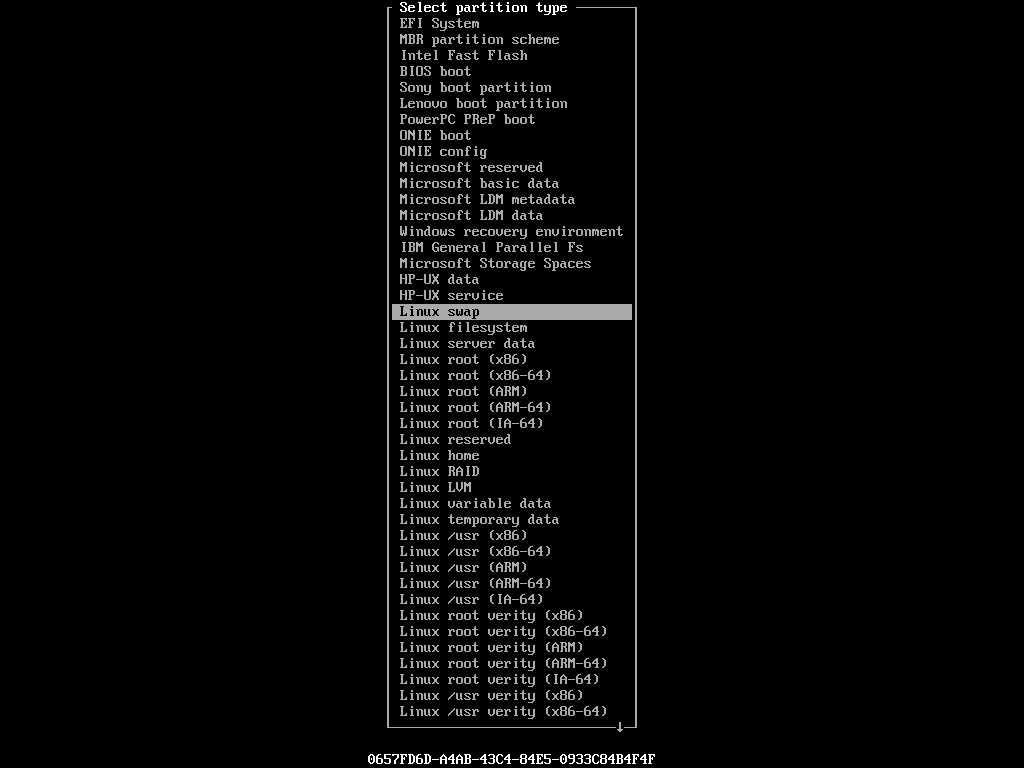
The EFI system partition is a special type of partition. It has to be in a specific type and format. To change the default type, keep the newly created partition highlighted and select [ Type ] from the list of actions.
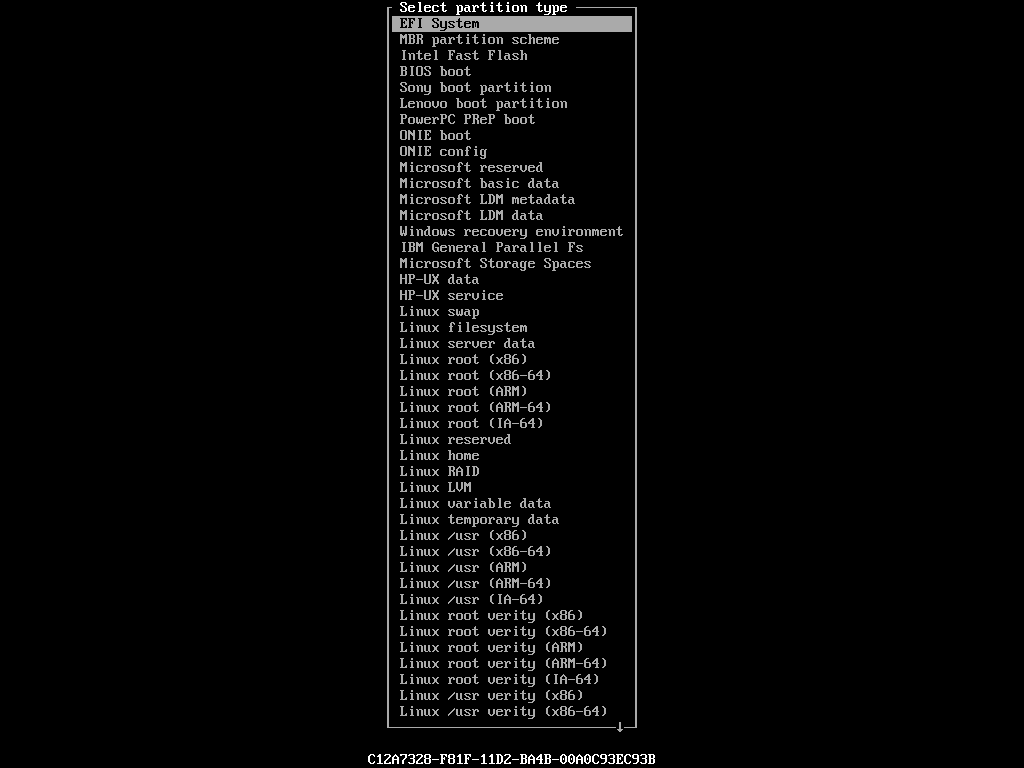
From this long list of types, highlight EFI System and press Enter. The type of the partition in the list should update accordingly:
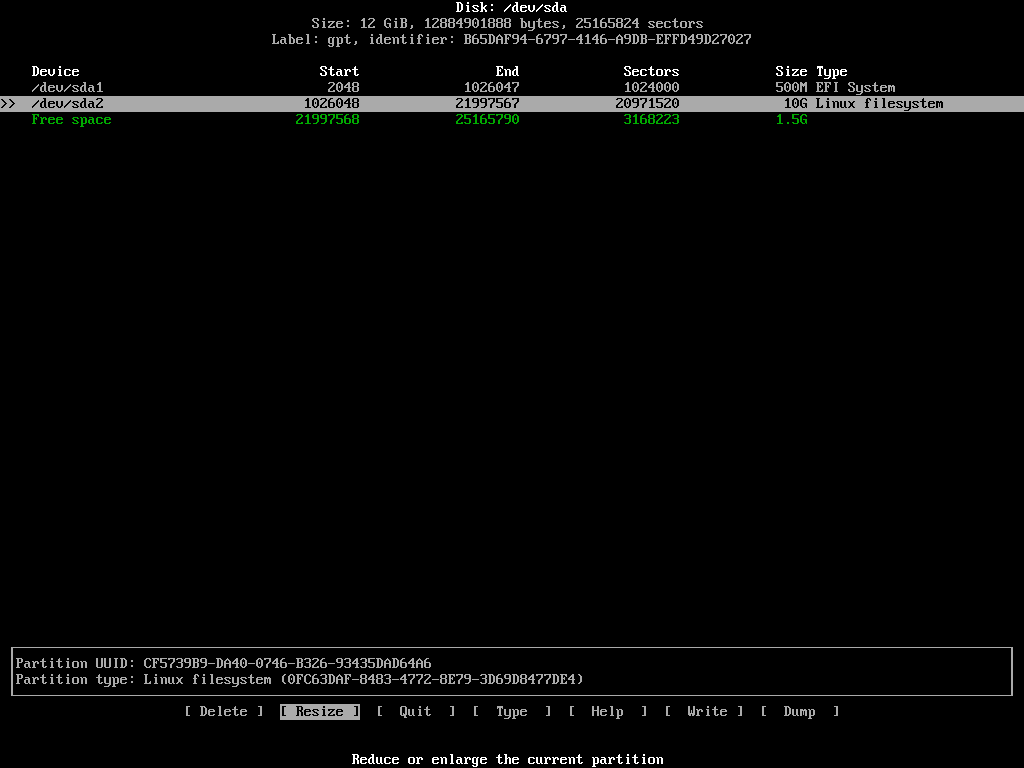
Next is the root partition. Highlight the remaining free space and select [ New ] once again. This time assign 10GB to this partition. The ideal size of the root partition depends on your necessities. Personally I allocate at least 100GB to the root partition of all my Linux installations.
You don't need to change the type of this partition. The default Linux filesystem will do.
Create one last partition with the remaining space and change its type to Linux swap from the menu:
The ideal size of a swap partition is a matter of debate. Personally I don't have swap partitions on my machines. The amount of physical RAM I have is more than enough. But if I ever feel the need for one later on, I use a swapfile instead. Anyways, the final state of your device should be as follows:
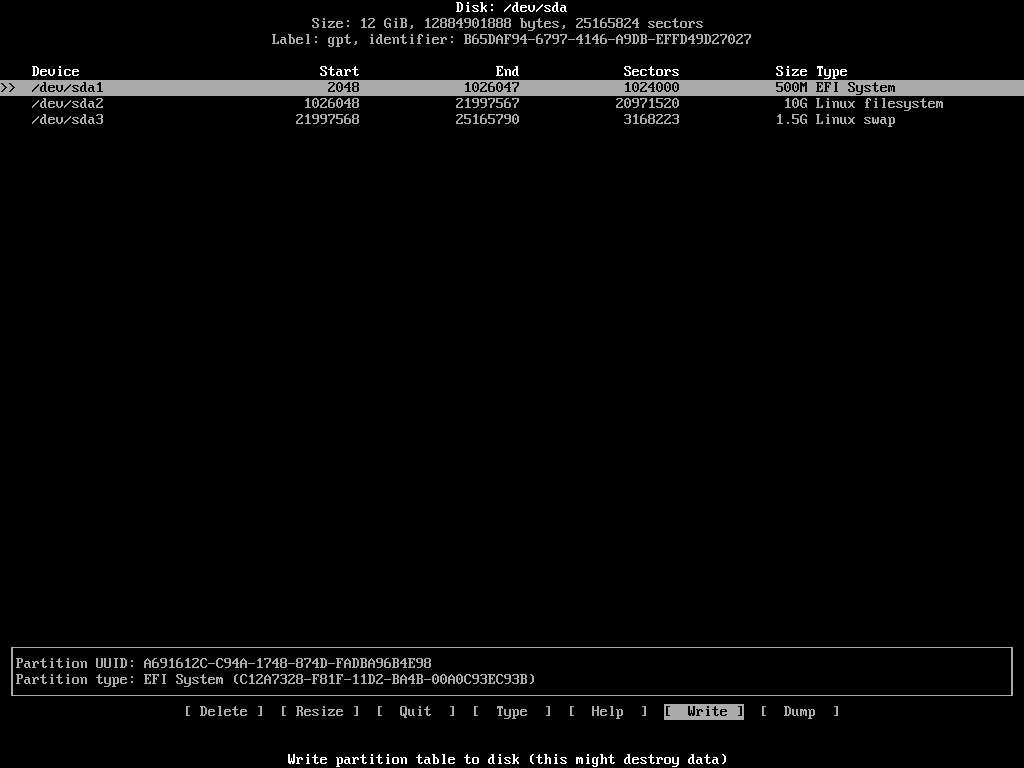
If you're happy with the set-up, highlight [ Write ] from the action list and hit Enter. The program will ask whether you want to persist these changes or not. You'll have to write yes and press enter if you agree. Once the partition table has been altered, select [ Quit ] to exit from the program.
One thing that I would like to mention for those trying to install Arch Linux alongside Windows is, in that case, the EFI system partition should already exist in your device. So don't touch that. Just create the other partitions and move on.
How To Format the Partitions
Now that you've created the necessary partitions, you'll have to format them accordingly. You can use the mkfs and mkswap programs to do that. Before the formatting, take a final look at your partition list by executing the following command:
fdisk /dev/sda -l
This time you'll see the three newly created partitions with their details:
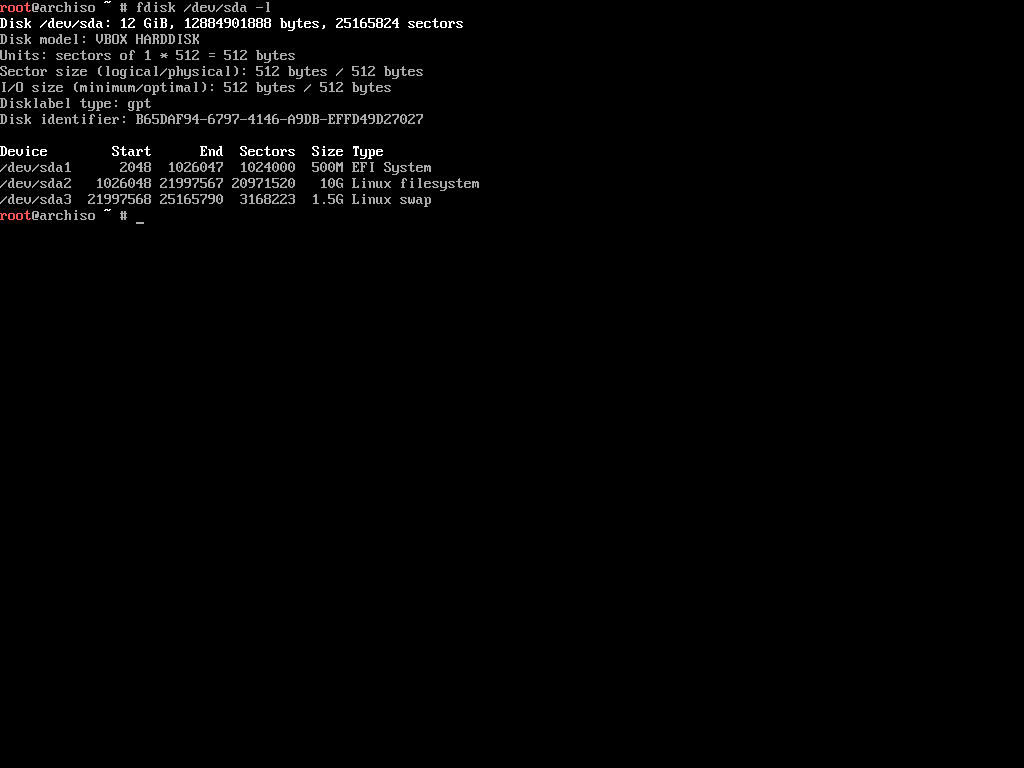
Take note of the device names, like /dev/sda1, /dev/sda2, /dev/sda3 and so on. The EFI system partition has to be in FAT32 format. Execute the following command to format a partition in FAT32 format:
mkfs.fat -F32 /dev/sda1
The next one is the root partition. It can be in a number of formats, but I prefer using EXT4 for all of my Linux filesystems. Use the following command to format the partition in EXT4:
mkfs.ext4 /dev/sda2
This operation may take a few moments to finish depending on your partition size. Finally, the swap partition. Use the following command to format that:
mkswap /dev/sda3
With that, you've finished the process of preparing your partitions for the installation.
How To Mount the File Systems
Now that you've created and formatted your partitions, you're ready mount them. You can use the mount command with appropriate mount points to mount any partition:
# mount <device> <mount point>

mount /dev/sda2 /mnt
I hope you remember that the /dev/sda2 partition was created to be the root partition. The /mnt mount point in Linux is for mounting a storage device temporarily. As we only need to mount the partition for installing Arch Linux on it, the /mnt mount point is perfect.
In the case of a swap partition, you won't mount it like the other ones. You'll have to tell Linux to use this partition as swap explicitly. To do so, execute the following command:
swapon /dev/sda3
As you may have guessed, the swapon command tells the system to swap on this device. We'll work with the EFI system partition in a later section. For now, mounting these two partitions will suffice.
How To Configure the Mirrors
There is one last step before you can install Arch Linux on your machine, and that is configuring the mirrors. Mirrors are servers located at different pointes around the world for serving the nearby population.
The installer comes with Reflector, a Python script written for retrieving the latest mirror list the Arch Linux Mirror Status page. To print out the latest mirror list, simply execute the following command:
reflector
If you have a slow internet connection, you may encounter an error message as follows:
failed to rate http(s) download (https://arch.jensgutermuth.de/community/os/x86_64/community.db): Download timed out after 5 second(s).
This happens when the default timeout (5 seconds) is lower than the actual time it's taking to download the information.
You can remedy to this problem by using the --download-timeout option:
reflector --download-timeout 60
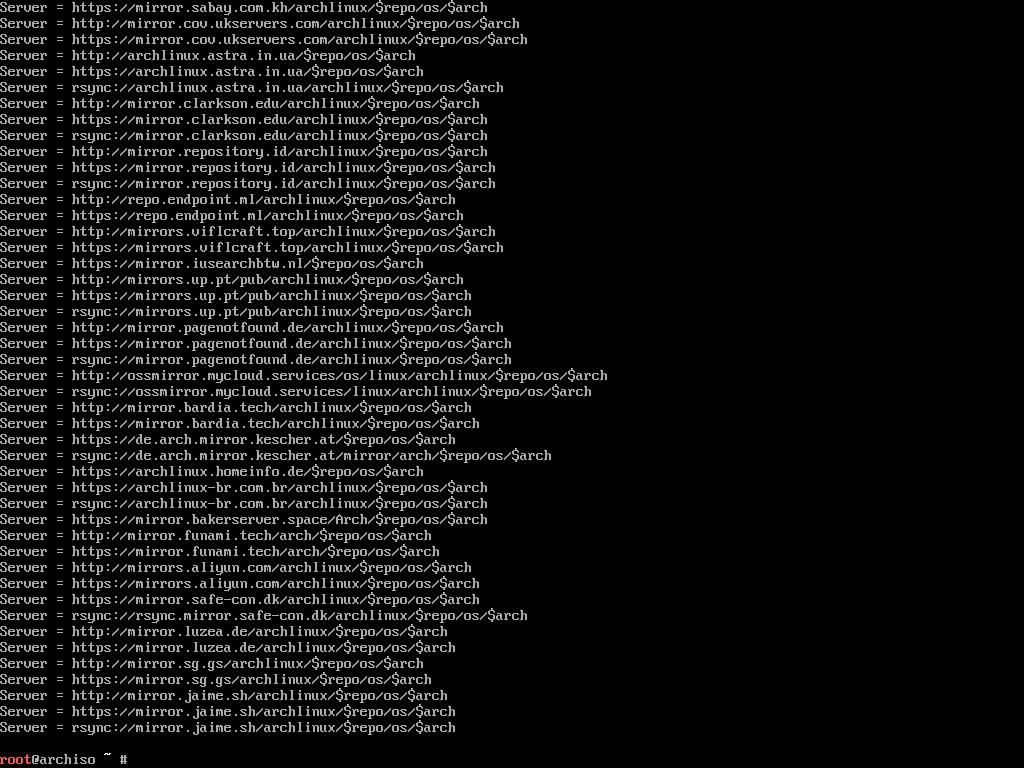
Now reflector will wait for a whole minute before starting to scream. A long list of mirrors should show up on your screen:
Going through the entire list to find nearby mirrors would be a pain. That's why reflector can do that for you.
Reflector can generate a list of mirrors based on a plethora of given constraints. For example, I want a list of mirrors that were synchronized within the last 12 hours and that are located either in India or Singapore (these two are closest to my location), and sort the mirrors by download speed.
Turns out, reflector can do that:
reflector --download-timeout 60 --country India,Singapore --age 12 --protocol https --sort rate
The found servers will be listed like before:
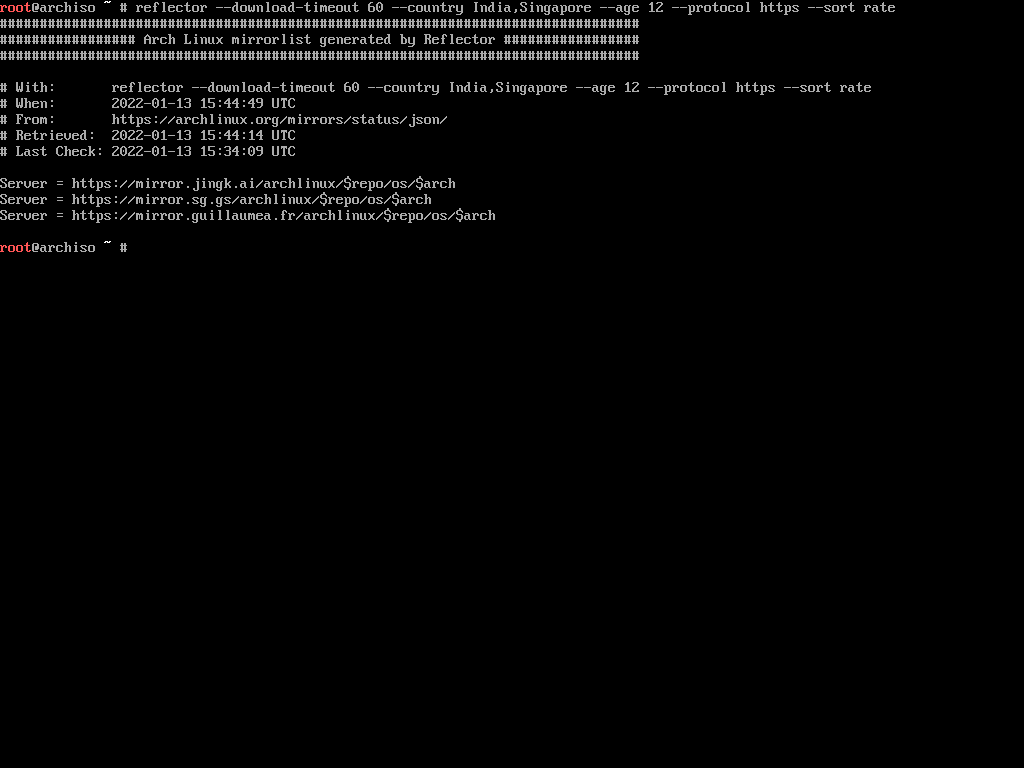
Printing out a mirror list like this is not enough. You'll have to persist the list in the /etc/pacman.d/mirrorlist location. Pacman, the default package manager for Arch Linux, uses this file to learn about the mirrors.
Before overwriting the default mirror list, make a copy of it:
cp /etc/pacman.d/mirrorlist /etc/pacman.d/mirrorlist.bak
Now execute the reflector command with the --save option as follows:
reflector --download-timeout 60 --country India,Singapore --age 12 --protocol https --sort rate --save /etc/pacman.d/mirrorlist
This command will generate the mirror list and overwrite the default one. Now you're ready to install the base Arch Linux system.
How To Install Arch Linux Base System
Before installing the base system, it's a good idea to update the package cache according to the new mirror list. To do so, execute the following command:
pacman -Sy
The pacman program to Arch Linux is what apt is to Ubuntu or dnf is to Fedora. The -S option means sync which is equivalent to install in apt or dnf package managers.
Once the update process is finished, you can use the pacstrap script to install the Arch Linux system. Execute the following command to start the installation process:
pacstrap /mnt base base-devel linux linux-firmware sudo nano ntfs-3g networkmanager
The pacstrap script can install packages to a specified new root directory. As you may remember, the root partition was mounted on the /mnt mount point, so that's what you'll use with this script. Then you'll pass the package names you want to install:
base– Minimal package set to define a basic Arch Linux installation.base-devel– Group of packages required for building software from source.linux– The kernel itself.linux-firmware– Drivers for common hardware.sudo– You want to run commands as root right?nano– A pico editor clone with some enhancements.ntfs-3g– NTFS filesystem driver and utilities required for working with NTFS drives.networkmanager– Provides detection and configuration for systems to automatically connect to networks.
I would like to clarify that this list of seven packages is not something mandatory. To have a functional Arch Linux installation, you just need the base, linux, and linux-firmware packages. But considering you'll need the other ones anyway, why not catch 'em all in one go.
Depending on your internet connection, the installation process may take a while. Sit back and relax until pacstrap does its thing. Once it's done, you'll see something as follows:
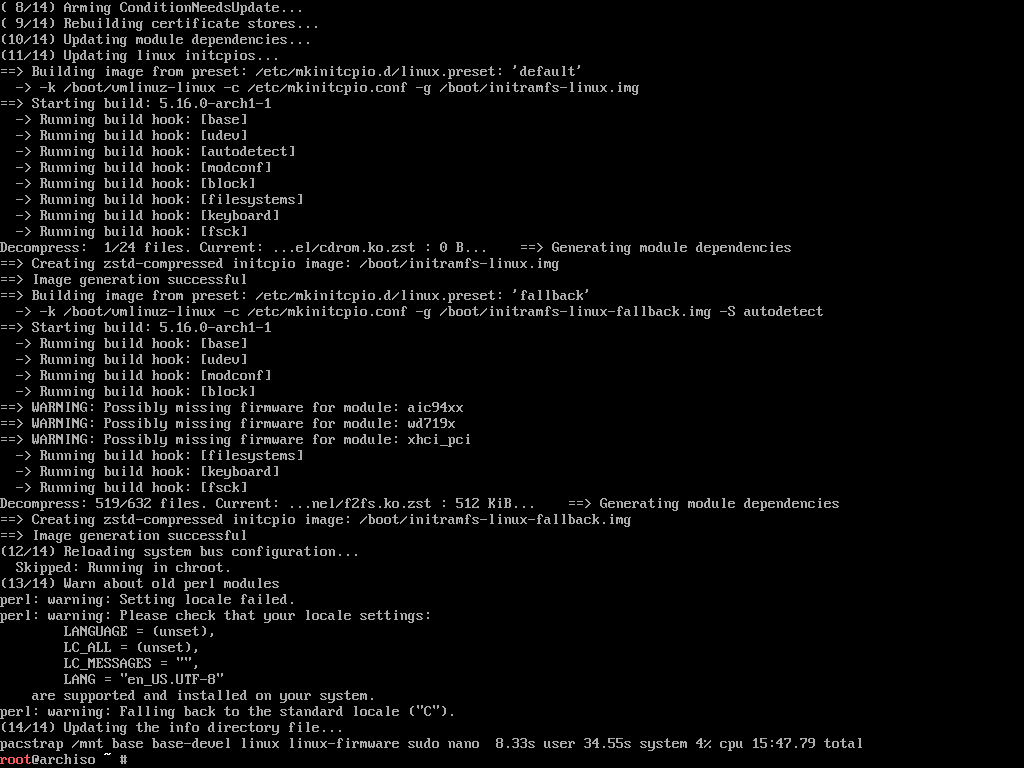
Congratulations, you've successfully installed Arch Linux on your computer. All that is left to do now is configuring the system.
How To Configure Arch Linux
Installing Arch Linux wasn't that hard right? In fact in my opinion, installing it is way more straightforward than configuring it. There is a lot to do here. So let's get started.
How To Generate the Fstab File
According to the ArchWiki,
The
fstabfile can be used to define how disk partitions, various other block devices, or remote file systems should be mounted into the file system.
In other distributions like Ubuntu or Fedora this gets generated automatically during the installation. On Arch however, you'll have to do it manually. To do so, execute the following command:
genfstab -U /mnt >> /mnt/etc/fstab
The genfstab program can detect all the current mounts below a given mount point and print them in fstab-compatible format to standard output. So genfstab -U /mnt will output all current mounts under the /mnt mount point. We can save that output to the /mnt/etc/fstab file using the >> operator.
How To Login to The Newly Installed System Using Arch-Chroot
Right now you're logged into the live environment and and not into your newly installed system.
To continue configuring your newly installed system, you'll have to first log into it. To do so, execute the following command:
arch-chroot /mnt
The arch-chroot bash script is part of the arch-install-scripts package and lets you change to the newly installed system's root user without any reboot. How cool is that!
How To Configure the Time Zone
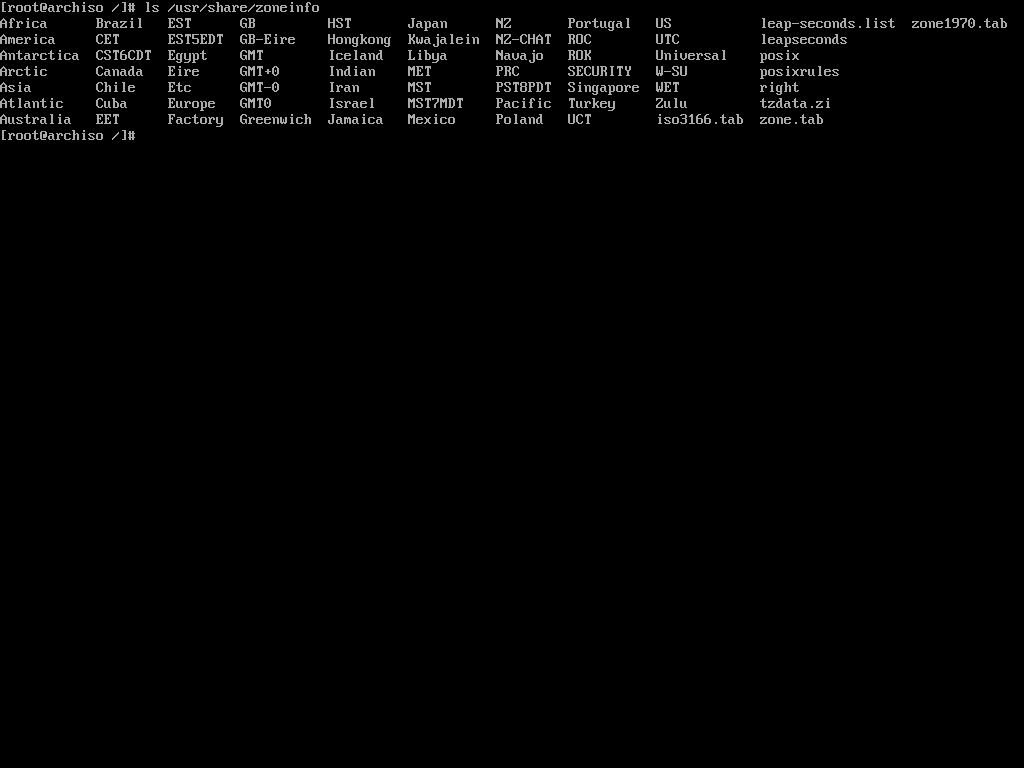
Once you've switched root, the first thing to configure is the time zone. To see a list of all the available zones, execute the following command:
ls /usr/share/zoneinfo
All the major zones should be in the directory.
I live in Dhaka, Bangladesh which resides inside the Asia zone. If I list out the content of Asia, I should see Dhaka there:
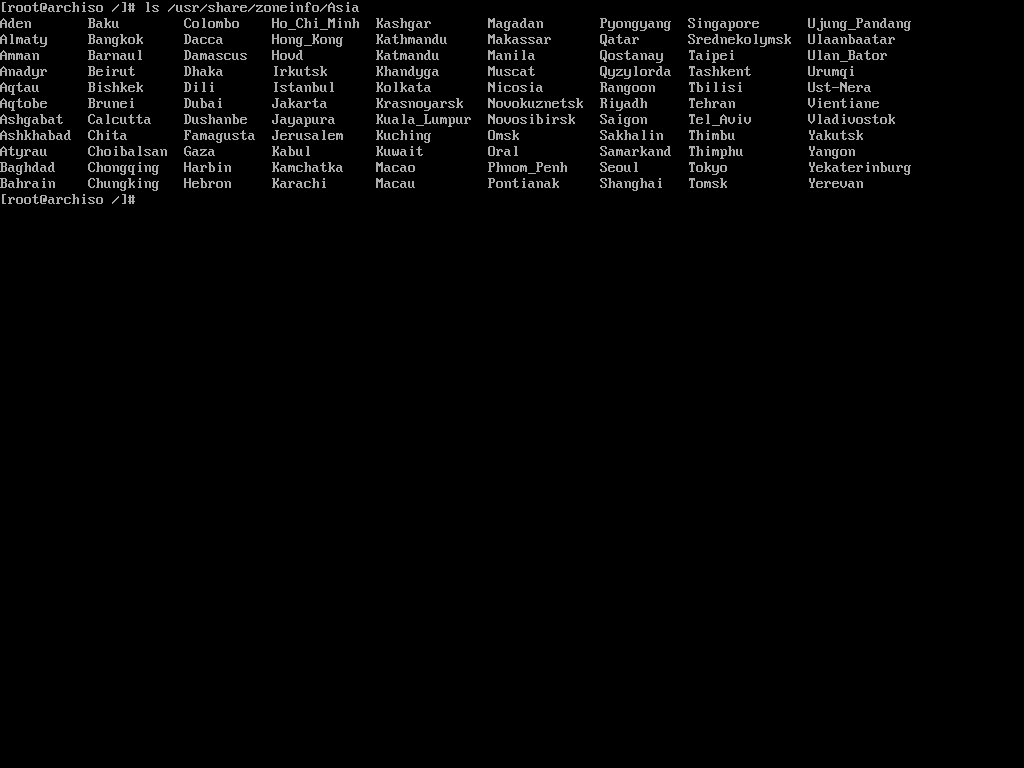
To set Asia/Dhaka as my default time zone, I'll have to make a symbolic link of the file at the /etc/localtime location:
ln -sf /usr/share/zoneinfo/Asia/Dhaka /etc/localtime
The ln command is used for creating symbolic links. The -sf options indicate soft and force, respectively.
How To Configure the Localization
Now you'll have to configure your languages. Arch Linux has an easy way to set that up as well.
First, you'll have to edit the etc/locale.gen file according to your localization. Open the file in the nano text editor:
nano /etc/locale.gen
You'll see a long list of languages:
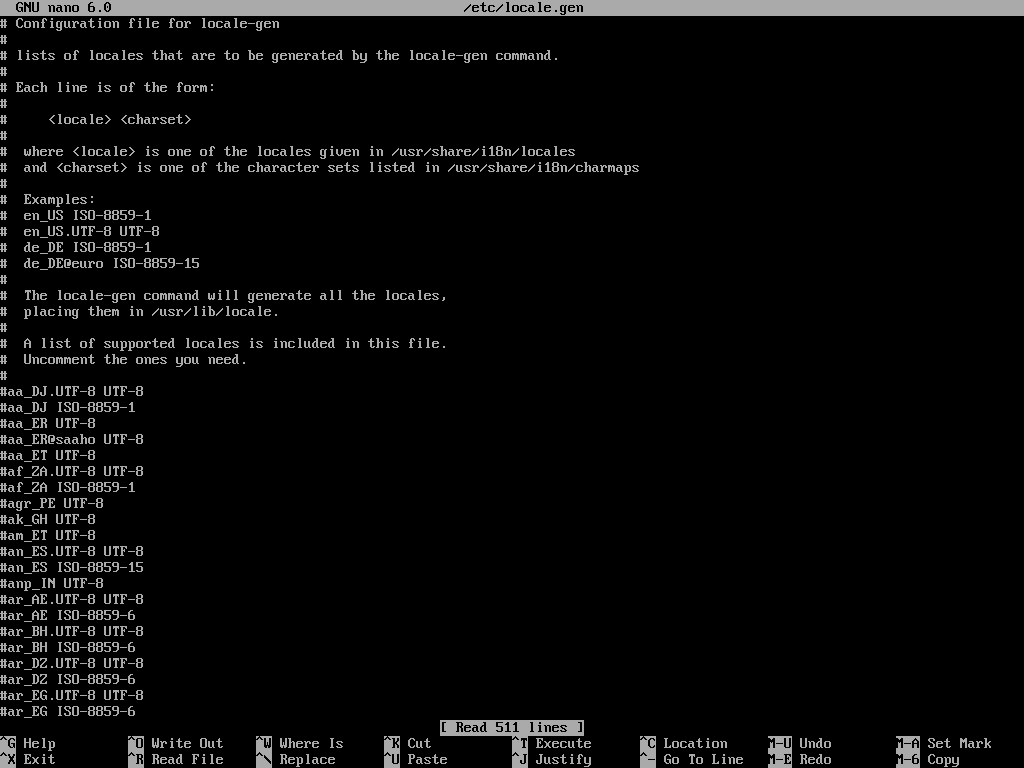
You'll have to uncomment the languages that you want to enable. I usually only need English and Bengali. So I'll locate the en_US.UTF-8 UTF-8, bn_BD UTF-8, and bn_IN UTF-8 languages. Save the file by pressing Ctrl + O and exit nano by pressing the Ctrl + X key combination.
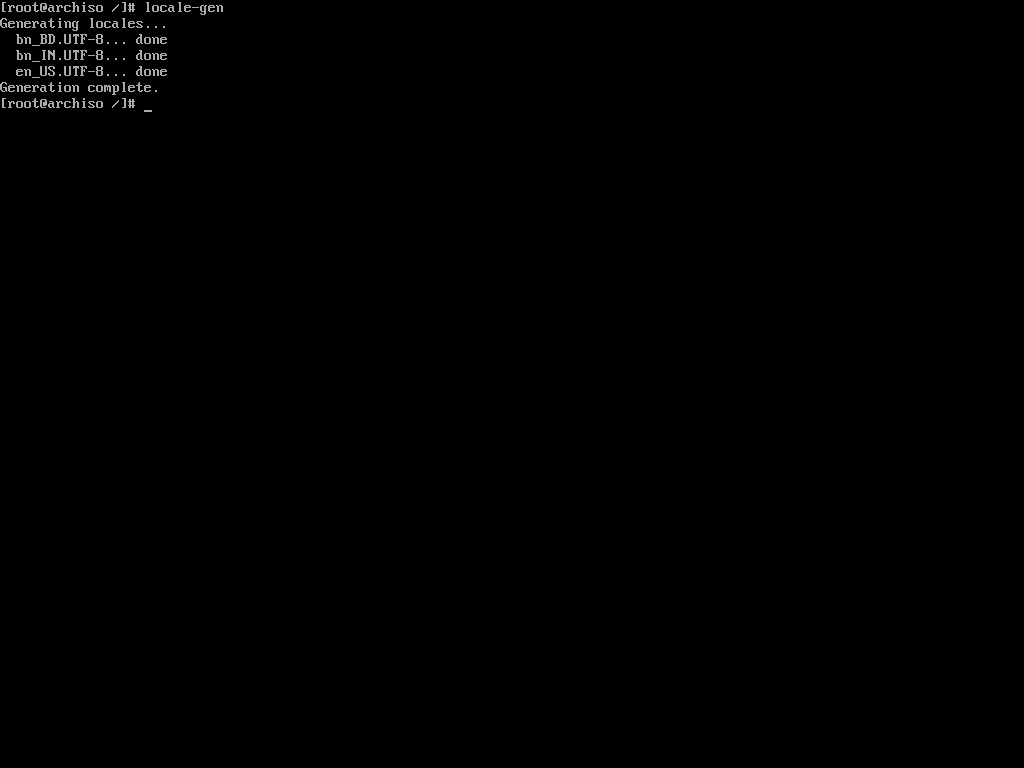
Now you'll have to execute the following command:
locale-gen
The locale-gen command will read your /etc/locale.gen file and generate the locales accordingly.
Now that you've enabled multiple languages, you'll have to tell Arch Linux which one to use by default. To do so, open the /etc/locale.conf file and add the following line to it:
LANG=en_US.UTF-8
That's all you gotta do to configure your locale. You can always go back to the /etc/locale.gen file and add or remove languages from it. Just remember to run locale-gen whenever you do that.
Apart from the locales, if you've made any changes to your console keymaps in the first step of installation, you may want to persist them now. To do so, open the /etc/vconsole.conf file and add your preferred keymaps there.
For example, if you changed the default keymaps to mac-us in the first step, then you may want to add the following line to the vconsole.conf file:
KEYMAP=mac-us
Now every time you use the virtual console, it'll have the correct keymap and you will not have to configure it every time.
How To Configure the Network
Configuring a network manually in any Linux distribution can be tricky. That's why I advised you to install the networkmanager package during the system installation. If you did as I said, you're good to go. Otherwise, use pacman to install the package now:
pacman -S networkmanager
Pacman is a package manager. You'll learn more about it later. Let's set the host name for your computer now. A host name is a unique name created to identify a machine on a network, written in the /etc/hostname file.
Open the file with nano and write your host name in it. You can use anything to identify your machine. I usually use my device brand or model as my hostname and as I'm on a legion laptop, I'll simply write the following:
legion
Local host name resolution is provided by nss-myhostname (an NSS module provided by systemd) without having to edit /etc/hosts file. It is enabled by default.
But some software may still read the /etc/hosts file directly. Open the file in nano and add the following lines to it:
127.0.0.1        localhost
::1              localhost
127.0.1.1        legion
Make sure to replace legion with your host name. Now you may install the aforementioned package:
pacman -S networkmanager
Enable the NetworkManager service by executing the following command:
systemctl enable NetworkManager
Make sure to write NetworkManager and not networkmanager as the service name. If the command succeeds, network manager will start automatically on boot from now on and do its thing.
How To Set the Root Password
You may want to set a password for the root user because why not? To do so, execute the following command:
passwd
The passwd command lets you change the password for a user. By default it affects the current user's password which is the root right now.
It'll ask for a new password and confirmation password. Input them carefully and make sure you don't forget the password.
How To Create a Non-root User
Using your Linux system as the root user for long is not a good idea. So creating a non-root user is important. To create a new user, execute the following command:
useradd -m -G wheel farhan
The useradd command lets you create a new user. Make sure to replace my name with the one you want to use. The -m option indicates that you also want it to create the corresponding home directory. The -G option will add the new user to the wheel group which is the administration user group in Arch Linux.
Now you can use the passwd command once again to set the password for the newly created user:
passwd farhan
The program will prompt you for a new password and a password confirmation. Again, don't forget to replace my name with the one you've used.
Finally, you'll have to enable sudo privilege for this new user. To do so, open the /etc/sudoers file using nano. Once open, locate the following line and uncomment it:
# %wheel ALL=(ALL) ALL
This file essentially means that all users in the wheel group can use sudo by providing their password. Save the file by hitting Ctrl + O and exit nano by hitting Ctrl + X. Now the new user will be able to use sudo when necessary.
How To Install Microcode
According to PCMag,
A set of elementary instructions in a complex instruction set computer (CISC). The microcode resides in a separate high-speed memory and functions as a translation layer between the machine instructions and the circuit level of the computer. Microcode enables the computer designer to create machine instructions without having to design electronic circuits.
Processor manufacturers such as Intel and AMD often release stability and security updates to the processor. These updates are crucial for the system's stability.
In Arch Linux, microcode updates are available through official packages that every user should install on their systems.
# for amd processors
pacman -S amd-ucode

# for intel processors
pacman -S intel-ucode
Just installing these packages is not enough though. You'll have to make sure that your bootloader is loading them. You'll learn about it in the next section.
How To Install and Configure a Boot Loader
According to Wikipedia,
A bootloader, also spelled as boot loader or called boot manager and bootstrap loader, is a computer program that is responsible for booting a computer.
The internals of bootloader is out of scope of this article so I'll just go on with the installation process. If you've used any other Linux distribution in the past you may have encountered the GRUB menu.
GRUB is one of the most popular bootloaders out there. Although there are a number of options available, I'll demonstrate the installation of GRUB because it is what most people will likely use.
To install GRUB, you'll have to first install two packages.
pacman -S grub efibootmgr
If you're installing alongside other operating systems, you'll also need the os-prober package:
pacman -S os-prober
This program will search for already installed operating systems on your system and will make them a part of the GRUB configuration file.
Now, you'll have to mount the EFI system partition you created a few sections ago. To do so, you'll have to first create an efi directory:
mkdir /boot/efi
According to Wikipedia,
In Linux, and other Unix-like operating systems, the
/boot/directory holds files used in booting the operating system.
This directory is present in all Unix-like operating systems. The above mentioned command creates a directory called efi inside the /boot directory. After creating the directory, you'll have to mount your EFI system partition in that directory.
mount /dev/sda1 /boot/efi
I hope you remember that we formatted the /dev/sda1 device as the EFI system partition during the partitioning phase. Make sure to use the correct one for your device.
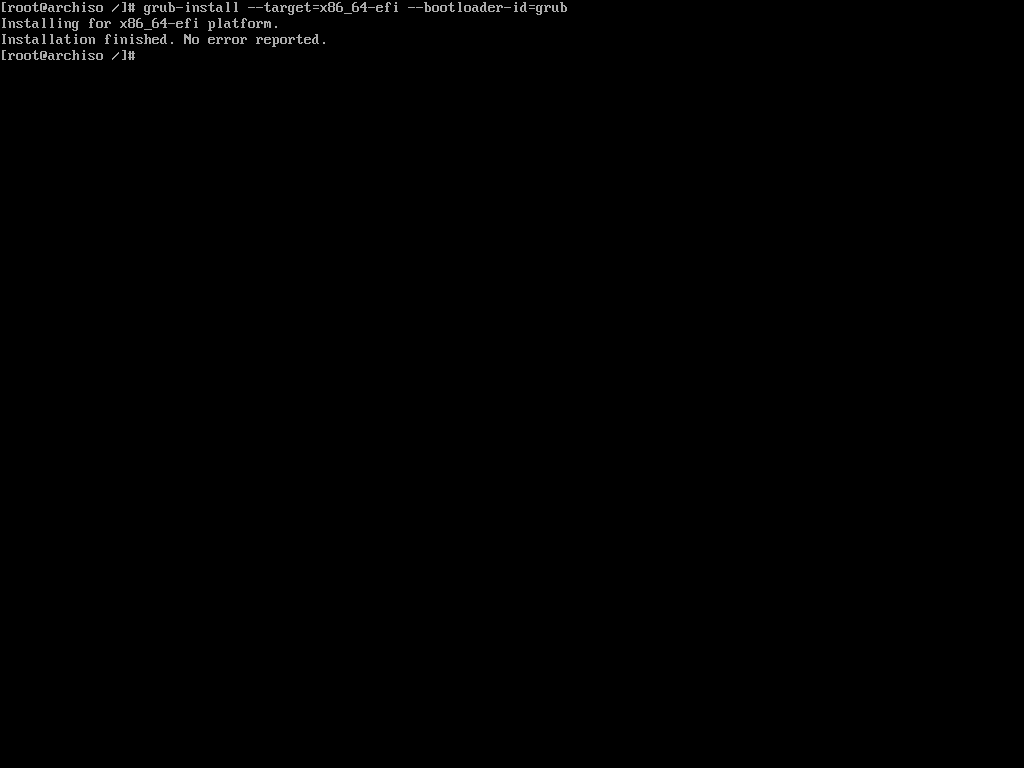
Now, we'll use the grub-install command to install GRUB in the newly mounted EFI system partition:
grub-install --target=x86_64-efi --bootloader-id=grub
You can more or less use this command verbatim. You can change the --bootloader-id to something more expressive like arch or something else. If the installation finishes without any errors, you'll then have to generate the GRUB configuration file.
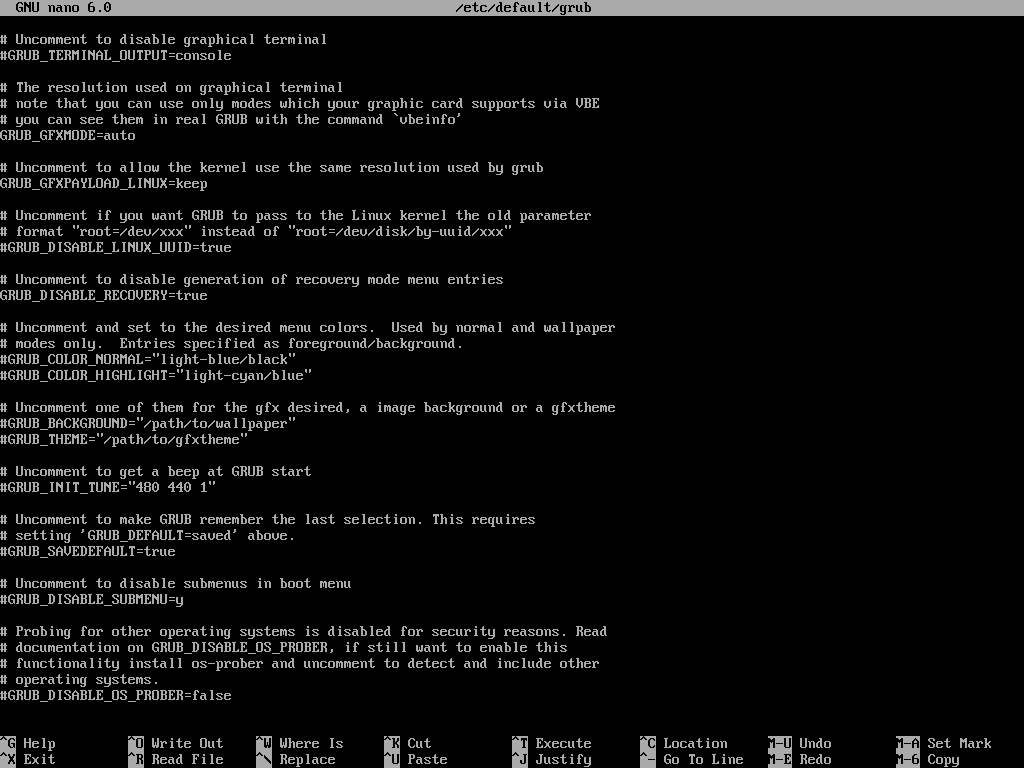
If you're installing alongside other operating systems, you'll have to enable os-prober before generating the configuration file. To do so, open the /etc/default/grub file in nano text editor. Locate the following line and uncomment it:
#GRUB_DISABLE_OS_PROBER=false
This should be the last line in the aforementioned file so just scroll to the bottom and uncomment it.
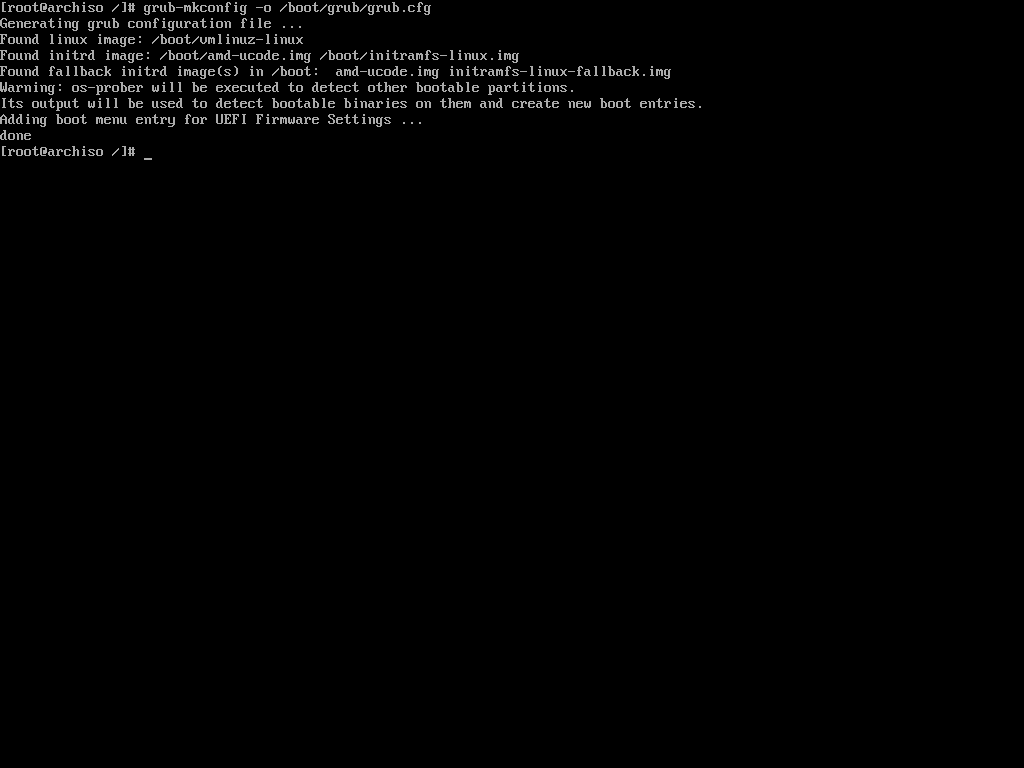
Now execute the following command to generate the configuration file:
grub-mkconfig -o /boot/grub/grub.cfg
The grub-mkconfig command generates the GRUB configuration file and saves it to a given target location. In this case /boot/grub/grub.cfg is the target location.
The command will also take into account the microcode you installed earlier and any other existing operating system on your machine.
Congratulations, you now have a working Arch Linux installation. At this point, you can exit the Arch-Chroot environment, unmount the partition, and reboot. But I would suggest you to stay a bit longer and set-up the graphical user interface as well.
How To Install Xorg
To run programs with graphical user interfaces on your system, you'll have to install an X Window System implementation. The most common one is Xorg.
To install Xorg, execute the following command:
pacman -S xorg-server
Wait until the installation is done and then move on to installing the necessary graphics drivers.
How To Install Graphics Drivers
Installing graphics drivers on Arch Linux is very straightforward. You just install the packages required by your graphics processing unit and call it a day.
# for nvidia graphics processing unit
pacman -S nvidia nvidia-utils

# for amd discreet and integrated graphics processing unit
pacman -S xf86-video-amdgpu

# for intel integrated graphics processing unit
pacman -S xf86-video-intel
If you need further assistance, feel free to check the ArchWiki page.
How To Install a Desktop Environment
Now that you've installed Xorg and the necessary graphics drivers, you're ready to install a desktop environment like GNOME, Plasma, or XFCE.
Arch Linux supports a long list of desktop environments but I've only tried out GNOME and Plasma. I'll demonstrate how you can install either of these two.
How To Install GNOME
To install GNOME, you'll have to install the gnome package. To do so, execute the following command:
pacman -S gnome
During the installation, you'll be offered multiple choices for pipwire-session-manager and emoji-font packages. Accept the defaults by hitting Enter in both prompts. The installation may take some time to finish.
The gnome package comes with GDM or Gnome Display Manager. You can enable the service by executing the following command:
systemctl enable gdm
That's all you need to do to get GNOME up and running on your Arch system.
How To Install Plasma
The KDE Plasma installation is not that different from GNOME. You'll need to install Plasma related packages instead of GNOME.
pacman -S plasma plasma-wayland-session
If you have an NVIDIA graphics card, then avoid installing the plasma-wayland-session and use plain old X11. I own two devices with NVIDIA GPUs and both of them have shown instability when using Wayland.
During the installation, you'll get multiple choices for ttf-font, pipwire-session-manager, and phonon-qt5-backend packages. Make sure to pick noto-fonts as your ttf-font and accept the defaults for the other two.
Like gdm in GNOME, Plasma comes with sddm as the default display manager. Execute the following command to enable the service:
systemctl enable sddm
And that's all you need to do to get Plasma up and running on your Arch Linux system.
How To Finalize The Installation
Now that you've installed Arch Linux and gone through all necessary configuration steps, you can reboot to your newly installed system. To do so, first come out of the Arch-Chroot environment:
exit
Next, unmount the root partition to make sure there are no pending operations:
umount -R /mnt
Now reboot the machine:
reboot
Wait until you see the GRUB menu.
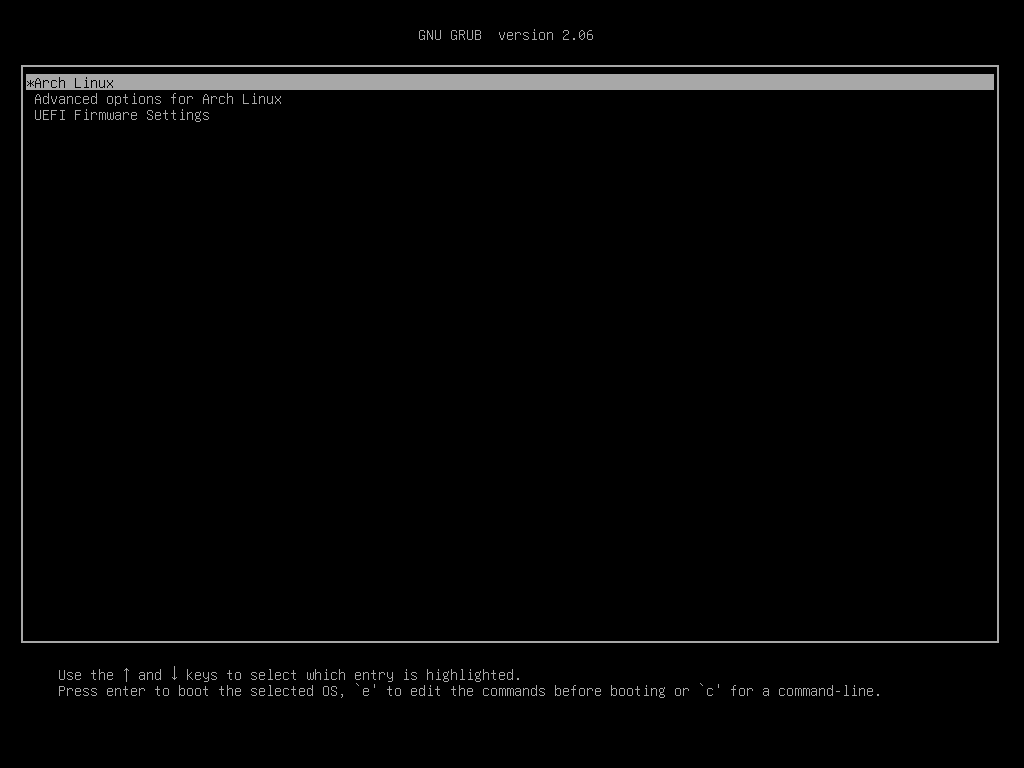
Choose Arch Linux from the list and wait until the system finishes booting up.
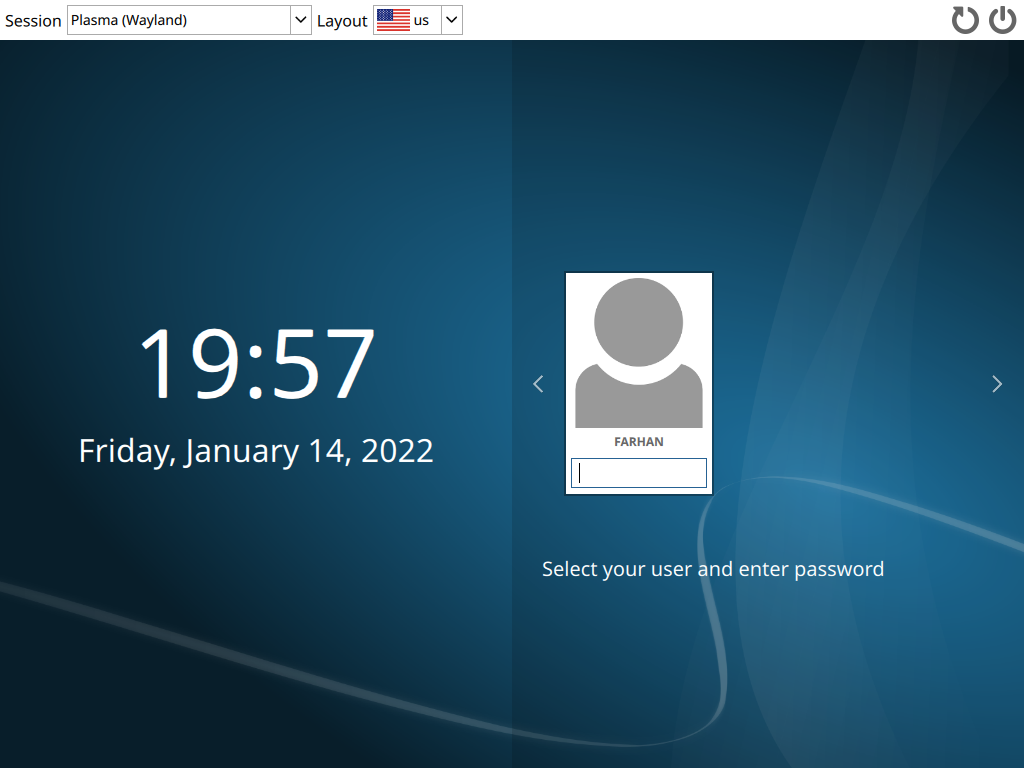
Log in with your user credentials and voilà!
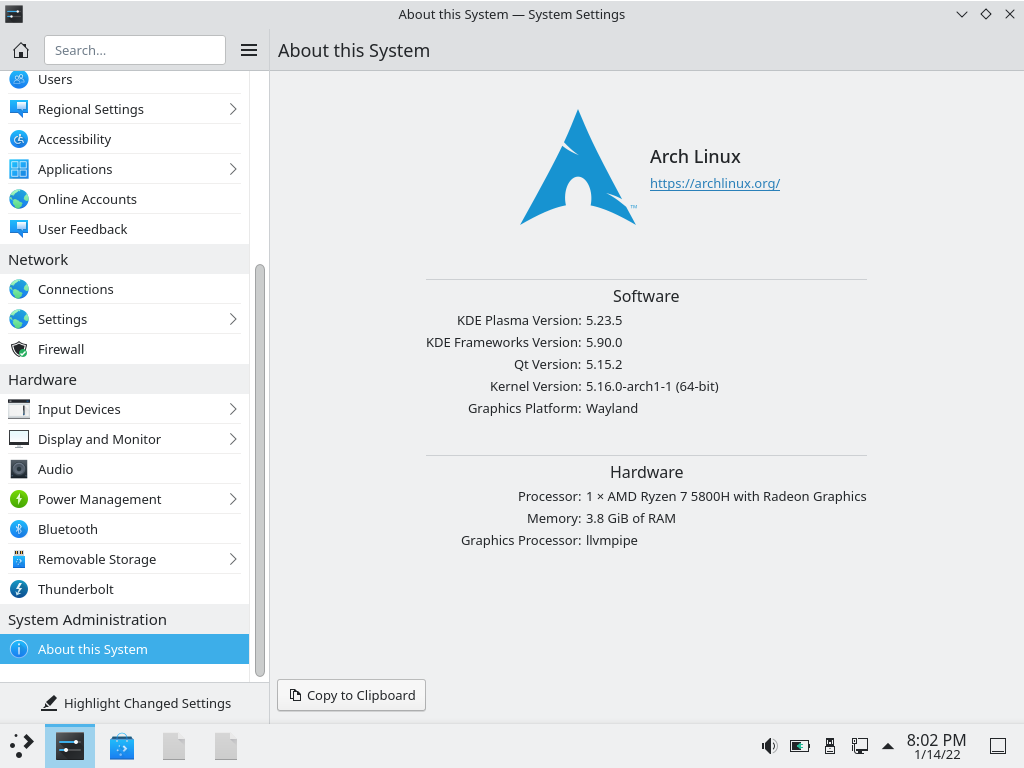
Your shiny new Arch Linux system is ready to do wonders.
How To Switch Between Desktop Environments
Unlike other distributions coupled tightly with their default desktop environment, Arch is flexible. You can switch to another desktop environment whenever you feel like it.
To do so, first logout of your current session.
As you can see, I'm currently using Plasma. Now switch to TTY2 press Ctrl + Alt + F2 key combination. You'll see a console login prompt:
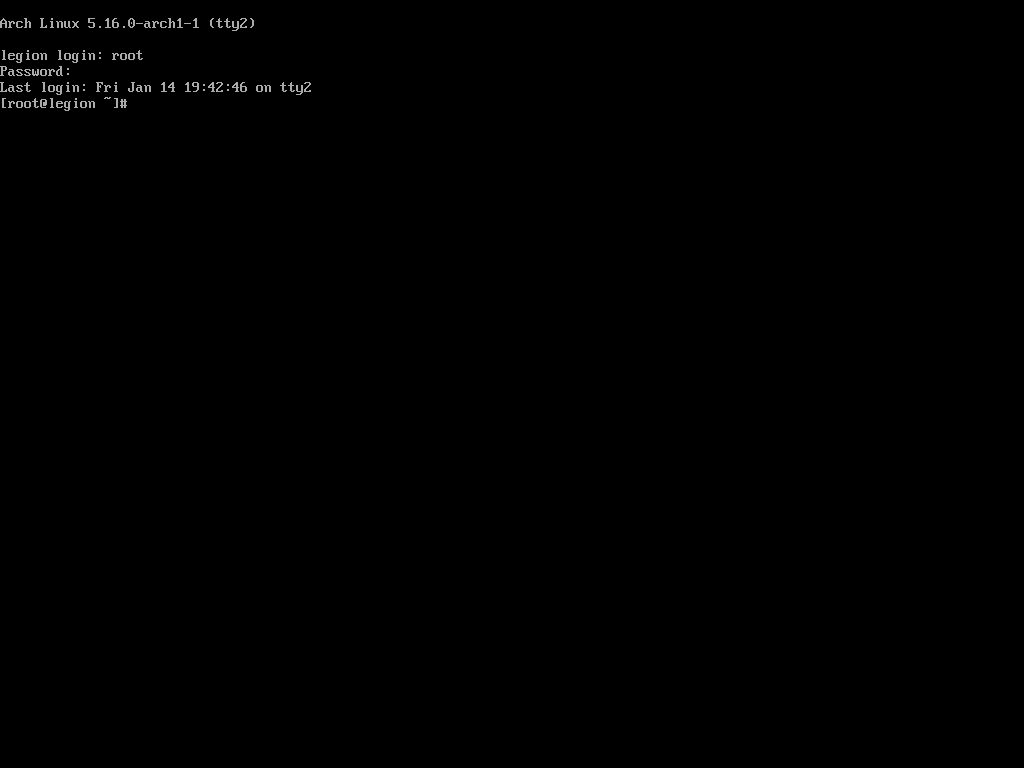
Login with the root credentials and disable the sddm display manager.
systemctl disable sddm
Then uninstall the Plasma related packages you installed earlier:
sudo pacman -Rns plasma plasma-wayland-session
Once the packages have been uninstalled, install the packages needed for GNOME:
pacman -S gnome
Then perform the installation according to the section you read earlier. After the gnome package has been installed, enable the gdm display manager:
systemctl enable gdm
Restart the computer.
reboot
Wait until the Arch Linux system finishes booting.
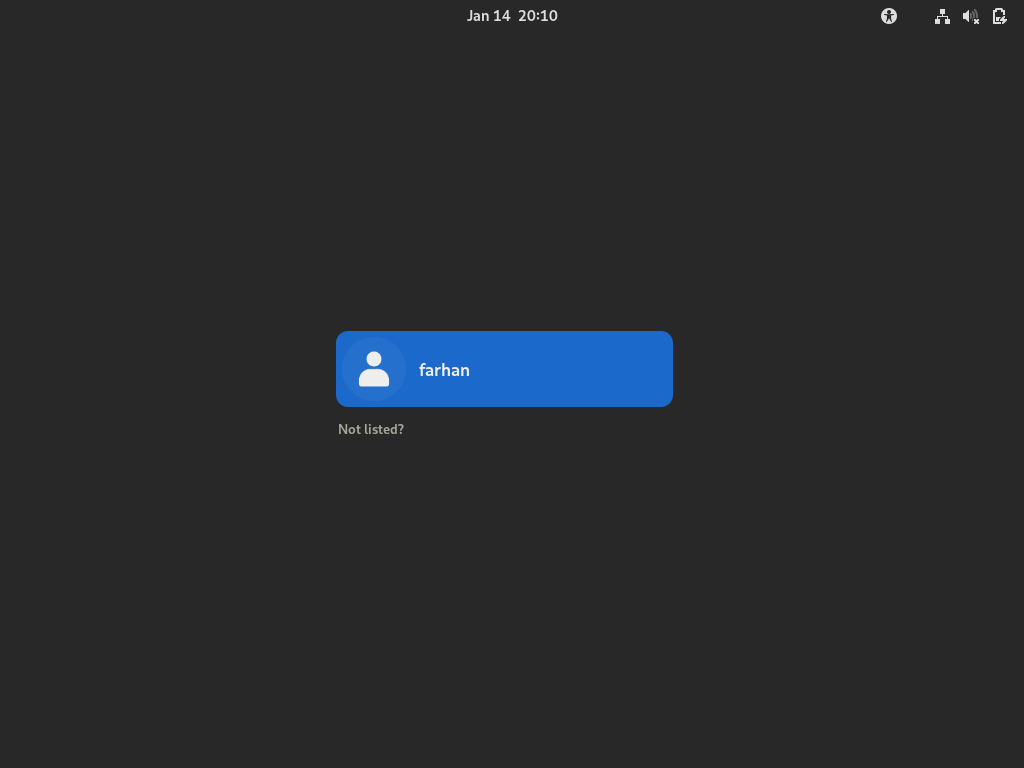
Lo and behold, the gorgeous Gnome Display Manager. Login with your credentials.
You can switch between the desktop environments as much as you want to, but I would suggest on settling down with one of them. Also, I wouldn't recommend having multiples of them installed at the same time.
How To Manage Packages Using Pacman
You've already installed a number of packages using pacman. It's equivalent to package managers like apt in Ubuntu and dnf in Fedora.
In this section, I'll introduce you to some of the common pacman commands that you may need on a daily basis.
How To Install Packages Using Pacman
To install a package using pacman, you can use the following command syntax:
# sudo pacman -S <package name>

sudo pacman -S rust
You can install multiple packages as follows:
# sudo pacman -S <package name> <package name>

sudo pacman -S rust golang
You can also specify the repository you want to install the package from like this:
# sudo pacman -S <package repository>/<package name>

sudo pacman -S extra/rust
In this command, the -S option means synchronize which is equivalent to install in the case of apt or dnf package managers.
How To Remove Packages Using Pacman
To remove a package using pacman you can use the following syntax:
# sudo pacman -R <package name>

sudo pacman -R rust
This will remove the package but will leave the dependencies. You can remove the package with dependencies if they're not required by any other package by executing the following command:
# sudo pacman -Rs <package name>

sudo pacman -Rs rust
Pacman often saves important configuration files when removing certain applications. You can override this behavior by using the following syntax:
# sudo pacman -Rn <package name>

sudo pacman -Rn rust
I usually use sudo pacman -Rns whenever I want to uninstall something. One last thing that I want to show is how to remove orphan packages.
In Ubuntu the sudo apt autoremove command uninstalls any unnecessary package. The equivalent command in Arch is:
sudo pacman -Qdtq | pacman -Rs -
This will cleanup any leftover package from previously installed packages.
How To Upgrade Packages Using Pacman
To upgrade all the packages in your system, you can use the following syntax:
sudo pacman -Syu
In this command, the S option synchronizes the packages, y refreshes the local package cache, and u updates the system. This is like the ultimate upgrade command and I run it at least once everyday.
How To Search for Packages Using Pacman
To search for a package in the database, you can use the following syntax:
# sudo pacman -Ss <package name>

sudo pacman -Ss rust
This will print out all the packages found in the database with that search term and will also indicate if any of those are already installed.
If you would like to check if a package is already installed or not, you can use the following command:
# sudo pacman -Qs <package name>

sudo pacman -Qs rust
This is useful when you want to uninstall a package but do not know its exact name.
How To Use AUR in Arch Linux
According to It's FOSS,
AUR stands for Arch User Repository. It is a community-driven repository for Arch-based Linux distributions users. It contains package descriptions named PKGBUILDs that allow you to compile a package from source with makepkg and then install it via pacman (package manager in Arch Linux).
AUR is one of the most attractive features of Arch Linux. It's due to AUR that Arch Linux has a package count almost equal to Debian. You've already used pacman to install various packages. Sadly, you can not use that to install packages from AUR.
You'll have to install one of the AUR helpers instead. Arch Linux doesn't support any of these helpers and advises you to learn how to build packages manually. I'll explain both techniques here. If you understand how a helper works, you'll be able to do it manually as well.
How To Install Packages Using a Helper
Among the available and currently maintained AUR helpers, I like the yay or yet another yogurt package. It's written in Go and is quite solid.
You can not install yay like other packages. You'll have to get the source code and compile the program. You'll need git and the base-devel package to do so. Assuming you've already installed base-devel during Arch Linux installation:
pacman -S git
Clone the yay repository from GitHub and cd into it:
git clone https://aur.archlinux.org/yay.git && cd yay
To build and install yay from source, execute the following command:
makepkg -si
The makepkg script automates the build process of packages. The -si options stand for sync dependencies and install. The first option will install required dependencies (Golang in this case) and the later option will install the built package.
After the build process finishes, makepkg will ask for installation confirmation and your password. Input your password carefully and let the installation finish.
Check if yay has been installed properly or not:
yay --version

# yay v11.1.0 - libalpm v13.0.1
Now let's install something using yay. One of the common packages you may want to install is the visual-studio-code-bin package. To do so, execute the following command:
yay -S visual-studio-code-bin
Unlike pacman, you shouldn't run yay with sudo. Yay will look for the given package and will ask whether you would like to see the diff or not:
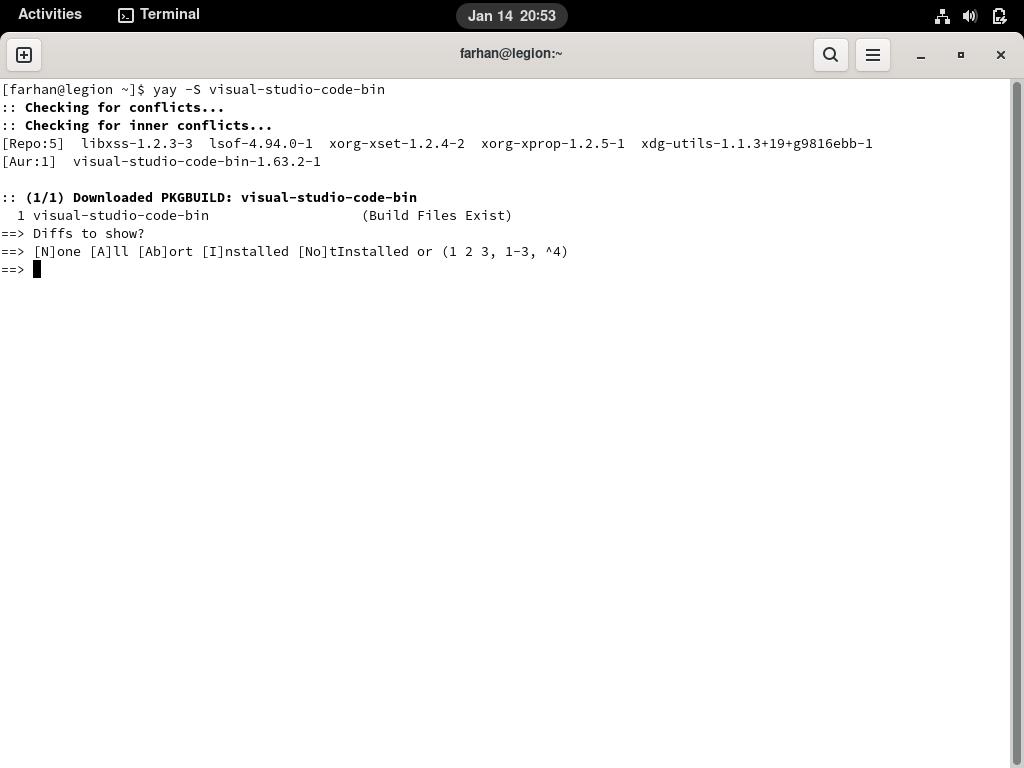
All the repositories over at AUR comes with a PKGBUILD file which contains the instructions for building this package. Yay has this nice feature where it shows you what has changed in the PKGBUILD file since the last time.
For now, I'll pick N for none and hit enter. Yay will now look for the dependencies and ask for your password to install them.
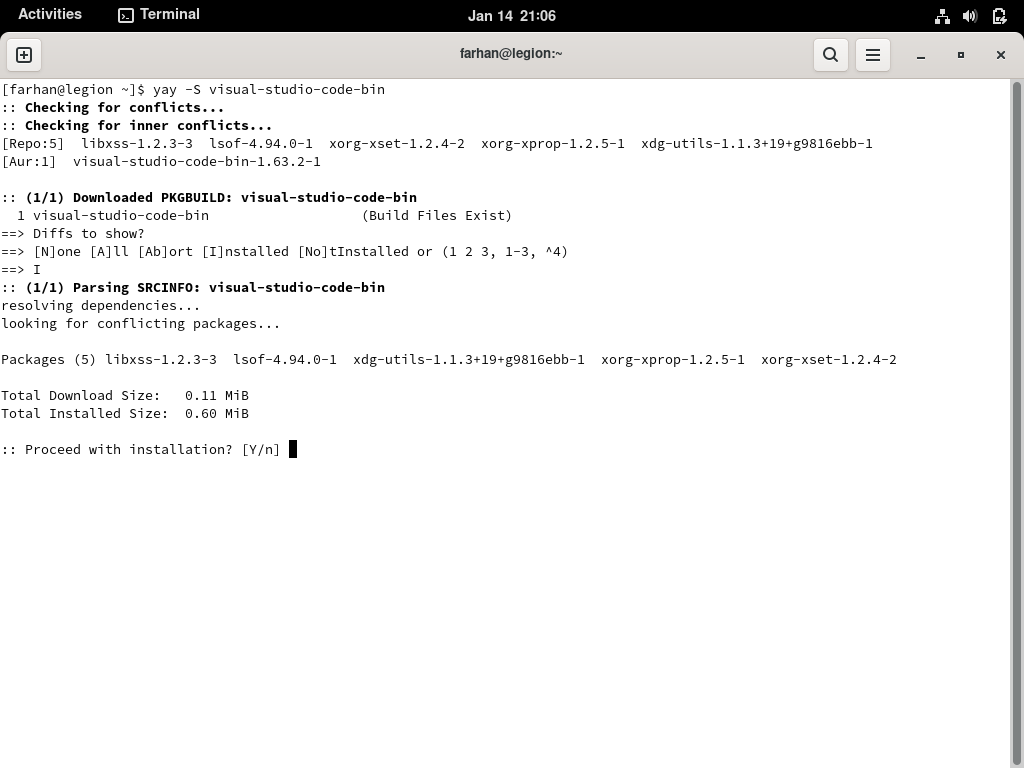
Confirm the installation and provide your password. Yay will then install the dependencies and start building the package. Once built, yay will install the package and prompt for your password where necessary.
After the installation finishes, search for Visual Studio Code in the application launcher:
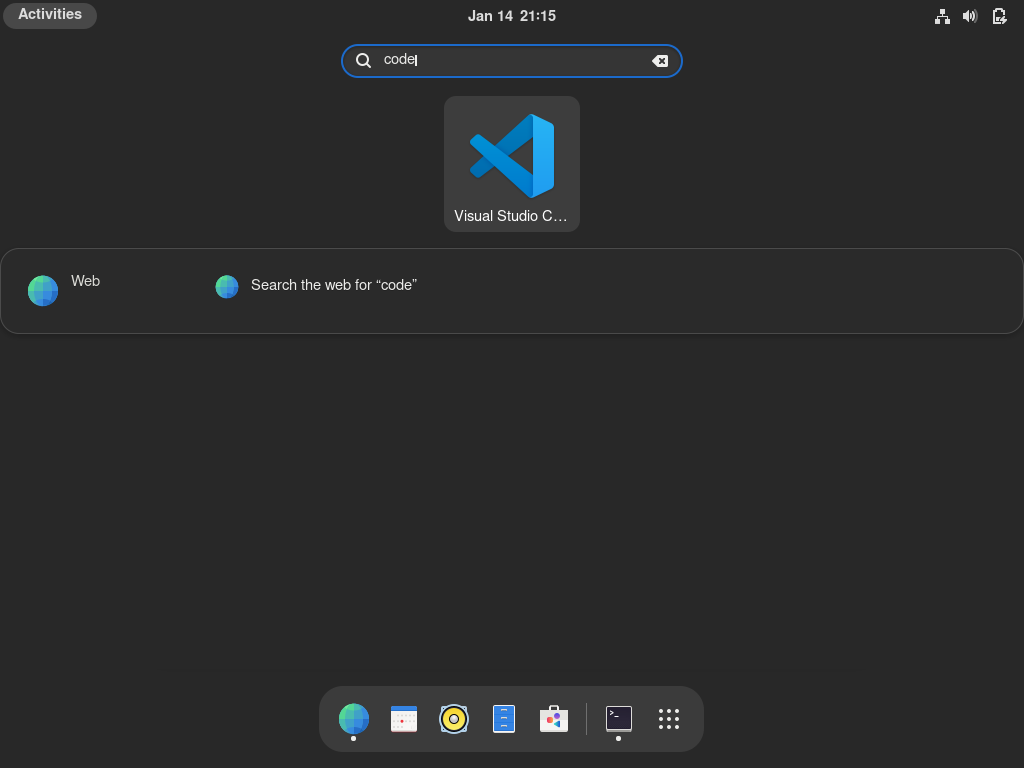
Congratulations on installing your first package from AUR. Yay commands are almost identical to pacman, so if you can do something with pacman, you should be able to do that with yay as well.
In fact, yay can also install packages from official Arch Linux repositories like pacman. But I would suggest you to use yay only for installing packages from AUR when necessary and pacman for everything else.
How To Install Packages Manually
Like I said in the previous section, the ArchWiki suggests avoiding any AUR helper and installing packages from AUR manually. I'll now show you how to do it.
Make sure you have git and base-devel packages installed. If not, use pacman to install them.
For the demonstration, let's install Spotify this time. First visit the AUR page for the spotify package - https://aur.archlinux.org/packages/spotify/ and copy the "Git Clone URL" from there.
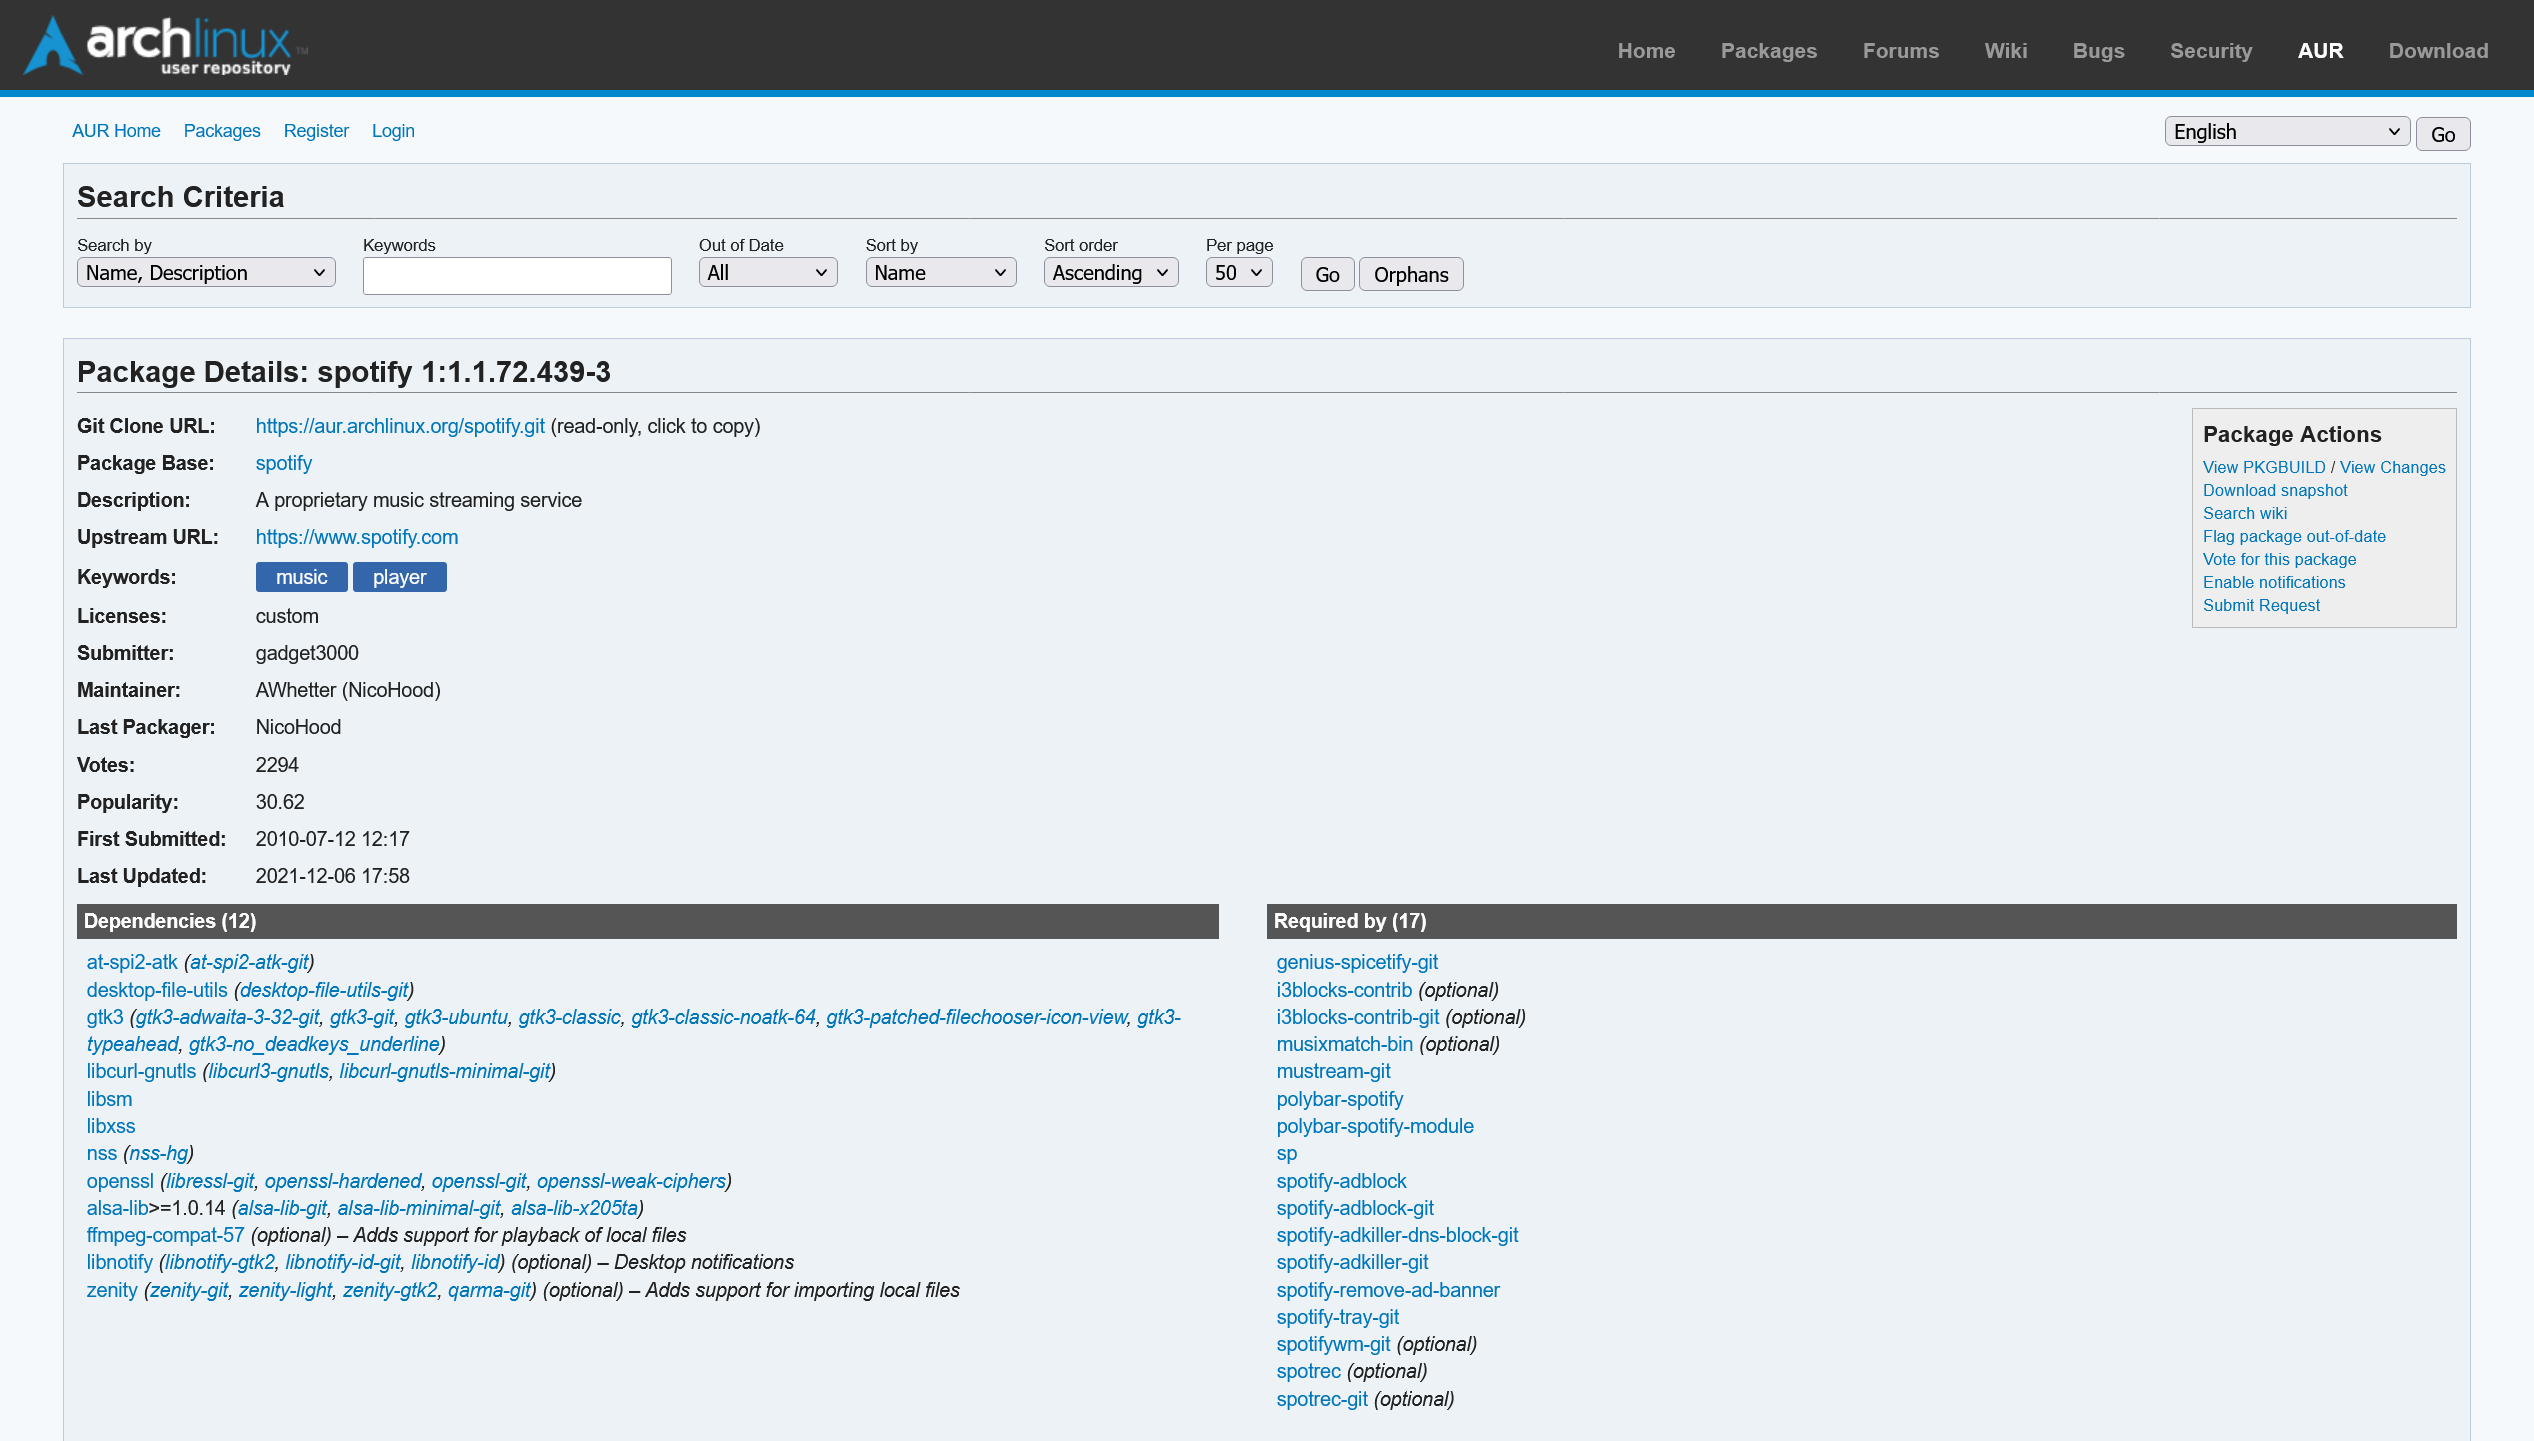
The page even lists all the dependencies you'll need. Clone the repository to your machine:
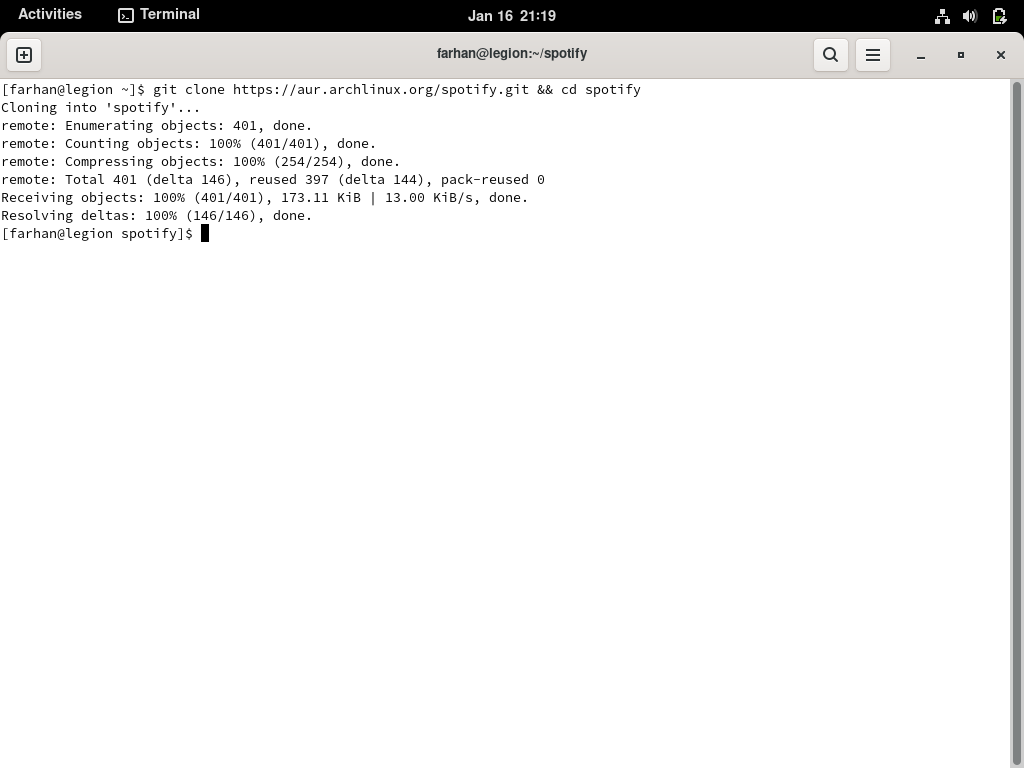
Every AUR repository comes with a PKGBUILD file containing the instructions for building the package. Whenever you're installing a package from AUR, it's a great idea to checkout the PKGBUILD file using something like the cat command:
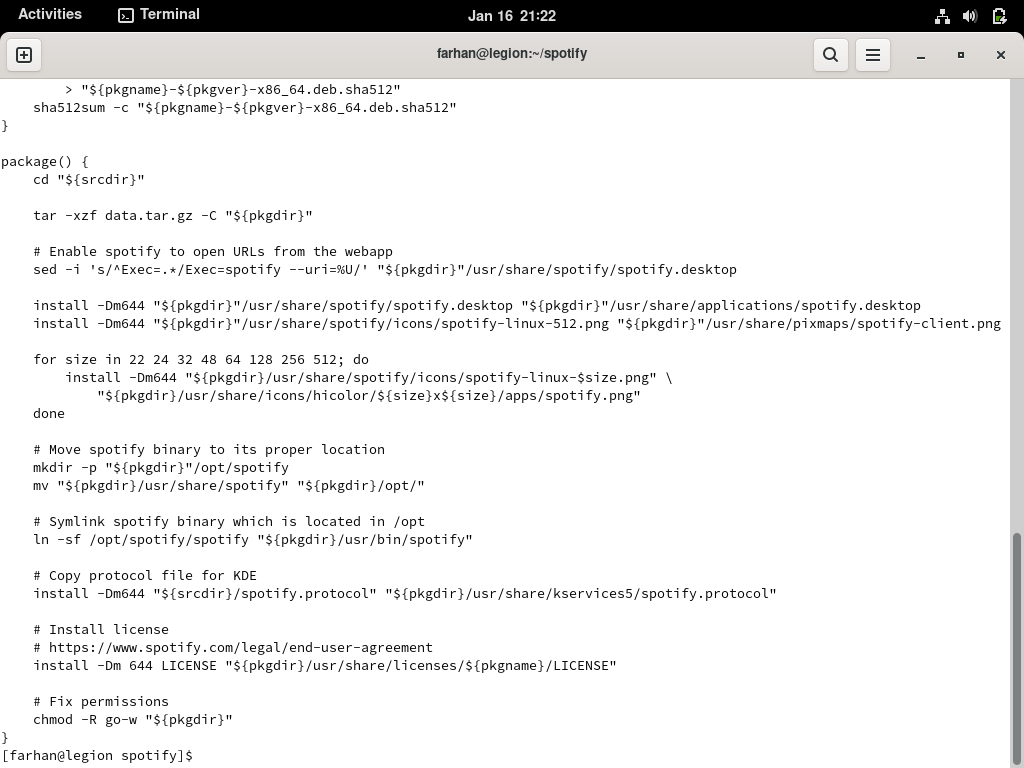
Make sure there's nothing harmful in the file. Once you're satisfied, use makepkg to install any dependencies, build the package, and install it. Ideally there shouldn't be any issues but sometimes, things can take an unexpected turn.
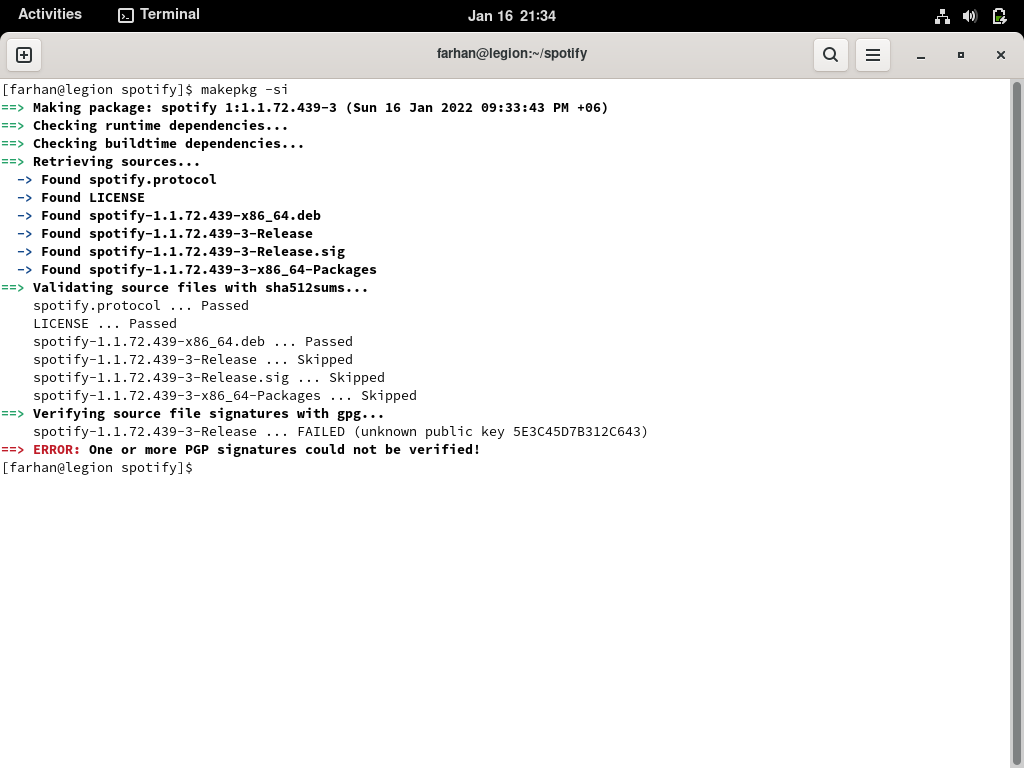
In these cases, go back to the corresponding AUR page and check the user comments. Like in this case, I found the following pinned comment:

Turns out the package requires you to add the Spotify for Linux gpg key to the user kyechain. This command downloads the gpg key using curl and pipes it as the input of the gpg --import command:
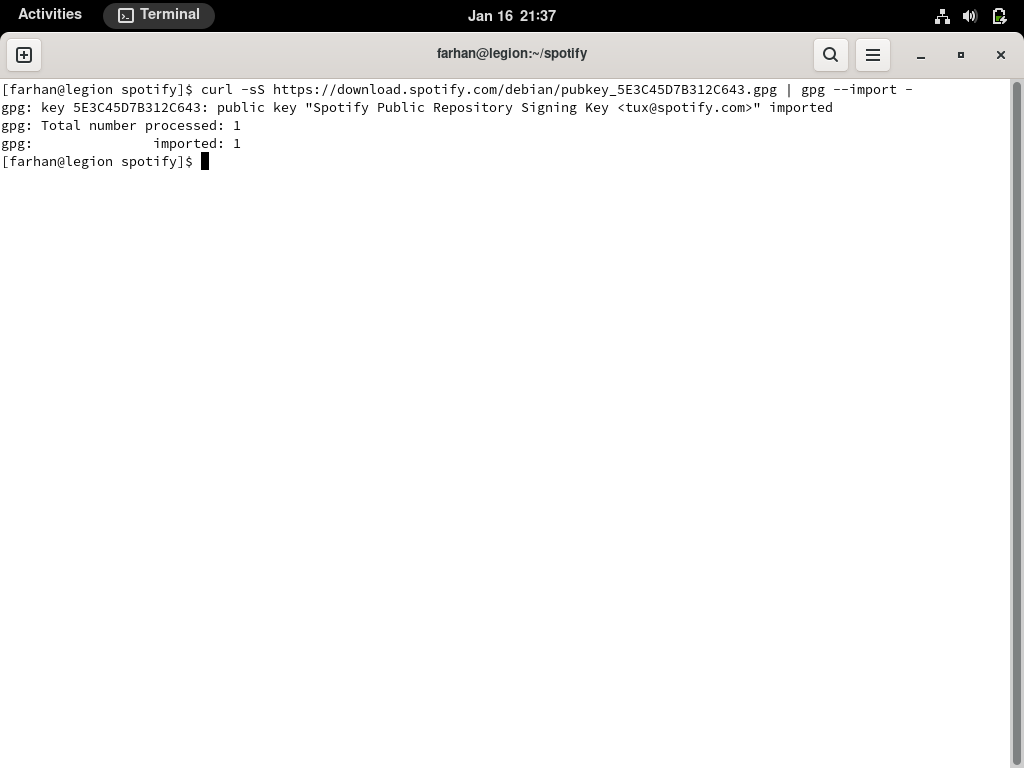
Try executing makepkg -si once again and everything should work fine this time:
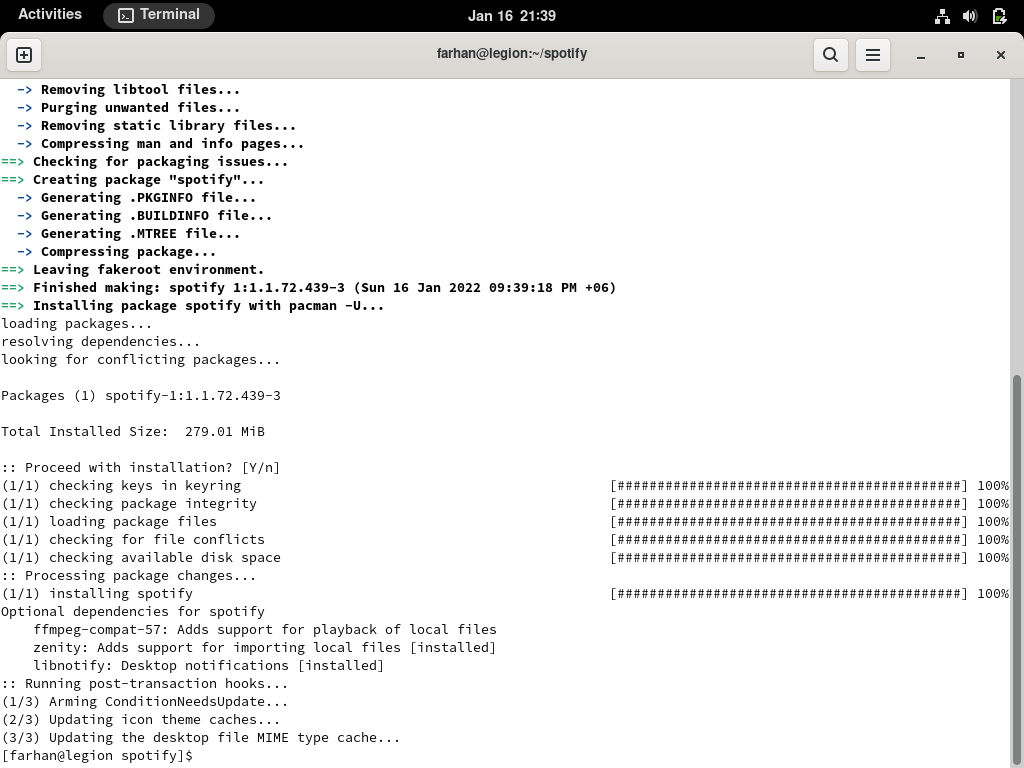
See, told ya! Manually installing packages often involves such troubleshooting but help is almost always around the comment corner. Let's enjoy some music now.
How To Troubleshoot Common Problems
Look, I've been using Arch as my primary on all my devices for some years now but I still run into issues. Fortunately there are some great places to look for help when you're stuck:
For the most part, the wiki should have the information you're looking for. In fact, if you're on a laptop and having difficulty getting something to work, there is an entire wiki category dedicated to different laptops. So look around the wiki.
If the wiki fails to solve your problem, then ask other fellow users at the forum as well as the subreddit. But whenever you're doing that, make sure to do your research first and include as much description as you can in the post. It's really annoying if other users have to keep asking you for more information and it'll also lower the chance that you'll get an answer.
How To Use the Live Arch ISO as a Rescue Media
Whatever people may say, Arch Linux is very stable as long as you know what you're doing. If you go about installing every funky package you come across in the AUR or keep switching different kernels without knowing what they're for, your system may fail to boot.
In those cases, you can use your live USB drive as a rescue media. To do so, reconnect the bootable USB to your computer and boot into the live environment. Once there, configure the time, keymaps, and fonts if you want to.
Then use fdisk to list out all your partitions and locate the one holding your Arch Linux installation. In my case it's the /dev/sda2 partition. Mount the partition like you did before:
mount /dev/sda2 /mnt
Now use Arch-Chroot to log in as the root user.
arch-chroot /mnt
Now uninstall the bad package you installed or go back to a kernel version that used to work in the past and so on. Once done, exit the Arch-Chroot environment, unmount the partition, and reboot:
exit
umount -R /mnt
reboot
If the computer boots fine then congratulations. Otherwise try the wiki, forum, or the subreddit. If nothing works, you may have to do a fresh install.
Further Reading
If you've come this far then you've done a lot of reading already – but that's not all. This entire handbook was written by combining information from the wiki, forum, and subreddit. I'm listing out some wiki pages that I think you should read.
- Installation guide
- Network configuration
- General recommendation
- Desktop environment
- pacman
- Arch Build System
- makepkg
- List of applications
Couldn't think of any more at the moment but I'll keep this list updated.
Conclusion
I would like to thank you from the bottom of my heart for the time you've spent on reading this article. I hope you've enjoyed your time and have learned a lot about not only Arch but Linux in general
Apart from this one, I've written full-length handbooks on other complicated topics available for free on freeCodeCamp.
These handbooks are part of my mission to simplify hard to understand technologies for everyone. Each of these handbooks takes a lot of time and effort to write.
If you've enjoyed my writing and want to keep me motivated, consider leaving starts on GitHub and endorse me for relevant skills on LinkedIn.
I'm always open to suggestions and discussions on Twitter or LinkedIn. Hit me with direct messages.
In the end, consider sharing the resources with others, because
In open source, we feel strongly that to really do something well, you have to get a lot of people involved. — Linus Torvalds
Till the next one, stay safe and keep learning.