
By Michael Umanah
Introduction
In this article, I will be taking us through a step by step process of installing a cpanel/whm on a digital ocean VPS. Note that these steps can be used to install a cpanel/whm on any VPS, but for this post, I will be using a Digital Ocean VPS.
Choosing a reliable hosting platform to use in hosting your projects can be a daunting task. I actually spent a good amount of time going through reviews and features before I finally agreed to go with Digital Ocean.
Why Digital Ocean
- They have one of the best prices for their VPS — it’s as low as $5 per month.
- Nice admin UI
- Very responsive support
- High performing servers.
Why are we installing cpanel/whm
Cpanel is a web-based server control panel that makes site management a piece of cake. It includes lots of features such as creating mails, server security, domain management, database, and so on, that simplify the work of a DevOps. You can see a demo of how it works by following this link.
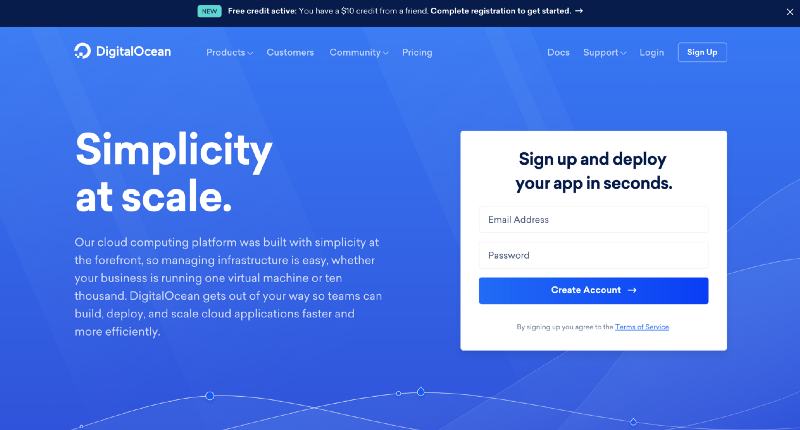
Setting up an account with Digital Ocean
First of all, you need to open an account with Digital Ocean. Signing up with this link, https://bit.ly/2JvuZ2V, will get a $10 credit deposited in your account for you to use, and it will also give me some referral credit. It’s really not much, but it’s better than nothing.
If you’re a student or know someone who is, sign up to Github’s Student Pack, and you’ll get $50 extra to use on your Digital Ocean account.
Creating a droplet
Once you are logged into your dashboard, go to the top right corner and click on the create button on the drop down, then select droplets.
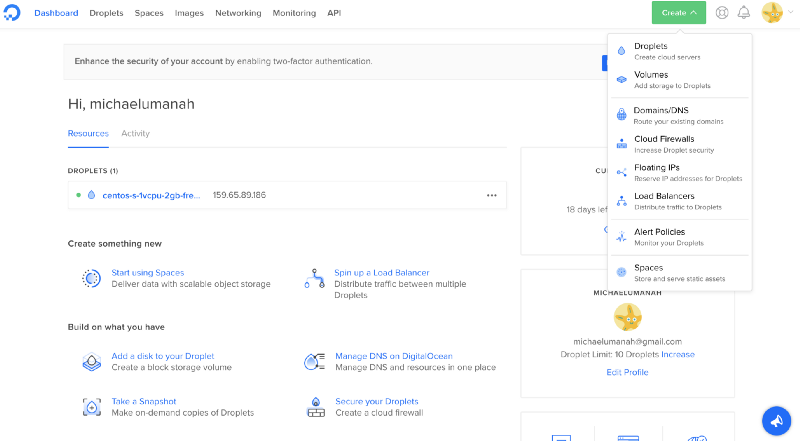
Droplet is the name given to Digital Ocean servers, which you will use in installing and setting up the cpanel.
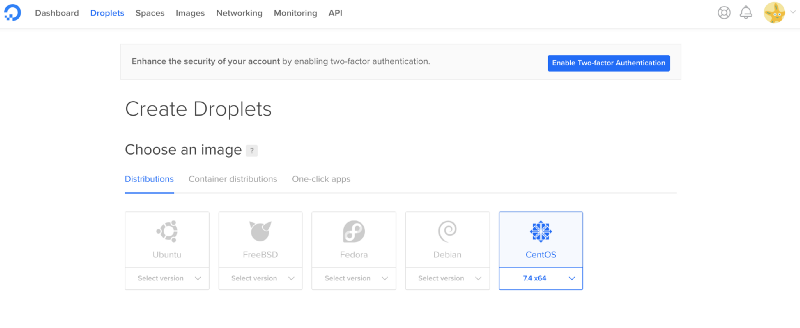
It will then take you to a screen for you to choose an image. Click on centOS. We choose that because WHM/cPanel runs on a CentOS server.
Scrolling down, you can choose the size of the droplet that you want. You can choose any configuration that you are okay with, but bear in mind that the minimum configuration for installing a cpanel as stated on the cpanel website is 1gb ram and 20gb disk space.
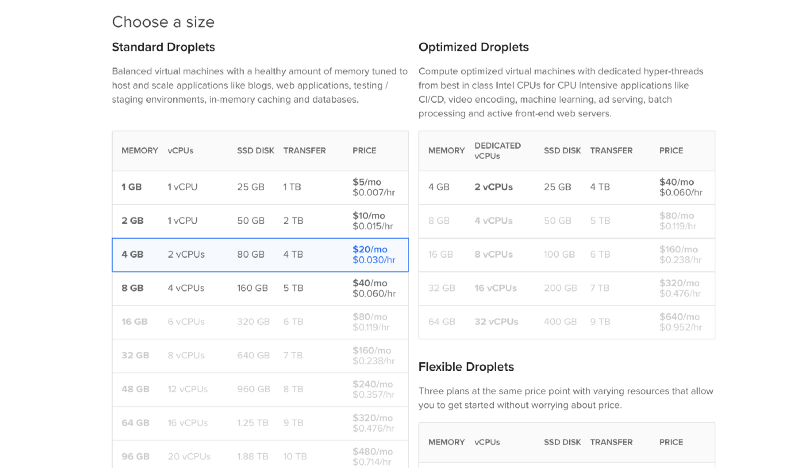
You can also choose a block storage for your data back up.

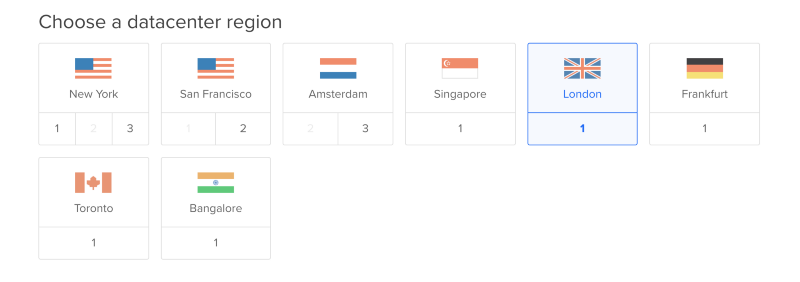
Scrolling down, you will be asked to choose a datacenter Region. If you’re targeting a specific country with most of your websites, it’s helpful to have a local server close to where most of your users will be accessing your websites.
Further down, you can select additional options. Here I typically go with Private Networking, IPv6, and Monitoring.

Make sure your hostname is HOSTNAME.YOURDOMAIN.COM
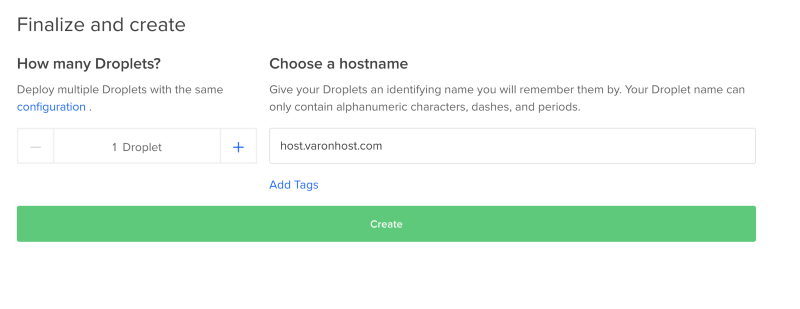
Once you finalize, Digital Ocean will start creating your droplet and email you the SSH keys, giving you root access to your server.
Installing Cpanel on your droplet.
Once you get the email, it means your server is now ready and you can start installing the cpanel/whm on it. You need to take note of the following things in the mail:
- Droplet Name
- Droplet IP Address
- Droplet Username (which is going to be root)
- Droplet Password (which you will be asked to changed on first login)
We need to be able access our server remotely to run a few commands on it.
For Mac users, you can do this easily by using the terminal. Open up the terminal on your Mac, and type the following command.
ssh root@162.345.323.09
The number above should be the droplet IP address that was sent to your email.
It will then prompt you for the password which you can copy and paste, and then click enter.
Note that when typing or pasting the password, the field won’t show — so just click on enter after pasting it.
For Windows users, I recommend using PuTTY (which you can download here). It’s a free software which you can use to gain shell access to a server.
After installing PuTTY and opening it, this is what you will see.
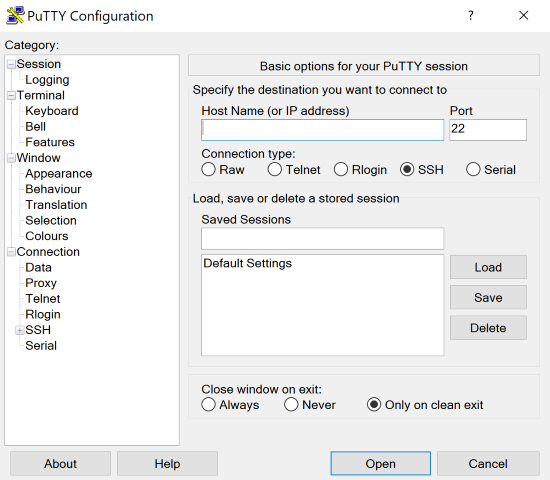
All you have to add here is your Host Name (or Droplet IP address) and click Open.
You’re going to log in as “root,” and then copy and paste the password you took note of earlier on.
Note: To copy and paste on Windows, simply right-click on your mouse and press enter. PuTTY doesn’t show your password for security reasons, but it’s there.
By default, Digital Ocean is going to ask you to reset your password. Simply enter your current password, then your desired password, and press enter.
Installing cPanel
Installing cpanel is quite easy, we will just be running few commands on our server. We begin by preparing our server for cpanel installation by running the following command to install perl.
sudo yum install perl
After installing perl, we need to take one more preliminary step. cPanel is very picky about making sure that server that it is installed on has a Fully Qualified Domain Name. To that effect, we need to provide it with a valid hostname. You can input a temporary one and then correct it once cPanel is installed.
hostname host.example.com
Note: the last command should be your own hostname.
We are now done with the pre-installation, and so we will start the actual cpanel installation. We start by installing screen and wget.
sudo yum install screen wget
Once screen and wget are installed, we can start a new screen session by typing this.
screen
After opening screen, we can then start installing cpanel using this command.
wget -N http://httpupdate.cPanel.net/latest
Once this is done, we can start the script by typing the command.
sh latest
The script might take 1 -3 hours to execute, so you just have to be patient until it’s done.
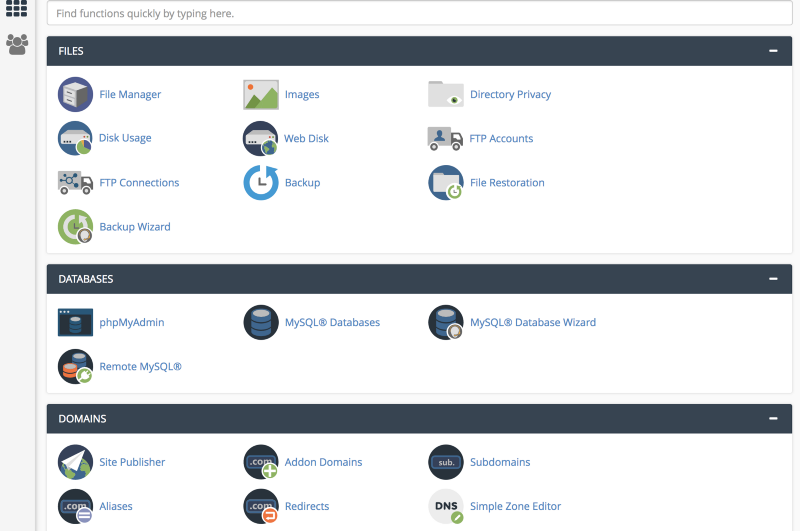
Setting Up your new cpanel account.
Wow, we finally have cpanel installed on the server. The next thing is to configure the basic settings on it.
Accessing your server
To access your server, go to https://YOUR DROPLET IP:2087 on your browser and enter your username and root password.
eg: https://162.345.323.09:2087

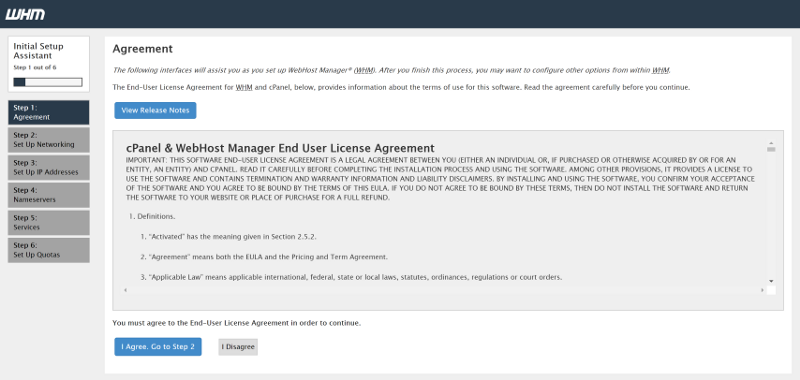
Once you are logged in, we need to now add the basic features to WHM and agree to their license terms.
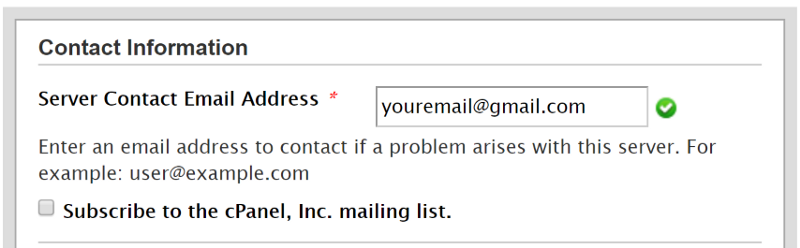
Next, enter your contact email, and move on to the next step. You don’t have to change the other settings.
Skip the next step.
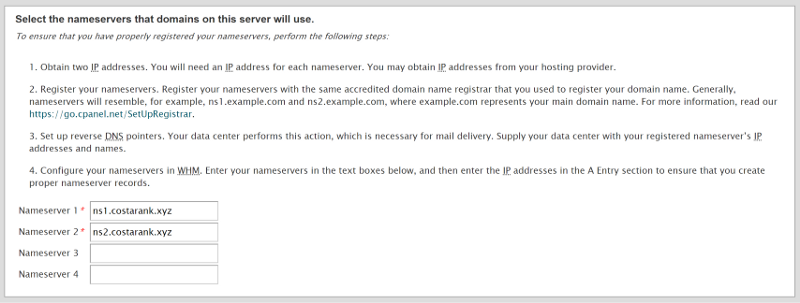
Make sure your Nameserver Configuration is set to BIND, and scroll down to select your nameservers.
Leave your FTP Server settings to be set to Pure-FTPD — this is the default setting on all cPanel systems. Once you’re done, move to the next step.
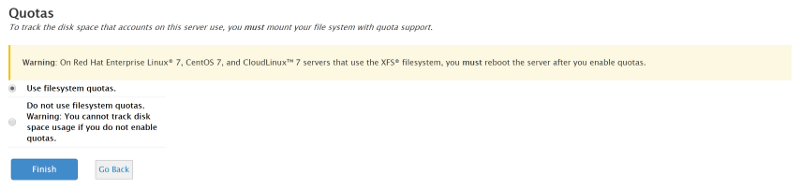
Select Use filesystem quotas and click Finish.
And you’re done! WHM is now installed. Ready for you to start creating accounts and adding your domains.
Cpanel/whm license
To use cpanel/whm on your server, you will need to pay for a license. But since you are installing the cpanel on a new server with a new IP address, you will have a free trial for 15 days. After that, you will have to add a license or else you will be locked out of the whm.
Purchasing a VPS whm/cpanel license from cpanel will cost you $20 per month. But if you need to save some bucks, you can follow this link to buy the same license for just 15 dollars per month from “buy cpanel,” which is an authorized reseller for cpanel.
After clicking on the link, remember to select the whm/cpanel VPS license, and then you can add any addon that you like. Then proceed to making your payment.
It’s really that easy. If you encounter any issue or suggestions while installing it, you can just add a comment and I will surely get back to you.