
By Amber Wilkie
Sometimes a dynamic single-page app is overkill. You just need to get some attractive information on the internet. Welcome back to static sites. With the Gatsby.js framework, you don’t have to leave your React skills behind in the pursuit of faster, better, weaker.

What is a static site and why do you want one?
A static site, as opposed to a dynamic site, is one that a) does not interact with a database, and b) looks the same for everyone. Each page of a static site exists as a separate file.
If you’ve worked with React or most other front-end frameworks, you’ll recognize that this is different than our current favorite model of a “single page site” — you may click links, but you always stay “on the same page”. Every React site on the internet is rendered almost completely within the app div of a very basic HTML page. Everything inside of the div is generated dynamically. Often very specifically for the user in front of the computer.
It may be further helpful to understand some of the things a static site cannot do:
- Render pages dynamically based on database information (displaying user information at
/user/<user-id>, for instance) - Generate and use logins / user authentication
- Be assured of any persistence of data (you can use cookies, of course, but your users are always free to trash them)
Advantages
Static sites are fast, as they don’t need to talk to any database to get their information. They are also already rendered and built when the user requests the page from their browser, so it is available instantaneously (image loading notwithstanding, of course). All the code needed to run your website is provided to the browser and it runs locally.
Static sites can be hosted simply. No Heroku falling asleep, no whirring up servers. It goes without saying that this is the cheapest way to get your content into the world. Most will be satisfied with the free options for simple sites.
Static sites are stable. The only barrier to more and more users loading your site is the hosting server where you have your files. No worries about database loads or processing. It’s just sending over HTML, CSS and Javascript files, and it can do it as quickly as your host allows.
Disadvantages
All the major disadvantages are baked into the very concept of a static site: difficulty in updating content and lack of response to users. If your project requires logins, a static site isn’t the right thing for you. If you have a great deal of content, or similar content you want displayed in similar ways, this may also be the wrong tool.
I don’t personally think a blog is a good candidate for a tool like this, because it requires too many steps to go from creation to publishing. If you’ve used something like Wordpress, it’s going to feel like a slog to get things live. Then again, you control your content from front-to-back, and that’s very attractive for many people.
The rest of this article will tackle the how of making a static site. Just a few years ago, if you wanted one, you’d have to write everything from scratch. Then potentially deploy via FTP or the like. But I’m here to say: you can build static websites using your React skills. Let’s jump in.
My Project

The reason I got into Gatsby.js in the first place is that I wanted to redo my portfolio site. I’d been using a modified template that I was uploading to my hosting site via FTP. It was such a pain in the butt to update, I’d gone literally years without touching it. I didn’t want to build it in React because then I’d have to host it on Heroku. Heroku puts its free tier apps to sleep if no one is using them — a delay I find unacceptable. I knew a static site would be much faster and would never have to sleep.
I was delighted to find static site generators built in React! I could put my React skills to use building something I could deploy on Github pages. Score!
If you’re the kind of person who wants to jump right into the code, you are welcome to the github repo for my portfolio.
Gatsby.js vs. Next.js
In the course of researching this article, I found a lot of people pointing to Next.js. It does have an option to export static content, but it is more commonly run on a server (enter Heroku sleeping) and is typically used for folks who want to employ server-side rendering. I can’t speak to it as a tool for such, but it looks neat and if you need to do some SSR, you should give it a look.
For me, various interwebs recommended Gatsby.js. I instantly fell in love when I got to work on my own portfolio.
Why Gatsby?
In a word: React. I already know how to build things in React and Gatsby leverages that skillset for me. But there’s more. Lots more.
Community
Gatsby has a loyal following and scads of people developing libraries for use with the framework. As of this writing, there are 545 plugins for Gatsby. Additionally, you can use a great many of the standard React libraries for building your site.
GraphQL, APIs, and all the data the internet has
At build time (when you, the developer, build the site, and not when the user visits it), Gatsby can reach out to the internet and grab all the information your heart could desire from wherever you want to get it. Here you can access any API, including ones you’ve built. Gatsby then folds this data into the HTML it’s generating, and creates the pages based on that data.
GraphQL is built right into the build package, so you can use a tool you may already be familiar with. If you’d prefer to use something like fetch (or the more widely supported axios) that’s fine too. Because you’re more or less writing React, you can use whatever React packages float your boat.
Of course, because there’s no server interaction when the site is live, Gatsby dumps the data into JSON files. Gatsby pulls from there for rendering.
Built-in lazy loading of images
If you’ve ever resized images for the web, you know how annoying it can be to deal with displaying images at a reasonable speed. Enter gatsby-image. This plugin allows you to pre-load your images and deliver them in the appropriate size for the browser, at that time.
Blazing fast
Gatsby includes out-of-the-box code and data splitting, so your site will explode out of the gates. It also pre-fetches data for the parts of the site you are not looking at. When the time comes, it’s ready to throw new information at your users.
Out-of-the-box Goodies
Gatsby makes it easy to get started. Second to being built on React, my favorite part of Gatsby is the automatic routing.
Routing
There’s a pages folder, and into it you place all of the links for your site. So you might have an index page, which you will by convention name index.js. You might also have an about page and maybe a contact page. Gatsby wants you to name the files in your pages folder the same as the links for your site.
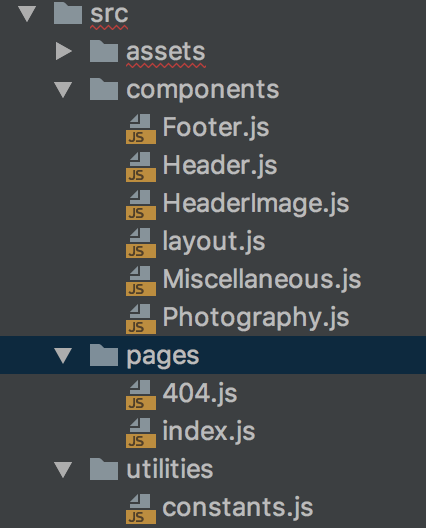
So when you make a About.js and Contact.js you will generate routing to /about and /contact automatically. Into these parent components you will place any code you want, including additional components, that will go and live somewhere other than your pages folder.
If you have ever set up React Router, this feels like a damn revelation. There’s literally no work to be done at all. You put the correctly named parent components (you might have called them containers in your React projects) into the pages folder. Gatsby does all the work for you.
To link between pages, use a simple <Link to='/contact'>Contact</Link>.
Tooling
The other great thing about Gatsby is how incredibly easy it is to get up and running. There’s a CLI tool, of course, so it’s a simple matter of:
npm install --global gatsby-cli
gatsby new site-name
gatsby develop
Gatsby takes care of everything, just like create-react-app. You’ve got hot reloading out of the box. When you’ve finished and are ready to send the bad boy off to your hosting provider, it’s just gatsby build and send that static content anywhere you want.
Starter Libraries
Another great thing about the community is the large number of starter libraries available so that you don’t have to begin each project from square one. If you know you want a blog, or a powerpoint-like presentation site, or even something that comes with design baked in, Gatsby can send you down that path quickly and efficiently.
(Make sure you pick a starter that is based on version 2 of Gatsby! I learned this one the hard way: upgrading was not pleasant.)
The code
So let’s take a look at what Gatsby project code looks like.
layouts/index.js
We start where the app starts: our components/layout.js. Here’s what mine looks like, after I delete some starter loading code I don’t particularly need or want:
import React from 'react'
import '../assets/scss/main.scss'

import Header from '../components/Header'
import Footer from '../components/Footer'

class Template extends React.Component {
  render() {
    return (
      <div className='body'>
        <Header/>
        {this.props.children}
        <Footer/>
      </div>
    )
  }
}

export default Template;
By convention we will wrap any page in this Template component. If we need different templates, of course we may use them wherever we like.
(Note: Gatsby v1 automatically grabbed code from your layouts/index.js and applied it to all pages. Gatsby v2 expects you to manage your layouts manually.)
We need to import our stylesheet. And look — we can use Sass! You’ll need to add node-sass and gatsby-plugin-sass, but otherwise write your sass, import it at the top of your site and be happy.
pages/index.js
pages/index.js is where our app really “starts”.
Here’s the whole component for my site. I …ed the texts to shorten things, but otherwise I left everything here so you can see that Gatsby code looks exactly like React code, because it is.
import React from 'react'
import me from '../assets/images/main/me.png'
import Helmet from 'react-helmet'
import Template from '../components/layout'
import Photography from '../components/Photography'
import Miscellaneous from '../components/Miscellaneous'

class IndexPage extends React.Component {
  state = {}

  ChevronLink = () => [...]

  render() {
    const { showMiscellaneous, showPhotography } = this.state

    return (
      <Template>
        <div>
          <Helmet>
            <meta charSet="utf-8"/>
            <title>Amber Wilkie, Software Engineer</title>
          </Helmet>

          <section id="aboutMe" className="main style1">
            <div className="grid-wrapper">
              <div className="col-6">
                <header className="major">
                  <h2>About Me</h2>
                </header>
                <p>Hi, it's me...</p>
                <div className='about-me-links' >
                  <a href='http://www.medium.com/@heyamberwilkie'>Tech Blog</a>
                  {this.ChevronLink('showPhotography', 'Photography')}
                  {this.ChevronLink('showMiscellaneous', 'Etc')}
                </div>
              </div>
              <div className="col-6">
                <span className="image fit">
                   <img src={me} alt="Amber near Dresden, Germany"/>
                </span>
              </div>
            </div>
          </section>
          {showPhotography && <Photography />}
          {showMiscellaneous && <Miscellaneous/>}
        </div>
      </Template>
    )
  }
}

export default IndexPage;
Everything is pretty basic React stuff here: some spans that toggle sections of the site, imports/exports, you know this stuff. The only thing you might pay attention to is that we must import and then reference imported elements. I can’t “link” a local image: at build time, those references are generated dynamically. If you want to reference any of your assets, you’ll need to import them.
Data fetching
The most interesting component in my site is Photography . Again, I’ve removed some code and …ed others to make room for the important bits.
import React, { Component } from 'react'
import { StaticQuery, graphql } from 'gatsby'
import Img from 'gatsby-image'
import { CSSTransition } from 'react-transition-group'
import { travelDescriptions } from '../utilities/constants'

class Photography extends Component {
  state = {
    currentImage: this.props.data.Images.edges[0].node,
    imageIndex: 0,
  }

  changeImage = () => [...]

  render() {
    const { currentImage } = this.state
    const imageSizes = currentImage.childImageSharp.sizes
    const imageName = currentImage.name

    return (
      <section id="photography" className="main style2">
       <div className="grid-wrapper">
         <div className='col-3'>
           <header className="major">
             <h2>Photography</h2>
           </header>
           <CSSTransition>
             [... photo descriptions ...]
           </CSSTransition>
         </div>
         <div className="col-9 image-holder">
           <div key={imageName}>
             <div className='left' onClick={() => this.changeImage(-1)}/>
           <Img
            title={imageName}
            alt={imageName}
            sizes={imageSizes}
            className="border-radius"
           />
          <div className='right' onClick={() => this.changeImage(1)}/>
        </div>
      </div>
    </div>
  </section>
)
  }
}

const query = graphql`
    query imagesQuery {
        Images: allFile(
            sort: {order: ASC, fields: [absolutePath]}
            filter: {relativePath: {regex: "/travel/"}}
        ) {
            edges {
                node {
                    relativePath
                    name
                    childImageSharp {
                        sizes(maxWidth: 1500) {
                            ...GatsbyImageSharpSizes
                        }
                    }
                }
            }
        }
    }
`
export default () => <StaticQuery
  query={query}
  render={data => <Photography data={data}/>}
/>
export default () => <StaticQuery query={query} render={data => <Photography data={data}/>}/>
GraphQL data fetching
Let’s look at the last part of that component. Though your site will be static at runtime, it can pull all kinds of data at build-time. Here’s where our GraphQL fetching comes in, included as part of Gatsby’s core library. Because I’m working in a component, I am required to use Gatsby’s StaticQuery, which will pass the results of my query into this.props.data.
If I were making this query on a page, I could simply dump my query into the code. It would automatically pass results to this.props.data. Note that StaticQuery cannot receive props, but anonymous queries on pages can.
It does the same thing here. If you get a more complicated data structure going on, you may prefer to create a data layer that can pass down data props instead. Here we’ll need the GraphQL query on the page to get data in props.
This is just one example of how Gatsby can fetch data from within your local folders. For more, check the GraphQL reference from the Gatsby docs. There are a number of image-grabbing tools as well, baked right into the framework. More examples in the docs on this as well.

But here we’ll just talk about what I’m doing. I’m looking for any files in my travel folder. Then childImageSharp will create an array of sizes, which we pass into the Img component (from the massively popular gatsby-image plugin). Img will create a blurry placeholder for us and also provide efficient image sizes based on our browser size. Pretty neat, right?
Finally, don’t forget that image key. You’re not mapping over anything, but gatsby-image expects you to tell it where the image is loading so it can make that pretty blurred placeholder.
Bonus: deploy on Netlify
It’s even easier to get your code on the internet with Netlify. These guys let you skip the build step and just upload your content to Github. Netlify will take your code from repo to available online, and basic tier is free, and includes SSL. There’s even a (ridiculously easy) step-by-step guide for getting Gatsby pages up and running. Every time you commit to master on Github, a Netlify build will be triggered. Because Gatsby grabs data from internal and external sources at build time, you’ll get new data every time a build is run.
Bonus: auto-deploy with IFTTT
As an extra step, you might consider creating an auto-deploy of your site, so you can grab new content from your external sources. For instance, it’s possible to add Medium article summaries through the gatsby-source-medium plugin (which I can attest is magically easy to set up).
Netlify will provide you with a URL for making POST requests. When you do, it will trigger a re-build and deploy of your site. You can condition this on whatever you want, using whatever tool you like.
I can champion IFTTT, a service that will make your day if you’ve never heard of it before. If This Then That creates webhooks for you. So you can condition a build on, say, publishing a new Medium article. IFTTT will handle the listener and the action. If you publish to Medium, it will send that POST request. Your Gatsby site will pull in the new content via its GraphQL query to Medium. Your site will be re-deployed with your new article summary.
Go get it, friends.
References
- Static Website definition
- What is a static site generator?
- Gatsby vs. Next
- Gatsby docs
- Big thanks to Maribel Duran for creating such a great tutorial. Be careful, though: she references a Gatsby v1 starter. You’ll hate life if you use it, as upgrading from Gatsby v1 to v2 is a tremendous PITA. I highly recommend you find something build in v2 to start with.