By Oladipupo Bello
In this article you will learn how to perform social authentication in GraphQL server with Passport.JS.
Perhaps you have an authentication system in place, using directives or resolver wrappers to protect your schema from unauthorized access and are wondering how to add authentication via Google, Facebook or any oauth provider to your API.
Well strap in, because a few lines of code and you’ll have just that.
I won’t go in-depth on how JWTs work or how to get an access token from a provider. This tutorial will focus on using an access token obtained on the client to get user data from a provider for registration and login.
I also will not go into how to set up authorization for your schema as a lot of amazing tutorials have been made on the subject.
A Short Trip Down Memory Lane — Before GraphQL ⏰
Authentication in REST is straightforward: stick your middleware on an endpoint and you’re done. In graphQL, however, there is only one endpoint so we need a different approach.
The Gist
Once you understand how to go about implementing social login, the sky will be the limit as to which framework, language, or database you choose to use in the end. So here goes:
Step 1: On the front-end, get the 3rd party authentication provider login popup to appear.
Step 2: (Still on the front-end) Grab the access token the provider returns after agreeing to login.
Step 3: (Yep, still front-end) Send that token to the back-end as part of the input argument of your mutation.
Step 4: On the back-end, verify the token.
Step 5: If the token is authentic, you will receive the user as part of the verification response (at least that’s the case with Passport.js, which we’ll be using).
Step 6: Save the user’s data to your database.
Step 7: Return a JWT to the front-end. What you do with that token is out of scope for this tutorial, but it should probably be used to authenticate each of the logged in user’s actions.
There you have it, the skeleton for creating social login with graphQL.
I’ll leave out steps 1, 2 and 3 as they have already been covered here. In practice it does not matter what frameworks/libraries you are using on the front-end. All that matters is grabbing an access code and running a mutation with it.
Enough chit-chat. Let’s get started.
First you’ll need to fetch authentication IDs and secrets from the various providers.
Step 1: Go to https://developers.facebook.com/apps/ and select ‘Add a new app.’
Step 2: Give your app a name and complete the security question.
Step 3: Select ‘Integrate Facebook Login’ and click confirm.
Step 4: Copy down the App Id and App Secret values that are hiding somewhere on the same page.
Step 1: Go to the developer console: https://console.developers.google.com/ and create a project
Step 2: Look up ‘oauth credentials’ in the search bar, and click the single option that pops up.
Step 3: Try to find the ‘Create credentials’ button. If you find it, go ahead and click on it. Choose ‘Oauth Client Id’.
For application type, select ‘web application’ .
For Authorized origins add http://localhost:3000. In production, you’ll probably want to be a bit more specific.
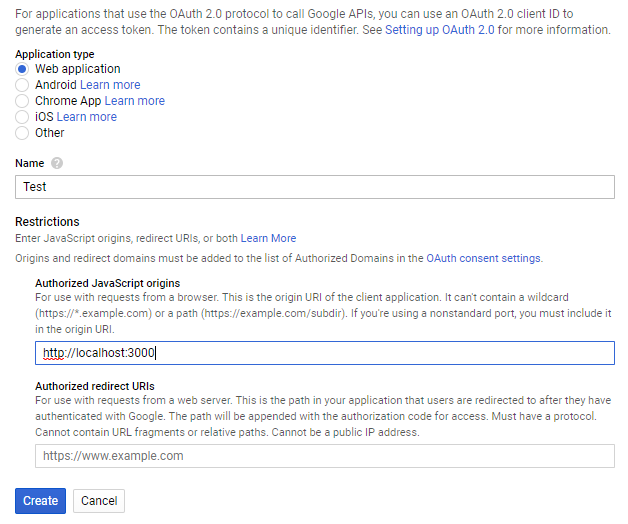
Step 4: Click create and copy down the Client Id and Client Secret that are hiding somewhere on the same page.
The API Server
Create a folder for your server:
mkdir graphql-social-auth && cd graphql-social-auth
Initialize the app with
npm init
or if you are using yarn
yarn init
Let’s get an API server running. I’ll be using apollo-server here.
npm install --save apollo-server graphql
or if you are using yarn
yarn add apollo-server graphql
Apollo Server will set an Express server up for you as long as you provide it with typeDefs and resolvers.
typeDefs stands for Type Definitions which define the “shape” of your data. Resolvers, on the other hand, are responsible for fetching the data for those types.
Create a file src/app.js and add the following code:
At this point we can start the server by running
node src/app.js
After you start the server it should print a message to the console indicating that it’s ready.
? Server ready at http://localhost:4000/
Wondering how to change the port or hook up the server to an existing node.js application? Check out the apollo-server documentation for more info.
To explore the newly created GraphQL API, open a browser to the link shown in the console, http://localhost:4000/. Apollo Server sets up GraphQL Playground for you so that you can start running queries and exploring schema quickly.
To run a query, copy the following query and then press the “▶️” button:
query { hello}
And the server should return a simple response:
{ "data": { "hello": "world" }}
Yay! The server works. Now here comes the fun part.
- We have to setup our graphQL schema and resolvers.
- We have to setup Passport and connect it to our resolvers to validate our tokens from the front end.
- We will also need to setup Mongo to handle storing our users.
I’ll be using MongoDB because it’s easier to setup, but replacing it with MySQL should be a non-issue.
First let’s install the necessary dependencies:
npm install --save passport passport-facebook-token passport-google-token mongoose jsonwebtoken
or if you are using yarn
yarn add passport passport-facebook-token passport-google-token mongoose jsonwebtoken
Next open the src folder and create the following files:
mongoose.jspassport.jstypeDefs.jsresolvers.js
Add the following to src/mongoose.js:
This will connect the app to the database and setup the user schema.
It will also create methods for generating JWTs and finding users from Facebook and Google in our database.
Add the following to src/passport.js:
Don’t forget to replace the dummy client ids and secret with the ones from Facebook and Google.
With that said and done, all that’s left now is updating the graphQL types and resolvers.
Let’s move the typeDefs and resolvers to separate files to keep our app.js neat and tidy. Add the following to src/typeDefs.js:
Next up src/resolver.js:
Next we refactor our src/app.js to import the schema from the separate files.
Finally we add the request and response objects from express to our graphQL context. This will make them available in our mutation resolvers for use with Passport.JS.
And we’re done.
Trying it out
Run the following command in a separate window to get the Mongo daemon running:
mongod
Now restart the API server:
node src/app.js
To make sure everything is working properly, let’s grab some access tokens and do some test runs.
Step 1: Open your app settings on https://developers.facebook.com/apps/ and select Roles -> Test Users in the sidebar on the left.
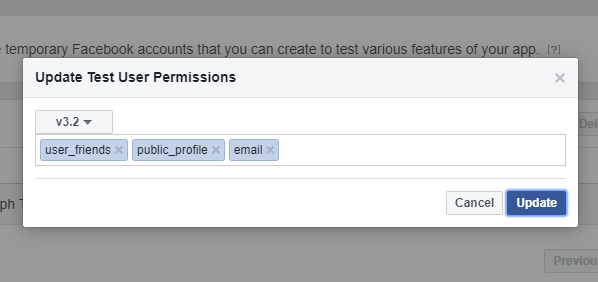
Step 2: Click on edit and select ‘Change permissions this test user granted to app’
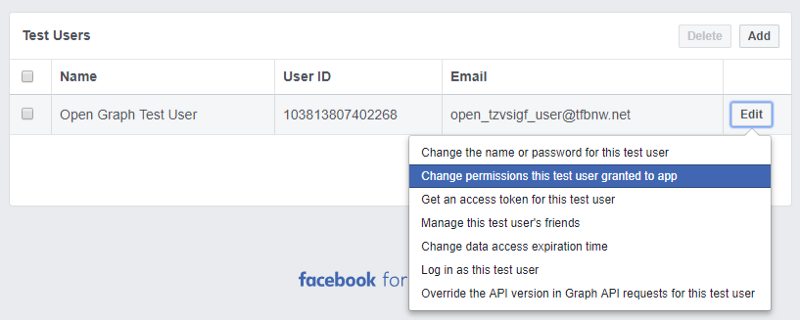
Step 3: Add email to the permissions and click update.
Step 4: Click on edit and select ‘Get an access token for this test user’
Step 5: Copy the access token and run the authFacebook mutation with it in the graphQL Playground.
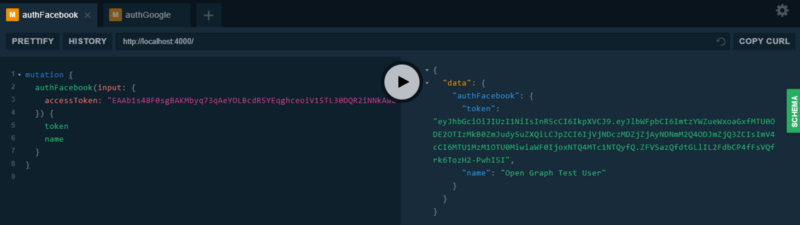 mutation and response from graphql playground
As far as I know google doesn’t have a test user equivalent for their APIs. but we can use the Oauth Playground to grab ourselves a valid access token.
Step 1: Go to https://developers.google.com/oauthplayground, select the ‘Google OAuth2 API v2’ scopes and click ‘Authorize APIs’:
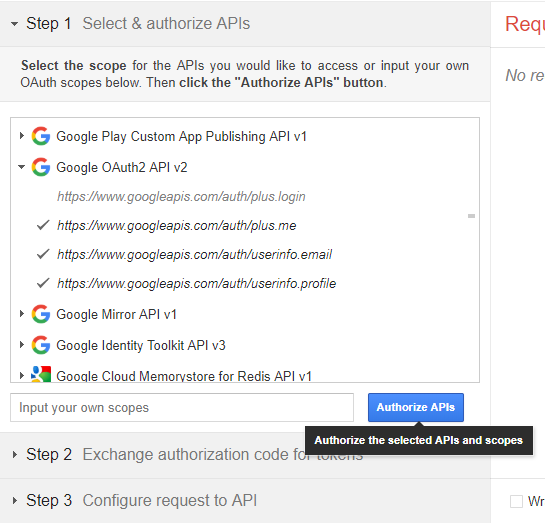 Auth scopes for Google OAuth2 API v2
You’ll be redirected to the Google consent screen.
Step 2: After providing your consent, find the ‘exchange authorization code for tokens button’ on the page and click on it. This will generate a valid refresh and access token for the signed in user.
Step 3: Copy the generated access token and run the authGoogle mutation with it in the graphQL Playground.
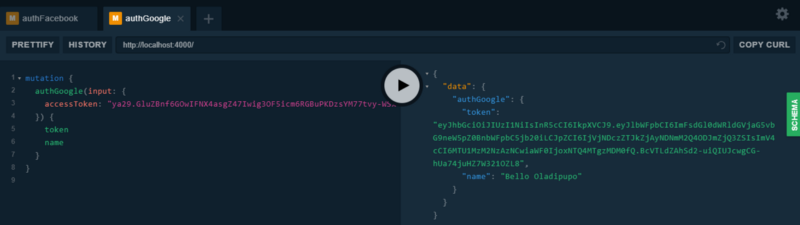 mutation and response from graphql playground
That’s it!
You made it all the way until the end! If you get stuck along the way, feel free to check out the code in this repository. If you have any questions or feedback, let me know in the comments down below.
Cheers!