
By Leanne Zhang
Getting started
This is a simple authentication tutorial for building a Twitter Authentication web application using Passport API. It’s a side project that I worked on for education purposes.
I broke down this tutorial into two parts. The first part focuses on building authentication routes in the backend. The second part focuses on building UI components in the front-end using React.
Tech Stack
- Server Side: Node.js, Express.js, Passport Twitter API, MongoDB,
- Client: ReactJS
What are we going to build?
- User clicks on login button which redirects to Twitter OAuth authentication page.
- Once the OAuth has been successfully authenticated to Twitter, the user will be redirected back to the web application home page.
Passport.js. offers authentication APIs to other OAuth service providers such as Google and Facebook. As an example, I chose to use Twitter as an OAuth service provider.
What is OAuth?
Open Authorization is a standard for granting your web application access to a third-party sign-in service like Twitter, Facebook, or Google, which returns an OAuth token. An OAuth Token is a credential that can be used by an application to access an external service API.
In this project, I'm using passport-twitter middleware to handle Twitter authentication using the OAuth 1.0 API, because it saves time and handles all the complex authentication process behind the scene.
What are the server endpoints?
/auth/twitter — authenticate via passport twitter
/auth/login/success — returns login success response with user information
/auth/login/failed — returns login failed message
/auth/logout — log-out and redirects to client home page
/auth/twitter/redirect — redirect to home page if login succeeded or redirect to /auth/login/failed if failed
Architecture Diagram
Here is an overview of the architecture diagram which we will be going over in more detail.

Project Structure
I separated server and client logic in different folders to be clear and clean. My server is running on localhost:4000, whereas the client is running on localhost:3000. (Feel free to define your own port.)
|-- twitter-auth-project| |-- server| | |-- index.js| | |-- package.json| |-- client| | |-- src| | | |-- index.jsx| | | |-- package.json
Implementation
Part 1: Register your app as an OAuth provider at Twitter Application Site
First things first, register your application at Twitter Application Management. You will be issued with a consumer key (API Key) and consumer secret (API Secret) that you can use in passport strategy later on.
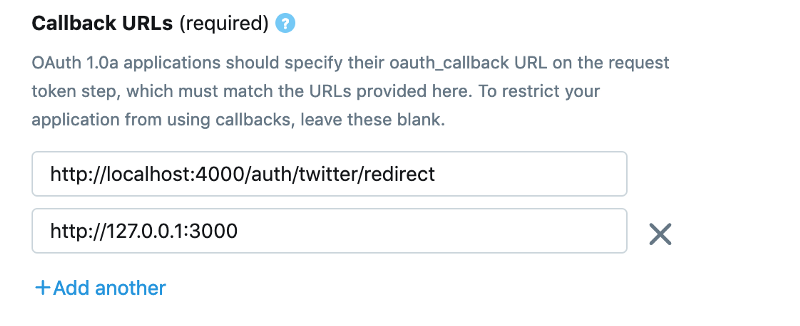
You will also need to configure a callback URL. This is the callback URL after the OAuth has been authenticated successfully.
For local development purpose, I customized my callback URLs to be the client URL which is localhost:3000.
Part 2: Setup Express Server for Twitter Authentication
I chose Express.js to set up the server on the backend. Express.js is a web application framework for Node.js which designed to build APIs.
|-- server| |-- config| | |-- keys.js| | |-- passport-setup.js|-- |-- models| | |-- user-model.js| |-- routes| | |-- auth-routes.js| |-- index.js| |-- package.json
npm install express to install an express server. The server runs on http://localhost:4000.
index.js is the entry point for all the server endpoints.
/routes/auth-routes.js contains all the authentication endpoints.
/config/keys.js contains all the Twitter API consumer keys, and database configs. You can copy them and put your own keys.
Part 3: Setup authentication routes
Previously in the “What are the server endpoints?” section, we have identified the authentication endpoints to Twitter API.
/auth/twitter — authenticate via passport twitter
/auth/login/success — returns login success response with user information
/auth/login/failed — returns login failed message
/auth/logout — logout and redirects to client home page
/auth/twitter/redirect — redirect to home page if login succeeded or to /auth/login/failed if failed
Let’s put them into practice.
/routes/auth-routes.js
In index.js, import routes/auth-routes,
npm install cors — support cross-origin browser
Part 4: Setup Twitter strategy using Passport API
Passport API is a middleware we use to authenticate via Twitter OAuth. Passport API does the login authentication behind the scene so you do not need to handle the complex logic. It has also different authentication strategies (i.e GoogleStrategy, FacebookStrategy). In my example, I chose to use TwitterStrategy to login via a Twitter account.
Part 5: Setup and connect a database
When the system successfully authenticates the user through PassportAPI, it will need to store the user in a database so it can retrieve this user information to the client.

I’m using MongoDB to store the user login information.
Part 5.1 — Sign up mlab and follow the instructions here: https://mlab.com/
Part 5.2 — Add MongoDB credentials in keys.js
Part 5.3 — Establish a MongoDB connection using mongoose
npm install mongoose to connect to MongoDB.
“Mongoose provides a straight-forward, schema-based solution to model your application data. It includes built-in typecasting, validation, and query building.” (https://mongoosejs.com/)
Part 5.4 — Create a user object model that represents the user profile in the database record
/models/user-model.js
Part 6: Save and fetch user from a database
Once the Passport API successfully authenticated via Twitter OAuth, our server saves the user information to the MongoDB. If this user already exists, the system simply finds the current user from the database and returns the user to the client. This is all done using mongoose APIs.
/config/passport-setup.js
Part 7: Use client session to store cookie session
Every time the user logins a website, the browser remembers this user information so that the user does not need to log in again. How this user gets remembered is through an HTTP cookie. An HTTP cookie contains encrypted data about the user and how long the session lasts.
If you login to any webpage, and open the DevTools, you can see the cookies have been set in the browser.
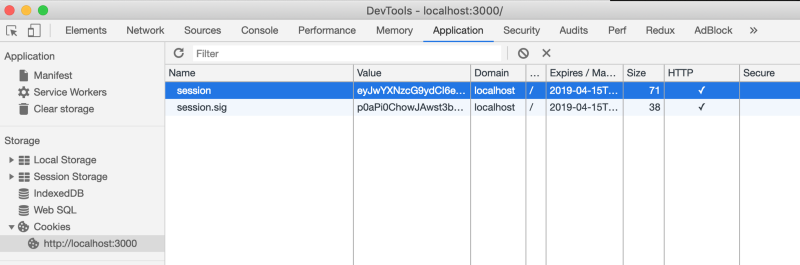
Serialization and deserialization are important concepts to know. Serialization is when the user gets encrypted from the database and sends it back to the browser as a cookie. Deserialization is when the user cookie gets decrypted from the browser to the database.
In order to support login sessions, Passport will serialize and deserialize user instance to and from the session.
/config/passport-setup.js
Here is the final index.js using cookie-session.
I chose to use cookie-session as a middle to store session data on the client.
$ npm install cookie-session
Also, use cookieSession in index.js
app.use(cookieSession({ name: 'session', keys: [/* secret keys */], maxAge: 24 * 60 * 60 * 1000 // session will expire after 24 hours}))
passport.session() acts as a middleware to alter the req object and change the encrypted user value that is currently the session sig (from the client cookie) into a user object.
Optional step:
I customized the localhost:4000/ root URL to show success message if login correctly otherwise shows a failed message.
Next Step: Client — Setup Login Page and Logout Page using React
I built the front end components using React, and React Router to set up links.
Functionality
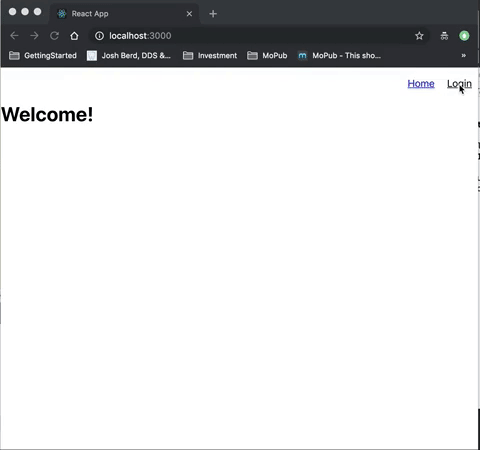
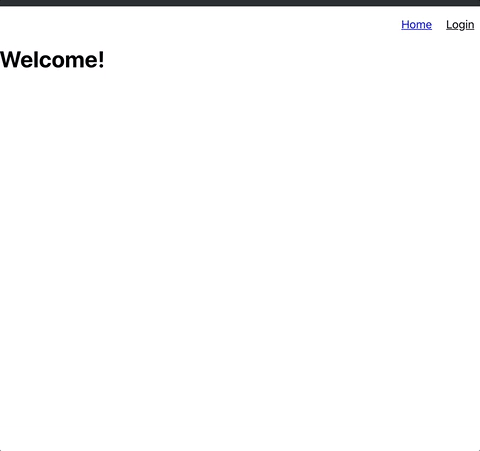
The page contains a header with home and login/logout button. Initially, the page will display the “welcome” message and “login” button. Once the user has authenticated via twitter authentication, it will display the username and “logout” button.
Client setup
client|-- src| |-- components| | |-- Header.jsx| | |-- Homepage.jsx| |-- App.js| |-- AppRouter.js| |-- index.js| |-- index.css| |-- serviceWorker.js|-- package.json
Identify UI components
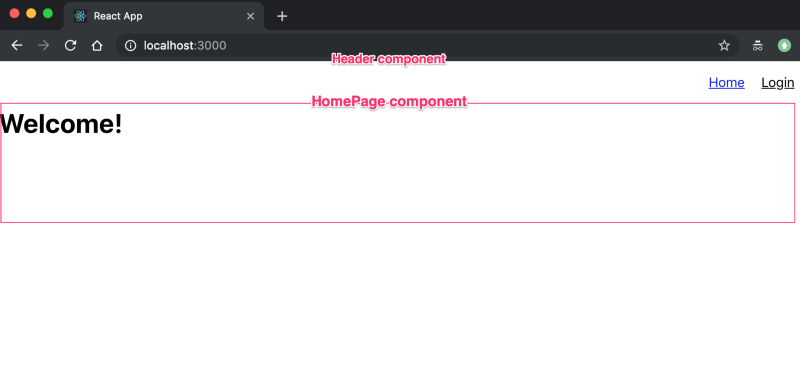
- HomePage: a container that displays welcome and user information. Calls /auth/login/success endpoint. If the endpoint succeeded, the user information will be stored in the user object and the state of authenticated will be set true. The page shows a message that “You have login successfully”. If the endpoint failed, the user is not authenticated, and the page displays “Welcome”.
- Header: It handles navigation. When the user is authenticated, “login” will be changed to “logout”. The authenticated state is passed down from HomePage as a prop.
Implementation
HomePage.jsx: a container that displays welcome and user information
Header.jsx — navigation component
Lastly, set up Route that navigates to HomePage in the AppRouter.jsx and App.jsx
Thank you so much for reading this blog post. I hope you found it helpful.
The entire project is available on my Github: https://github.com/leannezhang/twitter-authentication
If you have any comments or feedback, please feel free to comment below or reach me.
Twitter: @ liyangz