
If you're a software developer, you may be familiar with the concept of version control. Version control is the practice of managing changes to your codebase over time. It's an essential tool for any development project.
One of the most popular version control systems is Git, which is widely used by developers around the world. Git is a powerful and flexible tool that can help you manage your codebase, collaborate with other developers, and keep track of changes over time.
But Git can also be complex and intimidating, especially if you're new to version control. In this tutorial, we'll cover some of the best practices for using Git, including basic commands, remote repositories, and collaboration tools.
Whether you're a beginner or an experienced developer, this guide will help you get the most out of Git and improve your workflow.
Table of Contents
What is Version Control?
Version control is the management of changes to documents, files, or any other type of data. In software development, it is essential for managing and tracking changes to the codebase, ensuring code quality, reducing errors, and improving collaboration among team members.
Without version control, managing and tracking code changes would be a difficult and error-prone task. Version control tools like Git provide a way to manage code changes, keep track of versions, and collaborate with team members. This makes it a critical component of modern software development, used by virtually all software development teams.
What is Git?
Git is a popular version control system used by developers to manage changes to code. It allows developers to track changes made to their codebase, collaborate with team members, and revert to previous versions if needed.
Git is widely used in software development due to its flexibility, speed, and ability to handle large codebases with ease. It also offers a range of features and tools for managing and organizing code, such as branching and merging. And it has a large and active community of users who contribute to its development and provide support.
How to Get Started with Git
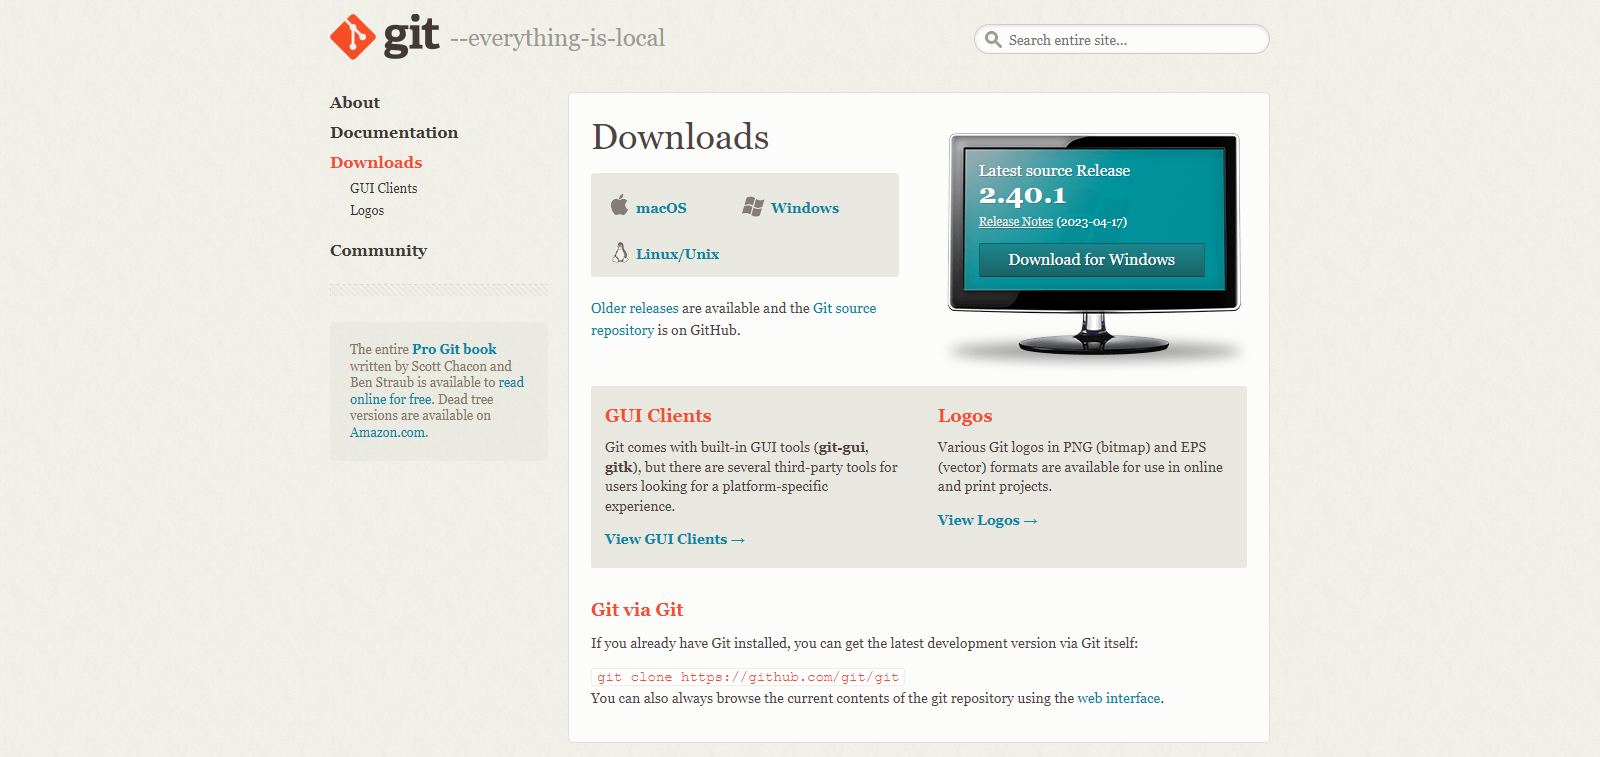
Git Download Page
How to Install Git
Git is a popular version control system used by software developers to manage and track changes to code. Here are the steps to install Git:
Step 1: Download Git
To get started, go to the official Git website (https://git-scm.com/downloads) and download the appropriate installer for your operating system.
As you can see on the download page in the graphic, the Git download page is smart enough to pick the OS (operating system) you are using – it is based on this that the desktop graphic will show the download button inside it.
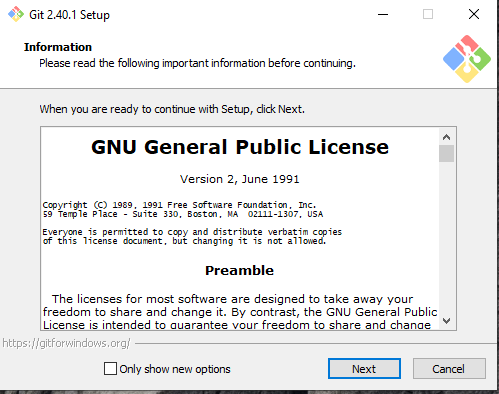
Git Installer UI
Step 2: Run the Installer
Once the download is complete, run the installer and follow the prompts. The installation process will vary depending on your operating system, but the installer should guide you through the process.
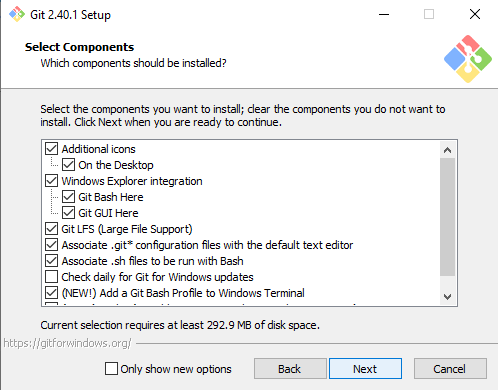
Git Installation Options
Step 3: Select Installation Options
During the installation process, you'll be prompted to select various options. For most users, the default options will be sufficient, but you can choose to customize your installation if desired.
On Windows and macOS, you can accept the default installation options, but on Linux, you may need to customize the installation process depending on your distribution.
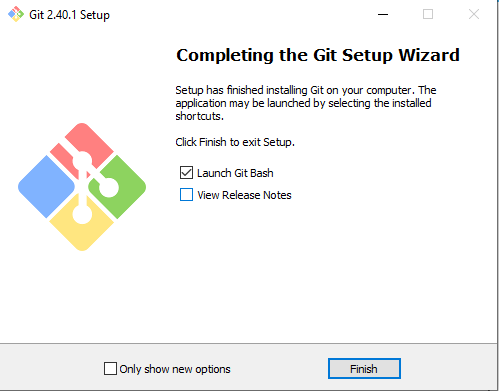
Git Installation Done
Step 4: Complete the Installation
Once you've selected your installation options, the installer will install Git on your computer. This may take a few minutes depending on your system.
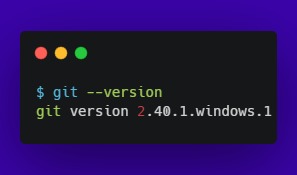
Verify Git Installation
Step 5: Verify the Installation
After the installation is complete, you can verify that Git has been installed correctly by opening a command prompt or terminal window and running the command git --version. This should display the current version of Git that is installed on your system, something like git version 2.40.1.windows.1.
How to Set Up a New Git Repository
Git repositories are used to manage and track changes to code. Setting up a new Git repository is a simple process that just takes a few steps.
Step 1: Create a New Directory
The first step in setting up a new Git repository is to create a new directory on your computer. This directory will serve as the root directory of your new repository.
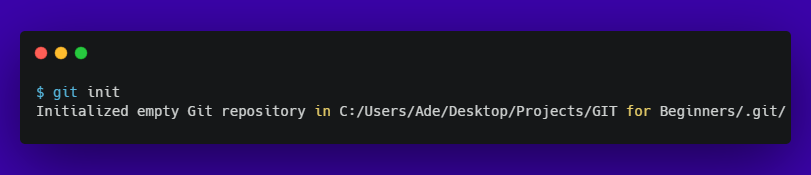
git init
Step 2: Initialize Git
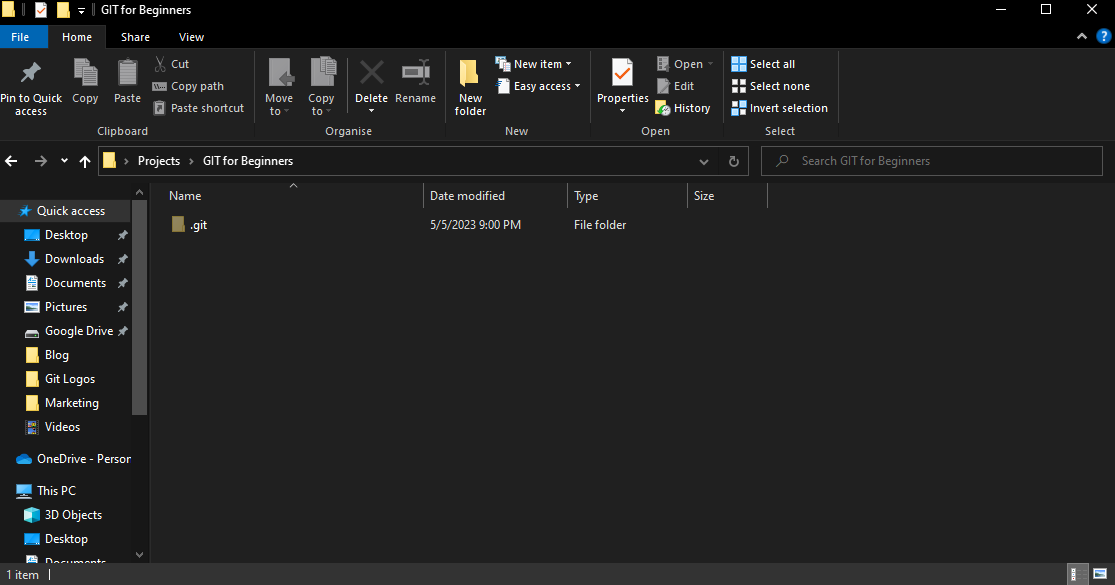
.git file
Once you have Git installed, the next step is to initialize a new repository. To do this, navigate to the root directory of your project in the command line or terminal and run the command git init. This will create a new .git directory in your project's root directory, which is where Git stores all of its metadata and version control information.
Once you’ve initialized the repository, you can start tracking changes to your project and making commits. It’s important to note that you only need to initialize a repository once for each project, so you won’t need to repeat this step for subsequent commits or changes.
Step 3: Add Files
After initializing your Git repository, the next step is to start tracking changes to your project by adding files to the staging area.
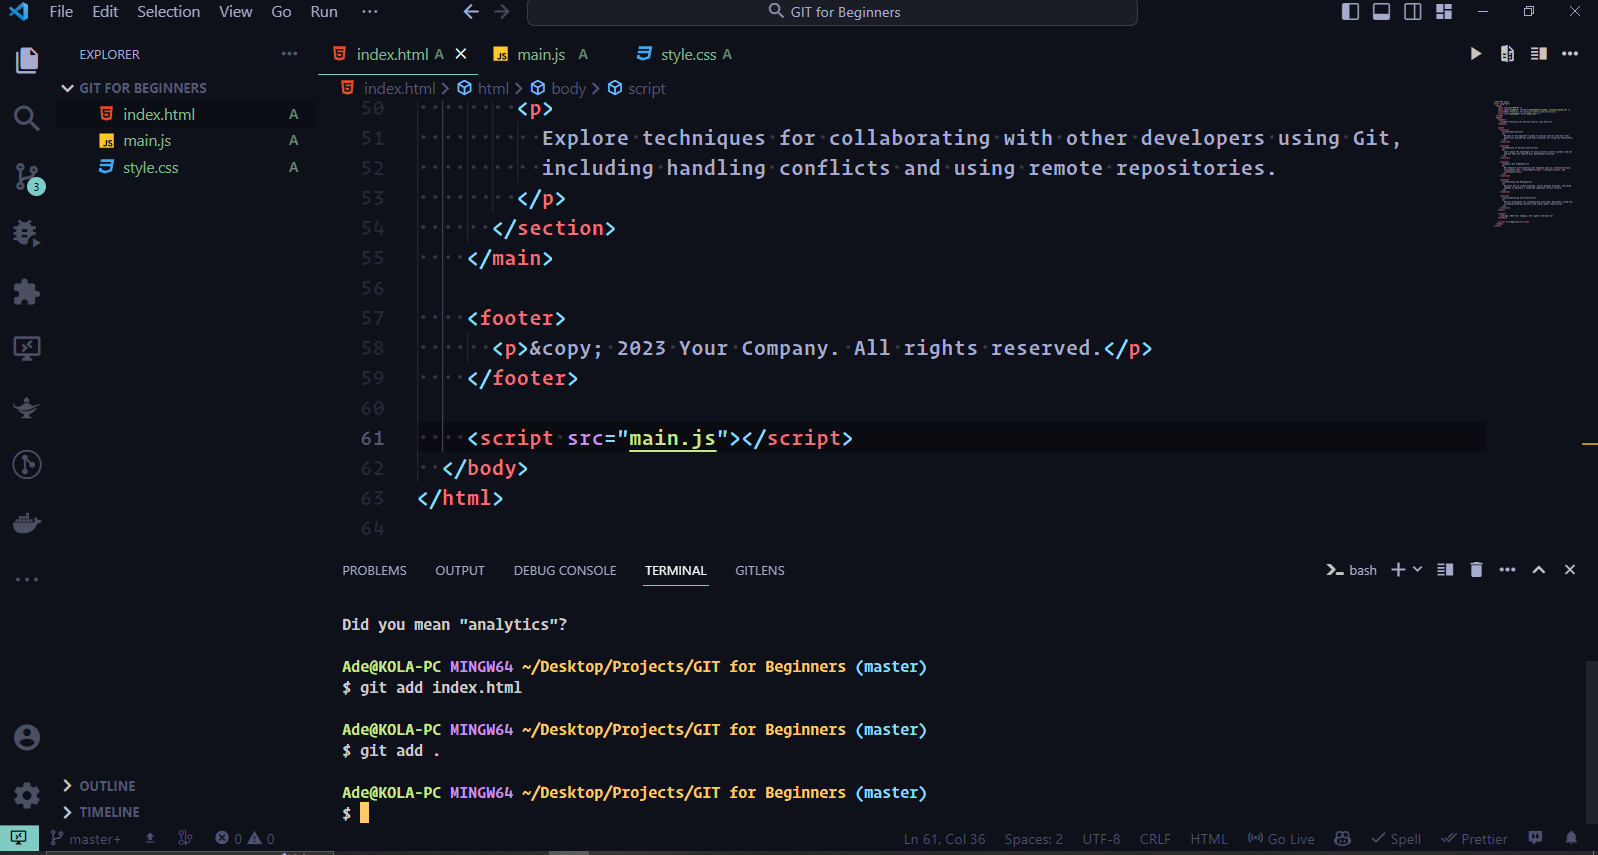
Staging files
To do this, use the command git add <filename> to add each file to the staging area. You can also use the command git add . to add all of the files in the current directory and its subdirectories to the staging area at once.
Also, as you see in the graphic above, there's a label of (master) after the ~/Desktop/Projects/GIT for Beginners. The (master) signifies the current branch for the project. This is the default branch for all projects that initialize Git.
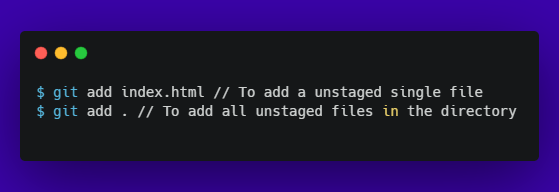
Git Staging Snippet
Once a file is added to the staging area, it's ready to be committed to the repository. It's important to note that adding files to the staging area doesn't actually commit them – it just prepares them for the commit. You can continue to add and modify files as needed before making a commit.
Step 4: Commit Changes
After adding files to the staging area, the next step is to commit the changes to your repository using the git commit command.
When committing changes, it's important to provide a clear and descriptive message that explains what changes you made in the commit. This message will be used to track the changes in the repository's history and will help other contributors understand the changes you made.
To commit changes, use the command git commit -m 'commit message' , replacing 'commit message' with a clear and descriptive message that explains the changes made in the commit. Once committed, the changes will be saved to the repository's history and can be tracked, reverted, or merged with other branches as needed.
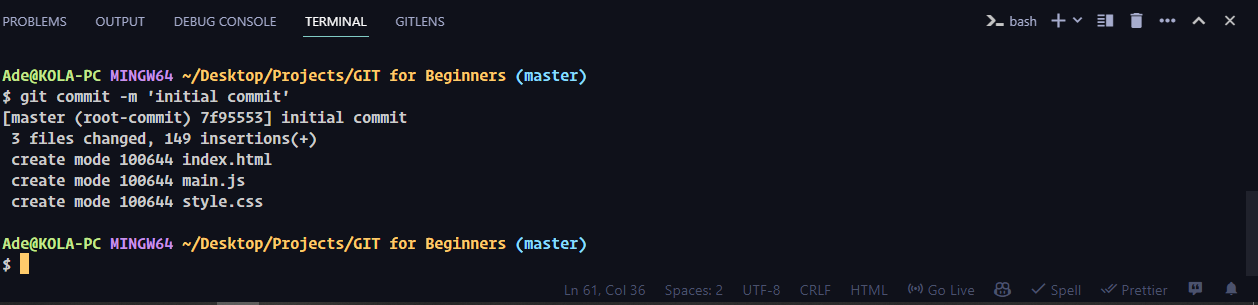
Git commit
Step 5: Connect to a Remote Repository
To share your changes with other developers or collaborate on a project, you can connect your local repository to a remote repository using Git.
A remote repository is a copy of your repository that is hosted on a server, such as GitHub, GitLab, or BitBucket, and allows multiple contributors to work on the same codebase.
To connect to a remote repository, use the git remote add command followed by the URL of the remote repository.

Connect to Remote Repository
For example, to connect to a GitHub repository, you would use the command git remote add origin <repository URL>. Before you can even connect to the remote repository, you need to create it.
Navigate to Scribe and follow the steps to create a repository on GitHub. But before doing this, you need to create a GitHub account if you don’t have one already.
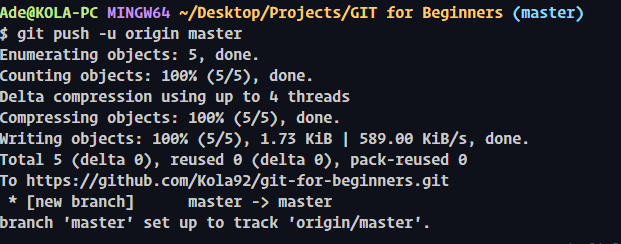
Once connected, you can push your changes to the remote repository using this git push -u <default branch> command. This command is often used when pushing changes for the first time to establish the relationship between the local branch and the remote branch.

Git First Remote Push
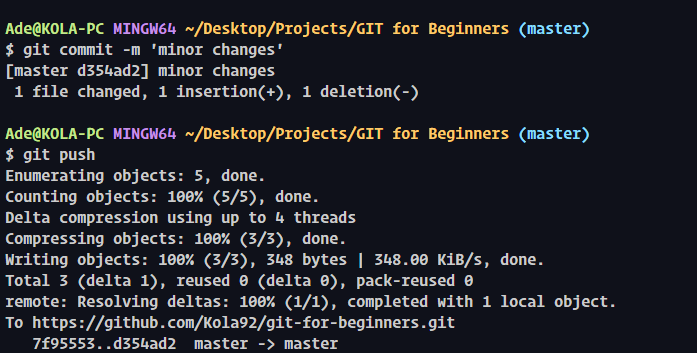
However, for subsequent push changes, use the command git push without specifying any additional arguments. Git will attempt to push changes from the current local branch on your local machine (computer) to the corresponding branch on the remote repository. It assumes that the local branch and the remote branch have the same name.

Git Subsequent Remote Push
The git pull command fetches the latest changes made by other contributors from a remote repository and automatically merges them into the current branch. By connecting to a remote repository, you can collaborate with other developers and contribute to open-source projects.
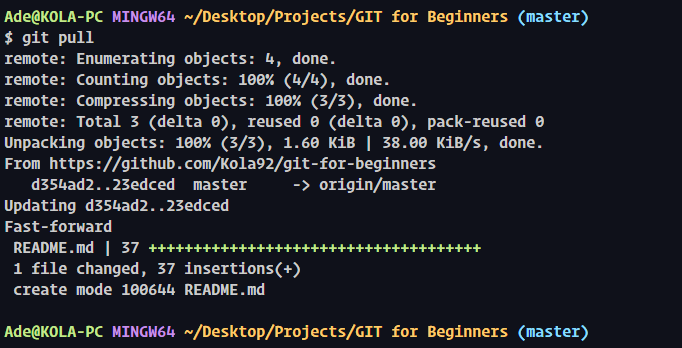
Git Pull
By following these simple steps, you can set up a new Git repository and start managing changes to your codebase.
Basic Commands to Create and Commit Changes
Once you've set up a new Git repository and added some files to it, you'll need to commit changes to your repository. Here are the basic commands to create and commit changes in Git.
Step 1: Check the Status
Before committing changes, you should check the status of your repository to see what changes have been made. To do this, run the command git status in a terminal or command prompt window.
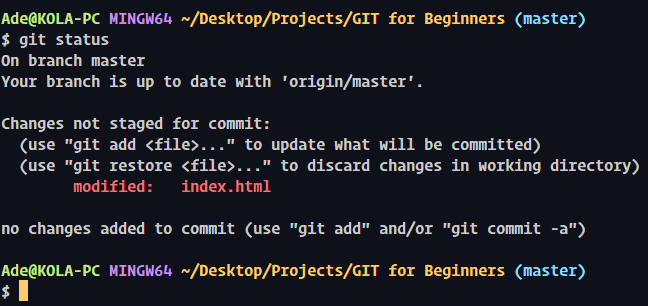
Git Status
Step 2: Stage Changes
To commit changes, you'll need to stage them first using the git add command. This tells Git which files to include in the next commit. You can stage all changes by running the command git add . or stage specific changes by running the command git add <filename> .

Git Staging
When you stage changes, Git takes a snapshot of the files at that moment in time. This snapshot includes all of the changes you've made since the last commit.
Staging changes allows you to carefully review your changes before committing them. You can stage changes in small chunks and commit them separately, or stage all changes and commit them together. This gives you more control over the changes you make to your codebase and helps you keep track of what changes have been made over time.
By staging changes in Git, you can ensure that your commits accurately reflect the changes you've made to your codebase.
Step 3: Commit Changes
Once you’ve staged your changes, you can commit them to your repository using the git commit command. This creates a new snapshot of your repository with the changes you made.
The commit is a snapshot of the changes made then, and it includes a reference to the previous commit in the branch’s history. This allows developers to track the changes made to the code over time, collaborate with other developers, and roll back to previous versions of the code if necessary.

Git Commit
You’ll need to include a commit message to describe the changes you made using the -m flag. For example, git commit -m Added new featurethe "Added new feature“ part is what the commit is called.
By including a clear and concise commit message like "Added new feature," other developers can quickly understand the purpose of the commit and what changes were made. This makes collaboration and code maintenance easier.
Step 4: Push Changes
If you’re working on a team or want to share your changes with others, you can push your changes to a remote repository using this git push command. This uploads your changes to a shared repository that others can access.
To push changes to a remote repository, you’ll first need to add a remote URL using the git remote add command. This tells Git where to push your changes.

Git
For example, git remote add origin[https://github.com/username/repository.git](https://github.com/username/repository.git). Before you get a remote URL to push, you need to create a repository on your GitHub account. To do this, navigate to https://bit.ly/417ULB7 .
By adding a remote repository, you establish a connection between your local repository and the remote repository, allowing you to push and pull changes between them.
Here's what git remote add <repository URL> does:
git remote: It is a Git command that manages the remote repositories associated with your local repository.add: It is an option used with thegit remotecommand to add a new remote repository.<repository URL>: This is the URL of the remote repository you want to add. It typically points to the Git repository hosting service where your remote repository resides.
Once you've added a remote URL, you can push your changes to the remote repository using the git push command. For example, git push origin master pushes changes to the "master" branch of the remote repository.
It's important to note that you'll need the appropriate permissions to push changes to a remote repository. If you're working on a team, you may need to coordinate with others to ensure you have the necessary permissions.
Pushing changes to a remote repository makes it easier for you to collaborate with others on software development projects and ensure that your team members are working with the latest version of the codebase.
By following these basic commands, you can create and commit changes to your Git repository. With Git, you can easily track changes to your codebase and collaborate with others on software development projects.

How to Collaborate with Git
A key benefit of using Git is its ability to facilitate collaboration between developers. Git allows you to work on the same codebase with others simultaneously, without overwriting other developers’ changes.
To collaborate on a Git project, you typically use a central repository that serves as the source of truth for the project. Each developer has a local copy of the repository on their machine, and they make changes and commit them to their local repository.
When you’re ready to share your changes with the rest of the team, you push your changes to the central repository. Other team members can then pull those changes down to their local repositories.
What are Remote Repositories?
Remote repositories are an essential component of Git workflows. A remote repository is a version-controlled repository that is hosted on a remote server. It can be accessed and modified by multiple developers from different locations.
Using remote repositories lets you efficiently collaborate with other developers on the same codebase, share your work with others, and track changes made to the codebase over time.
In Git, remote repositories are typically hosted on platforms such as GitHub, GitLab, or Bitbucket, and you can access them using the Git command line or a graphical user interface.
When working with remote repositories, you can push your local changes to the remote repository or pull changes from the remote repository to your local copy to keep your codebase up-to-date.
Git provides powerful tools for managing remote repositories, such as creating branches, managing pull requests, and resolving merge conflicts. This makes it a popular choice for distributed software development teams.
By using remote repositories in Git, you can collaborate with others on software development projects and share your codebase with them.
How to Clone a Repository
Cloning a repository is a common task when working with Git. Cloning creates a local copy of a remote repository, including all the files and history of the project.
Cloning a repository is straightforward in Git, and you can do it in several ways, such as using the command line or a graphical user interface. It’s a simple process that enables you to access the repository’s code, commit history, and branches. Let’s walk through the steps involved in cloning a repository:
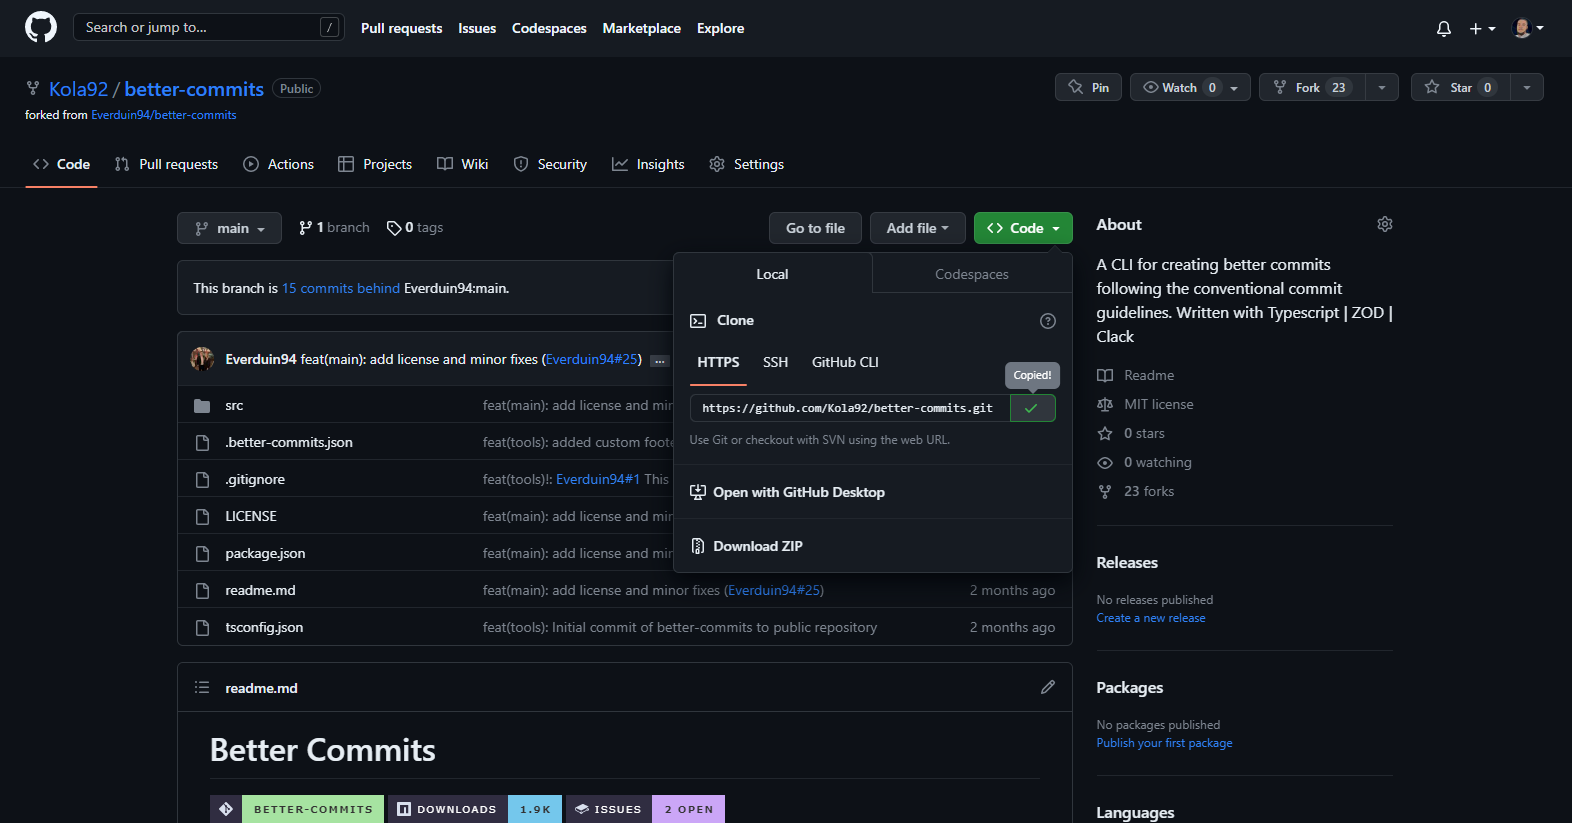
Copy Repository URL
Copy the repository URL: Start by obtaining the URL of the remote repository you want to clone. You can find this URL on the repository’s hosting platform, such as GitHub or GitLab.
Open a terminal or command prompt. Open your preferred command-line interface. This could be the Terminal on macOS and Linux or the Command Prompt on Windows.
Navigate to the Desired Location: Use the
cdcommand to navigate to the directory where you want to clone the repository. For example, if you want to clone it into the "Projects" directory on your desktop, you would runcd ~/Desktop/Projects.
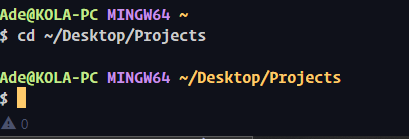
Changing directory
- Clone the repository: Execute the
git clonecommand followed by the repository URL. This command initiates the cloning process and creates a local copy of the repository. For instance, to clone a repository with the URL, you would rungit clone [https://github.com/username/repository.git](https://github.com/username/repository.git.).
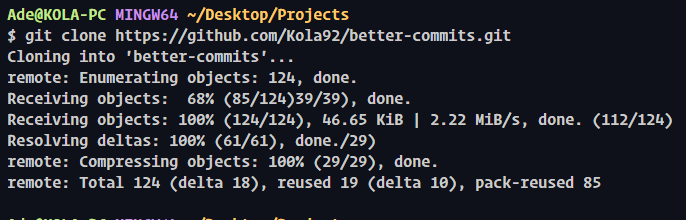
Git Cloning
- Verify the Cloning Process: Once the cloning process completes, you will see the repository’s files and commit history in the specified directory. You can now navigate into the cloned repository using
cd repository(where the name of the directory is the same as the cloned repository).
If you observe the graphic below, thecd better-commits command changes the directory to the better-commits directory, which has the same name as the cloned repository, as explained earlier. To further verify if there are any cloned files in the directory, thels command is used to list all the files in the directory.
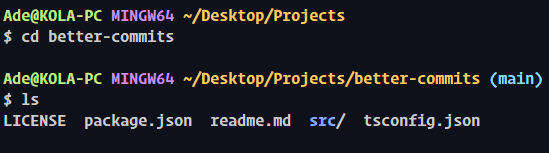
Verify git clone
That’s it! You have successfully cloned a Git repository to your local machine. You can now start working with the code, make changes, and utilize Git’s version control features to manage your project effectively.
Thegit clone <repository URL> command is used to create a copy of a remote Git repository on your local machine. It allows you to retrieve the entire history, branches, and files from the remote repository and sets up a local copy that you can work with.
Here’s what git clone <repository URL> does:
git cloneIt is a Git command that creates a clone or copy of a remote Git repository.<repository URL>This is the URL of the remote repository you want to clone. It typically points to the Git repository hosting service where the remote repository is located.
When you run the git clone <repository URL> command, it creates a new directory on your local machine with the same name as the remote repository. It initializes a new Git repository within that directory and copies all the files and commits history from the remote repository into the local repository.
Additionally, the git clone command automatically sets up a connection between your local repository and the remote repository. It configures the remote repository as the default upstream source and assigns a name origin to it.
Cloning repositories is a key part of Git workflows and an essential tool for distributed software development teams, whether you are collaborating with others, contributing to open-source projects, or simply working on your projects. It enables you to have a local copy of the codebase and keeps you in sync with the latest changes from the remote repository.
How to Push and Pull Changes in Git
Git Push setting upstream branch
The upstream branch refers to the branch on a remote repository that your local branch is associated with. It represents the remote branch that your local branch will be synchronized with when using commands like git pull or git push.
When you set up an upstream branch, it establishes a connection between your local branch and the corresponding branch in the remote repository. This connection allows you to easily push and pull changes between the local and remote branches.
Git Push without setting an upstream branch
Conversely, when you want to update your local copy of the repository with changes made by others, you can pull the changes from the remote repository using the git pull command. Pulling updates to your local repository with the latest changes made to the remote repository.
These operations are essential for collaborating on a Git project and keeping everyone's local copy of the repository up to date with the latest changes.
Git provides tools for resolving conflicts that may arise when pushing or pulling changes, such as merging changes or choosing which changes to keep. By using pushing and pulling in Git workflows, you can work more efficiently and effectively on software development projects.

Best Practices for Using Git
To get the most out of Git, it's important to follow best practices when working with the tool.
Some best practices include keeping commits small and focused, using clear and concise commit messages, branching frequently to isolate changes and reduce the risk of conflicts, and using pull requests for code reviews.
It's also important to regularly push changes to the remote repository, pull changes from the remote repository, and keep the local copy of the repository up to date.
Let's look at each of these a bit more in-depth now.
Keep Commits Small and Focused
When working with Git, it's important to keep commits small and focused on specific changes or features. This makes it easier to understand what was changed in each commit and helps reduce the risk of conflicts.
Short Commit Message
If a commit includes multiple changes, it can be difficult to understand the purpose of each change and how they relate to each other.

Long Commit Message
On the other hand, if a commit is focused on a single change, it’s much easier to understand the purpose of that change and to revert it if necessary. Keeping commits small and focused also makes it easier to review changes and track the progress of a project over time.
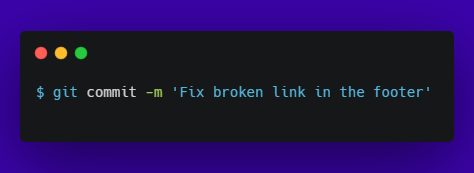
In the Long Commit Message image graphic above, you can see that there are up to three changes that were implemented based on the commit message: The -m flag means message, and with this kind of message, it would be hard for developers reviewing your code changes to focus on because a couple of changes were implemented in just one commit.
To make the code changes easier to review, stick to one change, probably the Fix broken link in the footer change. Then commit the change accordingly, like in the Short Commit Message image graphic above.
Doing this will ease the workflow process for your team members, and they will enjoy working with you.
Use Clear and Concise Commit Messages
When making changes to a codebase, it’s important to use clear and concise commit messages that describe what changes you made and why.
A good commit message should provide enough information to understand the context of the change without being too long or verbose. Clear and concise commit messages make it easier for other developers to understand what you changed and why, which is particularly important when reviewing changes or investigating issues.

Concise Commit Message
As we discussed in the previous sections, each commit should be limited to just one change in the code. Keeping commit messages plain and succinct further builds on this by aiding your team members in understanding what each of your commits is all about.
A great commit message should be less than 10 words. When your commit message gets longer, it is beginning to become really wordy, and the main message of the commit may be lost.
These are examples of clear and effective commit messages:
Update dependencies to latest versions
Add error handling for database connection
Remove debug console.log statements
Update styling for mobile responsiveness
Refactor variable names for clarity
git commit -m 'Update dependencies to latest versions'
git commit -m 'Add error handling for database connection'
git commit -m 'Remove debug console.log statements'
git commit -m 'Update styling for mobile responsiveness'
git commit -m 'Refactor variable names for clarity'
Using good commit messages also makes it easier to track changes over time and understand the history of a project.
By following this best practice, you can improve the quality and maintainability of your codebase and make it easier for yourself and others to work with the code in the future.
Branch Frequently to Isolate Changes
Branching is a powerful feature of Git that allows you to work on different changes or features in isolation from the main codebase. By creating a branch for each change or feature, you can make and test changes without affecting the main codebase, and merge your changes back into the main codebase once the changes are complete.
Branching frequently also makes it easier to manage changes and collaborate with other developers. For example, if multiple developers are working on different changes, they can each create their own branches and merge them back into the main codebase once their changes are complete.
Branching frequently in CI/CD (Continuous Integration/Continuous Deployment) is a best practice that involves creating separate branches to isolate changes. It enables parallel development, allowing teams to work independently on different features or bug fixes without conflict. By working on isolated branches, developers can focus on their specific changes, run tests, and ensure stability.
This approach facilitates risk-free integration, as changes are thoroughly tested within the branches before merging them back into the main codebase. Branching frequently promotes efficient collaboration, accelerates development cycles, and enhances the overall quality of the software by providing a controlled environment for individual changes.
To create a branch, use git branch <branch-name> command in your terminal. To switch to the new branch, use git checkout <branch-name>. Also, you can combine these two steps into just one command: git checkout -b <branch-name>. This command will create the branch and simultaneously switch to the newly created branch.
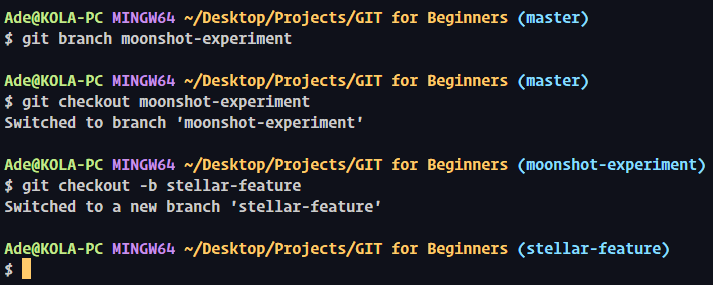
Git Branching
Observe in the Git Branching graphic image above that the git checkout -b stellar-feature command created and switched to the stellar-feature branch simultaneously. This is different from having to create the moonshot-experiment branch with the command git branch moonshot-experiment and then branching to it with the command, git checkout moonshot-experiment.
By following this best practice, you can reduce the risk of conflicts and errors in your codebase.
Use Pull Requests for Code Reviews
Code reviews are an essential part of the software development process. They help ensure that code changes are of high quality, follow best practices, and meet the requirements of the project.
One way to facilitate code reviews is to use pull requests. Pull requests allow you to share your changes with others and request feedback before merging them into the main codebase.
By using pull requests, other developers can review your changes, provide feedback, and suggest improvements. Pull requests also make it easier to track changes and ensure that code changes are properly tested and documented before they are merged.
Using pull requests (PRs) for code reviews in open-source projects enables collaboration and quality control. Developers create a branch, make changes, push it to a forked repository, and submit a PR. Reviewers provide feedback, suggest changes, and discuss improvements. Once approved, changes are merged into the main project, ensuring a robust and well-reviewed codebase.
PRs foster community involvement and allow project maintainers to ensure code quality and maintain coding standards.
PRs for code reviews are mostly applied in two situations:
Working on a project with team members in your company
Helping to improve open-source projects through bug fixes and adding new features.
And these open-source projects can even be libraries or frameworks (for example, React, Vue, and others) you work with to build applications.
Working on Projects with Team Members
Building upon the previous best practices we discussed earlier, create a new branch and switch to it with the command git checkout -b blackhole-security. At this point, you can start working on the project and make sure you stick with working on the feature you created the branch for.
This means that you should only work on the blackhole-security feature in the project; do not start building a feature like supernova-optimization. This will make it easier for your code reviewer to review it down the road.
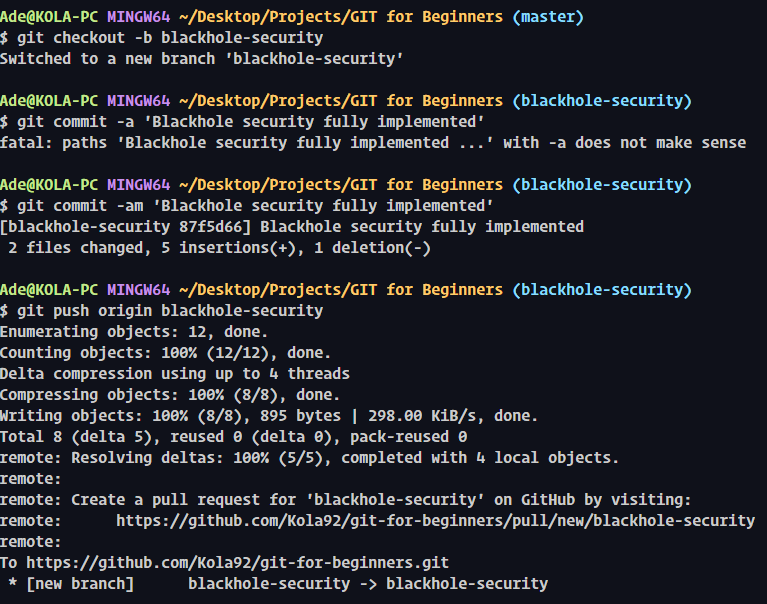
Git Pull Request
Once you are done working on the blackhole-security feature, stage and commit the changes with just a git commit -am 'Blackhole security fully implemented' command. At this point, you can now go ahead and push your change to the remote repository for your project manager to review. You can do this with the command git push origin blackhole-security. Or if you were working on a branch named planet-discovery, you would go ahead with the command, git push origin planet-discovery.
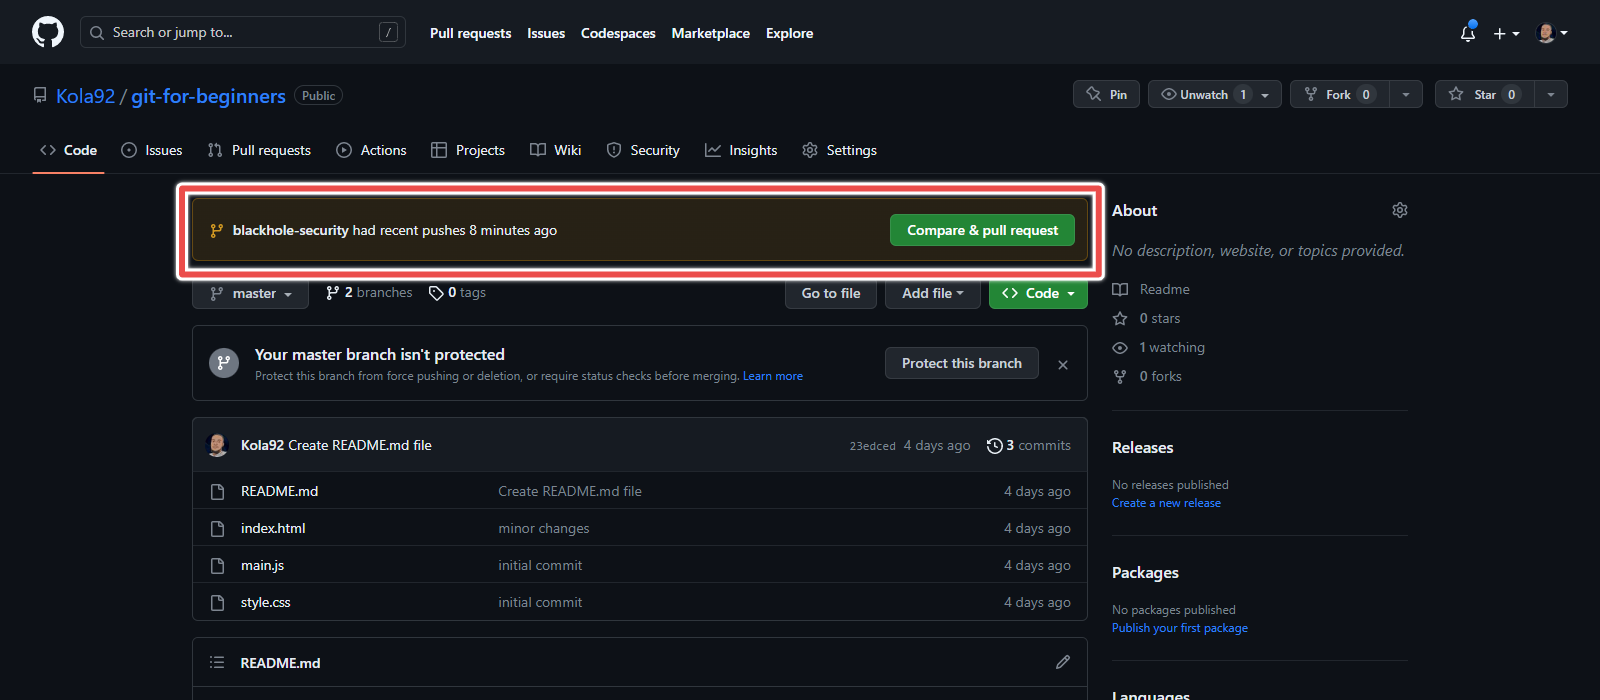
Compare & Pull Request
The Compare & Pull Request graphic image above as you can see in the red rectangle has a button there to click to create a pull request.
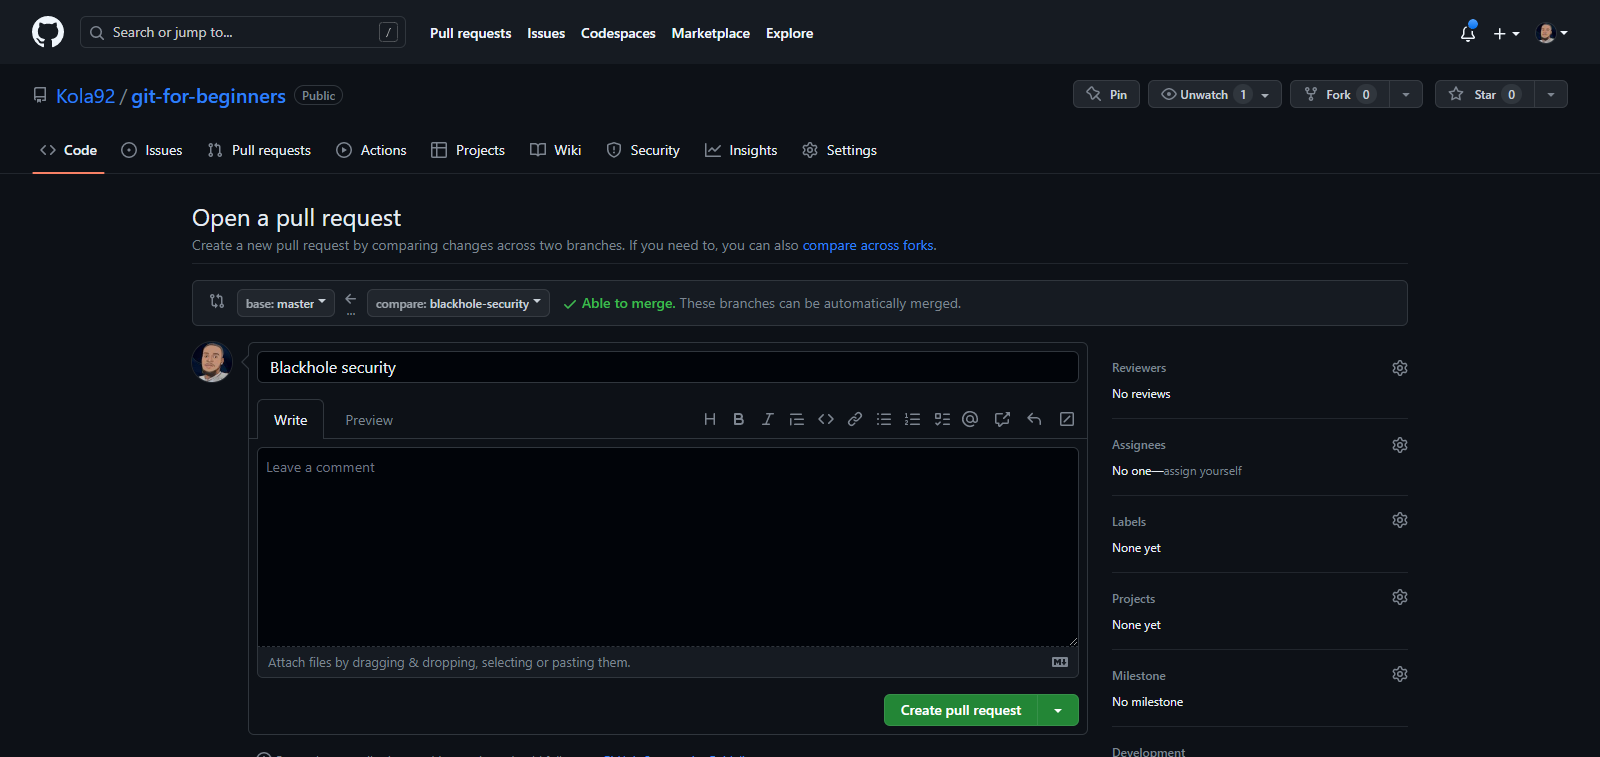
Open Pull Request
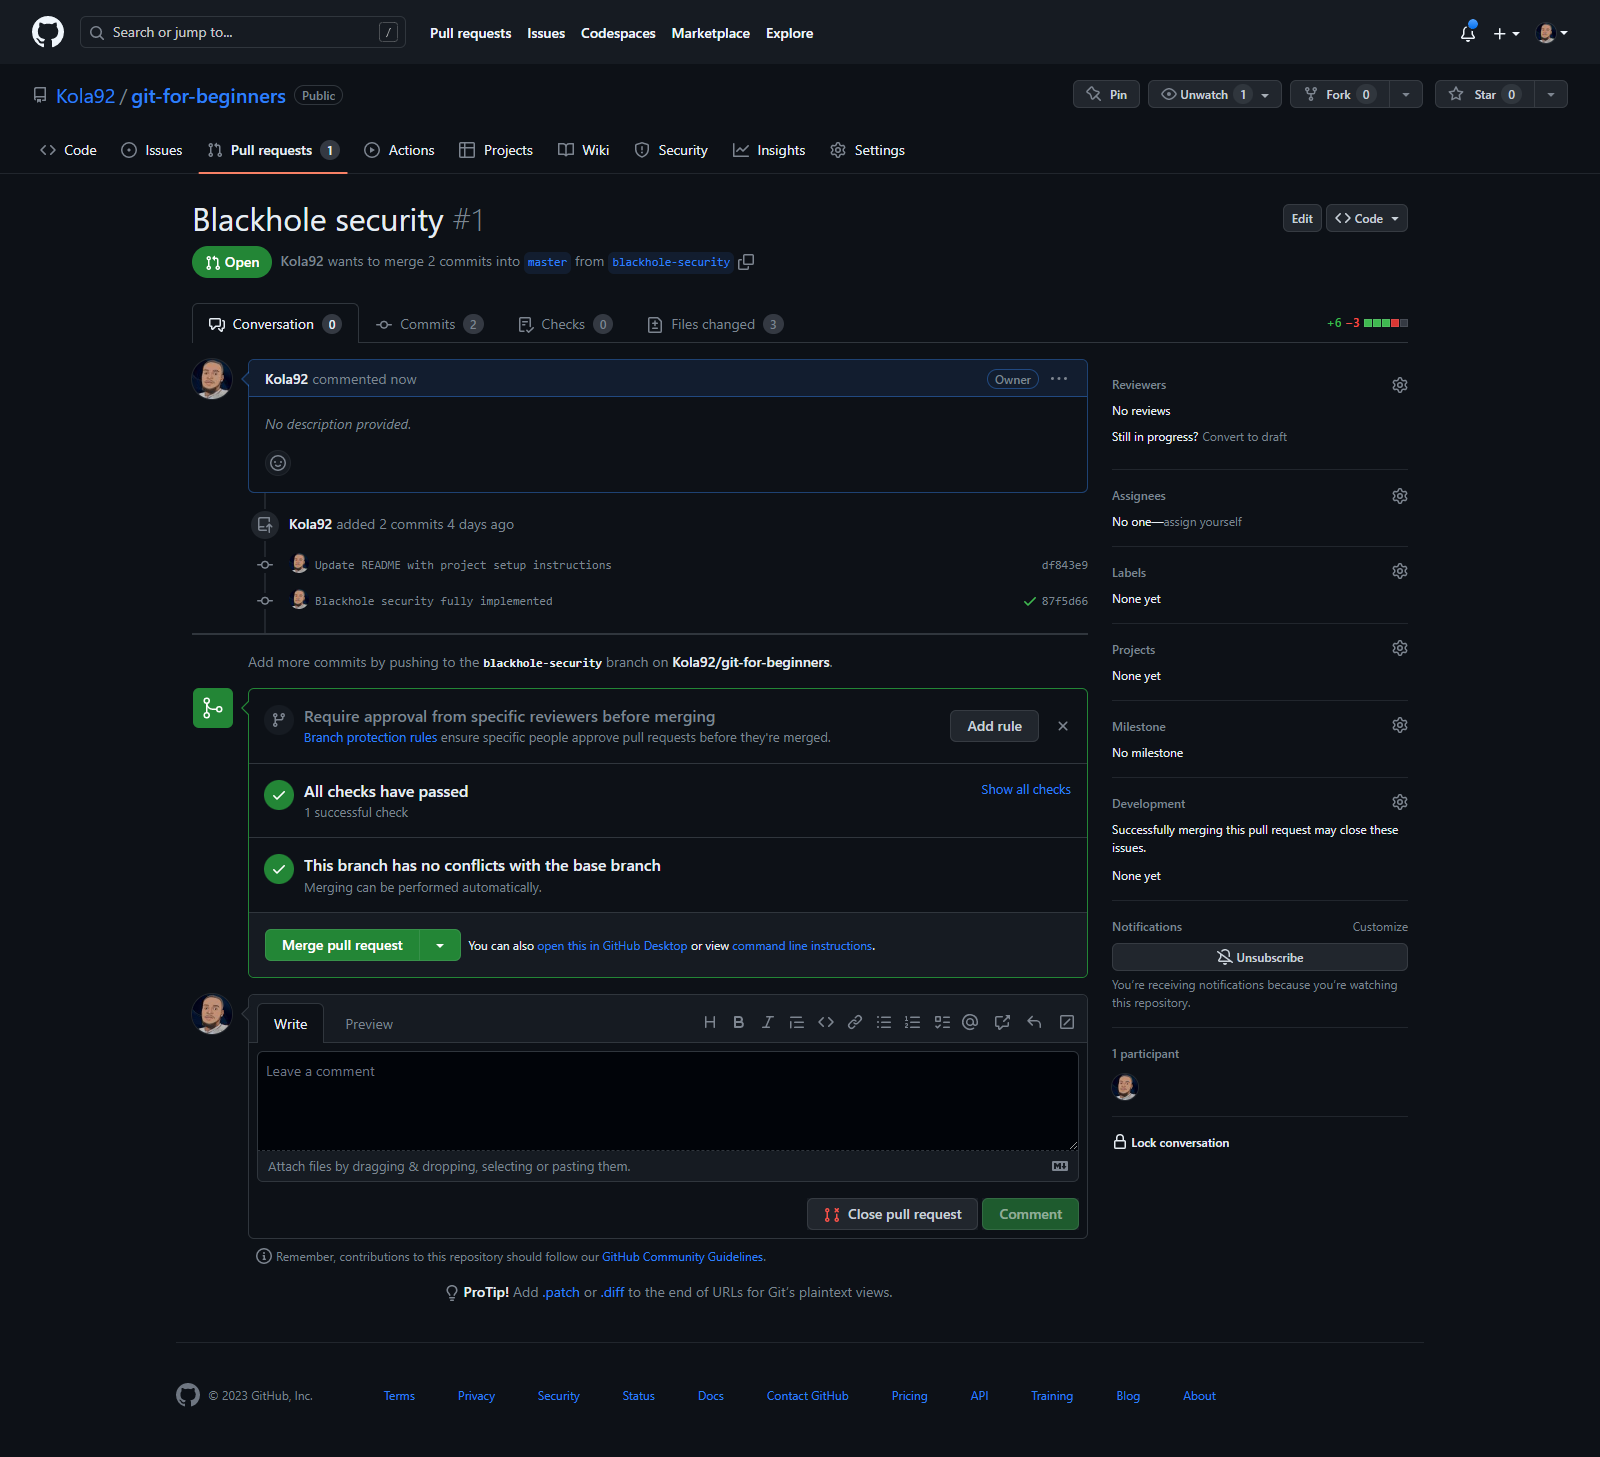
Merge Pull Request
The Open Pull Request graphic image above has the Create Pull Request button to open the pull request for code review. With the Merge Pull Request graphic image, this is the screen where your code reviewer provides feedback if any is needed before merging your PR into the master branch.
Working on Open-Source Projects
Before beginning collaboration on any open-source project, you will need to fork the open-source repository (a fork is a personal copy of a repository that allows independent development and contribution without altering the source code).
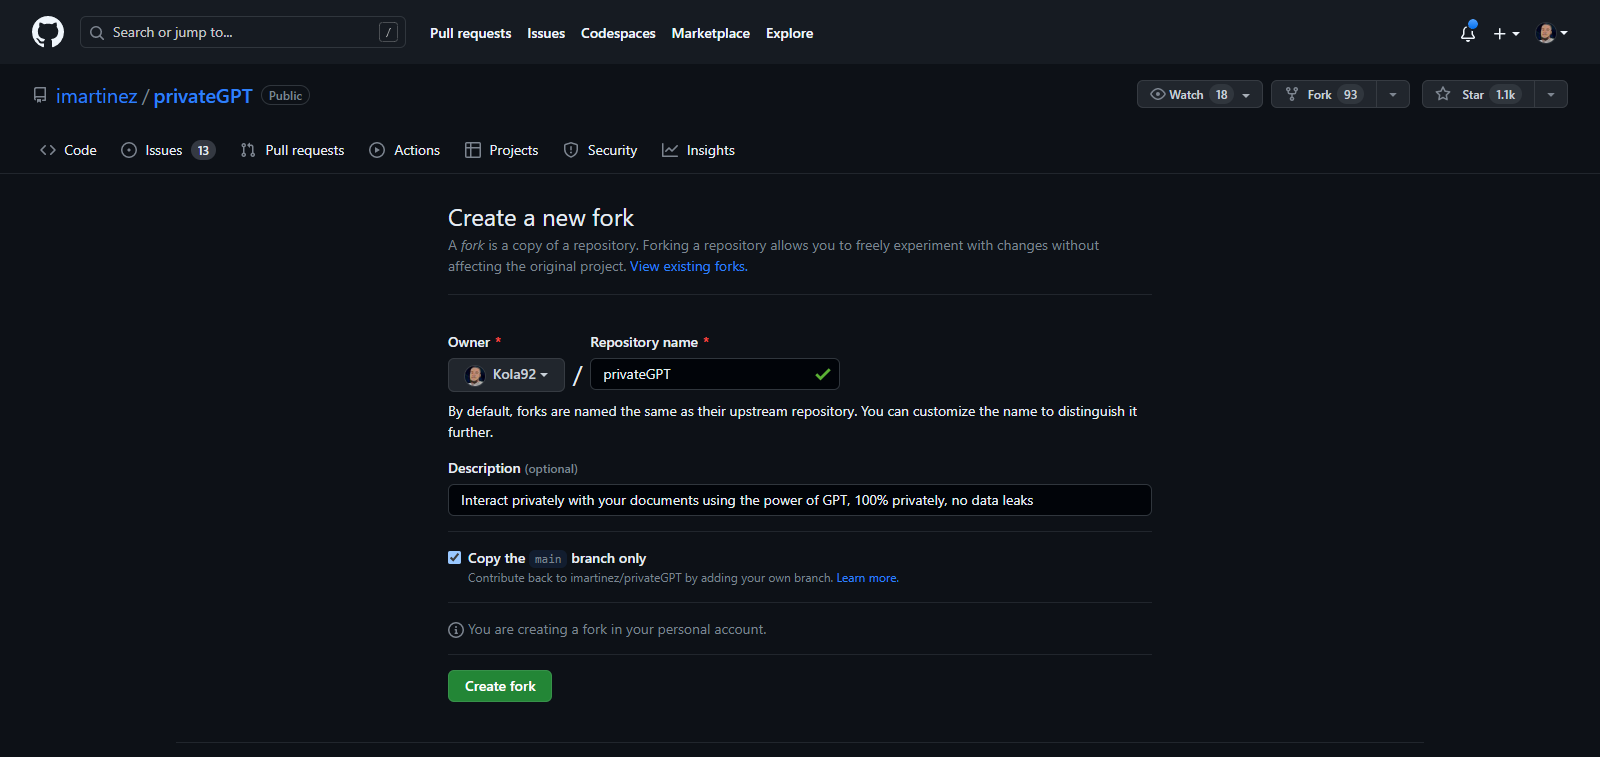
Create New Fork
When the repository is done forking, you can go ahead and clone the forked repository git clone [https://github.com/Kola92/privateGPT.git](https://github.com/Kola92/privateGPT.git.).
Once the forked repository has been cloned to your local machine, you can create a branch and switch to it. Then you can go ahead and start working on the project by committing, pushing to the remote repository, and creating a PR for code review.
Good PRs help improve the quality and maintainability of your codebase and ensure that changes are properly reviewed and approved before they are merged.
Keep the Repository Clean and Up to Date
A clean and up-to-date repository is crucial for maintaining the health and usability of your codebase.
One way to keep the repository clean is by avoiding committing unnecessary files, such as temporary files or build artifacts. This keeps the repository small and makes it easier to navigate. The following files are considered unnecessary:
IDE-specific files or directories (for example, .idea, .vscode) that are used for local development environment configurations.
Temporary files or backup files created by text editors or other tools (for example, .bak, .tmp).
Dependencies or package directories (for example, node_modules, vendor) that can be regenerated using package managers.
Configuration files containing sensitive information (for example, API keys, and passwords). Use environment variables or configuration files outside the repository for such sensitive data.
Build artifacts or output directories (for example, dist, build) that can be regenerated during the build process.
To avoid committing unnecessary files in a repository, follow these steps:
Create a
.gitignorefile in the root directory of your repository.Open the
.gitignorefile in a text editor.List the filenames, directories, or file patterns that you want to exclude from version control, each on a new line.
Save the
.gitignorefile.
Common patterns to include in .gitignore are:
Directory names (for example,
node_modules/,dist/,build/)File extensions (for example,
*.log,*.tmp,.env)Specific files (for example,
secrets.txt,config.ini)
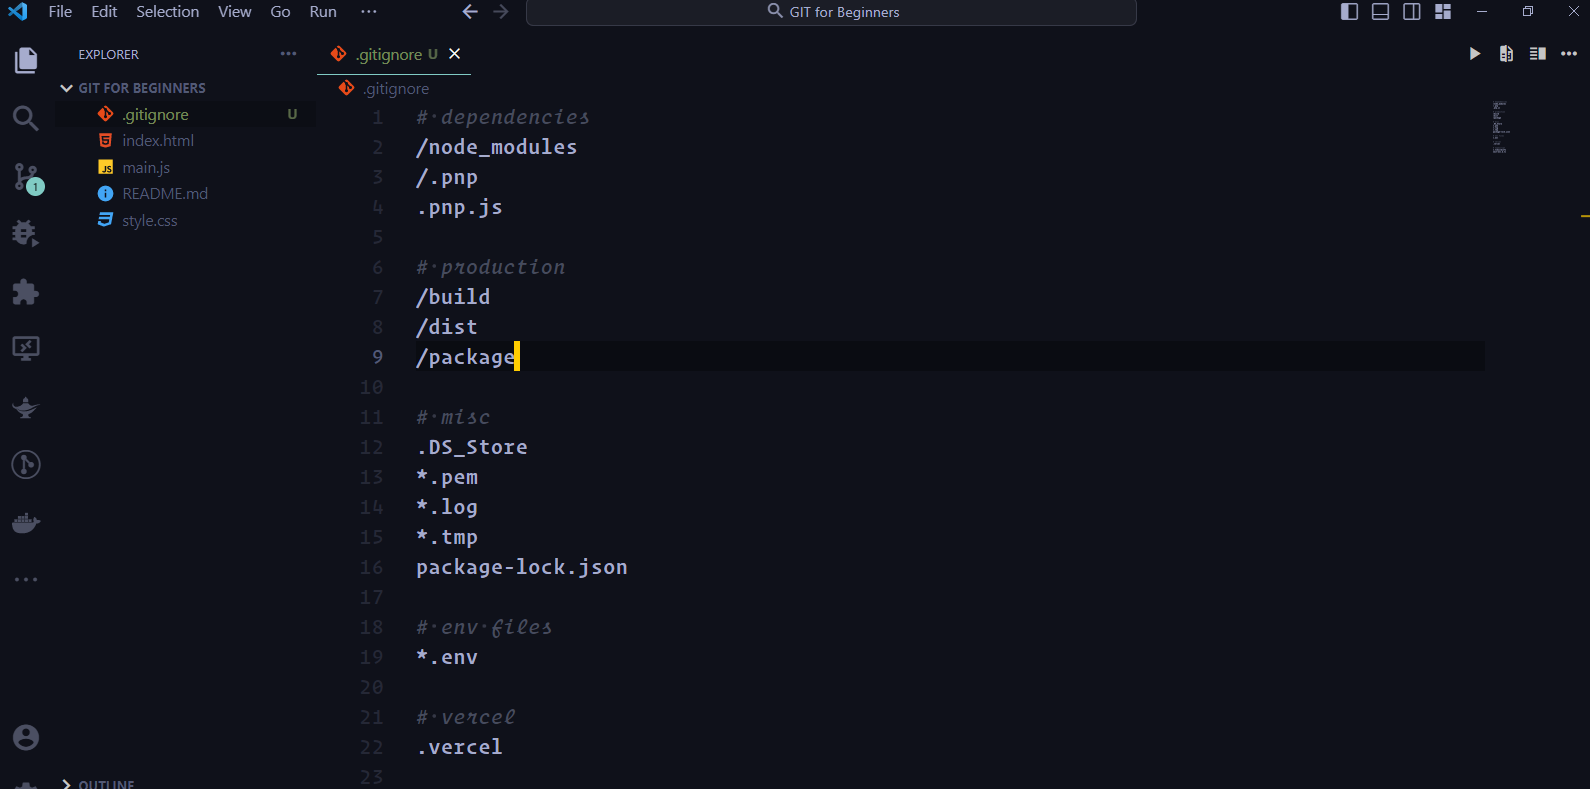
Creating .gitignore file
Ensure that the .gitignore file is committed and pushed to the repository. Git will then automatically exclude the listed files and directories from being staged or committed.
Regularly review and update the .gitignore file as new files or directories become unnecessary to include in the repository. This practice helps maintain a clean and focused version control history.
Reasons to Avoid Committing Unnecessary Files
As mentioned before, avoiding unnecessary files in a repository is crucial for maintaining efficiency, security, and collaboration. Here are a few reasons why it's important:
Reduced repository size: Unnecessary files can bloat the repository size, making cloning and fetching slower for collaborators.
Improved performance: Large repositories with unnecessary files can impact the performance of various Git operations, such as branching, merging, and history traversal.
Enhanced collaboration: Excluding unnecessary files ensures that only relevant code and assets are shared among team members, improving collaboration and reducing confusion.
Version control clarity: By omitting unnecessary files, the version control history remains focused on meaningful changes, making it easier to understand and review the development timeline.
Security and confidentiality: Avoiding the inclusion of sensitive information, such as API keys or passwords, in the repository helps maintain security and confidentiality.
Easier maintenance and deployment: When unnecessary files are excluded, maintenance tasks, such as cloning or deploying the repository, become faster and more streamlined.
Plus, it's important to keep the repository up to date by regularly pulling changes from the main branch and resolving any conflicts. This prevents merge conflicts and ensures that everyone is working with the most current version of the code.
By following these best practices, you can work more efficiently and collaboratively on Git projects, reduce the risk of errors and conflicts, and keep your codebase clean and maintainable.
Conclusion
In this tutorial, we've covered some of the best practices for using Git to manage your software development projects.
We discussed the importance of version control and how Git can help you keep track of changes to your codebase. We also covered the basic commands for creating and committing changes, and how to work with remote repositories. Finally, we discussed some of the best practices for using Git, including keeping commits small and focused, using clear and concise commit messages, branching frequently to isolate changes, and using pull requests for code reviews.
While we've covered some of the basics of Git, there's much more to learn and explore. Git is a powerful tool that can help you manage complex software development projects, collaborate with other developers, and streamline your workflow.
I encourage you to continue learning about Git and exploring its capabilities. By doing so, you can become a more effective and efficient developer, and improve the quality and maintainability of your codebase.
Whether you're a beginner or an experienced developer, there's always something new to learn about Git. So keep exploring, keep experimenting, and keep pushing the boundaries of what you can do with Git.