
By Aman Mittal
Most devices nowadays come with a notch at the top of the screen. So when you're building a mobile application using React Native, you need to make sure that the content of the app's screen is rendered correctly across different types of devices.
In this article, we'll look at two different approaches to making app screens in React Native. Each avoids having the content positioned behind a notch or status bar.
The first approach uses the SafeAreaView component from the React Native components API. The second approach discusses the advantage of using the react-native-safe-area-context open source library and how it provides a cross-platform solution.
The Notch Problem
When you are starting to build a screen in a React Native app, you might use the following code snippet to display text:
import React from 'react';
import { StyleSheet, Text, View } from 'react-native';

export const HomeScreen = () => {
  return (
    <View style={[styles.container]}>
      <View style={{ backgroundColor: 'blue' }}>
        <Text style={{ fontSize: 28, color: 'white' }}>Hello World</Text>
      </View>
    </View>
  );
};

const styles = StyleSheet.create({
  container: {
    flex: 1,
    backgroundColor: 'red'
  }
});
The above code snippet has a parent View component with a background color of red. It wraps another View component with a background color of blue that contains a Text component to display some text on the screen.
This will display the screen's content on an iOS device like this:
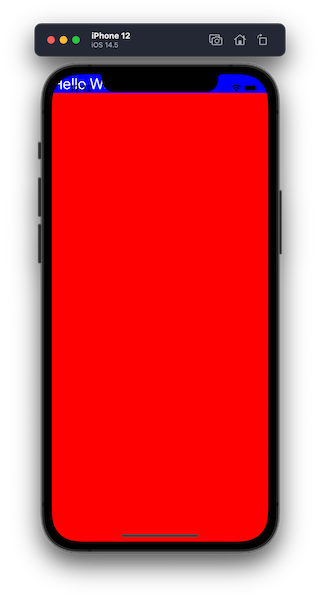 Without safe area view on iOS
The contents of the nested View component hide behind the status bar and the notch on the iOS device.
On an Android device, the behavior is exactly the same:
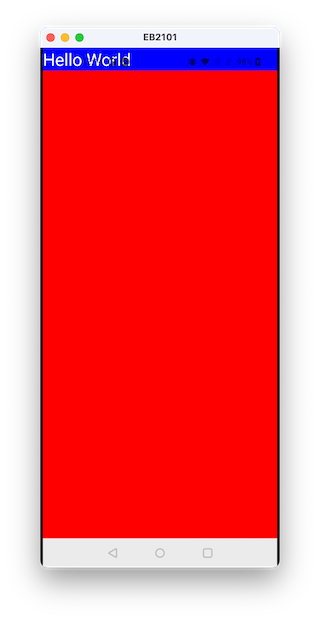 Status bar overlaps the content of the screen on Android
How to Use the SafeAreaView component from React Native
One approach is to use the SafeAreaView component that's available in React Native.
import { SafeAreaView } from 'react-native';
You just use it in place of the top-level View component. It makes sure content within the safe area boundaries is properly rendered around the nested content and applies padding automatically.
So now we can modify the previous code snippet:
import React from 'react';
import { StyleSheet, Text, View, SafeAreaView } from 'react-native';

export const HomeScreen = () => {
  return (
    <SafeAreaView style={[styles.container]}>
      <View style={{ backgroundColor: 'blue' }}>
        <Text style={{ fontSize: 28, color: 'white' }}>Hello World</Text>
      </View>
    </SafeAreaView>
  );
};
So that it works perfectly on iOS:
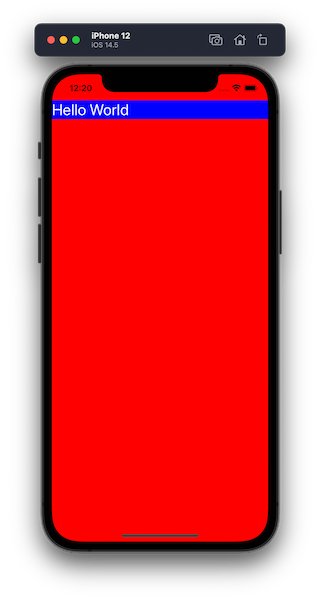 On using SafeAreaView component
In React Native, this component is only applicable to iOS devices with iOS version 11 or later. Unfortunately, that means it doesn't work for Android devices as the screen's content is still behind the status bar.
How to Use React Native's Safe Area Context Library
Fortunately, there is a cross-platform solution to handle safe areas on notch devices called react-native-safe-area-context. It provides a flexible API to handle safe area insets in JS and works on iOS, Android, and Web.
Start by installing it in your React Native app:
# for plain React Native apps
yarn add react-native-safe-area-context

# install pod dependency for iOS only
npx pod-install

# for Expo apps
expo install react-native-safe-area-context
This library provides a SafeAreaProvider that needs to wrap either your Root Navigator or the screen where you want to handle safe area insets.
For example, in the code snippet below, the SafeAreaProvider wraps the HomeScreen component since there is only one screen in the example app.
import React from 'react';
import { SafeAreaProvider } from 'react-native-safe-area-context';

import { HomeScreen } from './src/screens';

export default function App() {
  return (
    <SafeAreaProvider>
      <HomeScreen />
    </SafeAreaProvider>
  );
}
Now, you can import the SafeAreaView component from the react-native-safe-area-context library and replace it with the one from React Native.
import React from 'react';
import { StyleSheet, Text, View } from 'react-native';
import { SafeAreaView } from 'react-native-safe-area-context';

export const HomeScreen = () => {
  return (
    <SafeAreaView style={[styles.container]}>
      <View style={{ backgroundColor: 'blue' }}>
        <Text style={{ fontSize: 28, color: 'white' }}>Hello World</Text>
      </View>
    </SafeAreaView>
  );
};

const styles = StyleSheet.create({
  container: {
    flex: 1,
    backgroundColor: 'red'
  }
});
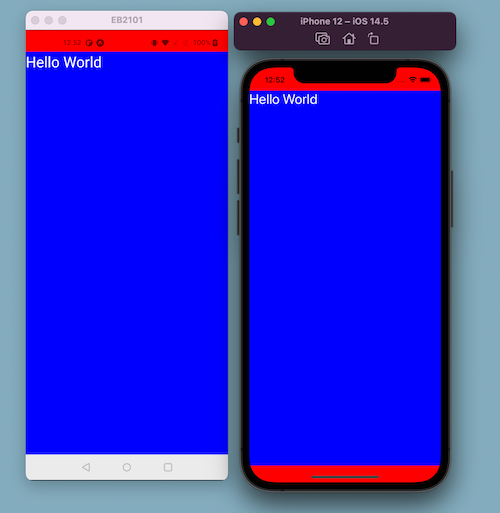
It works both for iOS and Android:
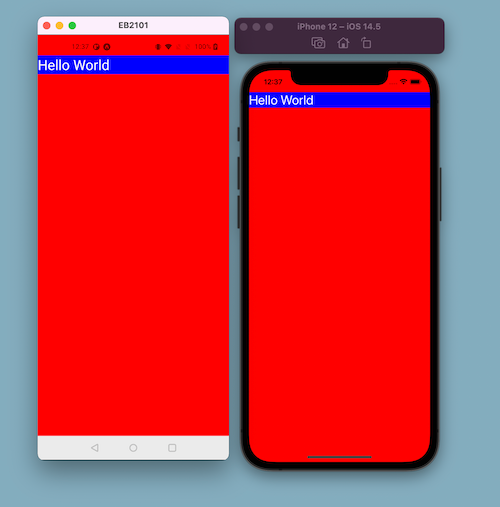 The library works on both iOS and Android without any extra configuration
If you give the nested View component a property of flex: 1 like this:
<View style={{ backgroundColor: 'blue', flex: 1 }}>
You can see the safe area edges on iOS:
The SafeAreaView acts like a regular View component from React Native and includes additional padding to position the content below the notch or status bar of a device.
It also comes with an edges prop that customizes safe area insets around different edges such as top, bottom, left, and right.
How to Use the useSafeAreaInsets Hook
Another advantage of using this library is that it provides a hook called useSafeAreaInsets which offers more flexibility. It also gives you more control, and you can apply padding for each edge using a property from this hook.
For example, in the View component below, we only want the padding to be applied at the top edge:
import { useSafeAreaInsets } from 'react-native-safe-area-context';

export const HomeScreen = () => {
  const insets = useSafeAreaInsets();

  return (
    <View
      style={{
        paddingTop: insets.top
      }}
    >
      {children}
    </View>
  );
};
Conclusion
Handling status bars and notches across different devices become much easier with the react-native-safe-area-context library. Try it out in your next React Native library.
🐙 Source code at this GitHub repository
Visit my blog and follow me on Twitter for more React Native or Expo related content.