

In this post you will learn about an amazing tool named Scapy. Scapy is a Python library that enables us to send, sniff, and dissect network frames.
It is useful in a variety of use cases, one of which is to actually get some hands-on experience when you learn Computer Networks. Wouldn't it be great if, when learning about Ethernet, for example, you could create, send, sniff and parse Ethernet frames on your own? Scapy is the perfect tool for that.
In addition, you can use Scapy for creating networking-based applications, parsing network traffic to analyze data, and many other cases.
This post assumes you have some background knowledge in Computer Networks, for example about the layers model. It also assumes you have some basic Python knowledge.
What will you learn?
In this post we will start from the very basics – what Scapy is, and how to install it.
You will learn how to sniff data and parse it with Scapy, and how to display it in a meaningful manner.
You will also learn how to create frames or packets, and how to send them. Altogether, you should have a new powerful tool under your belt.
How to Install Scapy
To install Scapy, you can simply use pip install scapy.
If you run into trouble, simply follow the official documentation.
How to Use Scapy
For now, let’s open up the command line and type in scapy.
You should expect something like the following:
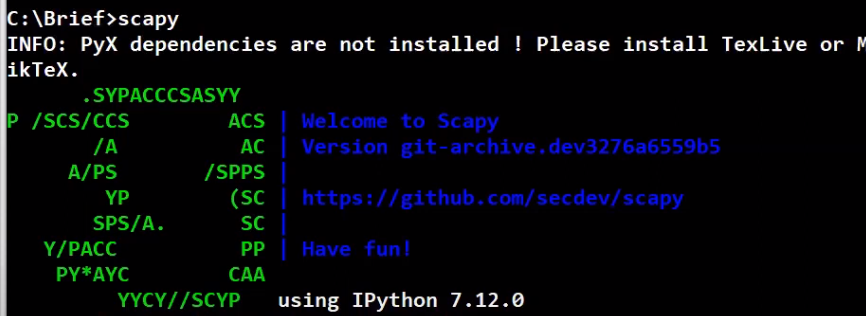 _Running Scapy from the CLI (Source: Brief)_
Note that the warning messages are fine.
Since this is a Python environment, dir, help, and any other Python function for information retrieval are available for you. Of course, you can always combine Python code with your Scapy scripts.
How to Work with Packets and Frames in Scapy
Packets and frames in Scapy are described by objects created by stacking different layers. So a packet can have a variable number of layers, but will always describe the sequence of bytes that have been sent (or are going to be sent) over the network.
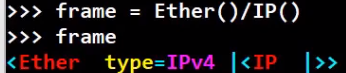
Let's create a frame that consists of an Ethernet layer, with an IP layer on top:
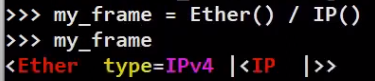 _Stacking Layers (Source: Brief)_
Look how easy that is! We’ve used the / operator in order to stack the IP layer on top of the Ethernet layer.
Note that when looking at this object, it only tells us non-default values. The type of Ethernet is 0x800 (in hexadecimal base) as this is the type when an IP layer is overloaded.
Let's look more deeply at the fields of the packet:
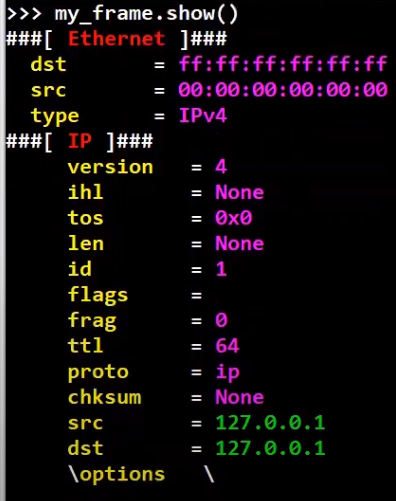 _With the
 show method we can observe all fields of the frame (Source: Brief)_
Pretty cool! 😎
How to Sniff with Scapy
Scapy also allows us to sniff the network by running the sniff command, like so:
 _Sniffing with the
 sniff command (Source: Brief)_
After running sniff with count=2, Scapy sniffs your network until 2 frames are received. Then it returns – and in this case, the variable packets will store the frames that have been received.
The return value of sniff can be treated as a list. Therefore packets[0] will contain the first packet received, and packets[1] will contain the second:
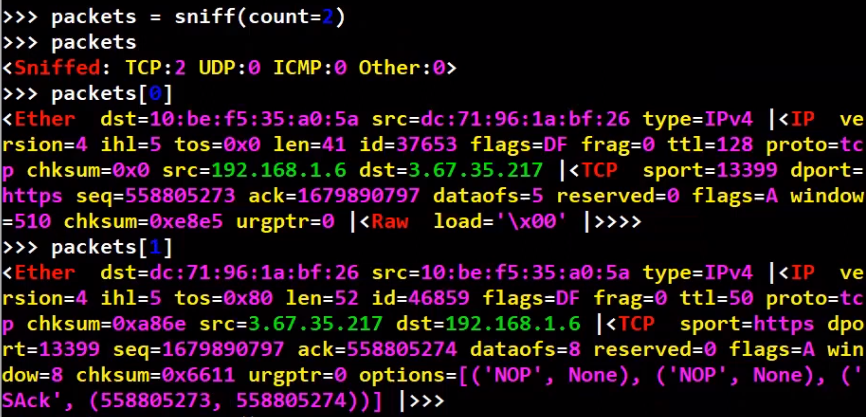 _The return value of
 sniff is an iterable, so it can be accessed as a list (Source: Brief)_
A helper function summary is available too and will provide minimal information regarding the packet collection:
 _Using
 summary we can get some information of the packet collection (Source: Brief)_
When looking at a specific frame, every layer or field can be accessed in a very elegant way. For instance, in order to get the IP section of the packet, we can access it like so:
 _Accessing a specific layer (and its payload) (Source: Brief)_
Note that this shows us everything from the IP layer and above (that is, the payload of the IP layer). Let's now observe the source Ethernet address of this frame:
 _Accessing a specific field (Source: Brief)_
Nice and easy. Now, you will learn how to run a specific command for every frame that you sniff.
First, create the callback function that will be run on every packet. For example, a function that will just print the source Ethernet address of the received frame:
 _Defining a callback function that receives a frame as its argument (Source: Brief)_
Now, we can pass this function to sniff, using the prn argument:
 _Run a callback function on every sniffed frame (Source: Brief)_
The Ethernet addresses have been printed as a result of print_source_ethernet being executed, where every time, it receives a sniffed frame as an argument.
Note that you can write the same in Python using a lambda function, as follows:
 _Define the callback function using
 lambda (Source: Brief)_
If you prefer to write an explicit function like the one we’ve written above, that’s perfectly fine.
We usually want to filter traffic that we receive – and look only at relevant frames. Scapy’s sniff function can take a filter function as an argument – that is, a function that will be executed on every frame, and return a boolean value – whether this frame is filtered or not.
For example, say we would like to filter only frames that are sent to broadcast. Let’s write a simple filtering function that does just that:
 _A simple filtering function (Source: Brief)_
Now, we can use the lfilter parameter of sniff in order to filter the relevant frames:
 _Filtering frames based on a filter function (Source: Brief)_
In order to clarify, let’s draw this process:
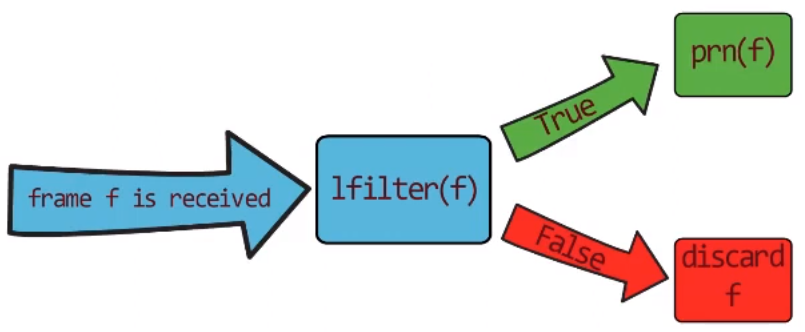 _The process of sniffing and filtering with
 lfilter (Source: Brief)_
A frame f is received by the network card. It is then transferred to lfilter(f). If the filter function returns False, f is discarded. If the filter returns True, then we execute the prn function on f.
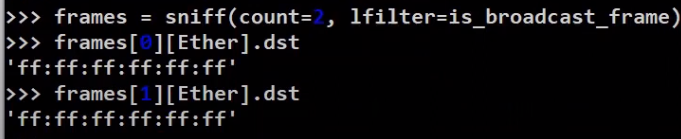
So we can now combine these two arguments of sniff, namely lfilter and prn, and print the source address of every frame that is sent to the broadcast address. Let’s do this now using lambda:
 _Combining
 lfilter and prn 💪🏻 (Source: Brief)_
This is equivalent to writing the following line, without lambda:
sniff(count=2, lfilter=is_broadcast_frame, prn=print_source_ethernet)
Readable, quick, and useful. Have you noticed that I love Scapy? 🥰
Alright, so far we’ve learnt how to sniff frames. When sniffing, we know how to filter only relevant frames, and how to execute a function on each filtered frame.
How to Create Frames in Scapy
To create a frame, simply create an Ethernet layer using Ether(). Then, stack additional layers on top of it. For instance, to stack an IP layer:
 _Creating a frame with two stacked layers (Source: Brief)_
Alternatively, we can just add raw data, as follows:
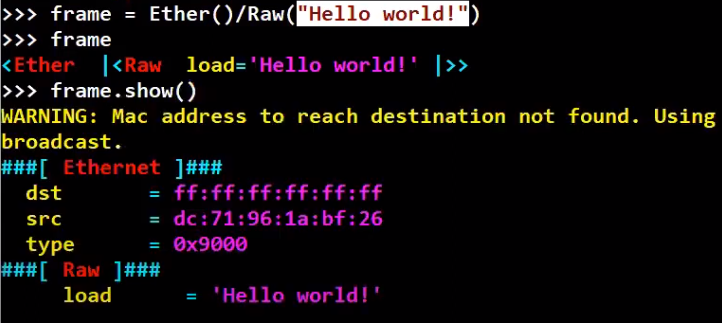 _Using Raw data as the payload (Source: Brief)_
If you want to specify a specific value, for instance the destination address of the frame, you can do it when you initially create the frame, like so:
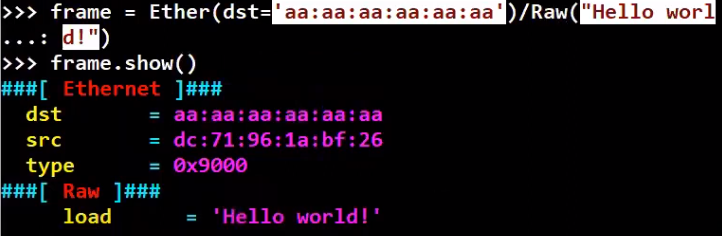 _Creating a frame and specifying specific values (Source: Brief)_
Or, we can modify the specific field after creation:
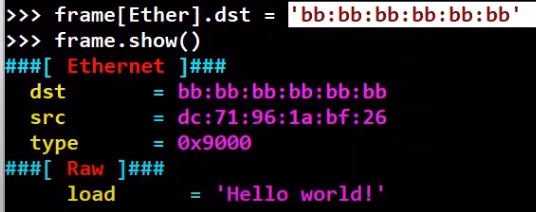 _Modifying specific values (Source: Brief)_
How can we look at the frame we’ve just created? One way is to observe a frame using show, as we’ve done above. Another way of looking at a frame is by looking at its byte stream, just like in Wireshark. You can do this using the hexdump function:
 _Viewing the hexadecimal byte stream (Source: Brief)_
Well, even better – we can just look at it inside Wireshark! By running wireshark(frame).
How to Send Frames in Scapy
You can send frames using sendp, as follows:
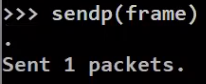 _Sending frames with
 sendp (Source: Brief)_
Let's sniff in wireshark while sending the frame to make sure that it’s actually sent:
 _Observing the frame we've sent using Wireshark (Source: Brief)_
Note that we use sendp only when we send an entire frame, using the second layer and above. If you want to send a packet including only the third layer and above, use send instead.
Recap
In this post you got to know an awesome tool called Scapy. You saw how you can sniff, how to filter packets, and how to run a function on sniffed packets. You also learned how to create and send frames.
About the Author
Omer Rosenbaum is Swimm’s Chief Technology Officer. He's the author of the Brief YouTube Channel. He's also a cyber training expert and founder of Checkpoint Security Academy. He's the author of Computer Networks (in Hebrew). You can find him on Twitter.