By Mateusz Tarnaski
Short answer: using a browser-based Augmented Reality (AR) application. For the long answer, read below.
The idea of playing with AR started as a random interesting experiment. In our company, we strive to stay at the edge of the curve. We share technical novelties and new technologies with each other on a semi-regular basis. Since we are mostly dealing with web technologies, the concept of AR in the browser really took off.
Since AR is mostly an entertainment technology, a practical application was not obvious to us from the start. Luckily, two unrelated things happened at the same time:
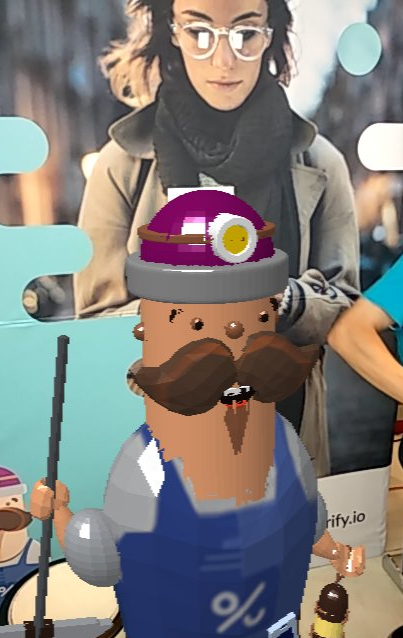
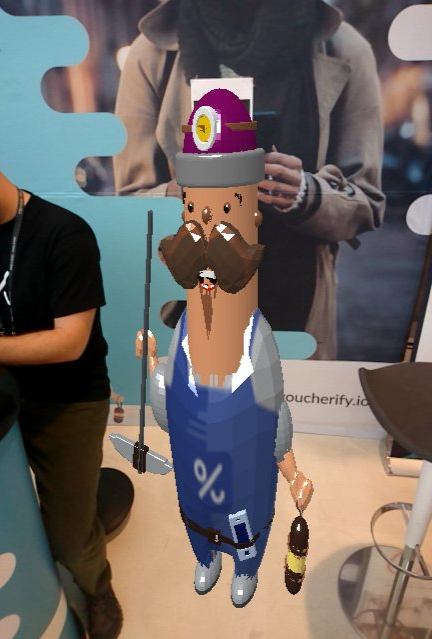
- we had just created a mascot for our product — Hubert,
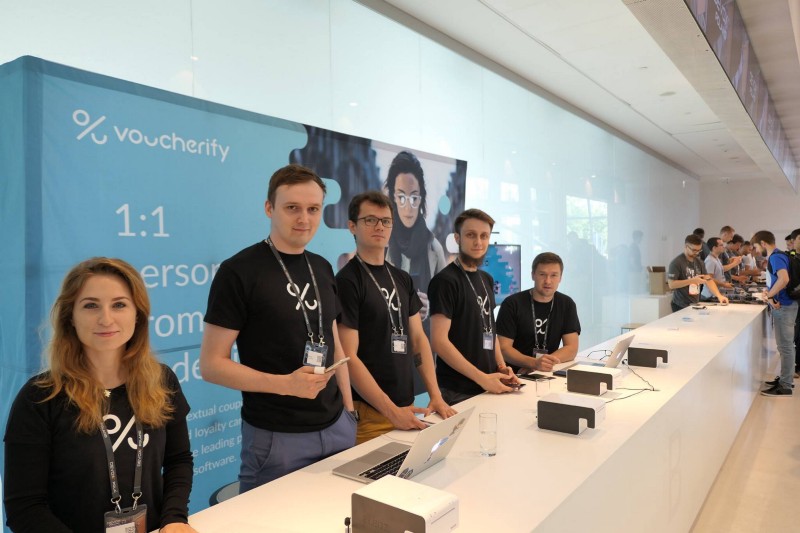
- we had to do a marketing booth at devoxxPL 2018
We decided to bring Hubert to life during the event, in the form of an AR app for people to play with. In our heads, users should be able to:
- render Hubert on a wall background in their phones
- take a picture of the rendered model
- tweet the photo (not the subject of this article)
The end result is available on glitch.com, scaled down and rotated to be suitable for a desktop experience (you can also take a quick look into the source code).

Rendering Hubert in real time
We used AR.js (version from this commit) as the main building block of our AR app — it packages webRTC camera access, marker recognition, and 3D scene rendering. We liked it mostly because you can have a basic demo running in around 20 lines of code.
Under the hood, AR.js can use either three.js or A-frame implementations to render your 3D scenes.
- three.js offers fine-grained control of 3D rendering, and is JavaScript-based. You have probably heard about it in the context of rendering 2D and 3D scenes in the browser.
- A-frame is a web framework designed specifically for building VR and AR experiences. It has an HTML-like markup that is more declarative than three.js, but sacrifices some of the control in favor of ease of use.
We didn’t have a VR or 3D expert (except Mrówa, who prepared the 3D model). As A-frame’s HTML-like declarative syntax looked more familiar to us, we opted for A-frame to do the rendering.
Here you can see the code for rendering Hubert, 30 lines on the dot. We omitted some options and A-frame tweaking for the sake of simplicity. You can refer to the repo to see it all.
This gives us Hubert nicely rendered in the web browser in real time.
Capturing a photo to tweet
Unfortunately, we don’t have a single video feed rendering the whole scene. There is the video from your camera and a rendered 3D scene. We quickly figured out that we would have to capture a frame from both sources and put them together for a nice photo of Hubert.
Taking frames out of a webRTC video stream is pretty straightforward. The best material on the subject can be found here. If your browser has the appropriate API, you need two elements:
- a reference to your source tag
- a destination element in which to put your frame
Then it’s just a simple matter of drawing a 2D image from video to canvas. In our case, both of these are a bit tricky.
The video take we are using is generated and embedded by AR.js. We had no idea how to get it gracefully, so we hacked our way around it with a loop and a DOM selector:
We also needed to hack some scaling. AR.js doesn’t present the raw video feed to the user, they scale it to fill the screen without losing aspect ratio. That means we need to apply the same scaling to our frame. If not, our screenshot will have “more” of the video feed than is shown on the screen. We don’t want to confuse the users here.
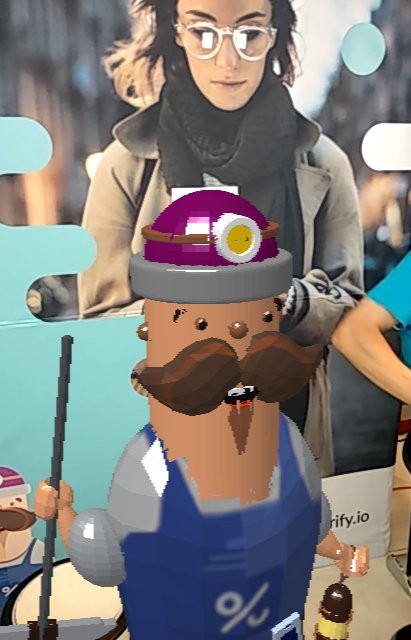
What the user sees:
If we take a frame without scaling and just try to copy from point (0,0) we lose margins imposed by AR.js. This is a totally different picture from what is presented to the user:

Suffice it to say we just reverse-engineered the scaling and figured out the bounding box of what the user sees:
To achieve this final result (the same as what is presented live to the user, give or take some camera shake):
Now we just need to get Hubert in the picture. Again, the API for that is very straightforward. To capture a screenshot of a rendered A-frame scene, we need to get the scene’s canvas. The relevant part is copied to our destination canvas, on top of the previously taken video frame.
Getting the relevant part is the tricky bit in our case. Thanks to the AR.js scaling, we cannot simply get the “perspective” shot of the scene and use that. It will look too wide or too short, depending on orientation.
For landscape mode (width > height), the scaling method we used for video works perfectly well.
For portrait mode, it works great on a PC… However, once you enter the realm of mobile devices, the scaling breaks and the screenshot doesn’t look nice. You get this skinny Hubert…
…instead of our lovely, bubbly mascot in all his glory:
We are still not sure why that is the case. We made the mistake of not testing it out thoroughly on actual mobile devices, thinking it would work the same as it does on the development machine. (Yes, we know how bad that sounds, but that’s the reality of it.) During the conference, we managed to figure out the formula for portrait scaling and introduced a fix:
It’s not pretty. It’s one of those “it’s late, it works, just leave it” fixes. The values presented above produced a satisfactory result and we left it at that.
With that, we have a picture of Hubert in the real world! It can be retrieved from the destination canvas element and displayed on the page or sent to the server to tweet out.
Summary
AR in the browser is possible. Even more, it is possible on mid-grade mobile hardware (as of June 2018). Getting it to work on every phone and browser is still a long shot, so don’t count on it for wide, diverse userbases.
However, if you have a somewhat controlled environment, augmented reality on a phone can be used to create unique experiences. These don’t require special hardware or workstations and that is a big, big plus. Just make sure to test it on actual devices ahead of time.