

We use lists all the time in our everyday lives.
We create them to structure and organize our days, and we use them to make to-do lists. We use them in recipes so we don't miss any of the steps. And we use them when we want to assemble a piece of furniture.
These are just a few examples of how we use lists to help us keep things organized.
So it makes sense that they are also such a frequently used and helpful feature in front-end web development.
There are three types of lists in HTML: unordered, ordered, and description lists.
In this article, you'll learn how to create unordered lists. You'll also see some ways in which you can change the default styling using just a few lines of CSS.
Let's get started!
How to create an unordered list in HTML
Unordered lists in HTML are collections of items that don't need to be in any specific order. We often use simple bullet points to list out these items.
You create an unordered list using the ul tag. Then, you use the li tag to list each and every one of the items you want your list to include.
The ul tag, which stands for unordered list, is the parent of the li
tag. This means that the li tag is the child of the ul tag.
<ul>
    <li>Item</li>
    <li>Another Item</li>
    <li>Yet Another Item</li>
</ul>
Output:
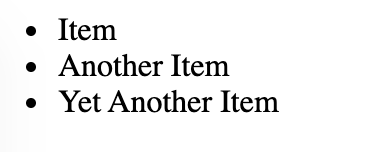
This is called a bulleted list because the default styling is that every list item has a bullet point next to it.
One thing to remember and be aware of is that li is the only direct child of ul.
This means that after creating the opening (<ul>) and closing (</ul>) tags for the unordered list, the first tag you include will be the li tag.
For example, don't do this:
<ul>
    <a href="#">I am a link to something on the web!</a>
</ul>
If you want your unordered list's items to be links, do this instead:
<ul>
    <li>
        <a href="#">I link to somewhere on the web!</a>
    </li>
</ul>
The link tag (a) is the child of the li tag and the grandchild (!) of the ul tag.
How to create a nested unordered list
A nested list is a list inside another list.
You can create a nested unordered list, or a nested ordered list, or even an ordered list nested inside an unordered one.
Remember that the only direct child of the ul tag is li.
Here's how you create a nested unordered list:
<ul><!-- start of  main list-->
  <li>HTML</li>
   <li>CSS</li>
    <li>JavaScript
            <ul><!-- start of nested list-->
                <li>Angular</li>
                <li>React</li>
                <li>Vue</li>
            </ul><!--end of nested list-->
     </li>
 </ul><!--end of  main list -->
Output:
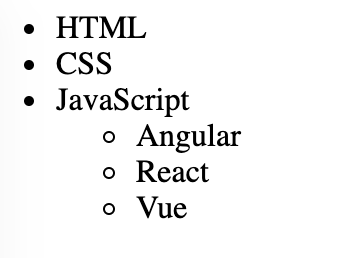
You create the nested unordered list under the main list's item of your choosing.
In the example above, I created a nested list between the opening and closing li that has the name 'JavaScript'.
Make sure to include both the closing tag and opening tags, as it can get confusing quickly.
A good practice to avoid any confusion is to comment your code. And keep in mind that you should use nested lists only when it semantically makes sense.
How to change the default styling of unordered lists
As you've seen so far, the default styling of unordered lists are bullet points next to each list item.
But you can change the styling using the list-style-type property in a separate .css file.
The default value of the property is disc.
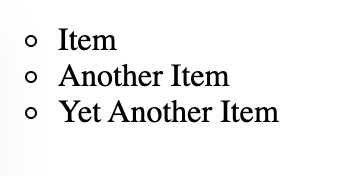
How to style list items with circles
You can create list items that have circles instead of solid bullet points as their style:
<ul>
    <li>Item</li>
    <li>Another Item</li>
    <li>Yet Another Item</li>
</ul>
ul {
    list-style-type: circle;
}
Output:
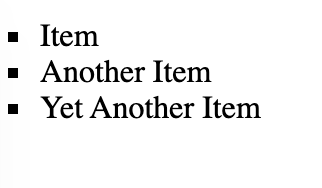
How to style list items with squares
You can also create list items that have squares as their style:
<ul>
    <li>Item</li>
    <li>Another Item</li>
    <li>Yet Another Item</li>
</ul>
ul {
    list-style-type: square;
}
Output:
How to remove styles from list items
You can even remove styling altogether:
<ul>
    <li>Item</li>
    <li>Another Item</li>
    <li>Yet Another Item</li>
</ul>
ul {
    list-style-type: none;
}
Output:
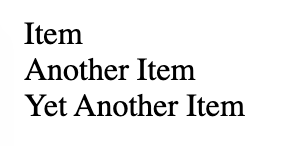
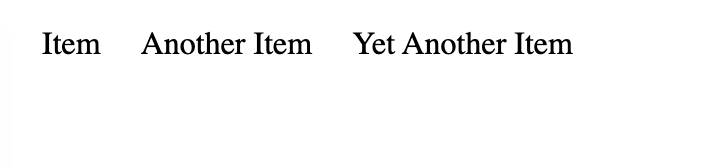
This is particularly helpful when you want to style the list items horizontally and create a navigation bar. This will require some extra styling.
Lists are block elements. By changing the list items to inline and using a Flexbox rule, you can get items to stack next to each other.
The same HTML:
<ul>
        <li>Item</li>
        <li>Another Item</li>
        <li>Yet Another Item</li>
    </ul>
And by adding a few new CSS rules:
ul {
    list-style-type: square;
    display:flex;
}

li{
    display:block;
    margin:10px;
}
You can style the list items horizontally:
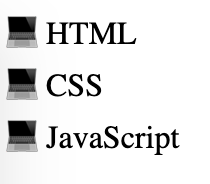
How to style list items with emojis
You don't have that many styling choices for styling items in an unordered list.
To make lists more interesting and fun, you can add emojis, using the CSS ::before pseudo-element.
Here is the HTML:
<ul>
    <li>HTML</li>
    <li>CSS</li>
    <li>JavaScript</li>
</ul>
The first step is to add the list-style-type:none; rule to the parent ul tag and remove the default padding and margin from the tag.
You add the emoji to the li tag using the ::before pseudo-element. You can pick and choose from a full list of emojis in this article.
ul {
    list-style-type: none;
    padding:0;
    margin:0;
}

li::before{
    content: "💻";
}
Output:
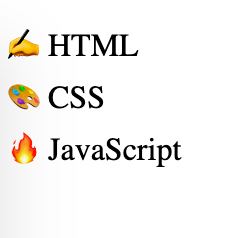
To give each list item a different emoji, use the :nth-child() selector on the list item before the ::before pseudo-element:
ul {
    list-style-type: none;
    padding:0;
    margin:0;
}

/*first list item*/
li:nth-child(1)::before{
    content: "✍️";
}

/*second list item*/
li:nth-child(2)::before{
    content: "🎨";
}

/*third list item*/
li:nth-child(3)::before{
    content: "🔥";
}
Output:
Conclusion
And there you have it! You now know how to create unordered lists in HTML and have seen some ways to style them.
To continue your HTML learning journey, watch the following videos on freeCodeCamp's YouTube channel:
freeCodeCamp also offers a free, project-based certification on Responsive Web Design.
It is ideal for complete beginners and assumes no previous knowledge. You'll start from the absolute necessary basics and build your skills as you progress. In the end, you'll complete five projects.
Thanks for reading and happy learning :)