
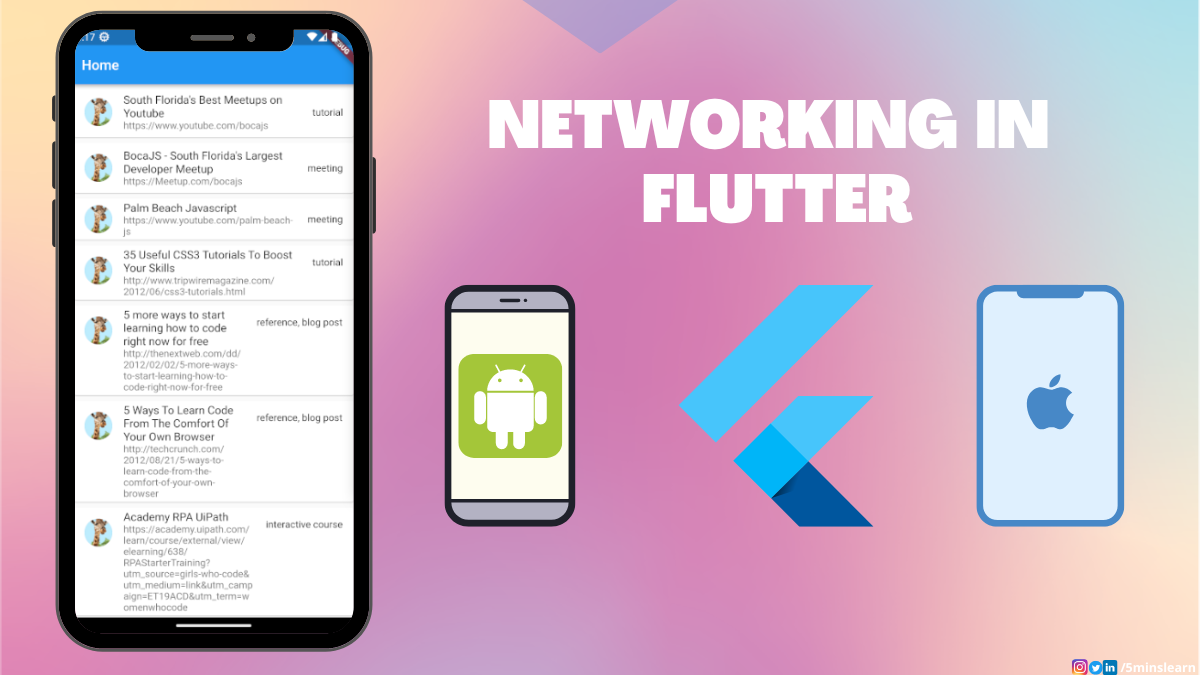
Almost all apps you use today run by accessing the internet. You can hardly find an app that runs without connecting to the internet.
The internet has become an integral part of our lives, as it solves one of the most critical problems we have to handle: data transfer. We're constantly either receiving or sending data to someone – whether it's a social media app, news app, or whatever type it may be, there's some form of data transfer.
Because of this, it's super important to learn networking if you're learning mobile app development. In this article I'll be explaining how to build a super simple mobile app that fetches data from internet and renders it on the app.
How to Create the Project
Navigate to the folder where you want to create your project in the terminal and run the following command:
git clone https://github.com/5minslearn/Flutter-Boilerplate.git
Navigate to the Flutter-Boilerplate folder and run the flutter pub get command to install the dependencies.
cd Flutter-Boilerplate/
flutter pub get
That's it. We've got our dependencies installed.
Open the project in Visual Studio Code by running the code ./ command in the terminal.
 Create a Flutter app from boiler plate
Start your emulator/connect your device and press F5 in VS Code to run your app.
At the moment, the app will just contain an empty screen as shown in the below screenshot.
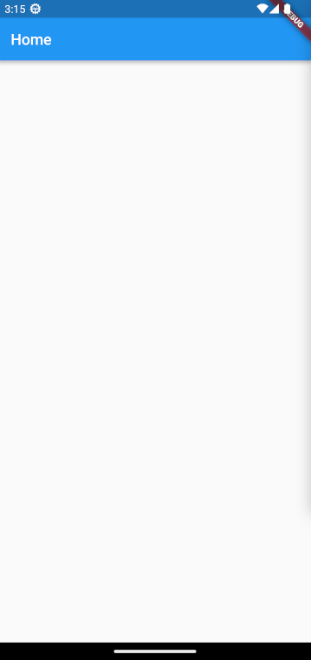 Flutter app with empty screen
Let's build our networking app.
Where to Get the Data
This is the most obvious question. If we were to fetch something from the internet and render, we need an API server exposing the data we need. But, most people cannot afford to do that for learning purposes. To overcome this, many people are offering free API services.
You can consume the data from their API services for learning purposes. But, we cannot validate the originality of the data, as most of them will be random.
In this tutorial, we'll be using the API exposed by https://sampleapis.com/. They expose an API endpoint that lists Coding Resources. The URL of the endpoint is https://api.sampleapis.com/codingresources/codingResources.
In our app, we'll fetch the data from this endpoint and list them in our app.
Install the Dependencies
Let's install the dependencies we need to build this app. They are:
- The
httppackage - The
url_launcherpackage
We'll use the http package to make a call to the API endpoint. And we'll use the url_launcher package to open a URL in an external browser.
Open the pubspec.yml file and add the following two packages in the dependencies section:
  http: ^0.13.6
  url_launcher: ^6.1.11
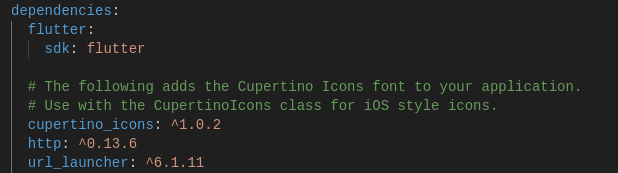 Add dependencies
If you're using VS Code as your IDE, the dependencies will be installed automatically by saving this file. For the other IDEs, run flutter pub get on your project root folder to install the dependencies.
How to Fetch the Data from the API
We got our dependencies ready. Let's make a request to our API and get the data.
Import the http package in the lib/main.dart file.
import 'package:http/http.dart' as http;
Initialize a list object in the _MyHomePageState class by adding the following code:
List _resources = [];
Let’s write a method that makes a call to our API endpoint and decode them into a JSON object.
  void _fetchResources() async {
    final response = await http.get(Uri.parse(
        'https://api.sampleapis.com/codingresources/codingResources'));
    if (response.statusCode == 200) {
      final data = json.decode(response.body) as List;
      setState(() {
        _resources = data;
      });
    } else {
      throw Exception('Failed to load resources');
    }
  }
Paste the above code into the MyHomePageState class. In the above method, we’re making a call to the API endpoint (https://api.sampleapis.com/codingresources/codingResources). From the response, we’re validating if it's successful in receiving the data by checking if its status code is 200 (and throwing an error if it’s not). We then decode the received data and save it in our app’s state.
You may notice an error after pasting the above code at the json.decode part. In order to decode JSON, we need import a convert package in our file. Add the following code at the top of the file:
import 'dart:convert';
The error should be gone now.
We have a method that makes a call to the API endpoint and saves the data in the state. Our next step is to trigger this method when we open the app.
We can do that by overriding the initState method.
  @override
  void initState() {
    super.initState();
    _fetchResources();
  }
Quoting from the Flutter documentation,
"
initStateis called when this object is inserted into the tree. The framework will call this method exactly once for each State object it creates."
In the above code, we called our method _fetchResources() in the initState() method.
How to Build the UI
We got the list of items whenever we open the app. Our next step is to render them on the UI.
Copy the below code and replace it with the build method of the _MyHomePageState class.
@override
  Widget build(BuildContext context) {
    return Scaffold(
        appBar: AppBar(
          title: Text(widget.title),
        ),
        body: _resources.isEmpty
            ? const Center(
                child: CircularProgressIndicator(),
              )
            : ListView.builder(
                itemCount: _resources.length,
                itemBuilder: (context, index) {
                  final resource = _resources[index];
                  return InkWell(
                      onTap: () => {},
                      child: Card(
                          child: ListTile(
                        title: Text(resource['description']),
                        subtitle: Text(resource['url']),
                        leading: const CircleAvatar(
                            backgroundImage: NetworkImage(
                                "https://images.unsplash.com/photo-1547721064-da6cfb341d50")),
                        trailing: Text(resource['types'].join(', ')),
                      )));
                }));
  }
Let’s understand the above code.
We show a loader if our state has empty values. If it has some values in it, we’ll iterate through as a ListView builder and we render a card widget for each item, displaying the description, url, and types of the resource.
That’s it.
Run the app by pressing F5 and you should be able to see the following:
 Loading the resources
 Showing the resources
That’s awesome, isn’t it?
Let's Fix the Missing Part
But I feel there’s one small thing that’s missing at this point.
We’re able to see the list of the resources. But, we’re not able to view those resources. Some resources have a short link that we can easily remember and type. But, a few of them have a long URL which would be hard for a typical human being to remember. Let’s add a small enhancement that when we click on a resource, its link should be opened in our default browser.
This is very simple to implement in Flutter. This is the reason we added the url_launcher package at the beginning of this tutorial.
Import the url_launcher package in your app like this
import 'package:url_launcher/url_launcher.dart';
Add the following method in the _MyHomePageState class:
_launchURL(String url) async {
    if (await canLaunch(url)) {
      await launch(url);
    } else {
      throw 'Could not launch $url';
    }
  }
The above method accepts a URL, validates the link, and opens it in the browser.
We have to call this method on tapping the card. We can achieve that by calling this method in the onTap property of the InkWell widget.
Here’s the code for it:
onTap: () => {_launchURL(resource['url'])},
Let’s run our app and test this.
You were likely disappointed on tapping a card – I certainly was while working on this.
You should have seen this error:
 Error on opening a url: Exception has occurred. "Could not launch https://www.youtube.com/bocajs"
Though the URL is right, why is our system not opening this in a browser?
What are Intent Actions?
Well, now we have to learn about intent actions.
Quoting it from Android Developers documentation,
"An Intent provides a facility for performing late runtime binding between the code in different applications. Its most significant use is in the launching of activities, where it can be thought of as the glue between activities. It is basically a passive data structure holding an abstract description of an action to be performed."
This basically means that when we hand over something to the external app, we have to declare that in our app. For Android, we have to define it in AndroidManifest.xml and for iOS most of these configurations go into the Info.plist file.
Add the queries block in the following code to your AndroidManifest.xml file.
<manifest>
    <application>
        ...
    </application>
    <queries>
        <intent>
            <action android:name="android.intent.action.VIEW" />
            <category android:name="android.intent.category.BROWSABLE" />
            <data android:scheme="https" />
        </intent>
    </queries>
</manifest>
Uninstall the app from your mobile and run the app again.
Hopefully you should be able to see the link opened in the browser.
 Link opened on a browser
Conclusion
In this article, you’ve learned about networking in Flutter. We made a request to an API, rendered the list, and opened the URL in the browser.
This repo has my code. You can use it for your reference.
To learn more about Flutter, subscribe to my email newsletter on my site (https://5minslearn.gogosoon.com) and follow me on social media.