
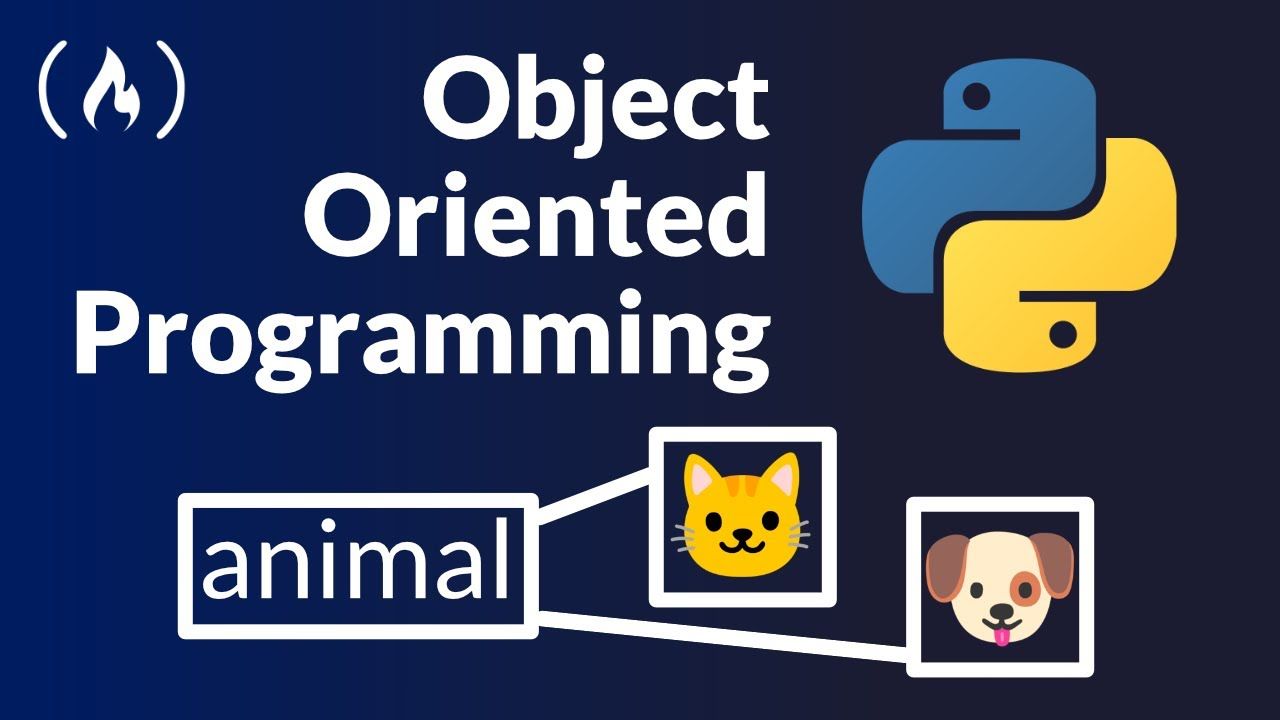
Object Oriented Programming is an important concept in software development.
Object Oriented Programming (OOP) is a programming paradigm that relies on the concept of classes and objects. You can use this method of writing programs in many programming languages, including Python
We just published a complete Object Oriented Programming in Python course on the freeCodeCamp.org YouTube channel.
Jim from JimShapedCoding developed this course. Jim has created many popular courses and is a great teacher.
In this complete tutorial, you will learn all about OOP and how to implement it using Python.
Here are the sections covered in this course:
- Getting Started with Classes
- Constructor, init
- Class vs Static Methods
- Inheritance
- Getters and Setters
- OOP Principles
Watch the full course below or on the freeCodeCamp.org YouTube channel (2-hour watch).
Transcript
(autogenerated)
It's important for software developers to understand object oriented programming.
In this course, Jim from JimShapeCoding will teach you all about object oriented programming and Python object oriented programming, it could be what is holding you back from being a great Python developer.
And as well as lending your first job as a software engineer, Welcome everyone to Python object oriented programming course.
Now if you struggle to understand the concepts of object oriented programming in the past, then you are totally fine.
And you're in good hands.
Because in this course, I'm going to make sure that this will be the last tutorial that you will ever watch about classes and the complex concepts that comes with object oriented programming.
And we are going to do this by developing a real Python application, that is going to be very cool to write.
And we will add to its complexity step by step.
And throughout the way, we will understand everything that we need to know about object oriented programming.
Now there are going to be some requirements to this course, I do expect from everybody to know at least about functions, variables, if statements and as well as for loops.
And if you know those things from other programming languages, then this is also fine.
So with that being said, let's get started.
Now to explain why you should write object oriented programs, I will explain the concepts based on a store management system that we will start developing together.
So starting to think about how to take our first steps with such a problem, we could first think about tracking after the items that we have right now in our store.
So one way we could get started, we could create those four variables to start tracking after our items.
So as you can see, we have our first variable item one equals to phone.
And then we have three more variables that are intentionally starting with the prefix of item one, so that we could describe that those four variables are related to each other by following the correct naming conventions.
Now, you might think that those four variables are related to each other only because it uses the same prefix of item one.
For Python, those are just four variables with different data types.
So if we were to print the type, for each of those four variables, now, we will receive their types with no surprises, right, we will receive string, and integer for price, quantity and price total.
Now I want to focus on those specific outputs right now, because as you can see, for each of the types, we also see the key word of class.
Now this means that those data types are actually instances of strings or integers.
So in Python programming language, each data type is an object that has been instantiated earlier by some class.
And for the item, one variable that has been instantiated from a string type of class.
And for the price quantity and price total, those have been instantiated from a class that is named Iand, meaning integer.
So it could have been nicer.
If we call the tail Python that we want to create a datatype of our own, it will allow us to write a code that we can reuse in the future easily if needed.
Now, each instance could have attributes to describe related information about it.
And we can think about at least some good candidates for attributes we could have for our item datatype, like its name, price, or quantity.
Alright, so let's go ahead and start creating our first class.
So I will clean everything from here, and we'll go ahead with it.
So it is going to be divided into two parts, the first one will be the creation of the class.
And the second one will be the part that I will instantiate some objects of this class.
Now when I say creating an instance, or creating an object, basically I mean to the same thing, so you might hear me saying one of those.
Alright, so let's go ahead and say class.
And then this needs to be followed by the name of the class that you want to create.
So we would like to give it the name of item.
And then inside of this class, in the future, we are going to write some code that will be very beneficial and very useful for us.
So we won't repeat ourselves every time that we like to take similar actions.
But for now, temporarily, I'm going to say here a pass so we will not receive any arrows inside this class definition.
Alright, so now that we have created our class, then we are allowed to create some instances of this class.
So let's go ahead and say item one is equal to item.
And that action is equivalent to creating an instance of a class, just like if you were to create a random string, then you will say something like the following.
This is equivalent to this one as well.
So it is very important to understand how classes are working in Python.
So I will delete this line because this was just for an example.
And now I said that we are allowed to assign some attributes to instances of a class.
So let's go ahead and start creating attributes.
And that will be achievable by using the dot sign right after the instance of a class.
And here you can say that you want to give it an attribute, like a name, that will be equal to phone, and item one, that price could be equal to 100.
And I think one dot quantity could be equal to five, for example.
Now in that stage, you might ask yourself, what is the difference between the random variables that we have created to those four lines? Well, here, we actually have a relationship between those four lines, because each one of the attributes are assigned to one instance of the class.
And I could probably do this by going ahead and try to print the types of item one nil, and as well as the types of the attributes of name, price and quantity.
Now with name, price and quantity, we are not going to have any surprises because we assign string type attributes to the item object.
But if we were to print that, then check out the result if I was to run this program, so you can see that now we have a data type of item here.
And that is the big difference between what we have seen previously to this thing that we have just created.
So now we understand how we can create our own data types.
Now let's go ahead and see what are the rest of the benefits using object oriented programming.
Okay, so until now, we understood how to assign attributes to instances, we should also understand now how we can create some methods and execute them on our instances.
Now, if we will take as an example, the building class of string, then you know that we have some methods that we can go ahead and execute for each of our strings.
And for this example, you can see that I grabbed an instance of a string that I named random str, and then I go ahead in the next line and execute the opera method, which if you remember is it's possible to grab all the letters and turn them to uppercase.
Now the biggest question here is how we can go ahead and design some methods that are going to be allowed to execute on our instances, Well, the answer is inside our class.
So we could go inside our class and write some methods that will be accessible from our instances.
So we could go ahead and say that and give our method a name.
Now a good candidate for a metal that we'd like to create now is actually calculate total price, because as we understand, it could have been nice.
If we were to have a method that will go ahead and calculate the result, multiplying it one dot price, with item one dot quantity, so we can get the total price for that specific item.
Now before we go ahead and complete this function, then I'm going to just create one more instance of this item by also deleting those two lines, because we understood the example.
So I'm just going to change those to item two, like that.
And I'm going to use something like laptop and change the price to 1000.
And say that we have three of those.
Now just a quick side note, when you will hear me say methods, then I basically mean two functions that are inside the classes.
Because in terms of Python, or in any programming language, when you have isolated definitions with this keyword, then those are considered to be called functions.
But when you go ahead and create those functions inside classes, then those are called methods.
So that is an important point that you should understand, because I'm going to call those methods from now.
Okay, so now if I was to continue by opening up and closing those parentheses, then you are going to see one parameter that is autogenerated that Python wants us to receive intentionally.
Now the reason that this happens, Python passes the object itself as a first argument, when you go ahead and call those methods.
Now, if I was to go here, and say item one dot calculate total price, then the action that we are doing now is calling this method.
But when you go ahead and call a method from an instance, then Python passes the object itself as the first argument every time.
So that is why we are not allowed to create methods that will never receive parameters.
Now you will see this if I was to remove the first parameter, and say something like pass.
Now if I was to execute this program now, then you're going to see type zero, calculate total price takes zero positional arguments, but one was given.
So in simple words, what this exception says is that Python tries to pass one argument and you are not received using any parameter, so that is very problematic.
And that is why you always have to receive at least one parameter when you go ahead and create your methods.
Now since we always receive this parameter, then it is just a common approach to call this self.
It was okay if I was to call it something like my perm, or I don't know something else.
But you never want to mess up with common conventions across different Python developers.
So that is why just make sure that you leave it as self every time.
Now, if I was to go ahead and run this program, then you got to see that we are not going to receive any errors.
So this means that this method has been implemented correctly.
Now let's see how we are going to benefit from creating this method, because it should go ahead and create a calculation for us using price and quantity.
So I will intentionally receive here two more parameters, which we could name just x&y for now.
And we could just say return x multiplied by y.
And now I will go ahead and pass in here, two additional arguments.
And it will be item one dot price.
The second one will be quantity.
So that is going to work because when you call this method in the background, Python passes this as an argument.
And then it passes the second argument.
And then this has been passed as a third argument.
So that is perfect.
And if I was to run that, and actually print this, so excuse me for running this before printing it, so I will surround this expression with this print built in function.
And I will run that and you're gonna see 500 as expected, now I could do the exact same thing for calculating the total price of our second item.
So if I was to grab this and paste this in, in this line, and actually change this to item two, and change this one to item two, and as well as this one, then I will receive 3000 as expected.
And that is how you can create a metal.
Alright, so until that point, we understood that we can assign attributes and as well as creating some methods that we can go ahead and use them from our instances directly, like those two examples in that line, and as well as in that line.
Now in that episode, we are going to solve some more problems that we have in terms of best practices in object oriented programming, and things that you're going to see in each project that is based on Opie.
Alright, so let's get started.
Now one of the first problems that we have here is the fact that we don't have a set of rules for the attributes that you would like to pass in in order to instantiate an instance successfully.
And what that means, it means that for each item that I want to go ahead and create, I need to hard code in the attribute name like those in here.
And it could have been nicer if we call somehow declaring the class that in order to instantiate an instance successfully, name, price and quantity must be passed, otherwise, the instance could not have been created successfully.
So what that means, it means that it could have been a great option if we could somehow execute something in the background.
The second that we instantiate an instance and there is a way that you can reach such a behavior.
And that is by creating a special method with a very unique name, which is called double underscore init double underscore.
Now you might hear this term as well as cold as constructor.
Basically, that is a method with a unique name that you need to call it the way it is intentionally in order to use its special futures.
Now, the way that this is going to work is by creating it the following way.
So it will be double underscore.
And as you can see, I already have auto completion for some very special methods that are starting and ending with double underscore.
Now the collection of those methods are used to be called Magic methods.
And we are going to learn a lot of more magic methods that you have in Opie, but the first one that we are going to start with will be the init double underscore, like that.
Alright, so now that we have created this method, then let's actually see what this metal does in the background.
So when you go ahead and create an instance of a class, then Python executes this double underscore init function automatically.
So what that means, it means that now that we have declared our class, Python is going to run through this line.
And then since an instance has been created, and we have double underscore init method designed, then it is going to call the actions that are inside this double underscore init double underscore method.
Now in order to prove that, then I'm going to start with a very basic point here that will say I am created Like that.
Now we got here, one instance.
And here we got another one.
So we should see I am created twice.
And in order to avoid confusions, then I'm going to delete those print lines from here so we can see a cleaner picture.
Alright, so if we were to run our program, then we can see that we have I am created twice.
And that is because Python called this double underscore init double underscore method twice, thanks to those two instances that we have graded.
Alright, so now that we use the double underscore init function in this class, we should take benefit from it and solve some more problems in order to implement Opie best practices.
Now if you remember in the beginning of this tutorial, I said that one of the problems that we have till this point is the fact that we still hard code in the attributes in that way by saying dot name, dot price dot quantity.
And that is something that we can for sure avoid.
Now let's see how we can start avoiding creating those attributes hard coded for each of the instances here.
So we can actually benefit from the double underscore init method that we have designed.
And let's see how now we understand that for each instance that we will create, it will go ahead and call this double underscore init method automatically.
So what that means, it means that not only we can allow ourselves to receive the self parameter, because this is a mandatory thing that we should do, because Python in the background, passes the instance itself as the first argument, we could, in addition, take some more parameters, and then do something with them.
So as a solder, let's say that we would like to receive one more parameter that we could name it name.
And as you can see, automatically, Python is going to complain how the name argument is not filled in here.
So now, I could go ahead and pass in the argument of phone for that one.
And for the second one, I can go ahead and pass in the argument of laptop.
Now once I have created this, then I can actually go ahead and change my print line a little bit.
So it will be a unique print line where I can identify from where each print line came from.
So I can go ahead and say an instance created and use a column here and then refer to the name like that.
And now that we have created this, then if we were to run our program, then you're gonna see unique sentences, an instance created for the phone, and as well as for the laptop.
Alright, so now that we have done this, then there is something that is still not quite perfect, because we still pass in the attribute of name here and here.
So now pay attention to how the init method has to receive the self as a parameter as well.
And we already know the reasons for that.
And the fact that we have self as a parameter here could actually allow us to assign the attributes from the init method, so that we will not have to go ahead and assign the attribute of name for each of the instances we create.
So what that means, it means that I can dynamically assign an attribute to an instance from this magic method, which is called double underscore in it.
So if I was to say, self, dot name, so I'm assigning the attribute of name to each instance, that is going to be created or created yet, and I'm making that to be equal to the name that is passed in from here.
So what that means, it means that now I can allow myself to delete this line.
And then this line.
So as you can see, now I have a dynamic attribute assignment, thanks to the self dot name equals name that we have wrote here in the to test that the attribute assignment world, then I can go down here and use two more lines that will look like the following.
So I will print it one dot name, and I will also print item to that name.
And in order to avoid confusions, then I'm going to get rid of this line.
So we could only see the print lines from here.
And now if I was to run that, then you can see that we receive a phone and laptop.
So it means that we were able to assign the attributes dynamically.
And that is perfect.
And now that we get the idea of that, then we should also do the same for the rest of the attributes that we'd like to receive.
So we also got the price and quantity to take care of.
So I'm going to go to my init method, and I'm going to receive again, price and quantity.
And I'm going to do the exact same thing.
So I'm going to assign the attribute of price.
And that will be equal to price.
And the quantity will be equal to the quantity.
And you can also see that again Python complains about the price and the quantity not being passed in here.
So I can say 100 and then five, and then I can delete those.
And then I can do the same here.
I could pass In 1000, and then three, and delete those, and in order to prove that this is going to work, then I'm going to copy myself a couple of times and change this to quantity, I mean price, this one will be price as well.
This one will be quantity and this one as well.
Now if I was to run that, then you can see that the results are as expected.
So that is a way that you should work with the double underscore init method, you should always take care of the attributes that you want to assign to an object inside the double underscore init method meaning inside the constructor.
Now a couple of signs that are quite important to remember when we work with classes.
Now when we go ahead and use the Ws coordinate method, this doesn't mean that we cannot differentiate between mandatory parameters to non mandatory parameters.
So say that you currently don't know how much you have from a specific item, then you can go ahead and by default, received this quantity parameter as zero, because it is realistic situation that you currently don't know how much phones you have on your store.
so we can directly go ahead and use a default value for that, for example, zero, and then this will mean that you will not have to pass in those five and three here.
And now in order to show you the results of that, if I was to run our program, then you can see that we receive zero twice for those two prints in here.
So that is something that you will want to remember.
And one more quite important point that I'd like to talk about now is the fact that you can assign attributes to specific instances individually.
So say that you want to know if the laptop has numpad are not because some laptops are not having the numpad on the right side of the keyboard.
But this is not a realistic attribute that you will want to assign to a phone.
And that is why you can go ahead and let me delete those print lines, by the way.
And that is why you can go ahead and say something like item two that has numpad equals to false like that.
And that is something that you want to remember, because the fact that you use some attribute assignments in the constructor doesn't mean that you cannot add some more attributes that you will like after you instantiate the instances that you would like to.
Alright, so now that we understood this, then there is still one small problem that is left that we need to solve.
Now pay attention how the calculate total price still receives the x and y as parameters.
And the question that we asked now is why it still receives those parameters.
Well, we could for sure now not received those parameters.
Because as we know, for each metal that we design in classes, then the object itself is passed in argument.
And I know that I repeated this a couple of times.
But this is where I failed to understand classes.
So that is why it is very important to understand this behavior.
And we already know that the object itself passed as an argument.
So that's why we receive self.
And so this means that now we could just return self dot price multiplied by self dot quantity.
And this will mean that we don't really have to receive those parameters, because we assign those attributes, once the instances has been graded.
So this means that we have access to those attributes through how the methods that we are going to add here in this class in the future.
So in order to test that this works, then I'm going to delete this example for now.
And I'm going to say print item one dot, calculate total price.
So we will be able to return the result here.
And I will do the same for item two, sorry, only this one.
Now to show some real number other than zero, then I will go ahead and pass in here, quantities.
So I will say one and three, for example, because I don't want to multiply a large number which is zero.
And that could come from here.
So I will run that.
And you'll see that we receive the expected results.
So now we completely understand the big picture, how to work with the constructors in classes, and what are the best practices that you should go ahead and implement.
Alright, so now that we understood this, then we might think that we have done everything perfectly.
But actually I want to show you what will happen if we were to pass in here a string besides an integer and run our program.
So if we were to run that, then you can see that we are screwing things up here.
Because this function for example, things that he chose to print the string three times because you'll see we have 1000 multiply by three that is being returned in here.
So it shows us 1000 once, 1000 twice, and then one more time.
So what that means, it means that we have to validate the datatypes of the values that we are passing in.
So there are a couple of ways to achieve this.
And one way is by using typing's in the parameters that you're declaring inside here, so a great starter will be, for example, to declare that a name must be a string.
Now, let me first take this back and change those to integer and then go here and design those parameters.
So in order to specify a typing, then you should go ahead and create a colon sign, followed by the type of the datatype that you expect to receive here.
So if I was to pass in here, only the object reference to the class of str, then it will mean that it will have to accept strings only.
And I can prove that by changing this to an integer.
And you're going to see that we have a complaint here that says expected type str God int instead.
And that is perfect.
So now that we have done this, then I'm going to do the same for the price itself.
And the price, we could actually do the same thing with it by passing in float.
Now when we pass float, it is okay to also pass integers.
And that is something very unique with floats and integers together.
So that is okay to use the typing of float.
And for the quantity, we don't need to specify a typing, because the fact that we passed a default value of integer already marked these parameter as to be integer always.
So that is why, for example, if I was to leave this as it is and change the quantity to a string, then you're gonna see that it is going to complain, because the default value is already an integer.
So it expects for an integer.
All right, so those things are actually great setups to make our init function more powerful.
But we might still want to validate the received values in the following way.
So say that you never want to receive a negative number of quantity.
And you'll never want to receive a negative number of price.
So that is something that you cannot achieve by the typing's in here.
But there is actually a great way to work this around.
And that will be by using assert statements.
Now assert is a statement keyword that is used to check if there is a match between what is happening to your expectations.
So let's see how we can get work with assert.
So I'm actually going to delete this from here.
And I'm going to organize our init method a little bit, I'm going to say here a comment and I will say assign to self object.
And I will say up top something like run validations to the received arguments.
Alright, so now it is a great idea to validate that the price and quantity are both greater than or equal to zero, because we probably don't want to handle with those when they are negative numbers and we want to crash the problem.
So we could say assert and pay attention that I use it as a statement not a built in function or something like that.
And I can say here, price is greater than or equal to zero.
Now once I said this, then I can also do the same for quantity, actually.
So let me do that quickly.
By this way, and then once we have this, then I can actually go ahead and run our program.
And you will see that I will not receive any arrows.
But the second that I change this quantity to negative one, for example, and this one being negative three, then I will have some arrows that will say, assertion error.
Now you can see that the fact that we see here, assertion error is quite a general exception, that doesn't mean anything.
Now what is so beautiful with a third, you can add your own exception messages right near of it as a second argument.
So let's go up top here and go back to those two lines.
So the first argument that is passed to the statement is the statement that we'd like to check.
But if we were to say here comma, and use a string to say, actually formatted string, and I can say price and then refer to the value of it is not greater than zero like that.
They can add an explanation mark here, and they can use the same thing.
Copy that with a comma and paste this in here.
And changed this quantity and then refer to the value of it and say that it is not equal to i mean greater than or equal to zero.
So we need to be actually changed to greater than or equal to, like that.
And same goes for here, and I have some a space here that will be deleted.
All right, so now if I was to execute our program, then you can see that we receive assertion error quantity minus one is not greater or equal than zero.
So I should delete this, then here for that, and now it is perfect.
So now we understand that using the assert statement could allow us to validate the arguments that we receive.
And also, it allows us to catch up the bugs as soon as possible, before going forward with the rest of the actions that we'd like to take within this program.
So let me actually change those back to valid values like that.
And that is perfect.
Alright, so until this point, we learned about how to work with the constructor.
And we also learned about how to assign different attributes to instances that are going to be unique per instance, which means that you can go ahead and create as much as instances as you want, and you have the control to pass whatever values you would like to for the name, price and quantity.
Now consider a situation that you'll want to make use of an attribute that is going to be global, or across all the instances now are a good candidate, for example of this could be a situation that you will want to apply a sale on your shop.
So this means that you want to go ahead and having the control of applying some discount for each one of the items.
And that is a good candidate for creating an attribute that is going to be shared across all the instances.
Now we call those kinds of attributes, class attributes, and the kinds of attributes that we have learned that till this point is actually called in a full name instance attributes.
So about instance attributes, we know everything, and we learned how to work with it, but we did not work it with the other kind of the attributes, which we will do in this tutorial, which is called again, a class attribute.
So a class attribute is an attribute that is going to be belong to the class itself.
But however, you can also access this attribute from the instance level as well.
Let's go ahead and see a good candidate for a class attribute that you want to go ahead and create it.
So that's going to be going to our class here.
And just in the first line inside our class, I can go ahead and create a class attribute.
So let's go ahead and create an attribute like pay rate equals to 0.8.
And the reason that I'm doing this is because I said that there is going to be 20% of discount.
So I probably want to store an attribute that will describe how much I still need to pay.
So I will say here, the pay grade after 20% discount like that.
Okay, so now that we have created this, then let's see what are the ways that we can access this attribute.
Now, if I was to go down and actually deleting one of those, and say something inside this print line that will look like the following.
So I will try to access to the reference of the class itself.
So I'm not going to create an instance like that, besides, I'm just going to bring in the reference to the class level itself.
And I'm going to try to access this attribute by saying the PE underscore rate.
Now if I was to run that, then you're going to see that as expected, we see this class attribute, because that is a way that you can access those class attributes.
Now this might be confusing, but I said a minute ago that you can also access those class attributes from the instance level.
Well, let's see if that is true.
So if I was to duplicate those lines twice, by using the shortcut of Ctrl D, then let's go ahead and change those to item one, and this one to item two.
Now see how I try to access the pay rate attribute from the instance, although we don't have such an instance attribute.
Now if I was to run that, then you're going to see that we still have the access to see that class attribute.
Well, that might be confusing.
And that might be hard to understand why that is happening.
Well, there is actually something that we need to understand when we work with instances in Python.
So when we have an instance on our hand, then At first this instance tries to bring the attribute from the instance level at first stage, but if it doesn't find it there, then it is going to try to bring that attribute from the class level.
So what that means it means that item one did something in here and say to itself, okay, so I don't have this attribute right in here because that is just not an attribute that assigned to me.
So I'm going to try to search that from the instance level and then I'm going to find it and if sprinted back.
So that is exactly what is happening here.
Item one and item two are instances that could not find the pay rate attribute on the instance level.
So both of them went ahead and try to bring this attribute from the class level.
And since it really exists in the class level, then we were able to access those.
Now to even give you a better idea of what is going on here.
Then I'm going to do one more additional thing.
Now I will delete these first print line.
And I will go ahead and delete those attributes from here as well.
Now there is a built in magic attribute, not a magic method, that you can go ahead and see all the attributes that are belonging to that specific object.
And that is achievable by using this double underscore vi CT double underscore like that.
So this will go ahead and try to bring you all the attributes that are belonging to the object that you apply this attribute and want to see its content.
So I will go ahead and copy this one and paste this in for the instance level as well.
So this will give me all the attributes for class level.
And the second line will do this for the instance level.
Alright, and if I was to run that, then let's explore the results for a second.
Now we can see that at the first line, we see this pay rate attribute.
But in the second line, we never see it, we see name, price and quantity.
And you can also pay attention that this magic attribute is actually responsible to take all the attributes and convert this to a dictionary.
And that is from where the dict keyword coming from it is just a shortened version of a dictionary.
So that is a very useful magic attribute that you can go ahead and use if you just want to see temporarily for debugging reasons, all the attributes that are belonging to some object.
Alright, so now that we understood this, then let's take it to a real life example and come up with a method that will go ahead and apply a discount on our items price.
So that will be by creating a method that will we belong to each of our instances in that means that we can go ahead and come up with a method that we could name apply discount.
So let's go ahead and start working on this.
So I'm going to say def apply, discount and pay attention that I'm using a new method inside a class here.
So right inside of this, then add first we need to figure out how we are going to override an attribute that is belonging to an instance.
And we already know that we can do that with the self keyword.
So it will be self dot price.
And that will be equal to self dot price, meaning the older value of this attribute multiplied by the pay rate.
Now you might expect that we could access this directly like that.
But if you remember, that is actually belonging to the item class itself.
Now this might be confusing, because this method already inside this class.
So you might think already that you can access it directly by saying pay rate, because it is already inside the class.
But that is actually not going to work.
Because you can either access it from the class level or the instance level as we understood previously.
So we can go ahead and say item dot pay rate like that.
And there you have a metal that can go ahead and basically override the price attribute for one of your items.
Now to show you that this works, then I can only use one instance for now.
And I can go ahead and call this method by saying apply discount.
And I can also now try to print the attribute of price for this item one, and we should see ad right.
So if we were to run that, then you're going to see that we are going to receive at point zero as expected.
Now we should not forget the option that you might also want to have a different discount amount for a specific item.
So say that one day you will have 20 items or in only for the laptop, you will want to have a 30% discount.
But it is going to be a bad idea changing the class attribute to 0.7 because it will affect all the items that you have right now on your hand.
So what you can do instead is you can assign this attribute directly to one of the instances that you would like to have a different discount amount for so let's go ahead and see an example for this.
So I will allow myself to bring back the item or laptop and then what I can do to apply a 30% discount for this item is assigning the exact same attribute to the instance.
So I can go ahead and use a item to that pay on the score rate is equal to 0.7.
Now what will happen here is that for item two, it will find the attribute of pay rate in the instance level.
So it does not really have to go ahead to the class level and bring back the value of pay rate because Add first look, it is going to find it in the instance level.
But for item one, it is different, it is still going to read from the item level, which is going to be 0.8.
So now, if we were to try to use item two dot apply discount, and as well as printing the price now, then let's see what will happen.
So I will uncomment this line to not see this screen for now.
And I will go ahead and execute our program.
Now you can see that we still, however, receive 800.
And what this means this means that the discount that has been applied is still a 20%.
And where this is coming from, well, this is coming from this method here that no matter what we try to pull the pay rate from the class level.
So a best practice here will be to change these two cells.
And that way, if we override the pay rate for the instance level, then it is going to read from the instance level.
But for item one, if we try to access the pay rate from the instance level, then this is still great, because we did not assign a specific pay rate for item one.
So it is going to pull that from the class level.
Now if we were to try to run that, then you're gonna see now that we have expected results.
And if we were to also uncomment, the first print line for the item one and rerun our program, then you can see that for item one, we had 20% discount.
And for item two, we had 30% discount.
So when it comes to accessing class attributes, you might want to reconsider how you want to access them when you will come up with some methods.
And specifically for creating a method like apply discount, it is a great idea to access it from the instance level.
So you also allow the option of using a pay rate that is assigned to the instance level.
Okay, so now that we understood completely about the differences between a class to an instance attribute, let's jump ahead to the next topic.
Now you'll see that I have deleted those print lines that I have down below.
And I came up with five instances that I have created here.
So you might also want to create those five instances immediately.
So that is why I will recommend you to go here to my repository, accessing these class attributes directory, and then code snippets, and then go ahead and copy the code from these five underscore items.py file.
Okay, so considering a situation that your shop is going to be larger in the future, meaning that you are going to have more items, then the more items that you're going to have the more filtration like things that you want to do in the future.
But what is problematic currently with our class is the fact that we don't have any resource where we can just access all the items that we have in our shop right now.
Now, it could have been nicer if we could somehow have a list with all the item instances that have been created until this point.
But currently, there is not an approach that will give us a list with five elements where each element will represent an instance of a class.
So in order to come up with such a design, then here is a wonderful candidate for creating a class attribute that we could name all.
And once we do this, then we're going to see how we are going to add our instances to that list.
So I will go ahead and start by going here and use in all attributes.
So it will be all equals to an empty list.
Now we need to figure out how we are going to add our instances for each time that we are going to go ahead and create an instance.
Now if you remember, the double underscore init method is being called immediately once the instance has been graded.
So it might be a wonderful idea going down below inside this double underscore init method and use a code that will be responsible to append to that list every time that we create an instance and that will be as easy as saying something like the following.
So first, you could pay attention that I actually wrote some commands in this double underscore init function like run validations and assigned to save object.
So it might be a great idea to start with a comment here that will say actions to execute just to really have a great separation between the different things that we are doing.
So now inside here I can say item dot all and you can see that I use the class object first and then that is a list so I can use dot append and then I will just append the self object.
Now we know that self is actually the instance itself every time that it is being created.
So once we go ahead and launch such a command inside the unit Then for each instance, that is going to be created, this all list is going to be filled with our instances.
Now to show you that I can jump line after we create the instances, and we can say print item that all.
And now if I was to run our program, then you're going to see that we're going to have a list with five instances.
If I was to scroll right a bit, then you can see that I have exactly five elements.
And that is perfect.
Now that's going to be extremely useful if you want to do something with only one of the attributes of your instances.
So say that you'd like to print all the names for all of your instances, then you can use easily a for loop to achieve such a task.
So we can go ahead and say, for instance, in item dot all and you can say print instance, dot name.
And once we come up with this, then you can see that we have all the names for all the instances that we have graded.
So that is going to be useful here and there, especially if you know how to use the filter function, for example, to apply some special things on some of the instances that are matching your criteria.
Alright, so now that we understood this, then let's also take care of one problem that we saw previously.
Now if I was to use a Ctrl, D couple of times, and still use this print item dot all now you could see that the way that the object is being represented is not too friendly.
Now, it could have been nicer if we could somehow change the way that the object is being represented in this list here.
Now, there is actually a way to achieve this by using a magic method inside our class.
Now there is a magic method that is called double underscore our EPR.
And our EPR stands for representing your objects.
So that is why you can actually go ahead and use this magic method.
And then you will have the control to display your objects when you are printing them in the console.
Now, I actually recommend watching a video that compares between a metal that is similar to it, which is called double underscore str.
And you can take a look in the description of this entire series to actually watch the video that I'm talking about.
Alright, so let's go ahead and use the RPM method to understand how this is going to work.
So I'm going to say def inside our class.
And I'm going to use double underscore r e, PR double underscore and as expected, it will receive the self.
Now what we can do now is returning a string that will be responsible to represent this object.
Now obviously, we don't want to use something that is not unique for each of the instances.
Because say that I was to use now return items, something like that, and run our program, then you can see that I'm going to receive a list with this string five times.
But it is going to be hard to identify which instance represents each string here.
So it could be helpful if we were to return a string that could be unique.
So I'm going to close the console here and go ahead here and use a formatted string.
And in order to make this unique, it is a best practice to represent it exactly like we create the instance like that.
So what I'm going to do here is living the item and use a brackets opener and the closure.
And then I'm going to make the return string here as much as equal as possible to the way that we create those instances.
So I will start by typing here single quotes to escape from the double quotes that are coming from here.
And I'm going to refer to the value of name by using self dot name.
And then I will leave my single quotes.
And I will use a comma like that.
And then I will go ahead and refer to the value of our price.
I will use one more comma, and I will say self dot quantity.
Now if we were to execute our program again, then you can see that now we receive a list that is way more friendly than what we have seen previously.
And you can also see that this first element, for example, is quite equivalent to this line here.
Now you might be curious why I worked so hard to return the representative version of our objects the same way that we create them.
So that is just the best practice according to pythons documentations because it will help us to create instances immediately by only the effort of copying and pasting these To the Python console.
So if you think about it right now, if you open a Python console, and you'll import this class, then it will be as easy as grabbing this and pasting to the Python console.
And then you will have an instance being graded.
So that is the single reason that I have came up with this approach.
And also for sure, I just wanted to return a unique string that will really represent our instance.
And you can see that it is very easy to identify the instances of our class with this list.
And with this approach, alright, so until this point, we understood how we can change the way that we represent our objects.
And we also understood how we can access to all of our instances by this class attribute that we intentionally named all.
Now in this part, we are going to take a look to solve one more problem that we have in terms of best practices when we are going to extend this application and add more features.
Now you can see that until this point, we maintain our data as code in this main.py file by only instantiating.
Those five items.
Now when we will look to extend this application and add some more futures, then we might have a harder life to add those features because the actual data and the code are maintained in the same location, meaning in the same main.py file.
Now you could think about creating a database that will maintain this information.
But I want to keep things more simple for the purposes of this tutorial.
And that is why I'm going to use something that is called CSV that you might have heard of.
csv stands for comma separated values.
So this means that you could go ahead and use a CSV file, and you could store your values as comma separated where each line will represent a single structured data in CSV is a great option here because it allows the data to be saved in a table structured format.
Alright, so let's go ahead and create a CSV file.
And I will actually go ahead and name these items, dot c is V, like that, and I will go ahead and paste in some CSV content that will be responsible at the end of the day represent the same data that we look to have here.
So you can see that at the first line, I have name, price and quantity.
And you can see that those are comma separated.
So those represents the columns that we're going to have as the data that we are going to maintain.
And in the second line and further, we are going to have some data that will represent the actual data that we look to maintain.
So if we were to now split the panes, then you can see that those are quite equivalent.
And now we should only look for a way to read the CSV file and actually instantiate those objects.
Now we can see that I have a suggestion by pi charm to install a plugin that will support CSV files.
So I'm going to just click on that and install those plugins.
And you can see that I will have a CSV reader here.
And we will see if we will be able to see this data in a table, which will be a lot nicer.
So let's go ahead and install this.
And now you can see that I have some more options that I can actually go ahead and use from here, I know that this is quite small, but actually you have some tabs that you can go ahead and click on them.
And if I was to click on table editor, and actually give this file more focus, then you can see that I actually have the best way to read this data.
Now, you can see that I have my columns, you can see that I have my rows.
And that is quite nice.
Now I can really go ahead and visualize my data more nicer.
And it's just more common way to maintain your data.
Okay, so now that we understood how CSV files are working, let's go ahead and read our CSV files and instantiate the instances in a generic way.
So it makes sense to delete those five lines.
And I'm going to use those lines below the apply discount and use a metal that I could name instantiate from CSV like that.
Now, you can see that this one is also going to receive itself because if you remember I said that in each metal that we will design, we need to receive at least one parameter that will be passed as the instance itself, because this is how Python op works.
Now, the problem is, we are not going to have any instances on our hand to call this method from the instance because this method is actually designed for instantiating the object itself.
So this means that this method could not be called from an instance.
So the way that this is going to be solved is by converting this method into a class method.
Now, a class method is a method that could be accessed in the following way.
So I will use this line tool, delete that, and it could be accessed from the class level only.
So this will look like item dot instantiate from CSV, and then in here, we will probably pass our CSV file.
So this method should take full responsibility to instantiate those objects for us.
So now that we understood this, let's go ahead and see how we can create a class method.
So for sure, we need to delete the self.
And I know that we have arrows, but we are going to solve each one of those just in a second.
Now in order to convert this to a class method, we need to use a decorator that will be responsible to convert this method into a class method.
Now decorators in Python is just a quick way to change the behavior of the functions that we will write by basically calling them just before the line that we create our function.
So we could use the Add sign and use the class method in here and then this instantiate from CSV method will be a class method.
Alright, so now that we understood this, then we should also understand one more piece of information before we go ahead and design this method.
Now I want to show you what will happen if I was to delete the entire name and try to recreate this function here.
And I will just say instantiate from CSV again, Now pay attention what will happen if I was to open up and close the parentheses, now we can see that it still receives a parameter, but this time, it is named CLS.
Now, what is going on here, and the thing that is going on here is the fact that when we call our class methods, then the class object itself is passed as the first argument always in the background.
So it is a bit alike the instance where it is also passed as the first argument.
But this time, when we call a class method in this approach, then the class reference must be passed as a first argument.
So that is why you should still receive at least one parameter, but we probably understand that we could not name this self, because that is just going to be too much confusing.
Okay, so now let's go ahead and write some code to read the CSV file and instantiate some objects.
Now, I'm going to go up top first, and I'm going to import a library that is called CSV.
So I will go here and I will use an import CSV line, because that will be the library that will take full responsibility to read the CSV file.
And then we will see how we can instantiate some objects.
All right, so now I can go ahead and use a context manager to read the items dot CSV file.
Now both of those files are located in the same location.
So I can just directly say, Wait, open items dot CSV, and the permission that I will be passing here could be hour because we only look to read this.
And I will say as f like that.
Now inside this open, I will go ahead and use some metadata to directly read the CSV, which at the end of the day will be responsible to convert this into a Python dictionary.
So I will say reader is equal to CSV, dot d ICT reader like that.
And I will pass in the content of our file like that.
Now, this method should go ahead and read our content as a list of dictionaries.
But at the end of the day, we should also go ahead and convert this into a list.
So I will go ahead and create one more variable that will be equal to items.
And I will just convert the reader into a list.
And that's it.
And now that we have completed the actions that we want to complete by reading the CSV file, let's go ahead and use a Shift Tab to indent out.
And now before we go ahead and instantiate some objects, let's go ahead and see the results of iterating over the items list.
Now I will go ahead and use for item in items.
And then I will just use print items to show you the behavior of that.
And excuse me, it should be item.
All right, so now that we understood this, then let's go ahead and see what we have in those lines.
So after our class definition, we only go ahead and call this item dot instantiate from CSV method.
So if I was to run that, then you can see that I received some dictionaries in separate lines.
And that is because I iterate over a list of dictionaries in Here, and that is just perfect.
All right, so the only thing that we miss right now is creating instances.
Now besides printing those, then we could now say something like item and open up and close parentheses.
And this will be enough to instantiate our instances.
Now I can go ahead and pass my arguments in here by basically reading the keys from a dictionary.
So I can say name is equal to item dot get, and that will receive name.
And now I can add a comma and duplicate this line twice, and change those accordingly.
So this will be price.
And this will be quantity.
And now I need to replace my key names.
So it will be price here, and then quantity right there.
And now let's go ahead and see what will happen if I was to call this method.
And as well as calling the attribute of item dot all because this one stores all the instances inside the list.
Now if I was to go ahead and run it, then you can see that I have some arrows.
Now you'll see that the arrows are related to the price.
And you can see that we receive is not greater than or equal to zero.
Now let's go ahead and fix this very quickly.
So in the items dot CSV, you can see that those are actually integers that are greater than zero.
So the problem is probably the fact that those are passed as strings.
So we need to go ahead and pass those as integers.
So I'm going to convert those into int, like that.
And now let's go ahead and see if we will have any problems as I expect to have any problem, because the quantity should complain about the same thing.
And you can see that this is exactly what is going on here.
So we can use the same for quantity like that, and work with that.
And you can see that now we see our instances perfectly.
Now I want to show one more problem that we could have in the future and we should avoid now.
So those three lines are going to work with this structural of Aveda.
But if I was to change the price of our keyboard to something like 74 dot 90, something like that, and re execute our file, then you can see that we will receive some problems.
So we need to convert the price not to an integer but to a float like that.
And that is the only way to get over this because we don't want to convert the price to an industrial directly because it could be float.
So now we could go ahead and execute and you can see that now it works perfectly, although we see the prices as 100.0 but that is something that we will look into it in the future but for now it works perfect.
And now we are ready to jump on to our next topic.
Okay, so now that we completely understood the class methods, let's go ahead and also understand what static methods are now established metal show do some work for you, that has some logical connection to a class.
So for example, if you want to check if a number is an integer or a float, then this is a good candidate for creating a static method, because this has some connection to the class that we work with.
So it makes sense to check if a price of an item has a decimal point and by saying has a decimal point, I obviously count out those that are point zero.
Now to be honest, static in class methods could look very alike to you.
But we will explain the main differences very soon.
Okay, so I will use those lines to create our first static method.
Now let's go ahead and use the def keyword.
And we will name this method is underscore integer because we said that we'd like to write a static method that will check if a received number is an integer or not.
Now if I was to open up and close parentheses, this would obviously receive itself now I want you to take a closer look what will happen if I was to change this method into being a static method and the approach is going to be pretty much the same like we have done with the class method, we will use a decorator that is called static method and this will be responsible to the conversion.
So I will go ahead and use this line and I will say add static method like that.
Now pay attention how the received parameter turned into the regular orange color that we are familiar because that is just a regular parameter that we receive.
Now this means that this static methods are never sending in the background, the instance as As a first argument and that is unlike the class methods, the class methods are sending the class reference as a first argument.
And that is why we had to receive the CLS.
And that is why it is intentionally colored with purple.
But with static methods, we never send the object as the first argument.
So that is why we should relate to the static method, like a regular function that just receives parameters like we are familiar with isolated functions.
Now I will go deeper on this just in a few minutes.
But let's go ahead and finish up our static method first.
So this should receive num as a one parameter because we should receive at least something to check if it is an integer or not.
All right, so now that we are inside this method, then I can go ahead and use a couple of statements to check if the received argument is an integer or mark.
Now if you remember, we said that we'd like to, we will count out the floats that are decimal that are point zero, okay? Meaning, for example, 5.0 10.0, and so on.
Alright, so now that we understood this, let's go ahead and use an if statement view.
So if in we will call the built in function that is called is instance.
And this should receive two arguments.
And we can understand what this function is going to do for us, it is going to check if the received parameter is an instance of a float or an integer.
So we will pass in as the first argument the num and as the second argument, the float without calling those parentheses, so only the reference to the float keyword.
So this conditional should go ahead and check if the num is a folding number or not.
Now inside this if statement, I will say return num.is integer, so by saying.is integer, then I basically say count out the floats that are decimal that are point zero.
So this means that if I was to pass in here a number like 10.0, then this will return false, but remember that this will enter here because he thinks it is a flaw because it is represented in that way.
And so the East amisco interview should check if the point is zero, and true return false accordingly.
Now, I will also use an else if statement here to basically check if it is integer by itself.
So I will say l E is instance num, and check if it is an instance of an integer, then I will just return true.
And if it is just something else, then I will just say return false like that.
So now that we have designed this method, then let's take a look how we can call it.
So now I will just remove this and this, I'm not actually going to instantiate anything, I'm just going to show you how you can access to the static method.
So I will just call this item.is interview and I will just pass in a number that I will like to check if it is an interview or not.
Now for sure, we'd like to print this.
So we will see the result.
Now let's go ahead and pass in seven.
So, you can see that we receive through now if I was to pass in 7.5 then I would receive false and what is happening in the background it is the fact that it enters here, but it sees that it is not an integer so it returns false.
But if I was to change this to 7.0 then this show Sorry about that, this should still return true because what is happening it is entering inside this conditional and then it checks if it is an integer, but we said that this method counts out the floats that are point zero.
So it returns true still so that is a perfect design Alright.
So I have came up with a new file, which I will just explain here when to use a class method and when to use a static method.
So we can completely understand the differences between those because I remember myself I had a very tough time to understand why I need this and why I need the other one.
So that will be the main question that I will be answering in this Python file.
So don't feel like you have to copy and paste the code following along what I am explaining here by listening should be enough Alright.
So in this file, I will just go ahead and create this class item that we have right and i will use pass to not receive arrows.
Now when we will use a static method.
So we will use a static method when we want to do something that should not be unique per instance.
Exactly like we have I have done previously.
So his interview is a method that is just going to be responsible to check if a number is integer or not.
So that is why I could allow myself to include this under the item, just like I could use this def as an isolated function right above the class.
And that was also okay.
But I prefer to not do that, because although this is a metal that has nothing to do with instance, that is somehow related to the item class.
So that is the reason you want to create this as a static method, like we have designed previously.
And the reason that you would like to create a class method is for instantiating instances from some structured data that you own.
So exactly like we have done, we have created a class metal that was responsible to read the CSV file and creating some instances.
So as I wrote here, those are used to manipulate different structures of data to instantiate objects, like we have done with the CSV file, we could also use a class method like instantiate from a JSON file, or from a yamo file, those just are different ways to maintain data in the best practice way in that is the code that you will look to include inside your class methods.
That is why they should be existing in any class, especially if you look to instantiate hundreds of objects on your programs.
So it is a great idea to have at least one class method, like we have done in the item class.
Now the only main difference between a class method and to a static method is the fact that static methods are not passing the object reference as the first argument in the background, it is noticeable from the fact that we don't have a special highlight purple, in my case for the first parameter.
So if you remember, if I was to go ahead and use here a first fundamental like num, then you will see that this is the first parameter that is colored with orange, because that is a regular parameter.
But that is purple, because this is a mandatory parameter that we should receive, because what I have just explained, so those are the main differences between a static method to a class metal.
Now if you remember, I intentionally said that the class methods and the static methods could only be called from the class level.
But however, those also could be called from instances.
So as you can see, I can actually instantiate an object and call the integer in as well as the instantiate from something can just pass in here in number like five and I will not receive any arrows.
And if I was to run the helper, then you can see that I don't have an error.
Now, I'm going to be honest with you, I never saw a reason to call a static method, or a class method from the instance level.
But that is just an option that exists, I know that it is very, very confusing.
But that is something you are rarely going to see.
And like I said, I never saw a great reason to call a static method or to call a class method from an instance.
So my recommendation to not confuse you is just not going with calling those from the instance level.
All right, so I minimize the code that we wrote so far in the class item.
Now in order to start solving the problems that we will solve in this episode, then I'm going to create here two instances.
So I will say form one is equal to an item.
And let's give it a name like JC phone v 10.
And then just use a random price and quantity.
And I will copy and paste this and use another variable like phone two in there, we'll increase the version by 10.
And let's say that this price for the phone two should be 700.
All right, so now that we have created two instances of a phone, pay attention that those two items are phones.
So we could think about some attributes that could represent phones in real life.
Think about an attribute like broken phones, because we could have some phones that could have been broken.
And so we cannot really mark it as a phone that we could really sell.
So this means that we could go ahead and say phone one that broken phones, let's say that we have unfortunately one broken phone on our hand right now.
So I will go ahead and assign the same attribute for our second phone.
And now that we have came up with this realistic attribute, then the next step that we might think about, could be creating a method that will go ahead and calculate the phones that are actually not broken, meaning subtracting the quantity by the broken phones amount because this is totally making sense.
And then we can understand what are the phones that we could go actually and sell them in the future.
But we have couple of problems creating a method that will go ahead and calculate Such a thing because we cannot we'll go ahead inside our item.
And do this smooth enough, because we don't really have the broken phones attribute assigned to self.
And we cannot actually go ahead and create this method inside this item class, because this method is not going to be useful for other hundreds of items that you will go ahead and create.
These just represent a phone kind of item.
So in order to solve this problem in terms of best practices in object oriented programming, then we could go ahead and create a separate class that will inherit the functionalities that the item class brings with it.
And that is exactly where we could benefit from inheritance.
And we could go ahead and create a separate class that we call name phone.
And then this phone class will inherit all the methods in all the attributes that item class has.
So let's go ahead and simulate that.
So I'm not going to delete the instances yet, but I'm going to go ahead here and create a class that I will name it phone.
Now pay attention that I will not use a semicolon and I will use those brackets and I will specify what class I would like to inherit from.
So I will inherit from item.
And then I will just use a pass temporarily because I will not like to use additional functionality right now inside this class.
Okay, so now that we have created this class, then let's go ahead and first execute our program, where at the first stage, the instances will be item instances.
And this should not have any problems because we know that we can create those item instances and we will not receive any arrows.
But if we were to change those to phone like that, then we should still not receive any arrows.
And that's just a basic way that you could use inheritance in order to represent different kinds of objects when you want to do that.
Now, this could also be applied to other real estate programs that you want to come up with them and buy your own.
But in my case, it totally makes sense to create some classes where each class will represent a kind of an item.
And then I could go ahead and inherit from the item class in each of the child classes that I will go ahead and create in the future, I could also use another class for a kind of item like laptop, and then I could go ahead and use the separated functionality for that.
Now when we talk about classes that we inherit from, then those are considered to be called parent classes.
And when we use multiple classes that inherits from that parent class, then those are considered to be called child classes.
So those are just terms that you want to be familiar with when we talk about object oriented programming.
And from here, we will see more advanced things that you can go ahead and do with your child classes.
Alright, so now let's go ahead and understand some more advanced things about inheritance.
Now to help this series, we learned that it is not a great idea to assign attributes manually, once we create those instances.
And the better way to do that is actually going ahead and creating our constructor and pass the value that we'd like to immediately in the instance creation exactly like here.
So in order to solve this, then we're going to need to figure out how we are going to do that, because creating the constructor inside this phone class is going to will be tricky, because we don't really want to break the logic that the development score in it brings with the parent class.
But we'd also like to pass in an additional attribute like broken phones, that we will go ahead and deal with that attribute and assign it to the self object exactly like we have done in the second part of our series.
So in order to keep the logic the same for this child class, and as well as received some more attributes.
Then for now, I am going to go ahead and copy the code in our constructor and just paste this in right inside our phone class.
And that's making sense temporarily, because we received the exact same parameters that we should receive when we instantiate an instance.
And we also have now the control to receive some more parameters, like we want to do with the broken phones.
So let's go ahead here and say broken.
So I will just scroll here, and I will say broken phones is equal to zero.
Let's also receive a default value for that.
And let's go ahead and type in a validation for the broken phones.
So I will allow myself to just copy that and paste this in.
And we'll use assert quantity I mean broken phones is greater than or equal to zero and I will change this to broken phone Like that, actually broken phones, and this should be exactly like we have done with the quantity.
And now let's go ahead to the section of assigned to self object.
And we can use self dot broken phones is equal to broken phones like that.
And you can see that here we have actions to execute.
Now it could have been nicer if we could also create a class attribute for the phone class.
And that will mean that we could go ahead here and say all is equal to an empty list, then we could go ahead and use a form dot all dot append, like that.
And now if I was to go ahead and run this program, then you can see that I will not receive any arrows.
Now to check that this works, then I'm also going to pass in here one.
And I'm going to do the same here as well.
And I'm going to remove those.
All right, I'm going to remove the hardcoded attributes, and the program still works.
Now I'd also like to test this by applying one of the methods that we have wrote so far in that will be obviously a method that I like to use from the parent class, because we inherit those methods.
So I can go ahead and use phone one dot, calculate total price, and it makes sense to print this.
So I will go ahead and print that.
And you can see that print phone one dot calculate total price.
And now if I was to run that, then you can see that I received a result.
So this means that I don't have any arrows.
Now I'm not sure if you pay attention to this.
But if I was to scroll up a bit, then you're gonna see that the constructor in the child class is complaining about something.
And let's Hover the mouse and see what is the warning.
Now you can see that it says to us call to double underscore in it of super class is missed.
And what that means, it means that when we initialize the double underscore init method inside the child class, then Python expects for some function to be called intentionally.
Now this function is named super.
And what super allows us to do, it allows us to have full access to all the attributes of the parent class.
And by using the super function, we don't really need to hard code in the attribute assignment, like we have done with the name, price and quantity.
And as well as for the other validations that we have executed every time that we want to come up with a child class.
Now imagine how hard that is going to be.
If for each of the child classes that we will create in the future, we will have to go through copying and pasting assert price and quantity.
And as well as doing the assigned to self object thing in those three lines.
That is going to be a lot of duplication of code.
Now to save us that time, that is exactly why we needed to use the super function, the super function will allow us to have the attributes access from the parent classes.
And therefore, we will be able to fully implement the best practices in inheritance when it comes to object oriented programs.
Now again, this program works because we assign the attributes of name, price and quantity for the sales object in the trial class.
But if I was to remove those three lines, and as well as those two lines, now those lines are happen to be the lines that I have copied and pasted and try to run this program, then you can see that we receive attribute error phone object has no attribute price, and pay attention from what line it comes from.
It comes from line 21 from the item class, because it thinks that it has the attribute of price.
But we never have the price attribute in the phone level.
Because we just deleted the self dot price is equal to price.
And that's why now we have some problems.
And we are going to replace all the lines that we have deleted with the following thing that I'm going to just execute now.
So I'm going to go to the first line of our constructor, and I'm going to say call to Super function to have access to all attributes slash methods.
And then I'm going to say super, net I'm going to open up and close parentheses.
And then I'm going to use the double underscore init method like that.
Now you can see that the second that I have completed this, then there are no more warnings about the constructor in this child class.
And you can also see that these double underscore init method expects for some special arguments.
Now those special arguments obviously coming from the item class that we inherit from.
So if I was to pass in here, name and also price and also quantity Then this should be fine.
Now, you can also ask yourself isn't the duplication of code, the fact that we also copied and pasted the parameters that we receive in the child class.
And yeah, that is a perfect question.
That is something that could be solved by something more advanced.
If you heard about keyword arguments, that is something that we can solve it with that way.
And then we will not have to duplicate the parameters that will receive for the constructor, that is not something that I'm going to show for that stage, I'm going to stick with it.
And I'm just going to leave it as it is now calling the super function.
And as well as the init method right after it should be responsible to have the same behavior like we had previously.
So we should still see 2500 for this print line, and we should not see any arrows.
And if I was to run the program, then you can see that we receive the expected result.
So that way, we implement the best practices of object oriented programming for each child class that we use a separated constructor, we also are going to need to call the super function in order to have fully access for all the attributes and methods that are coming from the class that we inherit from.
Alright, so I minimize the code for our classes.
And I also left with one instance of foam here.
Now I want to show you the results of the following things.
So I will say print, and I will see what is the list of all in the item class is going to bring us back.
So I'm going to say item dot all.
And then I'm also going to say phone that all if you remember, we implemented this class attribute as well here.
So I will minimize the code back.
And then I will run our program.
Now you can see something very weird in here we see item.
And then we basically see the result of the array PR method that comes from the item class.
Now the reason that this happens, because we never implemented in our EPR method inside the form class.
So that's why we see this on generic result of item.
Now you can also pay attention that we only create an instance of the phone class.
So that's not so good that we see item in those outputs.
So what we call use, instead of hard coding in the name of the class in the rppr method inside the item class, then we go to access to the name of the class generically.
Now if I was to replace this with some special magic attribute that will be responsible to give me the name of the class, then this will be perfect.
So I'm going to delete that.
And I'm going to use curly brackets, and I'm going to say self, dot double underscore class, dot double underscore name.
So that is a generic way to access to the name of the class from the instance.
And by doing this, then besides receiving item, hard coded string, then I should receive the name of the class that I initialize from the very beginning.
So this should be phone, because that is the only single instance that I have right now.
And you can see that this is exactly the result that I'm receiving back.
So that is perfect.
Now I said earlier that by using the super function, then we basically have access to all the attributes and the methods that are coming from the class that we inherit from.
So what that means, it means that we will also have the access to the class attribute of all that is inside the item class.
And I'm talking about that attribute, right.
Now to show you that, then I'm going to open back the code from the form class.
And I'm going to remove the old attribute.
And I'm just going to do that right now.
And I'm also going to delete the actions to execute where I use form dot all dot append, because we no longer having the old attribute in the form class.
And if I was to remove those, and execute our program now, then you can see that I still receive the same result.
So that is a great idea removing the old attribute in the child class level, it is a great idea to only use the old attribute in the parent class, because by using the super function in the child class, we will have access to the old attribute.
So this means that if one day we'd like to have access to all the items instances that have been initialized, including the child classes, then accessing them from item dot all should also be enough.
Now you might be confused how this line is responsible to add this instance inside the all attribute that is happened to be a list.
And that's happening because by using the super function and as well as the in it, then we basically call the init method inside the parent class.
Now in the latest line inside this method, we also use item dot all dot append, which is also going to be accessible From the form class, so that's why calling the all class attribute from the item class is a better idea, because it will give us the complete picture.
Okay, so before diving into the topic of that episode, then we're going to need to do some code organization in here, because as you can see, for each of the child classes that we will go ahead and create in the future to extend this project, then we're going to need to do this in the main.py file, because that was the only single file that we were working with.
And now that our project grows, we need to start working with multiple files.
So that's why it may be working with a file that will represent the class of item and working with a separate file that will represent the foreign child class will be a better idea.
So we will have the main.py file dedicated for only creating instances of those classes.
So let's get started with this.
So I'm going to go to the project directory and create two Python files.
First one, we will name the item.pi.
The other one should be named phone.pi.
And I'm going to take the code from our item class.
And I'm just going to grab everything.
Why, while the following, and I'm going to cut this and then I'm going to paste this in inside of that.
Now pay attention that I use the CSV library.
So that's actually the location that I need this library.
So I'm going to just copy the import line.
And that should be good enough.
Now I'm going to do the same process for the form dot p y, I'm going to be copying this into the form.py file as well.
But now this file needs to import the item class because as you can see, we got an arrow here.
So we should say from item, import items like the following in the arrows should be gone.
And then in the main.py file, we can basically use this file to only instantiate instances, meaning creating data that will represent something to Python.
So this means that we can go ahead and import the class from the item file, we can do the same from the form file.
And then we can go ahead and do the stuff that we use to do so we can say item dot instantiate from CSV.
into verify that this works, we can also say print, and item dot all like that.
And if we want to run this file now to see that this works, then we can do that.
And you can see that everything works just as expected.
Now just a quick side note, I'm not going to rely too much on the child class that we have created in the latest episode, to show the problems that we're going to solve in that episode, I'm going to rely more on the item class so that it will be easier to follow.
And we will not complex things too much.
Now that doesn't mean that I do not recommend using child classes or something like that.
But it will be just easier to show you the cases that I'm going to show in the parent class.
So that's why For example, I deleted temporarily the input line of the form class.
And I just came up with a random item instance that name is my item in the price happened to be that number I did not specify quantity because we have a default value.
And now after this line, you can see that I override this attribute by the string of other items.
Now the expected result is not going to surprise anyone because we see at the right time when we print this attribute.
But we might want to ask ourselves is that the behavior that we always want? What if we want to restrict our users to change the attribute of name, once the name has been set up in the initialization, meaning in that line? Well, that's something that we might want to achieve for critical attributes like the name of your instances, and in our case, the name of our item.
So what we could do, we could actually go ahead and create read only so called attributes, meaning that we have only one opportunity to set the name of our item.
And then we cannot touch the value of that anymore.
So what that means it means that we can set up this in the initialization.
And we should have arrows if we try to override the value of that.
Now that's also known as encapsulation when we talk about the principles of object oriented programming, which I will be focusing more on the future episodes.
But now let's go ahead and see how we can come up with read only attributes how we can restrict our users to override the attributes after the initialization of our instances.
Okay, so on the left side we have the main.py file, and on the right side we have the item.py file which we are going to work on and inside the class I'm going to create our first read only attribute.
Now the way that you can start doing this is by first using a decorator and if you remember from the previous episodes decorators are like functions that you can pre execute before another function.
So I could go ahead and use the property decorator, and then go ahead and create a function.
And here is the exact location that I could set up the name of our read only attribute.
So for testing reasons, let's go ahead and call this read only name something in that time, all right, and then I will open up and close parentheses, and this will obviously receive self because it's going to be belong to each of the instances.
And now for testing purposes, let's only go ahead and return a random string like a three times.
Alright, and then now that we have done this, I can go to our main dot php file and try to access this property.
Now pay attention that I'm going to call those properties and not attributes.
So I'm going to go here, and I'm going to try to print item one, that name and now that I have wrote name, pay attention to the differences in this drop down for read only name, we receive a totally different icon here on the left side, which stands for a property where in here we see the flutter which stands for irregular field.
So if I was to try to print that and run our program, then obviously we will receive the expected result.
But if I was to try to set a new value, for the read only name, say that we want to change this to something like that, then you're going to see that Python is going to complain about this.
And even if we try to execute that, then we will end up with an exception that says attribute error can set attribute.
So that is how read only attributes, so called are working in Python, you can create those by using a property decorator before your functions and return whatever value you'd like to return.
Now the biggest challenge here is going to be converting the name attribute that we actually have, which is happened to be exactly here into obeying a read only attribute.
And that is going to be a little bit challenging.
But let's go ahead and start working on that.
So first things first, I'm going to delete those three lines, because we are not going to use this property anymore.
And I'm going to scroll up a bit and work underneath this constructor here.
So you might think that converting the name attribute into being read only meaning a property is as easy as doing something like first using the property decorator, and then go ahead and say def name, then receive self as the parameter.
And then use something like return self dot name, because we already have the self type name assigned to the self object.
But actually doing something like this is like saying to that class, hey, from now on, you're going to have a name attribute that is going to be rain only.
And that is straightforward the effect of the property decorator.
So I'm going to leave a comment here that is going to look like the following.
But if you remember, we try to set the self dot name into a new value inside our constructor.
So you can see that this action is illegal because we have a read only property here.
So when you go ahead and create a property with the name of basically name, then you are normally allowed to set this value anymore, you are only allowed to have access to see this back in whatever instance you will create.
So that is why if I was to hover my mouse here, then we're going to see an arrow that is saying property name cannot be saved.
So the pythonic way to doing this workaround to get over this is using one underscore before the name of our actual attribute name that we assign to the self object.
And by doing this, we earn a couple of things that are quite important.
So first, let me add here and underscore and just use something like that.
And then now I need to go to my property function, meaning the property attribute.
And I'm going to need to add here the double underscore as well.
Because First things first I go ahead and set up the value for my double underscore, excuse me single underscore name into being equal to the value of this parameter here.
And then I go ahead and use one more read only attribute that I intentionally give the name of name and I and then I return self dot underscore name.
Now I can go back to my main.py file and see what effects those lines are having right now on our instances.
So first, I can go ahead and set a name for my item.
And I can access to the name of this item by saying something like I didn't want that name.
So I don't really have to go ahead and use item one dot underscore name, because that is going to be a little bit ugly, and not convenient.
Because accessing attributes with always an underscore before is not nice for each of the instances that you look to access to the attributes.
Doing this one time inside the class is going to make it okay.
But trying to access those attributes outside of your class, meaning from the instances is not going to turn it into too much pretty.
So that is the best way to overcome such a thing.
And now if I was to try to print that, then, excuse me, let me fix that quickly by item one dot name, and run our program, then you can see that that is working.
And now let's go ahead and also see if we can set our name into being equal to another thing like that, see, if that works, I can see that I cannot set that attribute.
But how ever, I can still see these underscore name from the instance level.
And that is maybe something that you look to avoid, it could have been a lot nicer if we could somehow prevent totally the axis from this underscore naming here.
So the way that this is achievable, is by adding one more underscore to the attribute name.
Now, this might remind you something that is called private attribute.
If you're familiar with programming languages, like Java, or C sharp, that is pretty much the same behavior of using the private key word before your attributes in those kinds of programming languages, where it has different principles when it comes to object oriented programming.
So to sum up, if you add one more underscore to your attribute names, meaning you use double underscore, then you basically prevented the access to those attributes totally outside of the class.
So let's see a simulation of that.
So I'm going to minimize the terminal, and I'm going to go to my item.py file.
And besides using here, single underscore, I'm going to add one more.
And then I'm going to change this to double underscore as well.
And now if we were to go to our main.py file, and let's use here it one dot and try to basically use double underscore and try to access to name now we can see that I don't even have an auto completion from my drop down, because I don't have access to see this attribute from the instance level.
And that is something that you look to achieve when you want to have a clean read only attribute.
And that is the way that you can do that.
So if I was to try to print this, then that's just going to complain about how it does not have the attribute of double underscore name in this instance.
And again, if I was to remove those double underscores, then I will just access it as a property meaning as a read only attribute.
And that is exactly what I looked to have here.
Alright, so now that we got the idea of that, then we still might be curious about how to set a new value for the name attribute.
Now obviously using the property decorator is going to turn this into being a read only attribute.
But there are still some decorators that will allow you to however, set a new value for this property of name.
So let's see how that is achievable.
So obviously, that is not going to work.
Because it says can't set attribute.
So what we can do is we can use a new method, where we can declare that we like to also set a new value for this attribute that we named name.
So the way that that's going to work is by going to our class here.
And using here one more method with a special decorator.
Now this decorator is going to look like the following.
So I'm going to refer to the name because that's the property name.
And then I'm going to use the dot setter.
So by doing this, then I basically say, hey, so I still want to set a new value for that name, although that is a property meaning a read only attribute.
So now if I was to go down and say something like def name, and this will receive self and as well as one additional parameter because the additional parameter should refer to the new value that I want to set to that name.
So I will receive a parameter that I could name something like value.
And then inside here, I'm only going to set the new value for our double underscore name.
Because if you remember, when an instance tries to see the value of name, then we basically return self dot double underscore name.
So when a user will try to set the name again to a new value, then it should execute self dot name equals to value and by doing this, I basically allow our users to yet set a new value for name.
So now let's show what effect those three lines are going to have in our main.py.
You can see that now the arrows gone, I can now go down here and use print item one dot name.
And that's going to work I can see that I have other item.
So this means not only I can set a new value for my underscore name, so called in the initialisation, I can also do that later on, if I only use this convention in here.
Now those getters and setters thing are always confusing in normal programming language you work.
So I will do a final summary of all what we have learned until this point.
All right.
So using add property will basically give you a control of what you'd like to do when you get a an attribute.
And also by using this then you basically convert this attribute into being read only if I was not implemented these setters in here.
So you can see that now, when I commented those out, then this line is going to have some problems, because by not doing this, then I basically say that hey, name is read only, you cannot set that if I was to again uncomment those back, then I will have the control to set this attribute to whatever attribute I'd like to now by using this statement here, basically getting the attribute, then I basically call the bunch of codes that are being executed in here.
So whenever I use item one dot name, then Python says to itself, okay, you try to get that attribute.
So, I will go ahead and try to execute all the lines of codes are that are here.
So that is what exactly happening here.
And to show you that, then I can just use a random print function here that will say, you are trying to get name like that, then you should see this line being printed right before what the actual value is.
Because at first, we print you're trying to fit the name, and then we return the self dot underscore name, so it prints that over here.
So that is what happening when you try to get an attitude.
But when you try to set an attitude, then Python says to itself, okay, so here, you try to set an attribute.
So because you set an attribute, then I should go ahead and execute the code that is inside here, because that is the center of that attribute.
So that is why when you go ahead and use this decorator, then you should always receive a parameter because the other item is going to be passed as an argument to that parameter, it is very important to understand that.
And that is why I can only allow myself to use one line of code that will say self dot double underscore name is equal to the new value that you try to set.
And to show you that again, I can go here and say print you are trying to set in this line should appear just before this print line because at first I tried to set a different value for name, and then I just print it back like that.
Okay, so if I was to run that, then you can see that at first we see the line of you're trying to set then right after it we actually see whatever item one dot name is equal to.
Now the reason that the value is set is because we set it over here and then the next time I try to get the value, then those lines are getting executed.
So that is the lifecycle of getters and setters.
And that is the way that it works.
By having the control of whatever you'd like to do when you set a new value, you can also restrict it, you can go ahead and do some conditioning, or you can go ahead and raise some exceptions.
If you don't like the value that you receive, let's say that you want to restrict the length of the characters for the name of that attribute.
Alright, so that is something that you can do, you can actually go here and say if when of the value is greater than 10, then you'd like to raise exception, that will say something like your, the name is too long, something like that.
And then you can say else and then you can execute the line that will be responsible to set that value.
So intentionally I'm going to leave it as it is because the length of that is nine characters.
So we should not have any arrows.
But if I was to add here, two more characters, Like that, and executed, then you can see that we are going to receive an exception that will say the name is too long.
So that's how getters and setters are working in Python, you will now have all the knowledge that you need to play around with different attributes, and manage them the way that you would like to.
So I believe that after the information that you received in that episode, you have everything that you need to manage your attributes successfully and play around with it, as well as coming up with rich classes that will have multiple attributes.
And then you can set up special behaviors to those attributes.
And also you can decide that you will not like to force to receive those attributes in the constructor, you can decide that you can delete some parameters in your constructor.
And you can say that, you will not like to assign those to the self object immediately when you create an instance.
So whatever you would like, do you have all the tools to play around with how to manage your attributes, object oriented programming comes with four key principles that you should be aware of.
So you will understand how you should design your large programs, so it will be easier to keep developing it.
And I'm going to talk about those principles which are encapsulation, abstraction, inheritance and polymorphism.
So the first principle will be encapsulation.
And we will talk about this a little bit.
So encapsulation refers to a mechanism of restricting the direct access to some of our attributes in a program.
Now notice how we did a great job in the last part, where we implemented the encapsulation principle on our project.
So pay attention to how the name attribute could not be set to a new value, before it goes through some conditions that we set here, like the length of the character being less than 10 characters.
So restricting the ability to override the values for your objects within your saddles, is exactly what the encapsulation principle is about.
Now to even give you a better example of encapsulation principle, then we are going to apply similar things to an additional attribute, which is going to be the price attribute.
Now if you take a quick look in that program that I have just executed, then you can already see that I have the ability to directly set these objects into whatever number that I like to also negative 900 will work here.
So that's probably something that we look to change.
And the way that we can change that is by implementing some methods that will restrict the access to this price attribute.
So it could have been nice if we could have two methods that will be responsible to increment these price by some percentage amount.
And the same goes for the discount.
Now if remember, we already came up with a similar method that looks like apply discount when we talk about class attributes, because self dot pay rate multiplied by the actual price is actually going to change this attribute being decreased by 20%.
Because pay rate is set to 0.8, if you remember from the previous episodes, so let's go ahead and continue designing this price attribute to totally support the encapsulation principle.
So first things first, I'm going to convert this prize into being a private attribute.
So it will be a great start avoiding to set this price directly like we have seen previously.
Now I'm not going to just add here double underscore, besides I'm going to grab this whole thing.
And I'm going to right click, and then I'm going to say refactor, rename, and then I'm just going to rename this price by setting it like that double underscore before that now doing this is actually going to refactor this change on the entire class where we try to access the price attribute.
So that is a great thing.
So we don't really have to change everywhere.
So once I have done that, then if we will also take a look in the apply discount, then you can see that we have this being set to a new variable name that we came up with.
So now that we have done this, then let's go ahead and create a property.
So we will have the ability to access the price attribute temporarily being only read only.
So I'm going to say add property.
And then I'm going to say def price, then I'm just going to return self dot price.
So that's a great starter to restrict the access to the price attribute, because now we still have access to the price attribute.
And then we cannot set that.
So you can see that if we were to try to access item one dot price, we will have some errors, but we can just access the actual value of that where it comes from the initialisation.
So that's a oh actually I see that we hit an error that says recursion error and that's probably because I did not add the double underscore in here by mistake.
So that's actually a great exception that we came across right now, you can see that we are going to hit recursion error, maximum recursion depth exceeded.
And that happened because I tried to return the price without the double underscore.
So if we try to call the self dot price, then it is going to try to call this function.
And if we try to return that, then it's just going to loop over it again.
And in some time, it's going to fail with the recursion error as you see.
So that's actually a great exception that we see.
Now, if you see this exception in your object oriented programs, now you know how to handle it.
And if I was to come back now to Maine and execute that, then you can see that the expected result is here.
Alright, so now that we have done this, then let's go back to our class and try to work on our methods that will modify the attributes of double underscore price.
So I will actually cut this metal from here.
And I will just put that right under the property price that we came up with.
So we will have a cleaner look.
Now First things first, you can see that we have the apply discount.
And we will also like to come up with a ply.
increment like the following.
And we will like to say here, self dot double underscore price is equal to self dot level underscore price plus self dot level underscore price multiplied by some value that we can receive as a parameter.
So we could actually receive a parameter that we could name implement value, and then we could just multiply it by that number.
So now that we came up with this, then let's test this up.
Okay, I'm going to go back to our my main.py.
And then I'm going to call it one dot apply increment, and then I'm just going to pass in 0.2.
So we will increment the value of 750 by 20%.
Now the next time that I access the item one dot price, we should be able to see the actual value of price, which should be 900.
And if I was to run that, then you can see that the price has been incremented to 900 as expected.
So that is exactly encapsulation in action, because you go ahead and you don't allow the access directly to the price attribute.
Besides you modify this attribute by using methods like apply increments, or apply discount.
Now the same will happen if I was to now go ahead and use item one dot apply, discount, and you can actually modify this method in the way that you'd like to.
But this currently refers to a class attribute that we use here.
So this should also again, apply a discount of 20% to the 900 price, we should be able to see 720.
And that's exactly what is happening here.
Alright, so the next principle that I'm going to talk about is called abstraction.
Now abstraction is the concept of object oriented programming that only shows the necessary attributes and hides the unnecessary information.
Now the main purpose of abstraction is basically hiding unnecessary details from the users.
Now by seeing users, I basically mean people like me or you that are going to use the item class to create some item objects.
Now we can see that now we have a new program here that has one item object that it's name is my item price being that number, and we have six from this item.
Now we can also see that I came up with a method that doesn't really exist, which is called send email.
So that method at the end of the day should send an email to someone that would like to decide about this item.
And it will send info about how much money we can earn by selling all the items and maybe about some more info that is related to this item.
Now sending an email is not as easy action just by calling it with that way.
Because in the background, email sending has to go a lot of processes like connecting to an SMTP server.
And as well as preparing the body of the email with an auto message that will display some info about this item.
So as we can understand we have to go through a lot of new methods before we go ahead and just call a Send Email method.
So to simulate that, then I can actually go ahead and say send email.
So I will just create the method that is necessary.
Temporarily I will use pass.
Now as I said we also have to go through a lot of other processes.
So it is a great idea to create methods for each of those processes, like connecting to an SMTP, server SMTP server like that.
And I will just say pass because we only try to simulate the idea of abstraction here, I'm not really going to send an actual email to someone, I'm just simulating an idea of sending an email.
And we will also have to go to preparing a body for an automatic mail prepare body, right, and then I can just return a formatted string that will say something like hello.
Someone, we could receive this as a parameter as well.
And then we can say, we have self dot name, six times, right, so it should be six.
So quantity times like that, then I can say regards to shave.
So that is just a very simple email that we can send to someone.
Now we can understand that we have to call those methods inside the same email.
So simulating that will be self dot Connect, and then self dot, prepare body.
And probably we also need to go through sending it right, so we can just say something like send here, then us passing it.
Now you can see that those metals at the end of the day are only going to be called from the Send Email.
Because those are just parts of the email sending process, that is a bigger process that we divided into multiple steps in this class.
Now the biggest problem is, we will have access calling those methods from the instance.
And that is exactly what abstraction is about.
abstraction principle says to you that you should hide unnecessary information from the instances.
So that is why by converting those methods into being private methods, then we actually apply abstraction principles.
And that is achievable in Python in a way, which I'm going to be honest, is not too much convenient, but it is achievable by adding double underscore.
Now again, in other programming languages, this is achievable by having access modifiers for your methods, like private or public.
And I'm talking about programming languages like Java, C sharp, etc.
So if we were to convert those methods to private methods, by only adding level underscore, then those only cool to be cold from the class level, meaning inside the class.
So if we were to try to access it, then you can see that I am going to have auto completion, meaning I will have the ability to access those methods.
And then I will just do the same for the other methods.
Now this arrow comes from here, because we did not really specify some argument, I'm just going to add an empty string.
Now if I was to go back to our main.py file, then you're going to see that we are going to have some troubles.
Even if I'm going to try to access it with a double underscore, I'm not even going to have an auto completion.
And the reason for that is because that is a private method.
So you really have to think about your methods if you want to make them accessible outside of your class, meaning from the instances.
And that is exactly what abstraction is about.
You want to abstract the information that is unnecessary to call it or to access it from your instances.
Okay, so inheritance is the third principle of object oriented programming.
inheritance is a mechanism that allows us to reuse code across our classes.
Now, that's something that we have totally designed well throughout this course, because we came up with more classes that are child classes of the item class, where each child class represents a kind of an item.
Now pay attention how I change the import line from phone import from, and I use the child class of item, which we came up with, which is called the phone, you can see that I'm passing similar arguments in they can still use a code that is implemented in the parent class.
If we were to execute this program, then we are not going to receive any problems.
Because phone uses all the methods and the attributes that it inherits from the item class, which is exactly here.
And if we remember we designed the Send Email method in the parent class and we can use it from the instance of a phone and we can also do that for the rest of the methods that we came up with that really affect some of the attributes like in the interview.
capsulation part where we applied the apply increments method that receives an increment value.
And if we were to test this incrementing, the price by 0.2, and then printing item one dot price, then we should see 1200.
So if we were to print that, then you can see that that is exactly the result.
So that is mainly what inheritance is about.
It is about reusing the code across all the classes.
And that's exactly the scenario here.
And the beauty behind that is that you can come up with more child classes that will represent the kinds of items like laptop, keyboard, camera, everything that you will think about.
And then you can just modify specific methods that you'd like to calling to the kind of item that you have.
So that's perfectly describing what inheritance is about.
Alright, so the last principle that we have now is polymorphism.
Now polymorphism is a very important concept in programming.
It refers to use of a single type entity to represent different types in different scenarios.
Now, a perfect example for this definition, will be some of the functions that we already know that exists in Python.
Now just a quick side note, polymorphism refers to many forms Paulie being many, and morphism being forms.
So again, the idea of applying polymorphism on our programs is the ability to have different scenarios, when we call the exact same entity and an entity could be a function that we just call.
Now, as you can understand polymorphism isn't something that is specifically applied to how you create your classes.
That is actually something that refers globally to your entire project.
And in the next few minutes, we are going to see some bad practices where polymorphism is not applied.
And we're also going to see where in Python the polymorphism is perfectly applied.
So a great example of where polymorphism is applied, is in the lane built in function.
Because the land building function in Python knows how to handle different kinds of objects that it receives as an argument, and it returns you a result accordingly.
So as you can see in here, if we were to use the Len built in function in a string, then we will have received the total amount of characters.
But if we will do this in a list, then we will not receive the length of characters of this entire expression in here.
Besides, we will receive back the amount of elements that are inside this list.
And to show you how this is going to work, then I'm just going to run this program and for sure, the results are just as expected.
So as the definition of polymorphism says, it is just a single entity that does know how to handle different kinds of objects, as expected.
All right.
So now that we understood that the polymorphism is applied everywhere in Python, especially in the land building function, let's also understand where it is implemented on our project here.
Now we can see that I tried to call the apply discount method that is never implemented inside the phone class.
And the fact that I can use it from the item class, it is because we inherit from this class.
And that is the basically reason.
Now if I was to go back to that main dot php file and run this, then you can see that that is going to work because the apply discount is a method that I can use from the inherited item class.
Now that's exactly what polymorphism is also inaction.
Because polymorphism again, refers to one single entity that you can use for multiple objects.
Now, if I was one day to go ahead and create more kinds of items, meaning more classes that will represent different kinds of items, and from them to call the apply discount method, that's also going to work because the apply discount is a method that is going to be accessible from all the kinds of objects so that's exactly why you might have heard about the terms of inheritance and polymorphism together combined.
Now to show you that, then let's try to create one more class that is going to be identical to the phone class, right, I'm going to create a keyboard file.
And then I'm just going to say here, class.
You know what, before that, let's go to phone and copy everything from here and paste this in like that.
I'm going to get rid from those lines.
And I'm just going to leave the init as it is I'm going to change the class name from phone to keyboard and I'm also going to delete that attribute that we don't need broken phones.
Alright, so now that we have this, then I can actually go ahead to my main dot php file and use one more important line that will say from key board import keyboard, and then I'm going to change this to keyboard will replace this name, just to make it more realistic, then I'm going to run the same problem, you can see that this works.
So that's again exactly where polymorphism is in action, because we can use this single entity from different kinds of objects, and it will know how to handle it properly.
Now by saying handle it properly, then I basically mean, you can have the control of how many amount of discount you want to apply inside your classes now, because if we were to go to keyboard and use a class attributes, exactly like we used in the item class, which was pay rate, then we're going to have full control for all the discounts that are going to apply to the keyboard.
And to show you that I am going to attempt the typing in pay rate.
And you can see that I even have auto completion because overriding in the child class that is legal, alright, so I can just say pay rate is equal to 0.7.
And that will be it.
Now I have the same discount amount for all my keyboards.
If I was again to run the main.py file, then you can see that the results are just as expected, we see 700.
So that is the beauty behind inheritance and polymorphism together.
And the same will go for sure if we were to decide that we would like to have 50% discount.
So it will only take for me to go ahead and say pay rate is equal to 0.5.
And that's it.
So I hope that you understand about polymorphism a bit better now.
Now just a quick side note polymorphism is perfectly cool, we implemented by using abstract classes.
And that is just the identical way of using interfaces in other programming languages like Java interface is a way that you can implement how a class should be designed.
Alright, so it is like a template for a class.
And that is achievable by using abstract classes, which I'm not going to cover in that part.
But again, polymorphism, like I said, is a term that is implemented in different areas in the whole python programming language.
So I hope you had a great time learning the object oriented programming course.
Now you have a lot of tools that you can go ahead and try to implement by yourself on your projects, which will really help you to take you to the next step as a developer.
See you next time.